(This hub refurb starts on page 9)
So now the hubs were ready for a lick of hammerite smooth in silver more on those later. Now turned my attention to the discs, they werre well within the wear limit indicated by two flats(vented discs) on the outside edge of the discs job for the lathe I deem so here is the before 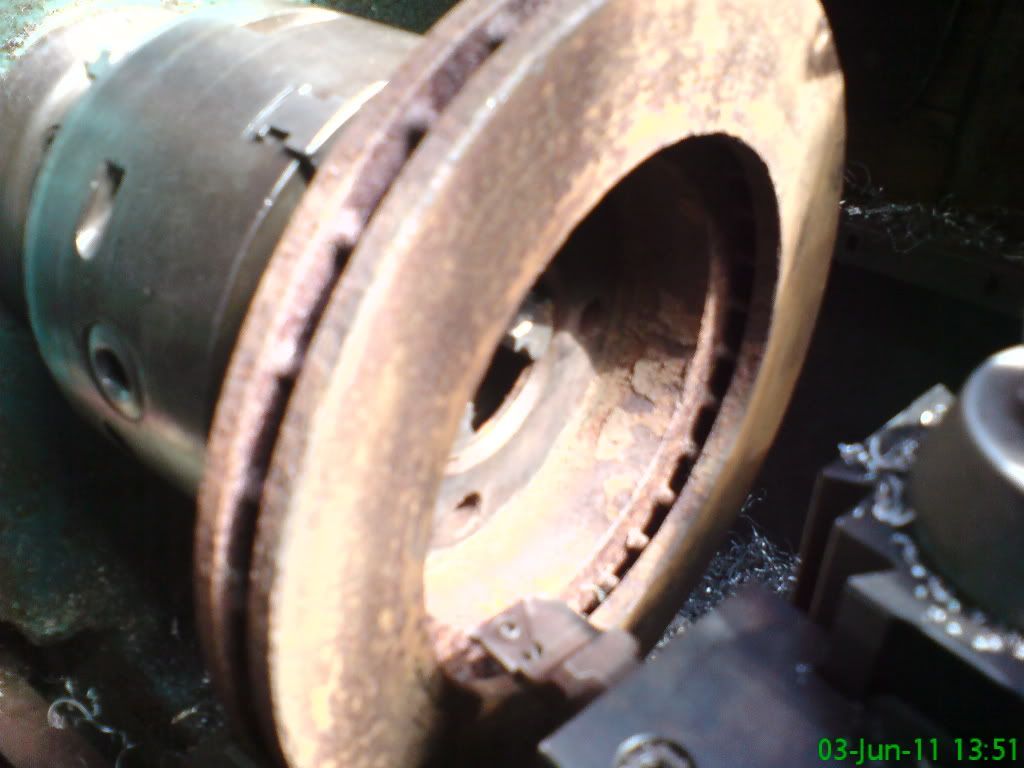  This time the rust was not so deep so all I need to do was to to skim them, got a good reading with the dti then proceeded to shave them just back to good metal...now apart from the edge which will be blasted they look as good as new 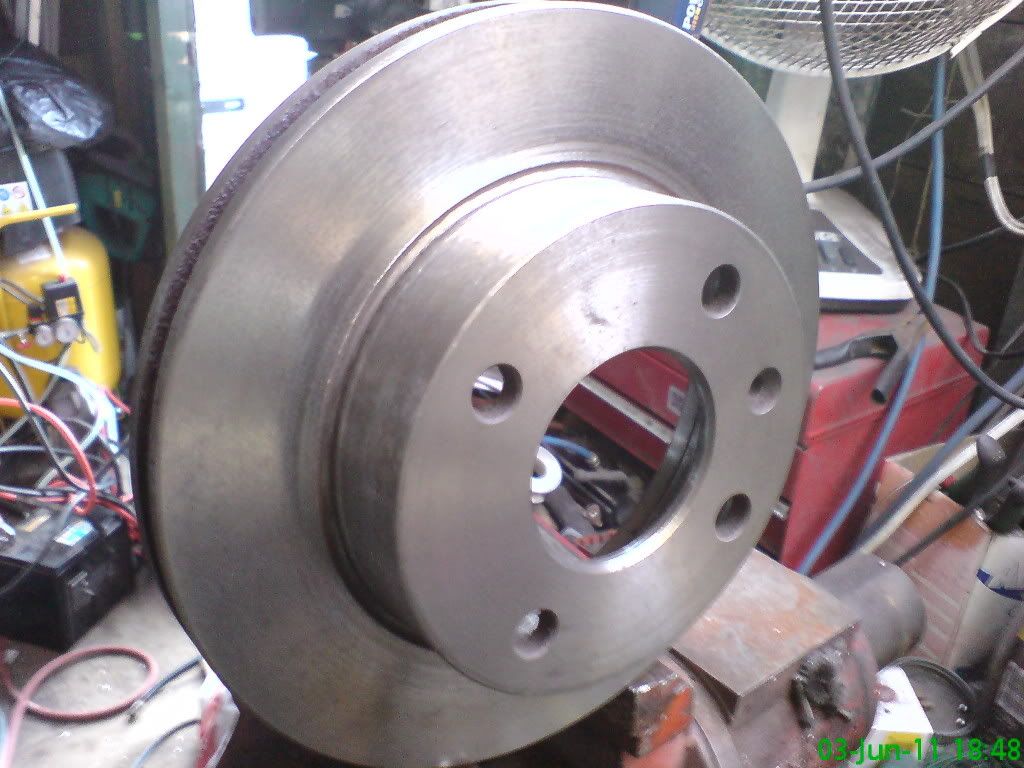 Going back to the hub carrier I mixed up 50/50 hammerite smooth with celly thinners and gave it a good 4-5 thickish coats(old dust caps lightly pressed in to keep the paint out) I will be giving them a coat of clear lacquer when all back together .....so now here is the before and after shot 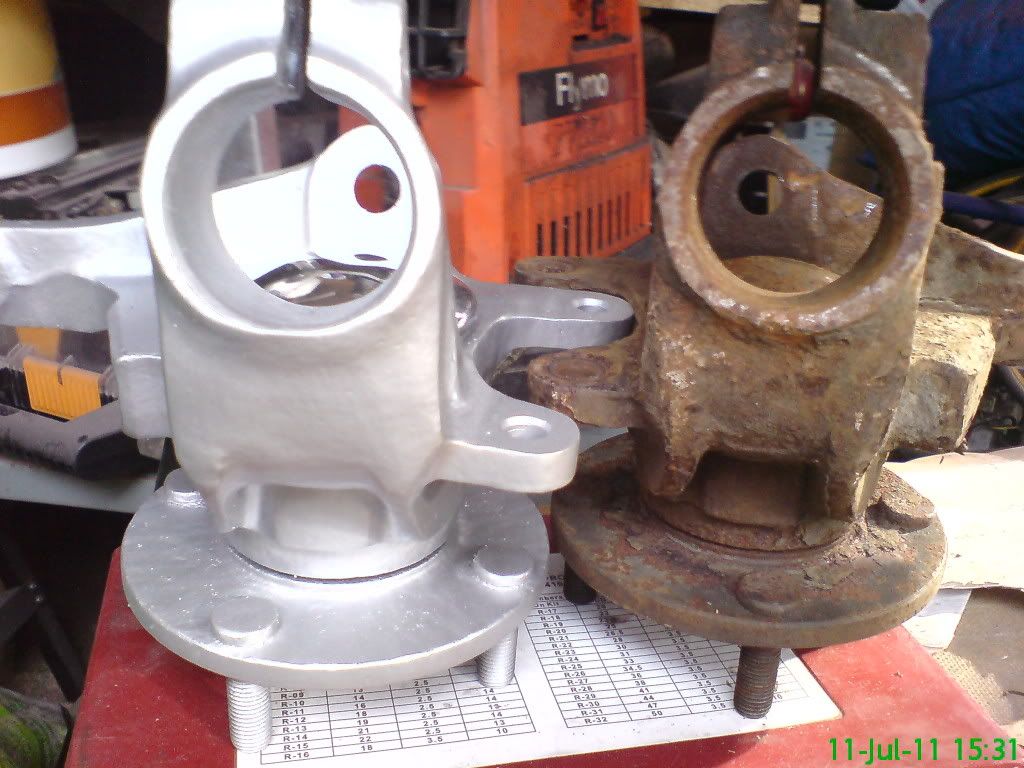 |
(This hub refurb starts on page 9)
Another little one of my gimmecky tweeks as follows.....home made dust caps worked a treat but I fancied something different so out came a small piece of 1mm aluminium and cut it the same dia as the dust caps I made and utilising my hardwood "bowl" again 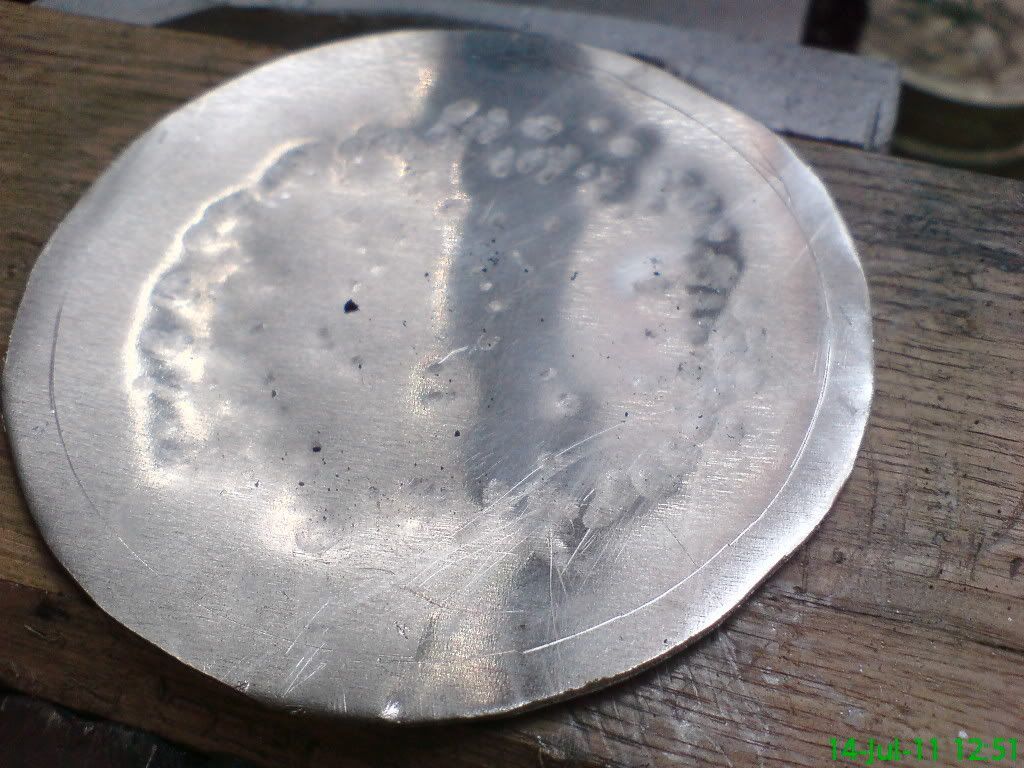 Working my way down to the bottom of the bowl and nearly finished (not) 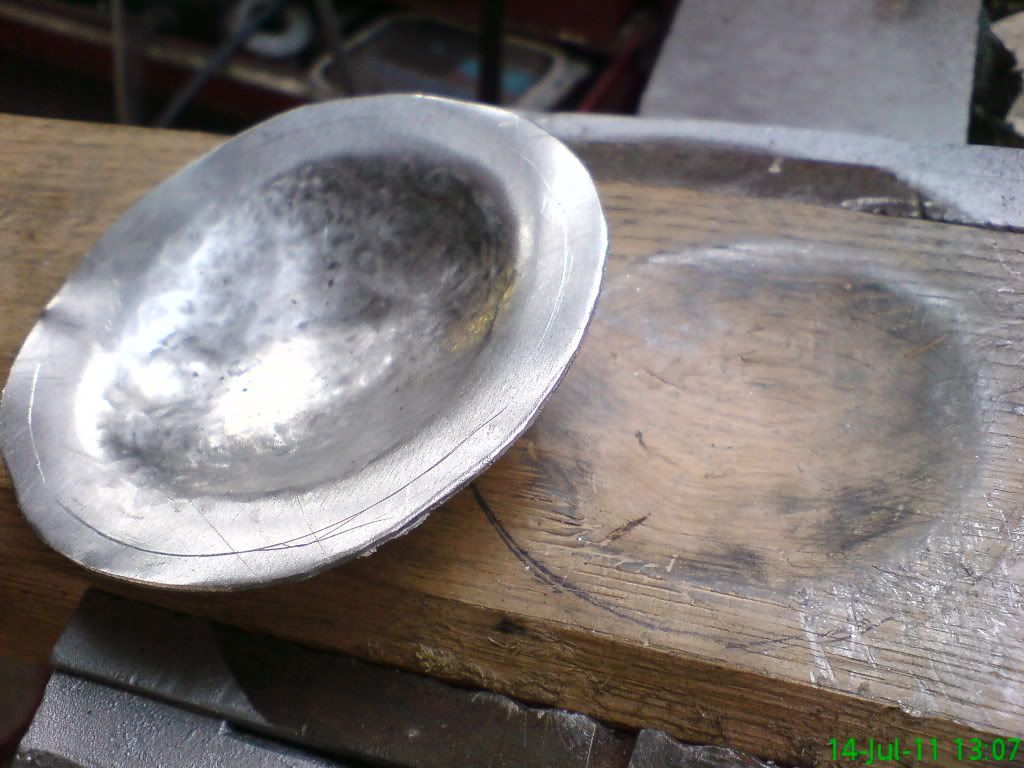 That side done now time to turn it over and use an old duff mushroom and and the back of an old wire brush as a slapper, I gently peen the ally over the edge of the mushroom to create a false dust cap 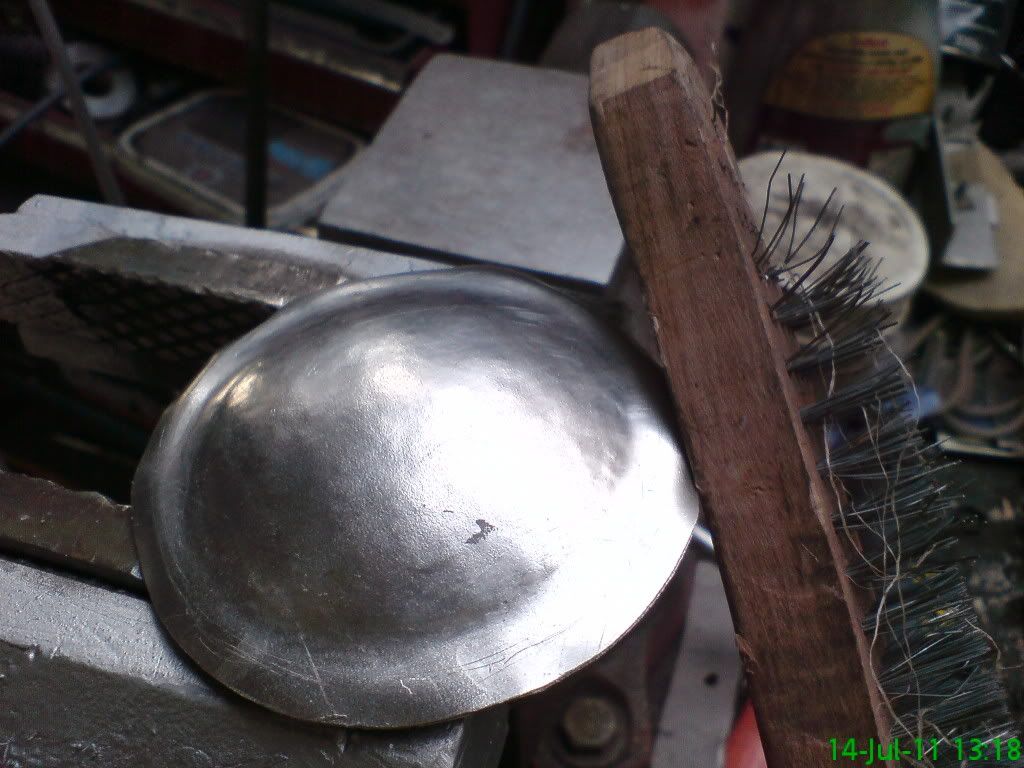 Why I hear you ask!!!....if you have followed the making of my wishbones you will realise I have foolishly (and I mean that) set a standard I need to uphold and although it will be time consuming it is MY stamp that I am putting on it and I don't care how long it takes. Anyway heres is a piccy of said false dustcap which has been polished up.....the next time you see it ,it will be anodised a fiery red along with my anodised mushies  |
Great stuff
Just caught up with this thread Kev
The standard of your work is awesome :) If only I had the patience to refurb stuff to such a high standard. Have the tools & skill but tend to take the easy route by buying new stuff :o :o Guess that is why my build is way off budget, well that & me keep changing my mind :D |
Thanks for the compliment Ronnie....I wish I could be that meticulous about keeping my shed and garage tidy ...I am totally mega untidy.
Anyway I am now finished one hub completely and here is the result  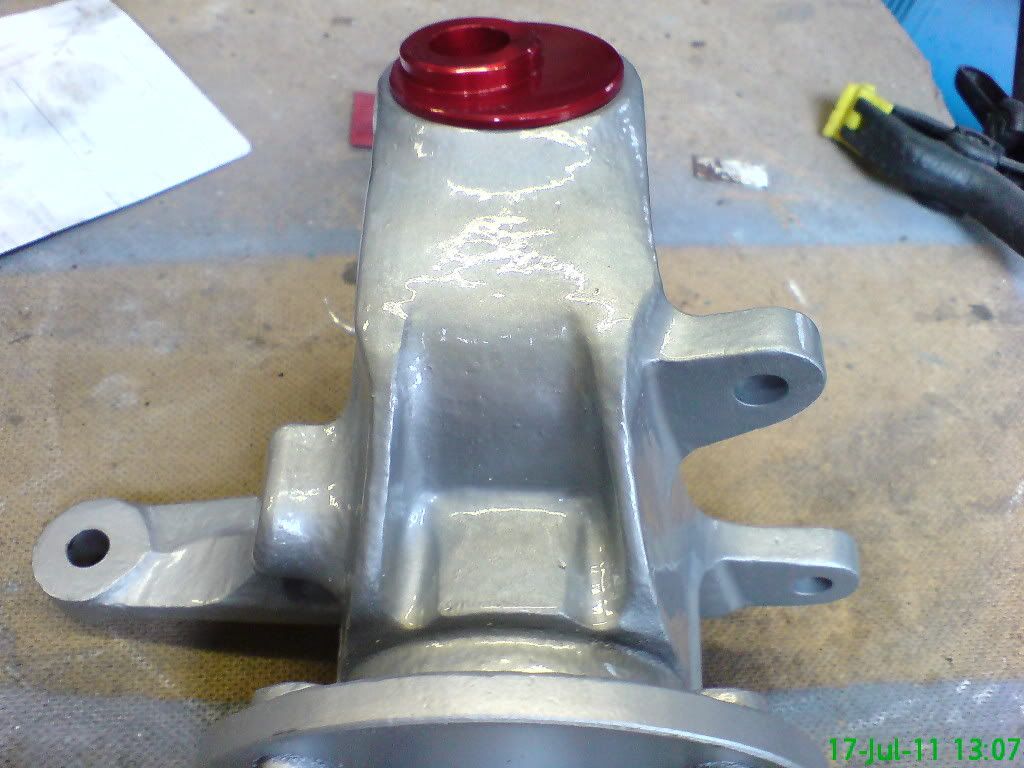 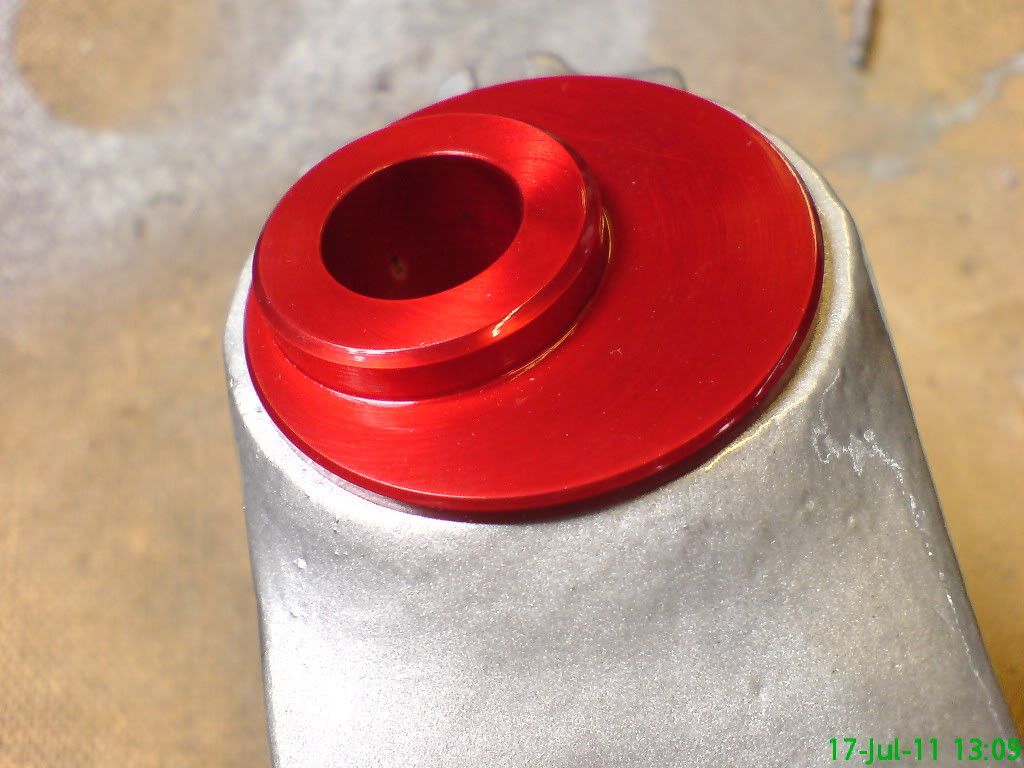 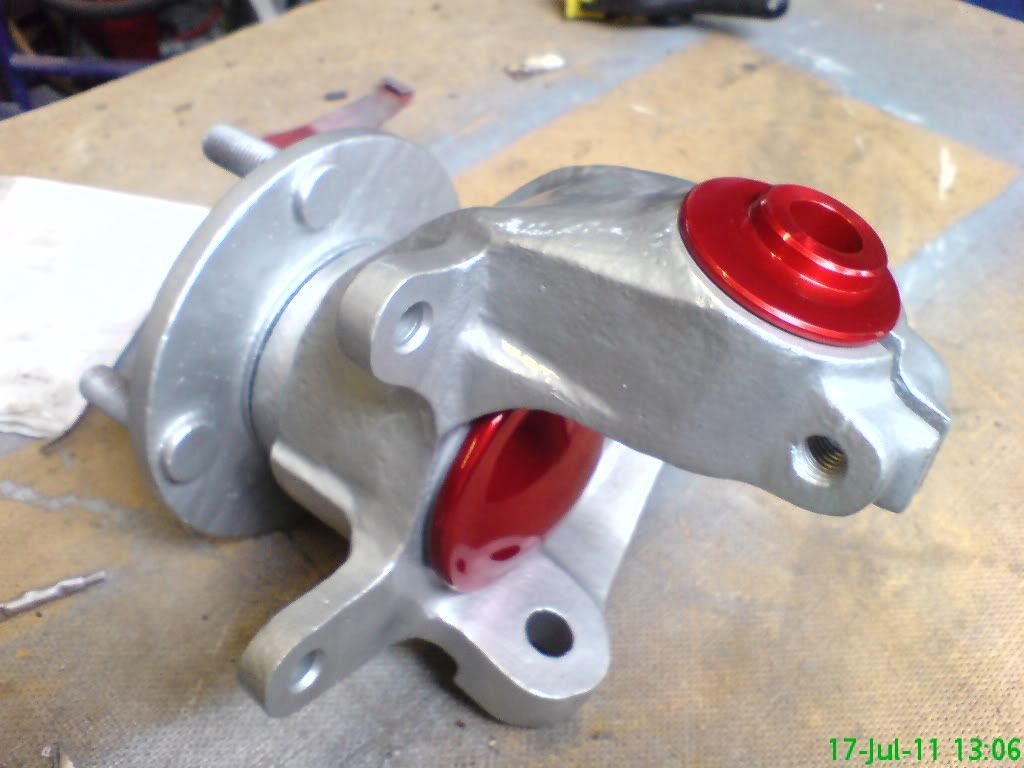 needless to say I am very happy with the result especially when you consider how they looked when I first took them off the donor.....with a bit luck I will have the other one finished tomorrow, I do find it much easier when you can take a smallish part off, refurb it and put it to one side till it is ready to put to its intended use |
superb
What a cracking job! Its attention to detail like this we should all follow, it improves the breed.
Bob |
What can I say
I am absolutely blown away with the high standard of that work Kev :)
Just had me Sunday lunch and to be honest, I would be proud to eat my dinner off of that hub assembly :D If you keep up this high standard I can see me doing Roadster re-build number 3 before I have even had the IVA test :o Very much looking forward to seeing your chassis all dressed up :cool: |
[quote=Bonzo;61317]
Just had me Sunday lunch and to be honest, I would be proud to eat my dinner off of that hub assembly :D I might let you LICK it of my hubs ....but sorry no knives or forks as it would scratch the paintwork.....oh and no onion gravy....the skins are murder to wash off:p :p |
[quote=K4KEV;61356]
Quote:
Not even plastic knives & forks :D Seriously, I really must have another go at electro plating sometime. That anodise certainly adds the bling factor ..... Hmmm wonder how many amps it would take to anodise a swirl pot or catch tank ?? Great work Kev |
I'm using a 25 amp boost charger at the mo and it is a little overkill on the small parts I am doing, however a 50 minute session gets a good depth of ano....your average 4-6 amp charger will do it in 4-6 hrs .....easiest way to do it is trial and error,,,,although if you needed some No's just ask...and I know red does it for you Ronnie;) ;)
|
New Build thread
Hi everyone hi kev I just wanted to ask you on how do you do your own electro plating could you perhaps give the details on how? THANKS
|
| All times are GMT +1. The time now is 05:15 PM. |
Powered by vBulletin® Version 3.6.4
Copyright ©2000 - 2024, Jelsoft Enterprises Ltd.