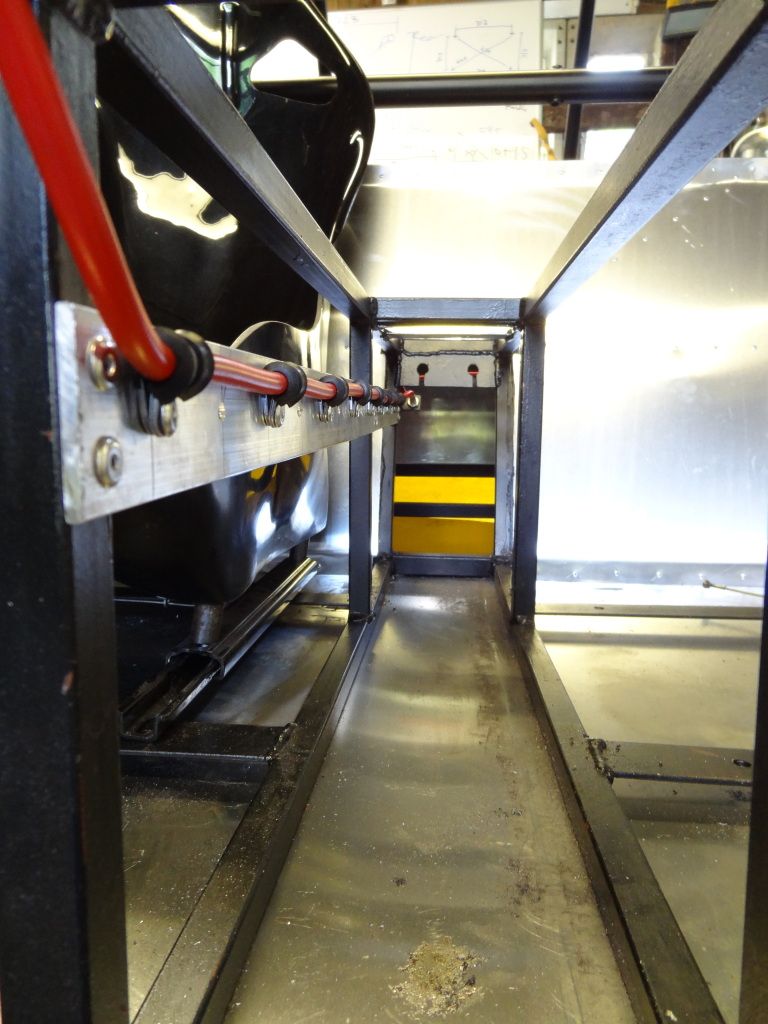
Well after buying a long armed riveter from axminster tools I have now managed to rivet in all of my brake lines, I have to say I am very happy with the job, they look good and weren't difficult to install, it's nice to be able to fit parts rather than fabricate them. Here some pictures:
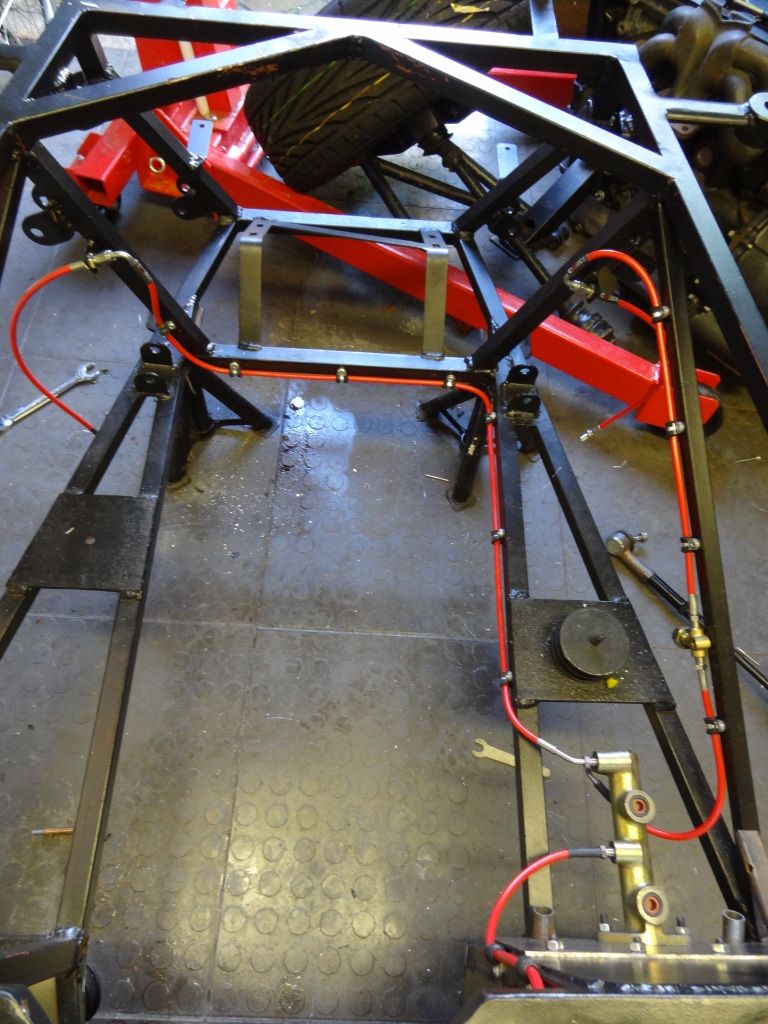    |
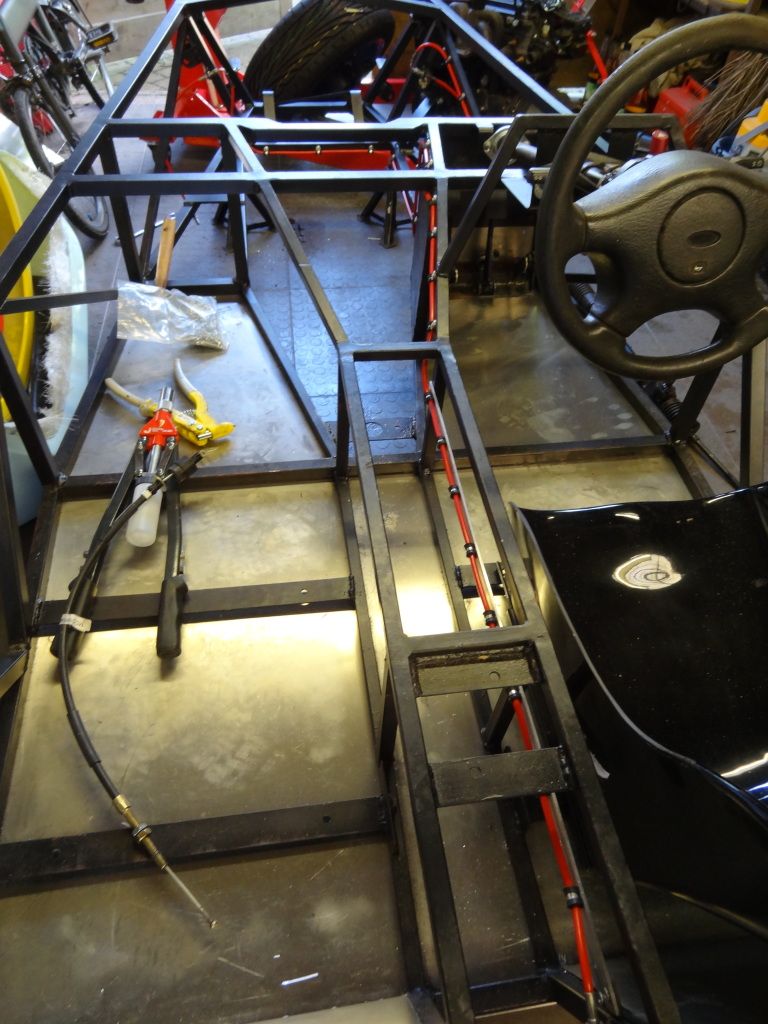  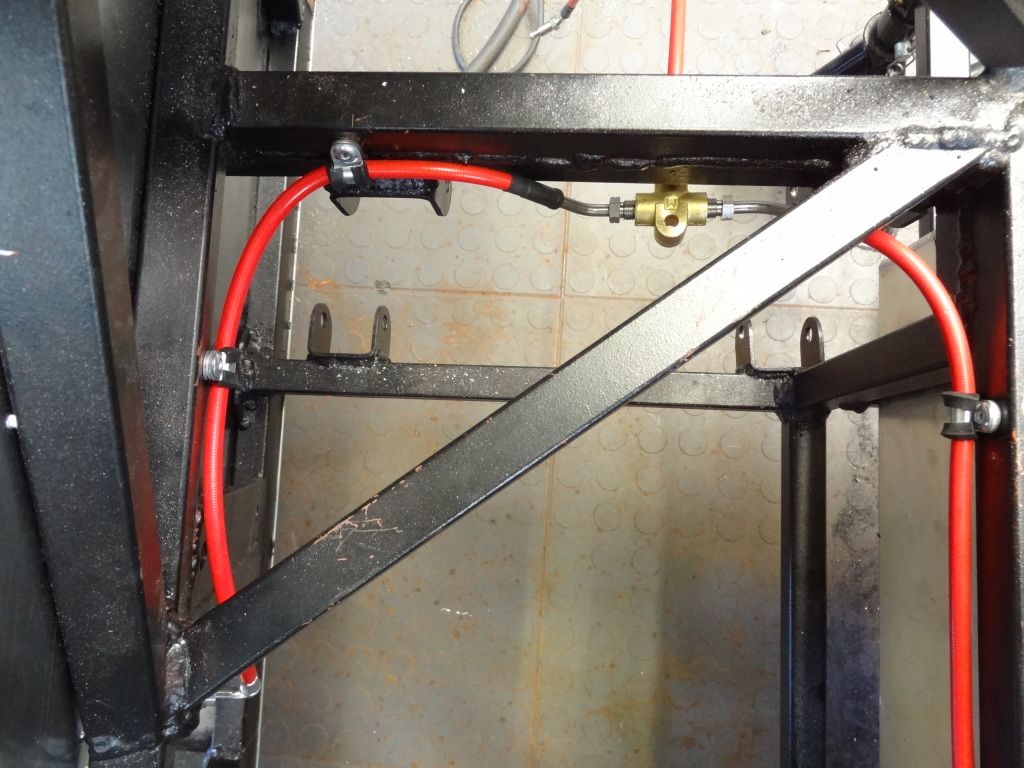 |
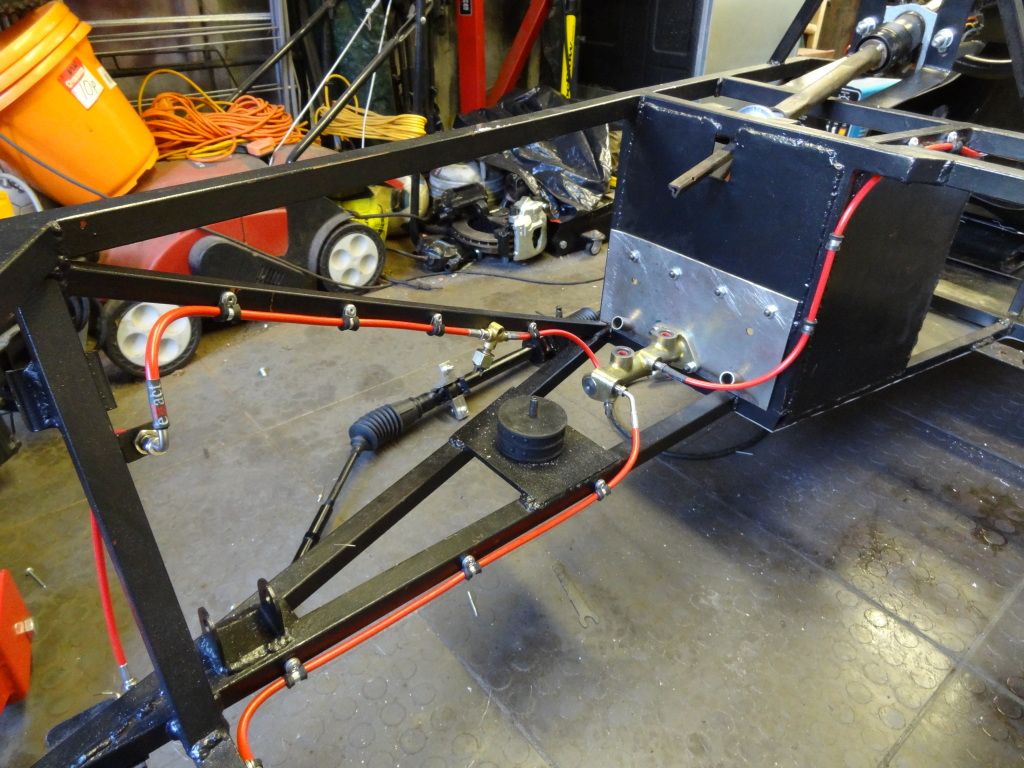
Now that the brake lines are done I've started running the fuel line, again I've used another 40mm strip of aluminium running the length of the straight part of the tunnel to run the fuel line:
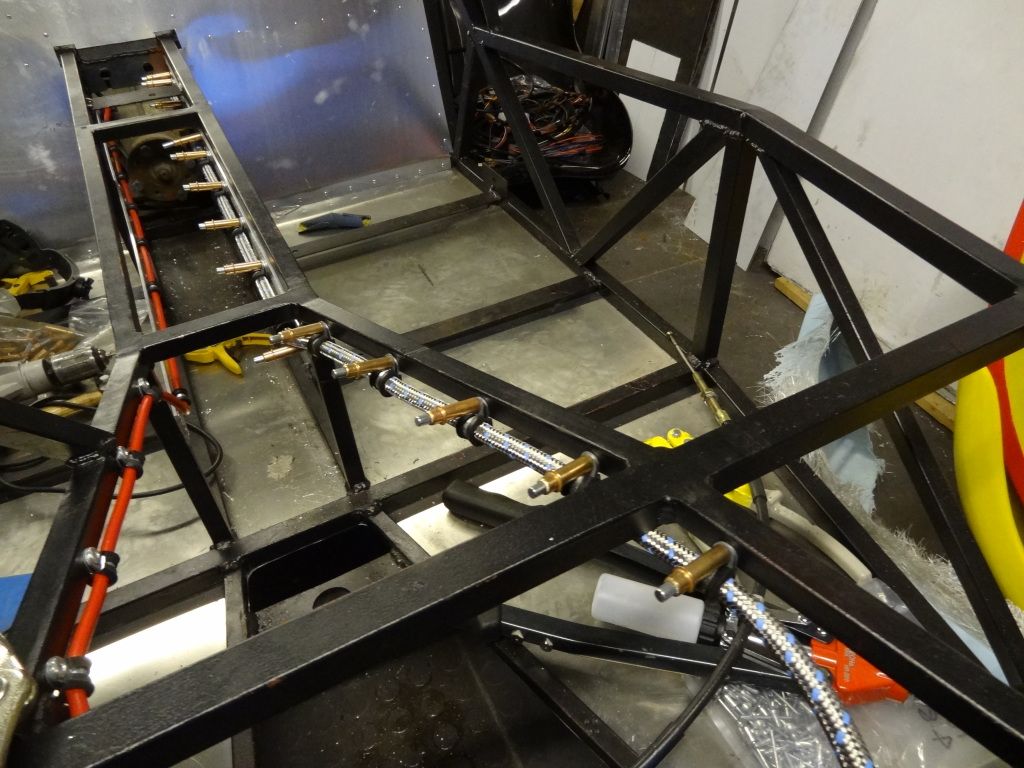 I just need to figure out what what round the fuel pump goes before I mount that... |
The lines look ace.
TT |
Quote:
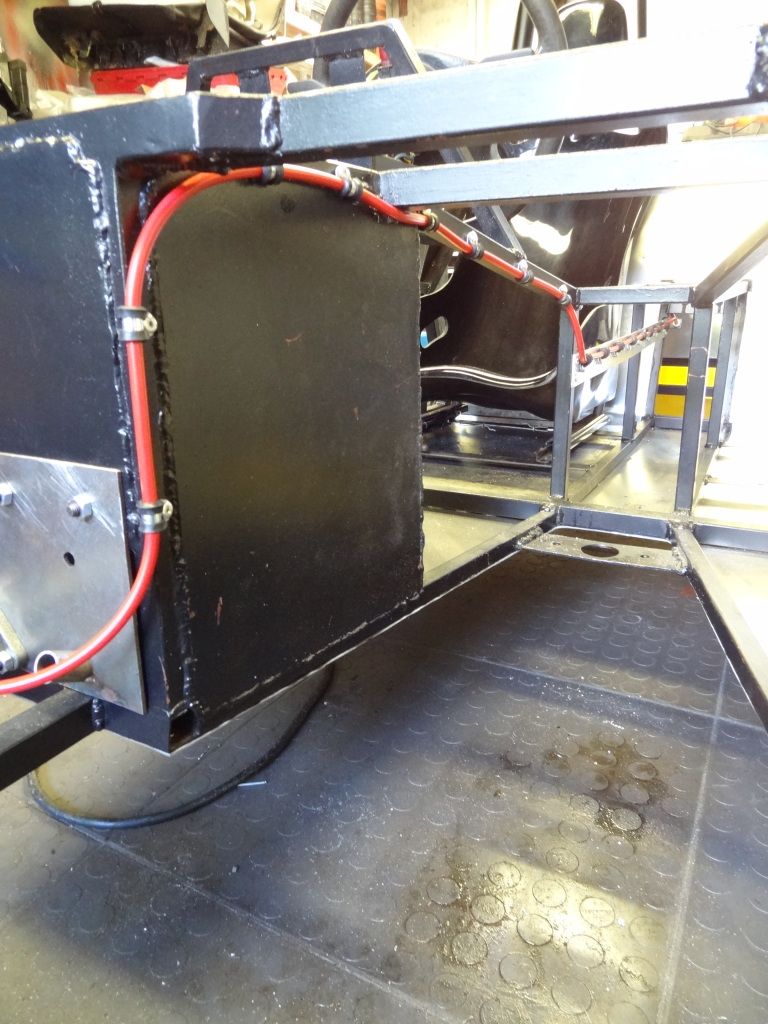
Well I've now finished riveting in the fuel line and have created the fuel pump and filter mounting plate and now how them mounted. I just need to cut the fuel line to join it all together and order another 4 hose finishers so that everything matches. 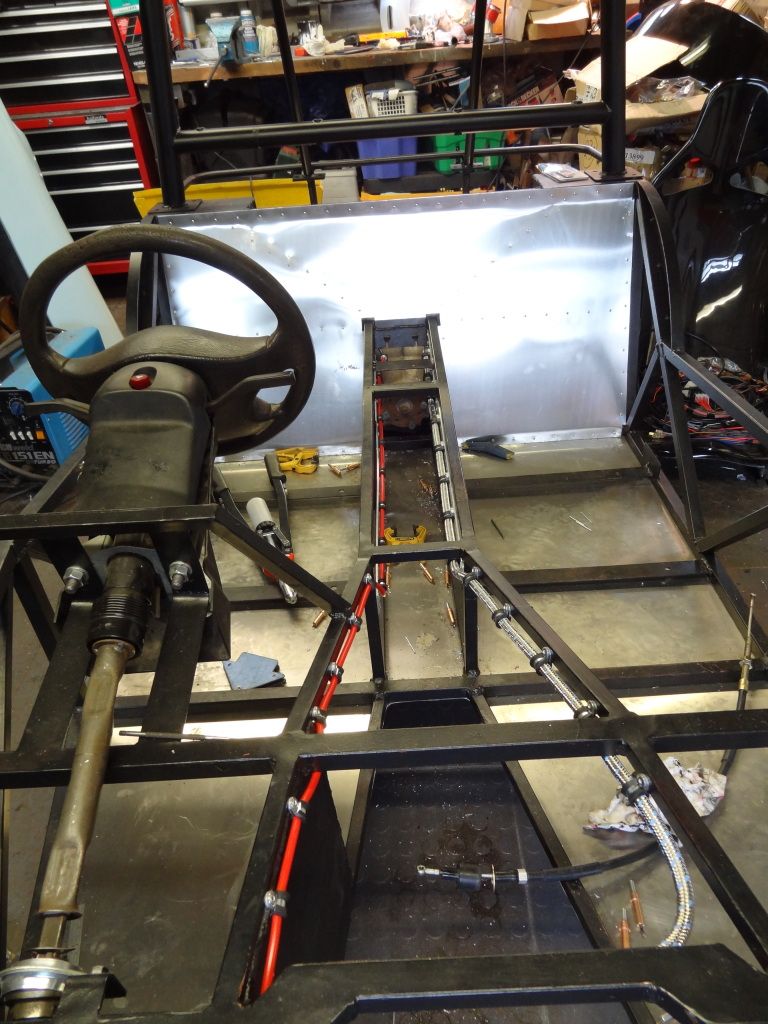 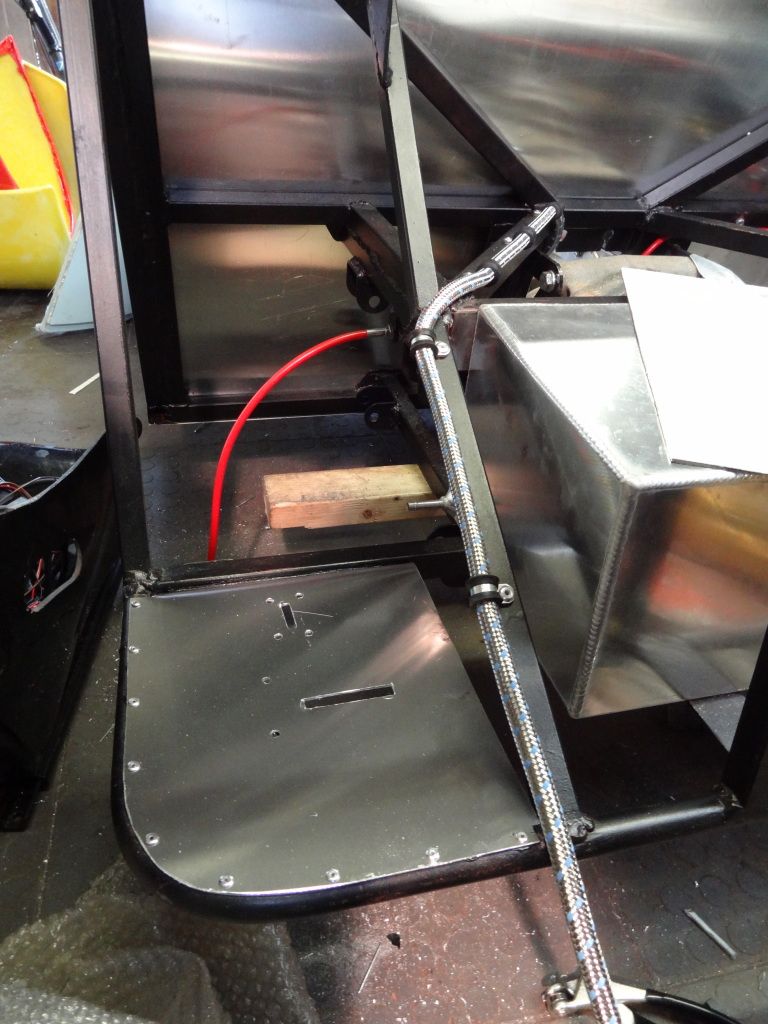 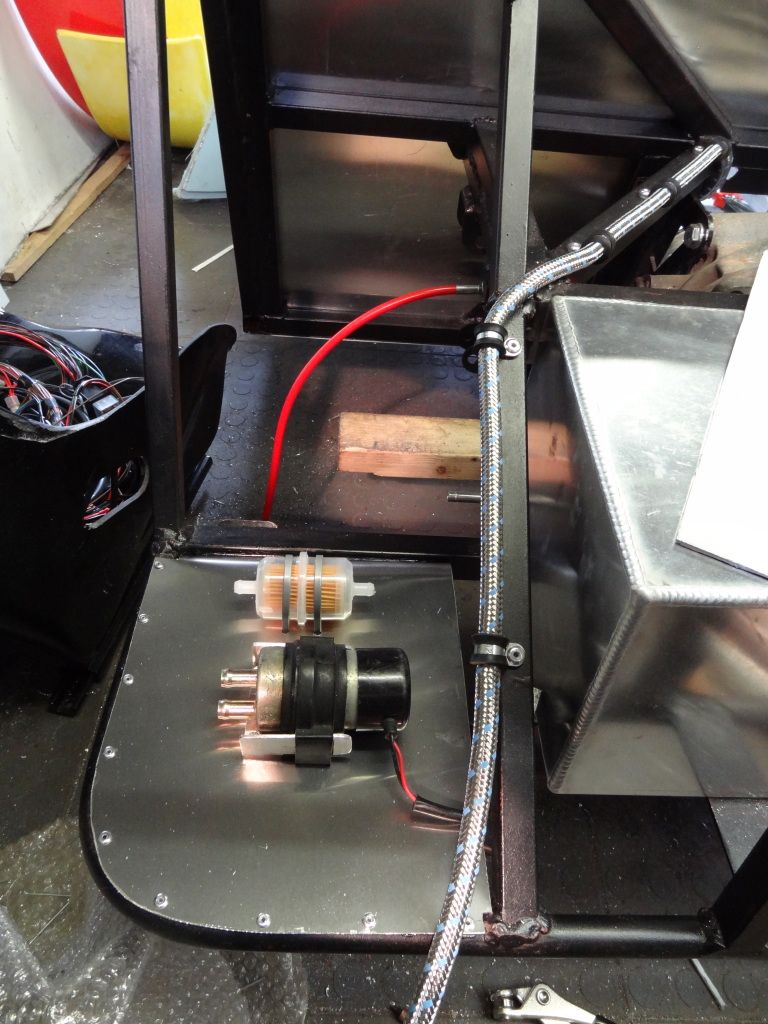 |
One thing to say :cool:
Top notch installation of all your lines. I bet it makes life easier with the flexible lines..:) Is there still plenty of clearance between gearbox and pipes as they look a little bigger than hard lines...? Looks like this could be the way to go for new builders. The only other question is this OK for the IVA with using all flexible lines? In my opinion it should be as we use flexible lines between callipers and chassis. Nice build:cool: Johno |
I haven't actually trial fitted the engine/box with the lines in place yet, but when I received the lines I messed around with the brake lines and there was plenty of clearance if I used current routing, there should hopefully be plenty of clearance for the fuel lines but tomorrows job will now to be to refit the engine and make sure!
It will also give me a chance to measure up for the drive shaft and get that ordered on Monday morning. I will take some pictures tomorrow with the engine and box fitted. Also the flexible lines will be fine with IVA as long as the correct paperwork is used as you need to have a certificate of compliance for the hoses to ensure they are to the correct standard. The lines were very easy to install, however it did require a bit of effort before hand to decide on routing, what fitting and fixtures I wanted, if I wanted a hydraulic or micro switch brake light, thread sizes ended up being a very big deal as it turned out I ordered a Sierra master cylinder instead of a Fiat 124 (supposed to give a better brake pedal) and the threads were different, I only found out when I received the lines but Sylvain was very helpful and provided a really good service and got the fittings changed for me. |
hi tatey
those brake lines look excellent. 2 questions, is your rear brake set up discs or drums?, and how much did the pipe set cost? cheers martin |
The rear setup is drum and it cost me about £260 (including delivery and VAT) for full brake line setup + stainless braided fuel hose + hose clamps/finishers + rubber lined p-clips for brake and fuel hoses + stainless braided hose for master cylinder to remote reservoir + push fittings for master cylinder + brass t-piece. It's definitely a more expensive option than copper lines but definitely seems worth the extra money!
|
I've just been out and refitted the engine and box and everything has copious amounts of clearance except for the two p-clips either side of the gearbox by the reverse switch, it should take 2 seconds to move them, to increase the clearance, I also need to trim a bit off of aluminium strip to allow for the reverse switch as at the minute it is touching and preventing the gearbox mount from being in the correct position, again a 2 second job to do, but other than that everything fits perfectly.
|
| All times are GMT +1. The time now is 12:19 AM. |
Powered by vBulletin® Version 3.6.4
Copyright ©2000 - 2024, Jelsoft Enterprises Ltd.