Progress Report
Hi all, thought it was time for a quick progress report.
Nearly 4 months to the day that my chassis was started, it is all finish painted, ready to be taken back to my garage. Cannot thank forum member Gus, enough for the hard work he has put in making my chassis with me during our half hour lunch breaks. At least his shopping bills have been cheap. Didn't give him time to eat!! Attached are a few pics of the chassis & cage all painted and assembled. Sorry if they are a bit dark. They look better on the camera. 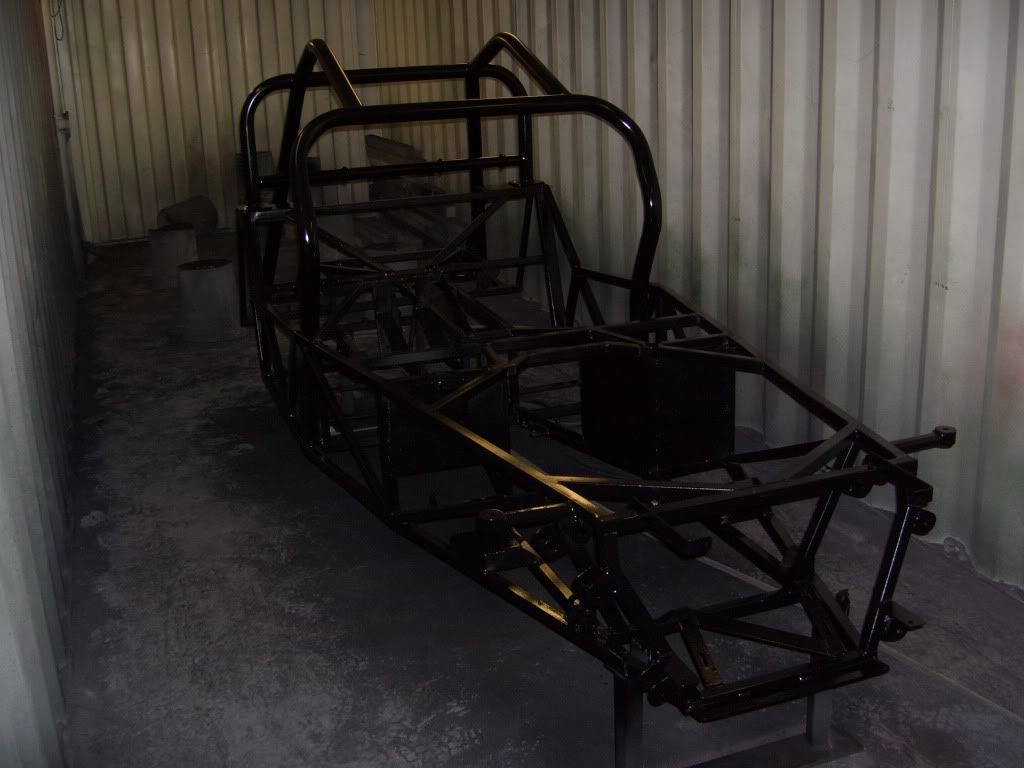  Cheers Dave |
Looking good Dave :cool:
Kind regards John |
Wow - that is looking brilliant. Lovely job you and Gus have done there.
Gus - is your car on the road now? |
Looking real good, nice roll cage to.
Well done to you both.....AndyH |
Here, I have adjusted them for you.
  |
Looking good.!!!
|
Hi
What he forgot to say was it had all the fittings and brackets done,so hopefully no welding on it when at home. Davidimurray - hope to have my car finished next week . Dash needs fitting , gear and hand brake gater and lots of trim. Then send off paper work . Gus |
Dave's chassis is looking fantastic :cool: :)
Nice to see that you have managed to crack on with your build Gus :) When will we see the grand unveiling :cool: |
WoW looking nice :cool:
Dave / Gus..... May I ask ......are the roll cage back stays & front down tubes welded to the chassis at the bottom? reason I ask is that I,ve recently done mine but bolted them in with 4 bolts similar to the upper roll bar mounting, just in case I ever need to remove the roll bar. I take it you both only have time for a kit kat in your lunch breaks, chassis is looking really nice :cool: cheers andy |
Thanks for all the comments guys.
I'll be glad to get it home to spend a bit more time on it. Not that i'll get much with a 3 year old boy to play with. He does like cars though. He was sat in Gus's at the weekend eating biscuits, and getting crumbs all over the place!! Andy the rollcage in completely bolted into the chassis. The rear stays each have 2no. M8 bolts welded into the bottom of them, which bolt through plates welded to the chassis rear frame. The front tubes each have 3 fixings which go through a plate welded into the corner of the chassis. These bolt will eventually go through the ali floor and a spreader plate underneath. Yesterday was the first time the rollcage had been back on the chassis since we welded it all up. Went on like a glove and all the bolts went in first time. Cheers Dave |
Looking good, glad to see you have attached things like your rad brackets at such an early stage. it's 'orrible when you paint something then have to weld on it again and ruin the paintwork.
Enoch |
Enoch,
Luckily we had gus's chassis to copy all the additional brackets from that I needed. The only thing left to weld on will be a plate with the vin number on. Cheers Dave |
Quote:
:eek: I,ve got a 3 yr old too...thanks for the tip to avoid biscuits , my little lad was sat in mine the other day too, using the indicator stalks like he was pumping up a bicycle tyre :eek: Roll cage looks really nice on the chassis, nice proportions if that makes sense. Look forward to more pics as you "build her up". cheers andy |
great looking chassis but arn't you missing RP1 and RP2?
|
Andy,
My little lad does the same thing with the stalks. He also pulls the gearstick backwards & forwards, and rips the handbrake up while making a screeching noise!! I dread to think how his mother drives!! lol. Bet she blames me. Cheers Dave |
My wife put our 6yr old on the bonnet of one of my cars a few months back, I was not best pleased even though the bonnet is scrap.
The 2.5yr old has ripped wiper blades of my headlamp wipers on two cars... But they are enthusiastic :rolleyes: TT |
Deanno,
I will be using the grp rear tub eventually so do not need RP1 & RP2. Well spotted though. Dave |
Progress Update
Well it's been a while since I posted any updates, so thought I best get out of the garage and upload some pictures.
With christmas & my birthday having just gone the fairies have been busy dropping of parcels. So far I have finished the engine coolant, and breather systems. Fuel system complete, horn fitted, brake flexi's, calipers rebuilt etc etc. Loom from Premier Wiring has also arrived. Deal of the week has to be the 16" alloys I got. Set of four, with only two tyres, but I can source the other two some cheap enough. Got them off a friend at work for £40. They need a repaint, but I will put them through our sand blaster at work. Lucky for me we have got a job in at the moment using 2pk traffic black paint. Guess what colour I wanted my wheels? Below are a few pics for you comments. Cheers Dave 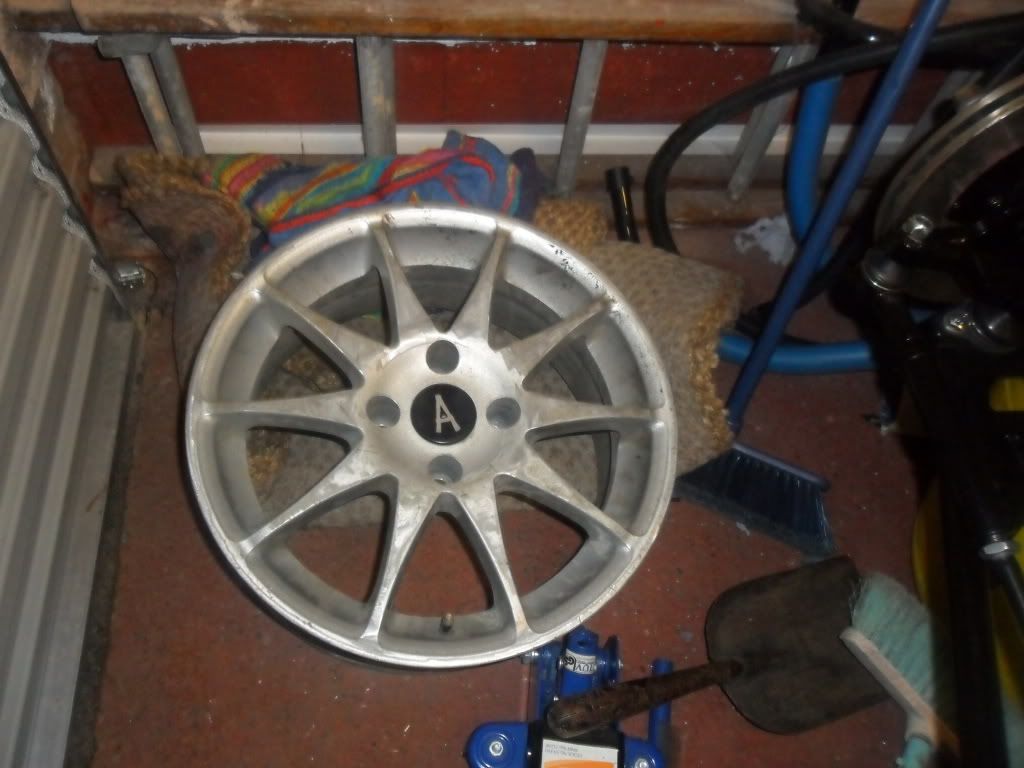 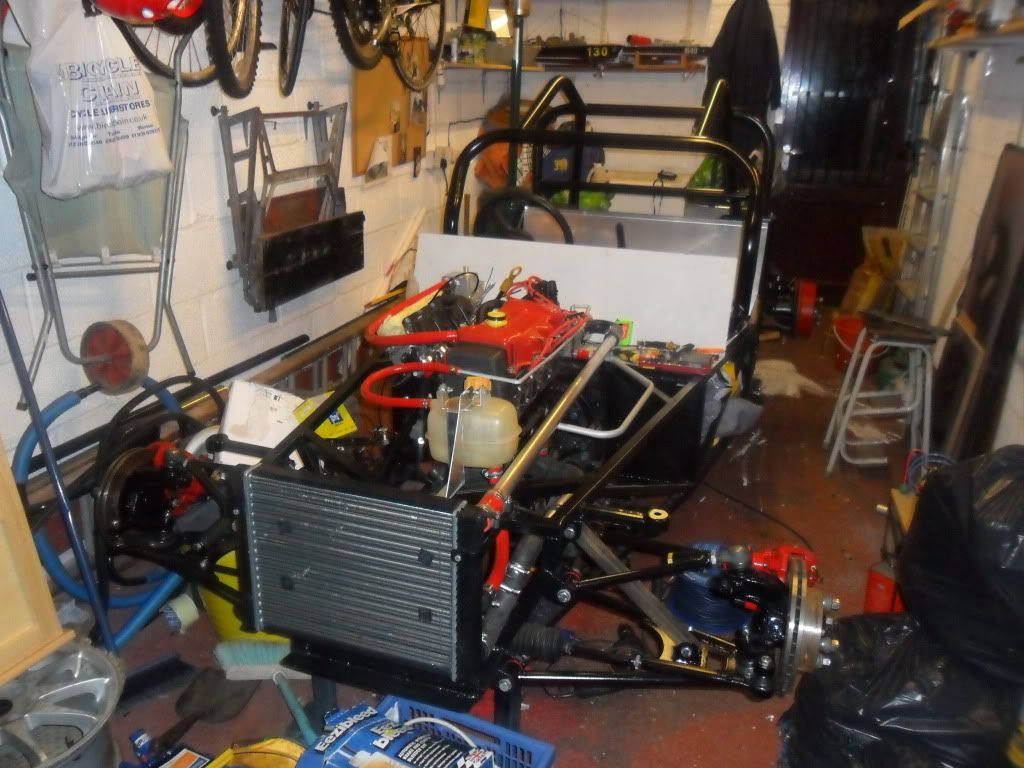 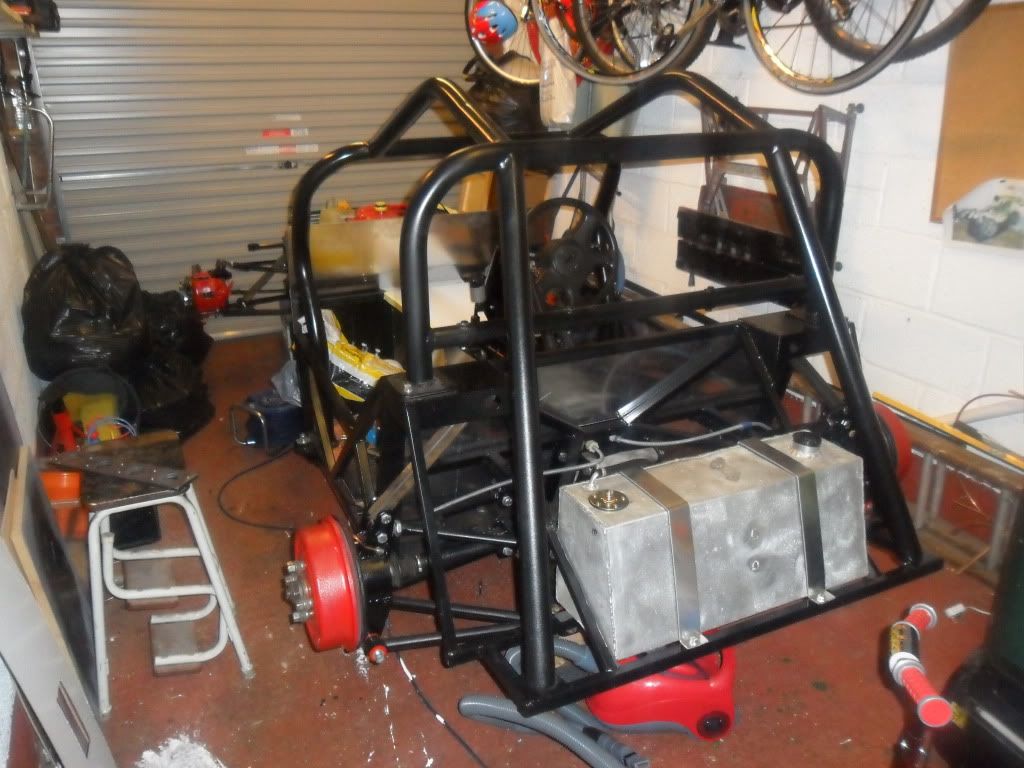 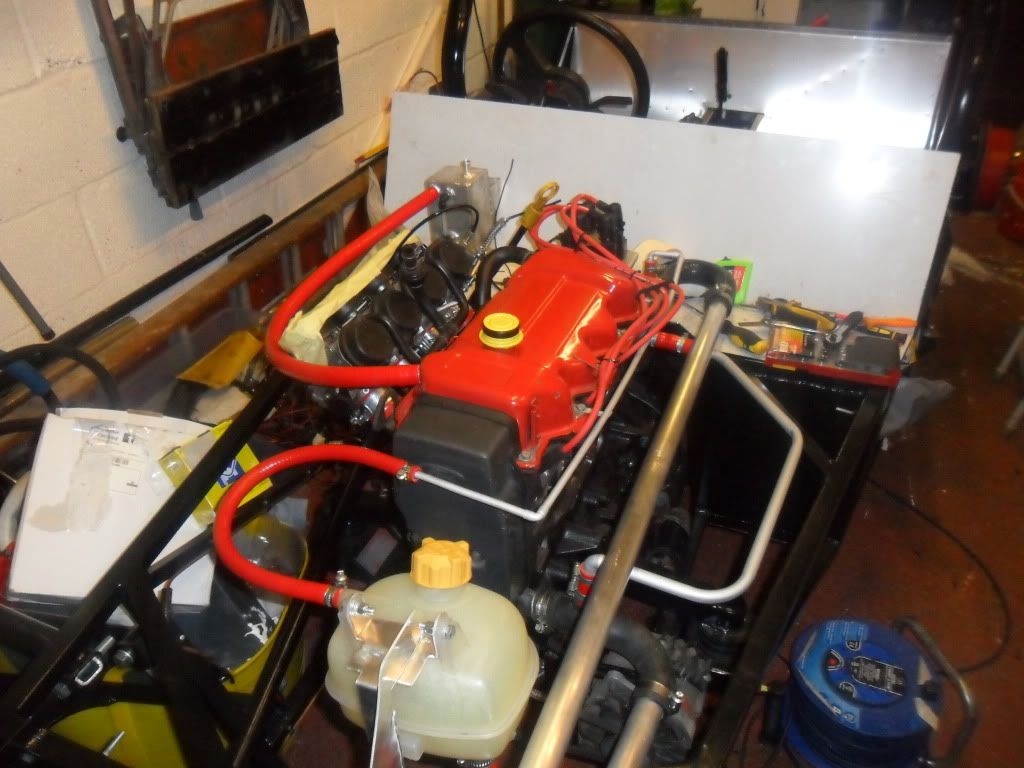 |
Now that looks very nice indeed :cool:
I really like your full cage , is it removable? can/could it be retro fitted? Sounds like a bargain on the wheels ....getting like me :D Nice work Dave . cheers andy |
Andy,
The cage is held in by 18 bolts. With a little bit of work it could be retro fitted. If you can build a car fitting the cage should be no problem. Cheers Dave |
Quote:
cheers andy |
What size are the wheels? they look like they are 14" ? If so have you tried them on the rear uprights? Should look great when painted up. I am looking at the bespoke centre caps you can purchase off ebay, to add that finishing touch!
|
Andy,
Gus and I made the cage as I wanted something a little different. Never really thought about making anymore. John at 3ge did ask to use the plans to market them, but don't think it ever got off the ground. Spike the wheels are 16" so no problems with them fitting over the rear uprights, I did try one on though just be sure. Cheers Dave |
I'd be interested in one of those cages too, after I finish building my car!:rolleyes:
|
After having my bodywork for about a month now, and spending a few hours messing about with it I thought it was about time I put an updated picture on the forum.
The bodywork still all need fixing on, but it is starting to take shape. 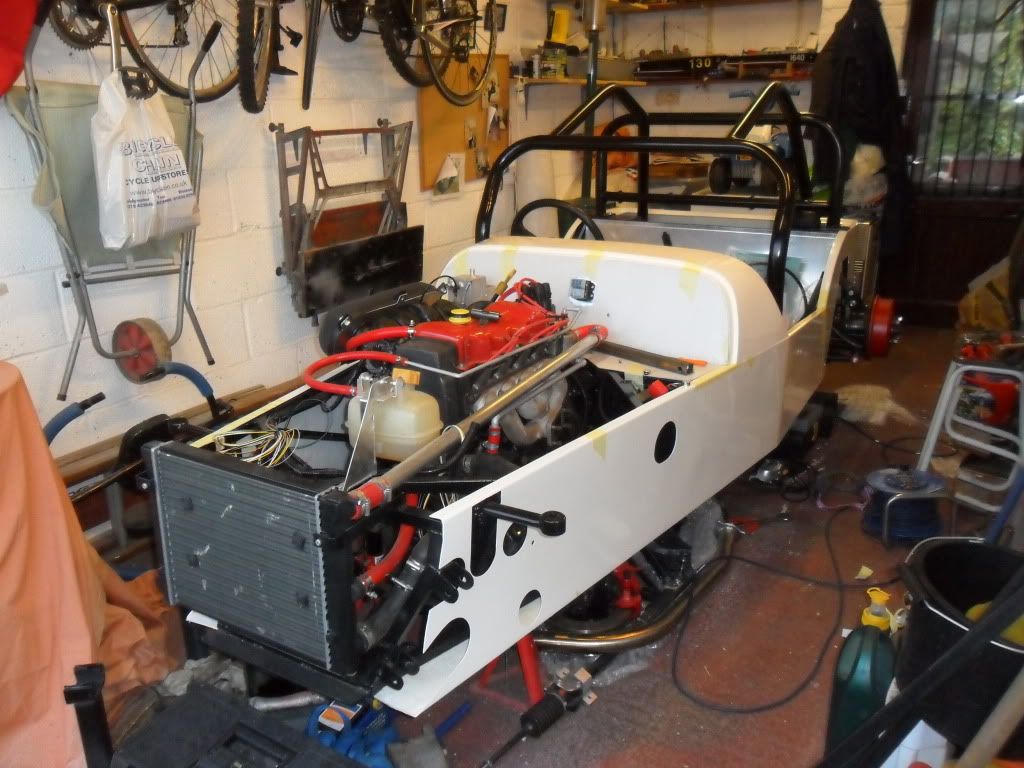 |
Car looks great. Would there be any chance of you making and selling the roll cage as a flat pack kit.
|
Myself and Gus made the cage where we work. Mainly did it because I like a challenge and wanted something different.
I have posted the plans on the forum previously if you wanted to try and find somebody more local to you to bend the tubes. Never thought about making flat pack kits. 3GE were going to do them, but they didn't get enough people wanting one to make it worth doing. |
I can see you are heading down the same meticulous route as Gus..:cool:
|
Thanks Mark, don't want to be out done by him.
|
thats looking nice,
I'm probably going for white when the time comes. How have you sorted the cooling on the cvh, blanked off manifold outlet and escort thermo on the back. A couple of pictures in that area would be good! |
Just for you mike here are some of the pictures you asked about.
  Like you said. Take core plug out of head & fit FWD thermostat housing. Manifold flange for bike carbs covers over the original water outlet, and I have fitted the sensor for the Acewell dash in the same position. You may notice in the first picture that I dog legged the chassis rail around the housing. |
Thanks dave.
Thats how I'm doing it, I've tried to notch a bit out of the chassis rail and added a peice behind to add strength back, I wont know if the notch will work untils the engines in an revved up under load, as I've got the extra bit already in I can always cut the orginal rail out if it fouls, What carbs are you using? Where did you get the manifold plate from? Is there a cover for the part above the old water outlet (not sure what it is two bolts) |
Mike,
This is where work comes in handy. Being a CAD designer I drew up the manifold plate from a gasket & we have a CNC flame cutting machine at work so I cut it myself. The carbs are GSXR 600 carbs with a TPS. The manifold has been remade since this picture. No matter how hard I tried the carbs kept falling out of the silicon hoses so I bought the proper inlet rubbers. I then had the manifold skimmed on our mill at work to get it perfectly flat both sides. The cover you mention is where the fuel pump should be, but my engine started out as a CFI engine so had no fuel pump fitted, and that is how Ford blank the hole in the head. Hope that helps, any more questions feel free to ask. |
Some folk are lucky to have machines to play with, must be a git having to "work" though when you want to get on and do your own stuff...
looking damn fine matey:) |
Good thing with it Mark is that if we had a quiet time, and the apprentice had nothing to do. "Just make this for me".
Got all the machined items need for the roadster & and few more besides made FOC ;) and help improve the skills of the work force :D |
I think theres a guy on lcb that will laser cut a plate for a good price!
Which way are you heading for the exhaust, that doesn't look like the standard sierra manfiold or down pipe, M |
Manifold is a series 2 Escort turbo manifold with an adapter plate between it and the head. Exhaust can is a Suzuki 1200 Bandit can with a custom stainless steel pipe between.
Again all made at work and polished by my own fair hand. The outlet of the can is rolled so will pass IVA but aims towards the rear arch. Providing the arch doesn't get damaged by the exhaust gas it should all be fine. The exhaust is actually quite quiet. It's the carbs that make all the noise when the engine is running.  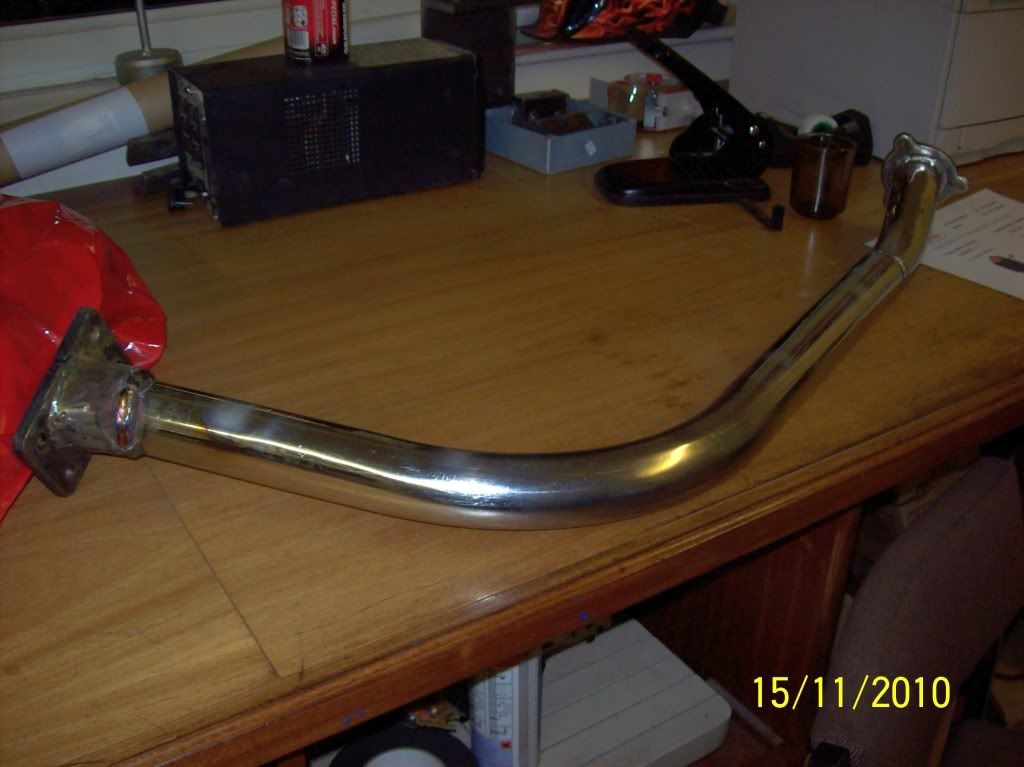 |
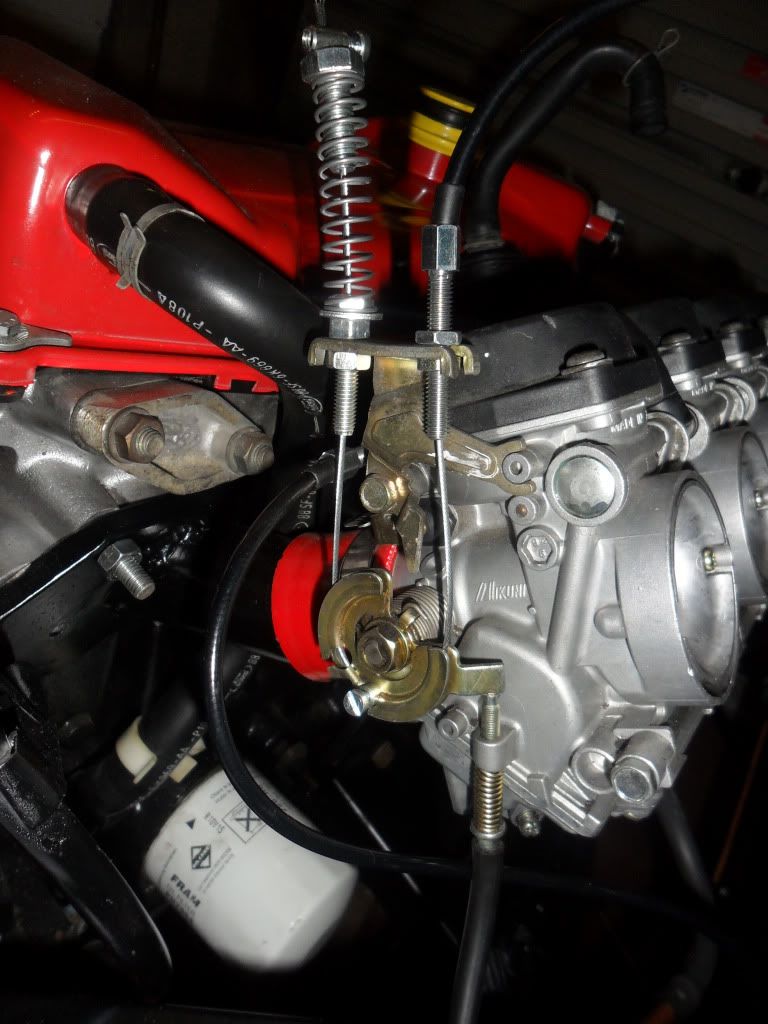
looking good but whats the deal with that odd push pull setup you have on the throttle cable?
the back cable was where the return cable would have been for the twist grip what is the deal with the spring and stuff? |
Baz. I found that the throttle was lazy closing due to the extra weight of the pedal. By adding an additional spring the throttle closes more positively, and means the coil spring on the throttle spindle does not have to work as hard.
|
Quote:
|
| All times are GMT +1. The time now is 11:58 PM. |
Powered by vBulletin® Version 3.6.4
Copyright ©2000 - 2024, Jelsoft Enterprises Ltd.