Quote:
TT |
Quote:
TT |
1 Jan 2010
Had a great day today, I started striping the Sierra, my hands are saw from being so cold. Rewind a little to two days ago, I finally got back in the garage after Christmas and in two days fitted the rest of the wishbone mounts, the steering rack mount and the dif mounts CP10. I bit the bullet and decided after fitting the last wish bone mounts that I didnt really need the build table anymore, I still have a little to do on the chassis like hand break mounts and the steering column assembly. So this morning (10ish) the chassis when outside for the second time, the build table got cut into three (I had used MDF as it is cheap and the thing had warped so would be no use to anyone) and the garage got a clear out. I enlisted the help of Nicky, my wife, and we went up to work to retrieve the Sierra, the minuet it was on the drive the stripping begun. [IMG] 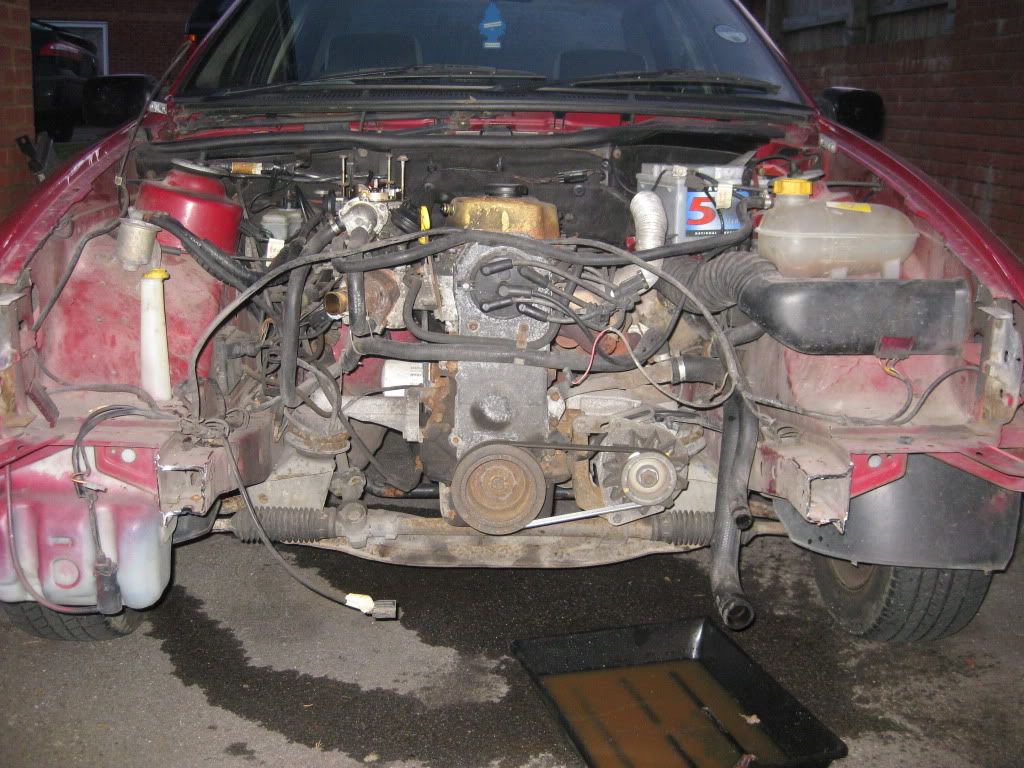 [/IMG] [/IMG][IMG] 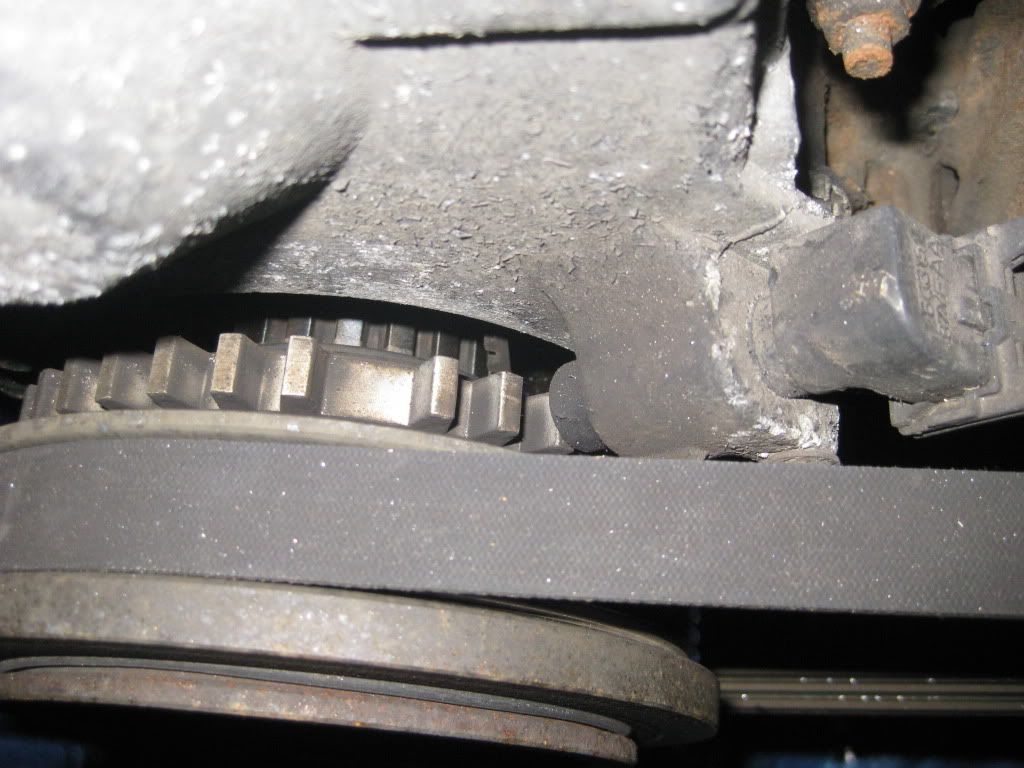 [/IMG] [/IMG]I now have a big pile of things to throw and only a little pile of thinks to keep. Now it is in the garage I can take my time labelling wires and getting ready to pluck the heart from the beast. Cheers Ginge |
Well done Ginge
Great feeling, stripping a car, knowing that you don't have to put it all back together again. Hope you hve not got too much spanner rash mate :eek: Another one working on their build on new years day ..........You folks are making me feel guilty .... Just sitting here with my feet up :D :D I am planning to make a re-start next weekend :o |
offer the unwanted parts on
http://forum.fordsierraclub.co.uk/ or give me a list of whats spare and I can do it for you.. Make sure you keep the magic tree for the Roadster. TT |
that should be stripped in a couple more hours mate :D took my mate andy and i 6 hours to reduce mine to a pile of parts on the floor.
when you drop the motor just undo the whole subframe and leave the engine attached as it allows the engine to stand upright on the subframe and makes it easier to move around |
Top tip on the sub frame Ash, cheers.:D
Looking at the toothed wheel and the pickup do I have the start of some sort of electronic ignition?:confused: Cheers Ginge |
It has the ESC-Hybrid Ignition system.
TT |
Quote:
That is a trigger wheel & VR sensor, very usefull if you fancy going down the Bike carb & Megajolt route If you feel realy brave..........Bike throttle bodies & Megasquirt :) Not sure what either of these mods would give on the CVH engine though. I dare say it'll give the motor a little bit more zip :) |
I have fitted bike carbs and megajolt to my cvh and as already said the trigger wheel and vr sensor are already in the correct position which makes it a very simple instalation :)
Havnt driven it yet so dont know if its made much difference, but i supspect it should once set up compared to the standard pierburg carb set up If you are planning zetec with bike carbs after iva then you should think about fitting bike carbs, megajolt and fuel pump now so come engine swap time you have what you want/need already, and experience of how it works. Also you wont have to add any extra wires in to the loom to get it going. If going down this route and are using the donor loom you can strip out all the wires that run the standard ignition system before its put into the car and wont have to do it later or have uneeded wiring allover the engine bay from the standard set up. |
Personaly... And this is just me..
I would bypass Bike carbs and fit a set of bike throttle bodies instead. Coupled to Megasquirt it will be a lot better in the long run. TT |
Quote:
I agree with you that in the long run i (and probably most people) would like to end up with a fuel injected zetec on throttle bodies but short term i wouldnt put that kind of effort/money into an 18 year old cvh that will probably only be in the car for 6 months In my opinion the bike carbs/megajolt thing is just a tried and tested cheap way of getting a little more power and isnt a complicated thing to do, hence why its such a popular choice for many builders of this style of car |
I agree , leave it stock for the IVA.
There's no gr8 difference in the difficulty of fitting efi over carbs + Jolt. Ok you need a high preasure fuel pump. But other than that it's just a few extra wires. The bike carbs will have to be jetted correctly and tuned idealy on a rolling road. And combine that with tuning the Jolt too.. The Squirt could be started on a base map and live mapped with a WBC on the "Private" road. So although the cost of MS over MJ ~£300 if you included the extra cost of bodies over carbs. The tuning costs could well make the price a lot closer overall. And if you move engines you just need to live map again. But your also right, no point spending money on a 1.8CVH. So.. Stick with the standard carb with the standard ESC-Hybrid ( which does the job very well ). and then throw in a firebeathing monster after the IVA and funds allow :D TT |
i was going to use the standard carb on my pinto. the problem i had was that i didnt want it sticking through the bonnet. i got a set of bike carbs for
£36 then the mjolt, edis4, coil pack, trig wheel, tps and vr sensor for £150 all in. made the inlet manifold from a bit of 5mm plate i pinched off my mate and left over 38mm tube from my roll bar back stays. put it all together £186. the carb setup i got at special rate through the mag. but usually would have cost £240 so £426 all done and sorted. the big result out if it was that my puny little 1.6 that should make 73hp at the fly wheel made near 75hp at the wheels which equates to around 90hp at the fly wheel. thats just over 20% power increase for £400 if my maths is correct. |
I think we are HiJacking GP's thread....
TT |
yep thought that about 2 seconds after i clicked post. sorry ginge
|
No no you guys carry on it is all good stuff.:)
I was idly thinking about fuel injection only the other day.:D The carb has so many sensors and vacuum tubes attached, also the auto choke has the water system plumbed into it. So it will all get junked for bike carbs and the obligatory MJ. Having taken the inlet manifold of today I noticed the coolant outlet from the engine runs through it. How have builders overcome this when making a manifold for the bike carbs? |
You have brought back a vauge memory there that the manifold has a waterway to the head. I may be wrong though I last worked on a CVH in 2000.....
TT |
TT,
Exactly that, there is a water way right at the back of the head, inlet side, in fact it looks almost like a fifth inlet port! Cheers Ginge |
my pinto was the same. simple solution dont make the hole in the new manifold plate ;)
|
Ash,
It is not that simple, water is sucked in to the engine from the bottom of the radiator on the right hand side of the engine quite low down, the only place the water can get out of the engine is through the aforementioned port in the head along side the rear most inlet port. Also the thermostat housing was bolted to the inlet manifold unlike the pinto where it is cast into the front of the head I believe. So two problems really, the first is an inlet manifold to take some bike carbs that has a take of for the water (that bit I can cope with), secondly fitting a thermostat into the system, not essential, I have run cars without them, but I would like one. I bet if I look, CBS do some sort of inline thermostat housing, that is the trouble with typing a long post I think of the answer by the time I have got to the end. Saves me lying awake all night pondering it though. |
2 Jan
Slow and steady today. I had to fire up the heater in the garage today, the frost outside didn’t clear all day. Exhaust manifold off with no studs sheared, inlet manifold off no studs sheared although the manifold is cracked right on the back end where the last stud goes through, not a problem as a bespoke item will be fabricated, the time consuming bit was labelling all the wires up. The car is now up on stands and the steering rack has been removed, ready to remove the prop and loosen the gearbox mounts. Should have it out tomorrow. [IMG]  [/IMG] [/IMG]I took a trailer load of old Sierra bits of the drive to keep the peace and no.1 son got involved. [IMG] 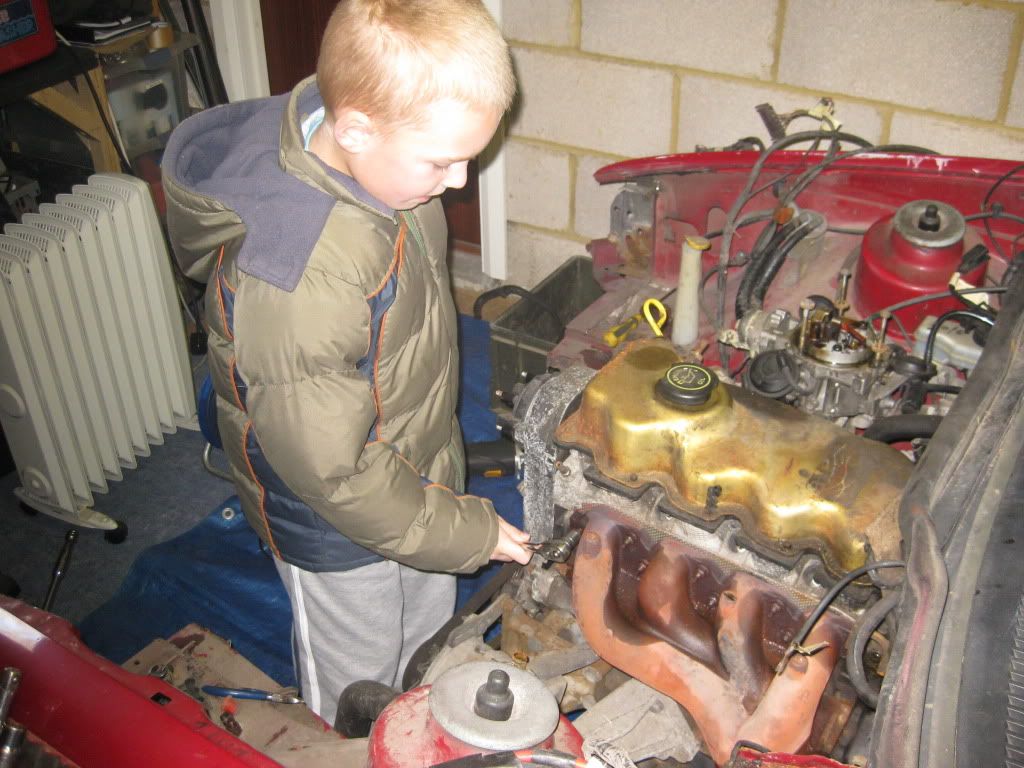 [/IMG] [/IMG]Not quite sure how I am going to move the Sierra once it has no wheels! |
Quote:
Then there is 3 core plugs on the back of the head that you can pop one out (the one with the m6 tapped holes either side)and the water will come out through there, then you can either fit a 1600cvh thermostat to the same point on the back of the head or just make a flange with a water oultlet and buy a by passing thermostat from car builder (this is what i have done) If you fit the 1600 cvh thermostat housing you will have to cut the chassis rail that runs behind the engine which is also the same problem when fitting a zetec Making your own housing will let you angle it upwards to clear the rail :) Hope this makes sense i wil post some pics tomorow if you want? |
I thought this was an 1800 CVH, that does not have the core plugs does it?
Cut the sierra up into managable chunks. Rob |
Yes please mark, that sounds like a good fix to the problem.
Cheers Ginge |
Quote:
When you pop one out you can see that the water actually passes this point when going to the standard inlet manifold outlet so seems as good a place as any to take it from Havnt seen a 1600 cvh for a few years now so cant remember what the thermostat housing looks like but i think DaddyA has used one so maybe he can post a pic so people can see the different options and how you need to modify the chassis rail that runs behind the engine |
Mark,
I went out to the garage and it is as you described, I couldnt see the core plug but could feel it from the inside and outside. Cheers Ginge |
just had a look at your picts and can see what you mean. if you want i could machine you an inline thermostat housing that will take a pinto thermostat. then all you would have to do is have a take off on the new inlet manifold.
|
Cheers Ash,
I am thinking of going down the 1.6 thermostat housing bolted to the back of the engine, route. I will keep the favour;) in the bank for MJ time cheers:D |
it looks so tweeee in there. I am used to trying to work round engines that only just fit in the sierra bay :)
TT |
TT,
Its great isnt it, especially when you can cut the front of the car of. I am more used to working on big diesel lumps in landrovers, trucks and tanks! |
as for moving it that's what the range is for.
|
Ash,
Do you know I hadn't thought of that!! |
There's no way I am cutting the front of either of my two sierras.. I just have to be trebble jointed and have see round corner vision.
TT |
1 Attachment(s)
The first pic are the core plugs as previously discussed
And the second are some pics of my water outlet, im mounting the dash temp gauge sender in the same pipe as the original was mounted to the donor inlet manifold, you can also see the by passing thermostat from car builder solutions The pipe is angled upwards so there is approximately 15mm of clearance between the pipe and chassis rail. I decided to take the plumbing under the inlet manifold instead of running on the hotter exhaust manifold side Although my outlet will be smoothed out and powder coated, using a 1600cvh thermostat housing would probably look a better job but after some thought i didnt want to chop the chassis above the gearbox to gain enough clearance to fit one as they are quite bulky and to me (just my opinion;) ) that looks like the weakest part of the chassis as it has to be open with no support underneath for the gearbox to fit in so i thought best to leave it alone :) |
Cheers Mark
Those pictures really helped, is the thermostat in the new pipe coming of the back of the engine? |
Quote:
The bypass is pointing over the top of the engine and has nothing connected to it yet, it will be reduced down to about 12mm and routed around the edge of the rocker cover to feed the standard cvh bypass which is a hose tail located just to the right of the timing cover at the top Hope this info is of some use! |
That makes sense:D
Thanks |
30 Jan
Wow one update at the start of Jan and one right at the end, it might seem like nothing has happened but things have moved on a little. Weekends have been busy with family and a great trip to Saturn Sports Cars to swap my band saw for some fibreglass. Now I dont mean to sound ungrateful, as I can imagine if you are out of work it must be hell, BUT after having five weeks off before Christmas, going back to work was a shock. It also gets in the way, as I tend to have to prepare things over the weekend for Monday. Excuses over, the story so far....... Engine and gearbox came out together and are staying that way to mock up engine mounts; I have kept every brake pipe union and every bolt that I removed. Today I removed the drive shafts and rear hubs (the fronts came off weeks ago) finally got the diff off and the hand break. My concern now is the wiring. Every plug within the engine bay is labelled and I was planning on removing the wiring loom complete, however, where the loom goes through the bulkhead there is no connector. So, I plan to lop the loom off at the bulk head so I have an engine loom, then cut the connectors for the steering column off leaving long tails. Also I cant seem to disconnect the clutch cable from the pedal. I hope to have the Sierra picked up next weekend. One other thing, I will be removing the VIN number from by the drivers seat and I have got the whole slam panel, but I was under the impression that cars had the VIN number stamped on the car in two places. Well, Im bu****ed if I can find a second VIN number stamp. Any ideas? Cheers Ginge |
1 Attachment(s)
The wiring loom will come out in one go, when you take out the fuse/ relay box the the loom will come out with it.
Attachment 673 |
| All times are GMT +1. The time now is 11:14 PM. |
Powered by vBulletin® Version 3.6.4
Copyright ©2000 - 2024, Jelsoft Enterprises Ltd.