Quote:
|
I had nothing better to do yesterday!:(
|
Quote:
|
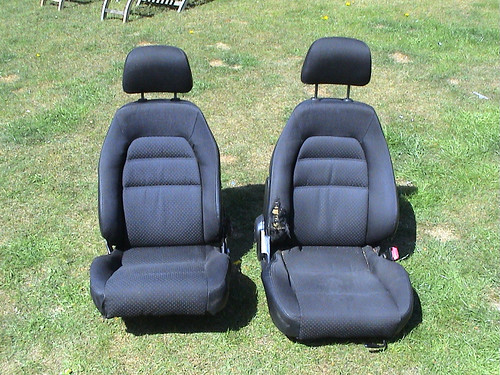
Well once you have removed all the brackets and runners and separated the back from the base you need to peel back the seat cover removing lots of little retainers. Now the foam is exposed get hold of your mothers/wifes/girlfriends sharpest serrated knife from the kitchen and start cutting the foam bolsters to size. After that it's a case of getting the seat covers to fit again. I managed to get the misses to sew the back one so it fitted snuggly but for the base I just pulled it as tight as possible and re-fixed it to the base metal using the runners and drilling small holes to reuse some of the retainers in different locations. A good strong pair of needle nose pliers is a must. I'm not worried that it looks a little baggy around the edges of the base as no one will be able to see that once fitted to the car. I didn't take any images but will when I get round to the other seat one afternoon when I'm bored.
Hardest Part?!? Getting the missus to do a bit of sewing! ;) |
I have narrowed some corsa sport seats just need to get around to making some new covers for them, was a lot easier than i thought it was going to be and they were free :)
|
Quote:
You owe your wife something nice! A fancy dinner perhaps? |
Might try this!!! Useful how too!
http://automotive-concepts.blogspot....g-extreme.html yes the wife deserves a treat, if she does the other one too mind!:D |
Mostly been selling mx5 bits and raised enough to order by wishbones from spud69. As I have been stripping the car I have been untaping the loom and cutting out all the unnecessary wiring for things like interior lights, heater, wipers, stereo etc. I've been watching "Victory by Design" on Discovery for the inspiration for screenless two seater cars!
It's funny when you start stripping a car for a roadster and you just laugh at how much stuff you really don't need to get from A-B and have fun! Also been looking at aftermarket EMS and turbos oh and wheels, but fortunately have managed to avoid spending any of the, money I don't have, on things I don't need. So pretty dull all in all but chassis kit, plate kit and wishbones should be here in a couple of weeks!:D |
So again today I started on the P/S of the engine bay stripping back the loom and removing the unnecessary and separating the lighting loom from the engine loom to make reuse simplified.
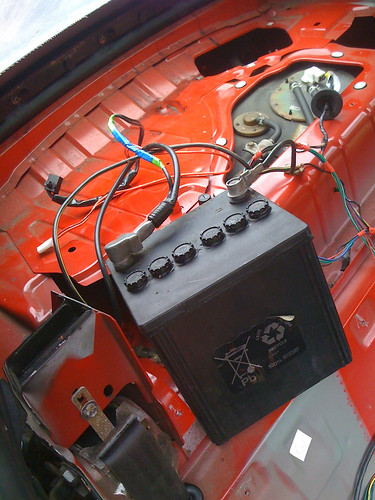 Battery behind the Drivers seat fuel pump connection in the bckgrd. 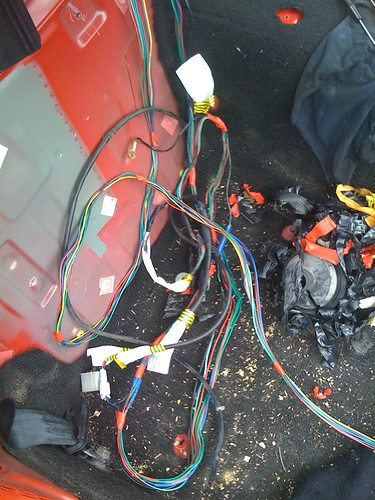 Rear lighting loom. 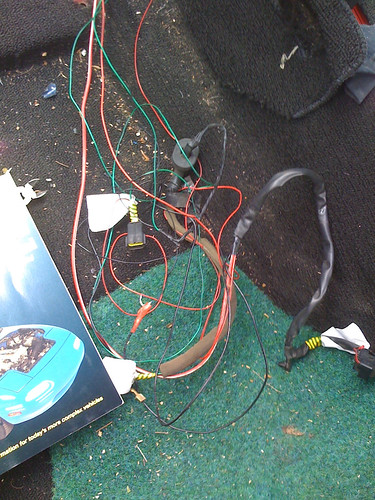 Front Passenger Lighting Loom. 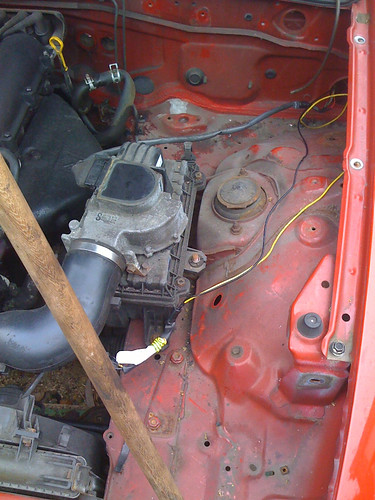 See simplified! See simplified! |
 Err Everything Else!  Err engine diags connector, lighting and horn relays, lighting resistor pack er I think! After a day stripping back I plugged it all back in and rechecked the engine still worked before finishing for the day. Should be able to keep the immobiliser if it caries on going this well. Next item on the list the under dash fuse-board! |
That's far too methodical :)
I just ripped all the wiring out and figured I'd worry about it at a later date. I suspect your approach will pay dividends later whilst I'm up to my eyeballs in tangled cables and impossible to understand wiring diagrams! |
I don't have anything else to do at the moment so I can take my time.Worst thing about the mx5 loom is that they changed them every year it seems. I've only just got hold of the mazda dealer wiring diagrams for the 94 year from a friend which are brilliant at showing everything very clearly. The mx5 looms really are a rats nest.
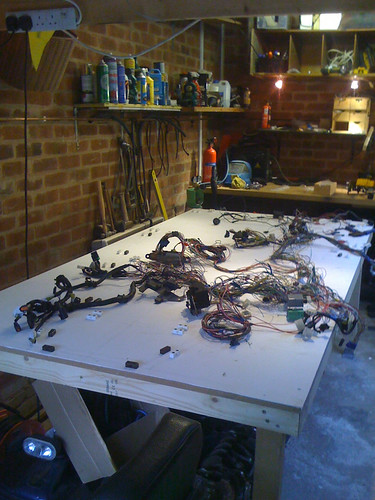
This link is good too! http://www.madracki.com/miata/ I'm starting to enjoy working on the loom now it's in the garage on the build table and I can see what is what!:) |
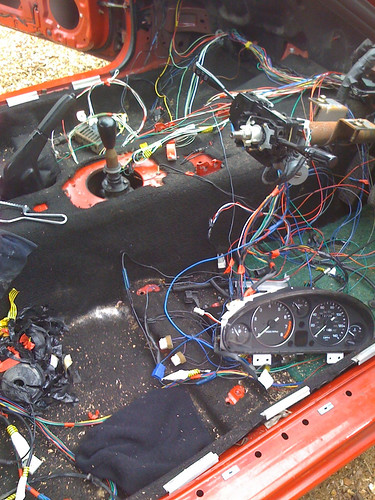
The wife's out for the day and I can't get out to the garage so I've currently got my loom spread out on the living room floor, lol
Thought I've have a go at identifying all the connectors. Wish I'd labelled them all before removing it from the car now!!! Try this link for diagrams: http://neomiata.com/garage/index.php...s%201990-1996/ They're not the easiest to follow, but there's individual diagrams for each year. |
Well the first thing I'd do if I were you, speaking from experience, is check all the ecu pinout wires and colours match your wiring diagram as I went through a few before I found my M reg 95 car had a 95' year rear loom and a 94' engine, front and interior loom!:rolleyes:
|
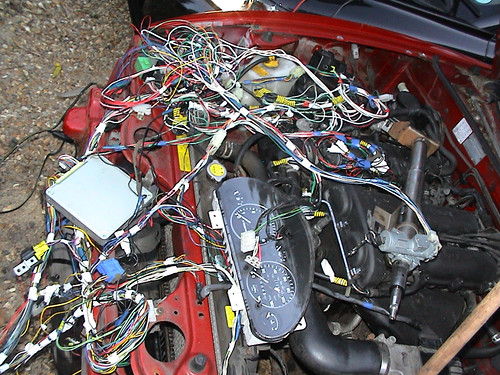
RAT'S NEST!
 |
now that is exactly the reason i went with a bike engine! that would probably cause me to have a nervous breakdown:)
|
 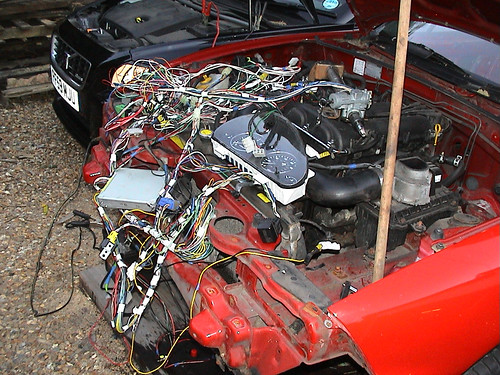 YES!!! The engine still works! I only made one mistake! I put the ignition live for the Fuel Pump Relay to a dead terminal rather than the relay. Once I had then hooked up another car to the battery to jump atart it as it was flat, and tightened a bad ground hey presto my loom still works without all the other stuff, including the immobiliser. I will wait till it's test fitted to the engine in the roadster before doing anything else to it. Time to put it in a box and forget about it happy in the knowledge it worked before I put it in the box and took the engine out! |
Wiring loom ain't too bad, a lot of that can come out - neater than the sierra. Got ours fired up earlier in the week and it sounds sweet. Just need the prop and it's having it's first test drive of the suspension around our "private" estate. Just going to modify / shorten the prop for now.
Andrew |
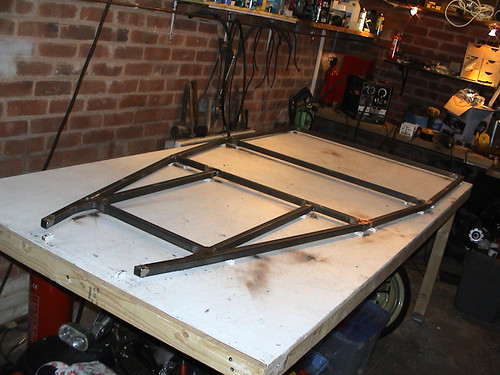
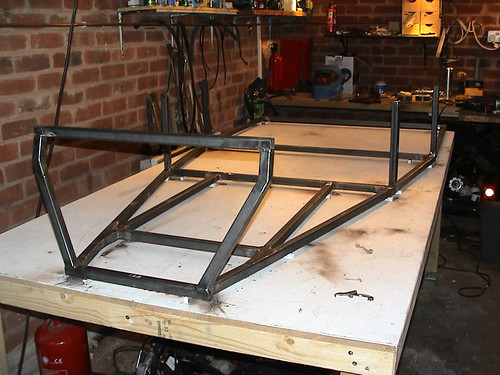
So I've decided like many that if I tacked the whole frame together I'd end up with a badly distorted frame when it came to fully welding it, with my limited welding skills, experience, potential for the table sagging under the weight and build space, I've decided to get the basic bottom rail frame fully welded and work out the distortion in it before continuing any further, I've learnt a lot doing this and now have an appreciation of weld procedure and heat management.
One thing I have found is that if you do get distortion that needs sorting, a good method is grind back the weld on the high side of the frame put a small V groove over the old weld and reweld. The heat generated doing this pulls the frame back in to shape and I now how a frame sitting pretty much level with minimal distortion. I'm a bit of a perfectionist and struggle to leave things if they aren't right but I'm happy with it. A few more welds and a bit of tidying up and I should be ready to continue!:) |
Great to see you've made a start on the welding :cool:
Need to see some pics! |
Got a good 8 hrs in the garage, many of which were spent swearing at the welder, but progress was made!
  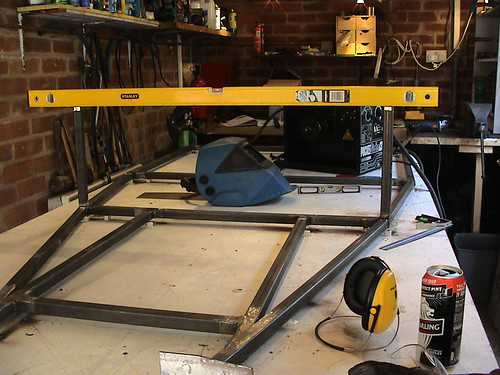 |
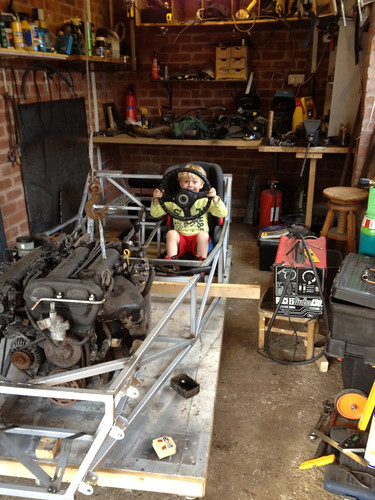
We took it of the table once the FF was in place and took it for a test drive round the front garden! :D
 |
Nice start :cool:
Not sure about your donor though, you might find it a bit underpowered :p  |
Quote:
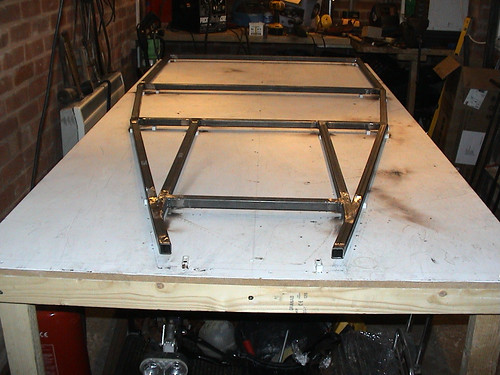
Been spending most of my time measuring, "Just off out to the garage for a bit of a measure dear!" You really do spend 90% of the time measuring. Couldn't figure how I was going to get an accurate 17˚ rake to the SB1s so I got out my protractor and spent 20 minutes making a template out of 3mm steel plate, also I have found computer hard drive magnets are excellent for holding the steels in place whilst tack welding. Got SB2 in place too and before moving on I fully welded all 3 in place and dressed the welds I have yet to fit the second inner pair of SB1s. Even though I fully welded the BR frame, welding in the uprights caused the back of the BR frame to lift by 3mm so I had to spend some time using weld heat on the underside to bring it back down again. Still enjoying the process. Which is why i wanted to do this project, driving it will just be a bonus. 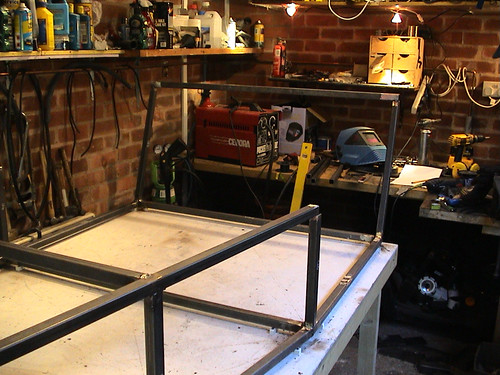  |
Pretty much at book figure 4.9 chassis stage but fully welded and today just picked up a 5kg reel or welding wire for £13.99 from halfords (rrp £19.99) as it had no bar code. Bonus! :D Needing another bottle of gas soon.
So glad I fully welded the bottom frame early on, the build table has sagged quite significantly with this heat. |
Yesterday I sat in the Chassis on the driveway, I positioned myself in the back corner of the chassis (no tunnel obviously) and well, my right arm will be outside the vehicle, Can't imagine doing 100mph and being able to touch the ground, seems wierd!! :eek:
This morning I started cutting out the seat runner mounts from the mazda, straight through the fuel and brake lines, doh! Thinking of using the mounts in the build with the mx runners, I've noticed that the mx-5 has very similar cabin dimensions (length wise) to the haynes!! |
Looking good so far bud will be rolling b4 long keep up the good work
|
Quote:
|
Got my VIN through the post today from the Preston DVLA office with plenty of information on kit car registration! Looks like this office might know what it's doing. My tranny tunnel is tacked in and seat back rails in place. Guess I better get on with the diff cage soon.
|
I have a wheel fitted hurrah!:D
|
Quote:
AndyH |
It's coming along slowly, I only get about 6 hrs a week at weekends in the garage, but I have spent ages measuring, checking and getting the rear diff cage suspension brackets etc in the right place.
This weekend I'll test fit the diff and finish up on the back end less the rear tub mounting as I think I've changed my mind and will go with a fibreglass tub. Then do some more full welding and put it on it's wheels, then I'll do the steering supports and spray the whole frame with u-pol weldthrough zinc primer. Then see if I can't get it steering on it's wheels.:) I do spend most of my time trying to figure out how I will organise the garage space at each stage of the build! It's doing my head in!!:mad: |
Some recent progress shots....
    |
Whats the secret of your eternal youth Chris?:D :D
|
Red wine! :)
|
Looks great!
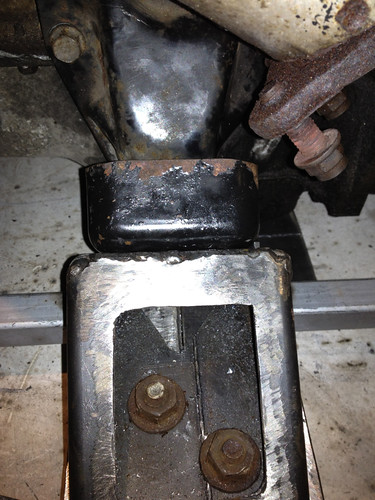
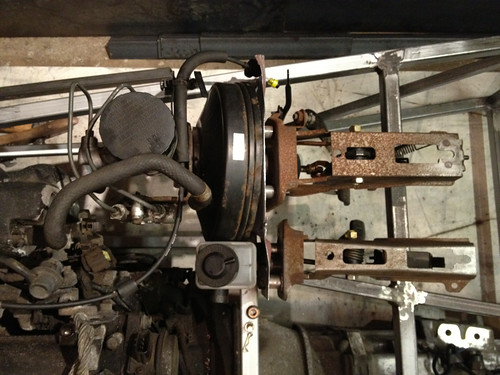
About the engine mounts. I am going to use the original mounts as you are but am thinking about the angle they sit and the compression of the rubber mounts. If you weld/bolt them up without the weight of the engine on them will the rubber mounts not be under lateral load instead of compression? In the mx5 the engine on it's mounts drops into the subframe like a wedge. I thought I would have to tack them in position then fit the spacer to make sure they compress. Am I on the right track with this or a complete nutter? |
Thanks Dodger, I understand what you're saying. The other mount will have a slot in it, like the mazda subframe, so the engine can settle into place, I measured the angles on the mazda subframe pass side at about 50˚ and the the drivers 60˚. Measuring the distance between the mounts on the mazda subframe should resolve any other worries about lateral loads.
|
Thats what I planned.
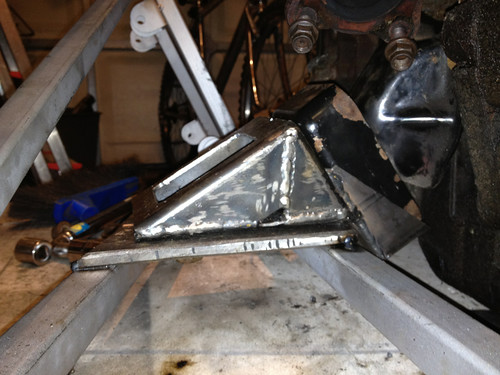
Unfortunately for me my engine sat too high on the standard mounts so have made new ones to lower it 50mm. 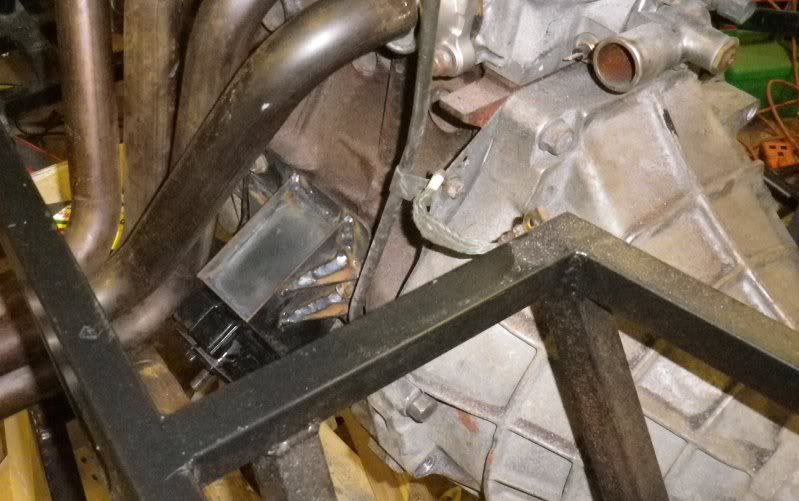 Not a great pic I'm afraid. This of course means the measurements I took from the MX5 won't help as I didn't make them the same as the OE ones :( |
I lowered my engine around 40mm and shifted it to the pass. side too. Finished the other mount today. Tomorrow I may put it on wheels and see where I'm at. :)
|
Looking good Chris!
I'm liking the engine mounts :cool: |
| All times are GMT +1. The time now is 04:59 PM. |
Powered by vBulletin® Version 3.6.4
Copyright ©2000 - 2024, Jelsoft Enterprises Ltd.