
 |
Bobs V8 Roadster Build
Brief recky of what I am building and why. A few mates of mine have been on the westfield scene for a few years and I have had the chance to drive them over a period of time. Also have a friend with a race tuned caterham 7 superlight , I was always impressed with the way they handled and being used to mental hp in other things I have had never been that impressed with the amount of grunt they had. That all changed when another friend built a westy v8, I was given the ride from hell and thought this is more like it :D . I got to drive the thing and although it went like stink the handling was ok ish it was not as darty or sharp as the four pot versions. On closer inspection westfield have got the engine pulled forward and sitting very high in the chassis just to obtain ground clearance and avoid messing with the already tight gear tunnel.
Anyway I fancied building a seven with a v8 and none of the kits on the market tick all the boxes which brings me to the Haynes, pretty much a blank canvas, wider than most of the other seven cars and plenty of leg room for tall drivers. The intention is to build a smallblock ford powered seven type car to have on the road but too also hill climb, sprint and track day. Along the way a friend of mine has been showing interest so he has bitten the bullet so there are two cars of the same spec being built along side each other. The build criteria is to get the engine as far back and as low as possible , this will be done by using a very small diameter nascar flywheel with an ap racing clutch, custom made bellhousing using a rear entry starter and a low profile sump. Shopping list on another thread and will be added to as and when.http://www.roadster-builders.co.uk/f...php?f=16&t=357 Any way time to crack on with the build and being a sunny day I thought it would be a good chance to get the chassis`s we got from talon in primer to stave off the tin worm,when all the mounts and welding are finished I will send them off for sand blasting and powder coating. Surface rust had already got to them so I attacked them with scotchbrite and a rotary wire brush. After about a hour all ten sheets of scotchbrite were in tatters but I found a rotary scotchbrite flap wheel in the workshop so set to with that http://www.ebay.co.uk/itm/10x-3M-SCO... tem27d2f23d8d. I have never used one before but shoved it in the drill, these are a fantastic thing for cleaning up steel without removing any material so I will get some more for later on. Primer was from a rattle can. 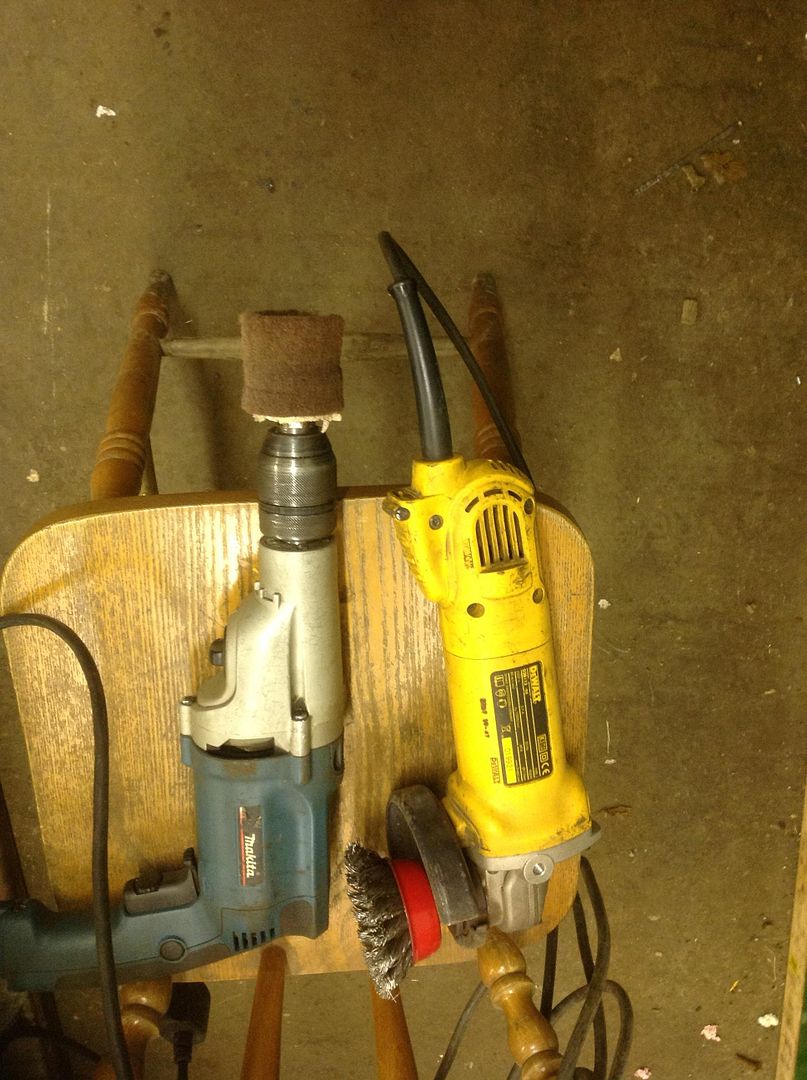 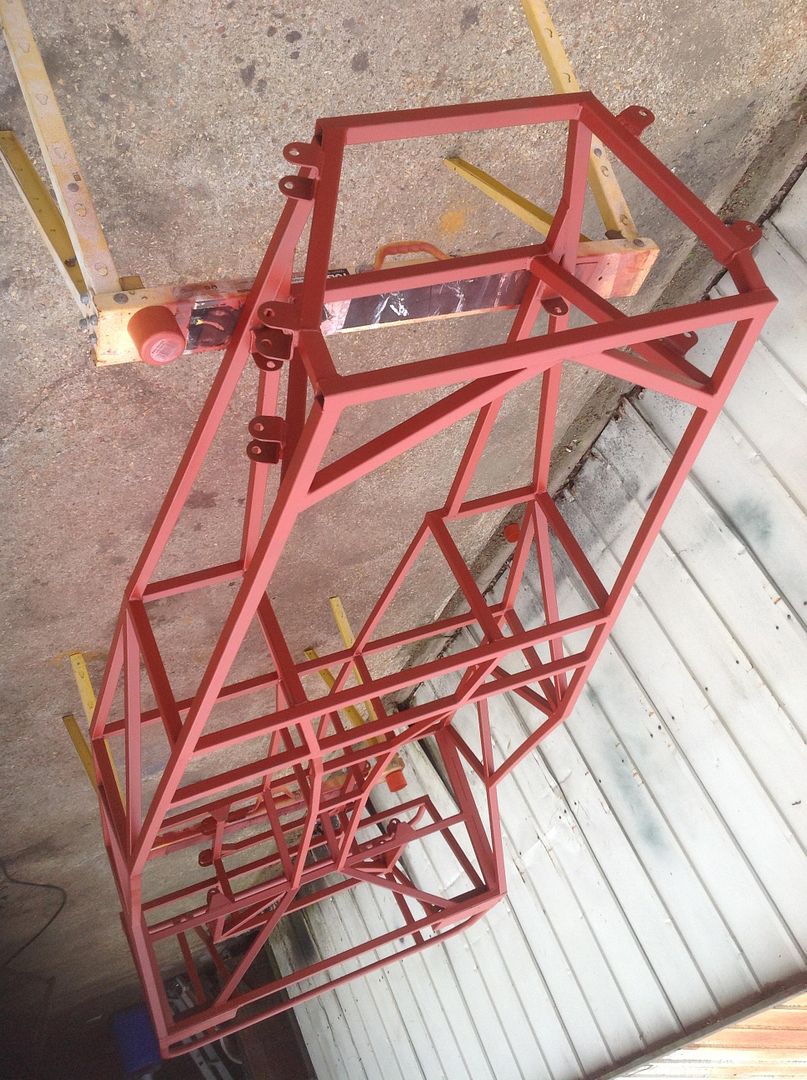 |
way to go bob.... way to go:D ....about time you made a start:rolleyes:
|
Well Bob I see the red mist has descended at last......:D
Good start with the chassis... Phil does top quality work.;) I see on your front frame top cross member the box section is open. Obviously I'm not going to tell you how to suck eggs but when I built my chassis I welded end caps square to the box section. In hindsight I wish I welded the end caps in line with the top side rails to look in line with the bodywork.. |
Just picked up this tvr pedal box that sort of lends itself to be chopped about for the roadster. Floor mounted and its very nicely made, only needs an inch taken off one side to fit. To chop or not to chop that is the question :)
Maybe just maybe :lol: Bob   |
That is a nice find Bob ....it has oodles of adjustability in it, and would save some work
|
|
Long time no see bob. Glad your back
I was watching those hub carriers (I think) |
I am never far away Steve but work has been hectic to say the least so not much roadster time. Anyway I have been spying and watching progress:) As the nights draw in I will get a lot more free time to play with the build.
Bob |
|
|
|
|
The landrover discovery rad seems to be a nice snug fit in the nose cone , it also has a built in oil cooler/ heat exchanger. its 540mm wide and 420mm high with a tank width of 100mm . These are five core units and will cool anything. It sits about 50mm off the front frame so there are no mounting issues.
Bob 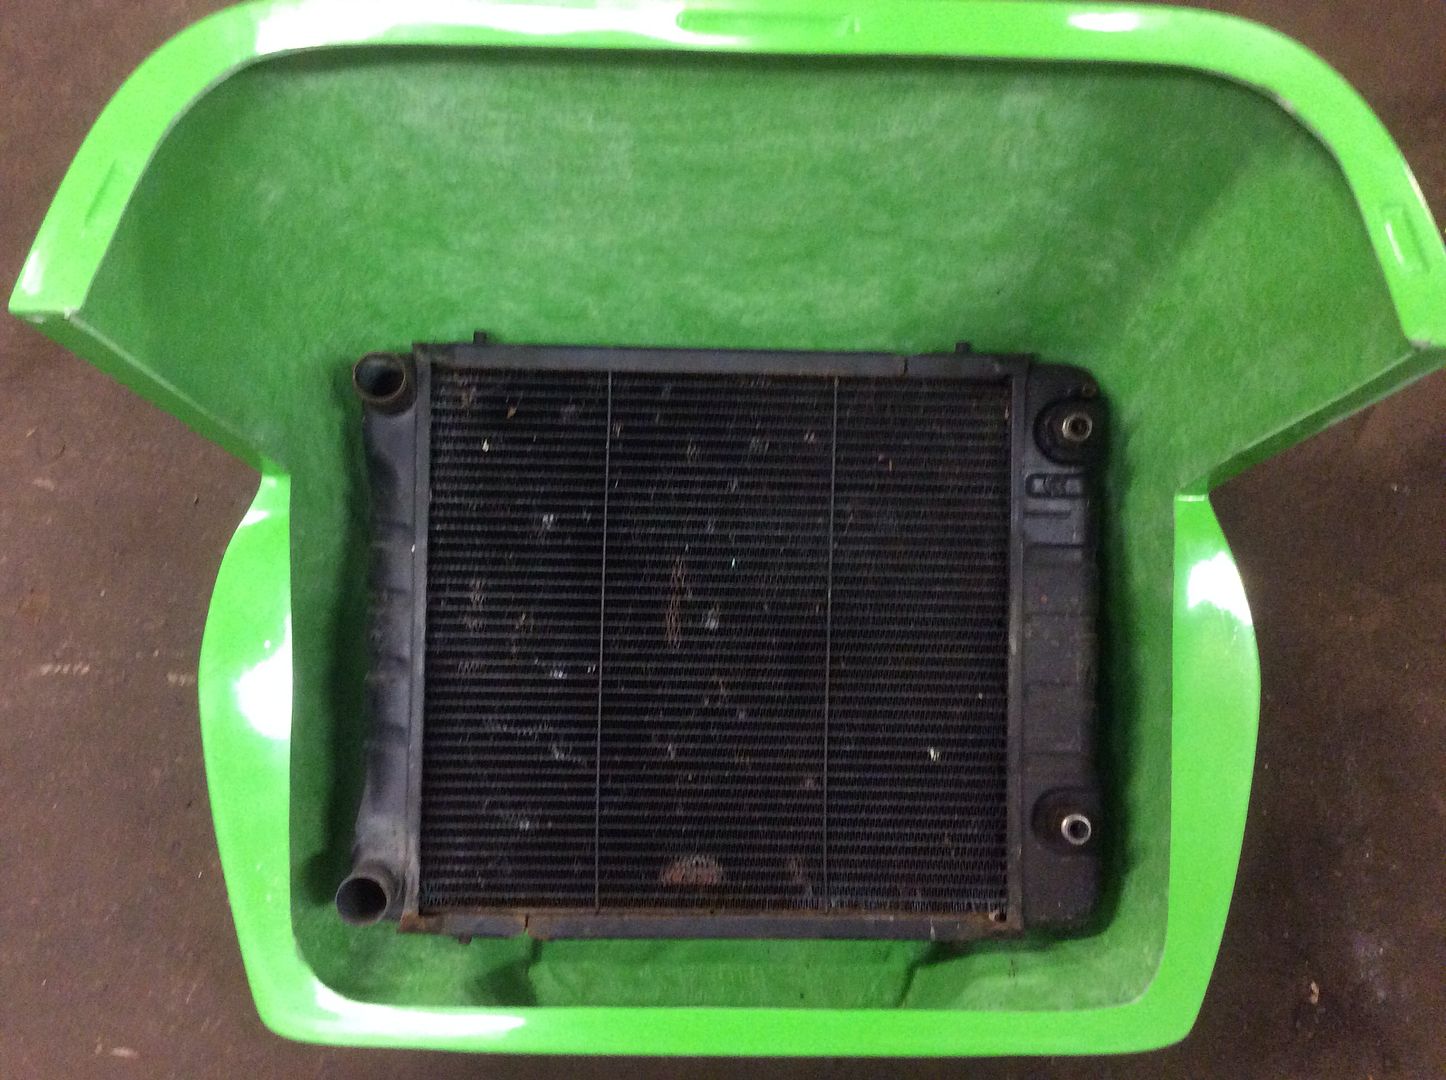 |
WOW.!!
That rad is a major find mate, really like it, but those ITBs HAVE to be on show, they are beautiful. :eek: |
Quote:
Bob |
Looking good. I like the green, it's nice and vibrant.
Is there enough room behind the rad for a fan? I made that mistake the first time. |
Good point Steve ,I best mock the whole thing up first. There is roughly 2" between the rad and the front frame so there may be a slim fan that will go in there but as you say its best to double check.
Bob |
Plenty of room for the fan steve:) Final position for the rad gives it about 15mm clear of the fiberglass all round and is high enough to leave the oil cooler aperture clear , it also puts the top hose level with the thermostat housing. Its all stood on blocks which are going to fall down as soon as I move the nose cone so god knows how I am going to measure up for brackets. By raising the rad it`s allowed me to kick the bottom of the rad towards the front of the car which in turn gives the bottom hose clearance for the lower wishbone brackets.
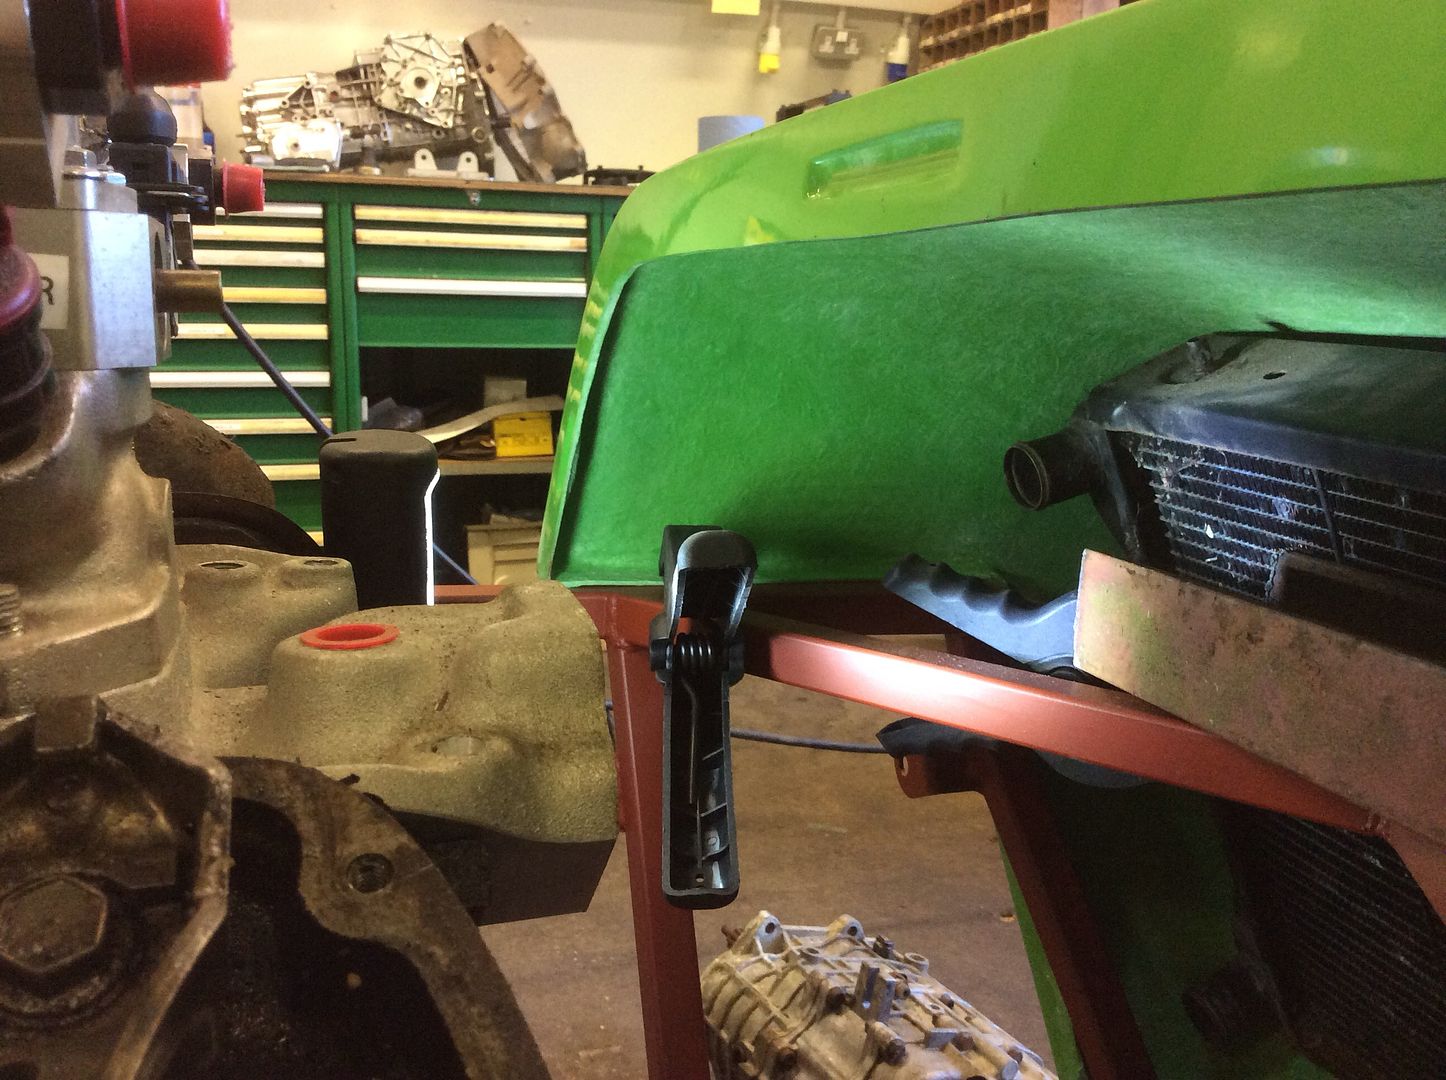 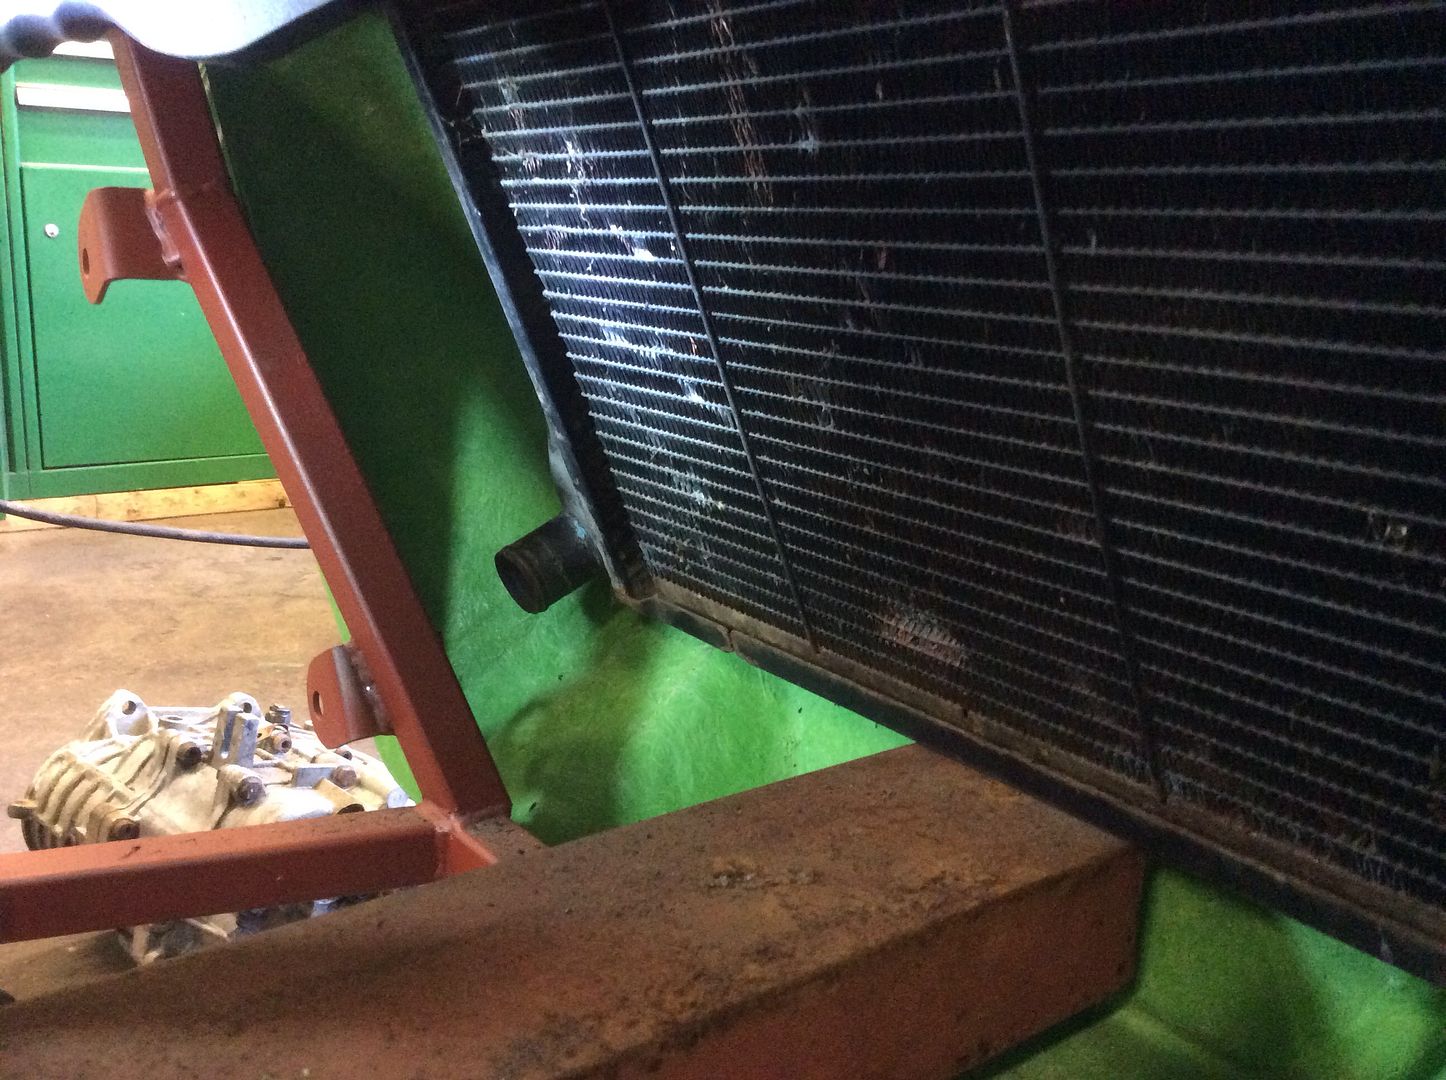 And one of the new rads that turned up yesterday:cool: |
|
The rack mounts turned up today. I found them on ebay http://www.ebay.co.uk/itm/1511420794... 4.m1497.l2649
Very nice in one piece. Bob 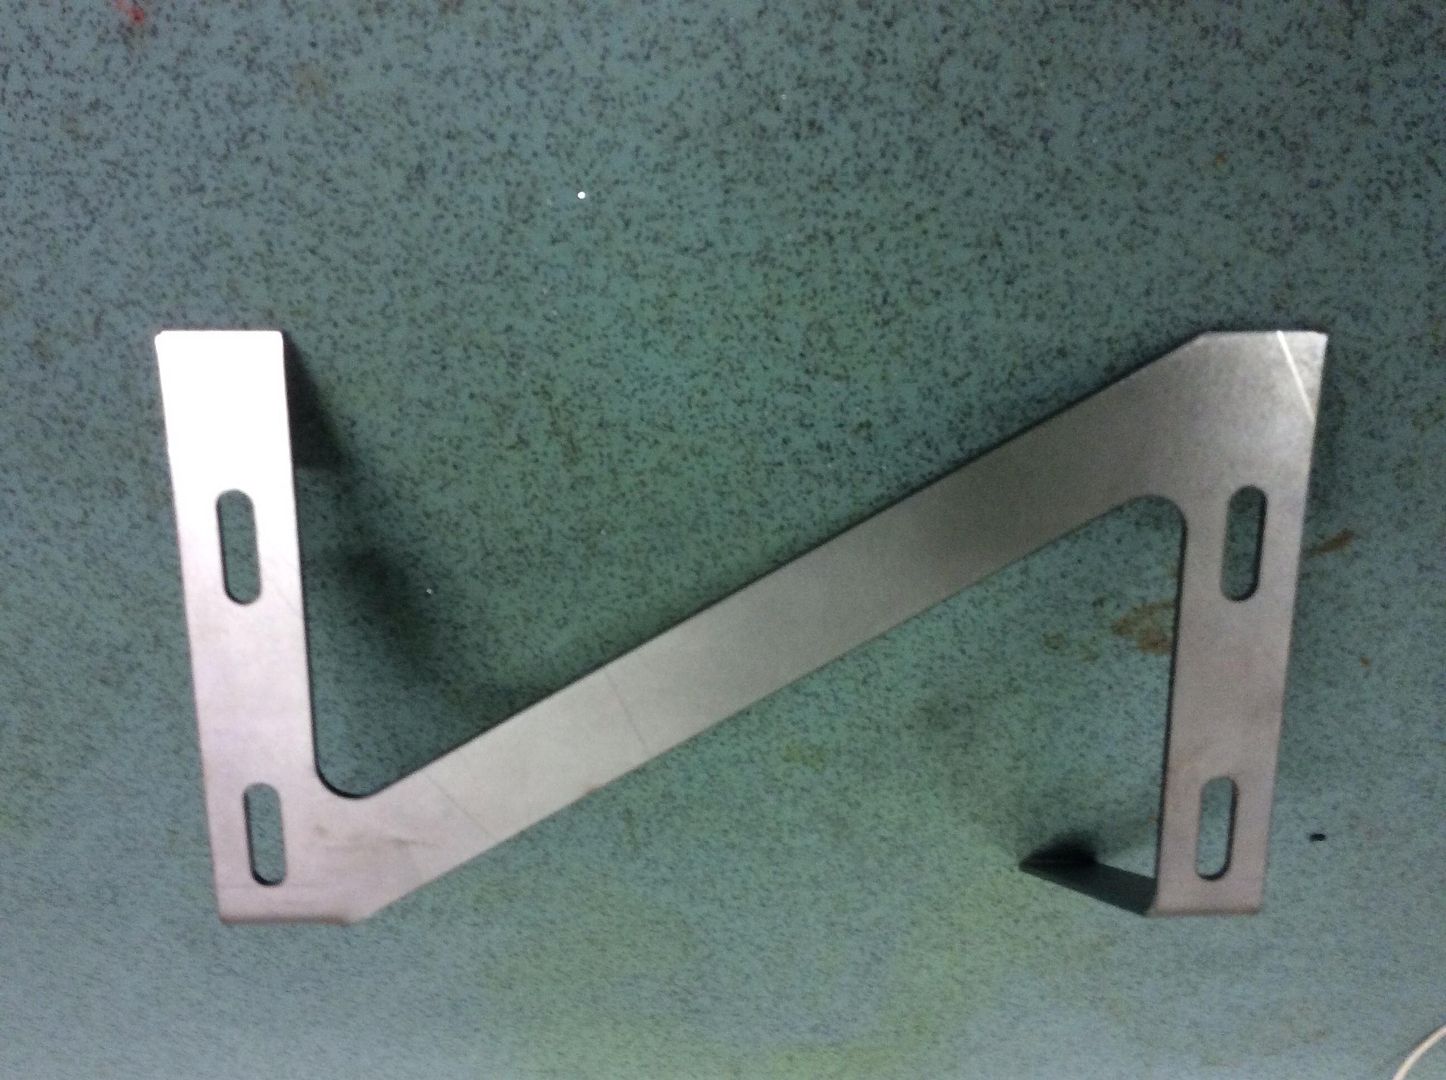 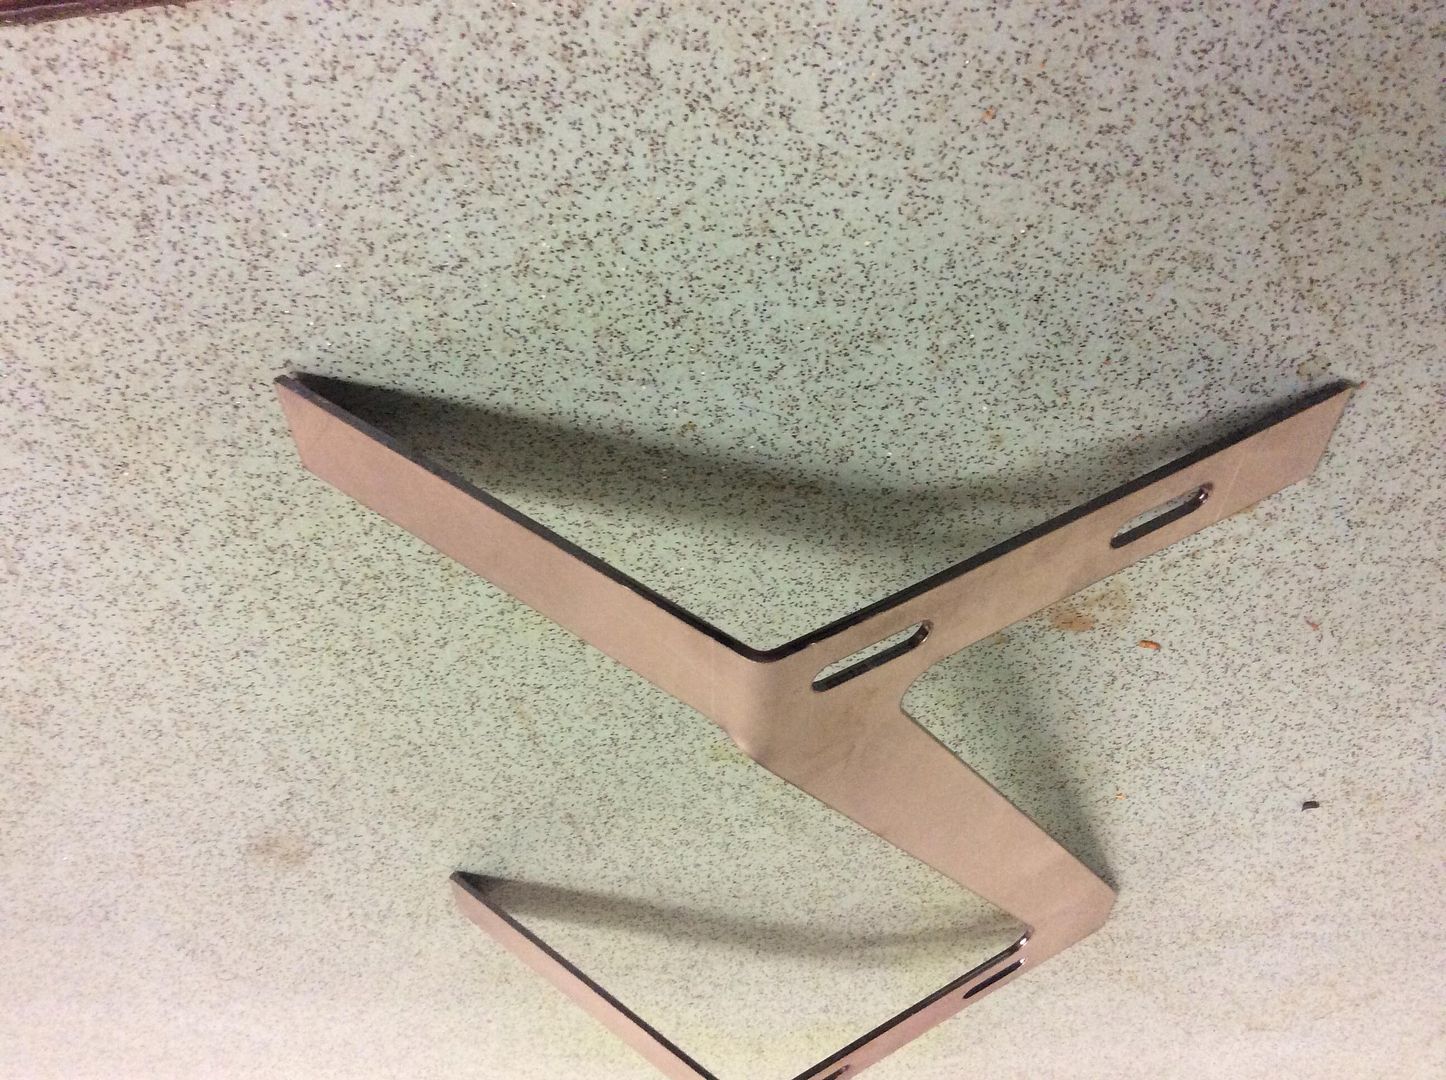 |
Looks nice that does. will you be adding any more bracing to it?
|
I had finally got the rad brackets sorted out ( mk4 ) when I spotted these 16" fans on the bay of thieves , anyway they fit the rad really well and with the mounting holes being so close to the rad brackets it seems a shame not to incorporate them at the same time. So its going to be mk5 rad bracket/fan mount combo .
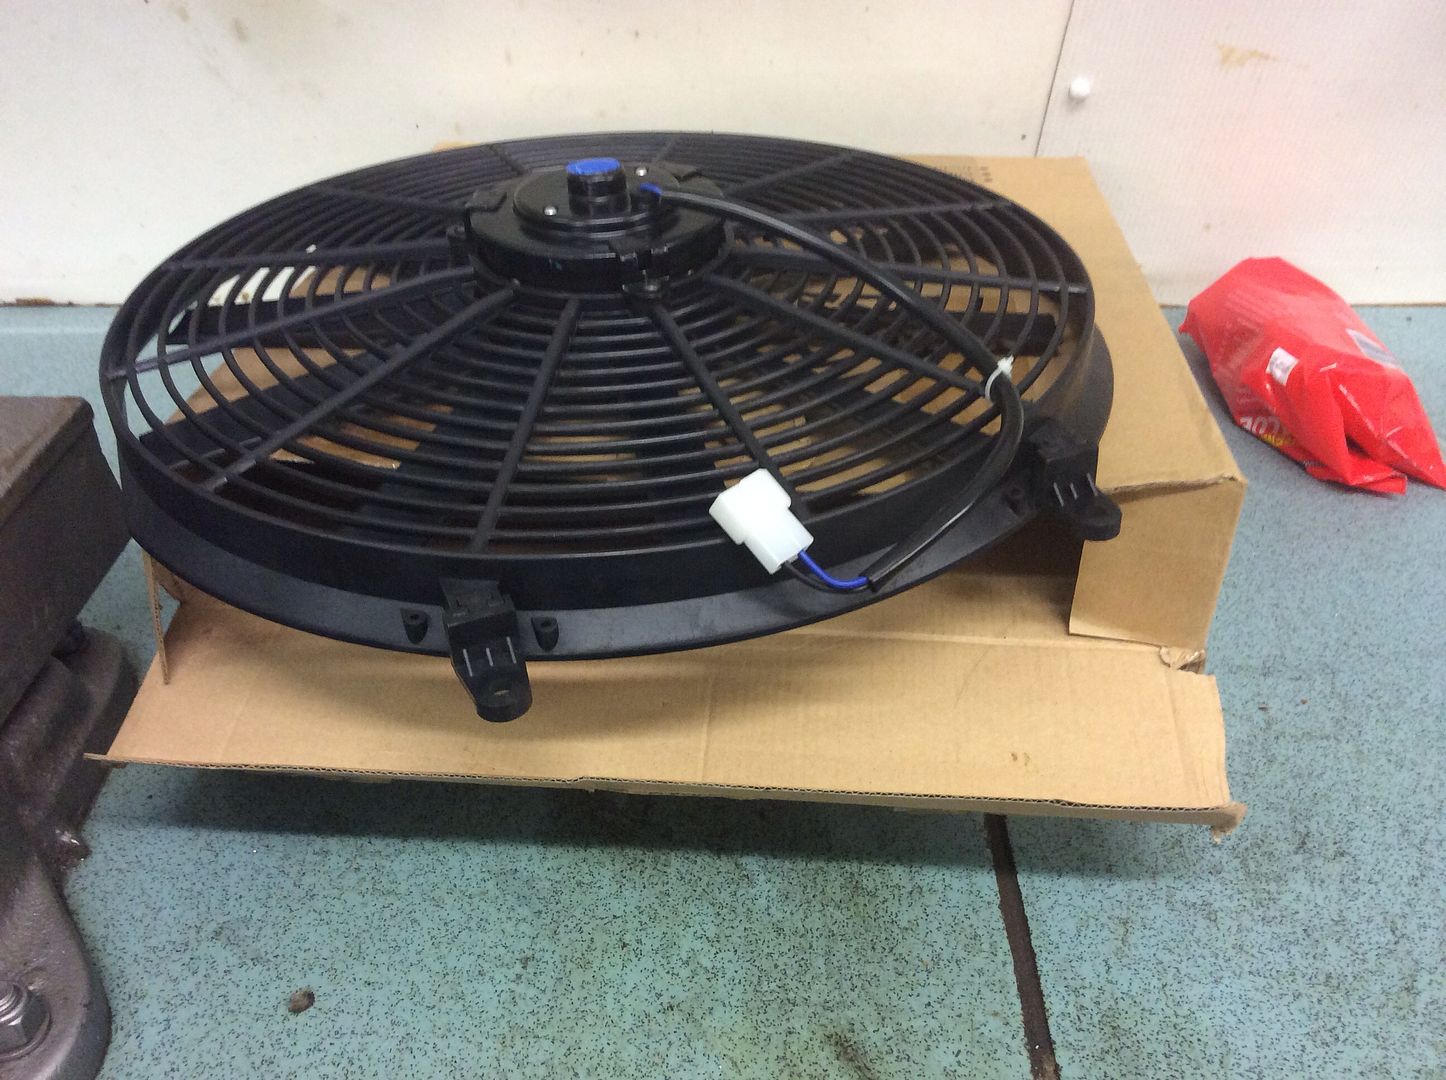 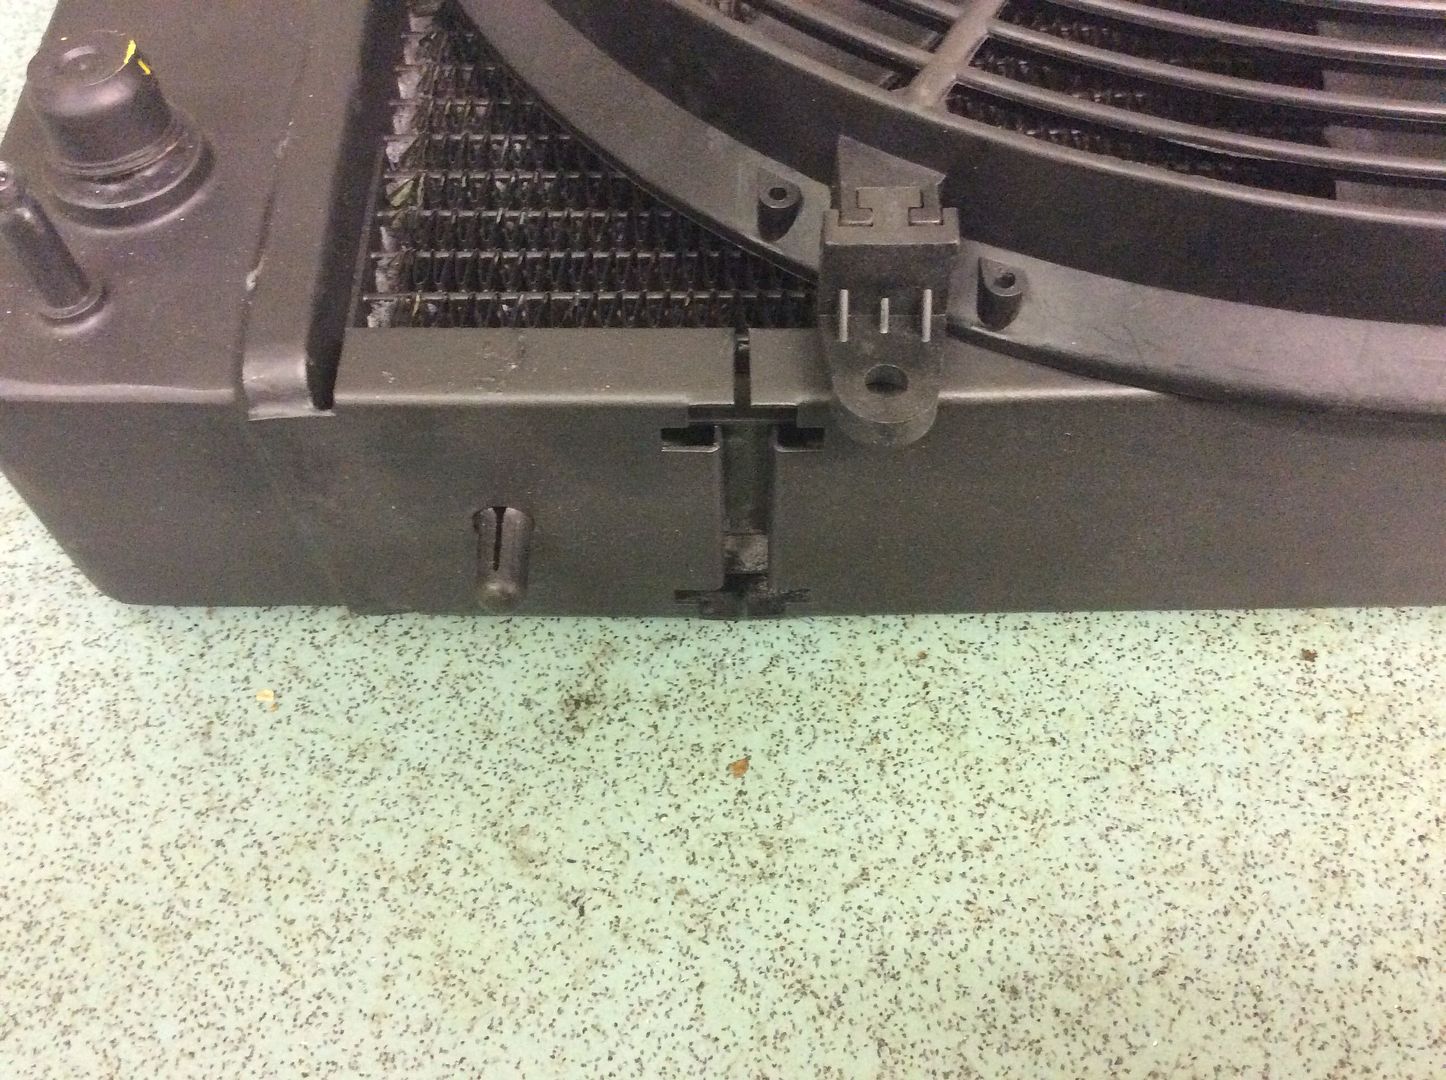 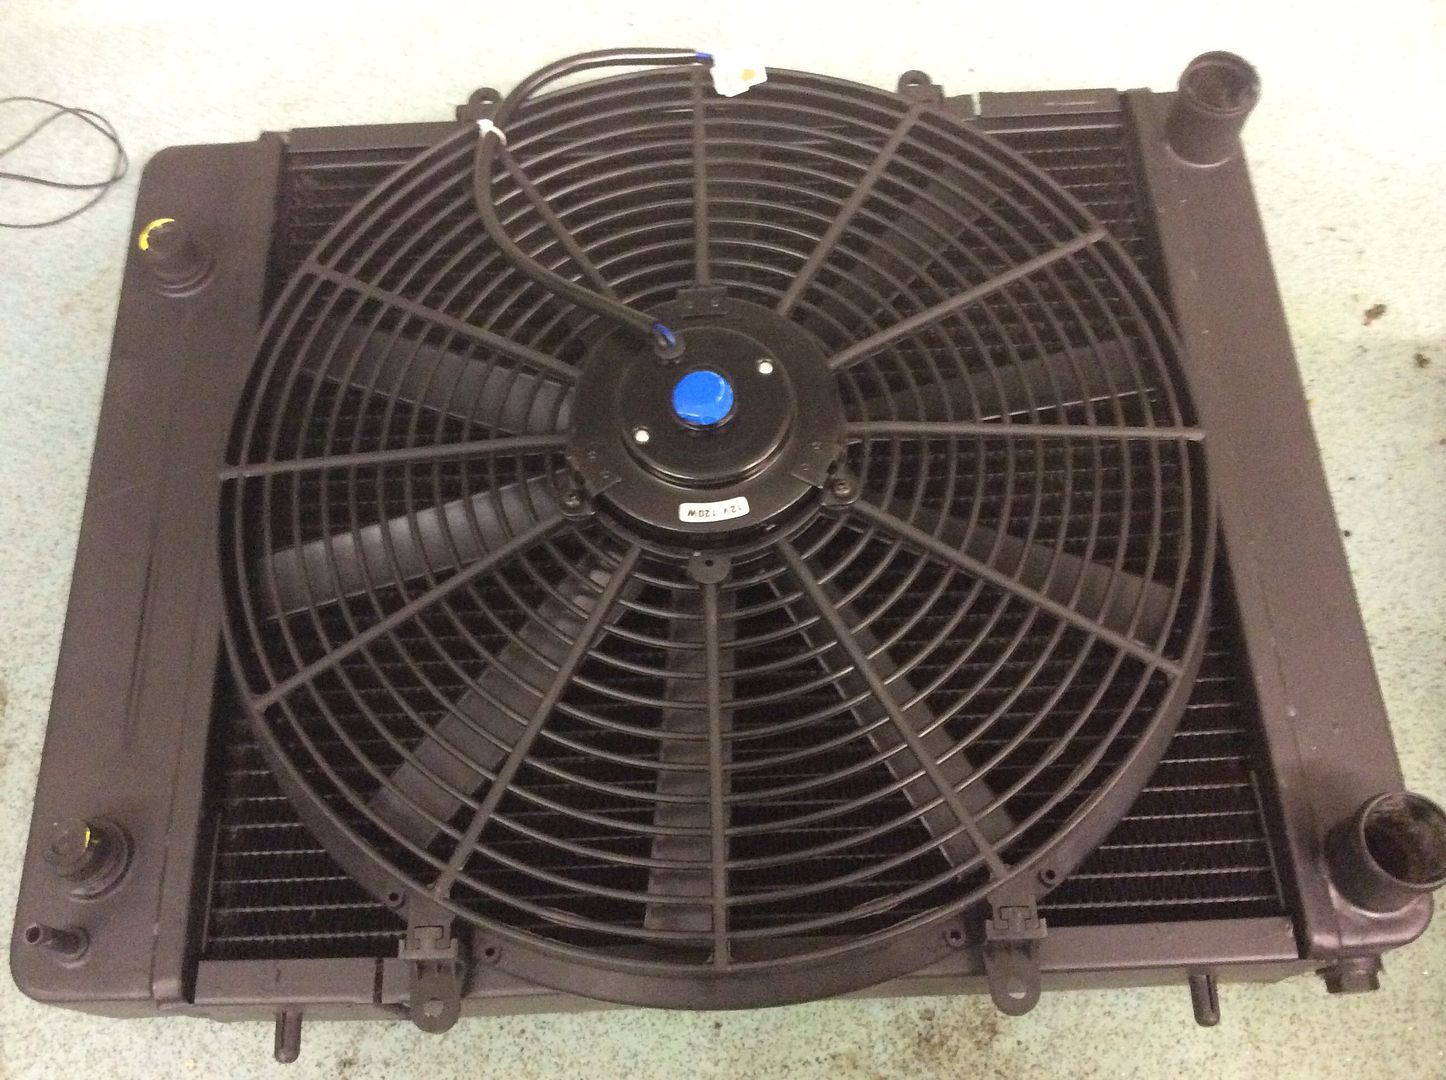 Just dont like the look of the fitting kit supplied with it that runs through the rad fins 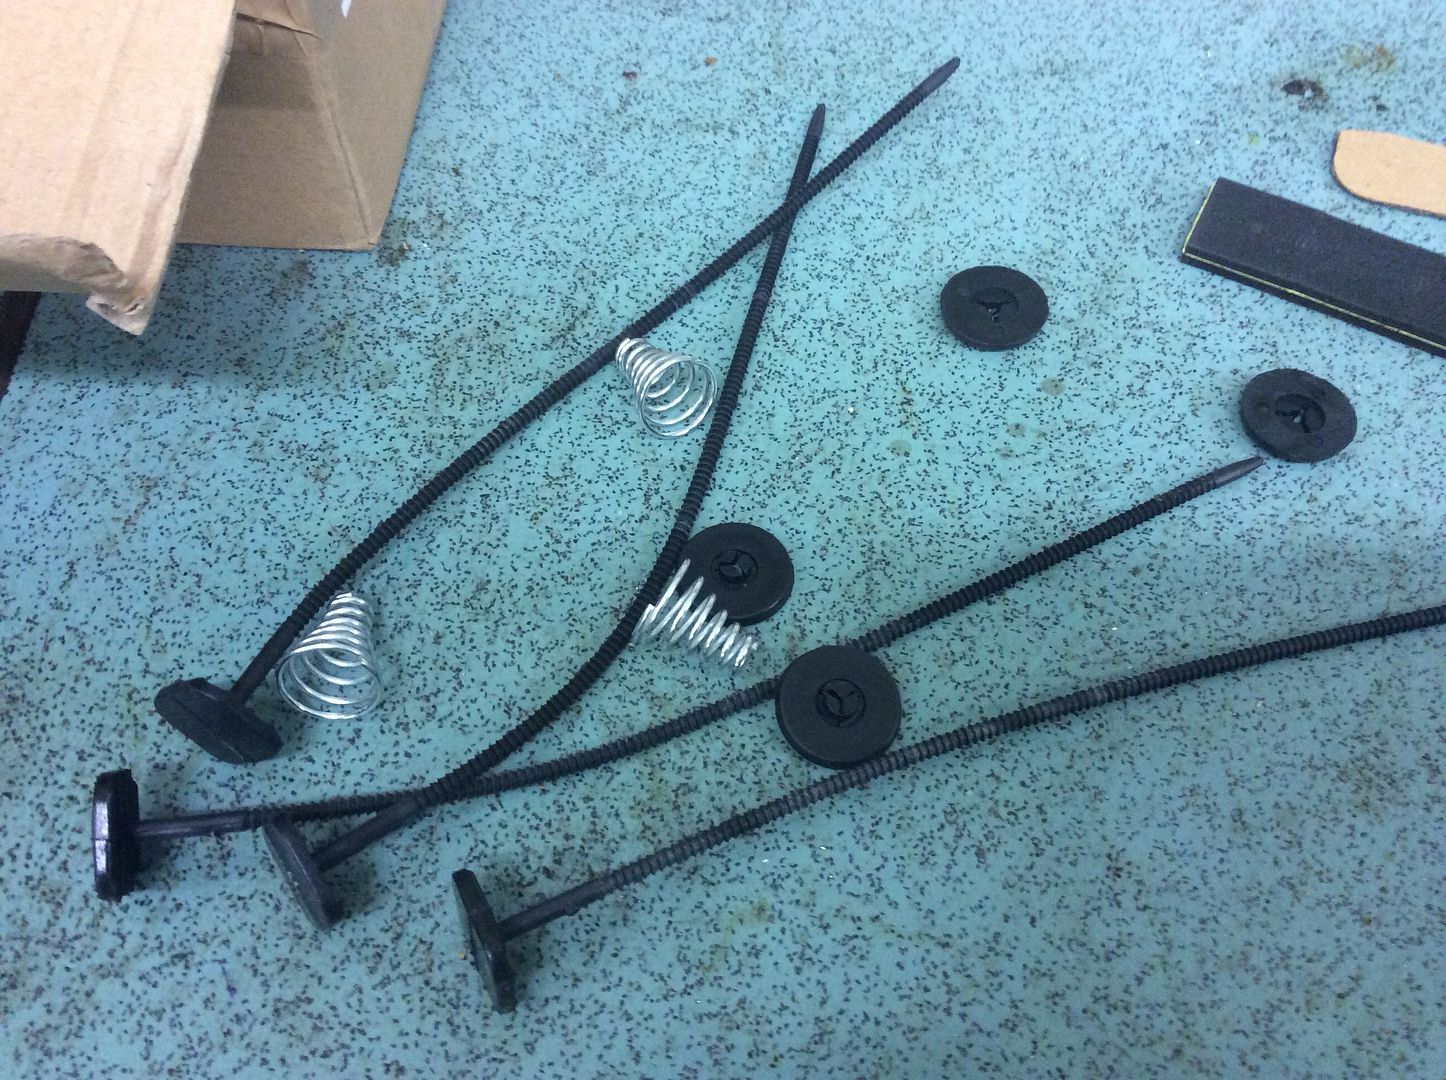 |
Quote:
Bob |
The guy that did my injectors for the roadster insisted I watched this :confused: :confused: :confused:
Bob Apparently this is good :D https://www.youtube.com/watch?featur...&v=Q5H_1m7MlMg |
|
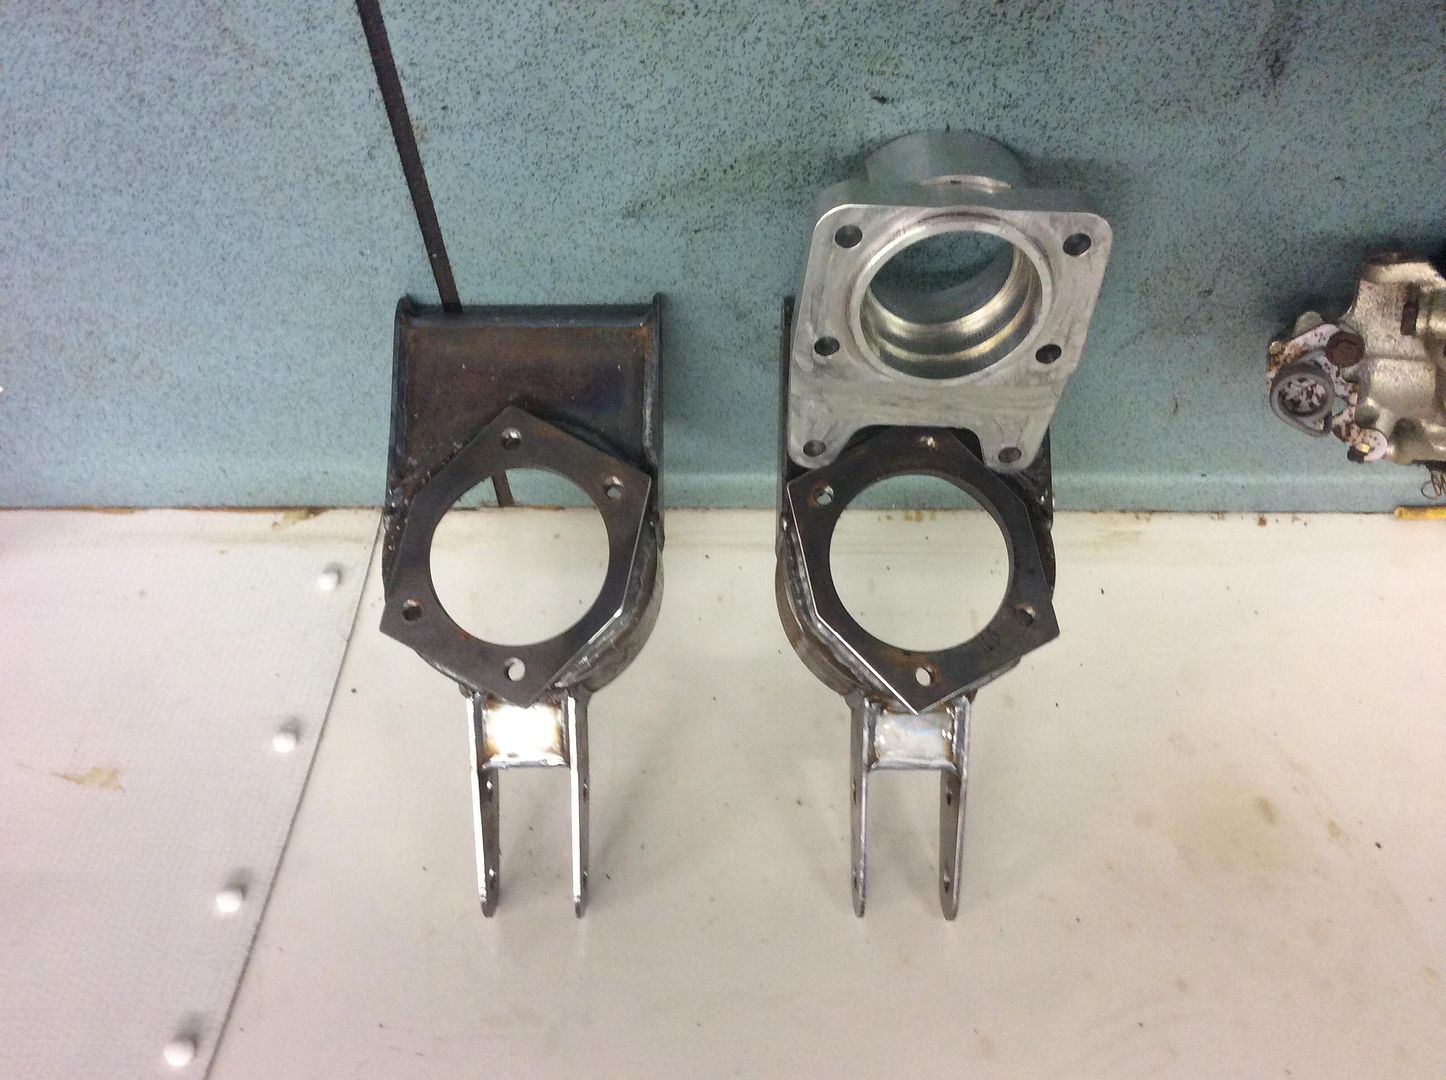
I took delivery of two of phils rear uprights the other day, mounting plates are on the skew to take the cossie rear discs and calipers, The angle they are set at is spot on which leaves the rear bleed nipple on the rear caliper in the right position The hubs will need to be sleeved down because the bearing carrier spigot is 2mm smaller than the hole in the profile which.
 The music made me press the buy it now button on the bay of thieves so I now have a dinky very nicley made pedal box from OBP complete with cylinders , reservoirs + flexi`s and balance knob for the dash :lol: It will need a very light rub with the grinder to fit between the two box sections u6 and u7. 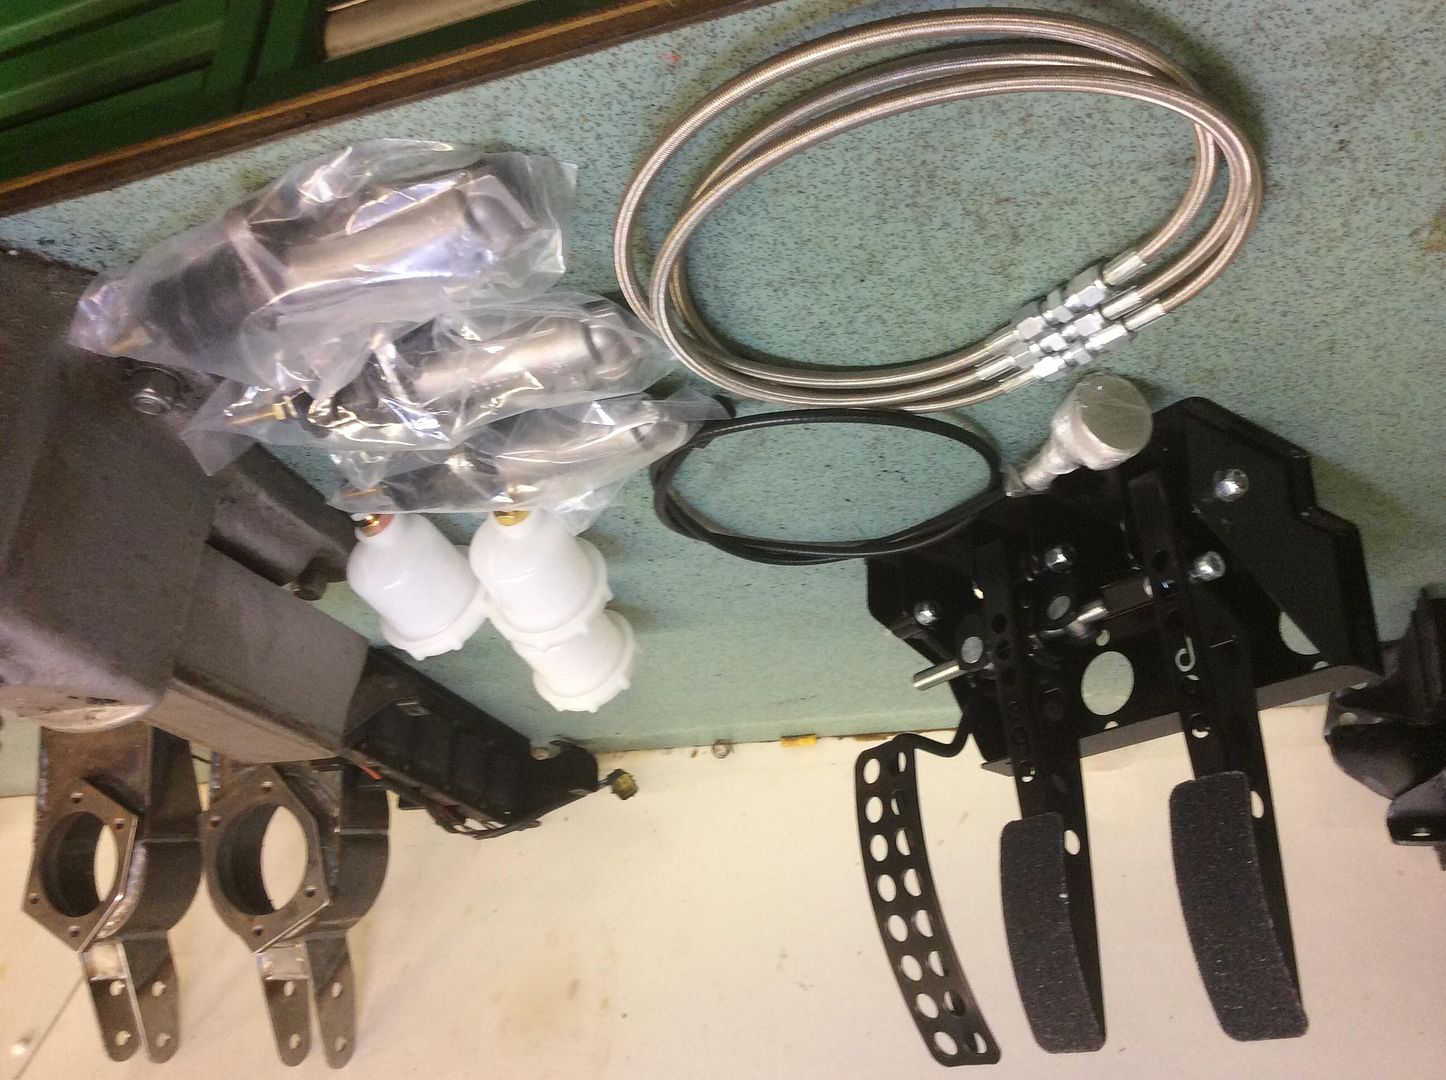 bob |
I do like the OBP stuff it does look the part how ever are you going to IVA these cars? The reason I ask is how do you plan to get around the lack of a 'low fluid' warning system on the fluid pot?
|
Quote:
|
We bought one of those from a vendor for the formula student car in work, for the cost of them I was greatly disappointed and the students managed to bend it on the brake test in scrutineering. It has now been consigned to the bin, so be aware they are not as strong as they look.
Arfon |
I seem to remember that ali bearing carriers where intended for NASA Autograss specials (think adult bike powered caged go kart) that weigh around 350-400kg and the rear brakes don't do much work on a dirt track. There are good versions of them out there made from proper spec material and there's the ones made from common HE30 which will be not so good. As for being able to bend them did this car have slick tyres?
|
I have been altering the Corsa epas today.
I attacked the steering column today. The motor on the epas needs flipping 180 degrees because it will stick through the scuttle if you centralise the unit. 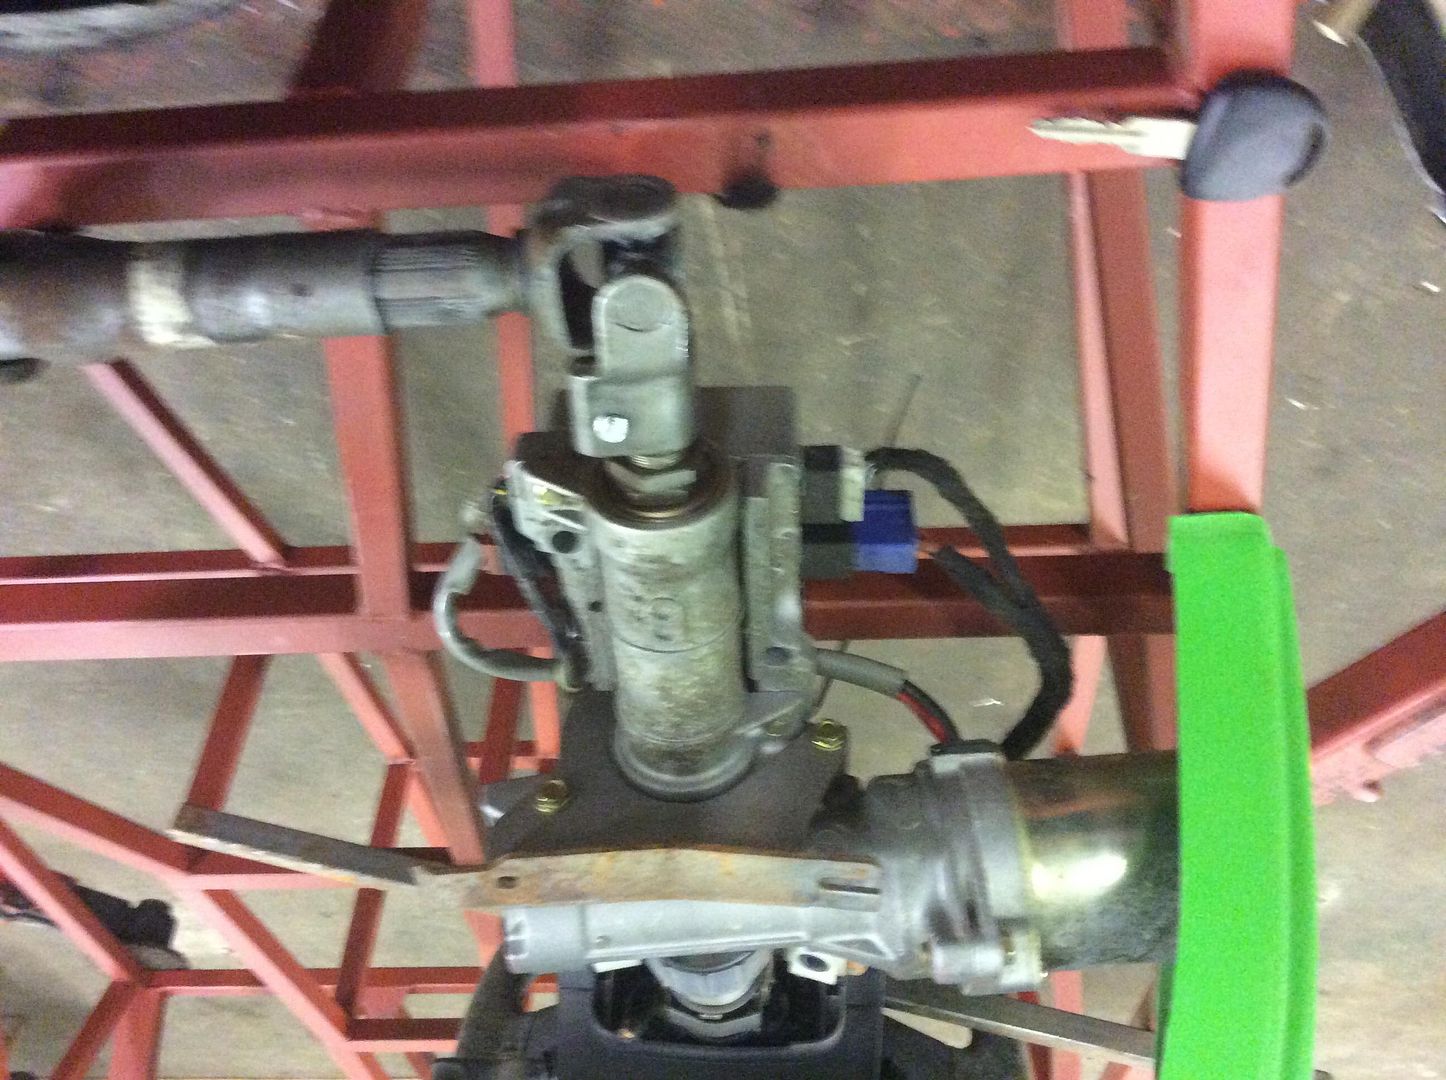 I cut the bracket holding the motor set up to the column , you cant just cut the rivets out because they are offset. I cut the bracket holding the motor set up to the column , you cant just cut the rivets out because they are offset. 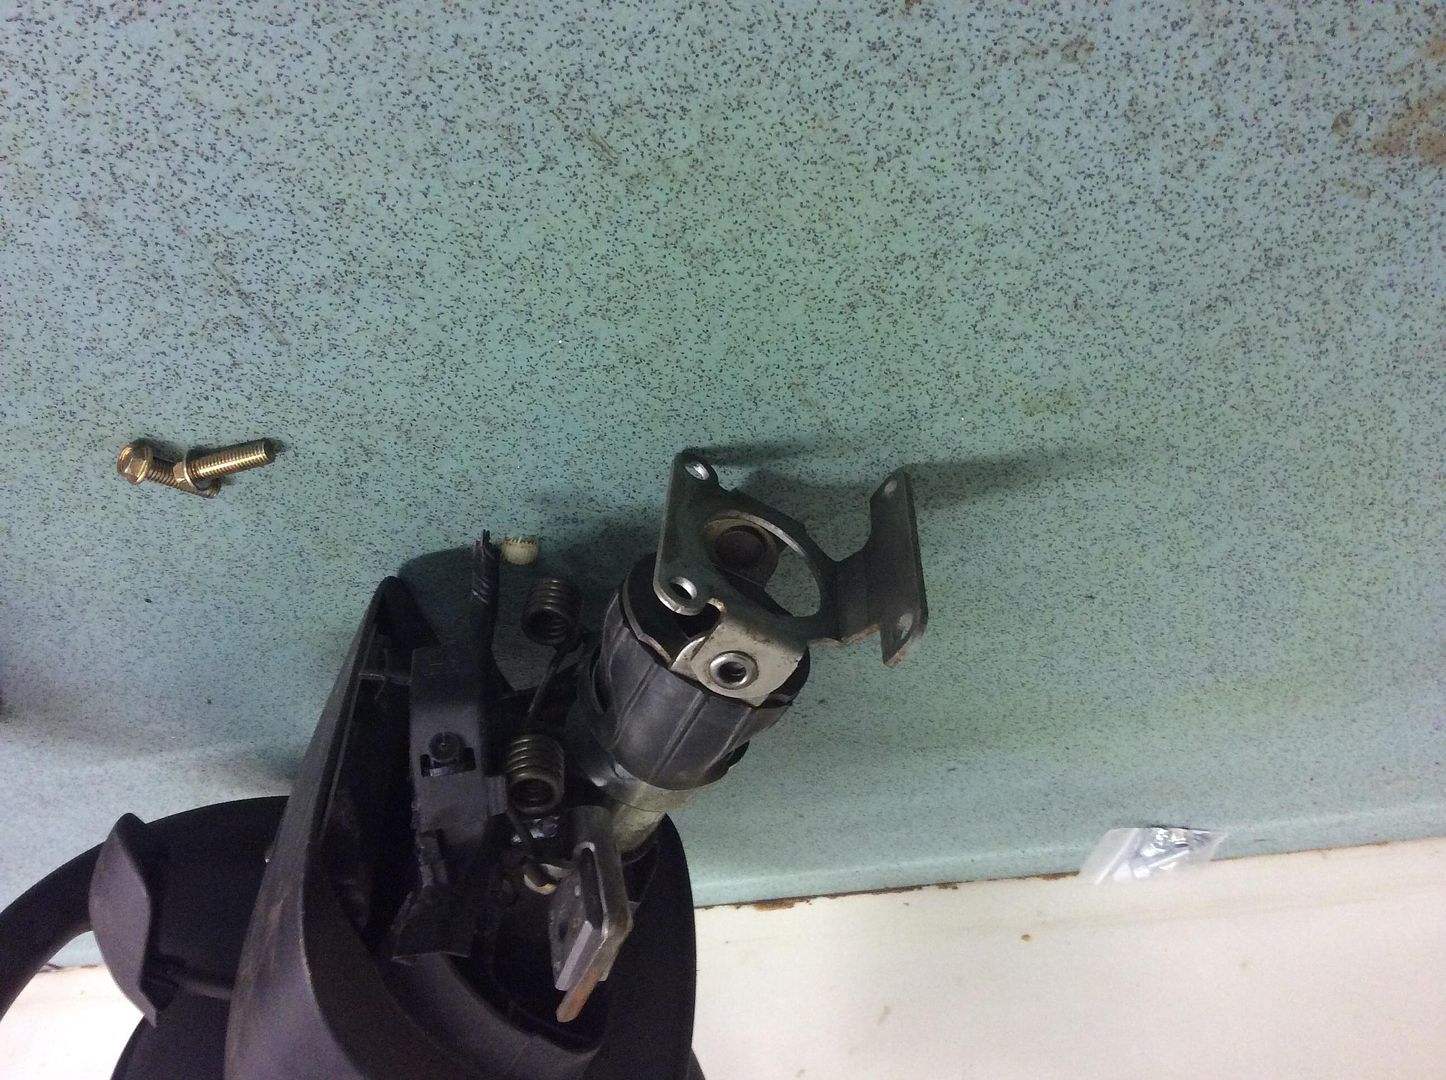 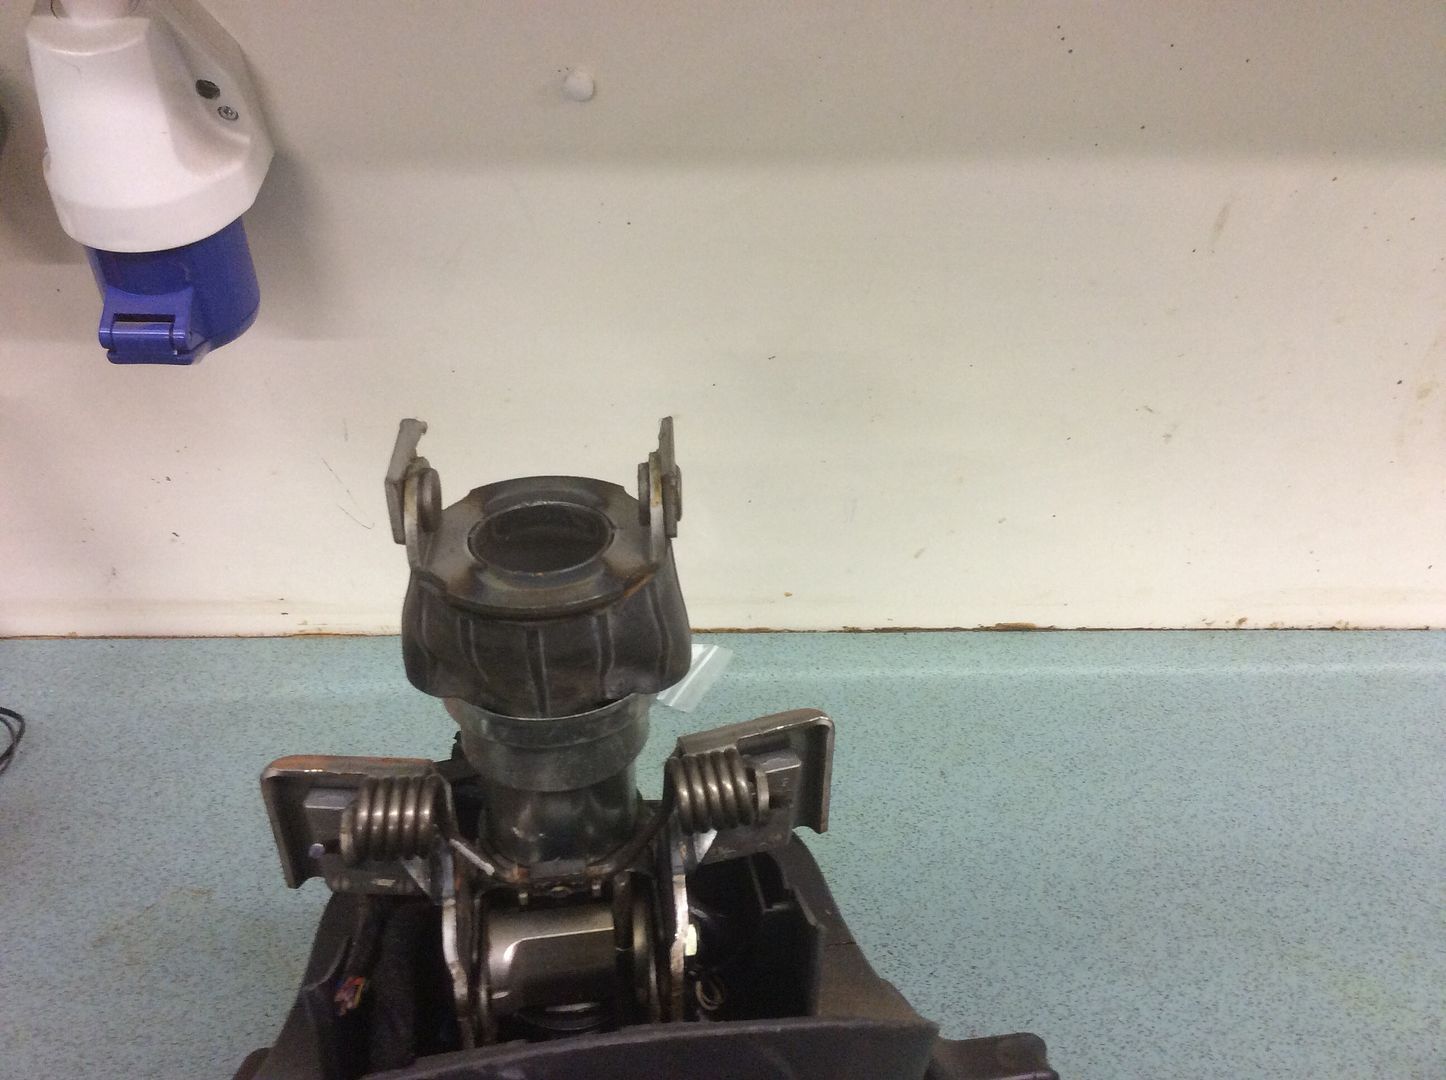 |
|
I decided from the beginning to run the column over the scuttle rather than through the pedals to make it less congested. The adjuster on the column gives 550mm floor to wheel center to 650mm floor to center , that will make it easier to get in and out
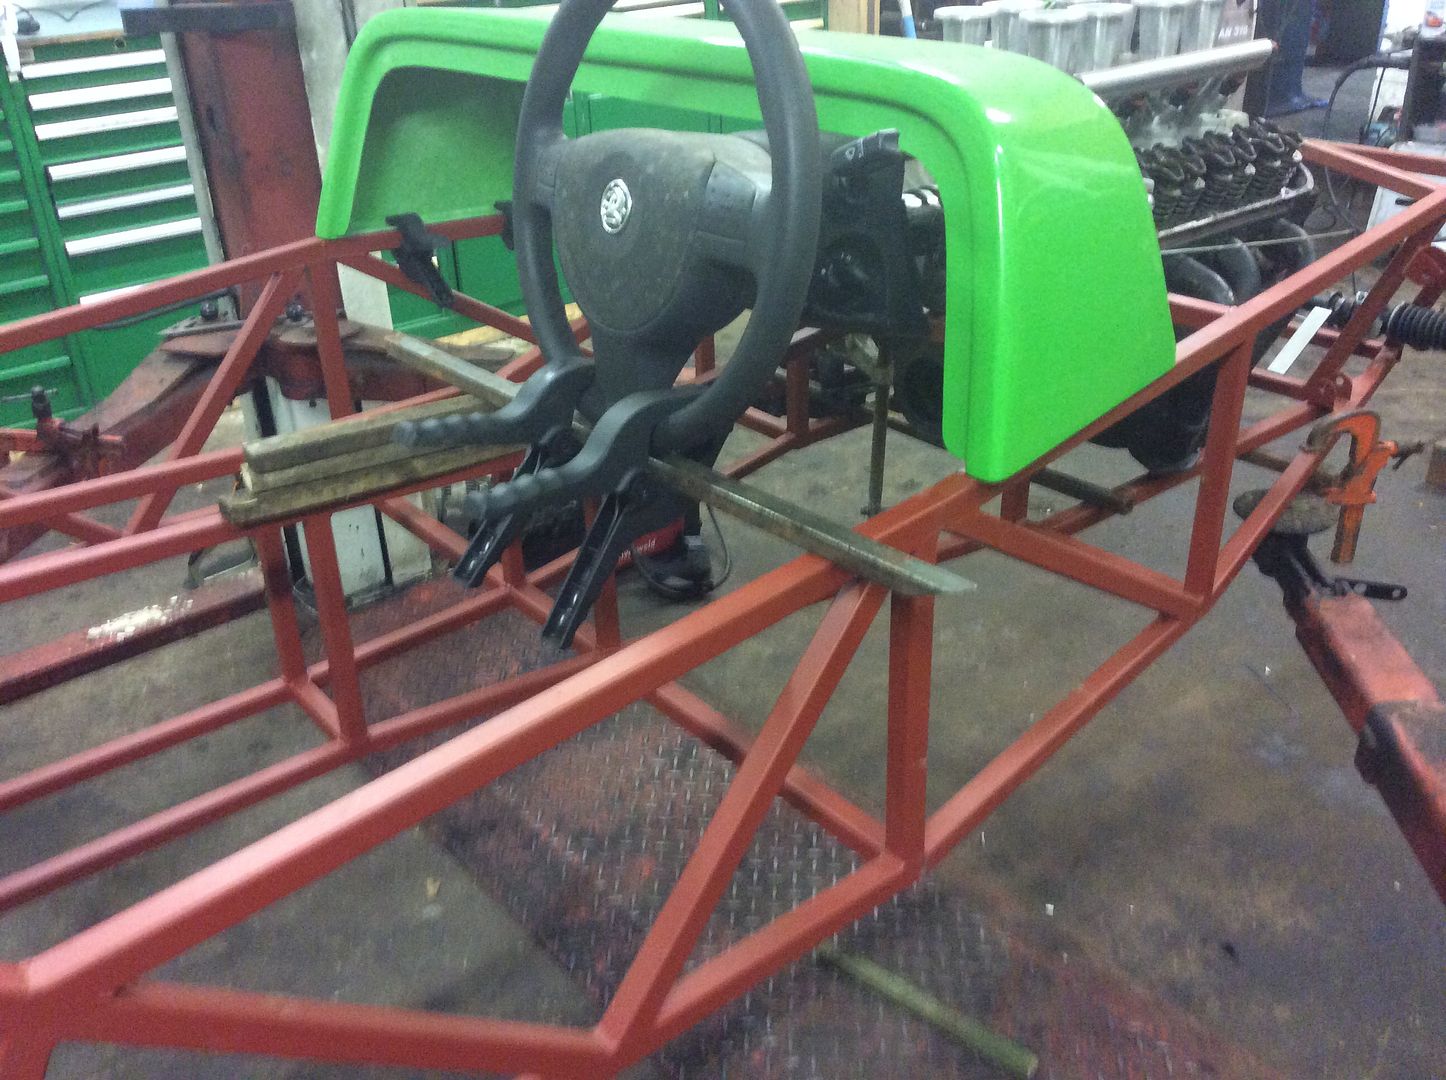 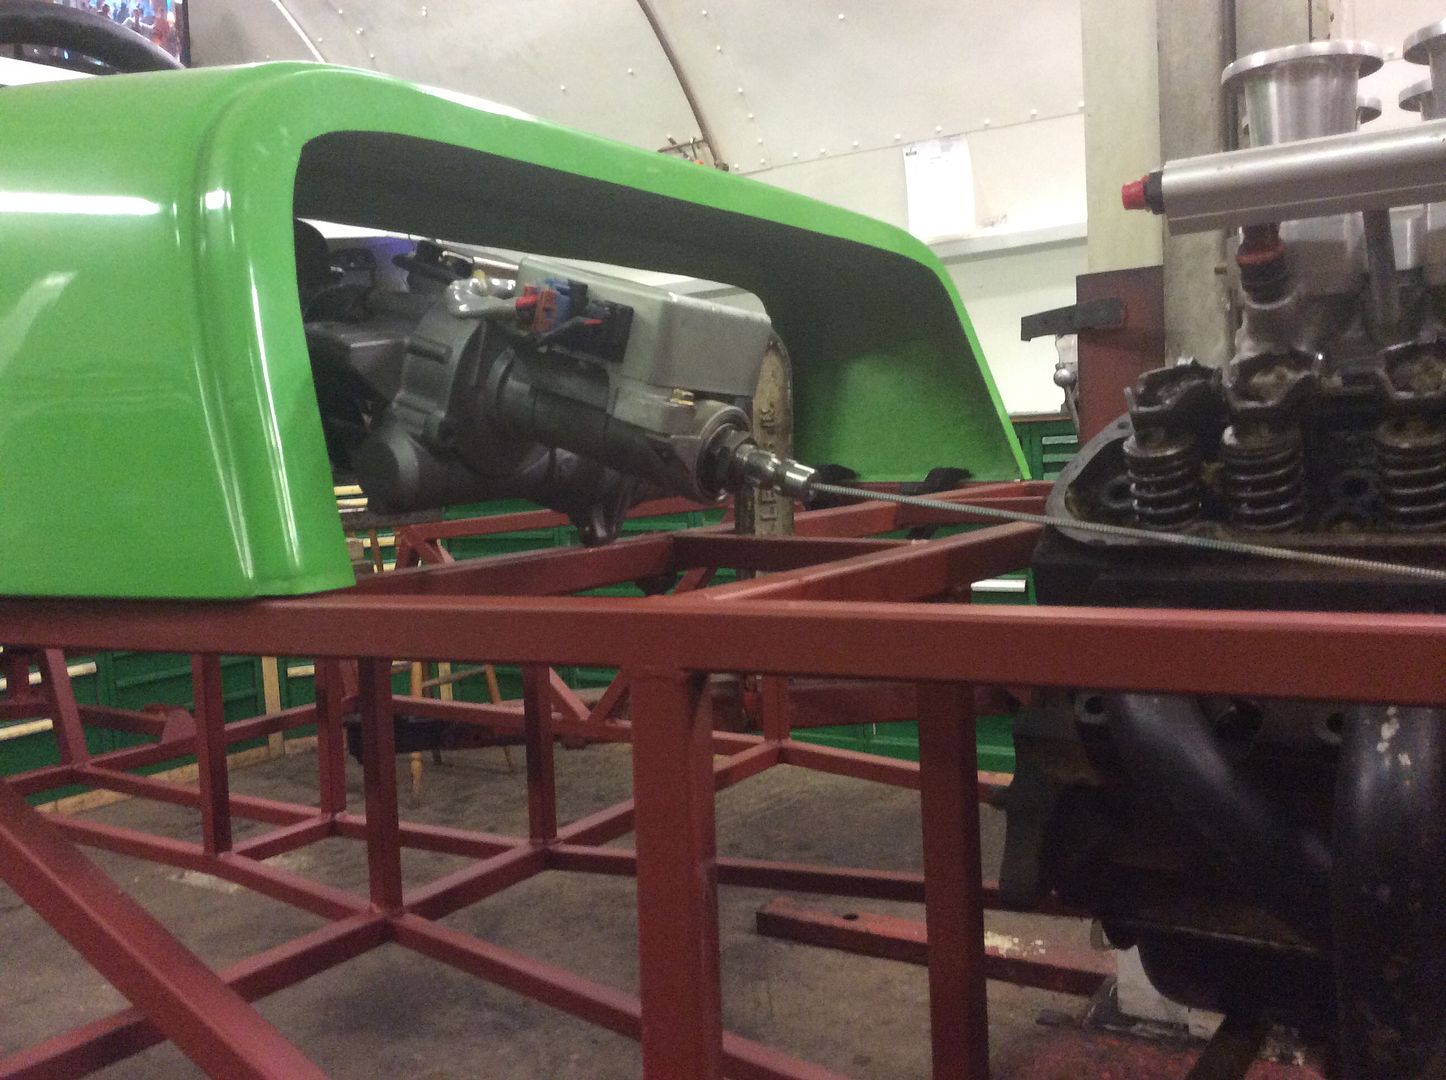 It also makes for an easy route for the steering shaft with no nasty angles, it all clears the headders by about three inches and the uj`s will have an easy time. The sharpest angle is 30 degrees. just need a bearing block mounted off the top chassis rail to carry the steering shaft. 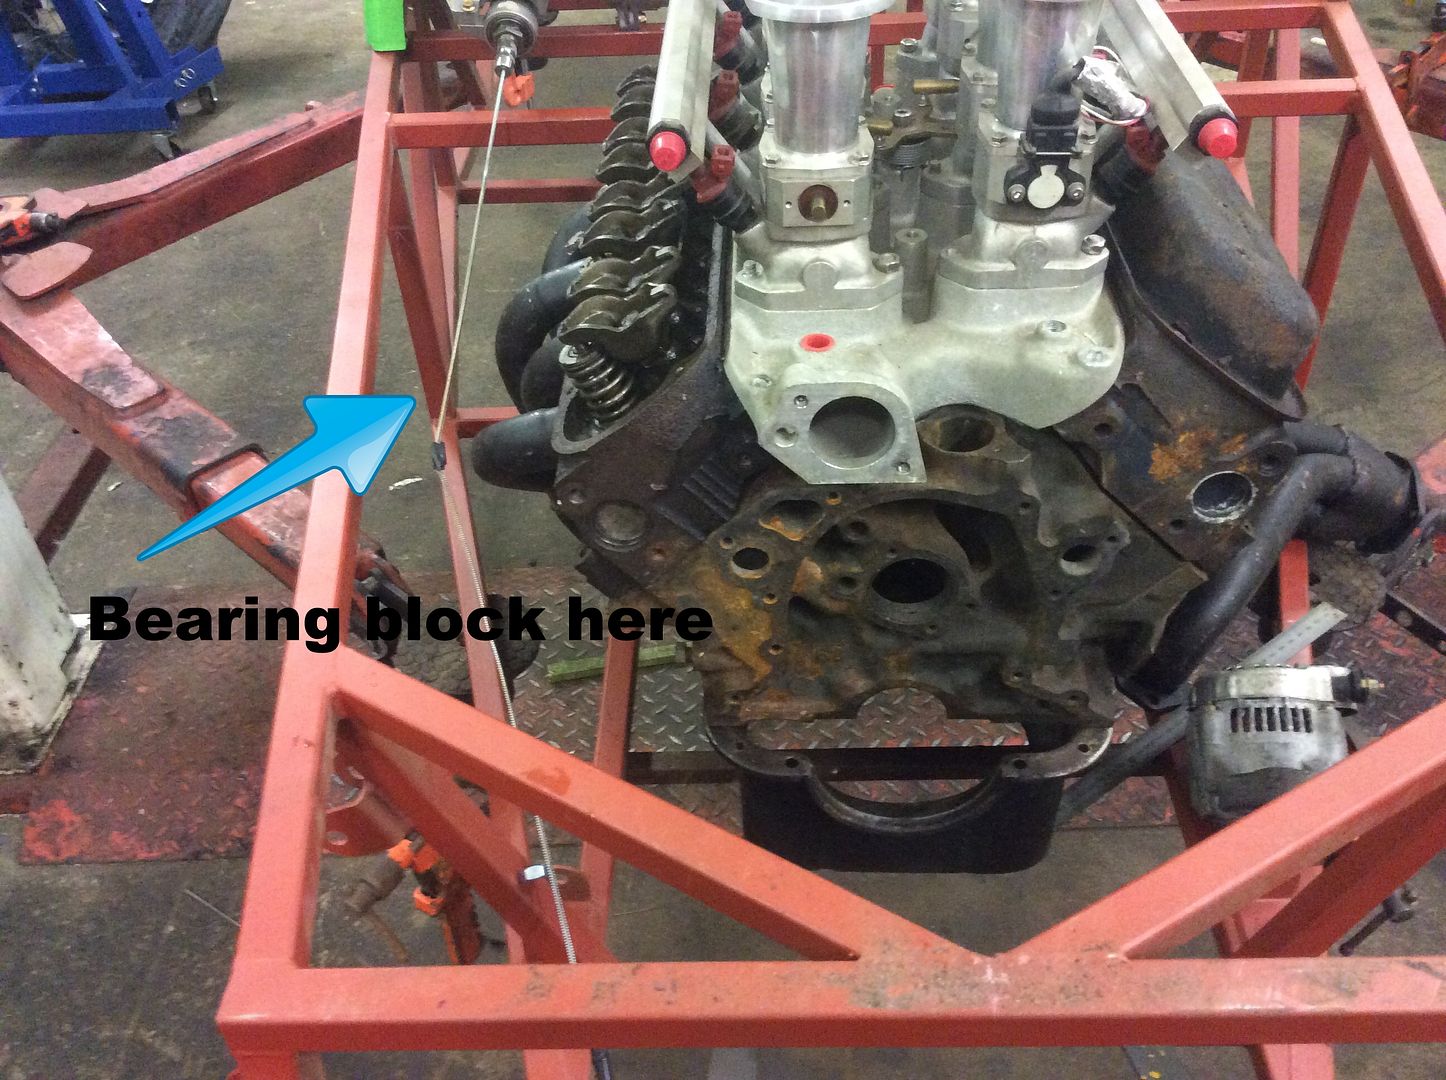 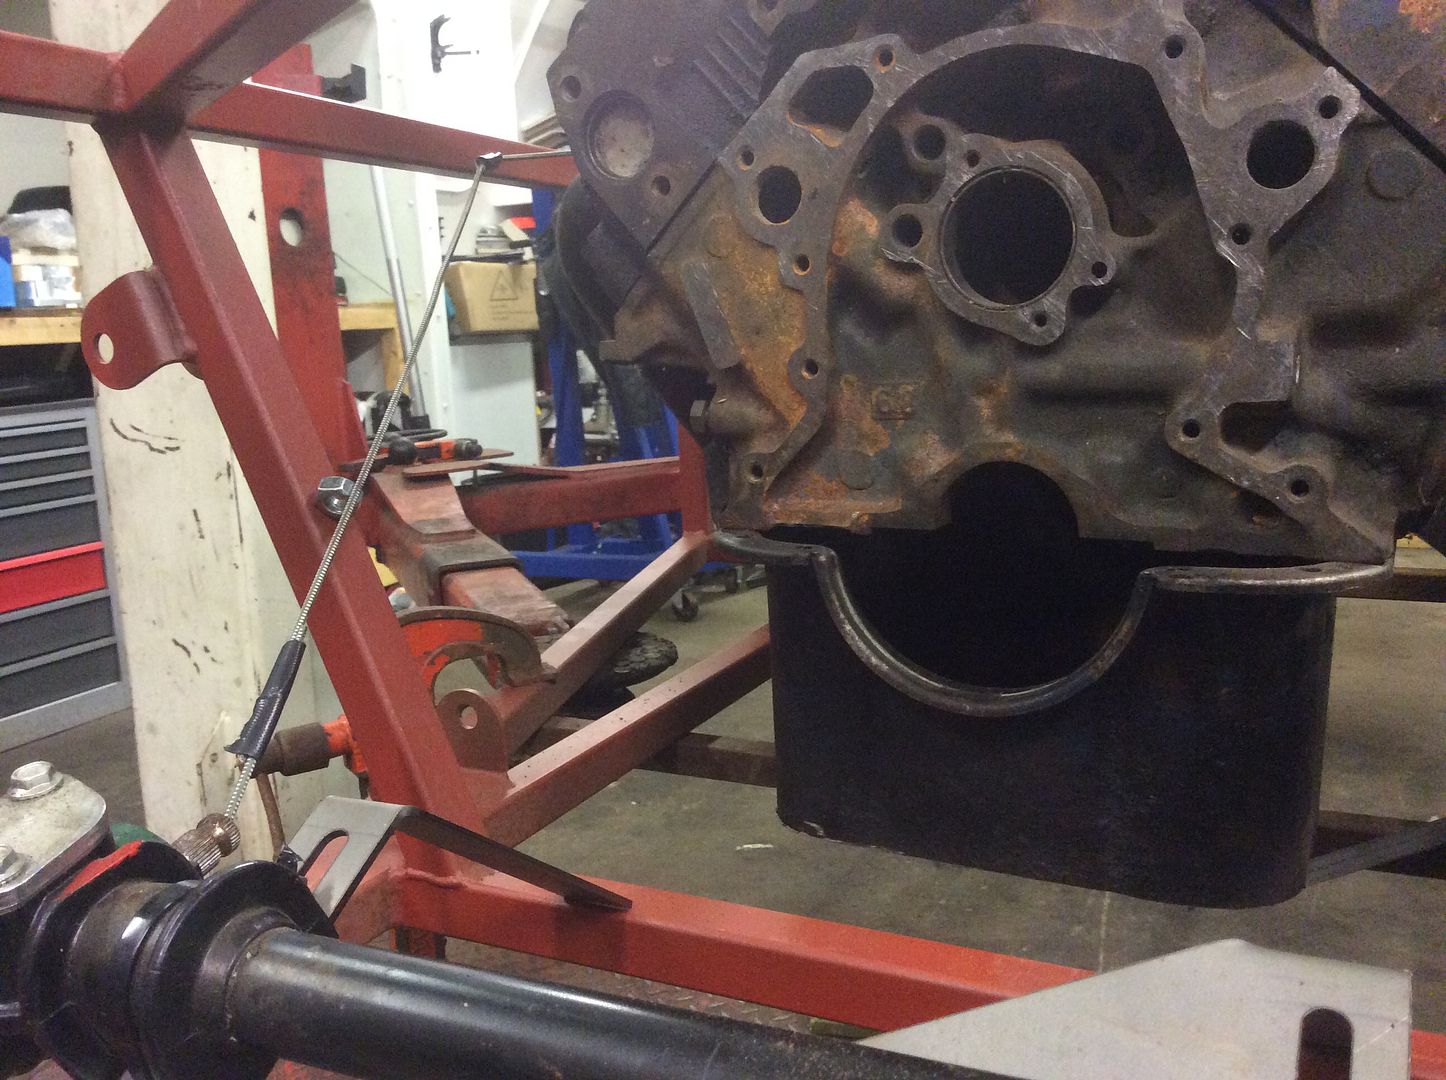 |
Epas control units have turned up. matching plugs as well :)
Blurb on them Corsa Steering Controller - NO KNOBS! Microprocessor based EasiPAS - Electric power steering assistance, EPAS controller for Corsa B or Corsa C steering columns, fitted or being fitted to any car. This product is ready to install. All you need to do is to connect an ignition switched +12V and install your own momentary push button on or near the dash. Colour installation and user instructions available in English, French, Portuguese and Spanish. Comes complete with microprocessor based controller, connection wires, plug to connect the Corsa ECU, installation manual. You will need a (momentary) push button to match your dash style. Electric power steering uses an electric motor to assist the driver’s steering effort. The Electronic Control Unit or ECU receives information from sensors and decides which level of assistance the electric motor should deliver to the steering you desire. Systems give more assistance at slow speeds and less assistance are higher speeds, as less steering effort is required to steer when the speed is higher. When you install a Corsa B or C electric power steering in your vehicle it won´t work correctly because the ECU won’t have or receive information from vehicle speed and engine sensors. EasiPAS solves this problem, by giving you the lowest assistance level at all times which is sufficient for most kit cars and/or rally cars. However should you wish to park, simply press the button and you get a minute of high assistance, after which time the system will automatically revert to the normal low level of assistance. HOW IT WORKS When the engine is started the circuit waits 10 seconds for the Corsa EPAS to initialise, other products do not do this! During this period it sends no pulses to the EPAS. After 10 secs the circuit outputs an engine rev pulse to let the EPAS know the engine is running, if the EPAS does not get this signal it turns off to conserve power. After the 10 sec start-up delay the EasiPAS outputs for 1 minute a slow speed signal this will give you 1 minute of high assistance to manoeuvre, after which time EasiPAS will revert to the default state of high speed which puts the EPAS into the low assistance state (as if you are driving at 45+ mph). So you always have this low level of assistance. Rather than an rotary knob our system uses a momentary contact push button, like a horn switch/button. If you press this button the circuit output goes to the low speed/high assistance state for 1 minute allowing you to park. After 1 minute it automatically reverts to the high speed/low assistance state. Should you need more time simply press again for another minute. Power steering columns are retrofitted to many vehicles. Corsa steering is particularly popular as the columns are small and can be easily obtained at a breakers yard and online. Typical applications: Rally cars, classic cars, AE86, Escort Mk1 Mk2, 7 Clones, Opel Manta Ascona Kadett, Westfield, Nova, Minis and many others. Note this controller only fits Corsa B and Corsa C electric power steering columns. Warranty – full 2 year return to base warranty. If you have any problems, just contact us. We ship worldwide. Most items are dispatched within 24 hours. Average delivery times: •UK and Irl - usually 3 working days •Europe - usually 4 working days •Rest of World - usually 5 to 6 working days Contact us if you need controllers for:- •Renault Clio 2 •Renault Twingo •Opel / Vauxhall Agila 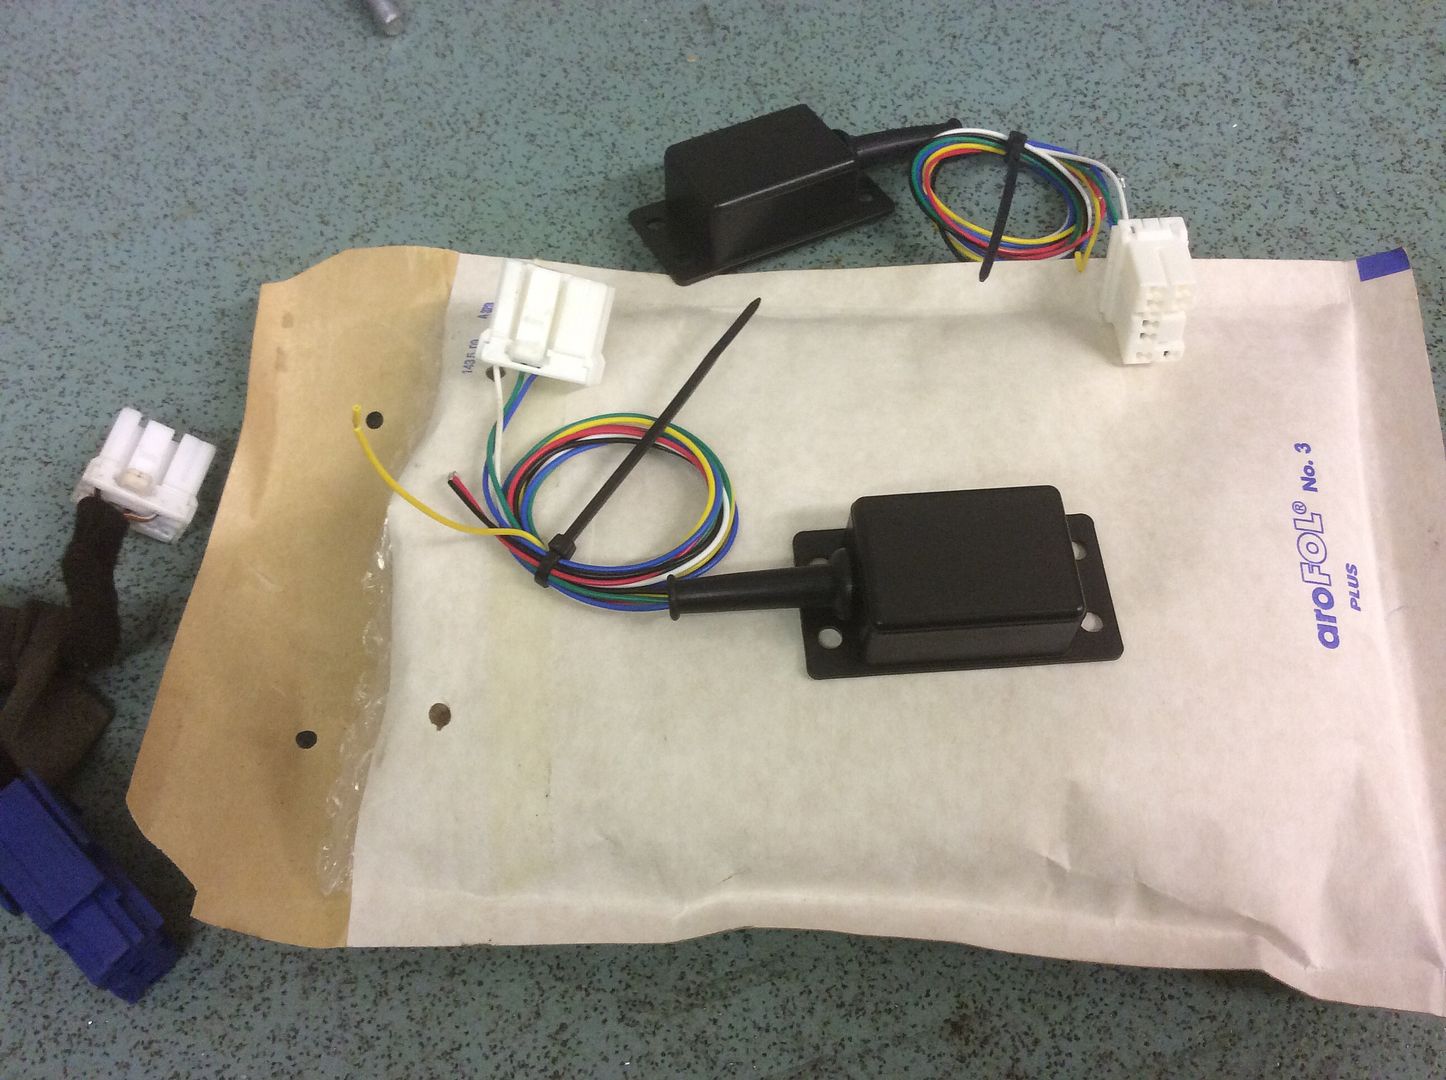 |
Clever stuff. What made you go for PAS in the first place ? Although the steering is quite heavy at low speeds I've never felt the need for it. I wonder what the difference will be in steering feel ?
|
Quote:
bob |
| All times are GMT +1. The time now is 01:47 PM. |
Powered by vBulletin® Version 3.6.4
Copyright ©2000 - 2024, Jelsoft Enterprises Ltd.