Deans mx5 roadster build
1 Attachment(s)
Time to start a thread on my build.
Firstly I think I should introduce myself my name is Dean andI live in a little village called Cottesmore, I'm an ex aircraft engineer and now work in a factory as a mechanical maintenance engineer, the good thing is I work shifts so will have plenty of garage time however I don't have a big wallet (wife and two young boys see to that!) Hopefully attached is a picture of my donor car, it is a 1.6 eunos roadster with terminal rust, I did attempt to restore it but it is just to far gone. The plan is to order the steel and cut and weld my own chassis. I'm going to soak the hub nuts in some shock and unlock then attempt to loosen them. Is there anything else I should consider before I start stripping it down? Cheers Dean |
The rear lower outer hub bolts are sometimes siezed mine too a load of heat and a 20 ton press to shift them
good luck with the build |
Good luck with the build.
They are pretty simple to strip hardest part being the wiring make sure and label it all. |
Hi Dean and welcome to the fold, there is a wealth of knolage on here so never be afraid to ask any questions
Good luck with the build |
Welcome to the mad house, nice to see another build starting, good luck and just remember the only stupid question on here is the one you didn't ask.
Arfon |
Hi and welcome, just get stuck in! Building the chassis in the best bit i think because it starts to look like something in no time, i used one of these to clean up the ends of my box section once i had cut with an angle grinder, just keeps the ends nice and the correct angle
http://www.ebay.co.uk/itm/Sealey-100...AOSw0e9Uy5p 2 not the exact one i used but this kind of thing Rosco |
Thank you everyone,
There is a press at work that I will be able to use if it's up to the job! I will definitely be asking lots of questions as this is my first go at building a car. I will be using the Haynes roadsters book and I also have downloaded a pdf file of the old Saturn plans of the mx5 chassis, is this the best way to go? |
Saturn plans are a bit vague in places but they do the job
I printed off the last page and marked them off as i cut them makes it a bit easier. Also some of the measurements for the diagonals are a bit off cant remember off the top of my head but just check before you cut them. |
Welcome and have fun building. Use the manual as more of a guide than as a bible. Look at peoples builds on here as there are some better solutions than what is shown the the book. Off the top of my head, roll bar harness fixings and the pedal box.
|
Welcome! As above this forum (and Locost Builders) are a wealth of knowledge and cunning ideas :)
One thing I would say is try to take as much as possible from your donor - it saves money in the long run! I didn't have a donor and it's definitely turned out more expensive. Also maybe check out the prices of components on ebay and take extra care removing items which fetch a good price ;) |
one other think, dont assume your sheet of plywood or whatever you use for your build bench is square, check it corner to corner before you start as i nearly had a chassis 10mm out of square but my dad noticed!! :D :D
|
My ply wood was the same so i just cut all the bottom chassis rails and squared them then bolted them down
|
Thanks for all the advice, keep it coming I really do need it!
For the build table my plan is to use some angle iron to make a frame for the ply wood table top, is this a good idea? Or should I stick to a wooden one? Not much to report, I have been stripping the donor and selling bits as I go and building a box of stuff I'm keeping. Tonight I have ordered a TMXR flat pack kit from Talon, bit premature but hay ho it might make me work quicker at getting that donor stripped. |
Getting very close to getting the shell removed now, the spaghetti junction of a wiring loom is labelled up and removed from the engine bay.
Today my flat pack TMXR chassis kit arrived so need to get the donor sorted asap and start the proper building. http://rs1123.pbsrc.com/albums/l556/...h=480&fit=clip http://rs1123.pbsrc.com/albums/l556/...h=480&fit=clip |
Hi Dean
Are you getting wishbones from Talon to? Well worth waiting for and look the biz if you don't want to make your own. I have also ordered diff mount and nose mount so it can be mounted like a Sierra unit that's not arrived yet so can comment but I will let you know Garf😀 |
Hi Gary,
Yes I think I will get the talons wishbones and the diff case. I want to make as much myself as I can but I think buying the wishbones will be a hell of a lot easier, especially the fronts. The diff case looks a work of art I don't think it would be something I could replicate! I will keep my eye on your build thread |
Between painting and wall papering (got to keep the her indoors happy!) I have managed to get the body removed it was a fairly straight forward.
It was one rusty car! The angry grinder was well used. http://s1123.photobucket.com/user/de...=copy&sp=false http://s1123.photobucket.com/user/de...=copy&sp=false http://s1123.photobucket.com/user/de...=copy&sp=false http://s1123.photobucket.com/user/de...=copy&sp=false |
Quote:
|
:mad:
Quote:
|
Quote:
|
Quote:
Yes lucky enough I too read plenty of build threads and read advice from other builders so I have slackened the nuts off using a 4ft bar! Anything else I need to keep off the shell Before it goes? I have cut the chassis number off and removed the chassis ID plate and cut out the bracket for the handbrake. |
Have you kept the fuel sender from the top of the tank
|
Yes I have removed the sender unit and the other bit which I assume is a return?
|
fuel sender has flow and return, the other bit is a vent
|
The donor has been completely stripped down now have a big pile for the tip and another pile of bits to sell and help fund the build.
Build table has now been built and I have marked out all the bottom rails. [IMG 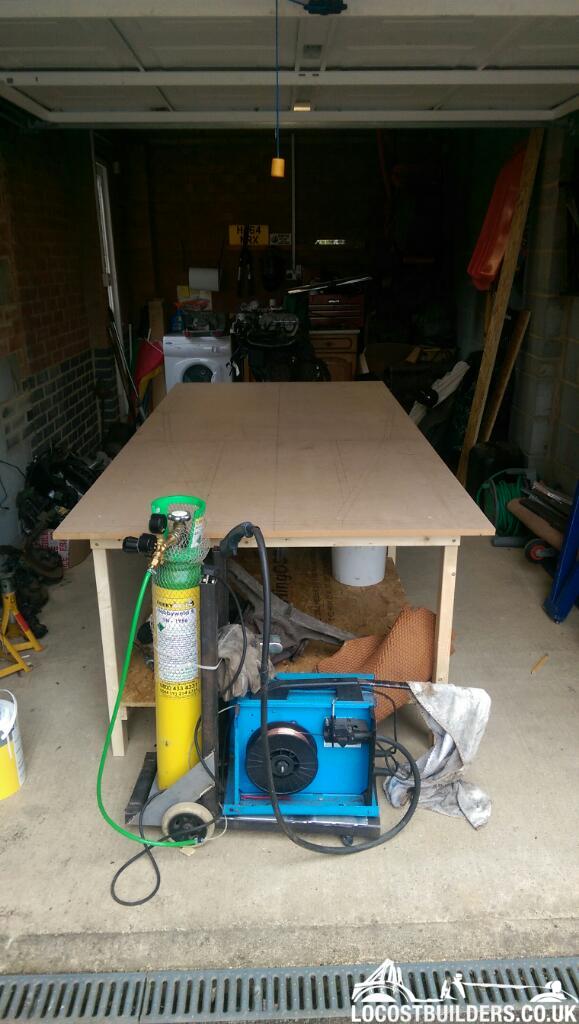 [/IMG] [/IMG][IMG] 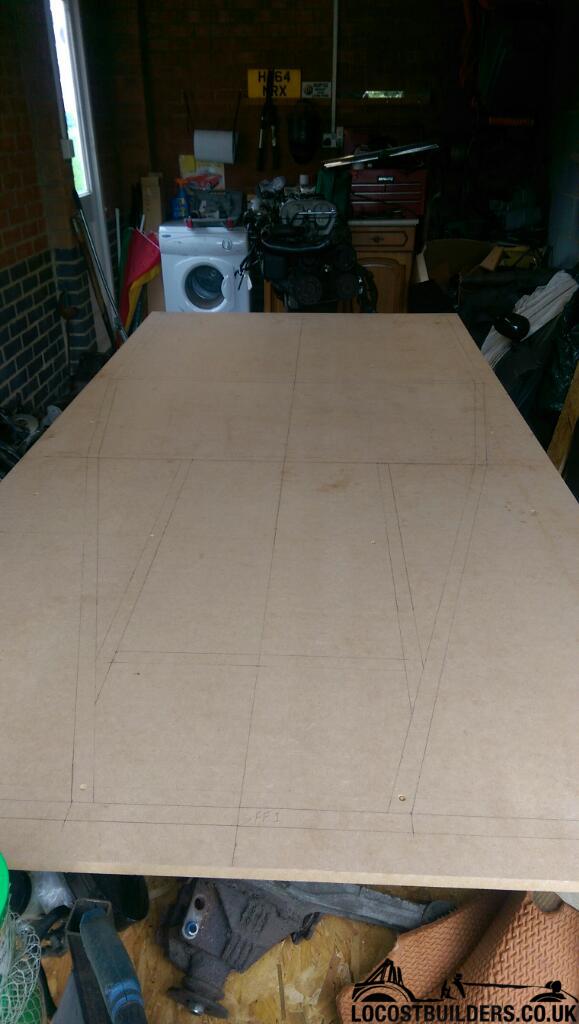 [/IMG] [/IMG]Only recently managed to check the chassis kit out, couple of bits missing nothing major so think I will cut them myself. In fact some may not be used or be different on the talon chassis compared to the book chassis. [IMG] 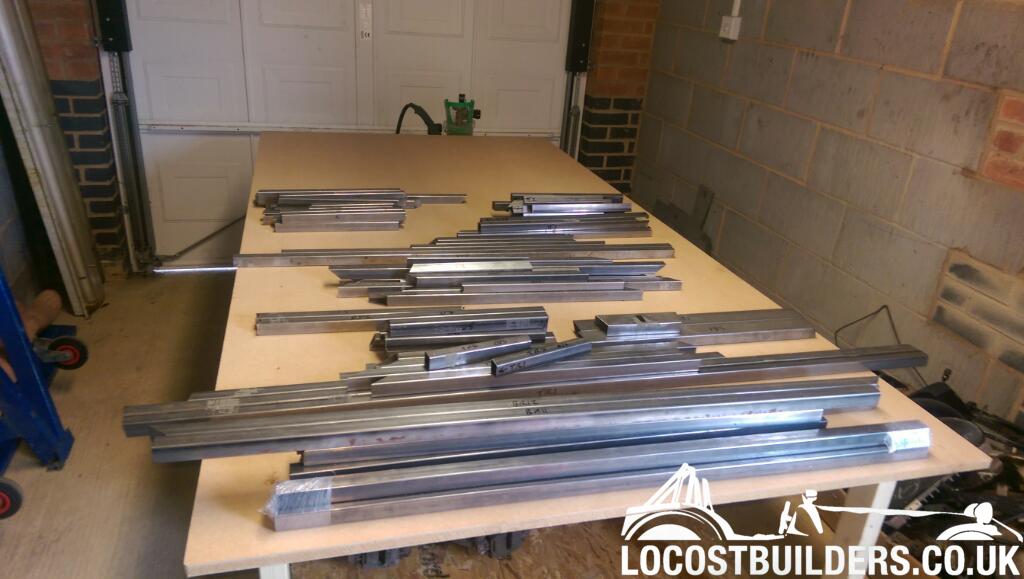 [/IMG] [/IMG] |
Quote:
|
thats the gearbox mount in the picture, bit box section two inch wide cut at angle on both ends with slot in the middle. bolt a landrover rubber mount and 50mm square box on top.
i will try measure mine tomorrow |
Quote:
|
I wondered what that bit was thanks guys.
If you want me to I will take some close up pictures of it and measure it too. I'm missing all bits for the front frame, which obviously I do need. I have started marking out the bits on some box section I bought for welding practice. Much head scratching on FF2 and FF3 but think I have it right now! Also missing are: SB 3, 4, 5 & 6 I'm guessing these are as per the book RS 15 again I'm guessing these are the same as in the book SW 1, 2 & 3 which I assume are different from the book? TT 6 & 8 not sure if these are used? Cheers Dean |
Get hold of phil he will get them sent out to you
|
Quote:
|
Thanks chaps, I contact Phil and he has said he will post the missing parts out to me!
Great service considering I ordered the kit at the end of February. |
As promised all of the missing parts arrived from Talon. Didn't realise Phil made up the front frame, that has saved a lot of messing about.
Made a bit of progress tacling my chassis together. [IMG] 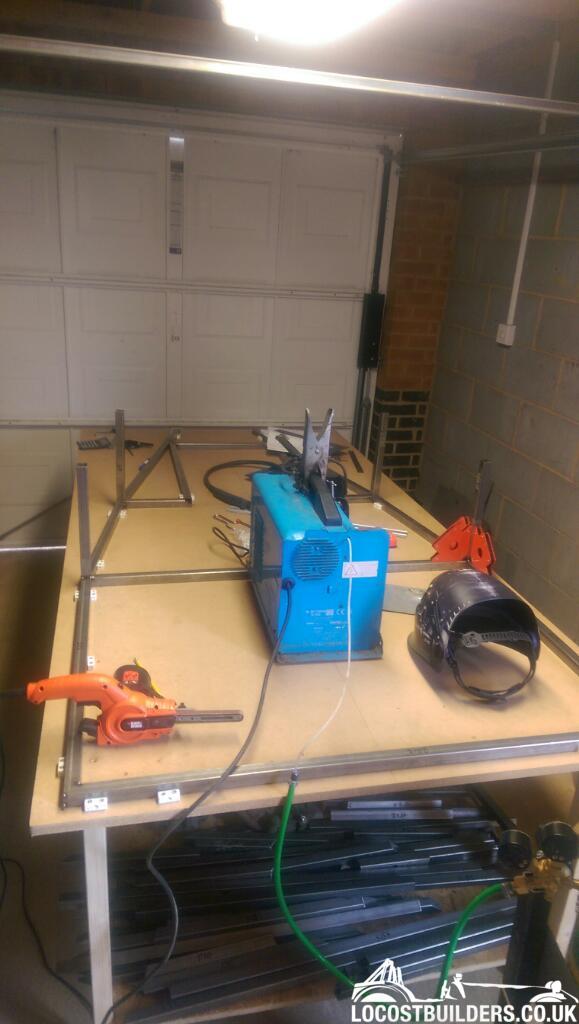 [/IMG] [/IMG][IMG] 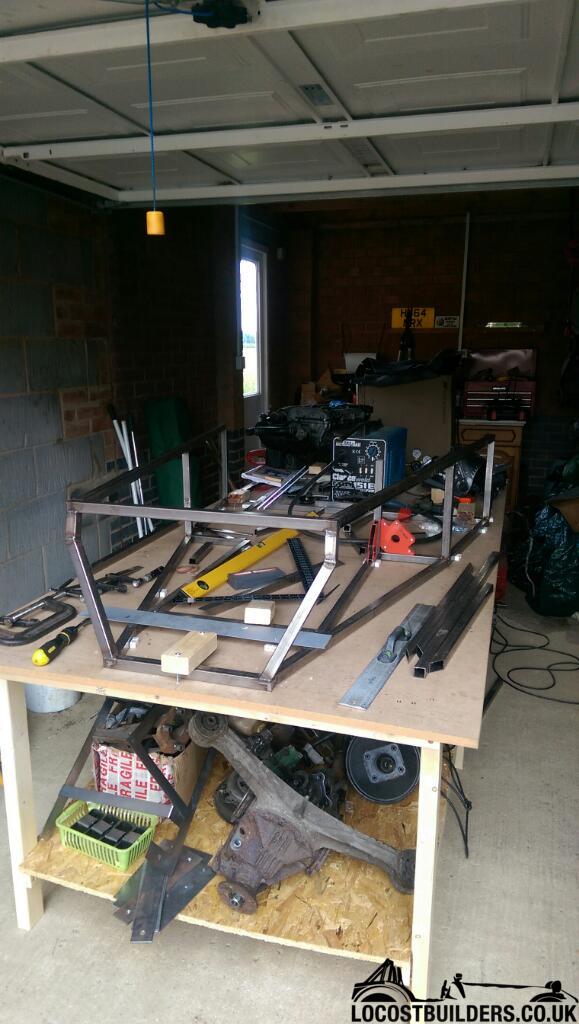 [/IMG] [/IMG][IMG]  [IMG] 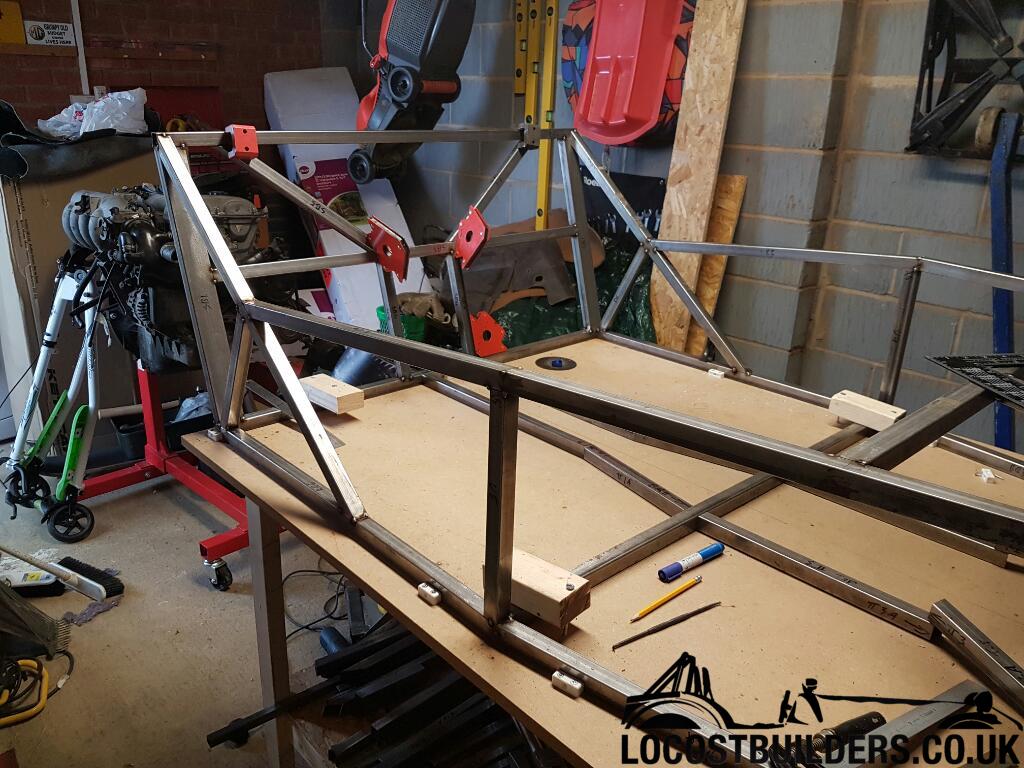 [/IMG] [/IMG] |
nice work and good to see you getting on a bit, keep going :)
|
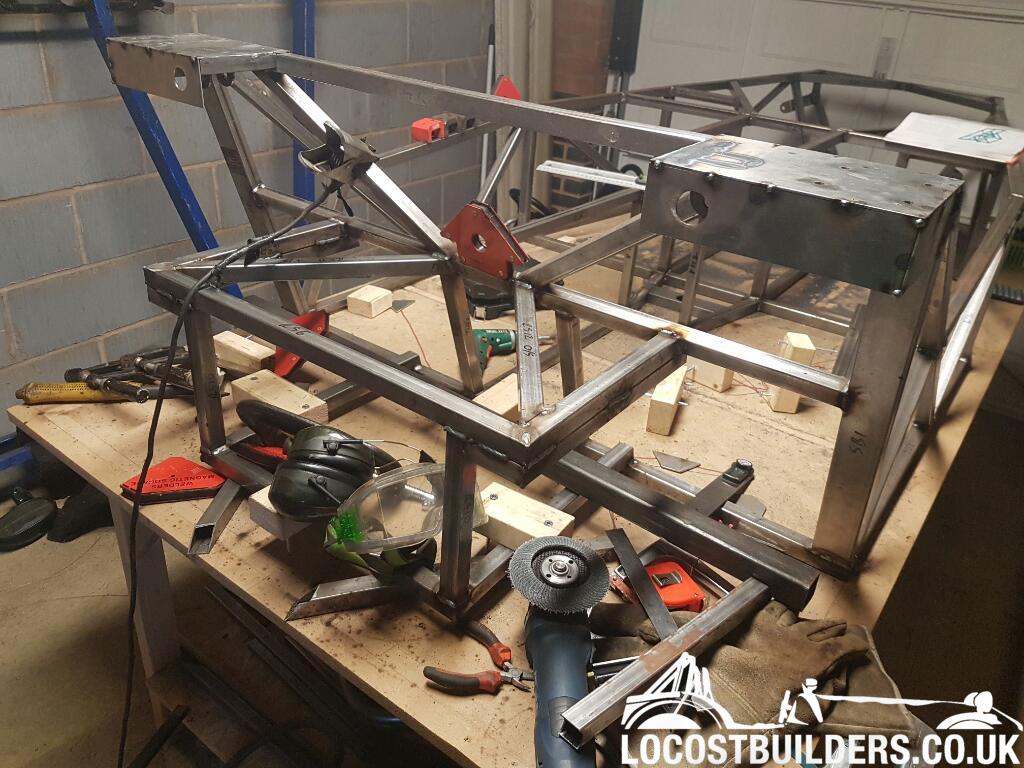
I am useless at keeping this updated!
I have been slowly plodding on with this. Im trying not to do too much due to an imminent house move and at the minute I can get the chassis in the removal truck with most of the component parts. So I have pretty much got the chassis together now and it is all fully welded. [IMG] 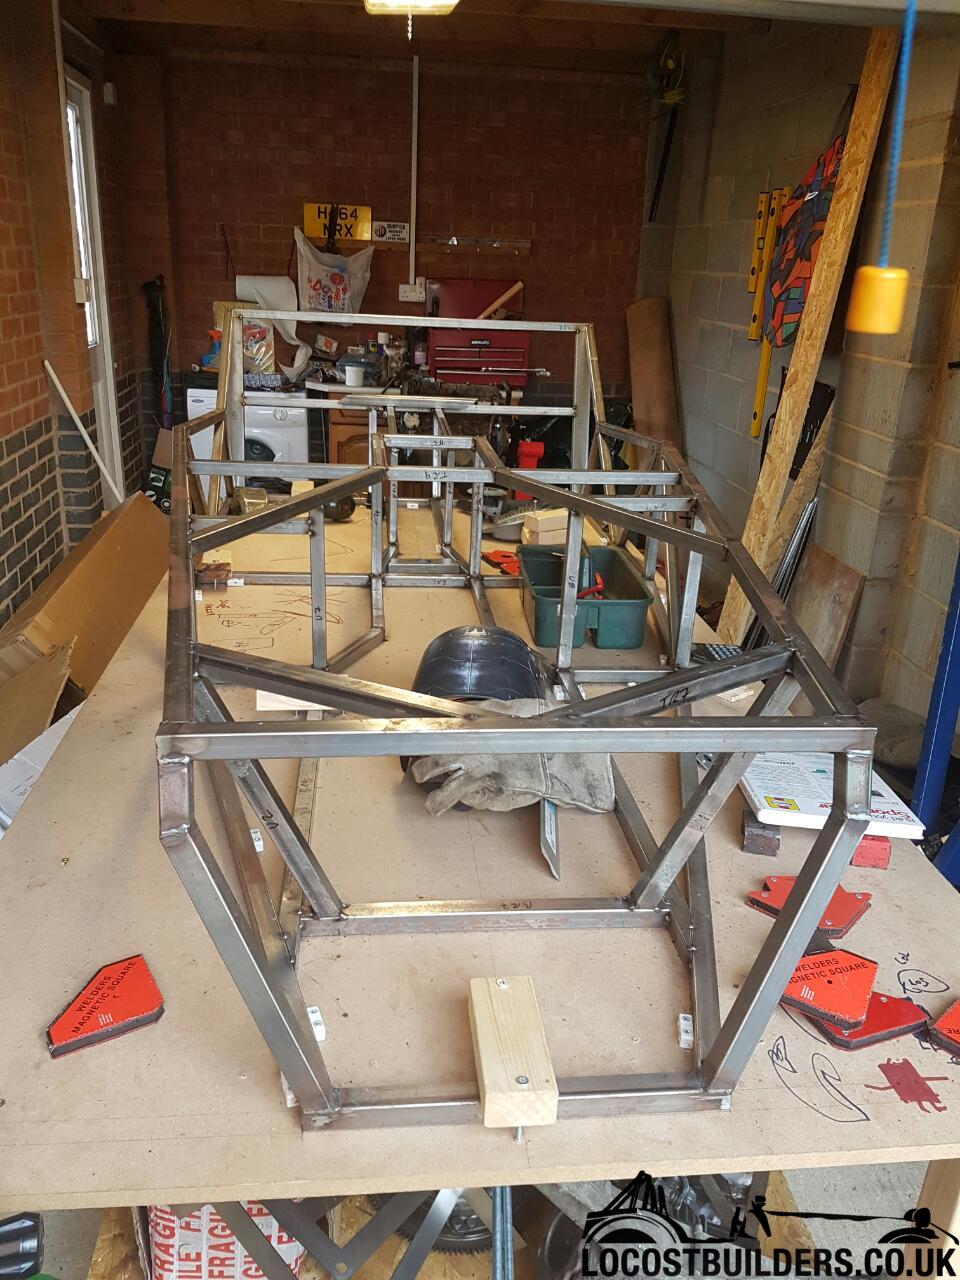 [/IMG] [/IMG][IMG] 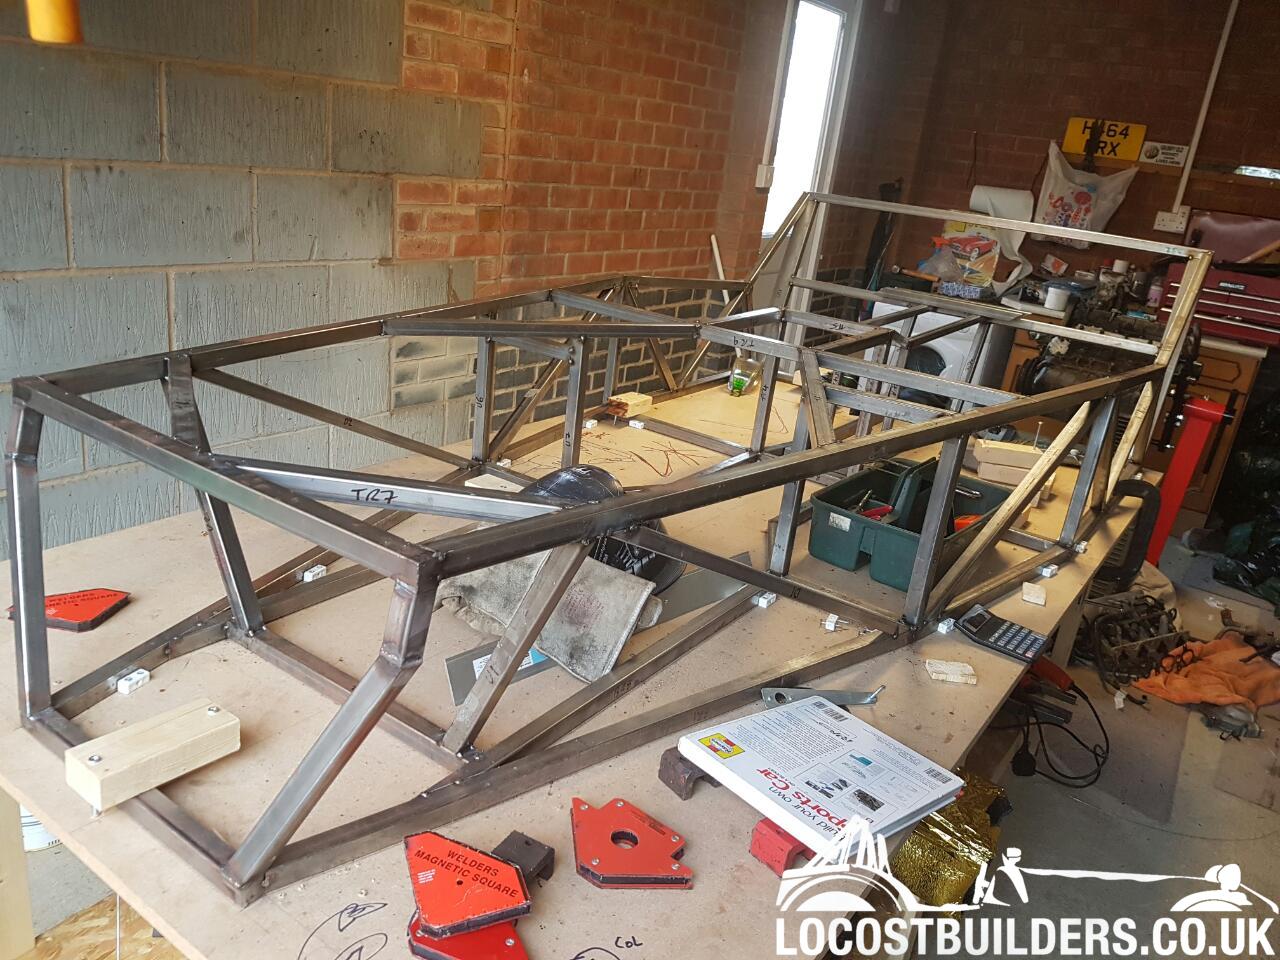 [/IMG] [/IMG][IMG] 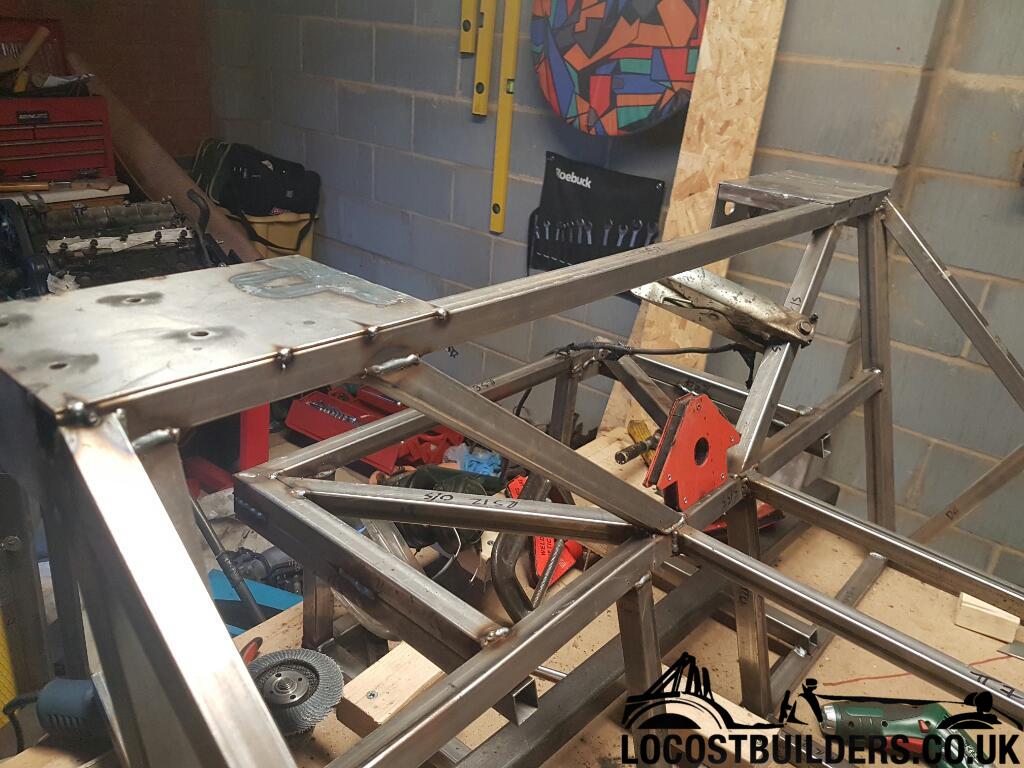 [/IMG] [/IMG] |
[IMG]
 [/IMG] [/IMG][IMG] 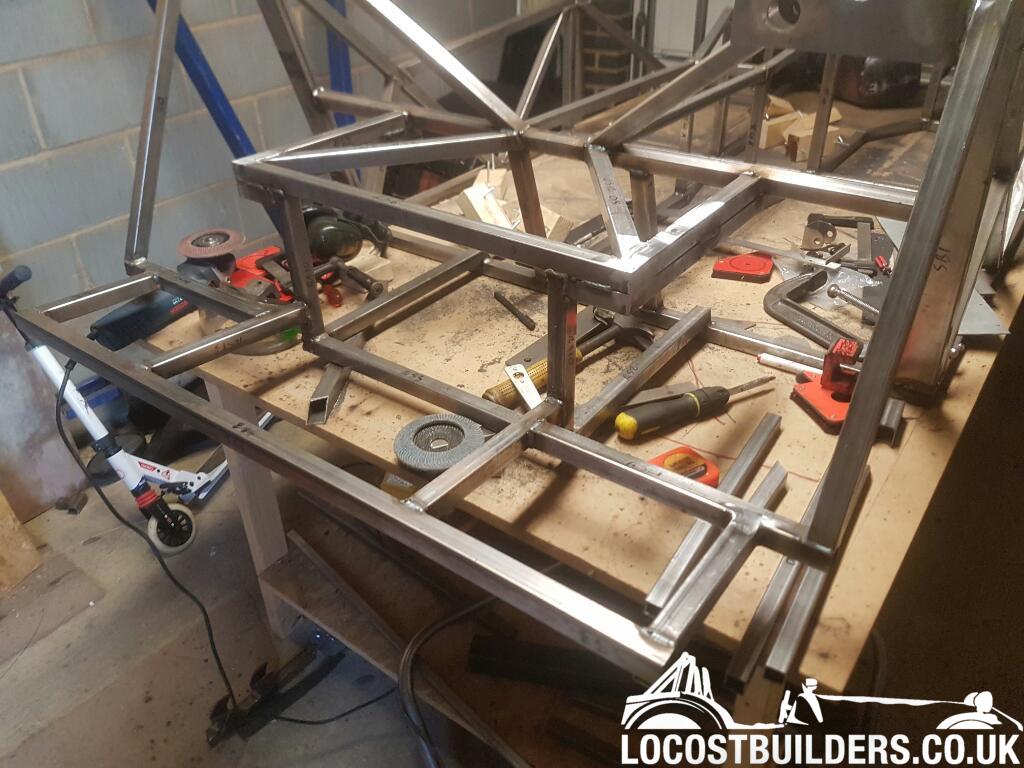 [/IMG] [/IMG]Have welded on all my suspension and wishbone brackets. [IMG] 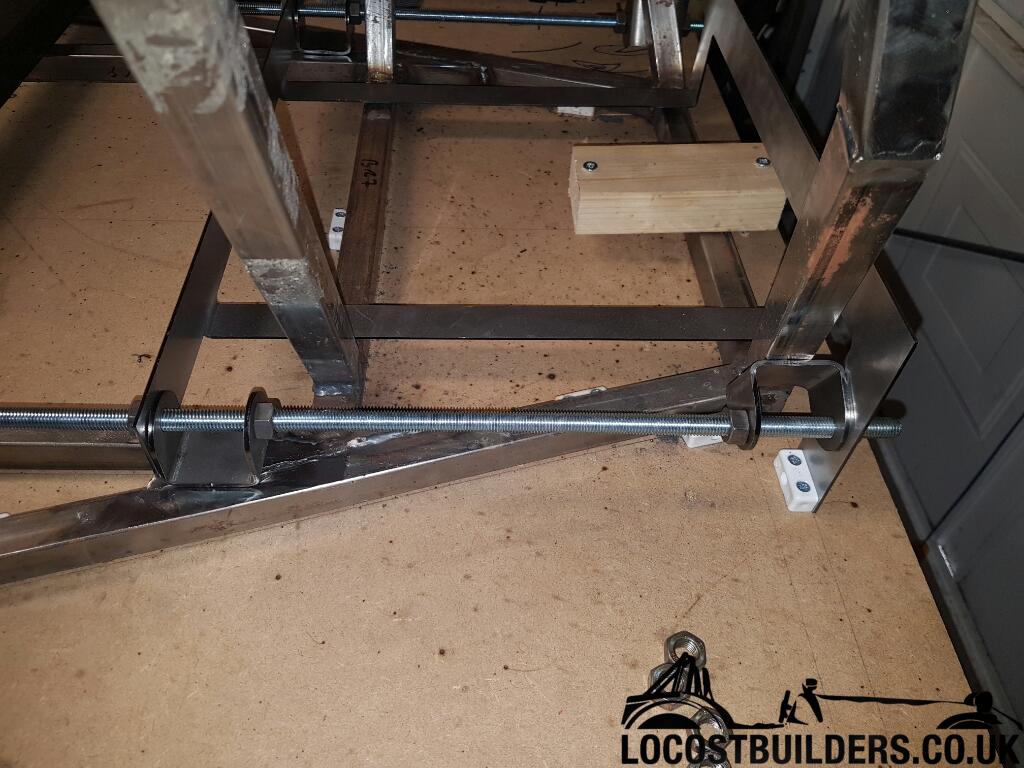 [/IMG] [/IMG][IMG] 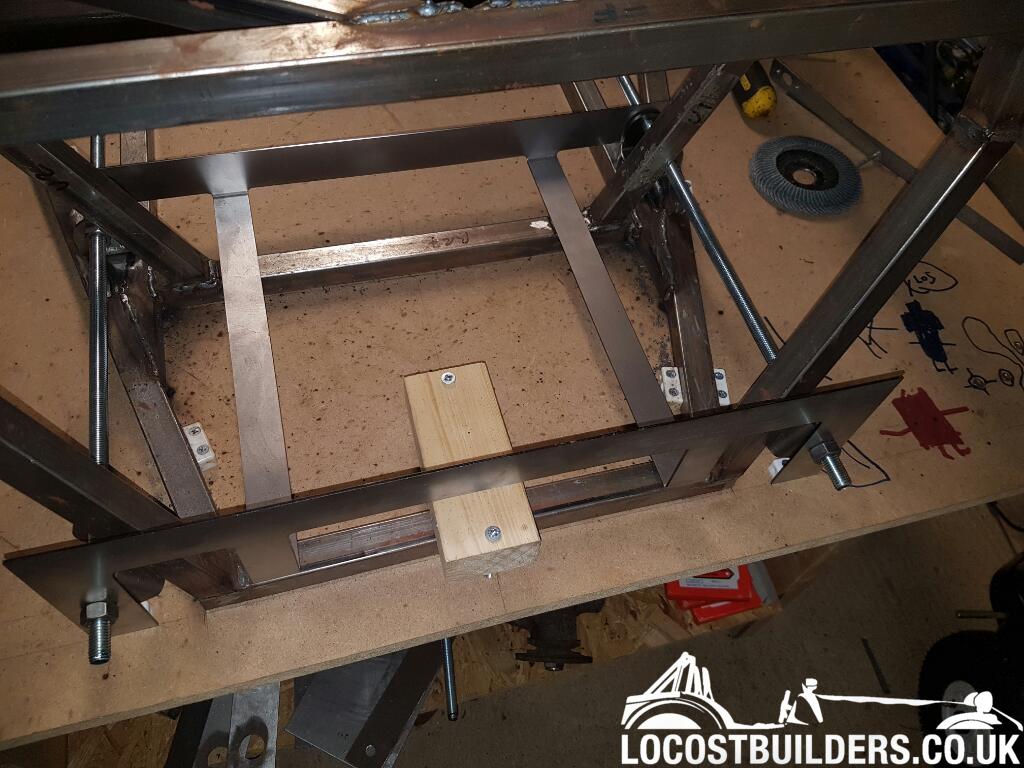 [/IMG] [/IMG] |
Trial fitting steering column, rack and seats.
What [IMG] 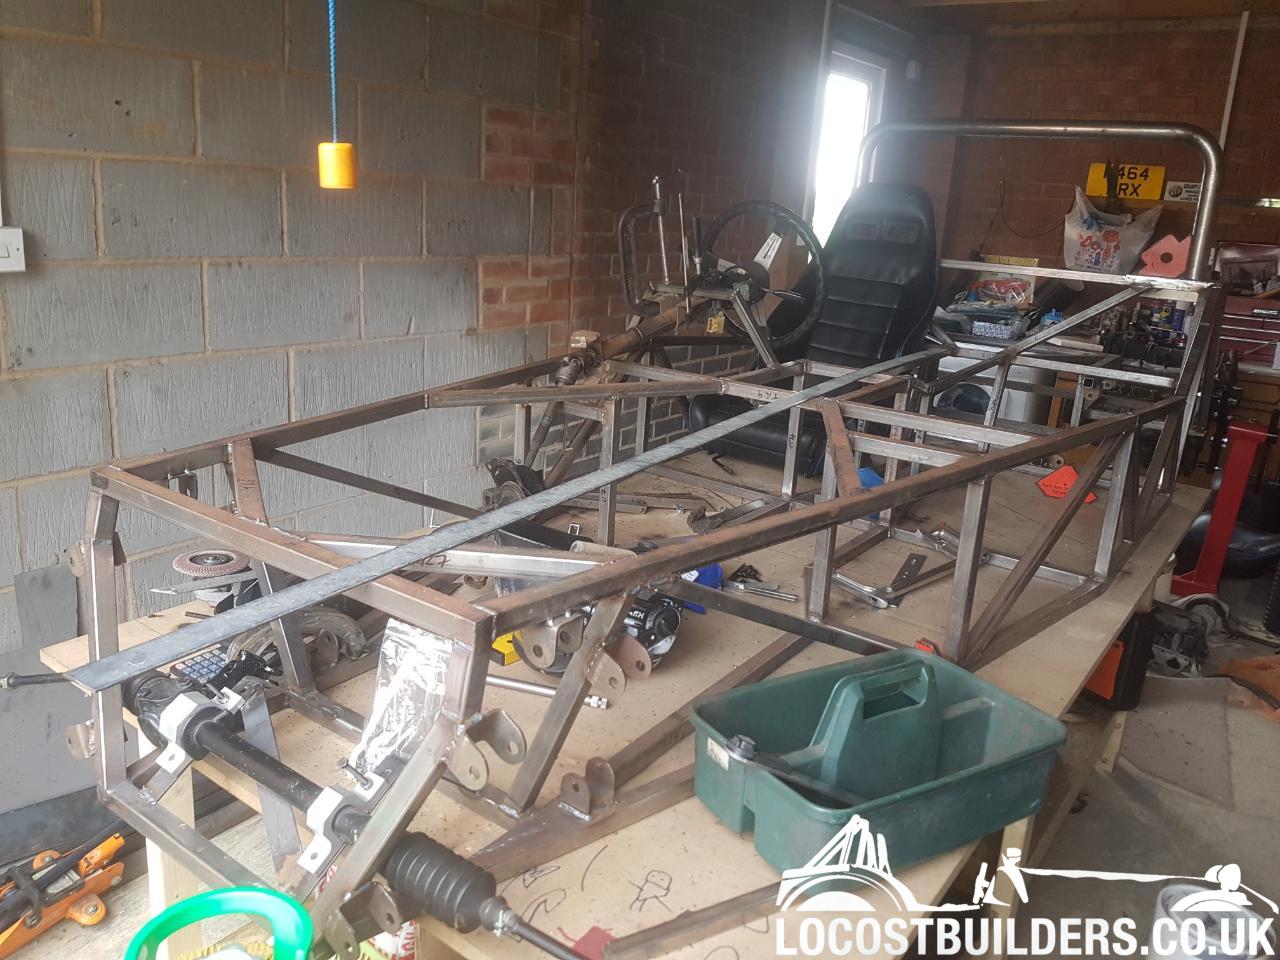 [/IMG] [/IMG]Now fitting the engine and making up the engine mounts. [IMG] 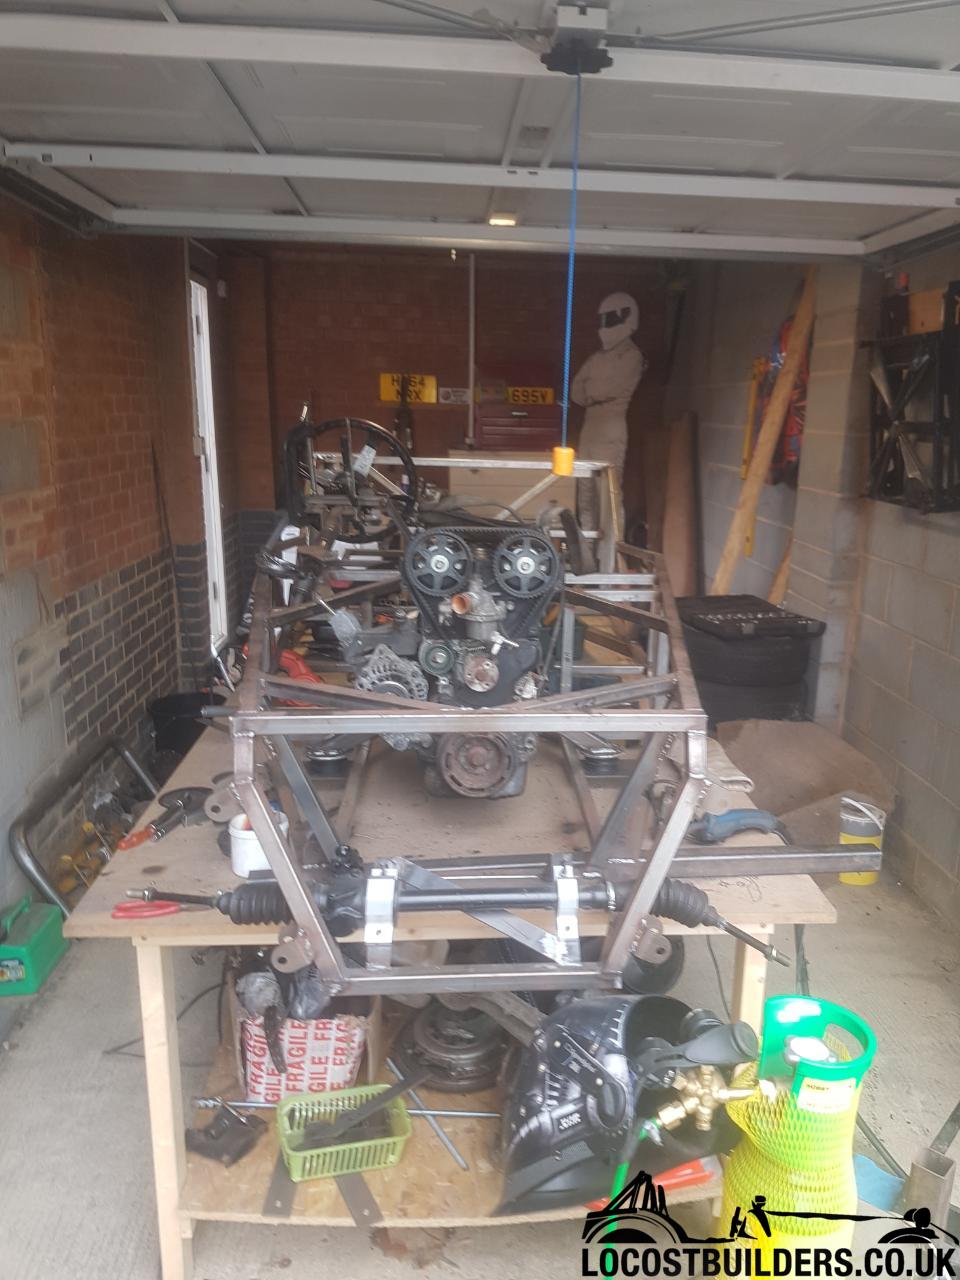 [/IMG] [/IMG][IMG] 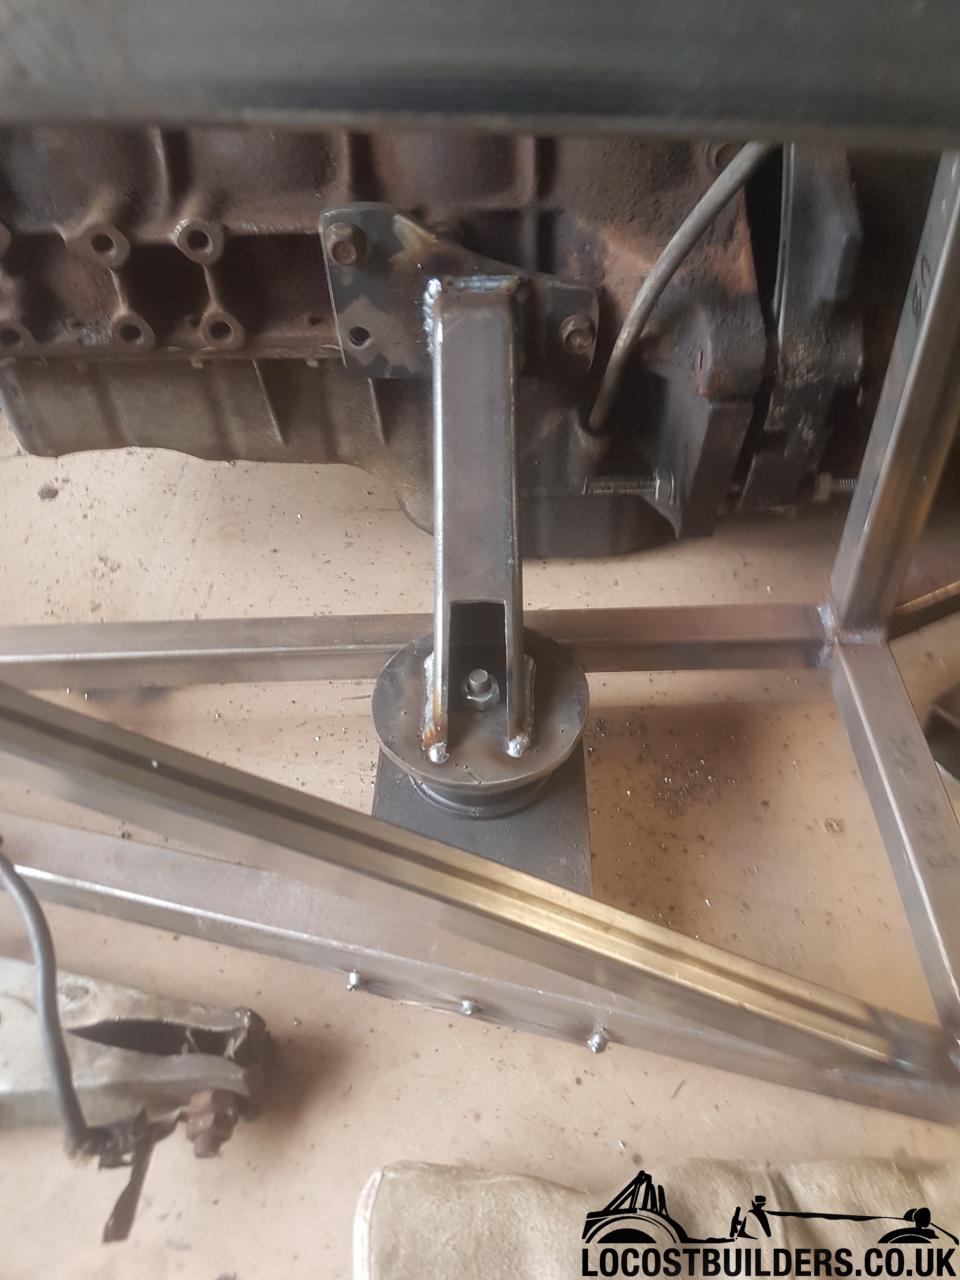 [/IMG] [/IMG][IMG] 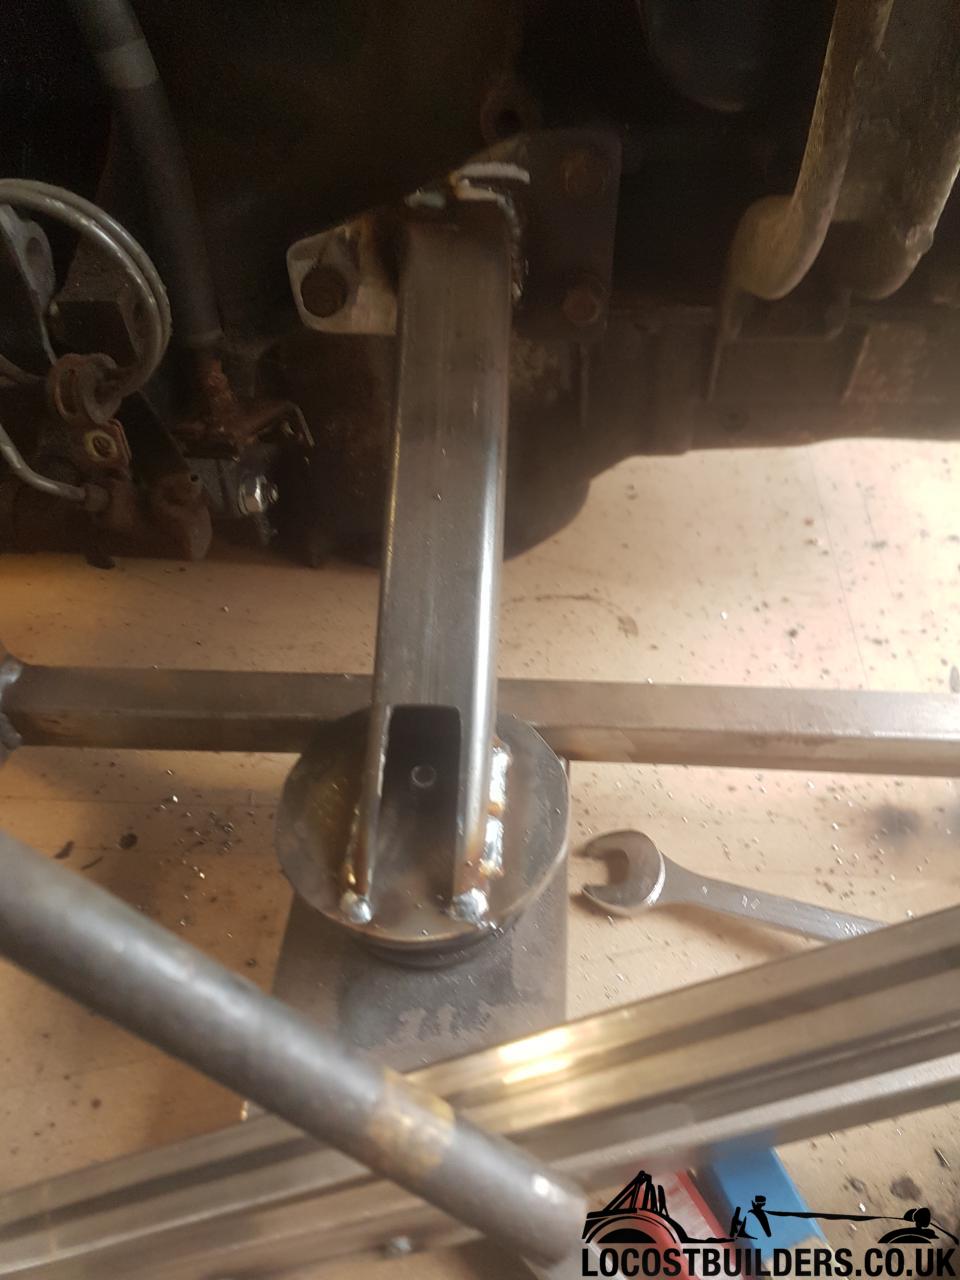 [/IMG] [/IMG]And that's about where I am now. My current job is sorting out extending the steering column so that it's set up for me, I'm a bit of a short arse though! |
| All times are GMT +1. The time now is 12:37 PM. |
Powered by vBulletin® Version 3.6.4
Copyright ©2000 - 2024, Jelsoft Enterprises Ltd.