If you want to be accurate, large civil airliners have their wings held together with interference fit "bolts". Smaller aircraft use Rivets & composites use bolts & glue!!
Hope that helps |
Cirrus SR 22 is plastic !
I think you mean what holds the wings on,they are still riveted together. A lot have "Jesus bolts". Jesus is that what holds that on. |
I can assure you that large aircraft wings are held together with interference fit bolts, they are hammered in & have nuts put on the reverse side to a set torque. Having worked on the A380 wings I think I can assure you this is correct!
|
Grob use a method of a spring loaded ball bearing in a tube to stop the wings falling off their de-riggable aircrage. ie sailplanes. It makes the easy to take apart if you end up landing in a field but always at the back of your mind when spinning
|
Hi,
Thank you very much for the tips and help... and the very good informations about how to make an airplane wing, it will be very useful if my next build is a DIY plane :-D ! So, I managed to fit my ally floor. 4mm aluminium rivets, 1 every 45mm, with a blob of sikaflex on each of them. Sikaflex on all the rails, including the 2 seat transversal rails.  2014-03-14_16-57-32 par Voucht71, sur Flickr It may have cost me a bit of money, but I'm very glad I bought a rivet air-gun and also (as I'm a very very lazy guy) and air sikaflex pump! Both of them worked a treat, and automatic tools were very welcome after I drilled all these holes ! A shame this air gun does not work with rivnuts! 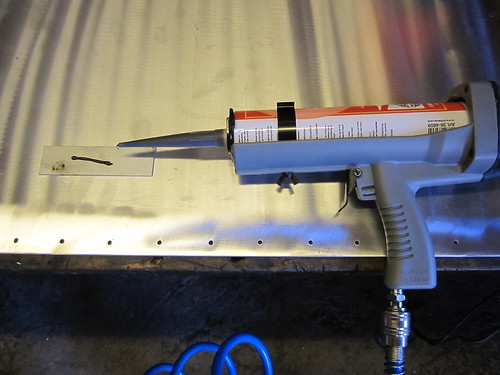 2014-03-13_10-36-38 par Voucht71, sur Flickr 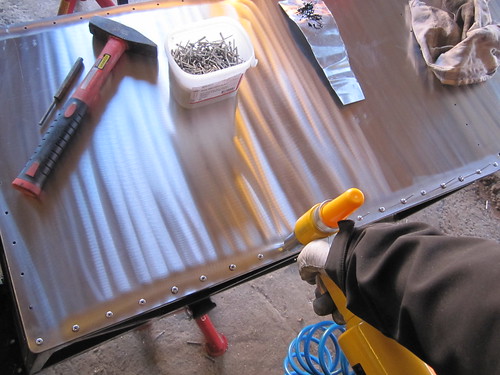 2014-03-13_11-29-42 par Voucht71, sur Flickr 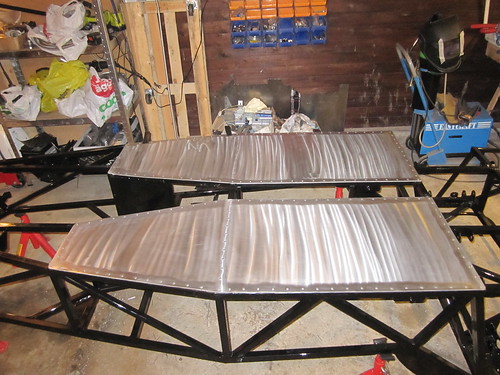 2014-03-14_18-15-36 par Voucht71, sur Flickr Tomorrow, I am going to put the chassis the right way around, and start to reassemble everything, starting with the engine and transmission. |
Quote:
I'm inclined to do similar to you, how many rivnuts did you use for the side panels. And did you drill out your 3mm floor (I have 3mm alu for the floor too) to fit the rivnuts flush with the floor panel? I had a look at your blog but my French is not good enough!!! |
Quote:
Anyway, here are my answers to your questions: Floor : I actually used rivets and not rivnuts for the floor, because I can't see why I would need to remove it, as I kept the transmission tunnel open, so I have access to the propshaft from underneath. So I used 4mm rivets every 50mm along each edge. I also sealed/glued with Sikaflex. Side panels : all the bodywork I wanted removable. So I used M5 rivnuts, countersunk head. Top side : 3 under the hood (the one in the very front is also the nose cone fitting point) 2 under the scuttle 2 between the scuttle and the rear arch None on the arch, but the rear part of the side panel is attached to the chassis with the rear wheel arches. So it is 7 fitting points + 2 or 3 with the rear wheel arches Underside : 5 on the front part (in front of the angle) 2 on the rear part (behind the angle) So it is 7 as well So 14 rivnuts per side panel. Hope that help. Do not hesitate to ask if you need :) Good luck! |
I just realized that I might have misunderstood your question.
You were asking about the rivnuts to fit the side panels through the ally floor. Sorry :o Quote:
The link to my blog about that is: http://vouchtroadster.blogspot.fr/20...panels-09.html (I moved the "Translate" button on top of the side bar so it is easier to find.) There are 4 rivnuts fitted through the floor (+ 3 directly on the tube, at the front of the chassis) Also, these countersunk rivnuts I used to fit my side panels are M6 (9mm hole) and not M5 (7mm hole) as I said yesterday. I hope I have now answered your question :) |
Merci beaucoup for taking the time with a comprehensive answer, much appreciated! I'll take a much closer look through your blog now, the photo's you've got on there are very helpful. Although I am hoping that I do not have the mysterious gaps in bodywork I suspect I may have similar challeneges ahead, as my bodywork has been waiting to be fitted for nearly 3 years now and may have adopted some new shapes...!
|
| All times are GMT +1. The time now is 09:42 PM. |
Powered by vBulletin® Version 3.6.4
Copyright ©2000 - 2024, Jelsoft Enterprises Ltd.