How about 3 sets or publish the plans!
I will see if I can get a picture of Nathan's online. He mounted his similar to the sierra upright but I had been thinking about using the 3 holes that retain the brake dust plate. David |
I aint running a production line, lol :)
I found these pics of how one of the kit car manufacturers (can't remember which one) does it for their MX5 based 7. Probably going to do something similar:   |
 During my IVA test, the radius ball thing was applied to my exhaust brackets and mounts (hence why the exhaust tip has to be rolled). With that in mind I think that bracket might struggle to pass. Obviously it depends on how thorough the IVA examiner is on the day. |
Hi Deezee, I did have my doubts about it!
I'm hoping a little adjustment and/or some strategically placed trim might get it through! |
Here's a pic of the NTS wingstays:
 |
Wow, well done John. Almost enthused enough to get in the garage but I broke my right scapula a few days ago so my right arm doesn't really work well. :rolleyes:
|
Quote:
I had to google scapula. Sounds painfull :eek: Wishing you a swift recovery!! |
Not the most exciting progress announcement, but I finally got around to making my tank straps.
Just used some thin steel strips and edge trim:   |
Hi skov any chance of a picture from the rear of the tank. When my straps are in place they won't follow the same line as the tank and I will have a gap. Also wondering how you fastened it to the bottom rail.
David |
Oooh, the straps look very neat!
|
Thanks Alga!
I was just going to have steel strips with foam on the bottom, but I made such a mess cutting the strips I came up with the idea of using the trim to hide the ragged edges :D David, my straps don't follow the lines of the tank perfectly either (in particularly down the rear!). They are tight against the corners of the tank though, so should hold it in place. I did take a photo of the rear (it's in my photo album), but it's not very clear. I'm in the middle of fitting the ali tub at the moment, so can't take another right now. It'll be coming off prior to final fitting, so I'll try to remember to get one then. |
That's my rear tub done!
Made a bit of a hash of it where I folded it over the round tubes, but I aint doing it again! (and the tub cover should hide it anyway) 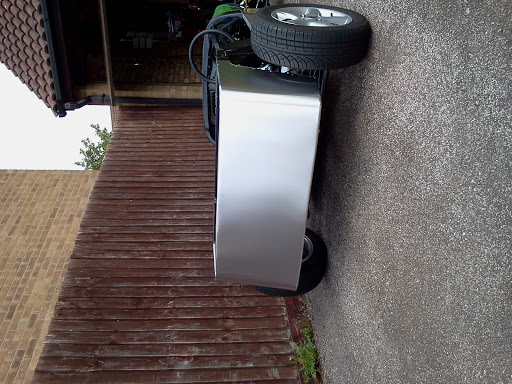    |
Rear tub looks bloody good mate.
|
Look excellent Skov, congratulations :cool:
Aluminium side and rear panel will be my choice too. |
Thanks guys!
To be fair it does look loads better in the photos than it does up close! |
Hi John,
Thats looking very nice indeed mate;) Rear tub looks good in the photo from what I can see. What colour scheme are you going with for the whole car??? Are you going to paint your Alu and your GRP as you said there are some scratches in the GRP. Cracking stuff:D :D Johno |
Haven't got a clue on the final colour scheme yet :confused:
It's all a bit of a mish mash at the moment! Going to look even worse when I fit the rear wings - they're red! I'll eventually get the whole thing either painted or vinyl wrapped depending on cost. |
One of the things I love about building the roadster is learning new skills.
Here's one I hadn't counted on... Decided to learn how to sew so I could attempt to knock up various bits of trim. It's not quite hairdressing, but probably more than girly enough to warrant using an MX5 as the donor :D Anyways, my wife refused to let me near her machine, so I picked up this little beauty off gumtree today for next to nothing:  They don't make them like this any more! Had a bit of a play this evening with some vinyl leatherette stuff I had kicking about (don't ask!). Didn't go too bad at all, managed flat-fell seams, french seams, and even a spot of welting :D  |
FMB you will be knitting the roadster some wollen wheel warmers next:eek: Thumbs up on the tin work skov its looking nearer to hitting the road by the day:)
Bob |
Thanks Bob!
Still not happy with the top of the rear tub, but with any luck I should be able to sew up a tonneau to cover it up :D Don't worry, I don't intend to take up knitting any time soon... ...not after the scarf debacle :o (I tried knitting one for one of the babies a few years back. About six inches in I gave up as it looked more like the Indian subcontinent than a scarf!) |
Ahaha! My mum had one of them! Nice job, car loks good. You are a very productive person in more ways than one! ;)
|
Thanks Chris!
Had to man up and get the real power tools out this weekend. I've done a bit of grinding, drilling, and welding here and there, and whipped the jigsaw out to make a start on the dash: 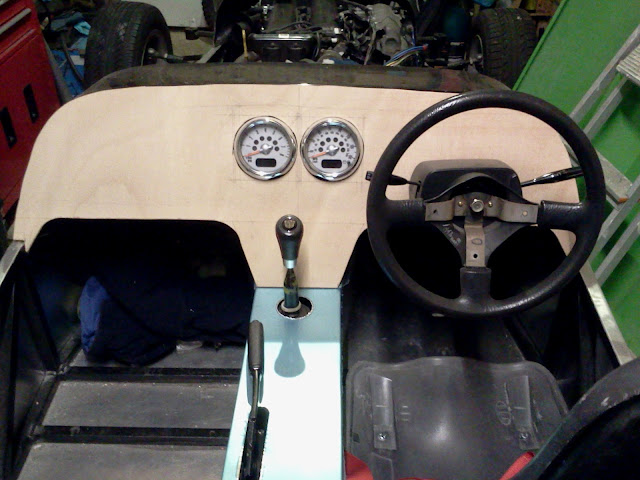 |
Looking good skov. How are you changing the speedo drive from cable to electric? I like the instruments you have chosen.
|
Quote:
 |
[quote=skov;7837
(I tried knitting one for one of the babies a few years back. About six inches in I gave up as it looked more like the Indian subcontinent than a scarf!)[/QUOTE] What Bradford?????? Are you getting any other guages?? glovebox etc. Bob |
Oooh, that's a bit politically incorrect :D
I'm planning to keep the dash nice and simple. The only additional things I'm going to add are hazard and rear fog switches. The clocks have all the tell-tale lights I need build into them, and they have a couple of little LCDs which I'm hoping I can use to display anything else I might want. |
Sorry I meant to say Southall. :)
So if the clocks have all the lights in ie highbeam,oil,indicators and ignition they would meet the iva standards ????. Seems like the way to go, thats a lot of stuff not to have to mount.:cool: Bob |
They should meet IVA standards, they're all the right picograms and colours and presumably passed type approval in the mini, so hopefully I'll be ok!
The only thing it's missing is a rear fog tell-tale, but I'm hoping I can use a switch with that built in. |
Hi skov just read your thread from start to finish, what a brilliant job so far.
I'm a new member I have just bought a part built chassis which I'm going to alter so as I can use an MX5 donor, been reading lots about it and would love to build one half as good as yours. Keep up the good work Regards Mick. |
Quote:
Are you sure you haven't got me mixed up with someone else though :p Good luck with the build. |
Alterations
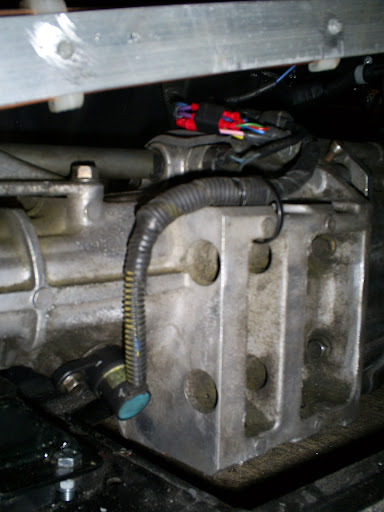
Hi skov been looking at your build thread, can you give me a bit of advice in the book it shows TT8 as 127mm and Saturn Mx5 alterations show TT8 as 165mm but in there photo it shows top and bottom tranny rails widening from behind TT8 to the new gap of 240mm is this right?.
Also in your picture on page 4 SB5,SB6 you haven't moved them out to line up with the tranny rails, I bought a chassis which has been part built for a Sierra which I will have to alter so I was hoping to cut the tranny top and bottom rails behind TT8 and renew to the new dimensions and leave SB5,SB6 where they are like you have would that be okay or does the tranny widen out further forward as we'll any information would be much appreciated. |
Hi mate, that's right - the tranny tunnel is the same up to and including tt8. It's only behind tt8 that it widens out.
I can't remember the numbers for the seat back rails, but the two vertical ones either side of the diff will need to be moved out to match the tunnel. The two diagonal ones above them can stay where they are though. |
Thought I'd whip the sewing machine out and have a practice go at the boot cover (the real one won't be red!).
Didn't turn out too bad for my first proper attempt at upholstery, some of the seams are a bit wonky, but I think I'm starting to get the hang of it:  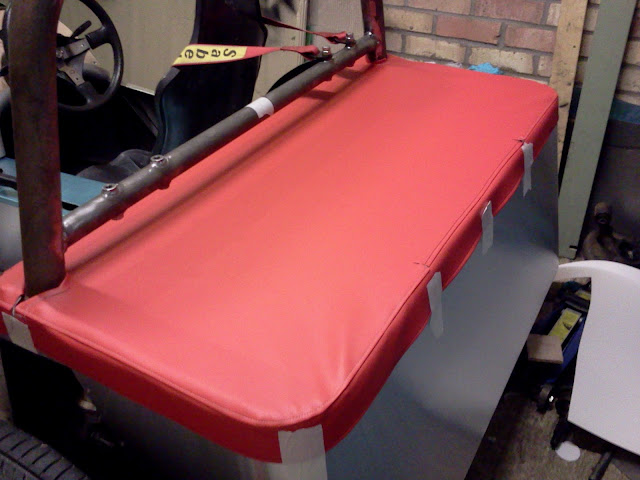 |
Skov that cover is the nuts.
bob |
Hi skov are you using a polo radiator. If so is it from a mk2?
What type of expansion bottle have you used? All the ones I have looked at seem to have too many outlets. thanks David |
Hi David,
Radiator is VW Polo 1983 - 1990 Expansion Tank is VW Polo 1981 - 1994 |
Thanks.
Does your expansion bottle have more than one outlet? The ones I have searched appear to have 2. I have looked at your photos and I can only see 1. If there is more than one outlet how did you plumb the second outlet in? David |
All VAG bottles I've seen have a ~16 mm outlet at the bottom and a 8 mm inlet at the top.
Mine's from a koda, but exactly the same one has been used in Golfs, Passats for about a decade. |
Mines the same bottle.
I've got the 16mm at the bottom Tee-d into the heater matrix hose, and I think I'm going to link the smaller outlet at the top to the small outlet at the top of the radiator. |
I decided to get that top outlet hooked up this evening whilst I was thinking about it.
I used my left over copper fuel line with a couple of short bits of hose either end to go to the tank and rad:    |
| All times are GMT +1. The time now is 01:58 AM. |
Powered by vBulletin® Version 3.6.4
Copyright ©2000 - 2024, Jelsoft Enterprises Ltd.