Time to start a build thread I suppose...
I haven't started a build thread before now as I hadn't actually started building anything; but now I have, and can!
Summary_ Location: South Somerset Donor: Ford Sierra 4x4 Engine: 2L DOHC About me_ I'm about to start my Masters in Mechanical Engineering at UWE (Bristol) next week, so have access to lots of wonderful facilities and a wealth of knowledge, but never seem to have the time to use them! I have spent the last 3 months working as a knight in a Medieval Jousting Tournament, spending no money and saving up just enough to finally buy some steel! Build Status_ I've had the donor for nearly a year, It's fully stripped of everything I might need or be able to sell and only the shell remains awaiting a trip to the scrappy. The steel arrived today and i have started to actually build! some of the dimentions may not be perfect yet as I'm waiting for the rulers to be sent in the post :D The build is all being done at my parents, between the straw-barn and my shed. This means access to all my dads tools. Wow thats a lot of words... Now thats out of the way I can get on with more important matters, where's the booze? |
Its one of lifes mysteries how nice clean unused tools in Dads box develop an urge to up sticks and move to the new surroundings of sons toolbox.
Ill bet 99.999rec % of tools collections were started using dads tools as the foundation:D Anyway welcome and all the best in the build |
You're doing much the same as me, I'm doing Mech Eng at Anglia Ruskin Uni.
Still working at disassembling my donor in my nans garage in Bournemouth (which is a 3 hour drive away) but it's getting there :) Were you gonna try and keep the four wheel drive or ditch it for rear wheel drive? |
Dad and I have a very mature aproach to tools: He borrows mine and then "loses" them in amongst his mess. I borrow his, clean them up, fix them, use them, and put them back much neater...
Hmmm, seems like I may be getting the raw end of the deal here. Oh well, I spose he does provide shelter, food, alcohol and building facilities, so its not all bad ;) I'm gonna have to use only 2wd unfortunately, there is a guy somewhere on here who is tyring to go 4wd and he's had to completely redesign the sump and front end! What year are you in Chris? Might be able to each other some advice. Building is progressing averagely, weather is great at the mo so spending it out in my shed cutting the steel. Must get back to that... Made one cock-up yesterday whilst cutting FF3, any guesses? |
I'm in my second year, but its probably easier than yours if you're at Bristol, I've got a friend in the second year of aeronautical and its much harder than mine.
Still, feel free to ask if you're not sure about anything, and I'll do my best :) And I'm not one to spurn help if it's offered :D And did you forget to cut FF3 with a slant on one end? Or cut the slant in the wrong direction? |
good luck with the build, I too am building with a DOHC and just up the road in Herefordshire, but work in Bristol, give me a shout if you got any questions... I'll help with the limited knowledge I do have:p
|
May very well be taking you up on that at some point in the future rapid.
Have you got to dealing with the engine yet? It's a little way in the future yet but I want to be prepared for all the extra work when the time comes. I remember second year... where did the easy times go? Oh well, one more year and I'll finally be more qualified than my Dad :D |
Made a fair bit of progress today, got the front frame fully welded up, and prepped a few more bits to help get the chassis started.
Had one dread moment when the welder decided it wasn't going to play ball. The welds were just building up on the surface and not even heating the rails. Started thinking I'd made a massive mistake, wasted lots of money, wasted time, would I be able to sell it? The problem is that i have 2.5mm SHS, thick black coated stuff. Did a manic search on here for a few threads I remember seeing back in the mists of time and found the solution: Thicker wire! New problem: don't have the right bits to swap it over. Dad drove to the local car parts shop at 4.45 and got some 0.8mm wire and the right nozzle. New problem #2: Nozzle is too big for the welder! Solution: electric drill and a file, cut a new thread and offer it up. Success!! Now welds brilliantly. I just need to get my welding technique sorted and I'll be fine... After all that palaver I only managed to get the front frame welded and wasn't able to set the table up. Jobs for tomorrow: Get the table up, set the pieces out, tranport all my junk up to Uni, then start welding! Oh yeah, and get some pictures uploaded. No problem ;) |
Lots of progress, so much so that I haven't been able to get on here!
Managed to get about half way through constructing the chassis before time caught up with me. Had to fully weld as much of the frame as I could so that it could be lifted and stored away whilst I'm back at Uni. While I'm here I'm gonna try and find some time to stick a load of photos up, might brighten this build thread up! |
With respect to the engine, I got the engine mounts fabb'd up and inlet manifold modified to reduce the height by about 40mm (hopefully it will fit under the new bonnet from Saturn but I've not bought the bonnet yet so can't check) there's a thread on here somewhere with some pics of the mod, other have completely replaced the inlet manifold with a custom design (see Enoch's he did a good job on this)
Rapid;) |
I've seen a few different variations of inlet mods, does the sump still need chopping if the manifold is shortened and the large bonnet is used?
|
I've not shortened the sump on mine the bottom of the sump is currently sat 40mm from the bottom rail
|
long break
Its been a little while since my last post on here, but don't worry, I am still working at it!
Latest progress: the majority of the frame is fully welded up to the seat back area. I haven't attatched U1 and 2 yet until I can set up the suspension mounts (haven't made them yet!) I've started work on the rear suspension area now, with all the parts cut and the c shaped frames welded up. One small issue: I'm a lazy git and haven't got round to sorting out the photos yet. But I will do! Honest!! |
First photo?
[IMG]
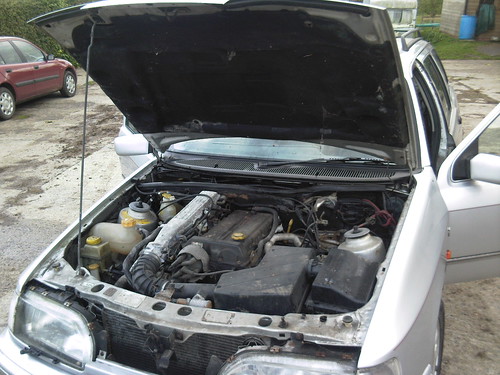 Photo-0024 by Oscarss, on Flickr[/IMG] Yes! I've finally got it figured out!! As you can probly tell, this is the donor car. Before stripping... |
What?!?! How has it been so long!!!!!
Took me several minutes to find my own build thread, how has it been so long? :eek:
In my defence I have been slightly busy trying to finish a Masters in Mechanical Engineering. Don't worry though, progress has been made! Current position: Donor is fully stripped, chopped up and storred in the hedge till we have time for a scrap run. Have made various parts at Uni whilst I still can (mushrooms, steering extensions, other parts from metal they have lying around ;) ) Chassis is coming along nicely, trany tunnel (MT75) is mostly welded with a couple of pieces fitted ready to weld. All parts for rear end are cut waiting to weld. All suspension mounts have been made, drilled, smoothed and prepped ready for welding. Now waiting for some M12 threaded bar (ordered off fleabay) to arrive so I can make up the jig. Others parts are lying around in various stages waiting for finishing or attatching. Now I just need some good weather to weld in! Wow, I might just have gotten this up to date! Deffinitely won't be leaving it so long between updates! :cool: |
Good to see you pick your build up again Oscar, good luck!
|
More work!
Was able to get to Uni to use the equipment and used the Colchester lathe (Huge piece of kit!) to finish the mushroom inserts. Also found a piece of 40mm dia steel which i machined down to 31 and 27 mm diameters for the upper wishbone ends. This is an extra mm on the desired dimentions so that I can clean it up on the smaller lathes that I'm better acquainted with! Oh yeah, still waiting on the weather to get some welding done! :mad: P.s. Pictures are on the way, just need to get round to uploading them! (might go do that now...) |
Some Photos:
The Suspension mounts before I cut the ends off. They're simply made from a piece of box with holes drilled and then each chopped off the beam.  The Chassis from a while ago, now has most of the tranny tunnel in place. 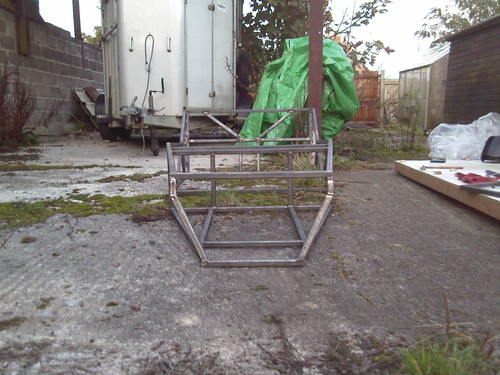 The Donor car, mid-way through the final stage of dismantling:  I quite like the look of this! I quite like the look of this!Just realised how behind I am on photo taking, will remedy the problem tomorow! ;) |
End of the Donor:
The shell has finally been fully decomisioned and "stored" for later removal:
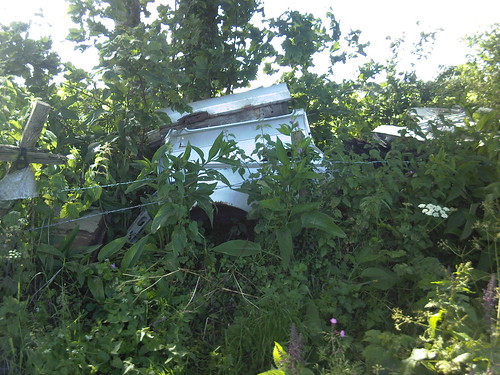 Should be safe here untill we have time to deal with it :D Also, as promised, I've updated my supply of chassis records: 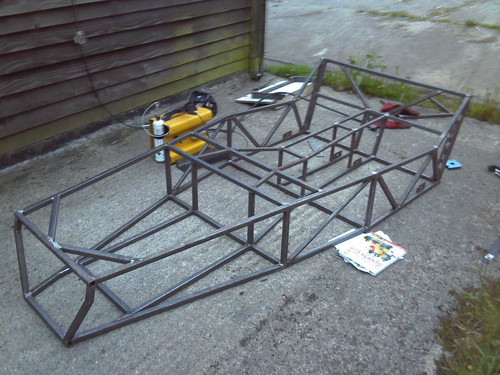  As you can see I've now got most of the tranny tunnel in place with the exception of one lower rail, this has been left off for now so that I can trial fit my gearbox; a 4wd mt75. This will be put in before painting happens! |
Mushrooms
Last Item to bring me up to date: The Mushrooms!
These have taken me many hours to make, but I can now add another item to the list of pats that I've made meself:  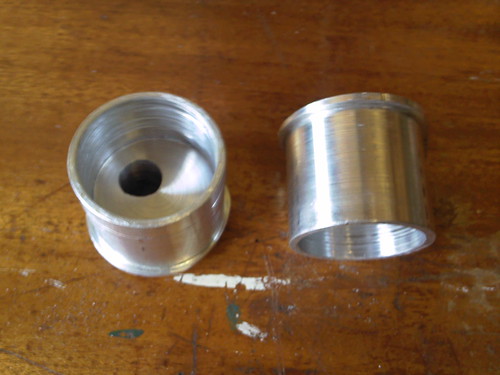 They're a bit rough around the top, but I will be smoothing them off some more as soon as I have time, honest! Wow! This brings me up to date!!! :eek: Wait, no, one other thing; I'm now allowed to use one of the old calf sheds as my build area on the proviso that I do it up. This means I'm no longer dependant on the weather to get any welding done! |
Rs3/4
If anyone says the internet is just for porn (I'm a student!:D ) then they're lying! Was having major problems working out the position of RS15 on plates CP3/4 so used the old search function.
Success! Found a 2 page long discussion between HandyAndy and NickHardy on just this problem!! Without this forum I would probably have made a terrible c*ck up. Did find find one error, drilled two of the holes on one of the plates on a random line about 10mm too close to the other pair :eek: Fortunately there was room to drill them in their proper place, now just have to weld up the mistakes and clean it up :rolleyes: |
Quote:
Glad the previous discussion helped out, & good to hear the forum search function worked ok for you :cool: cheers andy |
Wow, was starting to think noone was watching this thread!
That conversation layed it out clearly in so many ways it made it almost impossible to get it wrong. If anyone else ever reads this thread and needs the info the link is here: http://www.haynes.co.uk/forums/showt...?t=7982&page=2 and carries on for about 3 pages! Back to build: Now have a semi-clean indoorsy area to continue the build and have made much progress: Front suspension mounts fully lined up and welded CP3/4 cut and marked up Various other small parts cut ready for welding All welds cleaned and ground smooth where needed Also, got some M8 nuts and bolts in the post today for the underside of CP3/4. Went for some dome-heads in the hopes they wont need covering, should look snazzy :cool: One other thing: why no critisisms? There's no point writing all these essays if noone tells what I need to improve. Start finding faults!!!!! :mad: |
Wow this weather is miserable. Fortunately, I can still weld!!! :D
Having an enclosed area makes such a huge difference that I've prob'ly done more work in the last couple weeks that in the previous seven months!!! Put D's 1 and 2 in today, hadn't done these before cos I'd left the uprights till I did the front brackets. Also welded up all the parts on CP3/4. Will take some photos and you lot can tell me if I've got them right. If anyone ever comments that is!!! |
Sounds like your about to overtake me I better get my wriggle on
|
Definately! Hoping to get the rear box made in the next few days... It's always good to have goals, even if they are unrealistic.... :o
|
Quick question, (even if there isn't anyone reading this!) what size bolts are needed for attatching the steering wheel brackets to the support frame on the chassis?
The book says to use 13mm holes, but not sure if this is to give clearance for 12mm bolts or if 13mm bolts are intended for fastening? |
Both M10 and M12 will do with suitable washers.
|
Excellent, thanks Alga. That means I can use the 1/2" (12.7mm) bit to drill the holes in the support plates instead of spending out on a 13mm bit. Will get these finished tomorow and hopefully have the SW's and plates welded!
Here's a pic of a few bits I made the other day (useless at remembering the names of parts and the book is out in the shed still!): 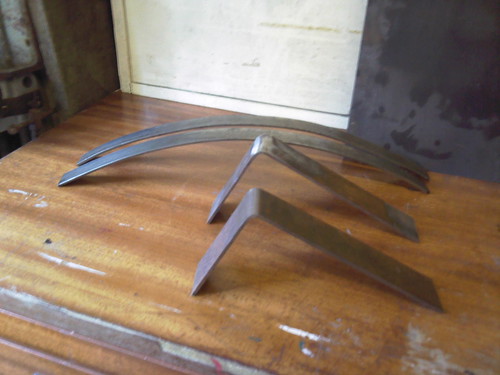 Amazing what you can do with a vice, a large hammer and a bit of brute force :D Will those be sharp enough for the right angles? They should be far enough away from any crucial holes/welds but I always like to check. |
Hi Oscar,
Can't see anything wrong with them.:) Sorry to be ignorant but what are the dome bolts for? (don't have the book at home)... The reason I ask is with a dome nut you can't tell if the bolt is the thread far enough. In theory it could only be in the nut by one thread so is this how Mr IVA man will look at it.:eek: Also with it being a dome nut you will have to fit a spring or shake proof washer of some type the other side... With reference to post #23 perhaps the reason nobody has critisiced your work is because there is nothing wrong with it...;) Trust me if there was something wrong it would have been pointed out by now...These guy's miss nothing:D So don't be so hard on yourself, your doing a top notch build. Just keep posting the photos...... Johno |
Hadn't considered IVA man Johno. The Dome headed bolts have normal nuts, they're for atatching the roll-bar to Cp3/4. Hoping the rounded edges will get arung the projections/radius issues without needing plastic caps.
Here's a pic:  Its around 30mm long and threaded along the entire length. Will this keep Mr IVA happy? Do they need to be grade 8.8 on the roll bar or will standard be OK? |
Anyhoo, on with todays proress:
Had the day off to visit dentist this morning (and yesterday off giving blood!) so made up most of the remaining chassis plates:  All done today! Holes in Cp6 aren't as large as stated in the plans (done with an angry grinder) but should still be plenty big enough for a socket to pass through. Spent Sunday pressure washing the new build area, so now properly moved from this:  To this: [ 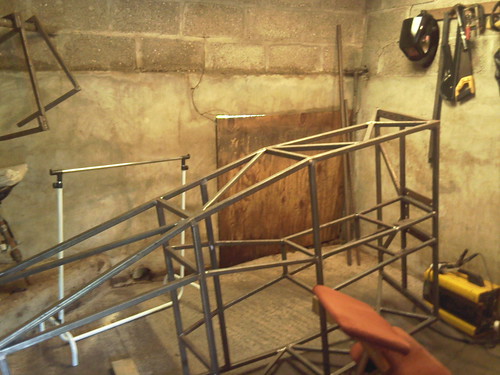 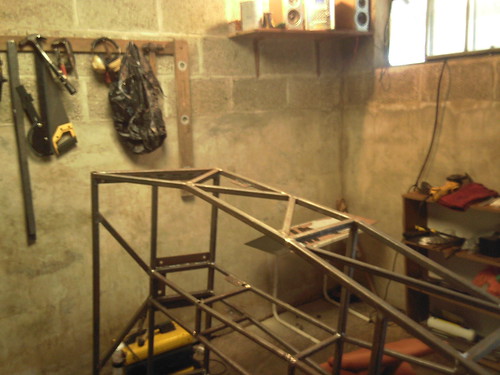 With the old shed still being used for some starage and drilling etc. |
4 picture rule!
One mistake made today: 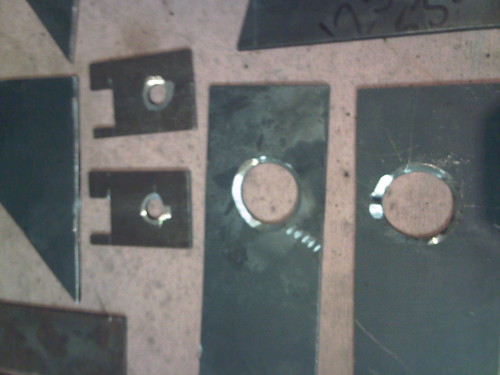 Cp9: made two the same instead of one mirrored, will have to make another when I get the chance! Also: Thanks for the kind remarks guys, (them as've said anything ;) ) always apreciated. And: Keep forgetting to say, as long as the admin's don't change anything, I now have a Master's in Mechanical Engineering with merit. So if I c*ck up I know how to blame it on someone else :cool: |
Hi Oscar :)
I,m following your build & enjoy seeing your progress, & as Johno has said...its looking great so don,t worry about lack of responses, keep cracking with the nice work you are doing;) If in doubt on anything then ask away, the members on here are great & always help with constructive advice when requested or if something is seen that "might" not be right etc :cool: With regard the bolts holding the roll bar.... I think its common practice from other builds going thru the IVA process that it appears most ( if not all ) testers like to see the 8.8 stamp on something so safety critical, said politely...your choice but for the sake of "peace of mind" I,ve used 16 bolts of 8.8 grade to secure my roll bar / back stays . One question ....before you get too far into the build....are you intending fitting a GRP or ALI rear tub ? ( from the parts/plates that you have made yesterday) I presume you intend to fit an Ali tub? Keep up the great work :) AND...A huge CONGRATULATIONS on your Masters Degree, nice one . cheers andy |
Cheers Andy, any advice (or congrats!) gratefully recieved!
Plan is to go for the Ali rear, no idea if theres a cost advantage, I just like the idea of trying to make as many of the parts myself as possible. One thing I will be buying at some point (not saying who from yet :p ) will bea set of rear uprights. Dont like the idea of trying to cut/weld/align something that bulky and critical. Re bolts: might go for 8.8 bolts for Iva then, maybe see if I can get some 8.8 dome heads? (trying to avoid plastic caps somewhere so prominent!) One thing I wanted to ask; I noticed on another build (looked back and can't find who's) a different lower support for the steering column: bearing out on bars instead of supported by the bulkhead plate. Was this for a specific reason or simply an individuals adaptation? Edit: Also, what size should the slots in CP15 be for the handbrake cable? Want to get them cut before I weld on the rear end. |
Cool build thred
Hi oscar
Just caught up with your build thread. Looks as if you have made a great start on your build. :) With reference to the steering support bearing fitted to the bulkhead. I think you will find details of that in AshG's build albums. ( Should find a link to that via his profile ) The slots in the CP plate that you mention only need to be wide enough to feed the bare section of the hanbrake cable through. ( It makes life a lot easier & no need to cut the cable in that area ) At a guess a 3-5mm wide slot should be plenty, if in doubt, measure the thickness of the bare section of a handbrake cable & use that as a guide. One thing I would note. I noticed that you may have made your steering rack support out of cold bent strip steel ? Just be aware that strip steel can vary in quality. I have seen this stuff fracture when cold bent . Being as it is a critical part of the build, personaly I would have a close look at the bends for stress fractures. Probably me just fussing about nothing though :) |
Cheers for the info Bonzo, will try and get that cut tonight allong with some other cleaning jobs.
The steel strip should be fairly decent, I managed to "Acquire" it from my uni! Didn't notice any fractures whilst bending and the curves are quite large, but you're right it was cold bent. I"ll add a close inspection to my list for this eve :o Re. the bearing, the one I noticed was on some supports welded on the drivers side of the top rail. Not in the bulkhead. Had a look on AshG's posts and couldn't find a build thread. And his photo account showed the standard setup on the photos I saw. Any ideas? :confused: |
Found the bearing setup! It's Tateys build:
http://www.haynes.co.uk/forums/showt...t=2736&page=14 No completely clear picture but definitely a different arrangement. Not too dificult to copy, just wondering if there are advantages/disadvantages? Also, had a look at the bent strip, no obvious signs of stress fatigue; slight evidence of poissons deformation and stress distortion but no signs of crack propogation or other surface defects that would be detrimental to the structural rigidity of the part. :D I feel the need to speak in big words now I have a fancy piece of paper :D :D Translation: can't see any damage. Is it worth applying some heat to initiate grain normalisation, or just assume it'll be strong (not much stress aplied during use anyway)? Question Time (again): Would there be any problem with welding ends on the chassis tubes that're open? Have others been doing this? Ordered my seatbelt mount nuts (for cp18?) off fleabay, nylocs arrived, welded on anyway. Nyloc melted. Would use threadlock on bolts. Problem with IVA? |
Hi Oscar,
You're really getting into the swing of things now.....:) Capping the end of chassis tubes is fine (stops the ingress of water). I TIG welded end caps to all my open chassis tubes which were open to the elements. By what you are saying you have welded nylocs to the seat/harness plates. To be honest that's not a good idea. IMO..:( The reason being, 1, You don't need a nyloc nut as harness/seat belt bolts have a shoulder on the bolt to stop the bolt being tightened onto the harness/seat belt bracket. This way it allows the bracket to swivel on the bolt. 2, It doesn't look good to Mr IVA man (big gap where the nylon used to be if you get my drift)... A standard nut welded to a plate will be fine for this. Just take a photo of the bolt with applied "Thread lock" for the "Men In White Coats" just to keep them happy....:D The same applies throughout the build, for instance if you have to grind a weld off on a critical area ie.. harness point plates to transmission tunnel box section (for flush fitting of ally panels) make sure you have prepped the edge of the plate for the weld to be ground off this will show them you know what you are doing so to speak. Johno |
Right, progress of a sort.
Have sorted out the nyloc problem, chopped out the empty part where the nylon used to be leaving standard size nuts behind. Having some problems positioning the SW's (see other thread) and have now tacked Cp16 in place. Havn't added the angled section yet as I'm not sure which route to go yet regarding bearing/support in that area. |
| All times are GMT +1. The time now is 04:26 PM. |
Powered by vBulletin® Version 3.6.4
Copyright ©2000 - 2024, Jelsoft Enterprises Ltd.