Haynes Forums

Haynes Forums (http://www.haynes.co.uk/forums/index.php)
-   General discussion (http://www.haynes.co.uk/forums/forumdisplay.php?f=10)
-   -   Dave's Build (Attempt) (http://www.haynes.co.uk/forums/showthread.php?t=13882)

Dave F 21st May 2016 08:37 AM

Dave's Build (Attempt)
 
So
I have properly started now, the story so far, which is discussed in other threads,
  1. I got myself a part stripped donor with all the parts I needed, I then set about stripping it down, got our local travellers to come and take away the shell and sub frames so that was that.
  2. I built myself the build table, mainly to store all the donor parts under.
  3. I set about 'tinkering' while I waited for my flat pack. My half shafts where seized solid in the hubs and no matter what I did I couldn’t get them out. I decided to pop out the shafts, leaving the CV's in the hub and then used a really big hammer, that worked, just, then £40 on 2 new CV's and inner boots, a couple of coats of hammerite smooth and that’s them done. I also gave the uprights a coat of hammerite smooth, after a couple of hours with a wire brush obviously.
  4. Then ........................................ My flat pack came. Checked the parts after a couple of days and a few parts where missing but contacted Phil and he’s sending the missing parts over in the coming days.
  5. I had enough of the flat pack to start tacking it together and that is what I did last night.
  6. still have the bottom of the transmission tunnel to tack in by which time hopefully the rest of the flat pack arrives, the "U's" are some of the missing parts so can’t go much further till they arrive.
  7. I have sent all (I hope) plates that I need to the laser cutter including pedal box, wing stays, wishbone and shock brackets, roll bar plates, I think that’s it, they are ready and I will collect them next week so I will have plenty to get on with.

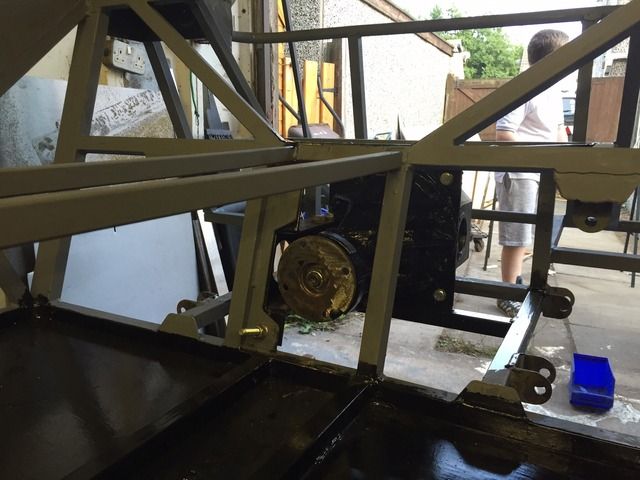
That’s the current stage of my build, will try to update regularly but there may be times where I don’t do much for a while. Also will not write so much next time as I know I prefer pictures to text so here they are.


Dave F 21st May 2016 08:47 AM

and more:


RichardH 21st May 2016 09:13 AM

looking good, the way your chassis sits now its worth getting some block of wood across each of the chassis rails and screwing down to the table , it will stop any twisting when welding, obviously at this point you are only tacking but it will still distort, i clamped as much as i could until the whole chassis was together and its straight as a die , ive read some horors of twisting as much as 10mm out

Dave F 21st May 2016 09:18 AM

Quote:

Originally Posted by RichardH (Post 103680)
looking good, the way your chassis sits now its worth getting some block of wood across each of the chassis rails and screwing down to the table , it will stop any twisting when welding, obviously at this point you are only tacking but it will still distort, i clamped as much as i could until the whole chassis was together and its straight as a die , ive read some horors of twisting as much as 10mm out

Was thinking about screwing it to the table and was wondering the best way to do it. I will get some lenghts of timber and pin it to the table.

rpjg1975 21st May 2016 10:13 AM

I always think it's strange how small it looks from the bottom rails then as you progress it takes shape really quickly!! Don't forget to go side to side and front to back when welding to eliminate heat build up

Russ

Dave F 21st May 2016 10:16 AM

Quote:

Originally Posted by rpjg1975 (Post 103682)
I always think it's strange how small it looks from the bottom rails then as you progress it takes shape really quickly.

It does look small, I was thinking will I fit as I'm 6'2" but there are loads of people my hight and taller who fit just fine so I decided I was worring over nothing and I cracked another beer.

Quote:

Originally Posted by rpjg1975 (Post 103682)
Don't forget to go side to side and front to back when welding to eliminate heat build up

I assume this is when fully welding and not just tacking? If so that's what I was planning to do so was going to research the best way when it's all tacked

TheArf 21st May 2016 10:36 AM

Do you still have your hard top from the MX5 if so how much would you want for it I may know someone looking for one

Arfon

Dave F 21st May 2016 10:49 AM

Quote:

Originally Posted by TheArf (Post 103684)
Do you still have your hard top from the MX5 if so how much would you want for it I may know someone looking for one

Arfon

Unfortunately I don't, the guy I bought the donor off took that and a few other panels, It cost £150 so can't complain.

TheArf 21st May 2016 11:31 AM

That's a pity

Arfon

RichardH 21st May 2016 12:15 PM

im over six foot as well, two things to watch for mount the seat so it can go as far back as possible and have the seat in before welding the steering column in, i built to the book and couldnt get my knees under the wheel. i fitted the scuttle and seat them moved the column about till it was comfy height wise

Dave F 21st May 2016 12:18 PM

Quote:

Originally Posted by RichardH (Post 103687)
im over six foot as well, two things to watch for mount the seat so it can go as far back as possible and have the seat in before welding the steering column in, i built to the book and couldnt get my knees under the wheel. i fitted the scuttle and seat them moved the column about till it was comfy height wise

I was thinking about the column. Will need to buy some seats sooner rather than later then, not sure which way to go with seats yet, ideally want some buckets but getting narrow ones are not easy and certainly not cheap.

RichardH 21st May 2016 01:20 PM

i went with the fibreglass kit car ones on ebay, westfield ones come up second hand sometimes.

Dave F 21st May 2016 01:24 PM

Quote:

Originally Posted by RichardH (Post 103689)
i went with the fibreglass kit car ones on ebay, westfield ones come up second hand sometimes.

I do like the look of the GRP ones, still £200 for them though.

TheArf 21st May 2016 02:01 PM

Have you looked at the seats that Robin Hood do, i think their parts section is called something like direct parts not sure on the name though:rolleyes:

garyt 21st May 2016 02:12 PM

that's good progress, if looking for seats you can get a free trial membership on the westfield forum as seats come up on there fairly often or stick a wanted ad on it

garyt 21st May 2016 02:15 PM

and just to prove it these were put on at lunchtime :)
http://forum.wscc.co.uk/forum/index....d-vinyl-seats/

Dave F 30th May 2016 07:16 PM

Some more progress
 
So done a few hours over the weekend and made some progress, dare I say, it's starting to look like a chassis now. I'm hoping to get another couple of nights in the garage this week which will hopefully be enough to tack together most, if not all, of the chassis.
here are the pictures.


garyt 30th May 2016 07:23 PM

nice progress your making there

Dave F 30th May 2016 07:44 PM

Quote:

Originally Posted by garyt (Post 103750)
nice progress your making there

I'm making the most of the time while I can, sooner or later her who cooks and cleans will start to limit my garage time, and also when the winter comes and the garage is cold, no heating, I will no doubt have less motivation.

Dave F 5th June 2016 08:29 AM

Some more progress made over the last few days.


Now qustion for you knowledgable lot.

Can I weld the front half/all fully before moving the chassis forward to make the diff cage? as its screwd to the table to try and keep it square so dont really want to disturb it till its fully welded.

Mking 5th June 2016 08:49 AM

Great progress and heartening to see someone building in a similar sized garage to me. I'm interested in the suggestion that you screw the chassis to the build table to keep it flat and prevent distortion. That was my plan but I am sure someone warned off doing that in case it masked distortion which only then became apparent once the chassis was unscrewed. As the consensus on here seems to be that that is not the case, I'll follow your lead.

I look forward to seeing your build progress.

Dave F 5th June 2016 08:55 AM

Quote:

Originally Posted by Mking (Post 103778)
Great progress and heartening to see someone building in a similar sized garage to me. I'm interested in the suggestion that you screw the chassis to the build table to keep it flat and prevent distortion. That was my plan but I am sure someone warned off doing that in case it masked distortion which only then became apparent once the chassis was unscrewed. As the consensus on here seems to be that that is not the case, I'll follow your lead.

I look forward to seeing your build progress.

My garage is not the largest but hay, I've seen treads of people building it outside and in sheds so I'm sure I'll manage in my modest garage. I was going to leave it loose on the table but as I was tacking it the front started lifting so I went with, if it started lifting when tacking it would be a bannah when I start fully welding it. I keep checking for sag on my build table and the measurements of my chassis to try and catch any problems but like you say the true test will be once I unscrew it from the table.

garyt 5th June 2016 10:13 PM

Quote:

Originally Posted by Dave F (Post 103777)
Some more progress made over the last few days.


Now qustion for you knowledgable lot.

Can I weld the front half/all fully before moving the chassis forward to make the diff cage? as its screwd to the table to try and keep it square so dont really want to disturb it till its fully welded.


don't see why not if you feel happier just keep moving back and fore, side to side to minimise / equal the forces , looking good by the way and good progress

RichardH 6th June 2016 08:38 AM

stop!
the two bars that go down from sb3 rear end of the tunnel have you fitted them per the book? you are using a talon chassis
/ diff setup yes? they are not welded per the book i will get the sizes and post them shortly

RichardH 6th June 2016 08:44 AM


Dave F 6th June 2016 09:58 AM

Quote:

Originally Posted by RichardH (Post 103784)

Thanks for that. So as far as I can see the offside is set wider, am I right, also what's the gap, yesterday I ordered the diffcover and nose bracket from talon so do I need to wait for that before I weld that in, I have the CP for the mounting.

RichardH 6th June 2016 10:26 AM

ok mark the centre line of sb3, then looking down the tunnel from the front of the car the outer edge of the box section to the right should be 89mm from the centre line. the left hand box section outer edge shoud be 137mm from centre line. the 5mm plate that the diff mount goes too gets welded to the inner edge of that box section, against the back edge of br12/sb3 big part of the flange to the top

Dave F 6th June 2016 12:20 PM

Quote:

Originally Posted by RichardH (Post 103786)
ok mark the centre line of sb3, then looking down the tunnel from the front of the car the outer edge of the box section to the right should be 89mm from the centre line. the left hand box section outer edge shoud be 137mm from centre line. the 5mm plate that the diff mount goes too gets welded to the inner edge of that box section, against the back edge of br12/sb3 big part of the flange to the top

Thanks for that its only tacked in at the moment so not a big issue.

Dave F 22nd January 2017 10:12 AM

So.
I have worked out that I am seriously crap at updating you ll on my build but I have been cracking on in the last 7 months. I did lose a few photos in a phone fail but i still have a few to share.

[IMG][/IMG]

[IMG][/IMG]

[IMG][/IMG]

Dave F 22nd January 2017 10:14 AM

[IMG][/IMG]


[IMG][/IMG]


[IMG][/IMG]

Dave F 22nd January 2017 10:16 AM

[IMG][/IMG]


Dave F 22nd January 2017 10:19 AM

And Last night this is what I achieved.

[IMG][/IMG]


I could have spent the 3 hours more productively but I wanted it rolling and steering, which it is, My next job now just has to be the fuel system so I can then plug in the loom and fire her up.

garyt 22nd January 2017 10:37 AM

Yes you have been busy and she is looking good and don't forget a video of the first start up its a real landmark moment so enjoy it :) keep the progress AND updates coming lol

garyout 22nd January 2017 03:42 PM

Looking good Dave


What body work are you using? I am just playing with hand brake cable routing at the moment but really want to mount column but waiting for body work, how have you run your column over top of pedal box area?

cracking work mate

Gary

Dave F 22nd January 2017 04:10 PM

Quote:

Originally Posted by garyout (Post 104988)
Looking good Dave


What body work are you using? I am just playing with hand brake cable routing at the moment but really want to mount column but waiting for body work, how have you run your column over top of pedal box area?

cracking work mate

Gary

I am using vMax bodywork, I have been collecting seconds as and when he has them, only need the rear tub now.
As for the column I have just been out and taken some photos, may not be the best way but seems to work for me as I can get in out without issue and the scuttle and bonnet fit like a glove, obviously had to trim the inside lip in places.

[IMG][/IMG]

[IMG][/IMG]

[IMG][/IMG]

garyout 22nd January 2017 04:17 PM

Hi Dave

I'm using vmax body work too. That's roughly the same as I was going to do with the steering I really don't know if just to wait until I get body work and then do steering so I'm 100% happy with it, how much does your sump hang under lower rails to clear bonnet

Sorry for so many questions :)

Gary

Dave F 22nd January 2017 04:29 PM

Quote:

Originally Posted by garyout (Post 104990)
Hi Dave

I'm using vmax body work too. That's roughly the same as I was going to do with the steering I really don't know if just to wait until I get body work and then do steering so I'm 100% happy with it, how much does your sump hang under lower rails to clear bonnet

Sorry for so many questions :)

Gary

I decided I wanted to get the steering comfortable in relation to my seating position, so apart from ensuring it fit under the scuttle I did't over think it, and besides there is nothing else that would really interfere with the bodywork, the only thing that would be different is the firewall and bulkhead which I will make out of Aluminium anyway. I'll answer any questions I can so don't worry about that, and if I can't or if I'm wrong there are many others that can answer and correct me.

Dave F 22nd January 2017 04:31 PM

When I say firewall and bulkhead I mean the back end of the scuttle that faces the engine bay and the alloy sheet that covers the top of the foot wells

garyout 22nd January 2017 04:43 PM

Cheers Dave

I think driving position is different for so many people soI think I will wait for body work sounds like vmax is on the mend anyways so hopefully it wont be to long now.

If you could measure how low your sump hangs I might be able to get engine and box mounted next weekend or at least make a start time dependant.

Cheers mate Gary

Dave F 22nd January 2017 04:46 PM

Quote:

Originally Posted by garyout (Post 104993)
Cheers Dave

I think driving position is different for so many people soI think I will wait for body work sounds like vmax is on the mend anyways so hopefully it wont be to long now.

If you could measure how low your sump hangs I might be able to get engine and box mounted next weekend or at least make a start time dependant.

Cheers mate Gary

No worrys, I'll measure the sump drop, I think it's around 40mm, I have also offset my engine to the passenger side to help clear the inlet manifold and give the clutch fork alittle more space.


All times are GMT +1. The time now is 02:36 PM.

Powered by vBulletin® Version 3.6.4
Copyright ©2000 - 2024, Jelsoft Enterprises Ltd.