DaveStruve Build Log
Completed Car:
 Build Log: Kind of getting a late start to this build thread, so I'm going to back date it a bit to show whats been done. Project Outline: Start Date: May 7, 2013 Build Plan: Haynes Roadster with Saturn Modifications Donor: Mazda MX5/Miata (on this side of the pond) 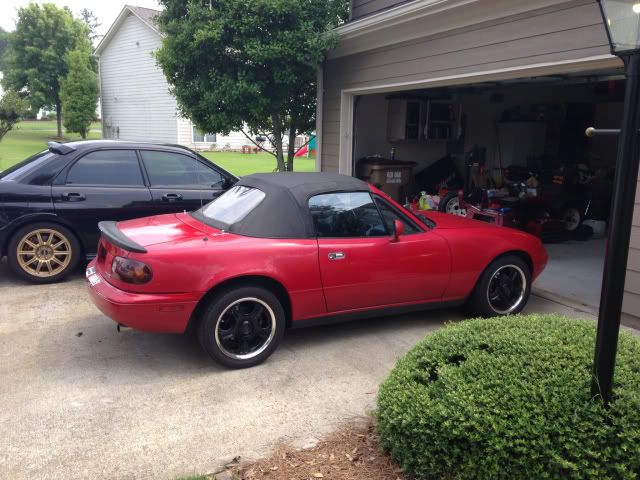 Slideshow: http://s125.photobucket.com/user/xcr...show/Lotus%207 Engine: Cleaned up, painted and supercharged 1.6 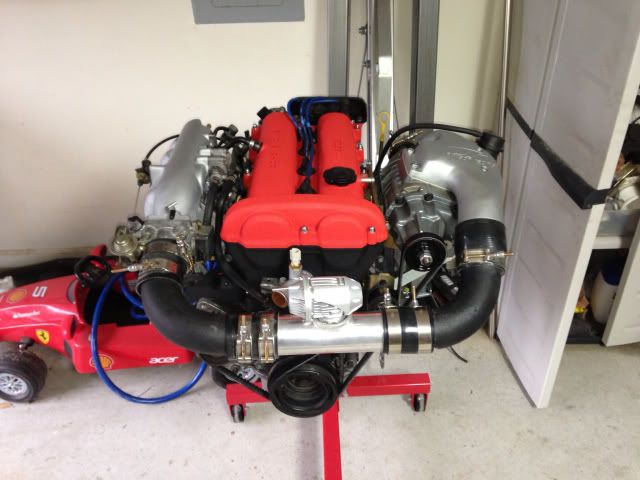 Seats: Lotus Exige 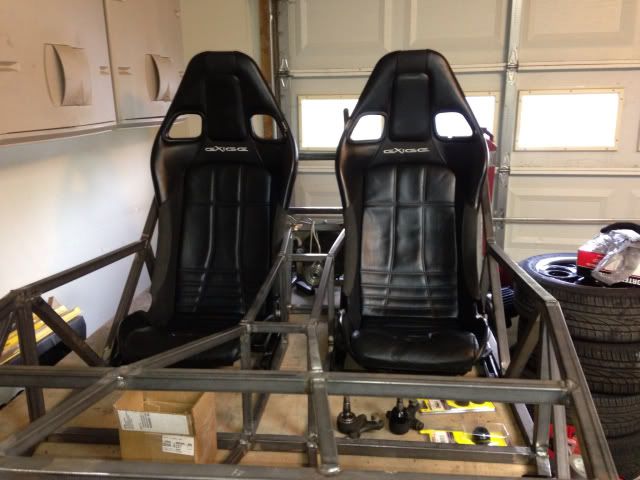 Rear End: Torsen Limited Slip Diff |
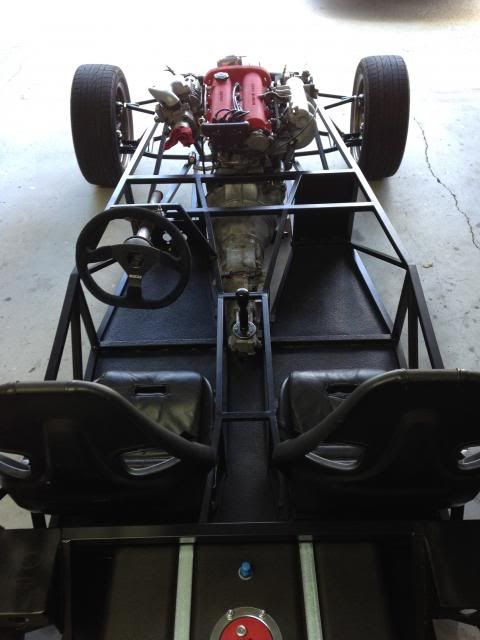
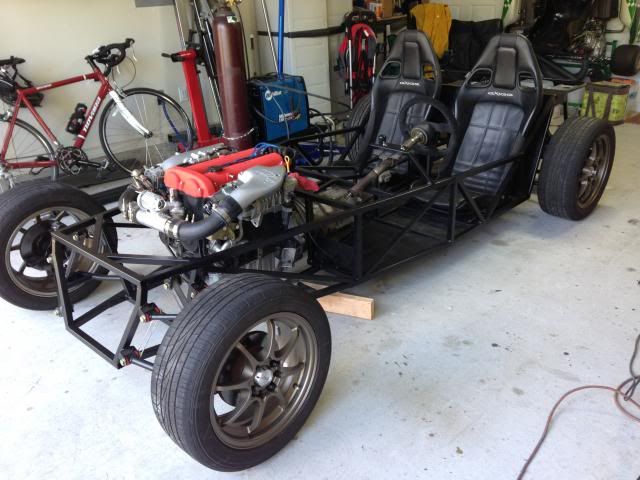
Ok and now on to where we are at today. As of yesterday I had a rolling chassis. Ride height is a inch to high at 6.5"/165mm. I'm debating whether I should lower it.
    |
lookin swell there Dave and love the rims....engine looks mint
|
that's going to be an interesting fitting job on that power plant..
Welcome TT |
Quote:
|
Quality stuff so far mate, love the seats and the engine :)
|
Looks very nice indeed
Was about to say about the steering column being on the wrong side but its been said to death and its only the japanese and australians that listen All seriousness very good work in such a short space of time look forward to seeing your progress |
The ride height will change when you swap those box section shocks for some thing with a little more give to them. The lower wishbone bolts and the ball joint bolt should be more or less horizontal to each other the bend in the lower wishbones is to clear the rack arms.
|
Quote:
|
Looks absolutely stunning there matey..:cool: :cool:
Very envious of your engine setup but the only problem I can see is it's not mine....;) Cracking build throughout so far, so please keep the photos coming. |
Loving the build so far, so who is going to run a book on how long it will take for the arse end to be going around the corner before the front on completion.
Arfon |
I wouldn't worry about the ride height too much at the moment, as soon as you get the engine, diff, gearbox, brakes & wiring e.t.c, it will lower the car anyway. I love the paint job on the chassis, you should be well chuffed !
|
Thanks for the kind words. The main reason im concerned about ride height is that i need to have the steering rack cut down. So i want to make sure that i am removing the correct amount based on ride height/steering rack position.
The chassis is painted with VHT satin black chassis and roll bar paint. Very nice stuff, very durable and the finish is beautiful. The floor and the entire undercarrage is painted with herculiner truck bed liner. Which give it a grippy ultra durable rubber finish. |
hey dave, looking like a good build those mx5 engines are good fun with a supercharger on them. what ecu are you going to run it with? diy autotune are in suwannee and do full megasquirt kits, matt and the guys there are really helpful. I'm over in atlanta for work fairly often there are some good roads to have fun on when you get away from the city. Do you know what to do to get the car registered in GA? my roadster has been on the road for nearly 4 years in the uk i was considering moving to GA last year and was wondering if i would be able to import my car and get it registered.
|
The supercharger kit came with a megasquirt, and yeah the diyautotune guys are walking distance from my home. So im hoping to get there assistance when time comes to tune this. As for registration, im honestly not completly sure yet. As it stands you'd have to get it inspected again to register it and depending on where you end up in georgia you may need emissions testing done. Upside is testing doesnt sound anywhere near as stringent as the uk. My problem now is that the laws can change between now and when i finish, im just hoping they change for the better. There has been some push to adopt SEMA's laws for registering custom car, which would simplify the process alot.
Here's the info i got from the guys that build the exocet kit car here. Quote:
|
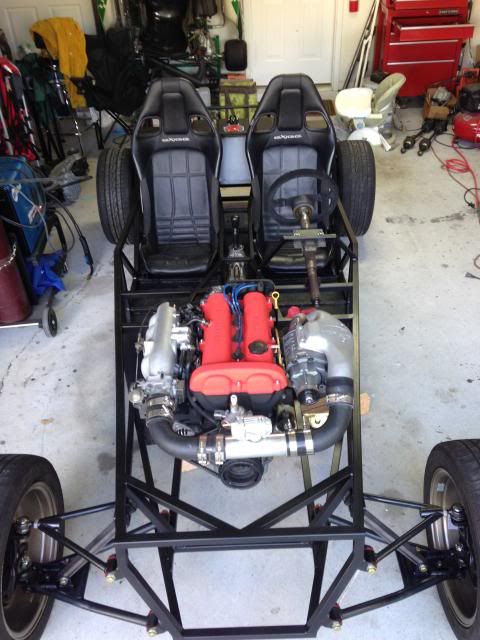
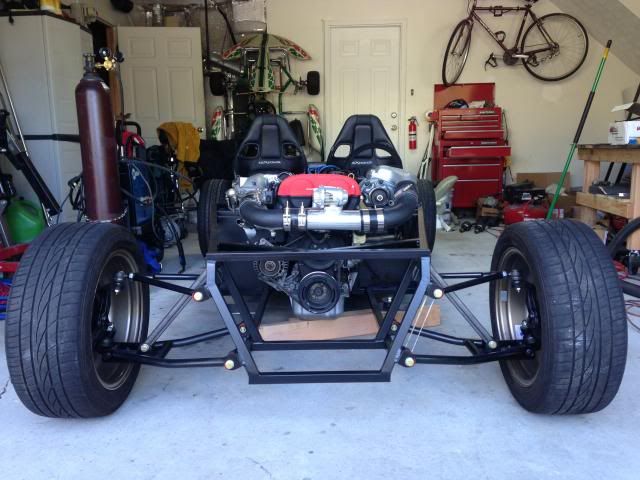
So I readjusted the ride height this past week and got the motor in place. This weeks goal is to get the motor mounts made and get the steering rack shortened. As you can see below, I'm going to more than likely have to make a custom hood to clear the supercharger.
    |
You'll need booster seats (and brown trousers ):D :D :D
|
Incontinence pads more like
Arfon p.s. is adrenaline brown and smelly |
September 27 Update:
Fairly Productive 2 weeks: •*Fabricated engine and transmission mounts • Finished Painting Chassis - used truck bed liner that I used on the floors to coat the entire undercarriage in a nice thick rubberized coating. This should help with vibration noise, and give me a nice durable rust proof finish. I figure this is more or less what they use on regular cars, so it should work well here too. • Reassembled chassis • Received delivery from kitcardirect.co.uk Neil is a top notch guy, I originally contacted him wanting to order carbon fiber caterham csr fenders, CF naca ducts, and CF winglets. I mentioned that I was having trouble sourcing haynes body work from the UK fiberglass companies, and he was nice enough to order them from equinox for me and ship them my way. I ordered a nose to begin with to verify it wouldn't get destroyed in the process. And am now ordering the the scuttle and rear wings. Not the cheapest or easiest way of doing this, but really no more expensive than ordering from the only company here in the states. This way I get exactly what I want. • Trimmed nose for openings and suspension bolts. Next will be trimming for duct work. • Good News clearance of supercharger is better than expected and may only require minor hood modifications to fit.     |
   |
hey dave i am flying out to ga friday did you want me to bring you a copy of my magazine articles?
 |
Yeah if you've got the time and be around Atlanta, your welcome to come on by. Shoot me a PM on what your schedule looks like and we can set something up.
|
Good progress this week.
Got the drive shaft shortened, balanced, installed. Started and finished the fuel system. Used a walbro 255 fuel pump, made a bunch of AN lines and fittings and adapters to connect it all together. Ran a pair of 3/8" aluminum racing hard lines to the front and connected them via some fuel injection line. My only concern at this point is the fuel filter, I'm currently using a small russell filter. I'll probably use another in front of the pump to filter the initial garbage from the fuel cell. But that can be dealt with later, as I'm tired of spending money on AN fittings, That stuff really added up quickly, but I'm very happy with how professional looking it all turned out.     |
Cracking progress really tidy looking build
Arfon |
I'm over in Atlanta for work so went to see Dave today, what a nice guy. Had a good long chat about building cars and the differences between the UK and US he then drove me to his favourite burger bar where he insisted on buying me lunch. This forum really has no boundaries, im thousads of miles from home and stunned by the hospitality and friendlyness of fellow builders.
Oh and the most important bit! His build is absolutly stunning. The attention to detail is fantastic, even better than the pictures hes put on the forum. His car is going to be very special when its finished, the bar has officially been raised! time to step it up a notch guys! |
Week of October 11 Update
This week I finished assembling the pedal box with the appropriate fittings, and hydraulic brake light switch. I ran the hard lines for the front brakes and fabricated the bracket and clevis to allow me to connect the mx5 throttle cable to the wilwood pedal box. When all said and done I'm very happy with how it turned out. It was a little tricky figuring out how the throttle cable needed to be routed in order to work with the wilwood throttle bracket (there are not many examples online of one of these pedal boxes installed and certainly nothing specific to the mx5). In the end I came from above, so that when the pedal is pressed its pulling the cable towards the floor. Finally I placed a few orders for bodywork and brakes. On the bodywork side, I 've got my scuttle and rear fenders from equinox via kitcardirect.co.uk. I've also got a 7 style front grill and a westfield carbon fiber dash that should be shipping out soon. I stumbled upon a company in the states here that sells a set of carbon fiber sport bike mirrors for $80US. Quality is pretty good, although I'm going to 3d print out a set of trim rings to obscure the poor cut of the mirror itself. I'll post some before and after shots when I get that done. On the braking side my original plan was to get a set of wilwood 4 piston calipers for the front and stick with the mx5 calipers in the rear. Well after needing a new set of rear rotors, rear pads and a replacement caliper, I came to the conclusion that I was approaching the price territory of a 4 wheel brake kit. So with that said, I now have a package on the way containing wilwood calipers for front and rear with slotted rotors, pads and just about everything else. Here's this weeks pictures, sorry about the quality, shooting black on black at night isnt the best way to reveal whats going on.     |
Good work going on, whish it would spur me on a bit..
TT |
I had three of those in line pressure brake switches fail on my car before I gave up and fitted a micro switch on the pedal. Has been flawless ever since.
|
Ash, are you sure the pressure switch was plumbed into the rear brake circuit? Initially I had it on one of the front lines, and it was wonky, it would not switch off immediately after the pedal was released. But when I moved it to the rear line, all problems disappeared. The book also mentions in passing that the pressure switch should be on the rear line.
|
Quote:
Did you pick up a set of the pedals? |
I didn't have time in the end. I did look on their website and suprisingly I can buy them for almost the same price in the UK. Its actually a good thing I didn't buy them as my bags were right on the weight limit, had I gone over the limit my savings would have been wiped out by excess baggage charges :-)
What I will say is that pedal box is firmly on my winter upgrade list. |
Brakes arrived today. Flyin Miata Lil Big Brake Kit - Wilwood 4 piston front and rear, 10" slotted rotors, and the ebrake version for the rear caliper. It's nice to have something that just bolts together. Just need to get some longer steel braided line up front and bleed the system and brakes are complete.
    |
What pads did you go for? I tried the Wildwood smart pads and didn't like them I'm now using mintex 1144's and they are much better
|
The kit came with a set of wilwood polymatrix e compound pads. Dont know much about them, we'll see.
|
Ok where to begin...It's been a busy few weeks here.
To start I did my second running of the 24hrs of America Kart Race, we finished 12th overall and first in class. Did 1456 laps and roughly 960 miles.  Once I got back and rested a few day, I got back into the car and started back at it. This led to to the first few mistakes I've had as well as some good progress. Mistake 1: After installing the brake kit I needed to order a set of braided lines for the front. So after measuring and re-measuring I ordered a set of braided lines to fit the front brakes. Well wouldn't you know it, but I never thought to take the steering into account and ended up with a $90 set of lines that were 4 inches to short. Mistake 2: Assuming that I would somehow be the lucky one that made the $35 brake flaring tool actually work without leaking. Needless to say my front lines which were the first I made leaked like crazy. Thankfully the long line from the pedals to the rear was good as well as the secondary rear line. The upside was I had a set of lines cut and shaped to size, so it was just a matter of having the company that made my braided lines flare me a set of straight lines at the length I needed and then shape them myself. This was another $90, but I was able to return the junk tool as well as a number of other bits and pieces I didn't need and recouped a good chunk of that. Mistake 3: This less of a mistake and more of a slight hassle. Ordered a aluminum radiator for a 65 ford mustang. I had read that this would fit the nose cone. Well it didn't, and would need to be shortened in order to work. So while looking for someone that could shorten it, I stumbled upon someone on ebay.co.uk that was making and selling a kit car specific aluminum radiator for a reasonable price and was willing to ship to the US. So I returned the mustang radiator, and ordered the kit car one... Which fits beautifully. Cost was about $200. Mistake 4: This one hurts as the wound is still fresh. On Monday of this week I received a large shipment from kitcardirect containing my scuttle, rear fenders, westfield carbon fiber dash, a 7 grill, and front fenders. Well after mounting the scuttle I proceeded to make a template for the dash, well I made the template set it on the carbon dash and cut the hole for the steering column, not noticing till the hole was done that the template was reversed, and I had just cut a 2.5" hole for a right hand drive car. So now I'm trying to come up with a solid solution on how to hide my mistake without re-ordering one, so suggestions are welcome. So far glove box or some sort of plaque it my pick.  So with all the mistakes in the open, let talk about what has actually been completed. Brakes are now totally functional and complete with the exception of the handbrake lever. Clutch Pedal is hooked up and functioning. Steering is complete - after waiting a month for my fabricator to shorten it and re-thread, he finally got it to me and everything his hooked up. I lengthened the stock steering shaft and tie rods. Nose cone and scuttle are now affixed with dzuz fasteners. Next up is the cooling system and hand brake. Here's the pictures:   |
   |
I can't see your hole you made by mistake, is it neer the one for the passenger side warm air vent ( unfitted as yet )? ;)
TT |
Quote:
|
Quote:
|
Here's what I'm thinking for the dash.
 |
| All times are GMT +1. The time now is 03:23 AM. |
Powered by vBulletin® Version 3.6.4
Copyright ©2000 - 2024, Jelsoft Enterprises Ltd.