I was dreading doing the floor, but it was easy appart from the the adhesive being almost solid in the tube.
I made a jig out of a piece of angle iron with holes drilled at intervals. this was then moved allong the rails and used to drill the floor and chassis. worked a treat. TT |
Been spending some after work time on some bits while the chassis is up on legs still.
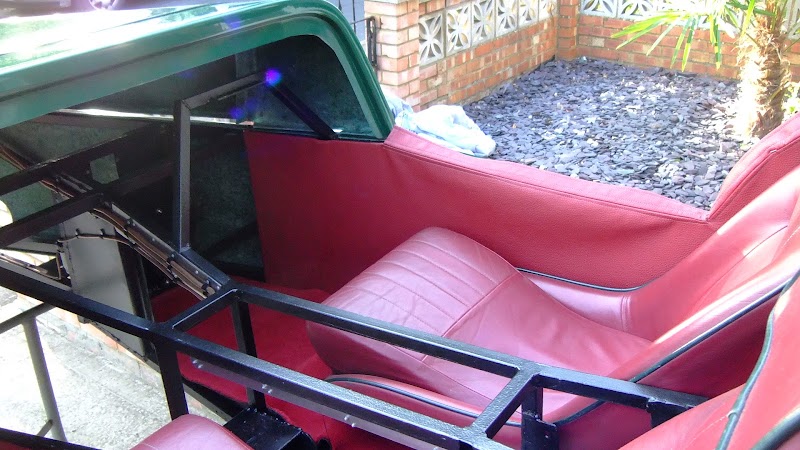
Trial fitting and trimming the bodywork and fitting in the pedal box. With the nice padded seats the pedals are in just the right place for me. :cool:   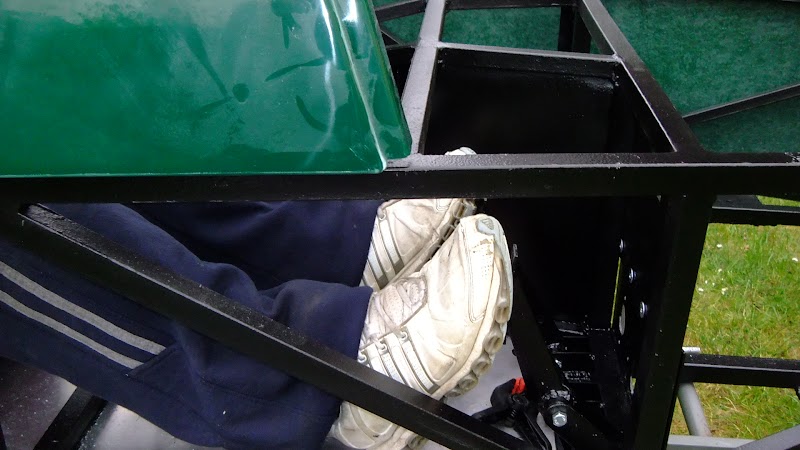 I may be putting a little too much trust in those table legs though.... Cheers Stot |
I think we should have a Monster Truck 7 Build :)
TT |
Top job stot. You and Johno have got the 2 best builds I have seen. You should be really proud !
|
Looks very good indeed!
What seats are they? They look very nice. any references? Thanks. |
Thanks guys. I must say that Johnos and many others finish will be leagues ahead of mine, mine is all smoke and mirrors. ;) I think it will be one of the quickest builds though!
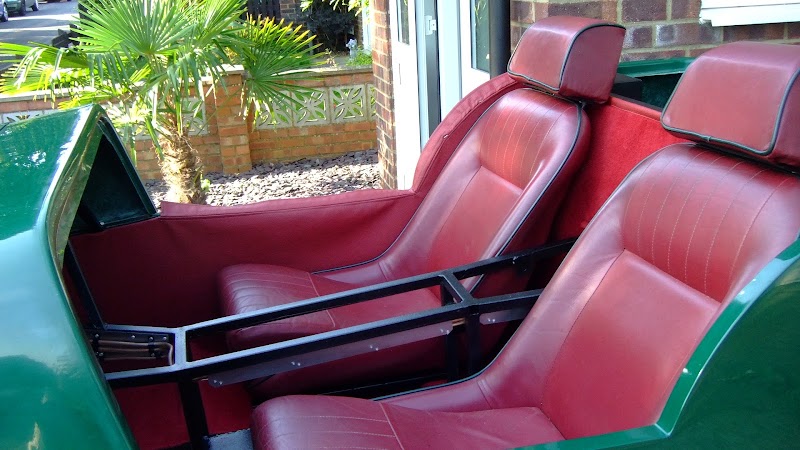
Voucht, the seats are full leather RX1110s from Interiors Seating. Not cheap to buy new but I picked the pair up second hand for £160. Mamba baby cub seats are similar but only available black vinyl. Cheers Stot |
Thank you for the links and the tips. This midland wheels website has very good prices on seats... and wheels. Might make a grouped order when it is time :)
Thanks. |
Quote:
 Cheers Stot |
Stot, are you using the book pedal box. I wasn't very happy with mine as I got over 1mm of flex at the master cylinder. Doesn't sound like much, but it is quite a bit at the actual pedal. I added an angle across the pedal box, and angles either side that hook around the chassis rail. I also added a stiffener under the floor as well. Made quite a difference and the pedal felt less spongy afterwards.
|
Quote:
Cheers Stot |
I love those seats :eek:
|
Trying to work on my rollbar between showers. Got the hoop tacked onto the mounting plates and fettled my crossmember fishmouths and harness bosses.
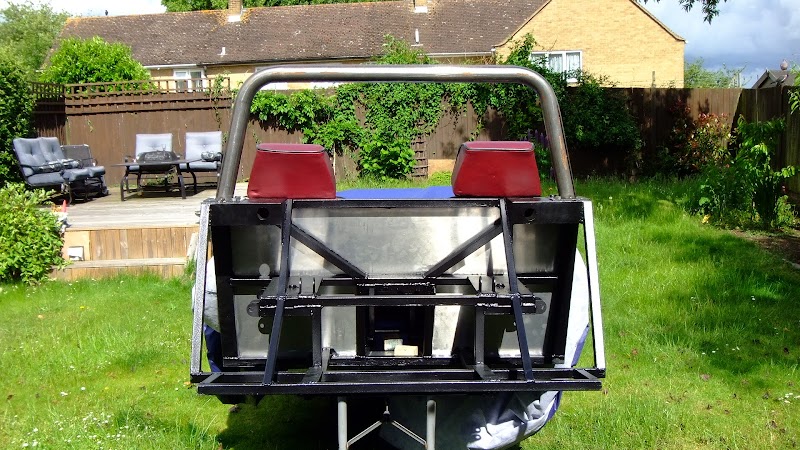   I'm so glad I have a mill! Cheers Stot |
rain shine rain shine...
I did my back struts too. Remember the plans im following...   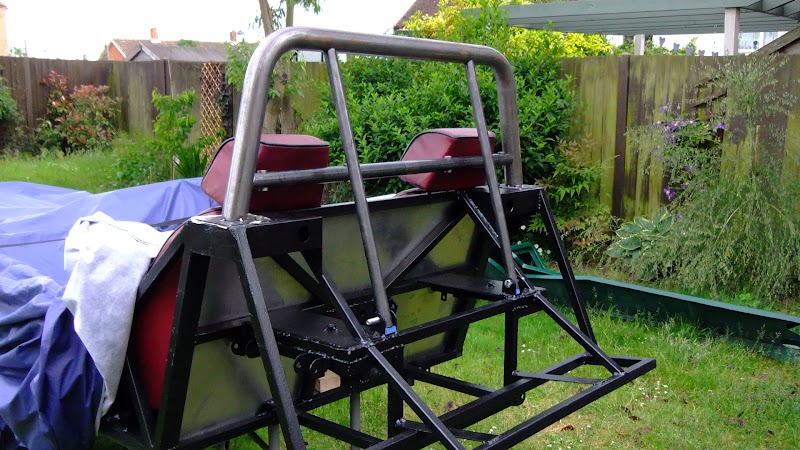  They mount into suspension brackets welded onto the back of the diff cage because I'm using a GRP tub and don't have the rear tub framework. The angle ends up being shallower than most but I figure that had I gone to the bottom rail on the outer corner like many GRP tub people have I would have longer and so more flexible struts but at a slightly deeper angle, maybe another 10 degrees or so. I think this should be just as stiff as that arrangement overall. Cheers Stot |
Ifi can give you only 1 bit of advice, listen to this.
Fully weld the cross brace, let it cool then weld the bottom plates on the roll bar. This should limit the amount of shrinkage and the pita it is to align the bolt holes!! |
That's inspired me to do my back stays. I was going to put them on the uprights but the thought of cutting a compound fisheye was putting me off. Seeing how you have done it simplifies it no end.
TT |
Looking good Stot,:)
Good idea with the roll bar support stays. I do like the tyre and wheel choice you made but I think you might have a problem regarding wheel arches available....:D Top quality work as always and you are flying through your build, (do you sleep)...:eek: Well keep the photos coming as it's a pleasure to see what new innervations you are coming up with next. |
Quote:
Cheers Stot |
Quote:
 Quote:
 And Johno, I catch up on my sleep at work..... :D Cheers Stot |
Quote:
Cheers Stot |
I think you have a little army of elves helping you out at the rate this build is coming along.:) Where did you get you bodywork from? And how much was it? Not really an option for me but I am curious.
|
Quote:
Its an Equinox bodykit, £795. I figured that once I had purchased the nose/scuttle/wings and the aluminum and then went through the process of painting it how I wanted I wouldn't be far off that cost for the bodywork. It does have its own inherent issues. The side panels for example because they are pre-formed don't conform to the variations in my chassis rails, so I have a little packing to do on it to fit it right. Cheers Stot |
The elves have been busy again..
Got the brake lines all in position. Just need to be clipped down now.  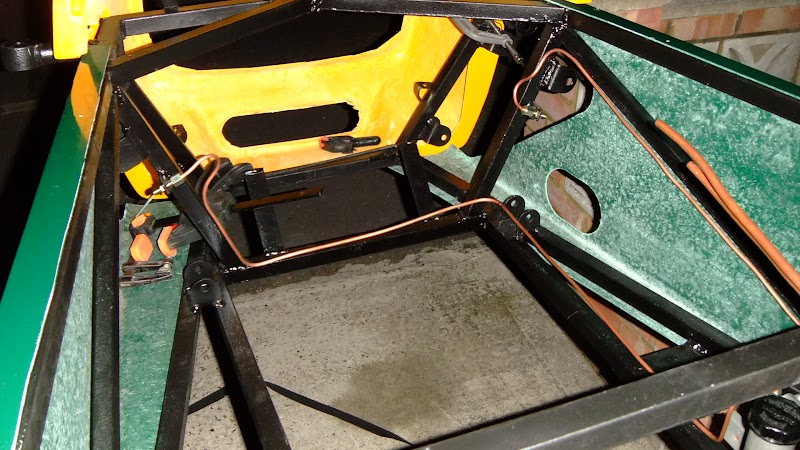 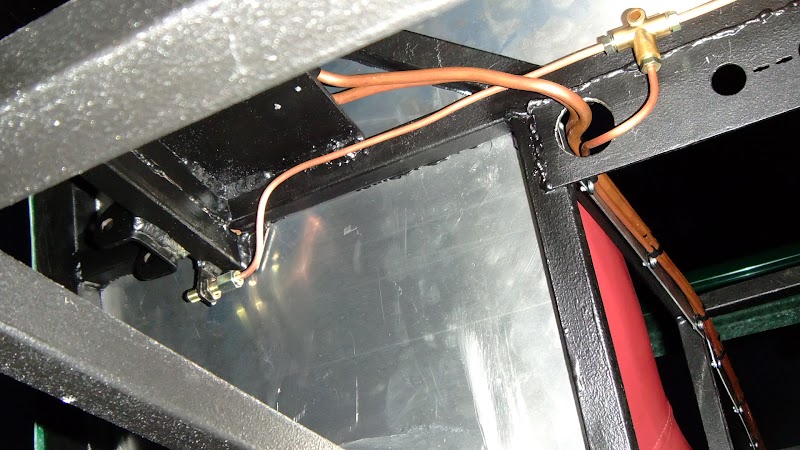 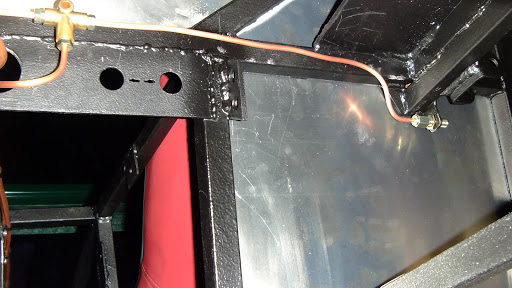 Next job is to paint the roll bar and the rest of the wishbones and get it back on its wheels! Cheers Stot |
Busy day.
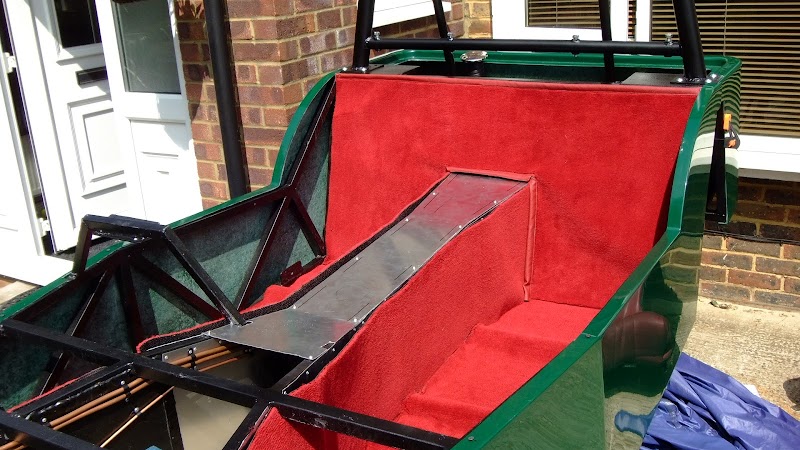
I got my brake lines secured in place.  I got the rest of my bits painted, including the rollbar.  And I got all my carpet pieces cut to size.   My build is not A-B-C more A-R-L-C but I figure that if I cant do the 'next' step in the build I may as well do 'a' step in the build rather than sit around. Cheers Stot |
Had a bbq with my family today and my dad kindly brought along his sewing machine so I can add some edging to areas of my carpet like down the trans tunnel and the top of the seat back.
I had a few practice runs to figure out the best way to do the edging. 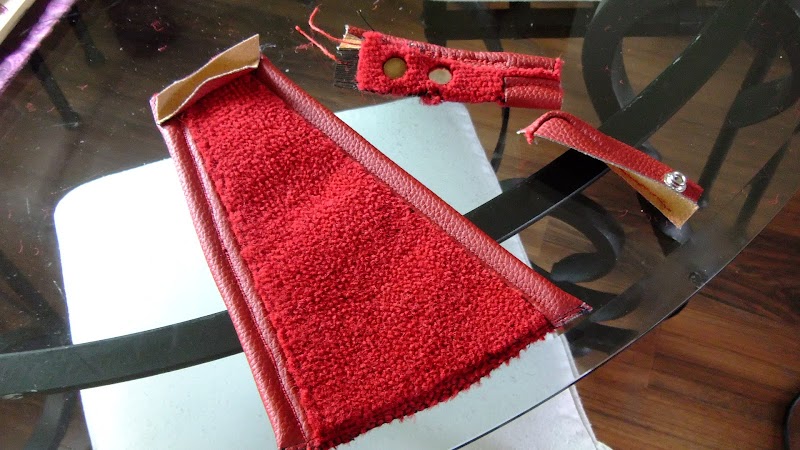 Think I have a winner. 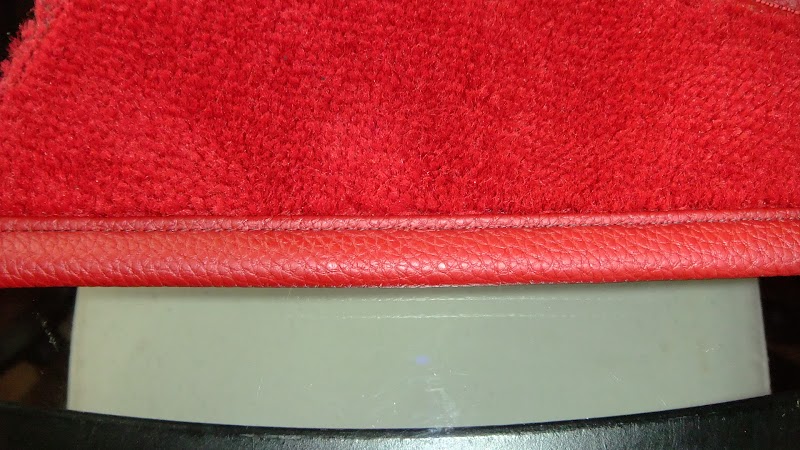 Cheers Stot |
Unless I have missed the part where you said what the carpet was I would be using Marine carpet, otherwise it will start rotting and stinking from the first time it gets wet and it will get wet.
|
Quote:
Cheers Stot |
do you use any backing or underlay or glue the carpet directly to the metal ?
|
Quote:
The edges of the trans tunnel will be trimmed with the leather and then use press studs to attach to the trans top so I can remove it easilly if I need access to the tunnel. I used a felt underlay in my Jester but dont think I needed it, or need it for this car. If I were building a Cobra or the like I would felt for sure to give that extra plush feel. Cheers Stot |
Had more of a play with the sewing machine today.
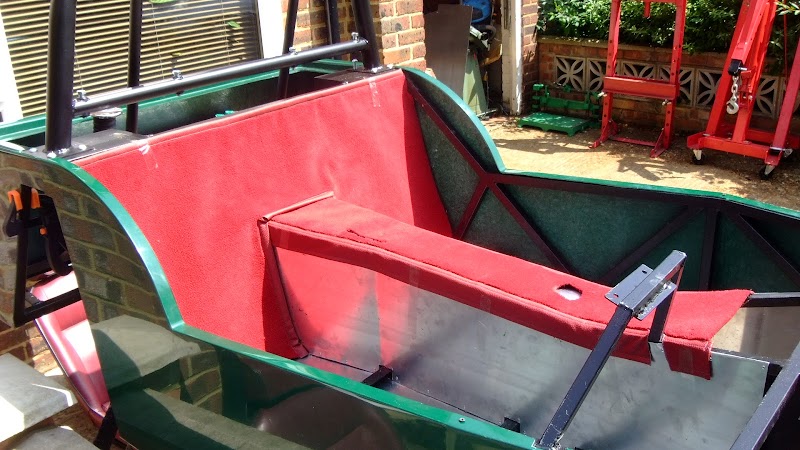
I'm going to cover my interior side panels with leather and have a pelmet coming off the top of it over the top of the side panels to finish them. 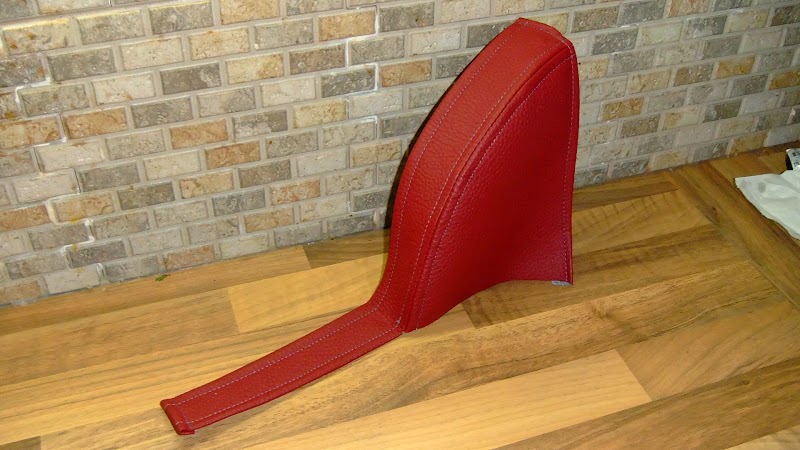 Really happy with how the test went, the finished item should look smart. :cool: Cheers Stot |
Most people have horse power stot ! Not cow power. Anything to be different. :D that is one tidy bit of upholstery there, come on then, when are you opening the one stop stot shop ? Selling locost badges, to upholstery ! Seriously, well done son, that is going to be a car worthy of a magazine front cover. :p
|
Nice needlework Stot :cool:
I'm glad I'm not the only one in touch with my feminine side :D |
Quote:
I had a day off yesterday so got quite a bit of the interior trim sorted. Carpets.  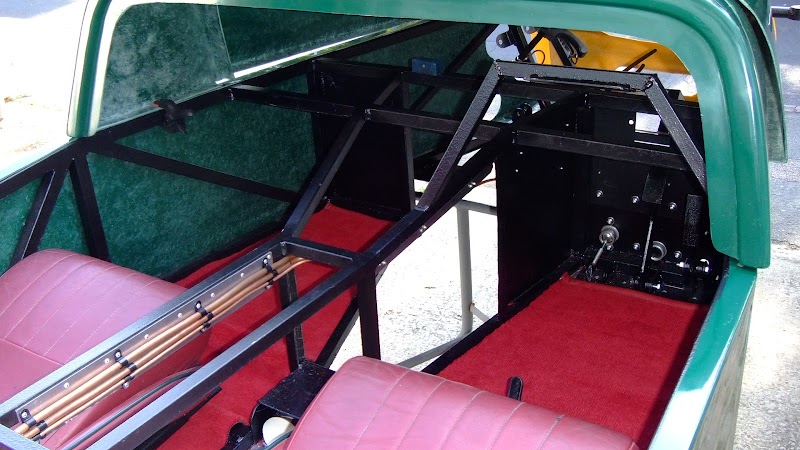 |
And the drivers side panel
   Needs some press studs on the lapels to hold it in place but ill do that when all the bodywork is final fitted. Cheers Stot |
Another day off so paneled most of the trans tunnel.
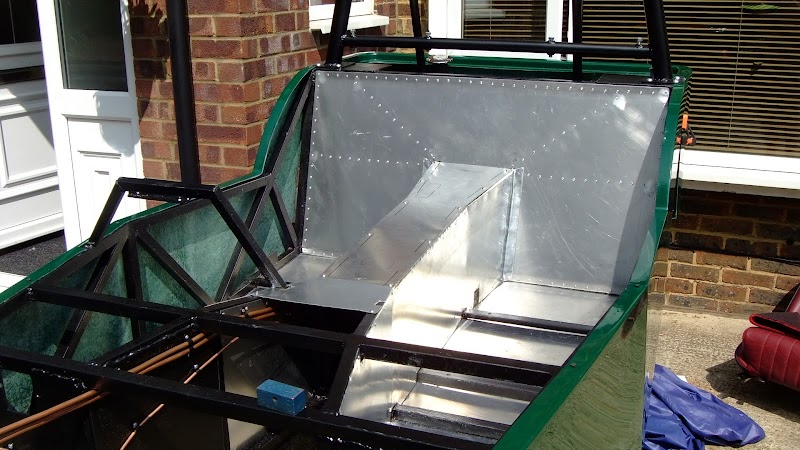  Cheers Stot |
Carpet slippers only in there folks:D :D :D
|
Beutiful job ! You should be really proud. :D
|
Looking really good there Stot....:cool: :cool:
At this rate you'll be on the road soon.. |
Hi my name is Jason, and this is THE HAYNES ROADSTER KIT CAR FORUM ! You can't go drifting in some traffic report son. Thanks for the advice, your straight jacket is by the front door !:D
|
Sorted my tunnel top carpet this morning.
 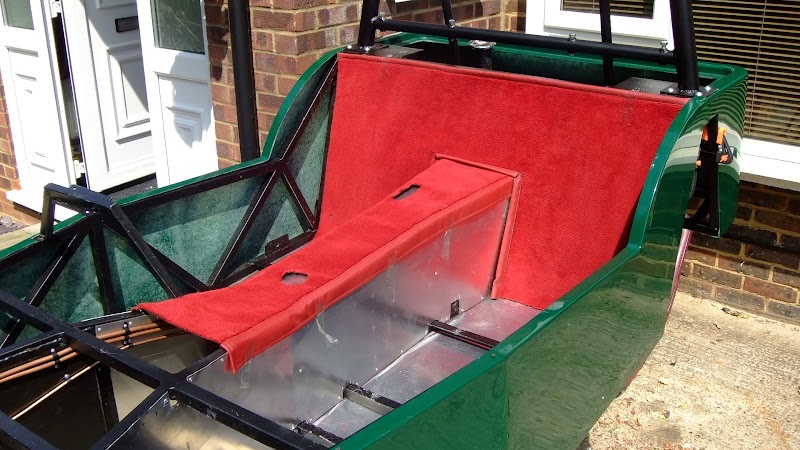 It will eventually be held on with press studs rather than sellotape... Cheers Stot |
One more update for today. Got it back on its wheels and the engine back in place so it looks like a car again. :cool:
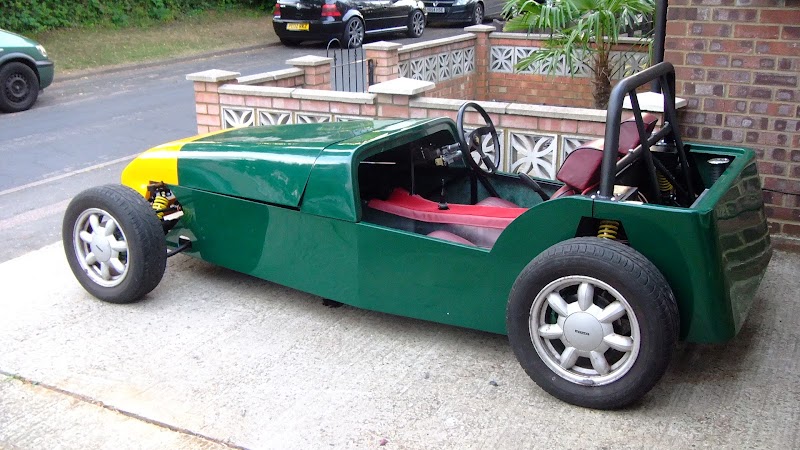  Now the electrics....:( Cheers Stot |
| All times are GMT +1. The time now is 08:26 AM. |
Powered by vBulletin® Version 3.6.4
Copyright ©2000 - 2024, Jelsoft Enterprises Ltd.