Nice one Ginge, looking good, the seat back is fun as you feel you need three pairs of hands all at the same time :eek:
i hope you don,t mind me asking but has the build table dropped slightly under the nose area of the chassis? as there seems to be a small gap between the table & the bottom rails at the front end , might be the camera angle too, as for fully welding, its best to leave it until you have all the diagonals & the "RS" parts tacked into place, also make sure you alternate where you fully weld, go from side to side/front to back etc to minimise any heat distortion from fully welding ;) when you "think" its all fully welded i,ll bet you a pint you,ll find one you missed :D i know i did :o nice progress, i bet the kids & Mrs are impressed. cheers andy |
Andy
I am glad you noticed the gap under the front rail. I went for the obligatory sit in your Roadster picture:D and the legs on the sh**y plastic A frame spread and I nearly ended on the floor,:eek: also when we had all the wet weather the board wasnt supported properly so as you said it has now got a gentle curve on it.:( On a positive note, although it has now warped the chassis (as you can see) has remained straight. Ginge |
can just imagine the scene :D and don,t lean back as you,ll end up on the floor with your legs in the air, i know that from when i had my "sit in my Roadster "moment :D
also , just noticed you have "U7" in the wrong place, needs moving towards the passenger side a tad ;) , hope you don,t mind me saying, but wouldn,t want you to get too far before you realised it:) cheers andy |
You can imagine what I have just done. Rushed out to the garage flipped to page 39 Fig 4.9 to ascertain which upright is U7 and immediately see my mistake, I was thinking it would be a bit tight fitting three pedals in that space.
This is why the forum is indispensable; I would have carried on blissfully unaware of my mistake and probably cut BR10 out as well before realising. Please feel free to comment any time on anything you think looks wrong, it can sometimes be the camera angle but if it is not the implications are huge. Thank you. Ginge |
no prob Ginge ;) , like you say "this is what the forum is there for",
sometimes its easy to get carried away with the eagerness to get "something done" & miss a small dimension check without realising it, :eek: :D like me fitting a new clutch, ended up installing the engine/gearbox back into my chassis then realised i,d not fitted the sandwich plate between engine & gearbox... result= engine out AGAIN:o andy |
16 Oct 09
First job today was to move U7, then I tacked on D9 and 10, moved on to SB3 and 4 which where straight forward then SB 5 and 6, I couldnt get my head around the drawing in the appendix so decided to cut them over length and then fettle to fit. Once I had the first one in the right place I could see the cut required and the drawing made sense! Whilst fitting TR 6 and 7 I noticed that the top of U2 was in the wrong place by 8mm, glad things are only tacked at the moment, moved it into the correct position and fitted TR 5, 6 and 7. I am going to fit the diagonals that run down the side of the car tomorrow so have flipped the chassis over to fully weld some of the joints that will get covered by the diagonals. I have only fitted 10 pieces today but corrected some minor mistakes and the seat back diagonals took a while. |
thats the beauty of just tack welding until you,re sure everything fits as it should, nice one Ginge :)
and just think when you are driving your Roadster you,ll know every single inch of it & how it went together, a total sense of pride . when you come to fitting the suspension brackets make sure you check & re check all the dimensions, i spent ages getting mine "just right", worth it tho ;) all the best for the rest of your build. andy ps... what engine are you going to install? |
With reference to the engine.
I was going 2l pinto or nothing but after checking out a web site that gave different engine sizes, power, weights etc I am not fussed if I end up with a 2l or 1.8, anything that is straight forward to get me through the IVA. I am watching a 2l pinto powered 1984 sierra estate on Ebay at the moment. http://cgi.ebay.co.uk/ws/eBayISAPI.d...=STRK:MEWAX:IT It is in Kent which is where I will be when it ends. It will have to be cheap as my priority is chassis plates for the next big purchase, if it goes any higher than £150 I will walk away. The ironic thing is about 9 years ago I was the proud owner of a nice 2l SOHC sierra, it only cost me £300 and lasted me for a year. I would like to try a bike engine conversion once the IVA is out of the way. |
the reason i asked what engine you are planning was to do with you saying you have tacked the TR5 into place, i,m using the 1.8cvh engine & had to cut the TR5 tube out as it fouls the carb/manifold, not sure if it causes a prob with other engines, but as the book was written using a pinto engine then i presume it,ll be fine if you do get the pinto,d sierra, :)
i would think hard about changing from car engine to bike engine after IVA, lots of things to change, maybe go bike engine from the beginning??? speak to Slimtater & Tilly as they have bike engines in their Roadsters, Slims is already been SVA,d & Tilly,s is a current build, maybe they could give you some advice on bike engined Roadsters. cheers andy |
17 Oct 09
6th day of the build and Sophie and I are of for a drive! [IMG] 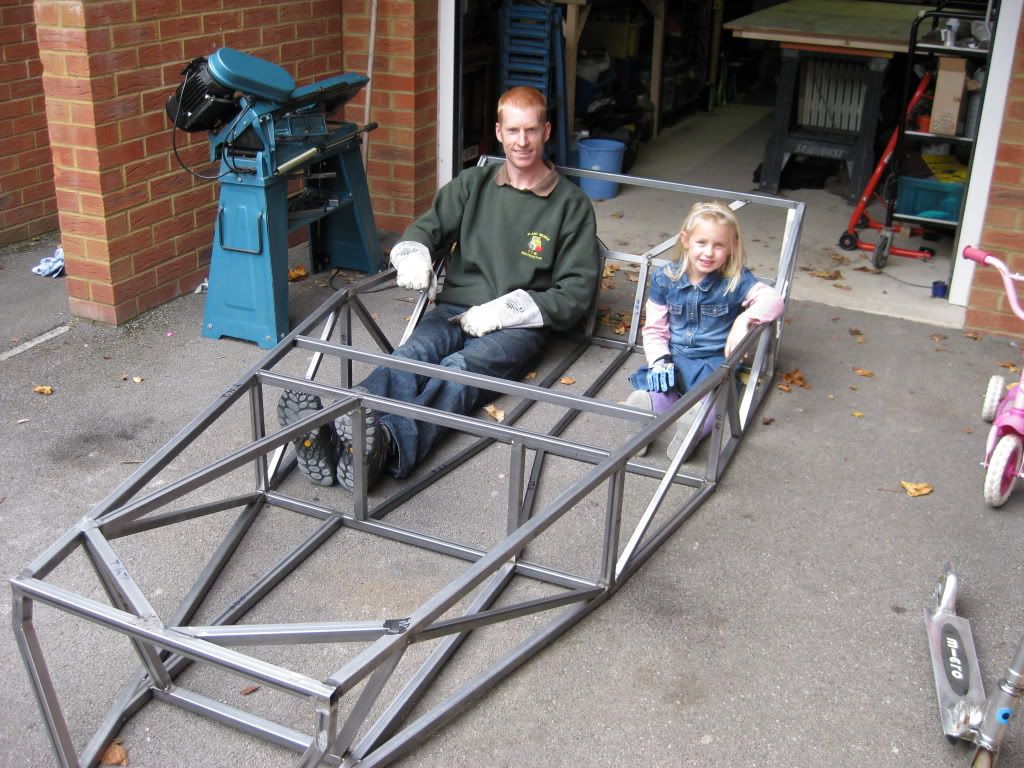 [/IMG] [/IMG]First job was to fit the six diagonals, D1 and 2 are an interesting fit so my tried and tested method of cutting a little over size and fettling for a snug fit worked a treat, also a quick look at some forum members build pictures helped. Moved on to the transmission tunnel next instead of the rear section as you need a few chassis plates for the rear and I wont be getting them for a while. The TT4/5 hoop was constructed on my welding table. I have only tacked on TT 1s and 2s and should get the rest done tomorrow, then a 5 week gap in construction before the big 5 weeks of. I have updated the pictures on photo bucket, it does annoy me that they appear in reverse order, ho hum. |
| All times are GMT +1. The time now is 11:18 PM. |
Powered by vBulletin® Version 3.6.4
Copyright ©2000 - 2024, Jelsoft Enterprises Ltd.