
|
|
|
|
#1
 7th April 2011, 09:19 PM
|
||||
|
||||
|
I thought it best that I completed a full bend of the test pieces
 Here is a picture of the fully bent pieces. 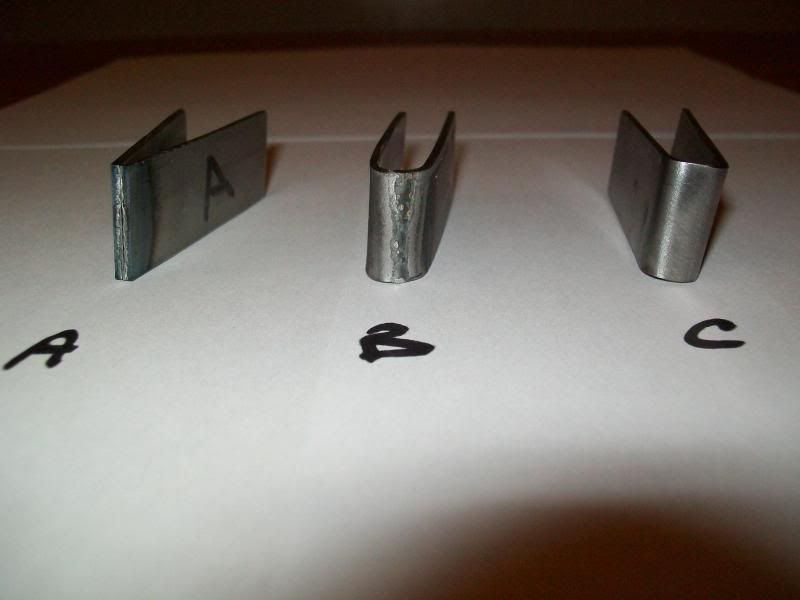 Test piece A folded in half by hand !!, if I were to try & straighten it again, one piece will become two again. The other two samples exhibit absolutely no signs of stress fracture, if test piece B looks a bit iffy, I can assure you that it is only a bit of mill scale as the test pieces have not been cleaned/polished Basic testing of a weld sample is quite simple to do at home, well for thin material anyways. If you do not have a press, a simple vice and an appropiate piece of round bar will do the job fine. Open the vice a little, place the piece of bar directly over the centre of the weld on the test piece & strike with a suitable hammer. This will allow you to bend the test piece a fair way. To complete the bend, just pinch the piece in the vice until fully bent, when I say fully bent, I don't mean squished flat  Once bent, examine the surface of the welded area for signs of stress fracture. If you want to examine in more detail, fettle & polish the weld with emmery paper, this will help to highlight any imperfections in the test piece I have not gone into fine detail of the weld settings used for the test pieces because. A: My welder does not have any digital read out of the weld current. B: The settings will vary between welders, even identical machines !! Hopefuly I have a least covered the basics of testing your welds. Setting up the welder & weld prep is another story waiting to be told.
__________________
I am not a complete idiot...........Some of the parts are missing !! Ronnie www.roadster-builders.co.uk 
|
 |
| Thread Tools | |
| Display Modes | |
|
|


 Hybrid Mode
