
|
|
#11
 22nd July 2010, 11:09 PM
|
||||
|
||||
|
I remember asking Chris about this before and he confirmed they are wrong. The 71 deg to the top chassis rail in Fig 4.20 is correct. I have a memory that SW3 is the tube that needs the angle altering - but I can't be 100% sure. If you don't get an answer beforehand - I can check the angles on my car on saturday
__________________
Gallery 2 http://www.facebook.com/album.php?ai...4&l=a9831a9319 Gallery 3 http://www.facebook.com/album.php?ai...4&l=3f0d42c523 Gallery 4 http://www.facebook.com/album.php?ai...4&l=efb083b7df Gallery 5 http://www.facebook.com/media/set/?set=a.10150244028550325.366987.601005324&l=583fd5 cd3a Gallery 6 http://www.facebook.com/media/set/?set=a.10150550640070325.430417.601005324&type=1&l =fe779b358c 
|
|
#12
22nd July 2010, 11:11 PM
|
||||
|
||||
|
Ok. Cheers, if noone can confirm the angle before tomorow evening, i'll try connecting all the other bits up then cut SW3 to fit. Should work

__________________
~ My Build Diary - http://davesroadster.blogspot.com/ *updated 7/6/11* Best bit so far: Getting it running Worst bit so far: Cutting steel for wishbones and engine mounts. Most annoying bit so far: Generator packing up half way through welding.
|
|
#13
22nd July 2010, 11:20 PM
|
||||
|
||||
|
Just had a quick look at the book - end of SW1 is cut at 23 deg - which when you work out it comes to 90-23 = 67deg and not 71. Hence I think it may be SW1 you need to cut to 19 deg instead.
__________________
Gallery 2 http://www.facebook.com/album.php?ai...4&l=a9831a9319 Gallery 3 http://www.facebook.com/album.php?ai...4&l=3f0d42c523 Gallery 4 http://www.facebook.com/album.php?ai...4&l=efb083b7df Gallery 5 http://www.facebook.com/media/set/?set=a.10150244028550325.366987.601005324&l=583fd5 cd3a Gallery 6 http://www.facebook.com/media/set/?set=a.10150550640070325.430417.601005324&type=1&l =fe779b358c
|
|
#14
23rd July 2010, 09:11 PM
|
||||
|
||||
|
Thanks to your help, i managed to get it sorted this evening... however... I balanced a seat in the car (on 25mm box section) and sat in it for the first time, problem is, my eyes are inline with the top of the steering wheel.
After IVA i'll be putting a smaller one on, so shouldn't be a problem, but what about iva man? Anyone else have this problem? (rack isn't height adjustable). 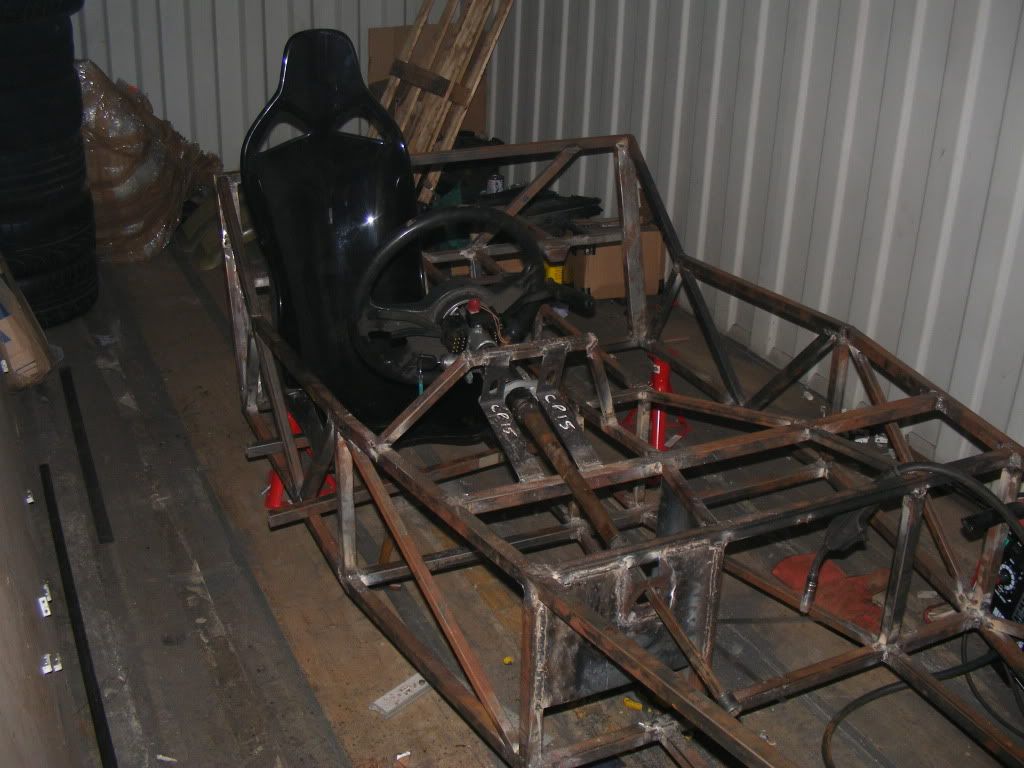 One other question for this evening, can anyone give me a clue to where these plates go? [EDIT] Had a look at some pics, and i'm guessing cp8 goes at the back for the fuel tank to sit on? and one of the cp14s at the back of the transmission tunnel for the handbrake cable. What about the others?? 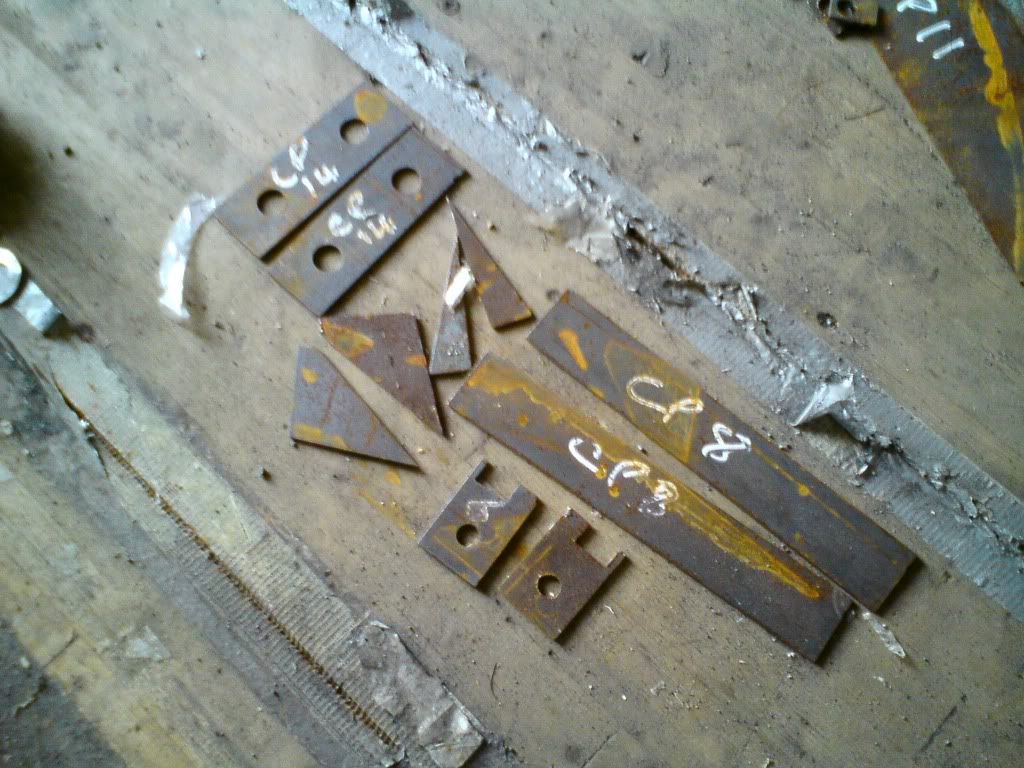
__________________
~ My Build Diary - http://davesroadster.blogspot.com/ *updated 7/6/11* Best bit so far: Getting it running Worst bit so far: Cutting steel for wishbones and engine mounts. Most annoying bit so far: Generator packing up half way through welding. Last edited by David_17 : 23rd July 2010 at 09:21 PM.
|
|
#15
23rd July 2010, 09:46 PM
|
|||
|
|||
|
cp14 goes in the center area of the diff cant remember what its called now... anyhow it holds he handbreak cable ect, The large triangle plates with the edges cut are for the ally rear tub same with the little squares with holes. dont have the book to hand but if you look in the rear tub section you will see them. As for the long triangles cp24....... well i have yet to find out

|
|
#16
24th July 2010, 08:55 AM
|
||||
|
||||
|
Great. Thanks for the help. Do both CP14s go in the diff area?
Also anyone else had problems with steering wheel or seat height?? Or are you all tall? 
__________________
~ My Build Diary - http://davesroadster.blogspot.com/ *updated 7/6/11* Best bit so far: Getting it running Worst bit so far: Cutting steel for wishbones and engine mounts. Most annoying bit so far: Generator packing up half way through welding.
|
|
#17
24th July 2010, 11:58 AM
|
||||
|
||||
|
I think you only need 1 cp14 for the handbrake

|
|
#19
24th July 2010, 01:31 PM
|
||||
|
||||
|
cp 14 - 1 off req to locate handbrake cable(slot both holes to slide cable in easily)
cp9 - 2 off ( square with square cut out & hole in) roll bar support plates cp8 2 off fuel tank supports cp25 2 0ff (larger triangle) below cp9 to strengthen cp9 supports cp24 as les g said
|
 |
| Thread Tools | |
| Display Modes | |
|
|


 Linear Mode

