
|
|
#281
 1st September 2013, 04:33 PM
|
||||
|
||||
|
Also fitted my finished steering column.
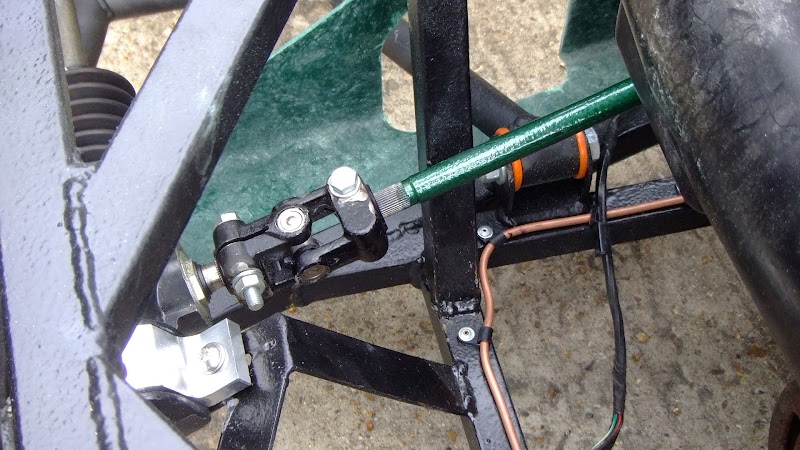 Cleared up the wiring behind the dash So I can start mounting it up.  
__________________
1.6 Mazda B6 : Garrett TBO339 : 420cc WRX Injectors : FMIC : Microsquirt V3 : LC-2 Wideband : Toyota COP Build Started Jan 2013 : OTR Aug 2014 : Build Pictures 
|
|
#282
1st September 2013, 04:34 PM
|
||||
|
||||
|
And had a general cleanup and take stock of the state of the build.
   I haven't felt like I did much lately so glad to get that all done.  Cheers Stot
__________________
1.6 Mazda B6 : Garrett TBO339 : 420cc WRX Injectors : FMIC : Microsquirt V3 : LC-2 Wideband : Toyota COP Build Started Jan 2013 : OTR Aug 2014 : Build Pictures
|
|
#283
1st September 2013, 05:39 PM
|
|||
|
|||
|
Looking very nice!
Don't know how you carry on with only one headlight, would really bug me not fitting the pair to match  That steering column end, does that UJ change from the sierra to the Escort size splines? If so, are they available on the open-market or a bespoke part by yourself? Looking for some way to replace the dodgy old rubber donut...
|
|
#284
1st September 2013, 06:13 PM
|
||||
|
||||
|
Quote:
The steering link is an escort spline at both ends. My steering gear is MX5 but you can buy column shafts from rally design and maybe remake your extension to get rid of the rubber donuts? Not sure I haven't played with a sierra build. They do do these though which is Sierra to Escort. Cheers Stot
__________________
1.6 Mazda B6 : Garrett TBO339 : 420cc WRX Injectors : FMIC : Microsquirt V3 : LC-2 Wideband : Toyota COP Build Started Jan 2013 : OTR Aug 2014 : Build Pictures
|
|
#285
7th September 2013, 06:07 PM
|
||||
|
||||
|
Had another play with my badge the past couple of days. I machined an aluminum one.
 I first tried using gelcoat to colour it like my other badges but it doesn't stick to the aluminum and the colour came out in nice molded pieces. ") So I gave it an acid etch primer coat and went at it with some Humbrol enamel model paints. So I gave it an acid etch primer coat and went at it with some Humbrol enamel model paints. The colour sits in there as I originally intended so as long as it dries nicely I should be able to sand the surface back to aluminum and polish it. Cheers Stot
__________________
1.6 Mazda B6 : Garrett TBO339 : 420cc WRX Injectors : FMIC : Microsquirt V3 : LC-2 Wideband : Toyota COP Build Started Jan 2013 : OTR Aug 2014 : Build Pictures Last edited by Stot : 7th September 2013 at 09:18 PM.
|
|
#287
8th September 2013, 01:55 PM
|
||||
|
||||
|
Quote:
Cheers Stot
__________________
1.6 Mazda B6 : Garrett TBO339 : 420cc WRX Injectors : FMIC : Microsquirt V3 : LC-2 Wideband : Toyota COP Build Started Jan 2013 : OTR Aug 2014 : Build Pictures
|
|
#288
8th September 2013, 02:00 PM
|
||||
|
||||
|
I made up some windscreen brackets today. Made them out of the 1.5mm 5251 H22 which is what I used for on my floor. I think it should hold the windscreen fine but if it seems too flimsy when I fit it Ill get some 3mm.
A set for a full size screen.  And a set for the flyscreen. 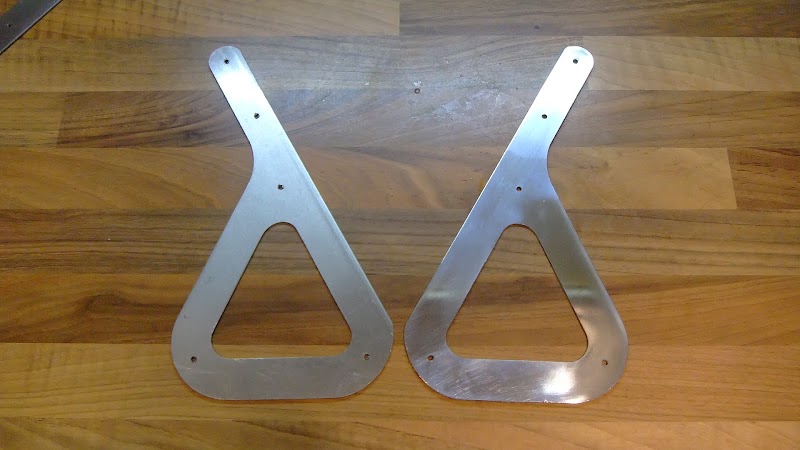 All the scuttle mounting holes are in the same place so I can swap them around easy enough. 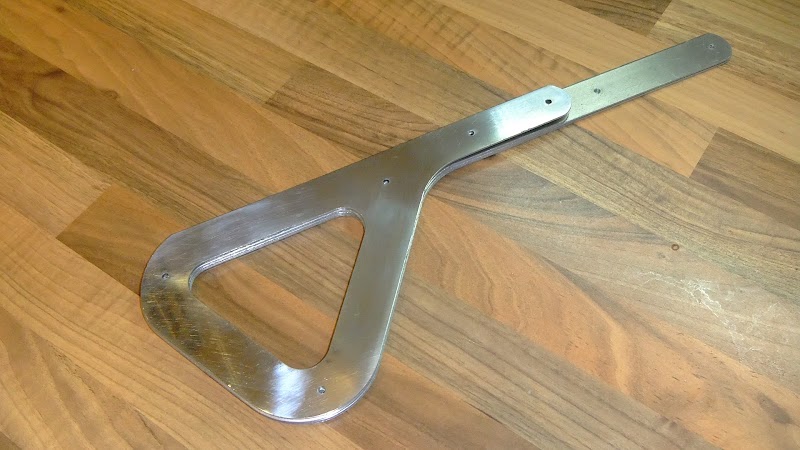 Cheers Stot
__________________
1.6 Mazda B6 : Garrett TBO339 : 420cc WRX Injectors : FMIC : Microsquirt V3 : LC-2 Wideband : Toyota COP Build Started Jan 2013 : OTR Aug 2014 : Build Pictures
|
|
#289
14th September 2013, 06:16 PM
|
||||
|
||||
|
The model paint wouldn't dry in the end. A week later it was still wet
I decided to 'cold enamel' it which is basically filling the voids with a coloured molding resin. That worked 100% better.  Ready for the nose then.  I have also been working on the bezels for the dials. I got some chrome bezels from ebay but they are designed to go behind the standard MX5 acrylic shield so I got some laser cut acrylic discs and glued them up with some clear setting epoxy. 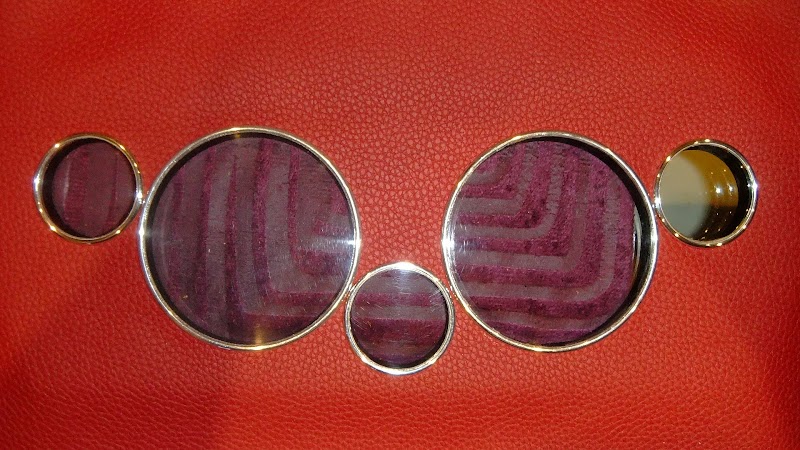 Its turned out well so far but I'm waiting for the laser guy to properly cut me the leather so I can mount up my warning lights and finish making the center dash. Cheers Stot
__________________
1.6 Mazda B6 : Garrett TBO339 : 420cc WRX Injectors : FMIC : Microsquirt V3 : LC-2 Wideband : Toyota COP Build Started Jan 2013 : OTR Aug 2014 : Build Pictures
|
|
#290
15th September 2013, 10:39 AM
|
||||
|
||||
|
The LED bezels finish it off nicely.
 Shame its going to be at least another week before I get the laser-ed leather to make it up properly without the pulling and wrinkles.  Cheers Stot
__________________
1.6 Mazda B6 : Garrett TBO339 : 420cc WRX Injectors : FMIC : Microsquirt V3 : LC-2 Wideband : Toyota COP Build Started Jan 2013 : OTR Aug 2014 : Build Pictures
|
 |
| Thread Tools | |
| Display Modes | |
|
|


 Linear Mode

