
|
|
#81
 10th February 2014, 05:00 PM
|
|||
|
|||
|
Does look good,well done Dave.

__________________
Cost : Little as possible. Thanks : To those who by their generosity my build has progressed. Its a handmade sports car not a flaming kit car !!! If at first you dont succeed,avoid skydiving... No parachute require to freefall,only if you want to do it twice. 
|
|
#82
14th February 2014, 10:09 PM
|
||||
|
||||
|
|
|
#83
15th February 2014, 09:50 AM
|
|||
|
|||
|
Well, that looks to me like someone might be holding the tiger by the tail, grab a hold and see what bites you.
It's awesome Arfon
|
|
#84
15th February 2014, 10:12 AM
|
|||
|
|||
|
Brilliant video.
Can I ask what model and size steering wheel you have chosen Thanks David
__________________
Click to see my build photos on Flikr http://www.flickr.com/photos/67112582@N03/ Saturn MX5 Based Chassis, Limited Slip Diff & 2.4 Quick Rack. Build cost.... seems to be spending more on tools than car bits at the moment! (they will be handy in the future though). Car iva'd and passed 15/08/2014. Finished weight 572kg.
|
|
#85
15th February 2014, 01:21 PM
|
||||
|
||||
|
Looking fantastic. It's such a great feeling to get it moving.
Your steering wheel seems to be on the wrong side. 
|
|
#86
15th February 2014, 01:34 PM
|
||||
|
||||
|
Quote:
|
|
#87
22nd February 2014, 02:47 PM
|
||||
|
||||
|
Heres this weeks update:
Started the week off by installing the headlights. Thankfully the brackets i made 8 months ago actually worked with the lights i bought last month. As well as being the correct height according to GA law. The lights have the integrated led signals as well as a running light on top. It also has a projector lens in the center. The buckets are made out of stainless, although i may end up painting them to match the car. 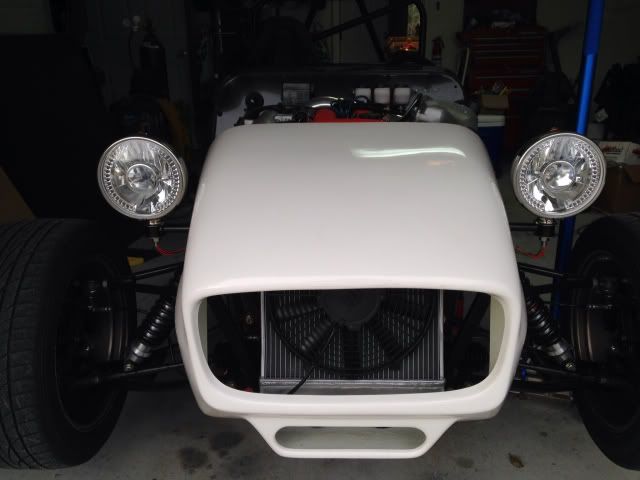 Next up was the seat belts. This turned to be easier than expected. I'm using Schroth 6 point harnesses combined with my lotus exige seats. Ill give you a run down of how they will be setup. First the shoulder straps loop around the roll bar cross member, then the hip straps bolt directly to the seats seat belt bolts, so that is easy enough. Finally the sub belts would be attached under the seat somehow. However this presented a bit of a problem. First the seat is so low (just a few mm above the floor) that almost anything would interfere with the seat or bracket. Second when the seats are in and body is fully skinned adjusting the sub belt is almost impossible from the main connection point. Third, the available mounting point through the rear seat rail on the chassis. This is a 3/4" square tube that is welded to the chassis as well as the steel floor, this would probably work if I could get the mounting point in without interfering... But that didn't happen. However there was another option, since i decided to use exige seats and brackets i benefited from a few things. I got some bitchin seats that are comfortable and i got the ability to use Sector 111's sys.6.pack http://www.sector111.com/parts/inter...nesses/sys.cfm . This gives me a low profile option that adds some addition reinforcement. Basically how it works is on the under side of the chassis you have a t shaped plate. On the top of the t you have 2 holes that pick up the seat bolts, on the bottom of the t you have 3 holes that get drilled through the floor and connect to a pinch plate that the sub belts loop through. So thats it a low profile solution that puts the belts in the correct location and was more or less a boltin with exige seat brackets. 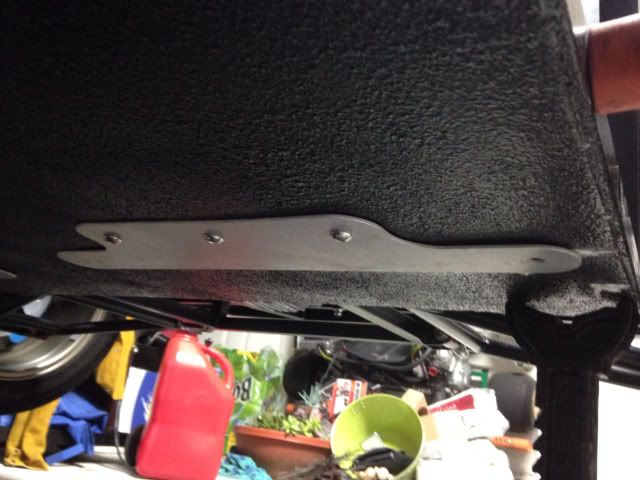  Finally my last accomplishment for the week, was sealing op the tunnel. I had been putting this off for a while for a couple reasons. I wanted to make sure all the wiring was run tot he back and the exige seat brackets i was just praising did conflict a bit with the saturn chassis variation. The problem was the tunnel had to get wider at the rear to clear the offset diff. This made the tunnel frame intersect with the seat rails. So i had to recess the skin of the tunnel, which meant doing some cutouts and then boxing it back in. Kinda a pain, and not the prettiest thing, but its obscured by the seats for the most part. 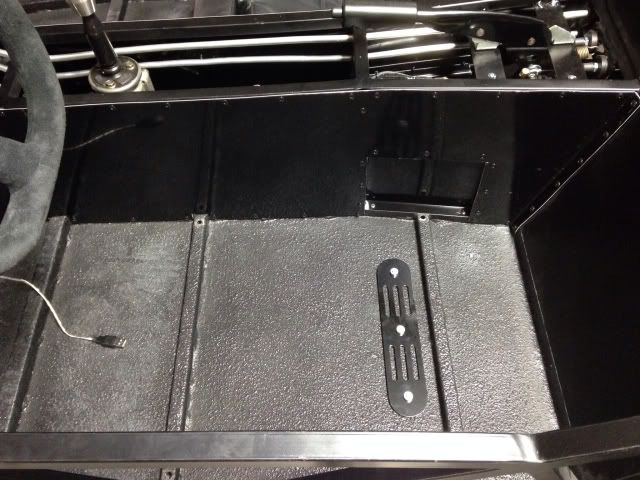 Anyway sides are now done and the top is next up. The final plan for the tunnel is to skin the top, then make a matching cut out in mdf. I will then round the edge of the mdf add some padding and wrap in alcantara, to create a decent arm rest, similar to what you see in caterhams.
|
|
#88
27th February 2014, 04:01 PM
|
||||
|
||||
|
Here's a couple pics with the seats back in and the tunnel closed off. Ran into a few issues with the tunnel. On the driver side the seat slider was such a tight fit after skinning the tunnel that it can no longer slide. Not really a hug deal as its in my seating position which is pretty much all the way back. And if I really wanted to I could probably fix it with a hammer. But right now I don't care. Second issue was that I forgot to install the brake balance bar adjuster knob before riveting everything shut. Again not a hug deal but something I had wanted to do to simplify the brake adjustments. I may come back for this later.
 
|
|
#89
27th February 2014, 05:07 PM
|
||||
|
||||
|
That's all coming together rather nicely ....those harness's look pretty mean.
I had a similar problem with my seat so I put them on their side and knelt a little bit on their sides until they gave 1/4" or so which was just enough to stop them sticking on the tunnel and outer cockpit frame, looks like yours might give a little in the same place.
|
|
#90
27th February 2014, 07:19 PM
|
||||
|
||||
|
Quote:
|
 |
| Thread Tools | |
| Display Modes | |
|
|


 Linear Mode

