
|
|
#1
 9th May 2010, 06:10 PM
|
||||
|
||||
|
Well today i've upgraded my electrolysis bath, I originally had issues with my first very simple design as the electrode cable was put into the water meaning that it was eaten away and snapped off, thus stopping the process. So i decided to get around that by making a new bigger electrolysis bath:
Electrolysis Bath 1.0 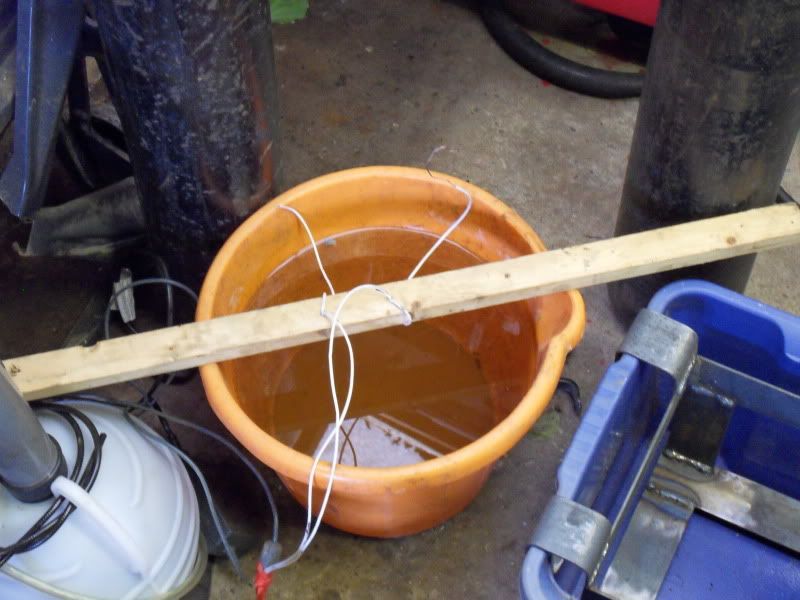 Electrolysis Bath 2.0: 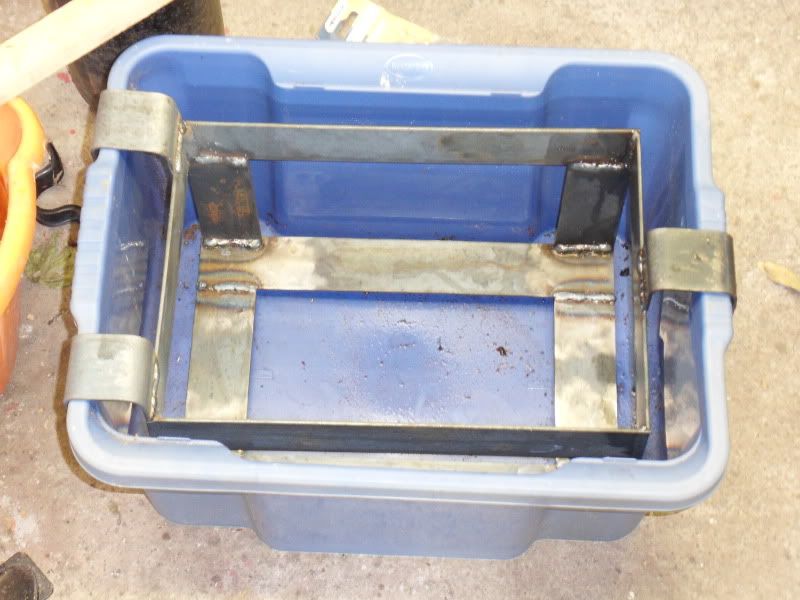 I think that Electrolysis Bath 2.1 will include a better method of holding rusty parts, as the current method involves some string ") . .Let me know what you think or if you have any questions about the process.
__________________
1.8 Silvertop Zetec (ZX6R Carbs + Megajolt) + Type 9 My Build Blog: http://www.haynes.co.uk/forums/showthread.php?t=2736 - Last Update: 31st October 2020 Total Spent so far: Stopped counting 

|
|
#2
9th May 2010, 06:30 PM
|
||||
|
||||
|
Nice one Tatey .... Very well worked out
  Have you been using washing soda for the electrolite or have you been using something more hardcore ? I have mostly new parts but I do have some stuff that could do with a good zap  I'll follow your progress with interest
__________________
I am not a complete idiot...........Some of the parts are missing !! Ronnie www.roadster-builders.co.uk
|
|
#3
9th May 2010, 06:35 PM
|
||||
|
||||
|
I'm just using soda crystals at the moment as they are cheap and easy to get hold of since they are only £1 for 1kg from Tesco.
I have to say it was quite fun just making up the new bath as I went along, makes a welcome change from following the build guide for the car  . .I'll be putting my hub carriers in once I can figure out how to remove the bearings, as I've learned from my uni course, that bearings really do not like electricity. I also need to figure out how to dissemble (without breaking ) the drum brake assembly, as that needs a good clean as well.
__________________
1.8 Silvertop Zetec (ZX6R Carbs + Megajolt) + Type 9 My Build Blog: http://www.haynes.co.uk/forums/showthread.php?t=2736 - Last Update: 31st October 2020 Total Spent so far: Stopped counting
|
|
#4
9th May 2010, 06:50 PM
|
||||
|
||||
|
Quote:
I seem to remember that they use pre-loaded taper bearings, if that is the case, once the oil seals are removed, the bearing inner races should just pop out  Doubt the tank will hurt the outer race shells !!?? I do stand to be corrected though
__________________
I am not a complete idiot...........Some of the parts are missing !! Ronnie www.roadster-builders.co.uk
|
|
#5
9th May 2010, 07:06 PM
|
||||
|
||||
|
From what I've been told, the electricity pits the surface of the ball bearings, outer and inner races, thus creating an uneven surface and vastly shortening the life of the bearings. So i guess its better to be safe than sorry, well thats if the outer race can be removed easily
.I had a quick look at them last week and they definitely are tapered bearings.
__________________
1.8 Silvertop Zetec (ZX6R Carbs + Megajolt) + Type 9 My Build Blog: http://www.haynes.co.uk/forums/showthread.php?t=2736 - Last Update: 31st October 2020 Total Spent so far: Stopped counting
|
|
#6
9th May 2010, 07:19 PM
|
||||
|
||||
|
Quote:
 I know it is probably needless but I have a personal thing about re-using an outer race once I have drifted it out .... Probably because I know what I have done to it getting it out I wouldn't imagine that bearing kits are too expensive & you get piece of mind + new oil seals
__________________
I am not a complete idiot...........Some of the parts are missing !! Ronnie www.roadster-builders.co.uk
|
|
#7
9th May 2010, 08:20 PM
|
||||
|
||||
|
Wow, this is a royal electrolysis bath! For 2.1 you could also add a dedicated contact point for the charger clamp!
As for holding the part, I used thick copper wire instead of string. Easy to bend to shape to hold the part, doubles as an electrode!
__________________
Albert Haynes Roadster FAQ | Haynes Builder Locations Gallery, build thread in Lithuanian / via Google Translate.
|
|
#8
9th May 2010, 08:43 PM
|
||||
|
||||
|
The contact point isn't shown in the picture Alga, its welded to the support arm on the right hand side (only because i forgot to drill the hole before bending the arm
), it's a hole drilled through the steel, which the cable is securely attached to, it seems to be working well.
__________________
1.8 Silvertop Zetec (ZX6R Carbs + Megajolt) + Type 9 My Build Blog: http://www.haynes.co.uk/forums/showthread.php?t=2736 - Last Update: 31st October 2020 Total Spent so far: Stopped counting
|
|
#9
9th May 2010, 08:45 PM
|
||||
|
||||
|
Some bearing kit's are expensive, like xr4x4 front ones.. But I think the normal front ones are not that bad.
TT
__________________
You only get a woosh with a dump valve Build Thread Man Cave Mantiques Cecil Street Auto Repairs Garage Carlisle Build Cost £4181.65 - Last - Wheel Cylinders
|
|
#10
9th May 2010, 08:46 PM
|
||||
|
||||
|
HI, When i did my rear hub carriers i removed the hub and used the lids from tubes of grease with a few rounds of insulation tape on them pushed into the seal either side ths stopped the water solution getting at the bearings this worked really well
i did remove the seals and bearings after for cleaning but managed to use all the old bits again as they looked good as new anyway hope this helps Ray
|
 |
| Thread Tools | |
| Display Modes | |
|
|


 Linear Mode

