Haynes Forums  

Go Back   Haynes Forums > Haynes Roadster Forums > Electrics
FAQ Members List Calendar Search Today's Posts Mark Forums Read

Reply
 
Thread Tools Display Modes
  #41  
Old 13th January 2013, 01:50 PM
big_wasa's Avatar
big_wasa big_wasa is offline
Senior Member
 
Join Date: Mar 2007
Location: Spalding, Lincs
Posts: 129
Default

The deep ecu needs the earlier loom as the pins are thicker and less of them. I would sooner use the newer ecu so I can have the obd2 function.
__________________
Nowt again.
Reply With Quote
  #42  
Old 22nd February 2013, 06:55 PM
big_wasa's Avatar
big_wasa big_wasa is offline
Senior Member
 
Join Date: Mar 2007
Location: Spalding, Lincs
Posts: 129
Default

And I know have an engine to play with

__________________
Nowt again.
Reply With Quote
  #43  
Old 23rd February 2013, 12:49 PM
Shorty Shorty is offline
Senior Member
 
Join Date: Jul 2010
Location: South shields
Posts: 166
Default

Good luck! I'm sure you will crack it.
Reply With Quote
  #44  
Old 24th February 2013, 09:05 PM
big_wasa's Avatar
big_wasa big_wasa is offline
Senior Member
 
Join Date: Mar 2007
Location: Spalding, Lincs
Posts: 129
Default

So ive striped the engine down to a tall block.


And ive picked up a spare sump and flywheel from a 1.8 blacktop and started choping the sump.


__________________
Nowt again.
Reply With Quote
  #45  
Old 24th February 2013, 09:17 PM
Eternal Eternal is offline
Senior Member
 
Join Date: Mar 2010
Location: Bournemouth, Dorset
Posts: 599
Default

nice! Chop chop chop!
__________________
Build Cost: .............. lost count a while back.

Skyline Roadster
Reply With Quote
  #46  
Old 3rd March 2013, 10:18 PM
big_wasa's Avatar
big_wasa big_wasa is offline
Senior Member
 
Join Date: Mar 2007
Location: Spalding, Lincs
Posts: 129
Default

Some progress.

Saturday. Having read off a local builder building a jig to chop the sump. An email was fired of and a quick ride across town see the top of the sump snipped of perfectly square. He then gave me the idea of building the short end up and running it back under the jig to make it square and equal to the rest. so another ride back an hour later, Thanks Martin.
The bottom was mabe out of the last of the steel from the locost floor.


Sunday. Having been dragged around Primark this morning I escaped to the garage after tea. I chopped up two pick up pipes and mocked it up with a fuel clip. When I got it where I wanted it I thought I would just get the tig out and join it up. Then I decided I would cut of the bracket and weld it on for suport.


Being nagged to come in, I thought I would just tack the bottom on, I got carried away and welded it around.
There is still one pin hole in the mig welding but the tig weld is good to go. Then I can test its oil tight.


Progress may get a little slower as ive taken on another wiring job that was offered a few weeks back, vag 20vt on a dta into a vw Caddy
__________________
Nowt again.

Last edited by big_wasa : 5th March 2013 at 09:17 AM. Reason: dead link
Reply With Quote
  #47  
Old 25th August 2013, 04:14 PM
big_wasa's Avatar
big_wasa big_wasa is offline
Senior Member
 
Join Date: Mar 2007
Location: Spalding, Lincs
Posts: 129
Default

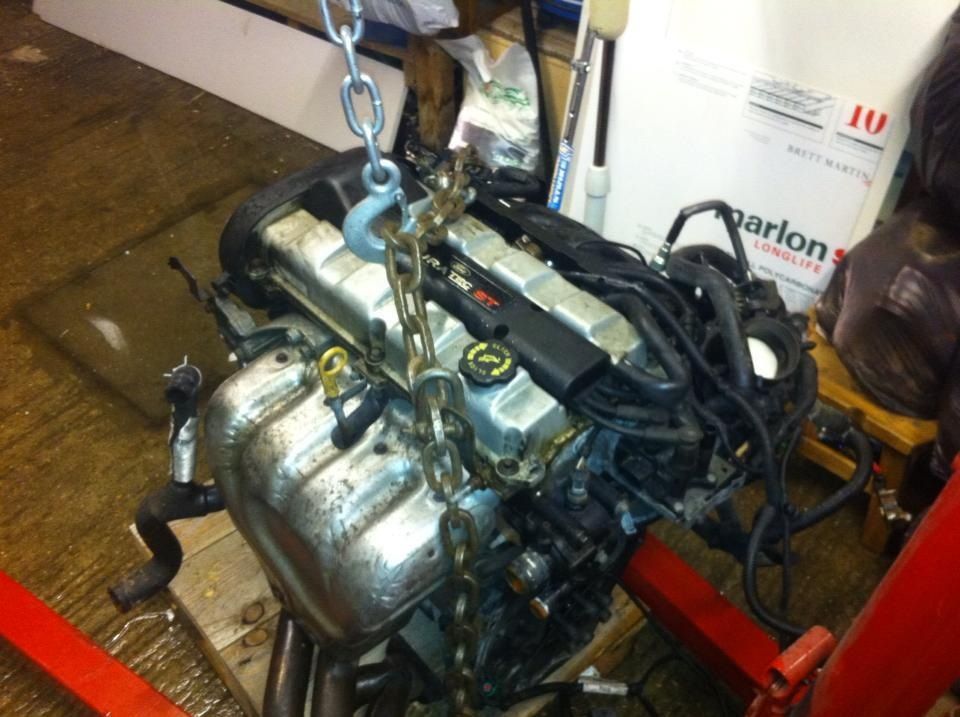
Finished.. So I thought I should finish of the thread.

Some progress....

Work has steadied up but that just means the wife had me do the garden

So I've

Cut up and remade the loom.
Cleaned up the engine.
Cut and shut the sump.
Replaced the leaking cam cover gasket and grommets. ££

I've made up the alternator kit

I've cut a set of plates out of 6mm plate for the engine mounts.

I've now got to mount it to something.


More progress, I seem to be doing loads but it doesn't look like much.

I've cut a dust guard out of 1.5mm steel. Fitted the flywheel and a new clutch.


So I made up an exhaust manifold from the st item.


The engine fist start.

http://www.youtube.com/watch?feature...&v=Mvo3lazzSVo

And it still running an hour latter.

http://www.youtube.com/watch?v=HIZO2...layer_embedded

And now I bored as its sold
__________________
Nowt again.

Last edited by big_wasa : 25th August 2013 at 04:20 PM.
Reply With Quote
  #48  
Old 26th August 2013, 09:11 PM
Shorty Shorty is offline
Senior Member
 
Join Date: Jul 2010
Location: South shields
Posts: 166
Default

Well done wasa, I knew you would get it going.
A nice and tidy little setup you got there
Reply With Quote
  #49  
Old 26th August 2013, 09:25 PM
big_wasa's Avatar
big_wasa big_wasa is offline
Senior Member
 
Join Date: Mar 2007
Location: Spalding, Lincs
Posts: 129
Default

Thanks.

I've loved playing with it.

Next project is "Ron's" off road buggy book to teach my lad a few things.
__________________
Nowt again.
Reply With Quote
  #50  
Old 26th August 2013, 09:55 PM
K4KEV's Avatar
K4KEV K4KEV is offline
Senior Member
 
Join Date: Feb 2010
Location: WINGATE CO DURHAM
Posts: 1,511
Default

That engine thingy sounds like it came from the depths of hell
Reply With Quote
Reply


Thread Tools
Display Modes

Posting Rules
You may not post new threads
You may not post replies
You may not post attachments
You may not edit your posts

vB code is On
Smilies are On
[IMG] code is On
HTML code is Off
Forum Jump


All times are GMT +1. The time now is 09:32 AM.


Powered by vBulletin® Version 3.6.4
Copyright ©2000 - 2024, Jelsoft Enterprises Ltd.