
|
|
#251
 10th October 2012, 11:15 AM
|
||||
|
||||
|
Got the chassis right way up now and it will be staying that way from now on.
Nearside floor now fitted and spent last night fitting the diff, went in well with no conflict from pipework.....only thing I had to do was pack out the brake T union to reduce the sharp bending of the pipes. 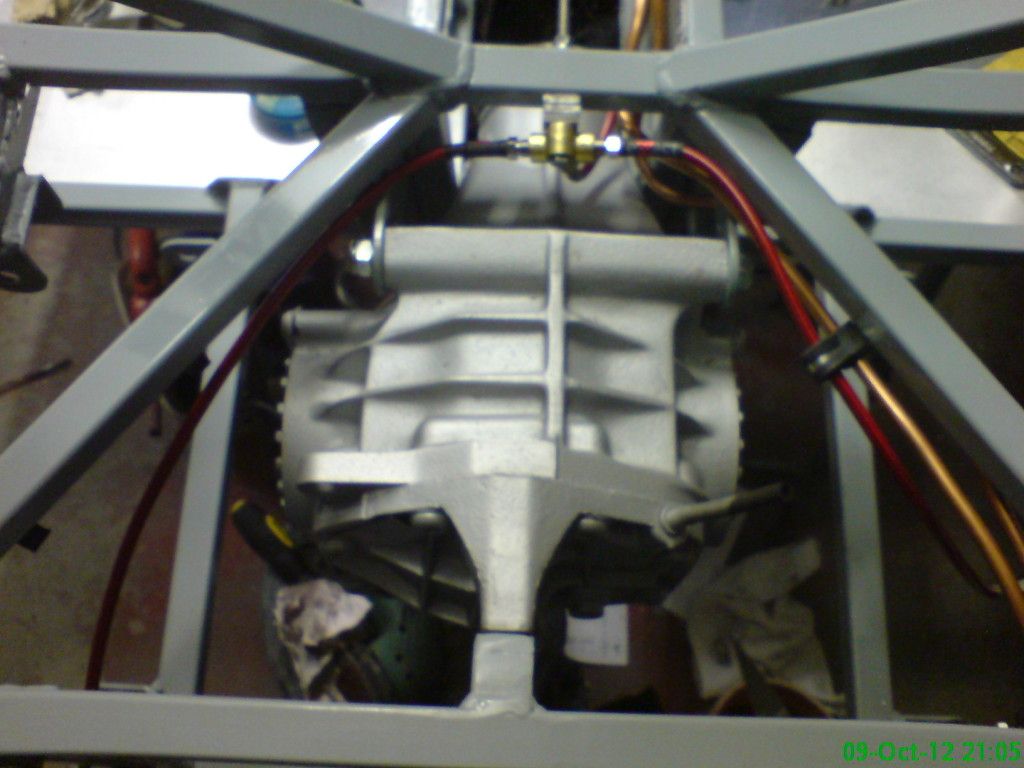 
|
|
#252
10th October 2012, 01:30 PM
|
||||
|
||||
|
That looks good Kevin, very neat. Also like the way you have mounted the diff on the back end to using the threaded insert on the diff.
Keep it up..........Andy
__________________
Haynes Roadster / Saturn GRP Bodywork. Now available direct through http://www.gillhamonline.co.uk/ or contact me direct on andrew.hugill@ntlworld.com Regards..........AndyH
|
|
#253
10th October 2012, 01:49 PM
|
||||
|
||||
|
Nice touch indeed! Did you trial fit the handbrake cables? Looks like it's going to be quite busy there above the diff nose.
__________________
Albert Haynes Roadster FAQ | Haynes Builder Locations Gallery, build thread in Lithuanian / via Google Translate.
|
|
#254
10th October 2012, 02:34 PM
|
||||
|
||||
|
Andy....that came from Ash when he was up here and I also drilled two extra mounting holes on the brackets where they face the handbrake ....put it this way that diff ain't going anywhere
 Albert.....yep....got that to come to but it should not cause me any headaches as they are bending the right way to start with but yes it will be a "busy area"
|
|
#255
11th October 2012, 11:54 PM
|
||||
|
||||
|
not much done today....only managed to paint gearbox with silver hammerite smooth.
Also had a trip to dragonville IE to a propshaft place called Major & Aspinal and left them with my prop shaft ends to make up a new propshaft gbox 
|
|
#256
13th October 2012, 10:26 AM
|
||||
|
||||
|
still catching up with lots of build progress threads after my break,
Very nice work indeed Kev  cheers andy
|
|
#257
13th October 2012, 10:40 AM
|
||||
|
||||
|
Hope your going to be more active yourself
TT
__________________
You only get a woosh with a dump valve Build Thread Man Cave Mantiques Cecil Street Auto Repairs Garage Carlisle Build Cost £4181.65 - Last - Wheel Cylinders
|
|
#258
13th October 2012, 08:41 PM
|
||||
|
||||
|
The gearbox looks very nice Kev
I have 2 questions: 1 - To paint it with Hammerite, did you use a brush, a spray, or an air brush? If you used an airbrush, I guess Hammerite is to thick and you have to dilute it, no? 2 - how did you clean the gearbox (and diff) before painting them? Mine are very dirty (mud and rust I guess). Sandblasting? High pressure jet? Or just a steel brush and your arm strength? Thanks in advance for the tip, I'll have to do it soon too 
__________________
Sylvain Pictures of my completed Roadster https://www.flickr.com/photos/994983...7646799525542/ Build blog: http://vouchtroadster.blogspot.se/ https://cafrazx550.blogspot.com/
|
|
#259
13th October 2012, 09:07 PM
|
||||
|
||||
|
theres a thinning guide on the hammerite tin last time i looked.
I did an engine years ago, had to use a combination of degreaser, brushes and a steam paper stripper. TT
__________________
You only get a woosh with a dump valve Build Thread Man Cave Mantiques Cecil Street Auto Repairs Garage Carlisle Build Cost £4181.65 - Last - Wheel Cylinders
|
|
#260
13th October 2012, 10:43 PM
|
||||
|
||||
|
yep I used a sand blaster with some crushed glass then gave it all a good wipe down with celly thinners......I know the hammerite tin will say use their thinners, but I have always just used celly to thin down all hammerite products I have used.
The gearbox was sprayed with a little cheapo gun exactly the same as this one http://www.ebay.co.uk/itm/Spray-Gun-...ht_4325wt_1139 it's spray pattern is variable up to 2" so there is little wastage due to overspray two healthy coats and looks as good as new, you are supposed to use a special primer for ally but I have never used it and have had no problems with paint coming off
|
 |
| Thread Tools | |
| Display Modes | |
|
|


 Linear Mode

