
|
|
#201
 18th February 2013, 08:11 PM
|
||||
|
||||
|
Quote:
Sorry I don't mean to depress anyone...  Trust me John it's far from perfect (I only post the good bits...). Once I figured out what to do the wheel arch panels weren't too bad to do. I jig sawed the two sides plates and fitted a spacer to keep the distance correct and then tack welded a 3mm strip to the radius on the car. The awkward part was to stop them distorting when welding, for this I made some thick steel radius plates and clamped them inbetween the two ally sides and left them in place until they cooled down a bit. I still may bugger them up yet when I try to match them to my rear panel.... 
__________________
Any intelligent fool can make things bigger and more complex... It takes a touch of genius - and a lot of courage to move in the opposite direction. Albert Einstein http://s1199.photobucket.com/albums/aa472/JohnoSS1/ Johno 
|
|
#202
10th March 2013, 09:34 AM
|
|||
|
|||
|
Johno,
Have you thought about where you will source you aero screen from ? David
__________________
Click to see my build photos on Flikr http://www.flickr.com/photos/67112582@N03/ Saturn MX5 Based Chassis, Limited Slip Diff & 2.4 Quick Rack. Build cost.... seems to be spending more on tools than car bits at the moment! (they will be handy in the future though). Car iva'd and passed 15/08/2014. Finished weight 572kg.
|
|
#203
10th March 2013, 09:39 AM
|
||||
|
||||
|
Quote:
I looked into a supplier some time ago... Lo all, Had a quick look on the net last night and found this company, http://www.aerodynamix.co.uk/index.html that make various aeroscreens in carbon fibre and GRP. I emailed them last night to see if they fit the Haynes. The reply said they have supplied some to Haynes builds and haven't had any problems.. They certainly look good and also make other carbon parts... Hope this helps.... 
__________________
Any intelligent fool can make things bigger and more complex... It takes a touch of genius - and a lot of courage to move in the opposite direction. Albert Einstein http://s1199.photobucket.com/albums/aa472/JohnoSS1/ Johno
|
|
#204
17th March 2013, 05:27 PM
|
||||
|
||||
|
Well I've eventually got round to start installing the wiring loom..
I removed the obvious stuff before placing it roughly in position in the car. I then set about removing some of the wires from the steering switches and fuse boxes etc.. which seemed easier to visualize what goes where when it's in the car rather than on the floor.. I've fabricated a shelf under the scuttle to install all the relays, wiring, immobiliser and ecu, to this shelf I can securely fix brackets to hold the various components in place. Here is a picture of the wiring roughly laid out in place. In the background you can see the ecu already mounted in place.  I've also fabricated a cover to go from the shelf to the underside of the dash which is removable. This will keep the electrics unaccessable to the interior of the car when the cover is bolted in place (you can just see it holding the dash in place without the scuttle). I've got other things on the go but don't want to give too much away yet.
__________________
Any intelligent fool can make things bigger and more complex... It takes a touch of genius - and a lot of courage to move in the opposite direction. Albert Einstein http://s1199.photobucket.com/albums/aa472/JohnoSS1/ Johno
|
|
#205
7th April 2013, 08:01 PM
|
||||
|
||||
|
Well I think I've got the worst of the electrics out of the way....
It's been a bit of an uphill struggle to say the least. Colours different to diagrams, wiring modified and relays removed to say a few of my problems. All the wirings roughly laid out in place except the wiring to the rear (which should be straight forward now), just needs tidying up. 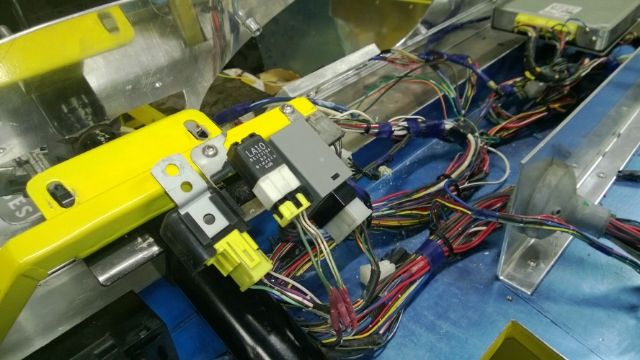 The main fuse box will be mounted to the removable cover for my steering column/brake pedals and when this is removed you will be able to access the secondary fuse box without removing the scuttle. 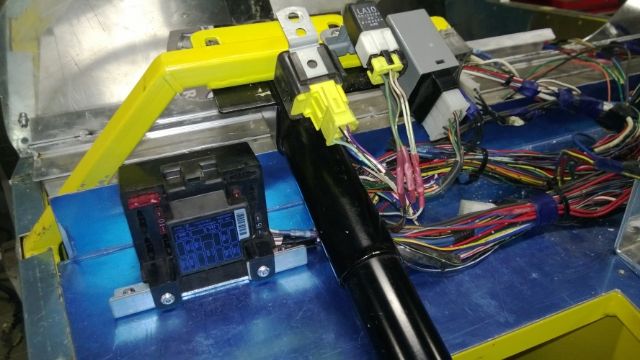 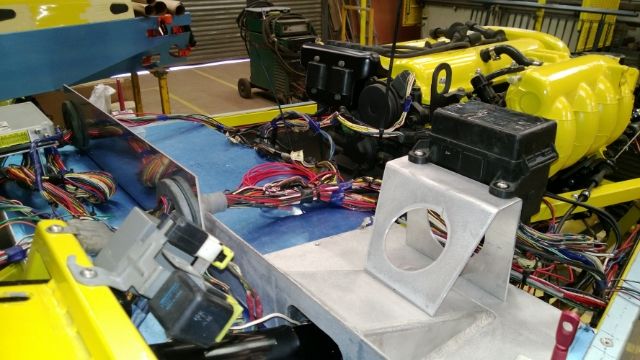 Hopefully within a week or two I should be able to try and start her....
__________________
Any intelligent fool can make things bigger and more complex... It takes a touch of genius - and a lot of courage to move in the opposite direction. Albert Einstein http://s1199.photobucket.com/albums/aa472/JohnoSS1/ Johno
|
|
#206
8th April 2013, 03:41 AM
|
|||
|
|||
|
looking great you have some nice ideas that i may steal
 lol lol
__________________
My build diary is at http://thailoz.wordpress.com/
|
|
#207
14th April 2013, 06:46 PM
|
||||
|
||||
|
Thanks thailoz, steal away buddy that's what this site is all about.
Well I fabricated an expansion tank today out of ally and raised it as high as I dare. It's approximately 200mm high by 100mm diameter with a 0.9 bar radiator cap which should leave plenty of room for the coolant to expand. I'm hoping I got it right but if anybody can see a problem with it please let me know as it was a spur of the moment thing..LOL 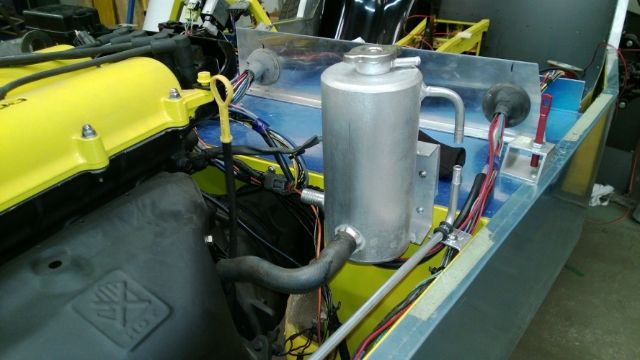 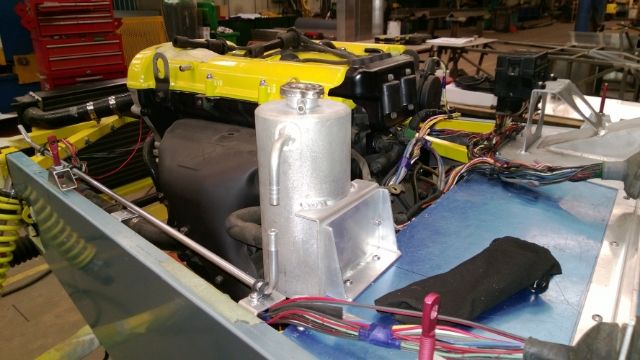 I've run a 10mm ally pipe from the top of the rad to the top of the tank which I guess should eliminate trapped air..  Just need to order some coolant hose to plumb it all up now. I've also been working on my electrics today and have the main fuse box in place and now routing the wires to the rear. 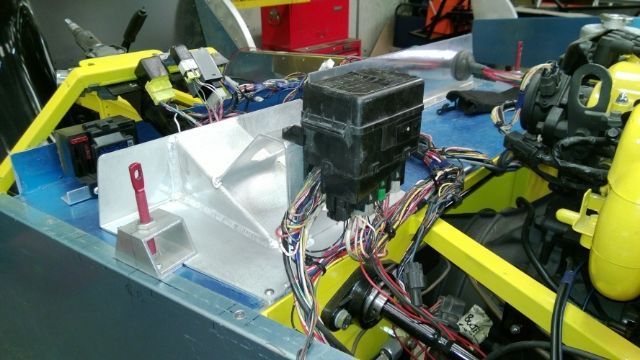
__________________
Any intelligent fool can make things bigger and more complex... It takes a touch of genius - and a lot of courage to move in the opposite direction. Albert Einstein http://s1199.photobucket.com/albums/aa472/JohnoSS1/ Johno
|
|
#208
18th April 2013, 09:30 PM
|
||||
|
||||
|
Quick update,
Fabricated my battery box tonight... 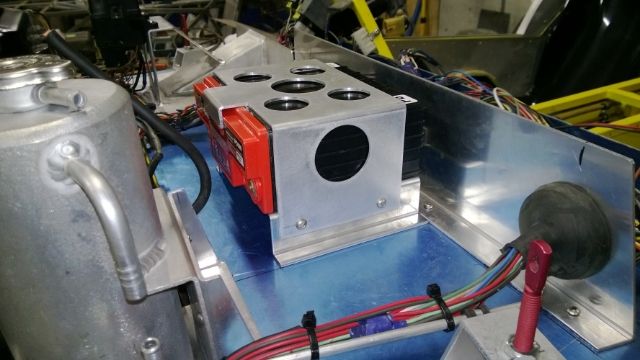 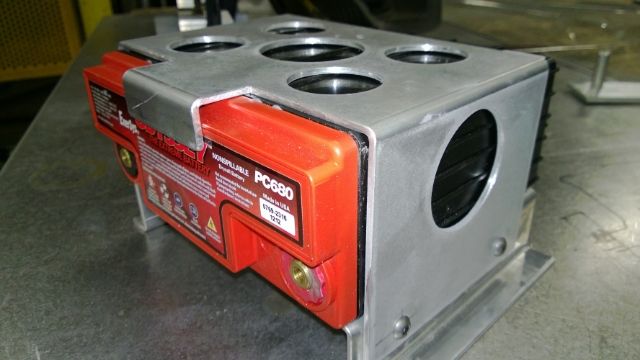 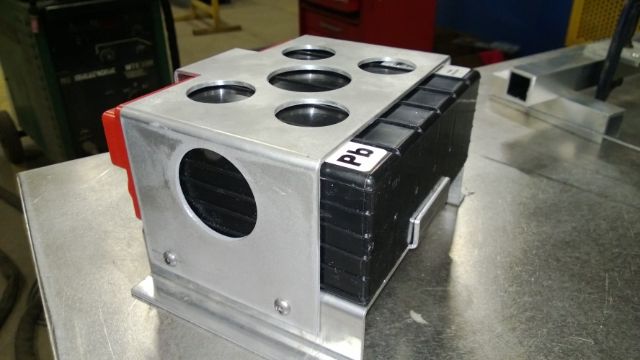
__________________
Any intelligent fool can make things bigger and more complex... It takes a touch of genius - and a lot of courage to move in the opposite direction. Albert Einstein http://s1199.photobucket.com/albums/aa472/JohnoSS1/ Johno
|
|
#209
19th April 2013, 12:52 PM
|
||||
|
||||
|
Nice box, are you going to put some U-Trim on it to prevent possible chaffing of the cables . Mr IVA may pick up on that.
Cheers TT
__________________
You only get a woosh with a dump valve Build Thread Man Cave Mantiques Cecil Street Auto Repairs Garage Carlisle Build Cost £4181.65 - Last - Wheel Cylinders
|
 |
| Thread Tools | |
| Display Modes | |
|
|


 Linear Mode

