
|
|
#131
 6th August 2012, 07:13 PM
|
||||
|
||||
|
Well I got a few things done on the car in the last week.
I managed to paint my roll bar in the end after making a mess of the first top coat... then when it did go OK a bug decided to do a "Kamikazee" dive straight into the nice wet paint... well I guess thats the first of many to end their life on it..LOL Installed my clutch cylinder piping, all I need to do now is purchase a flexi hose to go between the "T" piece and slave cylinder. I've tried to keep the pressure switch low on the "T" for my brakes and clutch to help prevent air being trapped between the oil and the switch. Finished my throttle cable routing and connected it to my accelerator pedal. The pedal just needs the stops adjusting now it's all in place. Finished my top and bottom rad hoses which now need clipping up. Is it better to use the constant tension clips for this job or will Jubilee's be fine? Fitted some silicone hose to intake manifold and various components. Sand blasted ball joints and gave them a few coats of paint. Started painting my internal panels. Also the steering rack got a coat of paint. Clutch "T" in place with hard lines... 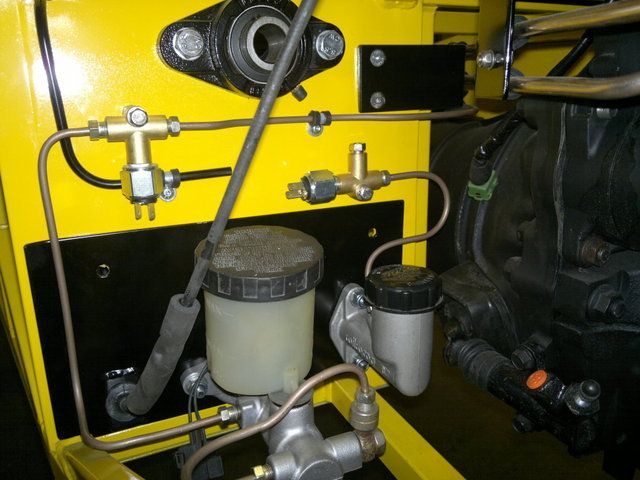 Bottom coolant pipe with bracket welded to it and fixed to chassis...  Roll bar and some of the internals panels in position... In the background is Simons build with a hint of Orange here and there. 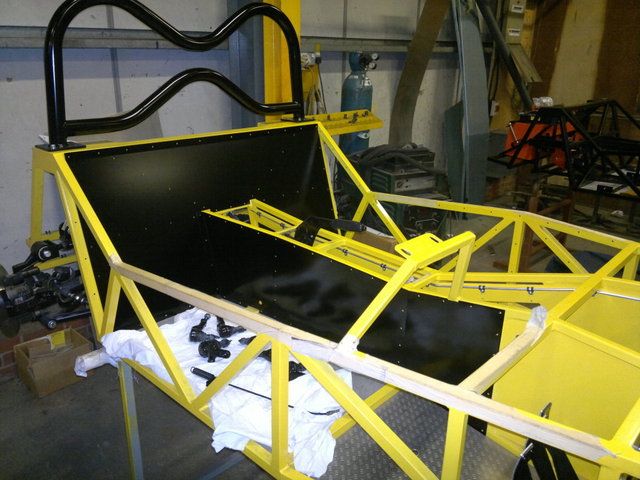 New silicone hose on some of the air intake manifold fittings... 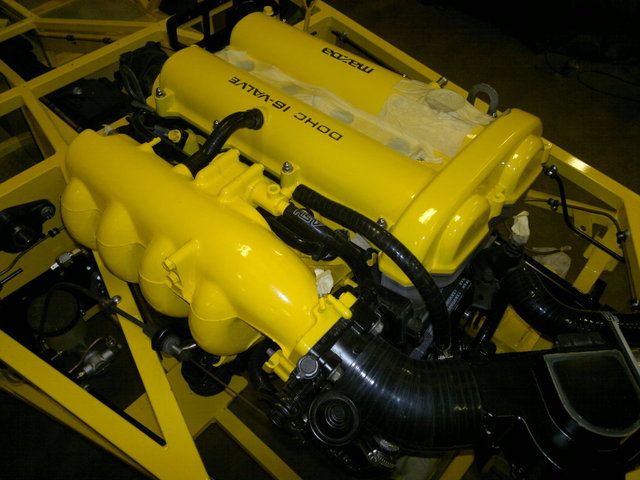 http://s1199.photobucket.com/albums/aa472/JohnoSS1/ Johno 
|
|
#133
7th August 2012, 07:25 AM
|
||||
|
||||
|
You have been a busy boy Johno!
What's the travel like on your throttle pedal?
|
|
#134
7th August 2012, 09:01 PM
|
||||
|
||||
|
Quote:
 I'm trying to darken it a bit with all the black panels and other stuff I have planned... Hi John I took a couple of photos of my pedal travel, why do you think there is a problem? 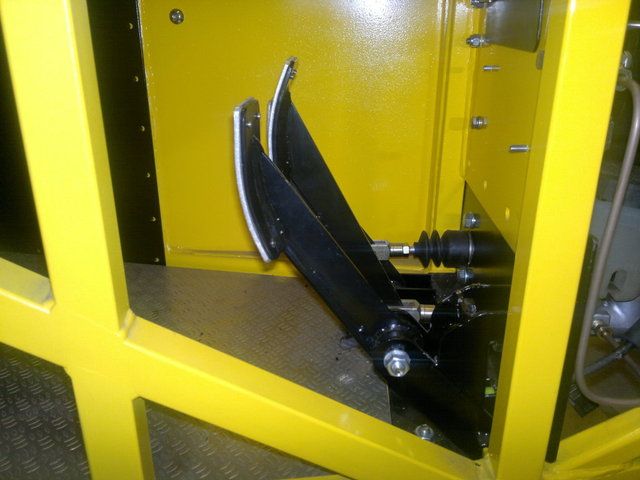 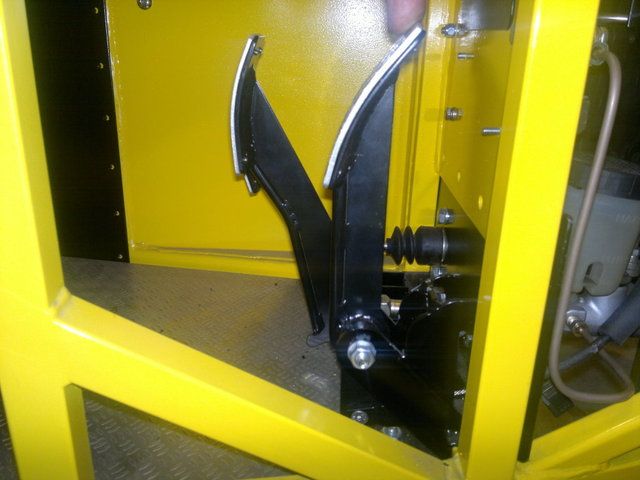 There is a fair bit of adjustment with the standard cable setup just before the throttle boddy on the original MX5 cable.... You got me worried now... On the down side of things you were right about the amount of steering lock. I have the same problem as you regarding as the extension hitting the wishbone.....bugger... Like yourself I am going to fit some sort of steering limiter which will help with the self centreing for the IVA. I've had a look around and there is nothing for the Ford Escort steering rack but there is kits for the Ford Focus with 18 inch wheels and Fiesta I believe. MNR fit a 5mm wheel spacer to the hub to stop the steering ball joint hitting the rim. I was thinking of getting a ally spacer bush made up in two halves with a jubilee clip to pull the two halves together. Each spacer would have a lip to just clear the jubilee width if you understand what I mean. I was also thinking about altering the extension itself in regards to thinning it down a bit with the MX5 ball joint only being 12mm thread. I will see how that goes. Out of curiousity how wide were your plastic steering rack stops? Johno
|
|
#135
7th August 2012, 09:16 PM
|
||||
|
||||
|
Does that give you the full range of movement on the throttle body?
My pedal travel seems to be a lot more than that, in fact it's slightly rediculous ") I'm thinking I might have to extend the bottom of the pedal down to give the cable more movement for less pedal travel if that makes any sense. I can't quite remember how wide my rack stops are. They weren't much wider than a jubilee clip though, maybe 20mm or so. Going to stick with that solution, but possibly remake them out of something less likely to shatter.
|
|
#136
7th August 2012, 09:16 PM
|
||||
|
||||
|
Wow johno looks really good if mine come out half as neat I will be happy keep it up mate
__________________
17.07.10 "Now i know the meaning of life" My Build pics http://www.flickr.com/photos/67605695@N04/ http://www.flickr.com/photos/97412063@N08/
|
|
#137
7th August 2012, 09:30 PM
|
||||
|
||||
|
Thanks all,
That's full travel on the throttle body John. Simon was with me when we adjusted it today to see what we could achieve. The accelerator pedal is book spec with the only addition of a home made clevis arrangement to accomadate the original cable. What sort of travel do you have then? I can't see why you should have a problem...... do you have the ability to alter the the lenght of travel near the throttle body? Johno
|
|
#138
11th August 2012, 07:55 PM
|
||||
|
||||
|
Well I altered my rear top wishbone yesterday.
Forum member Robo made a valid comment on them some time back and I've only just got round to altering them. At the time I made the adjuster out of 18mm coarse pitch studding which was OK for mocking up but no good for road use. After I made them I was not happy as I knew that thread in a shaft was not a good idea and Robo's comment only reinforced this. Basically he said "think Tobelerone" which is a good perspective as the coarse thread pitch along with thread all the way along the adjuster was a bad idea (failure everywhere). Well I wanted to keep the top adjustable wishbone idea and tackle the adjuster...... Here's my latest version.....  I started off with a 18mm fine pitched bolt rated at 8.8. This had the head cut off and a thread machined the same end... 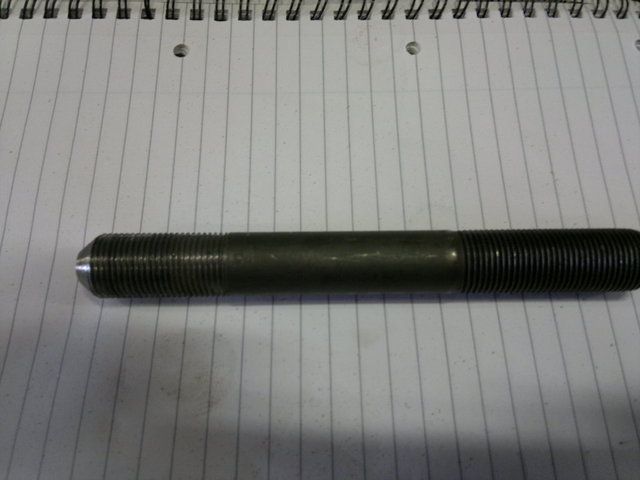 The part of the bolt which was to be welded to the yolk was prepped for weld. The yolk was also uprated to a 10mm back plate with 6mm side plates. Before the bolt was tacked to the yolk a Stainless half nut was fitted along with a machined half nut. The bolt was then welded to the yolk. The machined half nut was then welded to the back plate once it was tightened as far as it would go.... 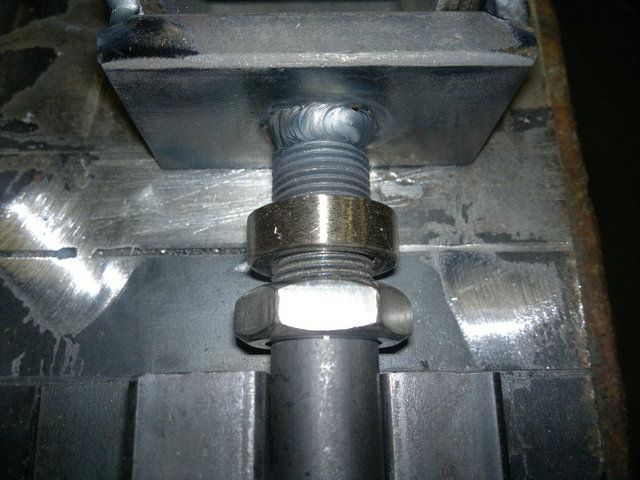 Here is the finished result... 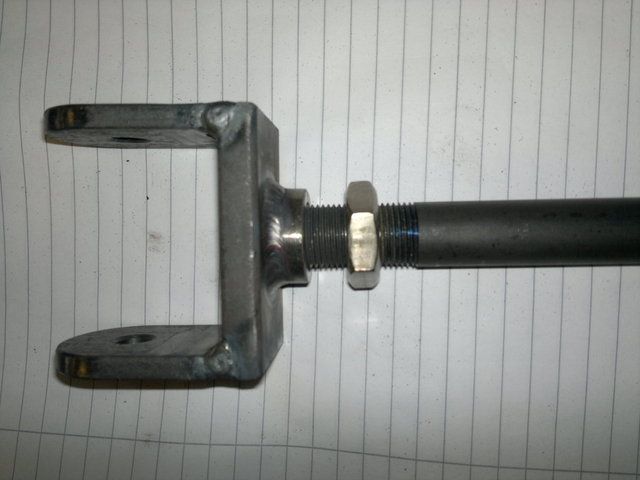 The idea of the machined nut is to reinforce the bolt along its length without putting another weld further along. This will also help to strengthen the weld under the machined half nut without creating a further failure point. Well that's the idea behind my thinking. The amount of thread between yolk and wishbone is quite small so hopefully this will help as well. The shank of the bolt is now inside the wishbone which gives a lot better fitment and strength. I'm more happier with it now but if anybody has an issue with it please let me know.... Thanks Johno Will post a picture tomorrow of the finished item... Last edited by Johno : 11th August 2012 at 07:58 PM.
|
|
#139
11th August 2012, 08:20 PM
|
||||
|
||||
|
Stop posting the welding porn, puts mine to shame
 Your build is coming on brilliantly, I can't wait to see the final result.
|
 |
| Thread Tools | |
| Display Modes | |
|
|


 )
)


 Linear Mode

