
|
|
#61
 6th October 2012, 09:13 PM
|
|||
|
|||
|
Why does all action seem to come in spurts?
Did nothing for over a month, and now I've suddenly made great progress! - Ordered wishbone ends, diff hanger brackets, rear end tubes and rear uprights from Talon. - Started tacking first wishbones together - Bought bearing for steering column (pressed steel version like Deezee's) - Restacked all the donor parts in my shed (had a large clear-up) - And ordered the Tap-spanner I need for the other wishbones... At this rate I might have a rolling chassis before the end of the year!  I might get round to adding some more photos at some point... 
|
|
#62
21st October 2012, 10:16 PM
|
|||
|
|||
|
Even more work!
After a parts injection from Talon, I've fully welded my front and rear lower wishbones. Painted the fronts (one coat to keep the red fuzz at bay) and double checked that all the dimentions are spot on. Must say, all the parts from Talon are top-notch, the bush tubes are even cleaned along one side to show where the join line is! Have also made up some spacers from 2 lengths of 19mm box to hold the new steering bearing in place, and have sanded around 1mm off the plastic triangle-to-circle adapter so it fits in. Once all bolted in place it should provide a much stronger steering system. Oh yes, also recieved my extra large tap spanner and tapped the large thread for one of the upper wishbones. So they'll be next made!
|
|
#63
6th January 2013, 10:27 PM
|
|||
|
|||
|
Still slogging away. Making progress here and there...
Now have all rear bones fabbed and painted, various parts of the chassis undercoated, a floor on the back half of the cockpit, rails in for the seats to mount to etc... etc..... Most recently, cleaned and painted the font uprights, painted the rear uprights and cleaned one of the rear hubs ready for painting. Off to the local motor-parts shop tomorow for some more high temp paint and might have some parts bolted together by the end of the week! Oh yes, might take some photos at some point too...
|
|
#64
8th January 2013, 10:11 PM
|
|||
|
|||
|
Well, I keep promising and not delivering but with any luck these will provoke some feedback!
 The current state of my chassis, back end almost complete and mostly painted: 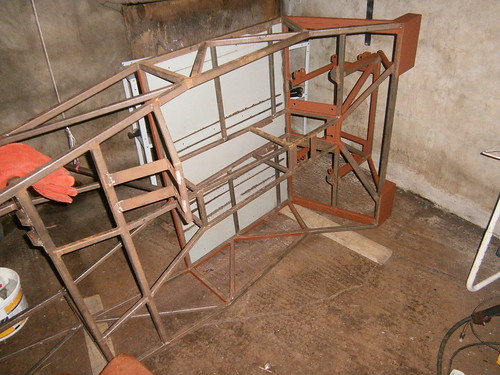 And my rear bones fully painted, bottoms: 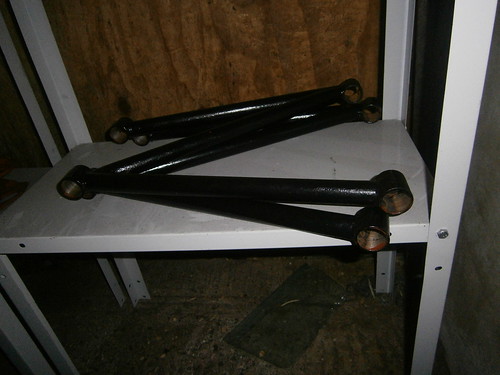 And tops: 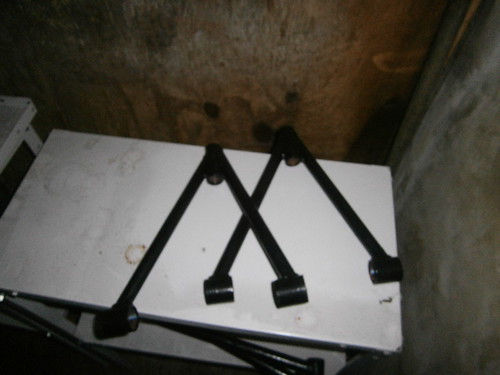 See next post for more. Yes, more!! Last edited by Oscar : 8th January 2013 at 10:16 PM.
|
|
#65
8th January 2013, 10:24 PM
|
|||
|
|||
|
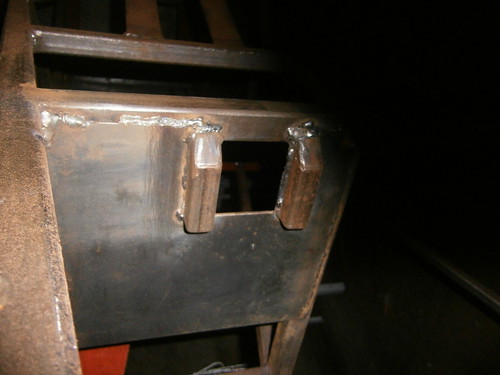
Heres a close-up of my modded steering bearing mounts:
 And, as I believe they're meant to be (though I'm still te be confirmed), the drivers side rear upright/hub/brake arrangement: 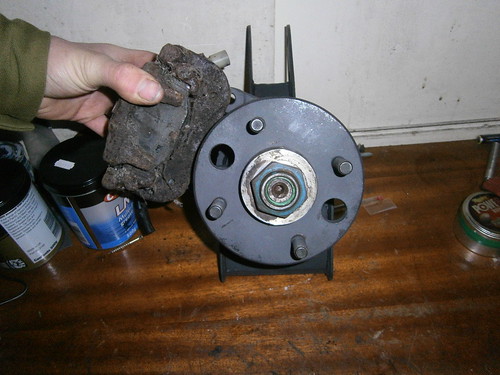 Also where the bleed nipple will be as there was some debate about this:  This should be OK as the process of bleeding will push any bubbles out of the bleed pipe, which extends form the top of the cylinder. Calipers are going to be stripped, electrolisysed and put back together with new rubbers. Think I'll wait to rebuild them untill I'm nearing the point of plumbing all the brakes in as I don't want the internalls to start rusting up before I've filled them will brake fluid. Please feel free to discuss all elements so far in a polite, sensible and non-judgmental way. (Leave all projectile weapons at the door, hand weapons are fine.) 
|
|
#66
13th January 2013, 09:20 PM
|
|||
|
|||
|
Bit more work over the last few days:
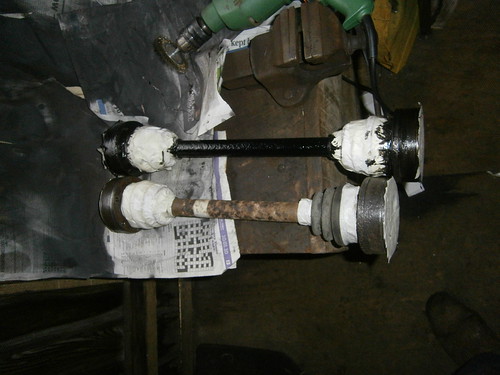 Cleaned up and painted both rear driveshafts 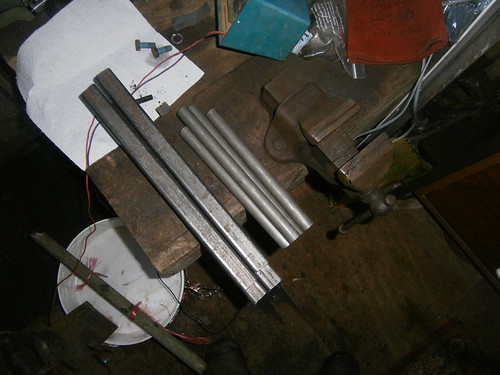 Cut the steel for the top front wishbones (last left to make) and 4 "shocks" Then tried to set up some electrolysis: 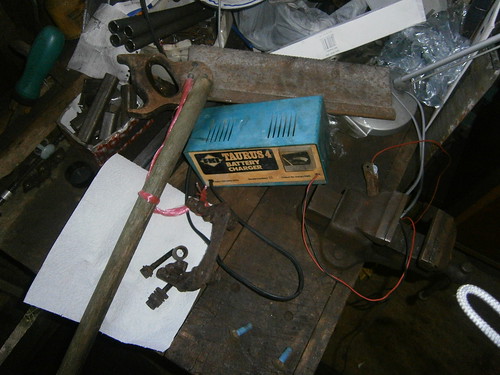 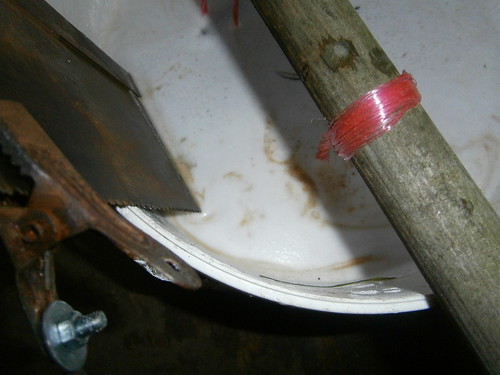 Only running at 0.5A, so need to tweak it a bit!
|
|
#67
13th January 2013, 09:44 PM
|
||||
|
||||
|
Oscar,
I cleaned my Sierra parts by electrolyse a few months ago. Watching at your pictures, I just noticed the position of the electrode. From what I've read everywhere, current circulation is better if the electrode does not touch the walls and the bottom of the bucket. It is also better if you can make an electrode in a "cage" shape, surrounding the part to clean, cleaning will be more even (electrolyse is also function of the distance between the anode and the cathode) Just thoughts. If you want more details, you can read this page of my blog (forgive my English) about that: I didn't come back on the electrolyse process that everyone knows, it would have been useless, but thanks to a lot of informations I gathered on Internet, I tried to describe what to think about to make it efficient, and what to avoid to keep it safe. Hope that can help. Good luck for the messy job (because it is  ) )
__________________
Sylvain Pictures of my completed Roadster https://www.flickr.com/photos/994983...7646799525542/ Build blog: http://vouchtroadster.blogspot.se/ https://cafrazx550.blogspot.com/
|
|
#68
13th January 2013, 10:30 PM
|
|||
|
|||
|
Oscar, I've been playing with the electrolysis quite a bit over the past 3 weeks with some quite good results, i'm planning on a bit of a write up but there's some pics and bits here
http://www.roadster-builders.co.uk/f...php?f=16&t=181 Mine was running anywhere between 5.5 and 9 amps and everything so far has taken no more that 24 hrs I found its best to take the piece out and give it a quick pressure wash/hose/brush to remove the softened bits every 2 - 4 hrs or whenever your passing it. Give me a shout if you got any questions, after a while of using the battery and charger I butchered an old 250w Atx PSU which worked just as well.
|
|
#69
13th January 2013, 10:44 PM
|
|||
|
|||
|
Some more pics here, I've got a load more still on the camera I've not uploaded yet.
http://s1157.beta.photobucket.com/us...postlogin=true
|
|
#70
13th January 2013, 10:50 PM
|
|||
|
|||
|
Just been outside to check the progress, wasn't sure if it was working till I checked the negative contact.
Big lump of rust on the old saw-blade! Current setup is a nackered battery charger drawing a tiny current, and a mixture of washing powder (just ordered the soda crystals). Plans for tomorow: have a go at adapting an old PSU thats lying in the shed, and see if get a better current. Cheers for the offer Dad-of-seven, really need to sign up to the new roadster forum, get the feeling I'm missing out on a few bits of info and gossip! 
|
 |
| Thread Tools | |
| Display Modes | |
|
|


 Linear Mode

