
|
|
#51
 28th May 2011, 08:51 AM
|
||||
|
||||
|
That's far too methodical
 I just ripped all the wiring out and figured I'd worry about it at a later date. I suspect your approach will pay dividends later whilst I'm up to my eyeballs in tangled cables and impossible to understand wiring diagrams! 
|
|
#52
28th May 2011, 10:37 AM
|
||||
|
||||
|
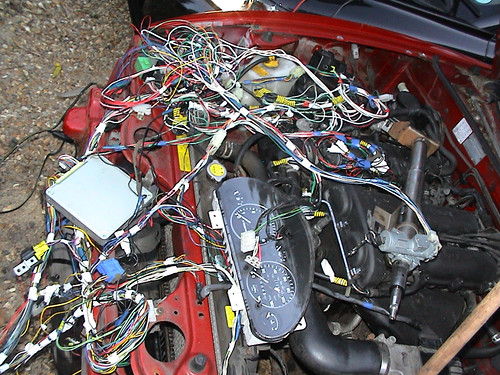
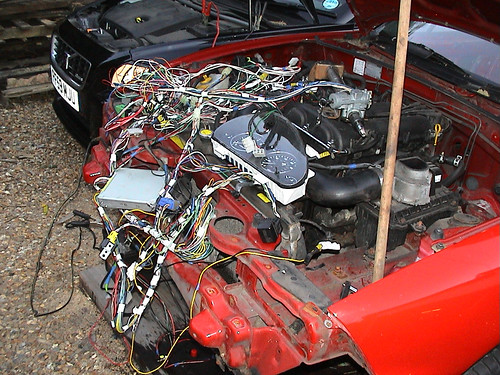
I don't have anything else to do at the moment so I can take my time.Worst thing about the mx5 loom is that they changed them every year it seems. I've only just got hold of the mazda dealer wiring diagrams for the 94 year from a friend which are brilliant at showing everything very clearly. The mx5 looms really are a rats nest.
This link is good too! http://www.madracki.com/miata/ I'm starting to enjoy working on the loom now it's in the garage on the build table and I can see what is what!
|
|
#53
28th May 2011, 11:29 AM
|
||||
|
||||
|
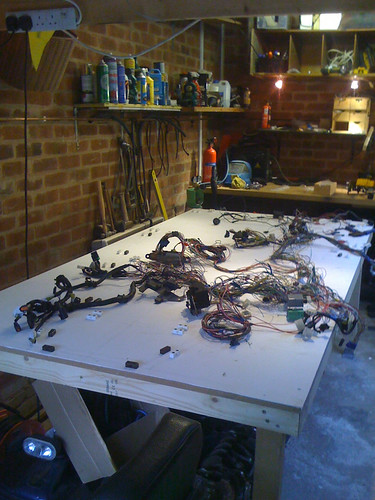
The wife's out for the day and I can't get out to the garage so I've currently got my loom spread out on the living room floor, lol
Thought I've have a go at identifying all the connectors. Wish I'd labelled them all before removing it from the car now!!! Try this link for diagrams: http://neomiata.com/garage/index.php...s%201990-1996/ They're not the easiest to follow, but there's individual diagrams for each year.
|
|
#54
28th May 2011, 11:41 AM
|
||||
|
||||
|
Well the first thing I'd do if I were you, speaking from experience, is check all the ecu pinout wires and colours match your wiring diagram as I went through a few before I found my M reg 95 car had a 95' year rear loom and a 94' engine, front and interior loom!
")
|
|
#56
28th May 2011, 06:29 PM
|
||||
|
||||
|
now that is exactly the reason i went with a bike engine! that would probably cause me to have a nervous breakdown
__________________
A few build photos... www.photobucket.com/ntsengineering
|
|
#57
2nd June 2011, 10:26 PM
|
||||
|
||||
  YES!!! The engine still works! I only made one mistake! I put the ignition live for the Fuel Pump Relay to a dead terminal rather than the relay. Once I had then hooked up another car to the battery to jump atart it as it was flat, and tightened a bad ground hey presto my loom still works without all the other stuff, including the immobiliser. I will wait till it's test fitted to the engine in the roadster before doing anything else to it. Time to put it in a box and forget about it happy in the knowledge it worked before I put it in the box and took the engine out! Last edited by CTWV50 : 16th June 2011 at 12:56 PM.
|
|
#58
3rd June 2011, 09:11 AM
|
||||
|
||||
|
Wiring loom ain't too bad, a lot of that can come out - neater than the sierra. Got ours fired up earlier in the week and it sounds sweet. Just need the prop and it's having it's first test drive of the suspension around our "private" estate. Just going to modify / shorten the prop for now.
Andrew
__________________
Haynes Roadster / Saturn GRP Bodywork. Now available direct through http://www.gillhamonline.co.uk/ or contact me direct on andrew.hugill@ntlworld.com Regards..........AndyH
|
|
#59
16th June 2011, 12:54 PM
|
||||
|
||||
|
So I've decided like many that if I tacked the whole frame together I'd end up with a badly distorted frame when it came to fully welding it, with my limited welding skills, experience, potential for the table sagging under the weight and build space, I've decided to get the basic bottom rail frame fully welded and work out the distortion in it before continuing any further, I've learnt a lot doing this and now have an appreciation of weld procedure and heat management.
One thing I have found is that if you do get distortion that needs sorting, a good method is grind back the weld on the high side of the frame put a small V groove over the old weld and reweld. The heat generated doing this pulls the frame back in to shape and I now how a frame sitting pretty much level with minimal distortion. I'm a bit of a perfectionist and struggle to leave things if they aren't right but I'm happy with it. A few more welds and a bit of tidying up and I should be ready to continue!
|
|
#60
16th June 2011, 01:55 PM
|
||||
|
||||
|
Great to see you've made a start on the welding
 Need to see some pics!
|
 |
| Thread Tools | |
| Display Modes | |
|
|


 Linear Mode

