Haynes Forums

Haynes Forums (http://www.haynes.co.uk/forums/index.php)
-   General discussion (http://www.haynes.co.uk/forums/forumdisplay.php?f=10)
-   -   Rosco's haynes Build (http://www.haynes.co.uk/forums/showthread.php?t=13517)

flyerncle 18th December 2015 12:39 PM

Knowledge and too much info .....:p

SeriesLandy 19th December 2015 11:37 PM

Quote:

Originally Posted by K4KEV (Post 102572)
Rosco ...you might want to re engineer the front mudguard stays as the book ones are pretty useless, they crack and shake like a woman's mechanical friend

Lol.
I used kev's design and they are spot on. Although 1 does wobble ever so slightly at 70mph. I also used 5x40mm plate which is probably overkill but it's what I had.

voucht 20th December 2015 12:58 PM

Quote:

Originally Posted by K4KEV (Post 102572)
Rosco ...you might want to re engineer the front mudguard stays as the book ones are pretty useless, they crack and shake like a woman's mechanical friend

Quote:

Originally Posted by SeriesLandy (Post 102581)
Lol.
I used kev's design and they are spot on. Although 1 does wobble ever so slightly at 70mph. I also used 5x40mm plate which is probably overkill but it's what I had.

I think the book's design for the wing stays is not that bad if you replace the 3mm strips by 5mm. Mines are now book's design (a bit different on WS1, and around the brake line though) with 20x2mm round tubes, 20x5mm strips, and 5mm plates, and they are very stiff, no wobbling at all whatsoever, at all speeds. I'm very pleased with them.

If I have had the facility to nicely bend the tubes as Rosco did, I would have gone this route too, because assembling the tubes together on WS1 with the right angles, etc., is a part I found very difficult to achieve. IMO, making the tubular part of the wing stay in one-piece is a very good idea.

If the steel strips holding the wings are 5mm thick, Rosco's wing stays should not wobble at all. Just my humble opinion though :)

MrFozzieBear 20th December 2015 02:27 PM

If you've done the same as me and got the MK wing stays.

They will be spot on with very little vibration when you've got it on the road.

I put them on dry first because they needed slight fettling on the bottom bracket. But they are solid and look good when powdercoated.

Rosco 20th December 2015 07:33 PM

Cheers guys, yeah I gave in and brought mk's, sound like they should be ok then, I couldn't face making anything else lol

norton 20th December 2015 07:43 PM

Are you using mx5 or Sierra uprights?

Rosco 20th December 2015 07:48 PM

Quote:

Originally Posted by norton (Post 102586)
Are you using mx5 or Sierra uprights?

Sierra :D

norton 20th December 2015 07:58 PM

Ah, I've been looking for an off the shelf mx5 stay :(

Davidbolam 20th December 2015 08:01 PM

Quote:

Originally Posted by norton (Post 102588)
Ah, I've been looking for an off the shelf mx5 stay :(

Westfield sell these for 35 powder coated and they are solid

norton 20th December 2015 08:09 PM

Ahhhh, I've been searching but not found them. Do you have a link?

Rosco 20th December 2015 08:18 PM

Well me and my dad have had two full days on the car again this weekend, got the side panels finish trimmed, painted the inside black and bonded on with tiger seal

Also got the bonnet trimmed to match the scuttle and the scuttle fixed on with Rivnuts


Rosco 20th December 2015 08:19 PM

Rear tub fitted


Then made a card template for a exhaust heat shield


Then drawn up on the pic, we had to rotate so it would fit on my dads cnc


Rosco 20th December 2015 08:20 PM

Finished product in aluminium, I might still cover this in heat reflective foil, then it will be rivited on I think


norton 20th December 2015 08:27 PM

Tidiest build by far!

Davidbolam 21st December 2015 01:33 PM

Quote:

Originally Posted by norton (Post 102591)
Ahhhh, I've been searching but not found them. Do you have a link?

I phoned Westfield parts and collected them from a show. They showed me on their model how to attach them etc. they are also pre bent.

Rosco 1st January 2016 07:08 PM

Right I've had three full days on the car this Christmas, and hopefully two more still to go,


Santa brought me a gopro


Rosco 1st January 2016 07:08 PM

Space heat foil stuck on the aluminium heat shield and bolted on


Exhaust manifold fitted, and even if I say so myself I couldn't stop smiling after getting this all fitted up


Rosco 1st January 2016 07:09 PM

Next job Dashboard, I've been struggling with this, deciding which way to go, I didn't like the look of the equinox one, I wanted a carbon one but there's not one with an iva edge,

In the end I decided to make one with deboned sheet, easy to work with etc, as for the lower edge I'm using black pvc waste pipe, sounds crude but it's turned out sweet

Template first, I used 2mm coriguated plastic from wickes, was only £4 for an 8x4 sheet and can be easily cut


Fixing holes drilled and rivnuts fitted in scuttle


Rubber grommet and sleeve for steering column


Rosco 1st January 2016 07:10 PM

I was in the zone and forgot to take any pictures, I cut all the switch and dash holes out on my dads cnc

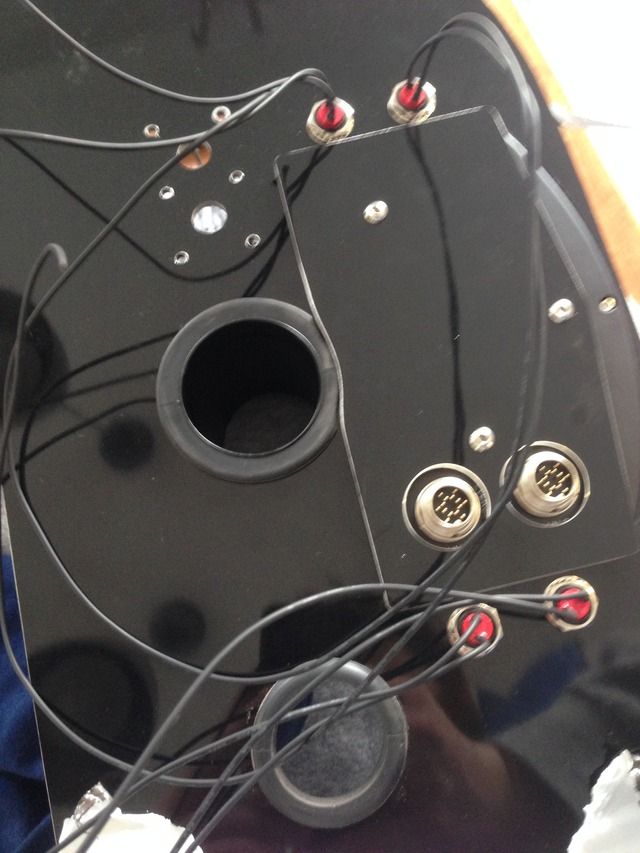
Back of the dash


All fitted up for good hopefully, lower edge pipe trim fitted
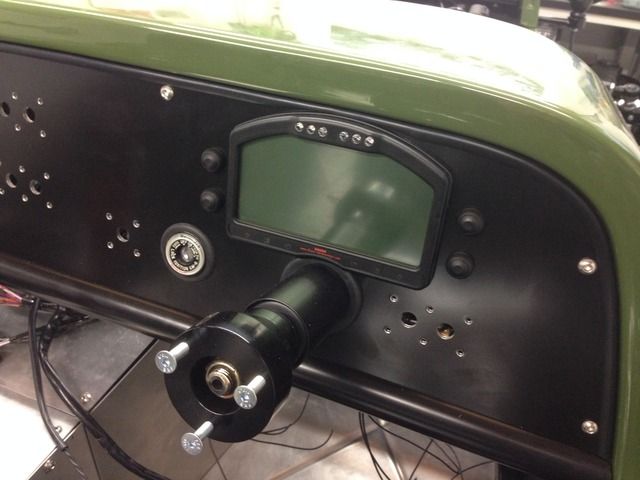


Full photo
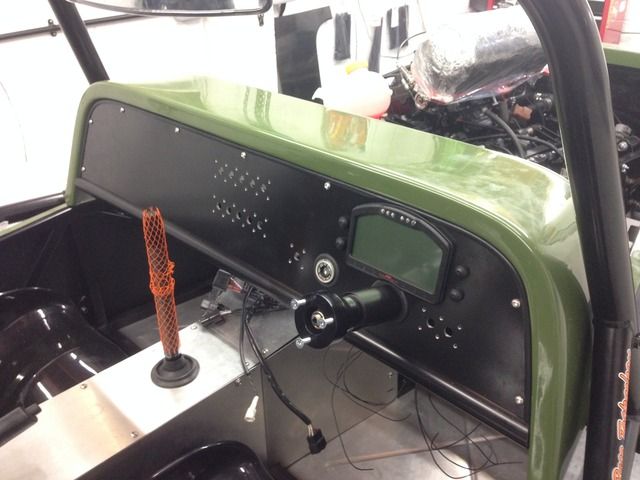


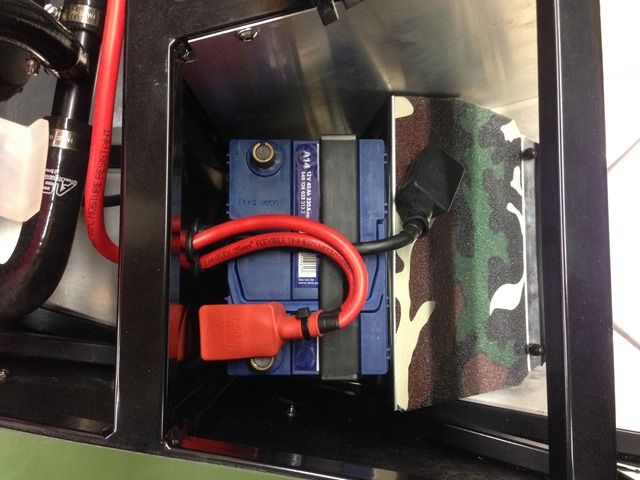
Battery fitted and passenger footrest, I might block the battery off from the footwell with a bit of dibond

Rosco 1st January 2016 07:10 PM

And a full shot for a change, starting to look like a car


metal matt 2nd January 2016 10:46 AM

Looking good there Rosco. Must say iv been following you and it's a very good build. Wish I had a accses to CNC machines as iv had to do all mine by hand which does limit things. Looking forward to seeing it on the ground and on the road.

https://www.flickr.com/photos/124541083@N02/

jason 82 2nd January 2016 02:34 PM

Loving the build, colour is beautiful !

Rosco 2nd January 2016 03:18 PM

Quote:

Originally Posted by metal matt (Post 102654)
Looking good there Rosco. Must say iv been following you and it's a very good build. Wish I had a accses to CNC machines as iv had to do all mine by hand which does limit things. Looking forward to seeing it on the ground and on the road.

https://www.flickr.com/photos/124541083@N02/

Cheers pal! Yeah a cnc is sweet, lucky to have use of one I guess,

Your builds sweet too, I've been looking at it on Flickr but can't seem to comment on it on the iPad, love your rear lights and did you wet lay the dash yourself? I wish I had of gone for aluminium sides, looks very smart, have you booked your iva yet?

Quote:

Originally Posted by jason 82 (Post 102656)
Loving the build, colour is beautiful !

Cheers, yeah the image I have in my brain is starting to come to life now!

Rosco 2nd January 2016 03:18 PM

Got a bit more done today,

Boot lid temple made up


And then as if like magic


Sorry forgot to take any pics, but yes I did it on my dads cnc, still needs a bit of fitting but waiting on some rubber bobbins now
Each of the three pieces will be bolted in place with the centre easy to unbolt and remove


metal matt 2nd January 2016 04:58 PM

Yes it is real carbon but only skined as I made my dash out of aluminium sheet first and covered it in vinal with the intention to re do it in carbon after but I was not happy with it so just done it anyway. Glad I did now. I'm going to do the same down the center tunnel.

https://www.flickr.com/photos/124541083@N02/

Rosco 3rd January 2016 08:42 PM

Quote:

Originally Posted by metal matt (Post 102663)
Yes it is real carbon but only skined as I made my dash out of aluminium sheet first and covered it in vinal with the intention to re do it in carbon after but I was not happy with it so just done it anyway. Glad I did now. I'm going to do the same down the center tunnel.

https://www.flickr.com/photos/124541083@N02/

Looks wicked!

Rosco 3rd January 2016 08:43 PM

Quick update from today, me and my dad fitted the bonnet aerocatches, went rather smoothly, I thought it was going to be tricky but turned out sweet


Next weeks job is to try and remember what's going on here


RichardH 3rd January 2016 10:28 PM

how did you do the front of the bonnet? i have bought four of those aero catches and was planning on using four but i have also seen some done with pins at the front

SeriesLandy 3rd January 2016 11:51 PM

I used 4 as the Saturn bodywork doesn't have a lip at the front.
Looking great btw.

Did you make your steering wheel boss??

Rosco 4th January 2016 01:04 PM

Quote:

Originally Posted by RichardH (Post 102681)
how did you do the front of the bonnet? i have bought four of those aero catches and was planning on using four but i have also seen some done with pins at the front

yeah the bonnet has some little lugs that locate in the nose cone, there not that big though so i'm going to add a couple of long pins on the bonnet edge just to be on the safe side, i will take some pics when i do

Quote:

Originally Posted by SeriesLandy (Post 102685)
I used 4 as the Saturn bodywork doesn't have a lip at the front.
Looking great btw.

Did you make your steering wheel boss??

cheers, yeah just turned up some aluminium and milled the tapered hex, i did think about getting a batch made but don't no how well they would sell

rpjg1975 4th January 2016 01:32 PM

I managed to get an rs boss for 99p a while back that fitted my aftermarket wheel but they cost silly money now so there might be a market for them....

MrFozzieBear 4th January 2016 01:42 PM

I used two aero Aero Catches in the same position as Rosco but also used these at the front:

http://www.kitspares.co.uk/index.php...70&search=Pins


Not the cheapest but works well and looks clean.

Rosco 23rd January 2016 08:11 PM

Bit of an update, I've been flat out with every bit of spare time trying to get this thing somewhere near finished

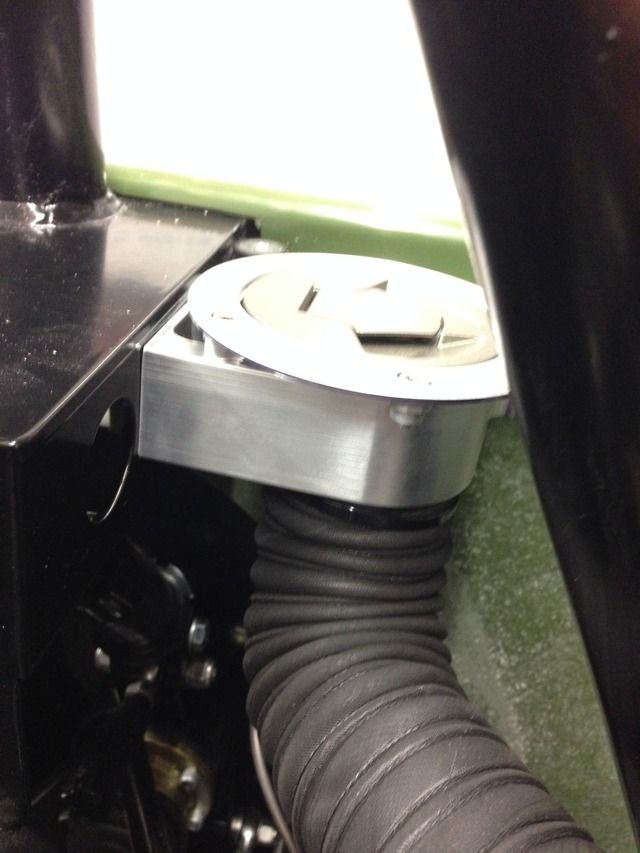
I drew this up and made one, it's so I can use the bike fuel filler cap so the keys the same for the ignition and the tank
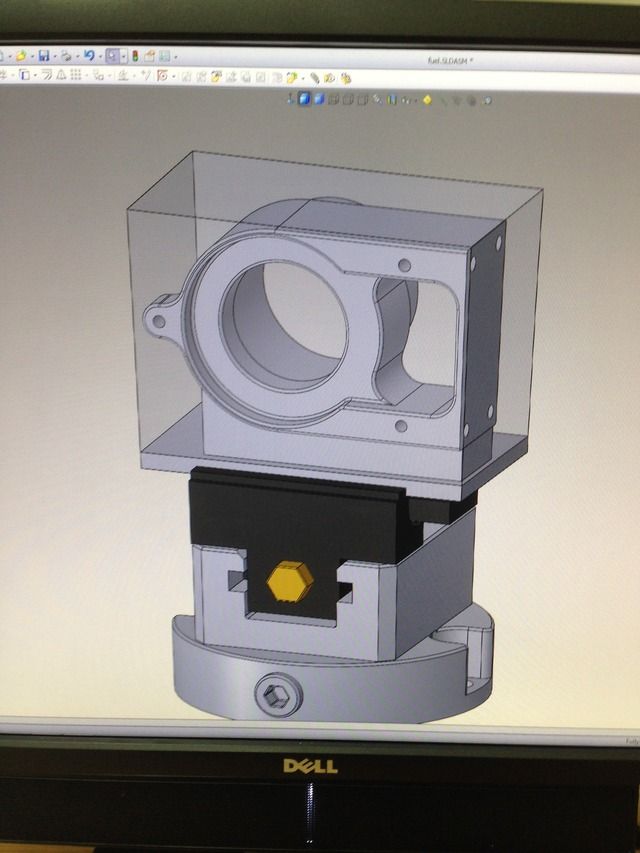


It was quite tricky to draw it up but turned out great
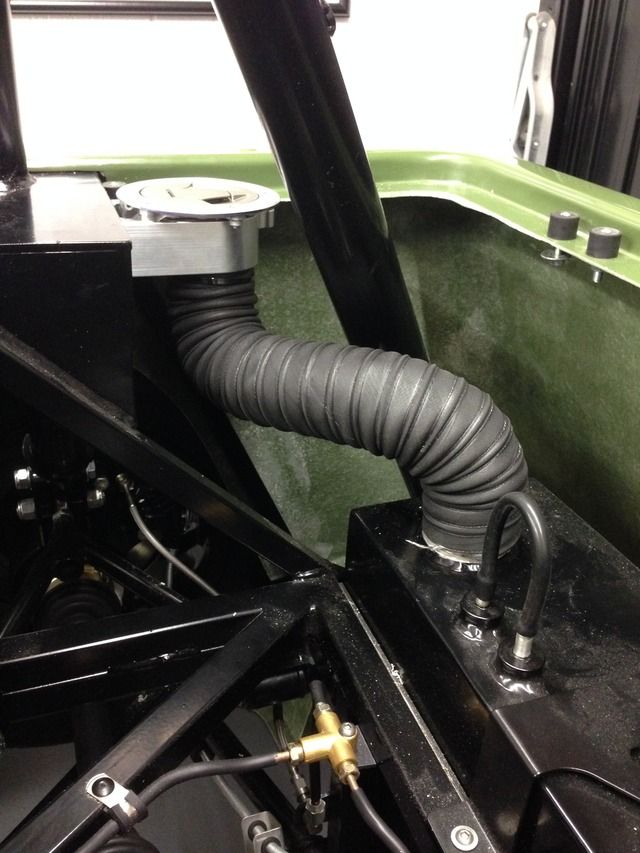


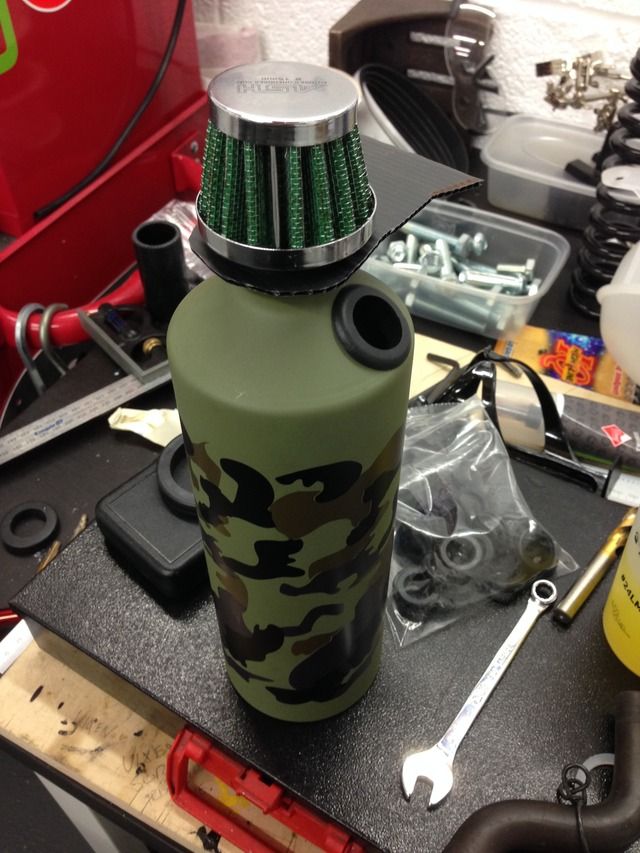
Started on an oil catch tank from an alu water bottle

Rosco 23rd January 2016 08:13 PM

Got some logos made up for my centre caps


Couple of bonnet location pins made


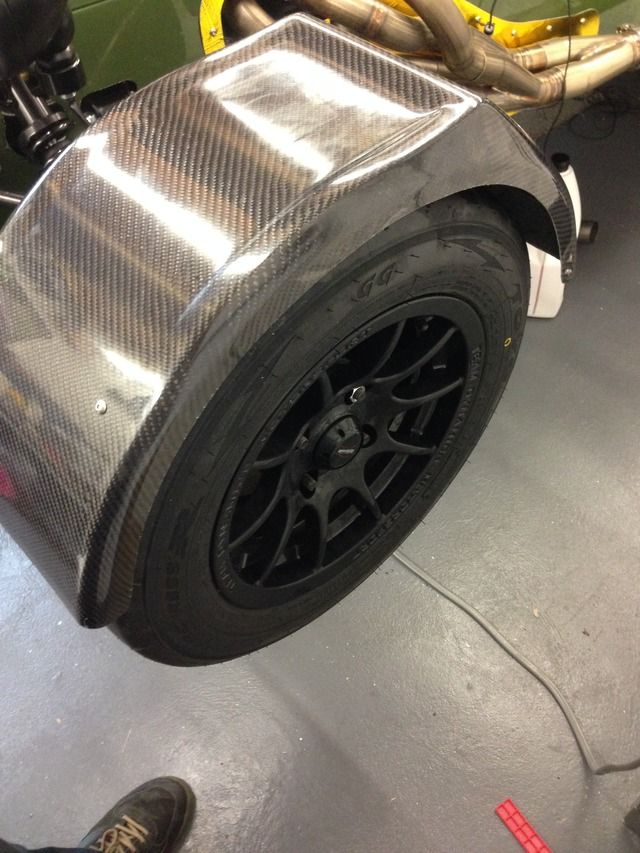
Got some front arches from MK, there proper smart, well happy with the quality of them


Decided to get some tube bent as the flat bar looked a bit naff


Rosco 23rd January 2016 08:15 PM

I used m5 rubber well nuts in the tubes to bolt them on, took me all day and stressed me out trying to get them right! Turned out ok in the end
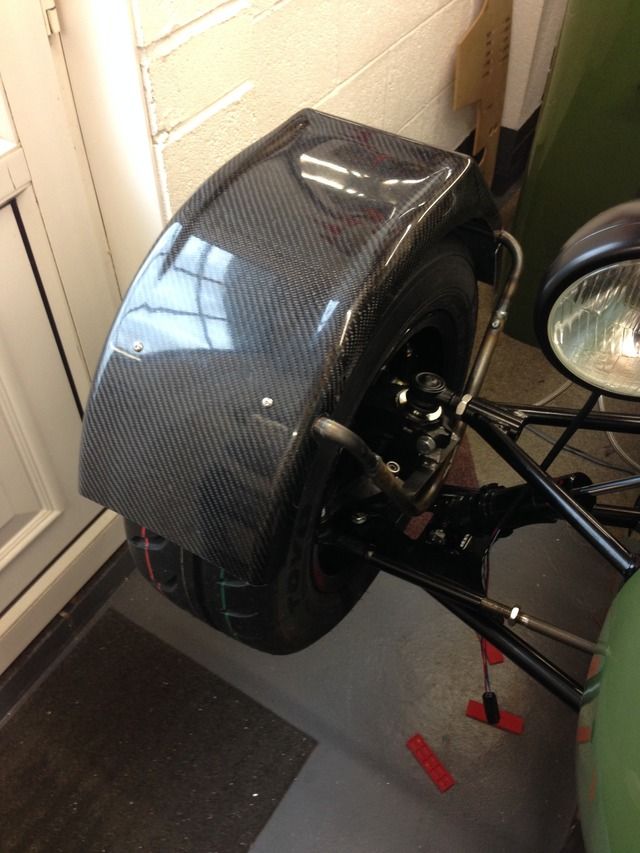


I've not mounted them to close to the tyre as I want to be able to swap wheels early


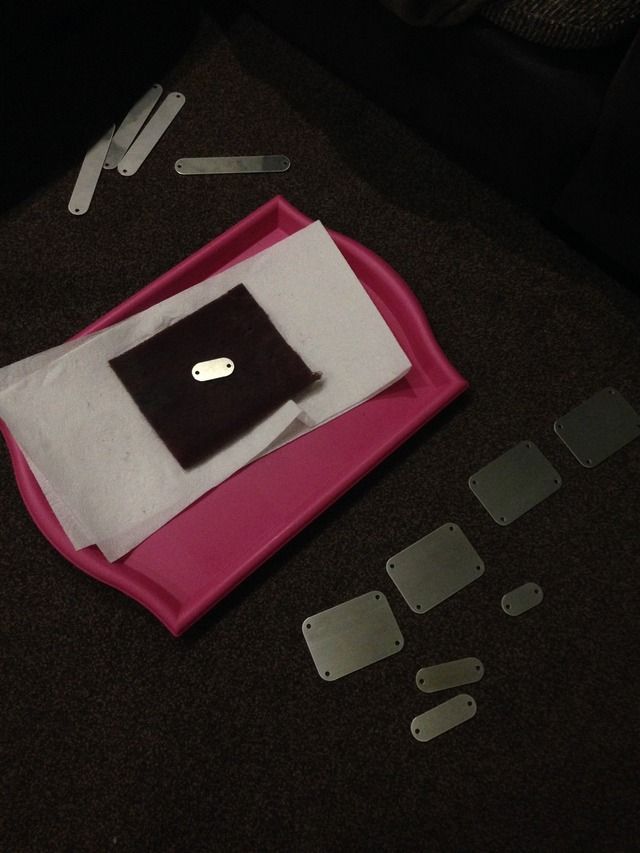
Made some name plates for under my switches etc, there getting anodised then I will engrave them up


The next job took me almost two full days! The bulkhead, took a shot to prove I don't use cnc for everything
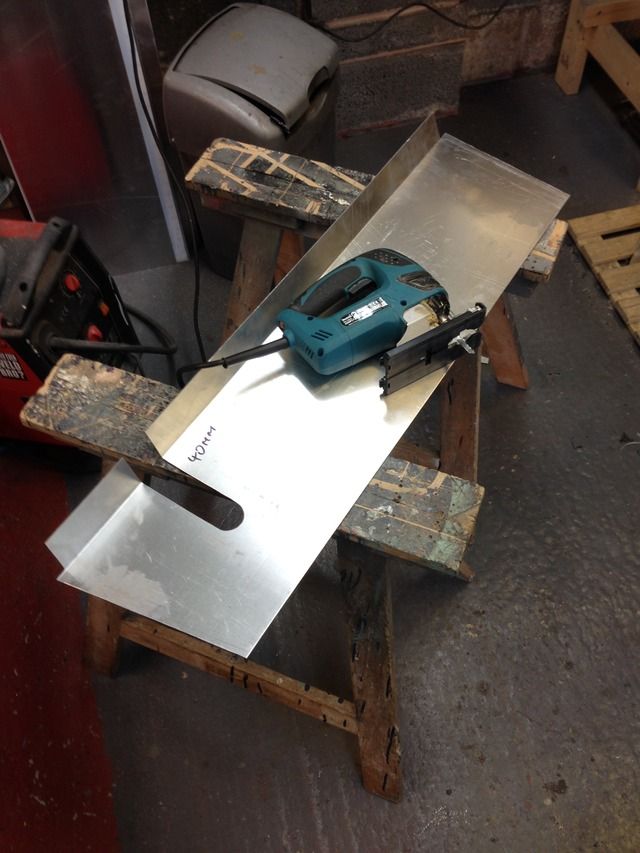

Rosco 23rd January 2016 08:17 PM


I've done it in two parts so I can get behind the dash easily


Inspection holes cut out


Left cover


Rosco 23rd January 2016 08:17 PM

Both covers in place


Bit of bead rolling


Everything's going to get powder coated black

Also got my brakes all bled! Pedal feels great and no leaks so I'm well happy with that

Next job is to get that wiring sorted that I've been putting off

TalonMotorFabrication 24th January 2016 11:00 AM

Quote:

Originally Posted by Rosco (Post 102836)
I drew this up and made one, it's so I can use the bike fuel filler cap so the keys the same for the ignition and the tank


Don't you just hate builds like this, you put the rest of us to shame.

I had the same idea about using a bike fuel cap and making a combined backing plate with a filler neck seeing as you can pick them up new for £15. I've been looking around and even the cheap ali aero items are £70-90.

Rosco 24th January 2016 07:10 PM

Quote:

Originally Posted by TalonMotorFabrication (Post 102845)
Don't you just hate builds like this, you put the rest of us to shame.

I had the same idea about using a bike fuel cap and making a combined backing plate with a filler neck seeing as you can pick them up new for £15. I've been looking around and even the cheap ali aero items are £70-90.

Haha cheers, I will take that as a complement!

Yeah this cap came with the engine, took a bit of working out as I never had a tank neck to measure, it's real nice OEM quality too!

Rosco 24th January 2016 07:10 PM

Was on my lathe at 6am today

Turned this up to fit the drinks bottle, bit of screw cutting to


Filter pressed on top


Then on my dads cnc for a few brackets


Bracket bent and tank in place


All times are GMT +1. The time now is 03:15 AM.

Powered by vBulletin® Version 3.6.4
Copyright ©2000 - 2025, Jelsoft Enterprises Ltd.