That's such an amazing job you did on the Engine Kev, incredible! Congratulations, really nice and I look forward to see it running :)
|
Very nice work on that engine indeed sir....:cool: :cool:
It'll almost be a shame (sorry a crime) to cover it up...LOL:D I guess you just keep moving the bar upwards on everything you do... Keep up the good work. |
Quote:
bob |
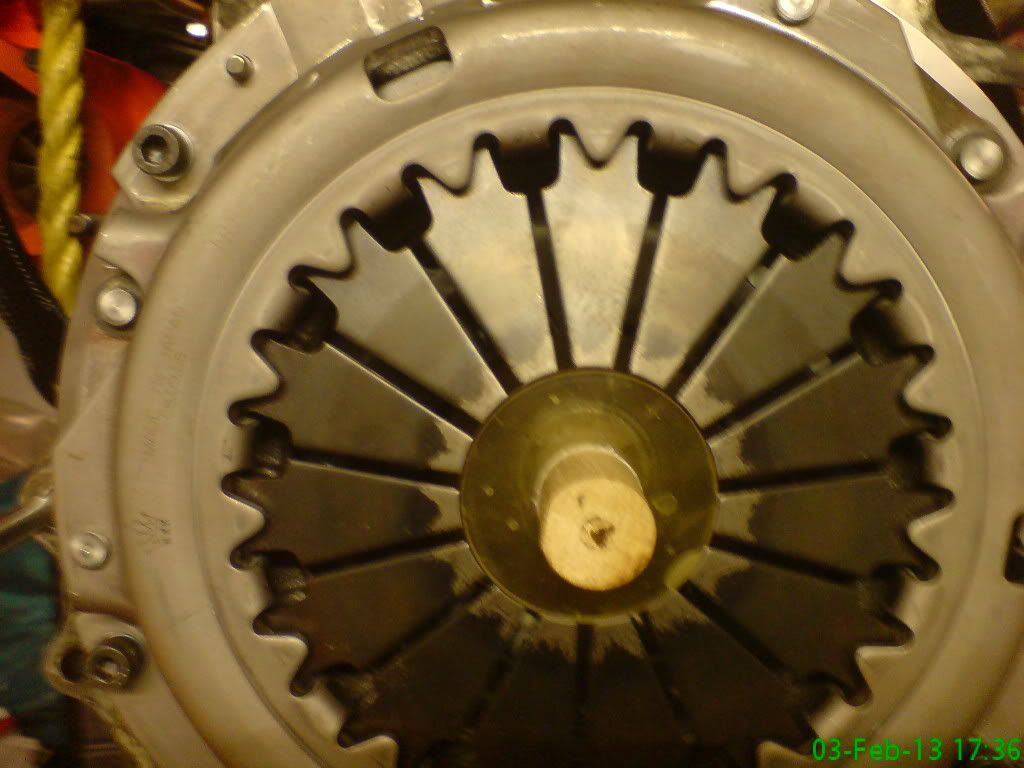
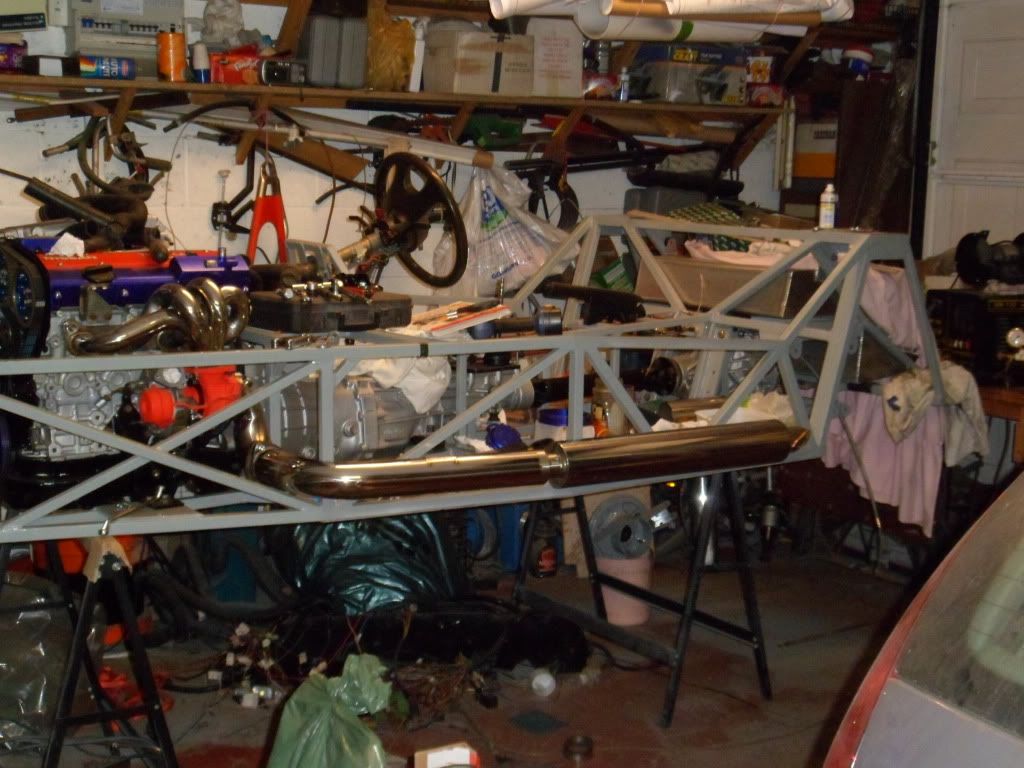
Again....thanks guys.....needed a few days off from the build, hence not much further on until today.....right back into it, engine is now ready to go in. I managed to fit my flywheel and used my home brew clutch alignment tool to fit the clutch assembly.....worked a treat.....when it came to trying to mate engine and box I discovered a water pipe fouling the upper engine bay diagonal so I intend to either shift the pipe or remove it and some corresponding pipework that actually won't be needed. sooooo will be back with the usual updates/piccies
 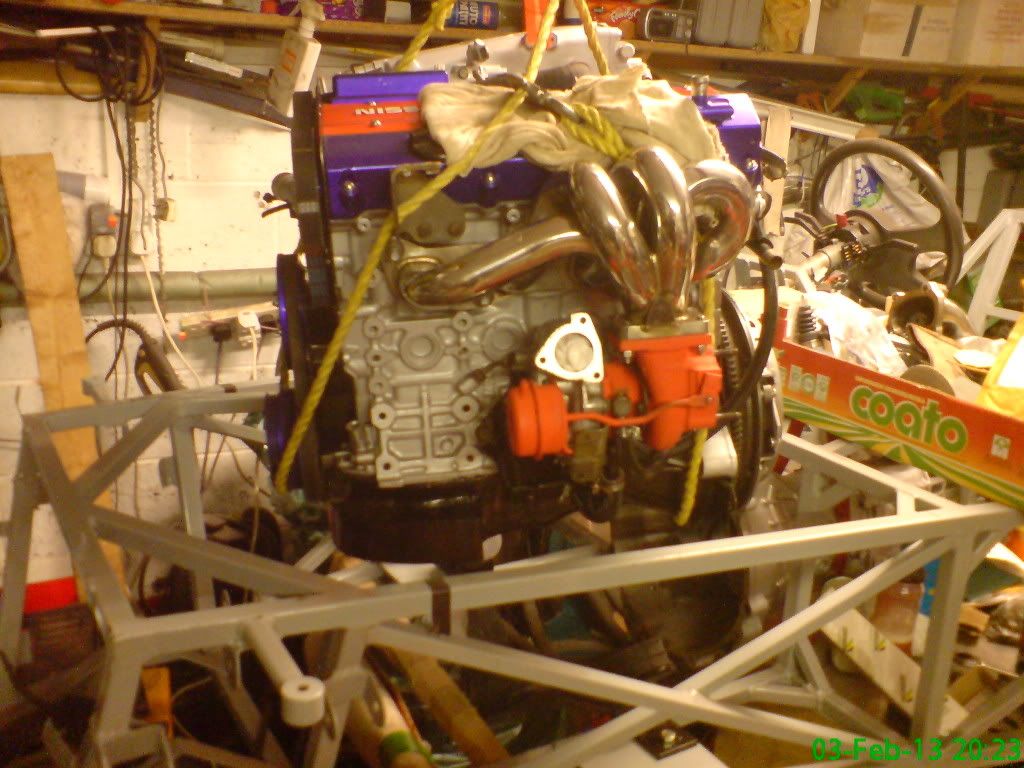 |
engine came back out for me to "minimise" cooling system.....turns out I could remove 10 water junctions and 4 hard tubes.....a lot of them were to keep the plenum warm in winter motoring....well they were the ones that were fouling so they have now gone and and flow route has been changed a little, that now done the engine went in without a hitch, apart from the customary wiggle wobble jiggle to get the gearbox primary shaft to engage the spigot bearing in the crankshaft.
Its in.....yaaaayy 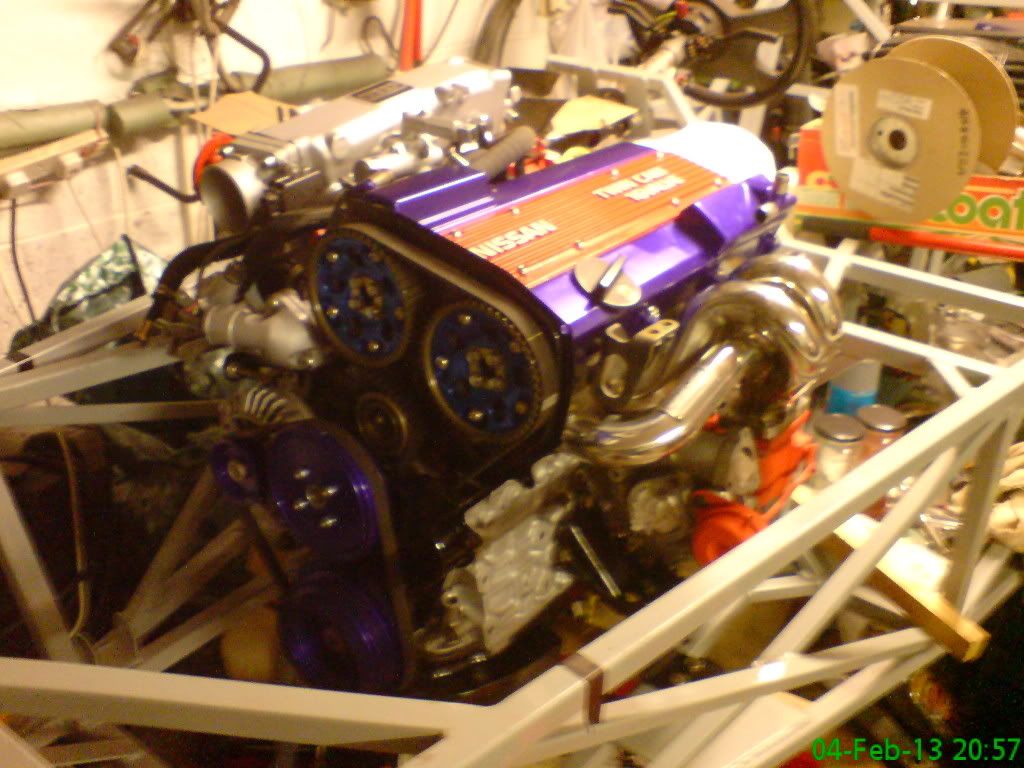 |
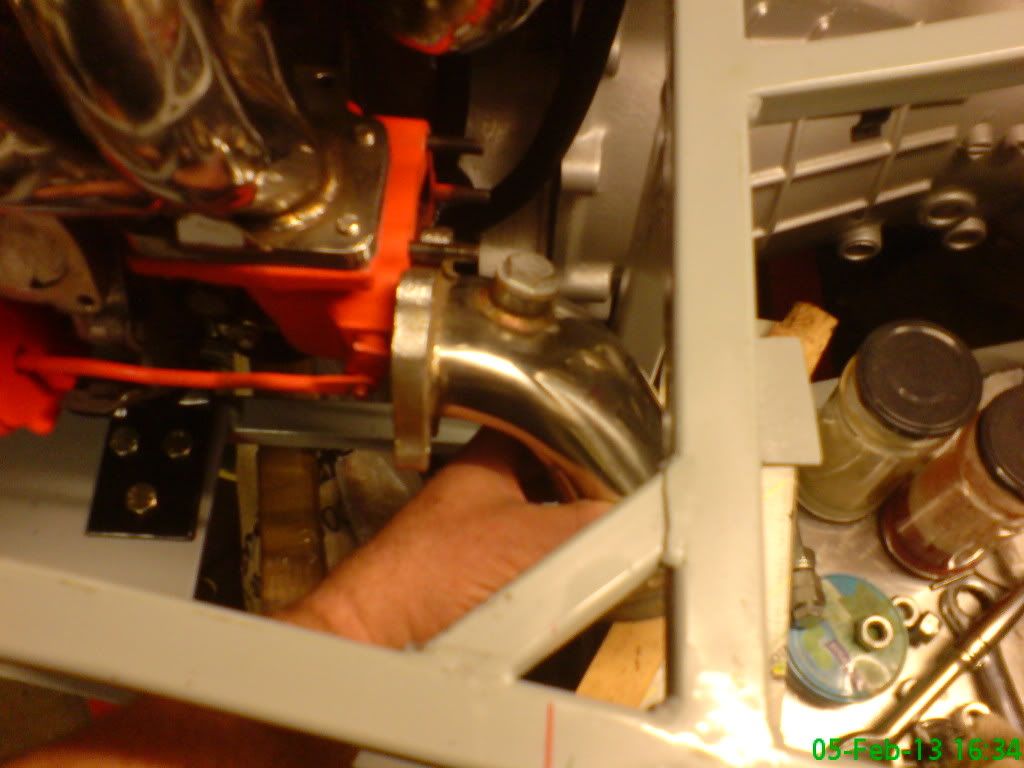
BOY am I gonna have a headache with this bugger:mad: .....I knew it was tight and I was gonna have to re-fabricate the turbo down pipe but we are talking about a sod of a job and I don't want to cut bits out of the passenger well but I might have to....I can lose 9mm from the turbo studs as long as I recess the downpipe flange where the nuts fit. in fact I will probably lose the studs and use bolts instead, any thoughts peeps?
 |
Could you put the passenger footwell endplate on the inside of the footwell instead of the outside? That should give you an extra 25mm clearance.
|
Fabricate another flange and recess pipe into flange effectiveley shortening the distance between bulkhead and pipe and as Simon says (no pun intended :p )put the plate on the inside.
|
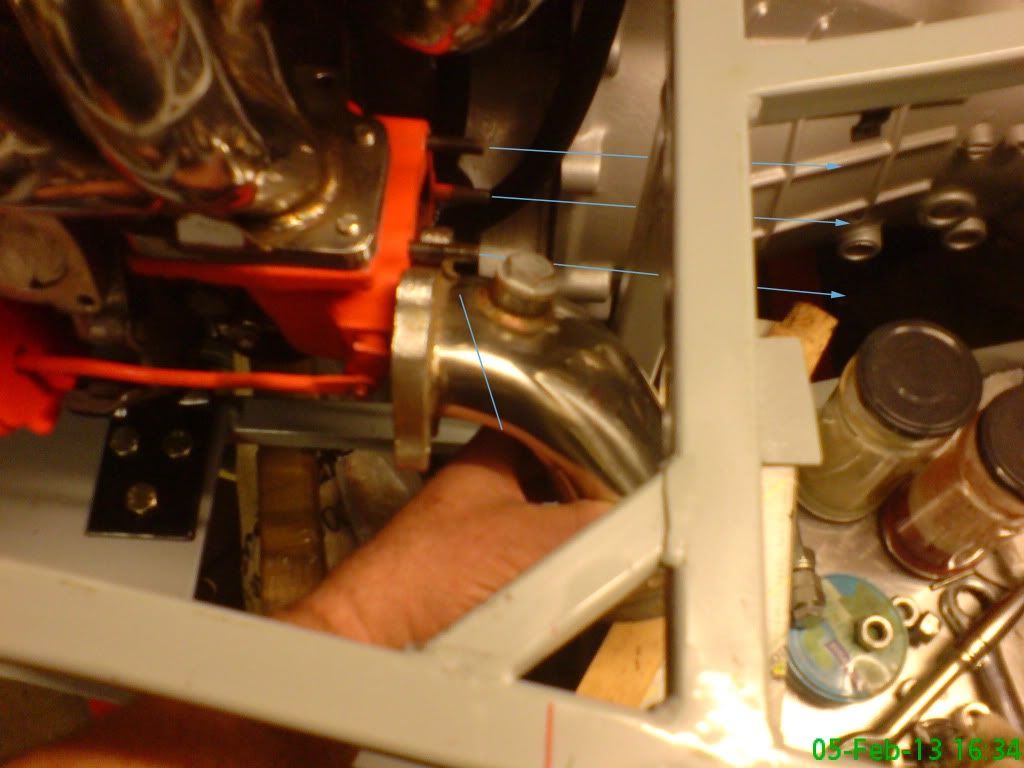
just one wee problem.....it is called U8 and it sits right in the middle so I cannot claw back the 25mm that you refer to.....the picture is a little misleading as I am holding the elbow towards me, check the turbo studs and direction I have marked where they point (either side of U8).....pipe was already inset into the flange Paul but I know what you are on about.....I will achieve the same result by cutting the diagonal line I drew on and re-weld it the flange is big enough to accept the greater length of the diagonal, maybe a little persuasion might be needed but the end result should leave me with the same sq area with maybe a very slight decrease in escape velocity of the exhaust gas
 |
How about cutting the outlet flange off on the exhaust manifold, rotate it 10-20 degrees and weld it back up.
 Easier than the cut and shut you have suggested and should get you past the upright? Cheers Stot |
Won't work either Stot, as the compressor housing is only 12-15mm away from the engine block..... won't work up and down either as it will put exhaust pipe joint too low in the chassis......thanks for all the input guys.....I will get around this issue (I hope)
|
Get onto this crowd kev they have 1D rad bends, It will clear that lot by a long margin.http://www.goodfabs.com/
 |
Bit of a dillema Kev and now I see what you are at,I think I would be tempted to move U8 rearward to sort it if that is possible.
Just read post above,AAS in Lemington and tyrespot will bend stainless pipe. |
Quote:
really don't want to cut the chassis Paul.....I am going to tackle it tomorrow if I get my ss bend of ebay. Started to figure out rad pipework and I am using some more stuff I have lying around in the guise of waste pipe for straight runs see pic ...I tried some in some boiling water and steam and it held up no bother .....will be experimental for the moment....also fitted radiator and protected it with some cardboard, now that I reduced the pipework to the minimum there is really only top hose and bottom hose to fab up  |
I have just cut my thermo housing for the RB engine and moved it so it points forward. Might be worth doing the same? I have a local tig welder and he did it for a fiver :)
|
Oh and re the turbo it might be worth seeing if you can cut the flange of the engine side and twist it around so it misses D8 You can also be sneaky and rather than panel the front of the foot well panel the inside instead this will give you 25mm more space.
|
Hi Alex .....had considered tigging the thermo housing but at the end of the day I had/have quite a bit of hosing, so I knew I could cover most routing anyway ....I think I will probably stick with altering the down pipe as it will make the routing of the side pipe exhaust easy, like one 90 degree bend and out the side panel.
Started attacking a problem that I knew would be coming, one of the downsides of getting that gearbox as far back as I did was the clutch slave cylinder of which I did not have was going to be very tight against the chassis....so I do what I usually do...hit ebay for a cheap alternative and got 2 new items for around a tenner, one is a master clutch cylinder from a land rover defender and the other is a Alfa 156 slave cylinder, I got this because it has a very low profile, incidently does any one know the thread of the flare nut on this, I know the land rover is 12 x 1 but I need to find out the slave so I can get Sylvain to make up a short line for me to match the rest. So yet again ...thinking cap on as to how I am going to mount this in the same location as the original.....so raiding the scrap bin I find a piece of tubing that was once a coffee table leg and the flat bar was also, which I will be utilizing for my wing stays, they are both nice and thick. So I cut a 2" section off and cut a slot length ways in it so as to provide a clamping action once a couple of mild steel tabs have been welded on, then welded another two tabs on, one to lock/locate and one to mount, as you vcan see from the photos there is no space left in that area so this method WILL work. table leg as mentioned above with clutch slave cylinder 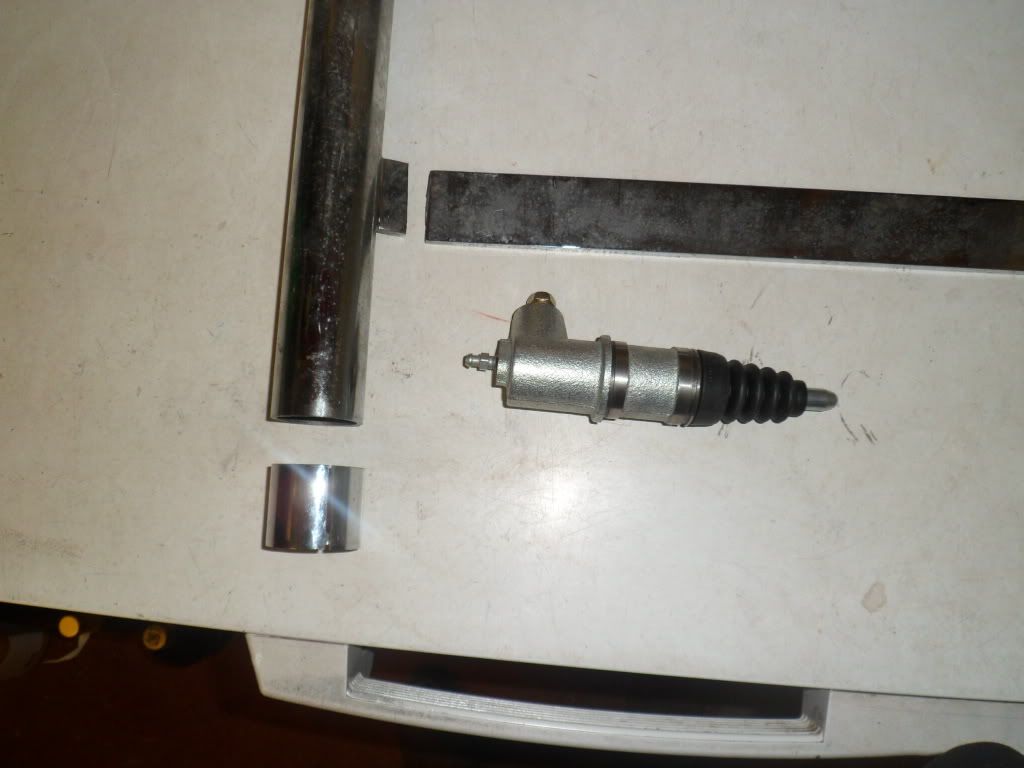 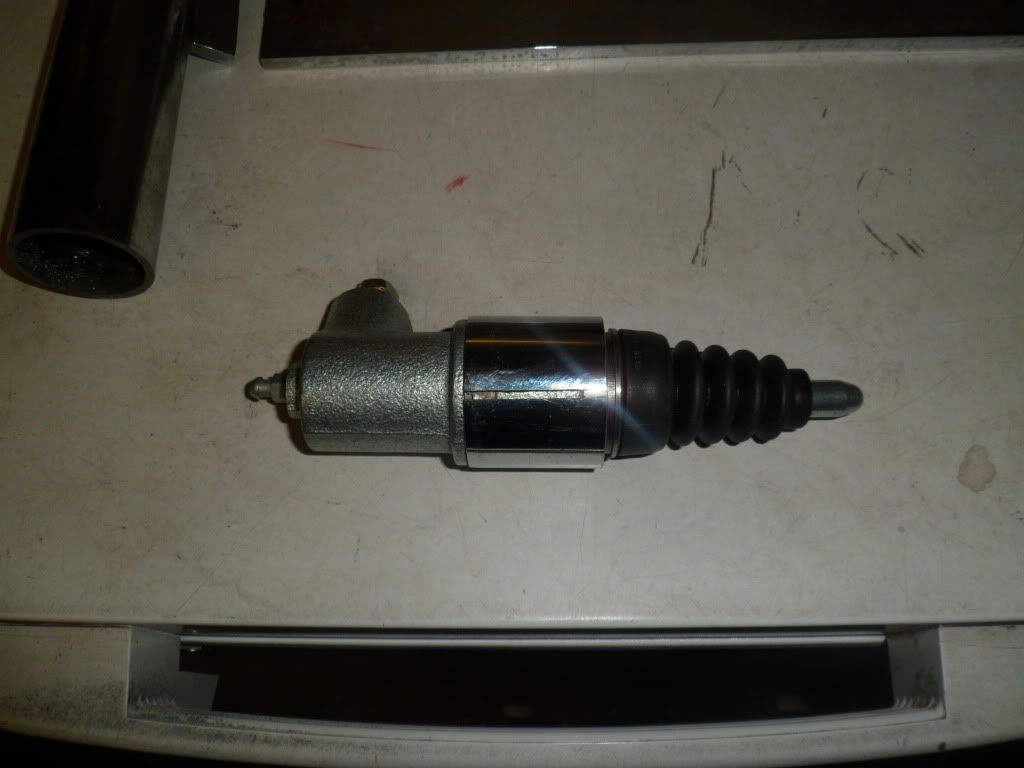  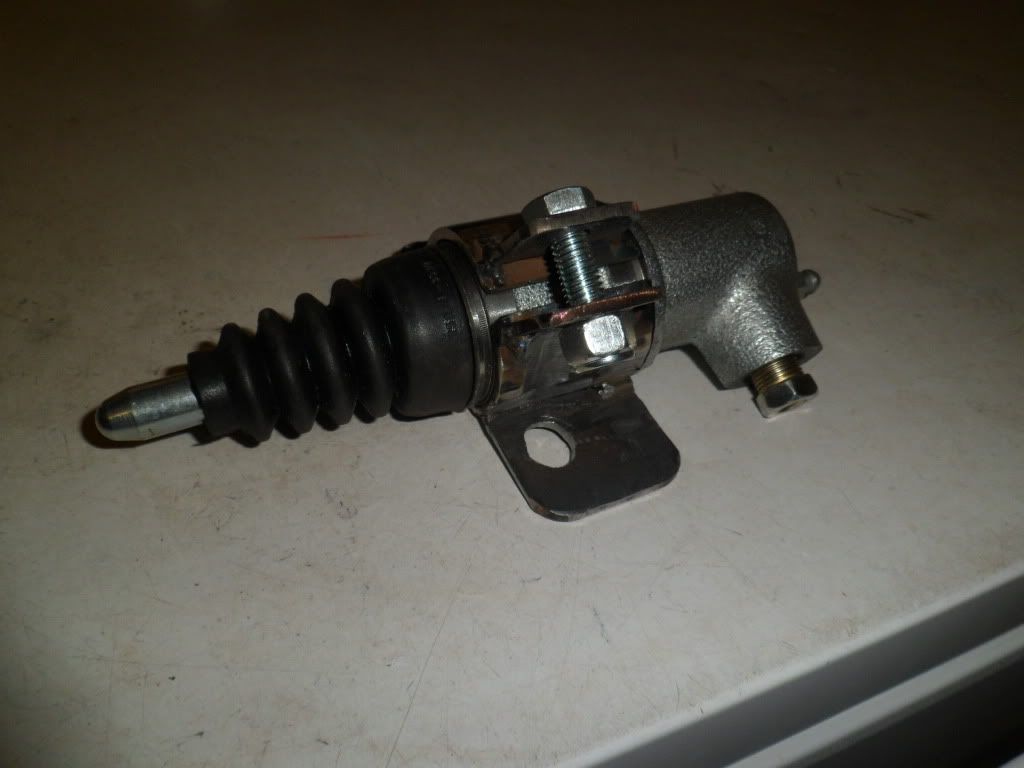 |
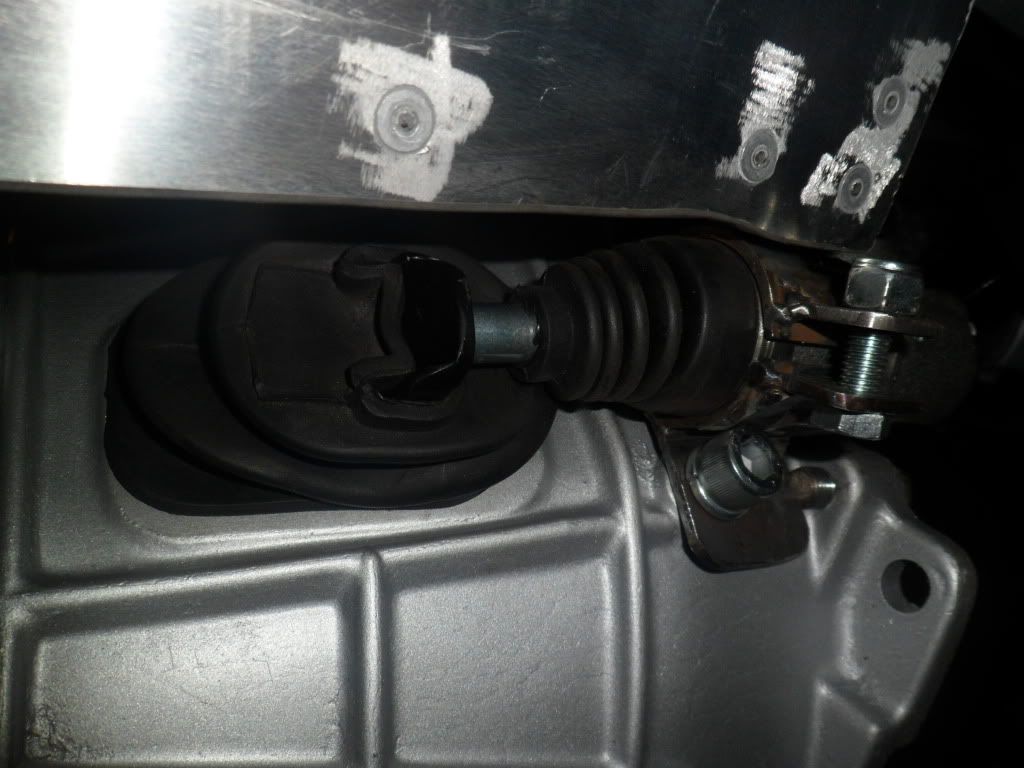
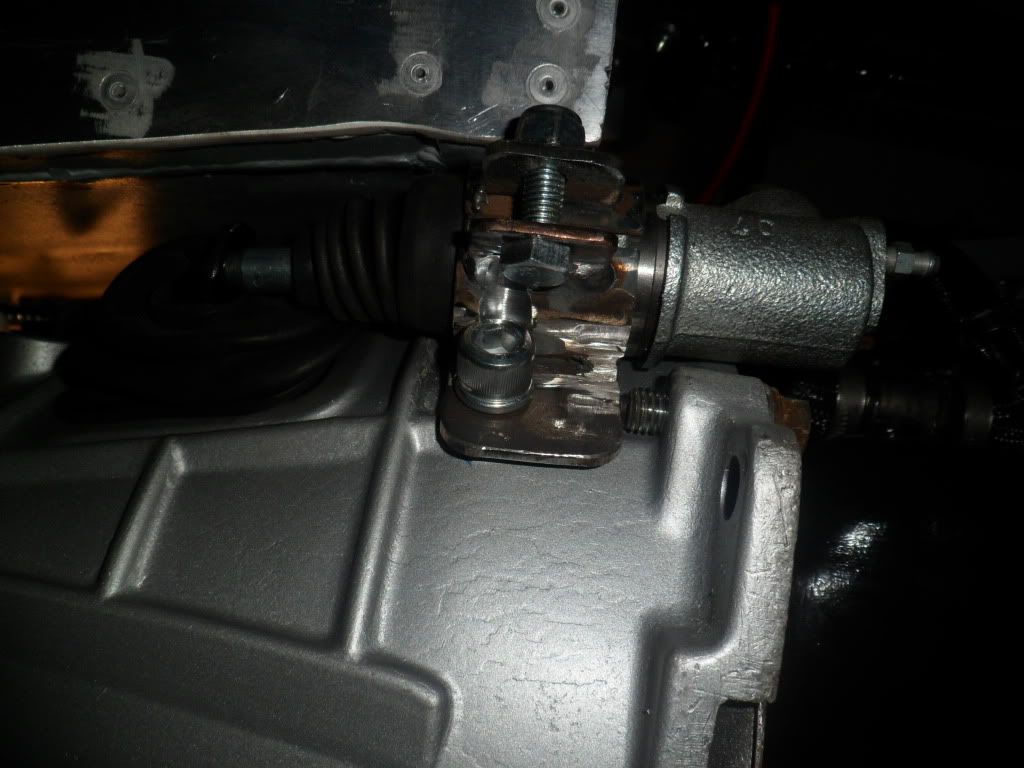
couple of shots of in situ looking as if you were lying on your back underneath the car, going to be taken off and painted today then straight back on.
  |
Wow that is a bit tight! What tunnel did you go for? I decided on the MT75 and has give me loads of room. So much i can probably get away with the larger skyline gearbox if needed. I have to find myself a slave cylinder but that has given me a great idea mind if i copy it? as the ones for my box are around £90
|
yeah go ahead Alex ...break a leg dude:cool: ....I always think, if it expensive is there a generic 3rd party item that will do the same job, and if that is too expensive then make it, if that does not work ........just sit down and cry:(
I chose the type 9 tunnel as the dimensions of the two boxes were similar but I placed a lot of emphasis on getting the hand to gearstick near perfect .....the cost was tight spaces in and around the gearbox area.....but hey it has not defeated me as of yet. |
Couple of things kev, First on is the ratio of master boresize vs slave boresize. The last car i converted to hydraulic clutch was a total brain ache, I had about 6 inches of pedal travel (if i wanted to keep the pedals all at the same height at rest) and struggled to find the correct ratio of pedal movement vs clutch arm movement while maintaining a clutch that was not to heavy or to light . Or one that was so light it never released the clutch and one that was to heavy to be practical for driving. Got there in the end but not after going through a dozen different combos of bore sizes. Next thing is to check that the torque movement of the lump under load wont get that slave rubbing and buzzing on the chassis. Looks like you could get a rizla trapped in there:eek: :eek: :)
Just thoughts Bob Edit. dont trust that plastic waste pipe kev the stuff age hardens and splits. |
There is no stopping the Man ! ;)
|
Me thinks I will cross that bridge when I get to it Bob but thanks for the heads up on it....my other headache is now solved, the turbo elbow had a wedge cut out of it and I had a bash at tigging stainless steel, I found it similar to ally except for the size of the arc which can be tiny. So now I am looking at welding on a 90 degree bend to bring it out of the side panel close to the bottom.
Here is my re-fabbed turbo elbow and first time tigging with stainless 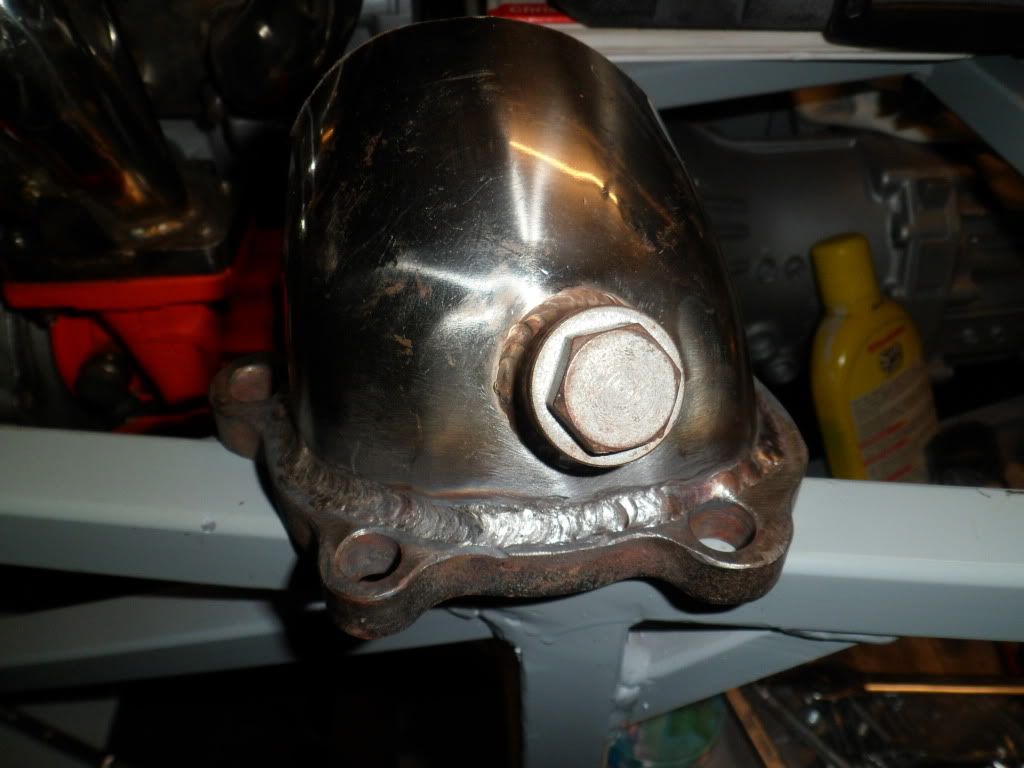 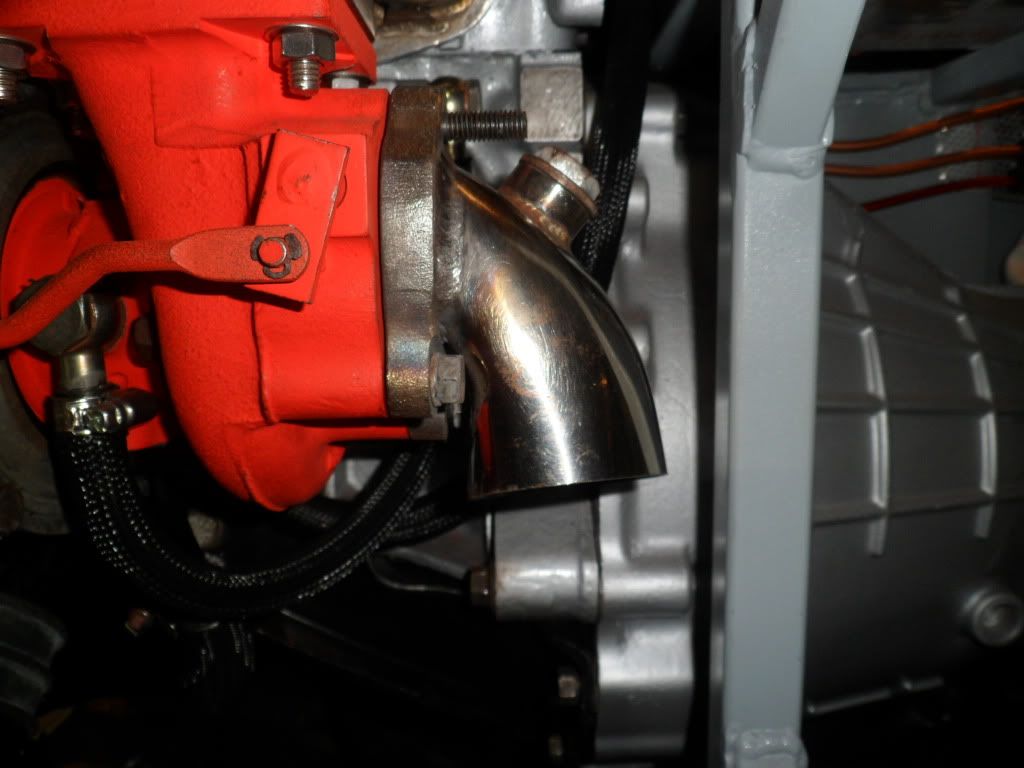 |
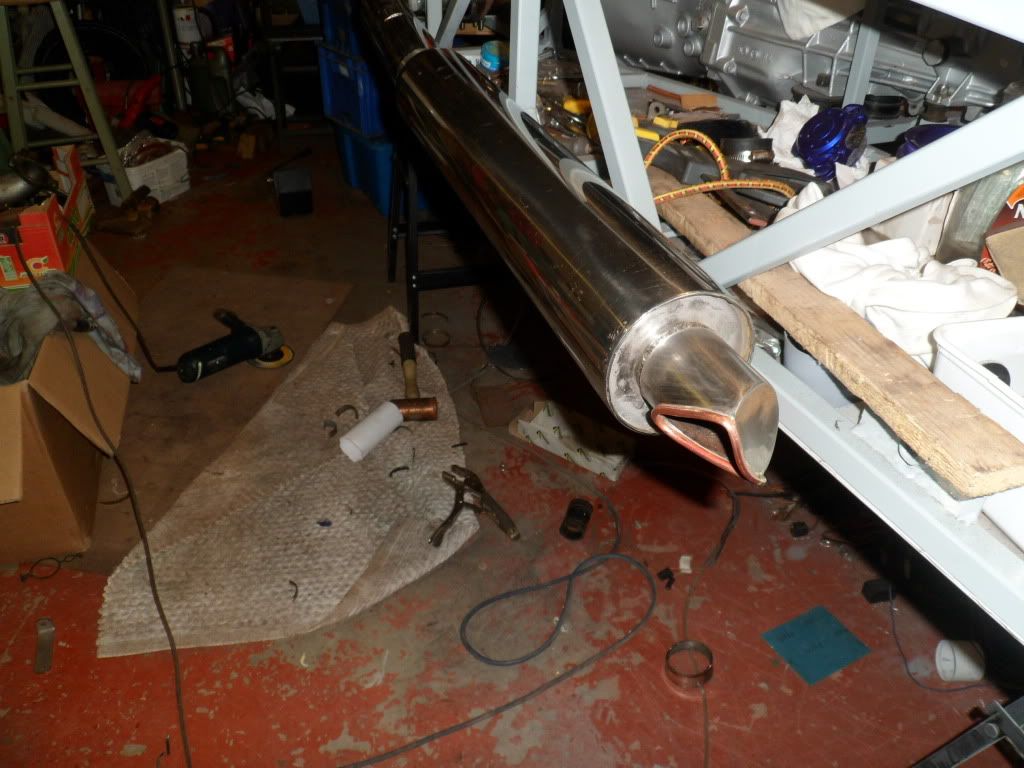
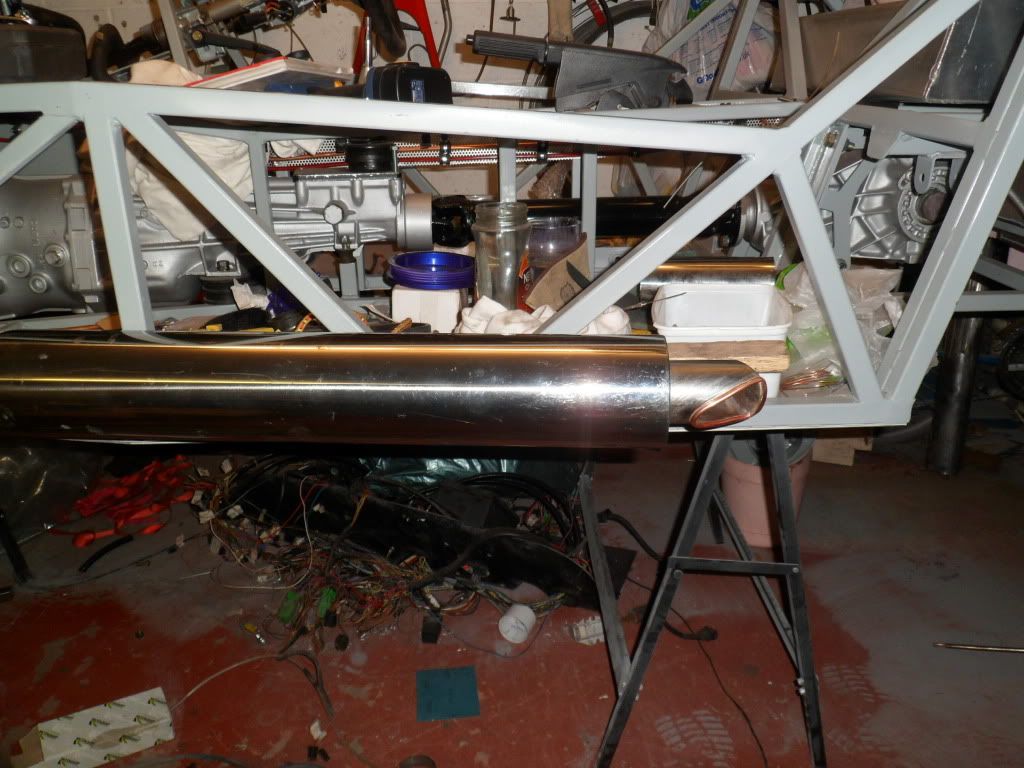
Exhaust is now coming together and I have learnt a lot about tigging stainless, and it aint as easy as I first thought.....got my 90 degree bend on and will soon fit and weld on a 3 hole flange to fit the outer exhaust pipe and silencer.....one picture is of me just offering the outer pipe up to check any clearance issues and none so far.
cut and welded up 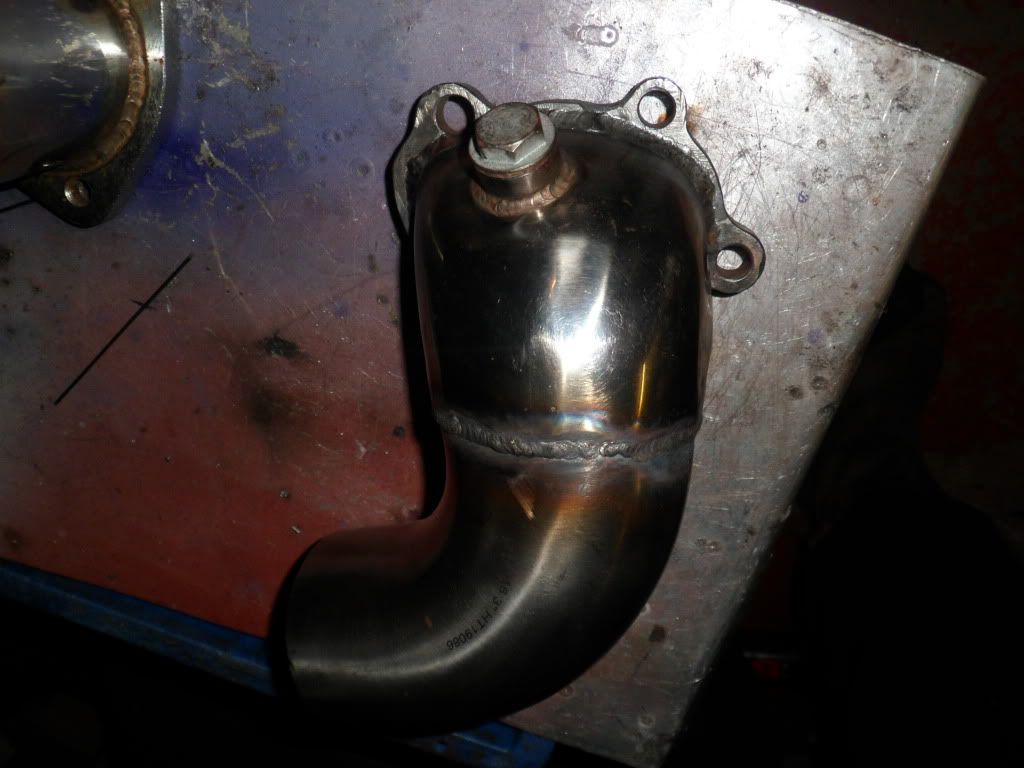 looking from inside the car 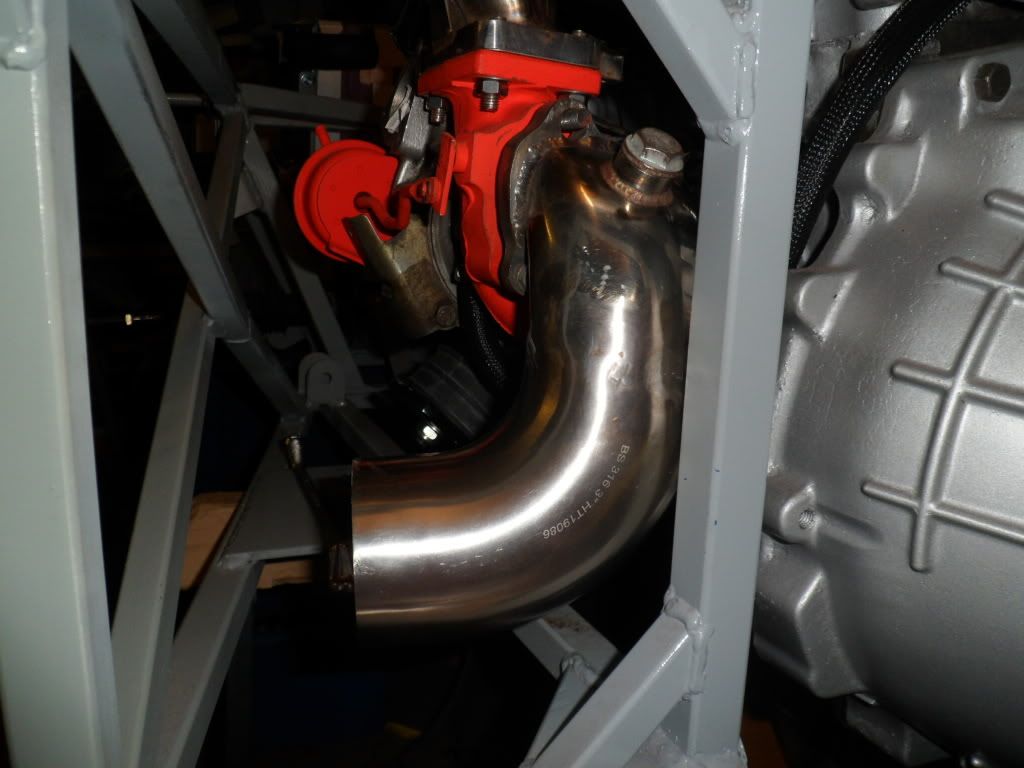 these two lower bolt are t*ats to get at but do-able 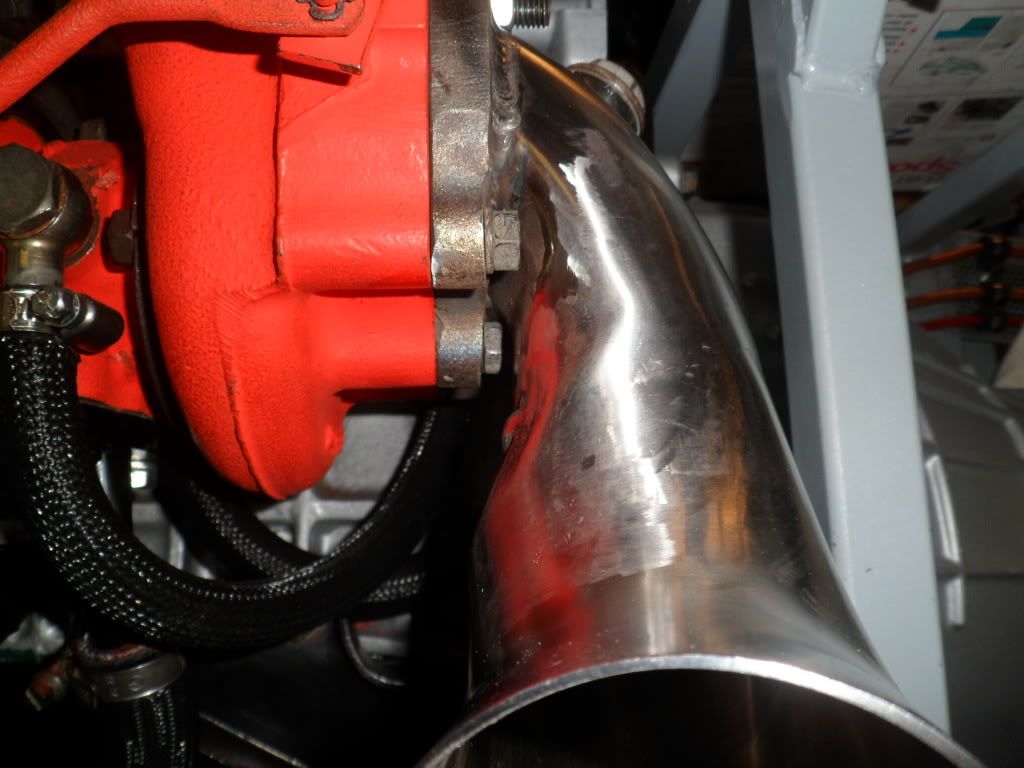 and what it should look like 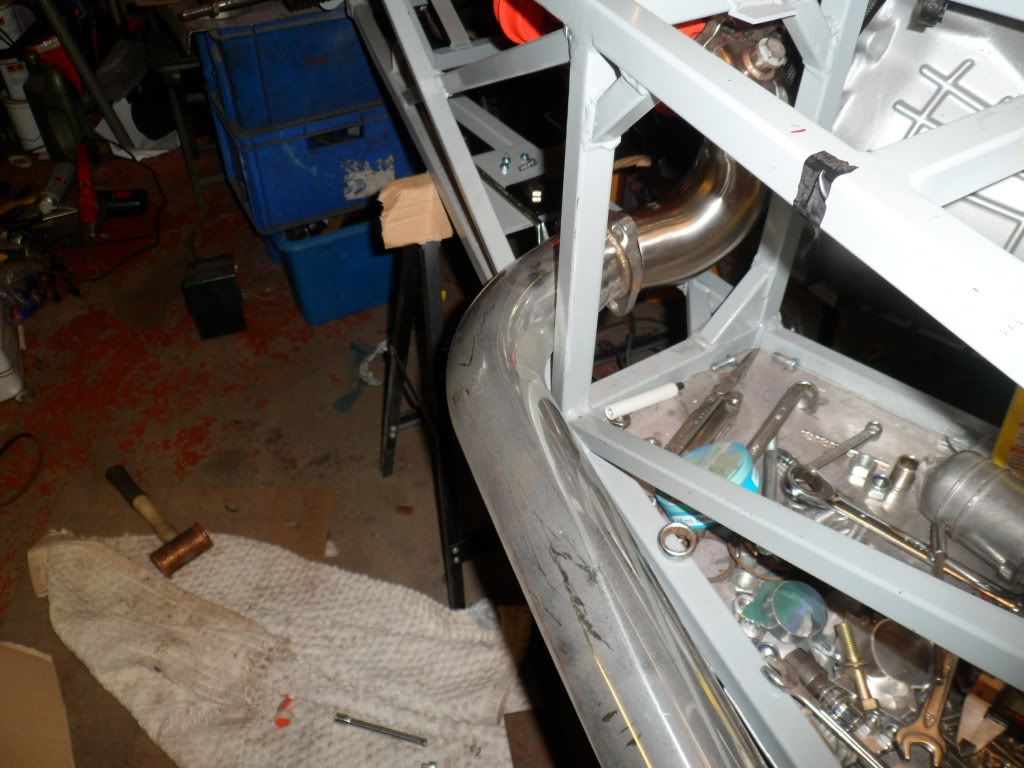 |
Should see me finished the exhaust today.....after reading about one of Jason's failure points, I decided I was going to incorporate a decibel killer into my exhaust while I could, so I got a piece of old exhaust tube blanked off one end , then cut some slits along the pipe and then dinted the tube in on one side of the slit meaning the exhaust would momentarily have to travel backwards before going forwards again which should give a small amount of noise canceling
As you can see from the pictures it is going in before the silencer which will help even more because most decibel killers just go inside the silencer, this will be removed post IVA as I want a straight through exhaust on final tuning, the last thing I will have to do will be a rolled exhaust tip.....will be making that as well piccies as usual 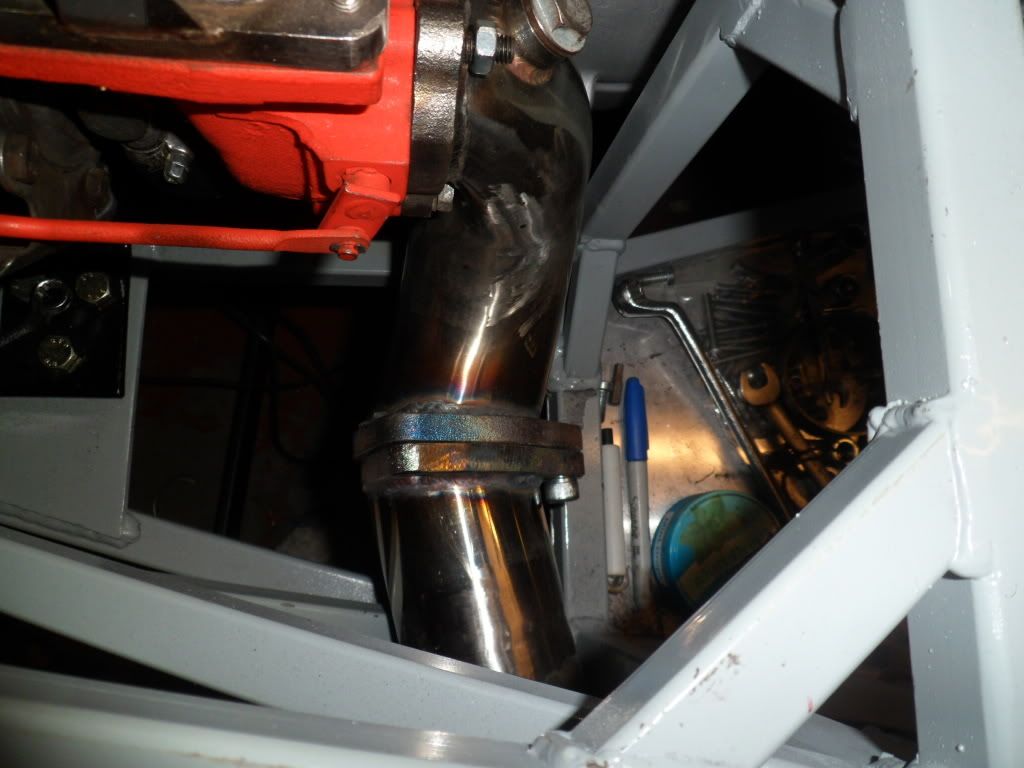 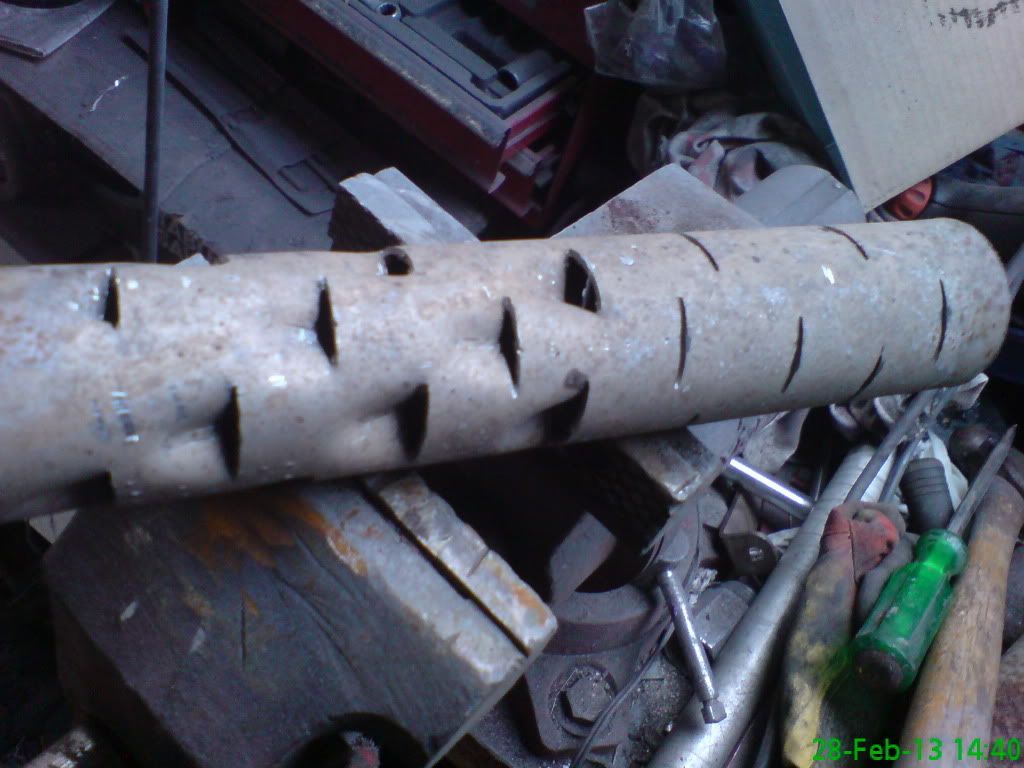 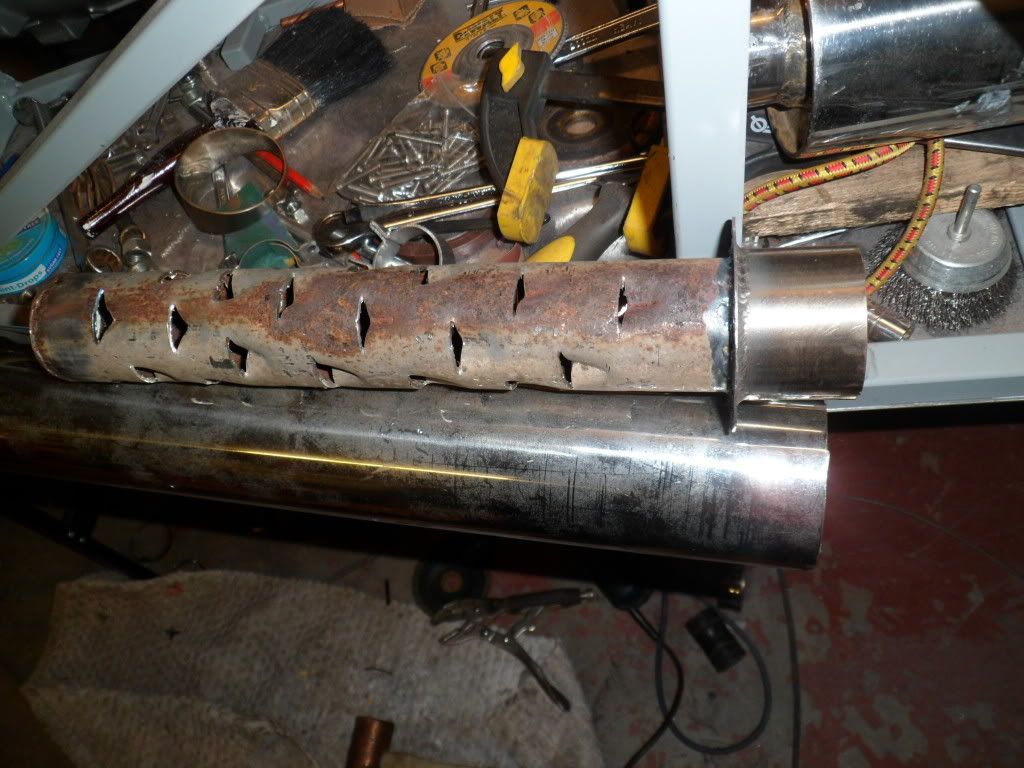 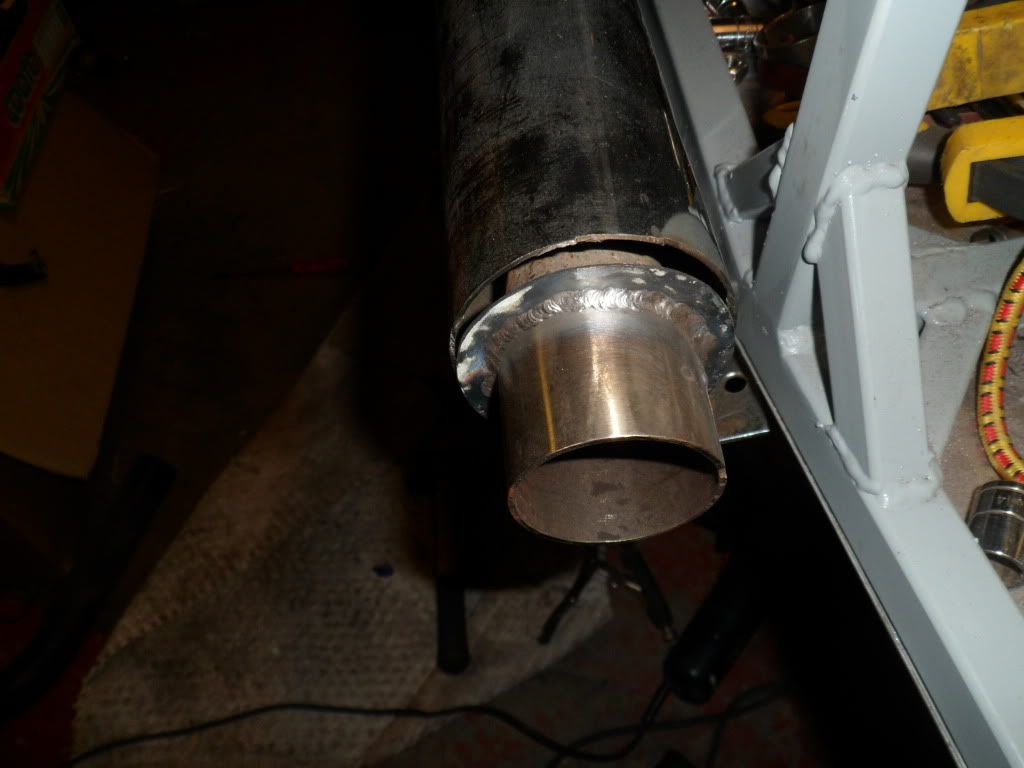 |
Nice one as usual Kev,not a criticism but something that would bug me,the sharp angle of the exhaust exit may be liable to a lot gas cutting due to high temperature gas straight from the turbo hitting the pipe.
You will understand what I am getting at,a liner at that point may be a long term solution. |
Jesus Kev
You don't half plod on with your build pal, how do you fit it in? |
Quote:
Hi Will.....steady away mate steady away, although you will see some rapid progress over the coming months as I want it on the road this year:cool: |
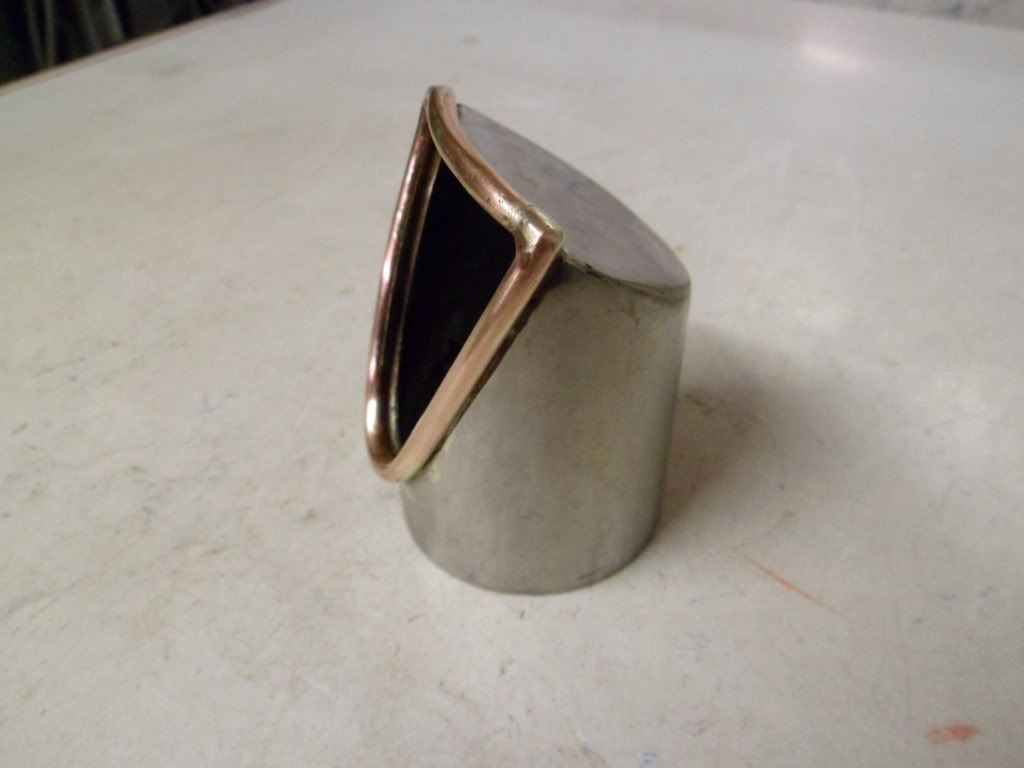
After much trolling the internet and ebay last week for a tight radius rolled tip stainless exhaust end and not finding anything remotely suitable, I do what I usually do and make my own....now in doing that it means I can be different as usual. So here is a quick run down of how I made it.
First raid the scrap bin for a piece of 2" stainless exhaust pipe, then give the bit I'm using a polish up and scrape the carbon out from inside, then I give the piece a 45 degree cut then mark out the next angled cut to intersect the first one, now grabbed the first offcut and gave it a bash or two to flatten the steel, now using the 45 degree angle as a template mark out on the flat piece of steel. Now attack with angry grinder until correct shape, when that has I nice fit its back onto the tig table and weld it onto the exhaust tip grind back then polish up with a powerfile ......now to achieve the "rolled tip" I silver soldered a length of shaped brake pipe onto the exhaust exit, the following pictures will make sense of what I have just described. 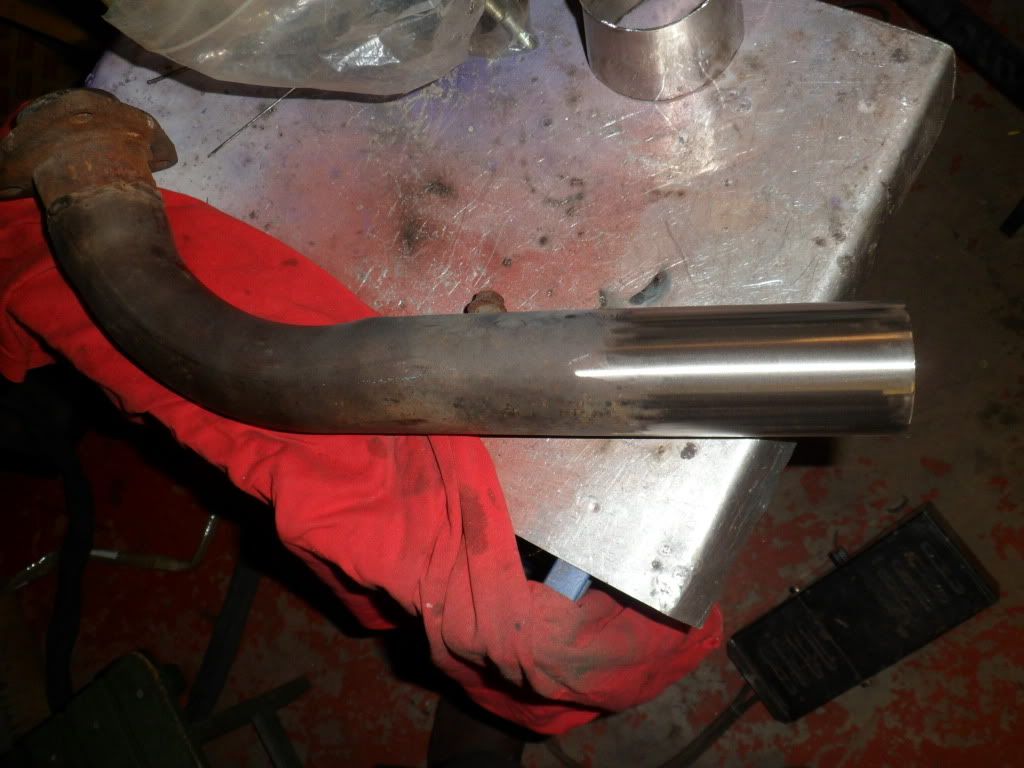 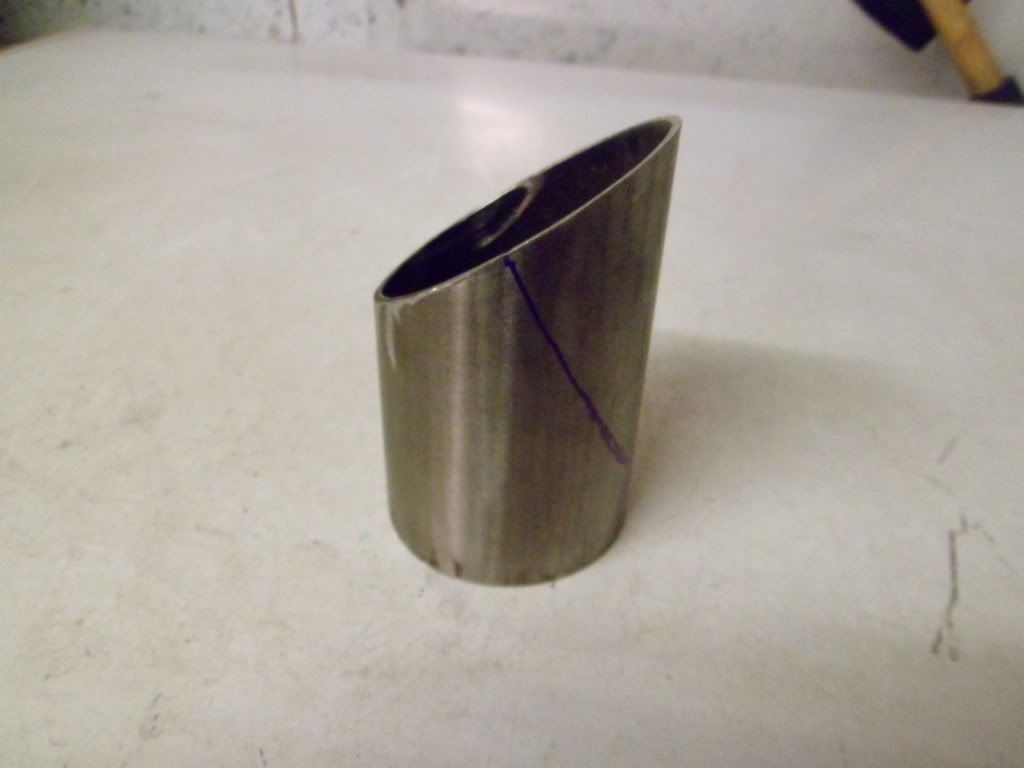 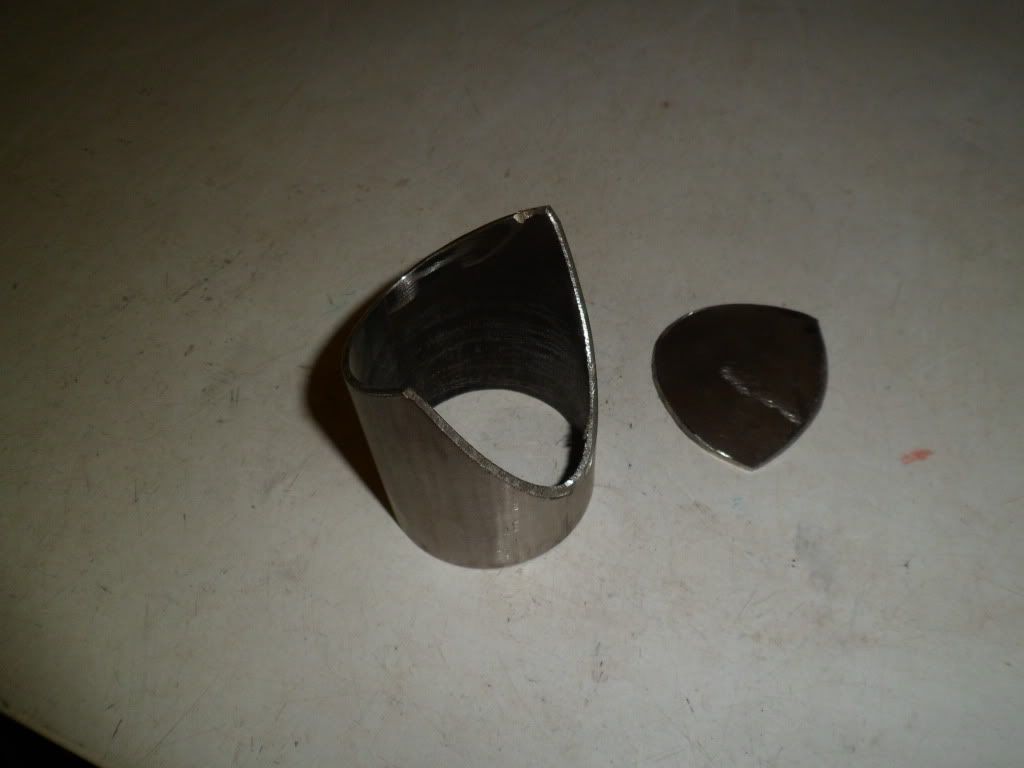 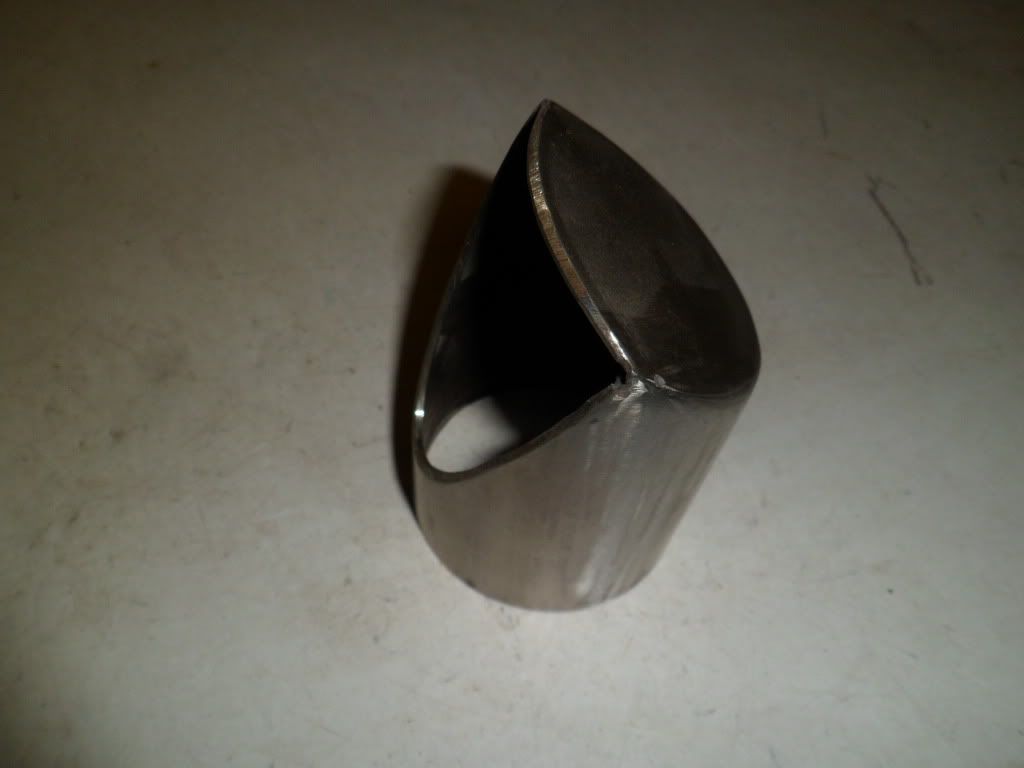 |
    |
Awesome work, glad you have finally sorted your Zorst. Love the tailpipe.
TT |
Kev if you need stuff in stainless bent I have a good contact that does Powerflow piping.
|
Awesome work on the exhaust there Kev....:cool: :cool:
I really like the outlet with the brake pipe soldered to it.. |
cheers guys and thanks Paul will bear that in mind when I come to fit the sidewinder:eek:
bit of a come down since doing the exhaust...been messing on with the fuel delivery, have fitted a stand alone filter just before injection rail and a Sard FPR to save me doing it later when I will inevitably want to up the fuel pressure, so I have just finished the fuel system from tank to injun and am going to get back to the cooling system as I left that to do the exhaust. Once that is done I hope to chuck the wiring loom on and look for a first injun start at the week end. (trembles with exitement) ....only one pic today.... said refinements above. 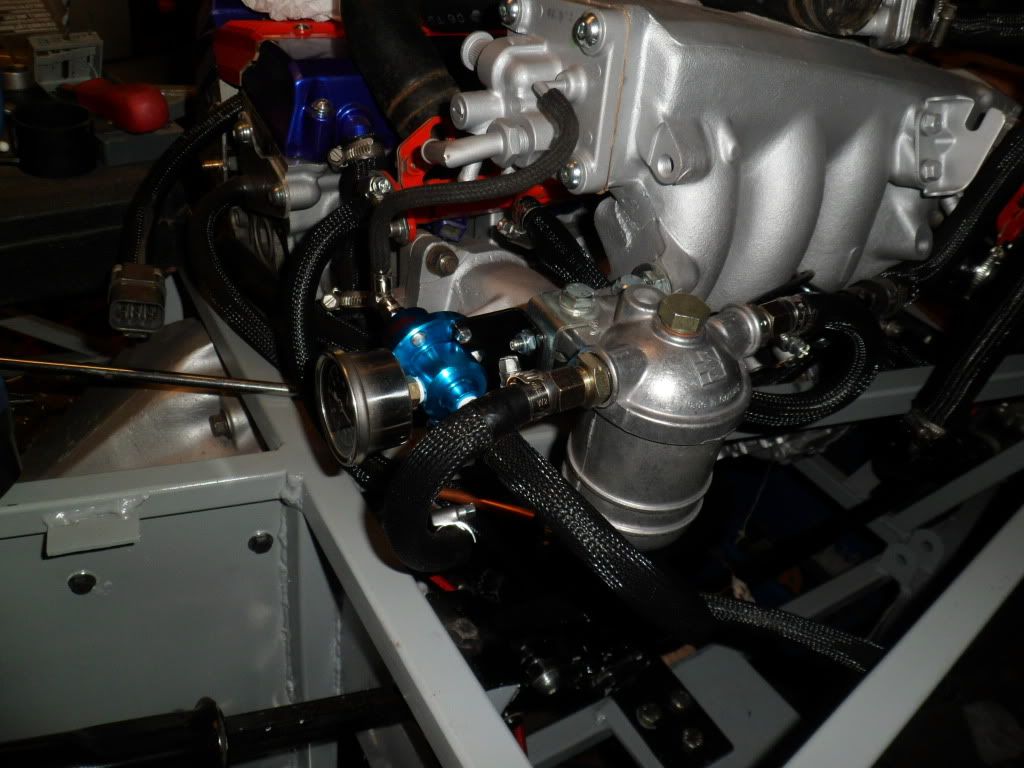 |
Quote:
|
After something Bob said about plastic going hard and brittle....I changed my mind and gone for metal tubes between hoses where needed and in my usual fashion.....a rummage around the shed finds me a skeleton of one of those rotary air dryers that the missus condemned to the council tip (not on your life pet) a quick measure of the central pole leaves it tiny bit small but well within what a jubly would squeeze, but just to make sure I cut a couple of strips of copper from a scrap bit o pipe....polish up with a bit o steel wool and solder them on to the ends of the tube to recreate a bead ....I might just polish these up a little and lacquer as is.
cooling system should be all sorted tomoz even got me a nice easy two pin rad stat although I think I will still run it via a relay to be on the safe side.....here are some piccies as usual 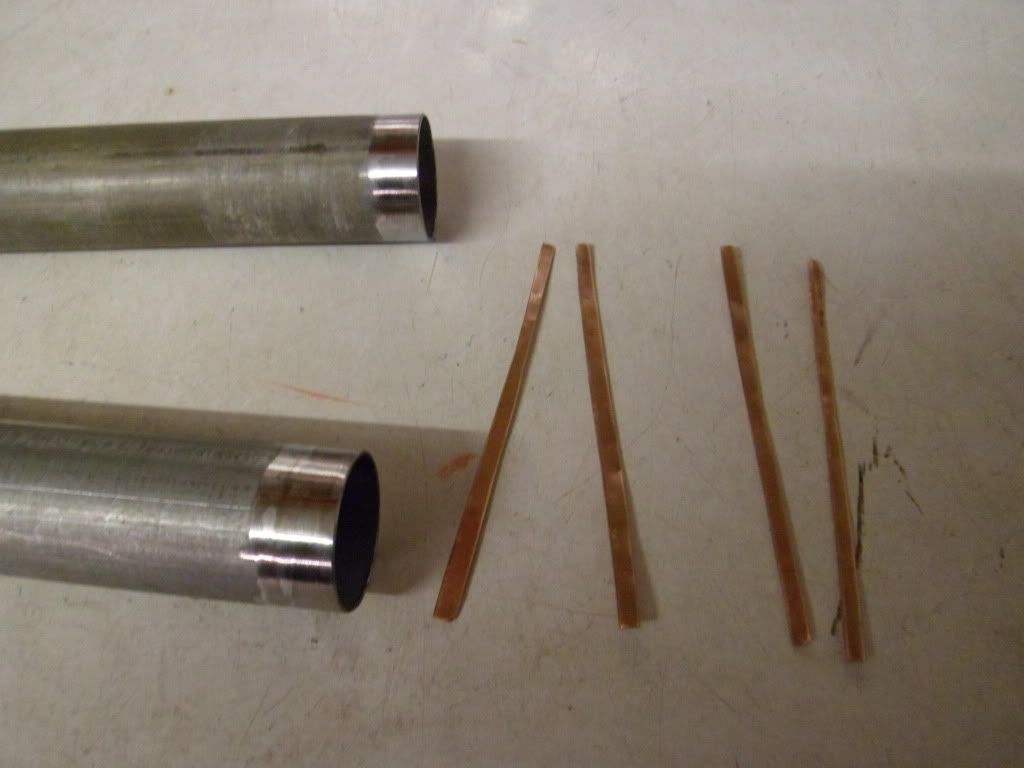 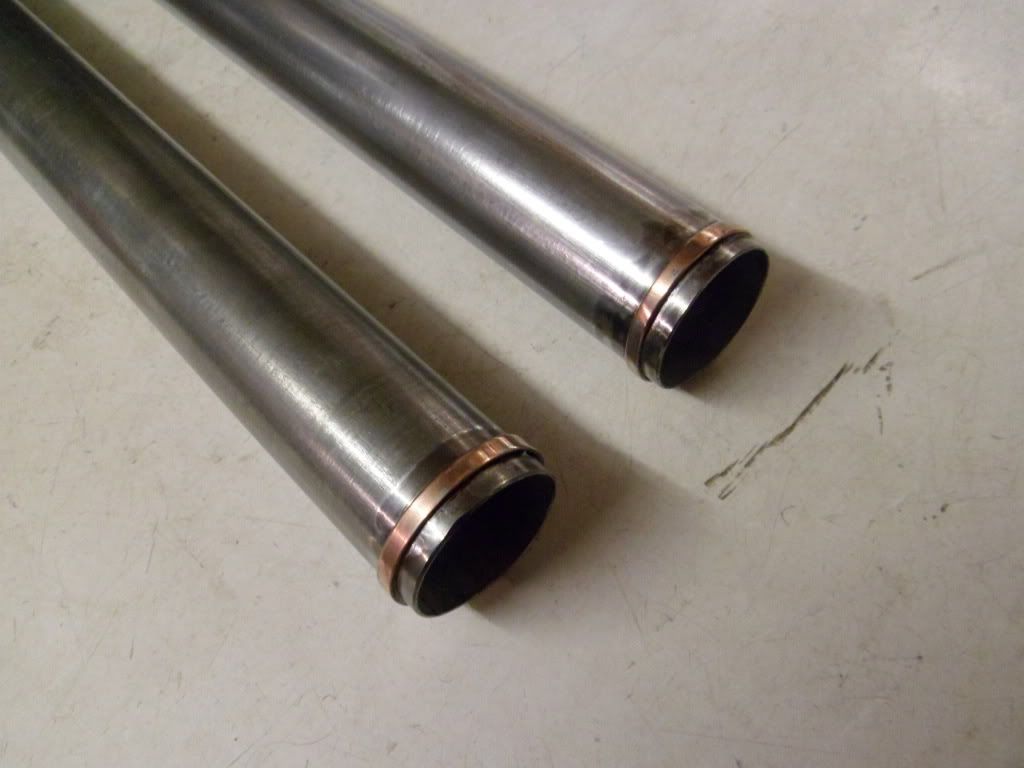 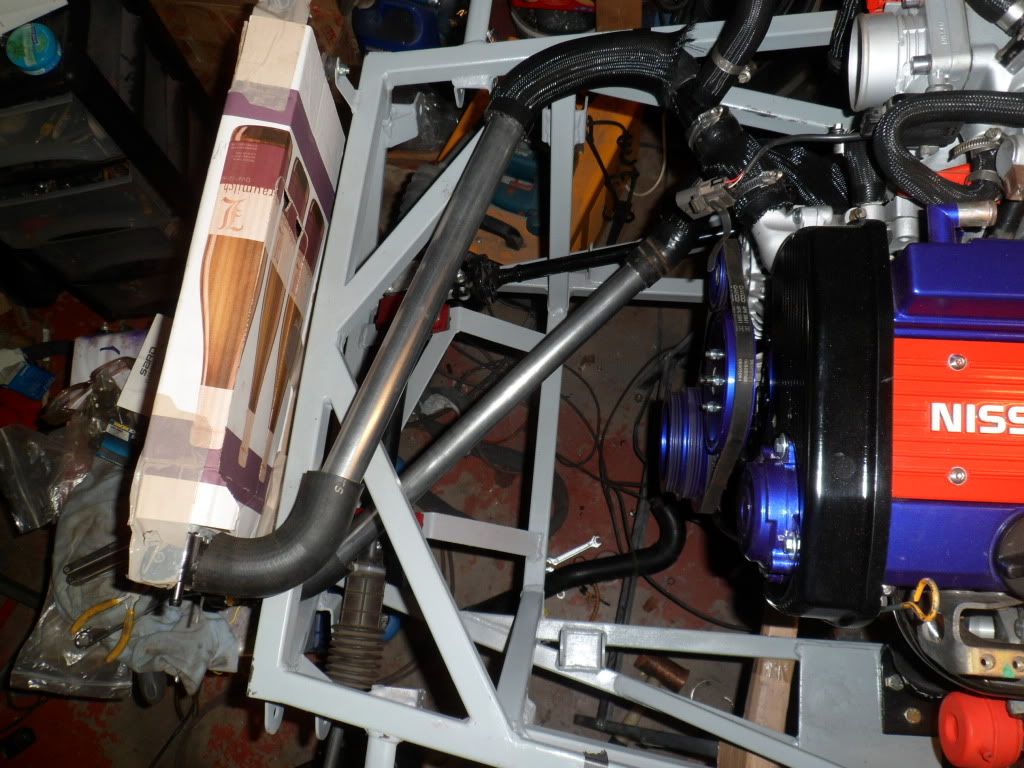  |
I bet you go skip diving too ;)
Nice effot on the pipes... TT |
Quote:
Bob |
absolutely Bob and yes TT I have been known to do a little skip reccy or two when they are around.
Not a lot done last few days, just managed to do the compessor side of the induction ......two pipes joined in the middle one side to the turbo and one side to the plenum, no intercooler at present ....that will come after IVA. I am thinking along the lines of "get it on the road first" then I will tweek it to the way I want it Bob.....checked my clutch MC travel against SC travel and there is about 1-2mm difference so I am thinking it will be ok. 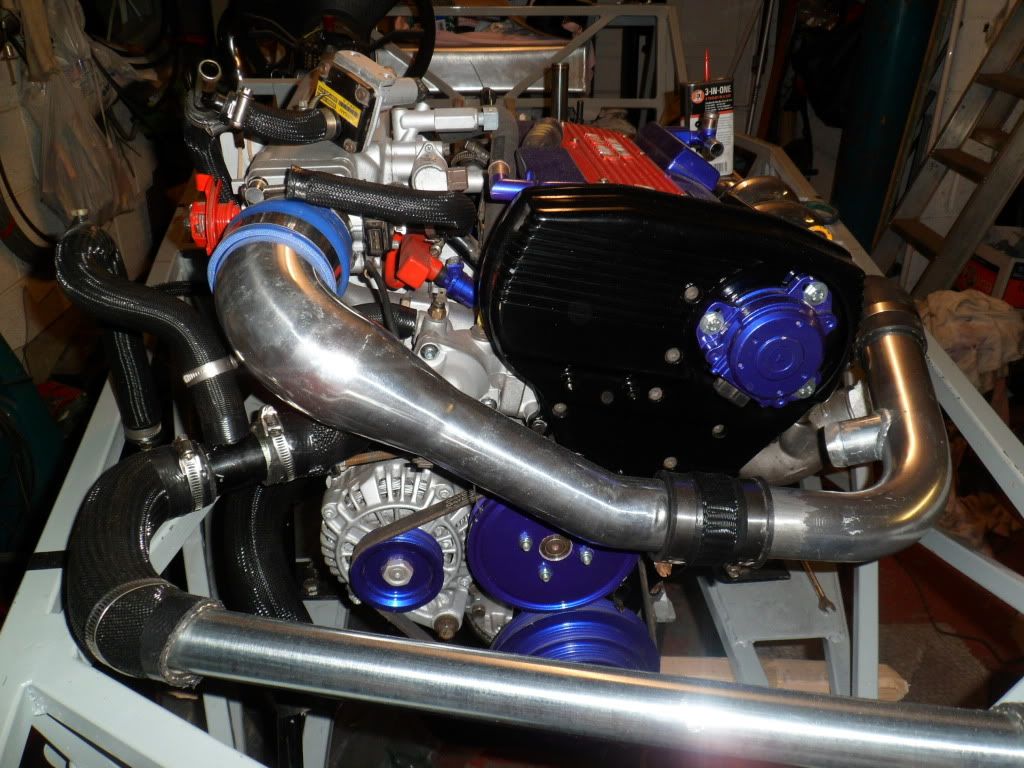 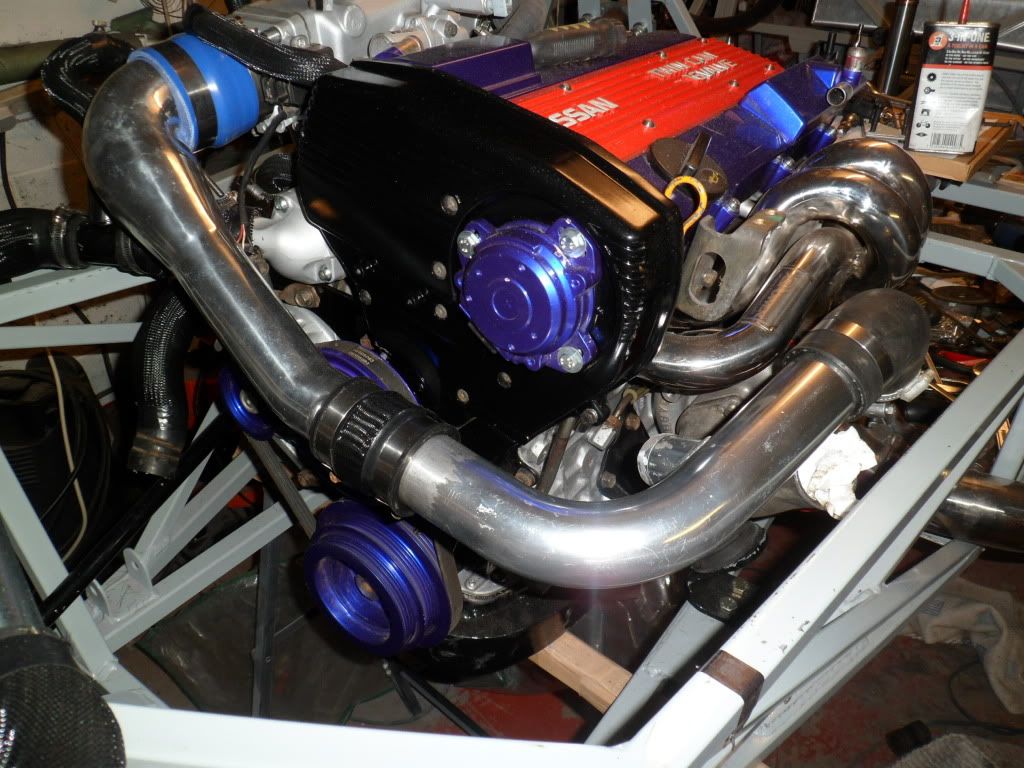 |
Starting to move towards first engine start....so a new blood transfusion.....never thought I'd ever see Castrol GTX being one of the cheap oils to run around in a refreshed engine.....I think 500-700 miles then get some proppa stuff in:D
Probably put loom on top of chassis tomorrow and start connecting stuff, will certainly be giving the engine a minute or so spin minus sparkies, just to get the oil all around the galleries and especially the tub cartridge.  |
| All times are GMT +1. The time now is 01:28 AM. |
Powered by vBulletin® Version 3.6.4
Copyright ©2000 - 2025, Jelsoft Enterprises Ltd.