
 |
Thats brill Dave ....I will let you know when my test date is when I get it.
Been having a play with some buttons today and so far so good I now have an engine start button in the dash..except you cannot see it as I am working it so you have to press the "word" START to turn the engine over and at the same time I have put a remote start button in the engine bay as well so I don't have to run backwards and forwards to start the engine. will get some photo's up tonight. |
|
Hi Kev
Just noticed your post re water leak a little while ago. Mine developed a leak at the test centre:mad: It wasn't a fail in itself but the testers were concerned about either possible burst or having hot water dripping on them whilst checking the car. They asked me to do something about it. I fixed it while they were inspecting:cool: The car is running for a long time during the test |
Funny you should mention that AJ, as I could'nt live with the said leak so I sent away for a new water pump yesterday and it has just come a few minutes ago. so it is a job for today.....tw*t of a job as the crank pulley has to come off
I did get my clutch and brake system filled and bled ...pleased to say no leaks and brake pedal has hardened up very nicely. |
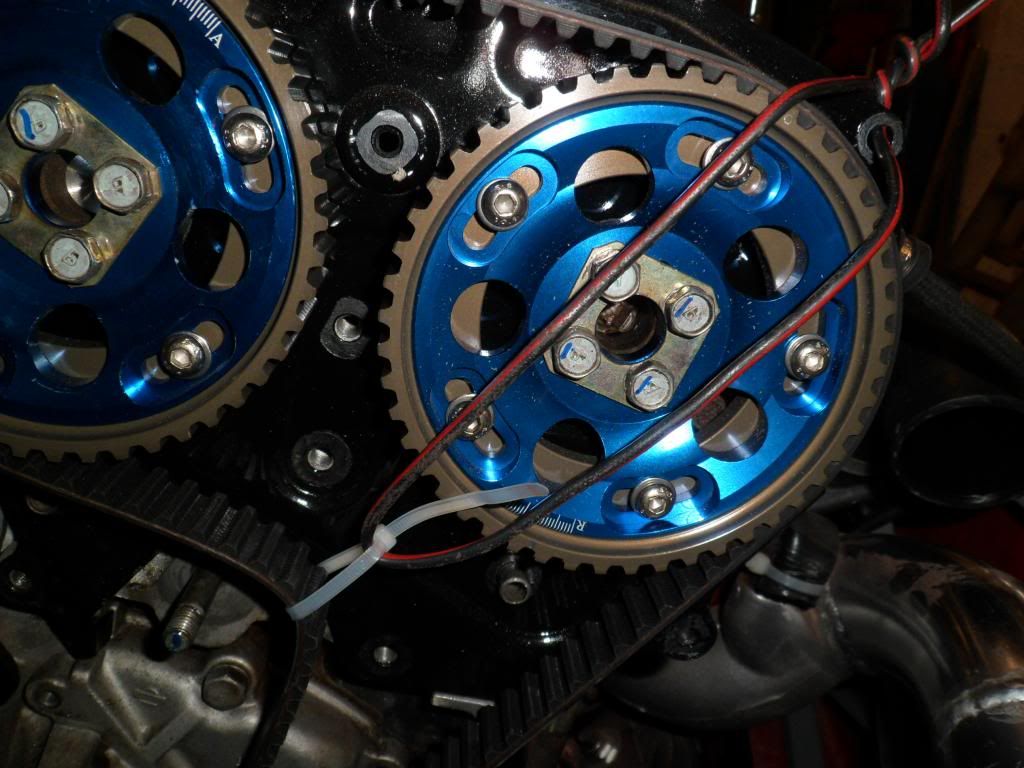
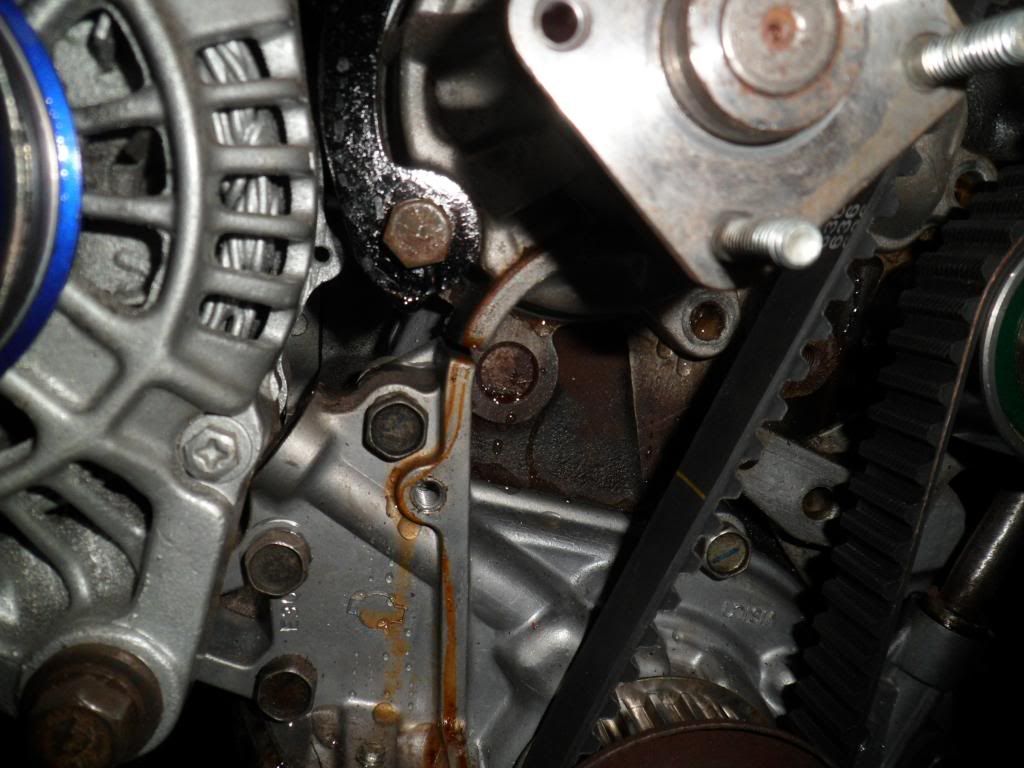
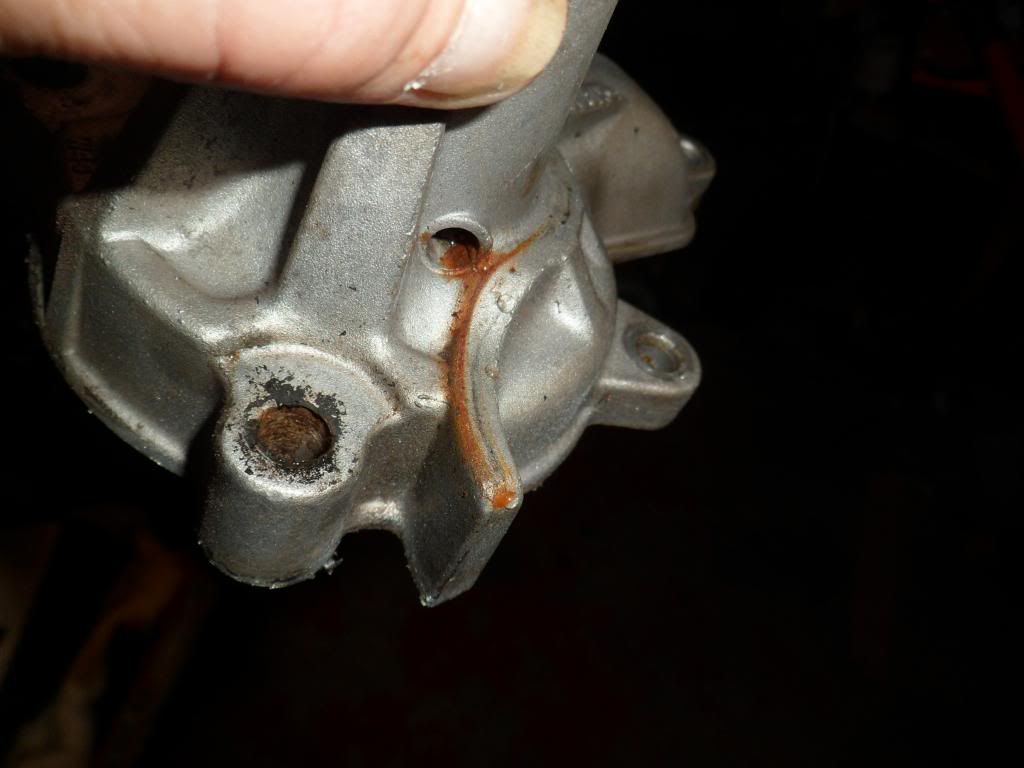
water pump off now ...thankfully the crank pulley came off with out a a hitch, tied off the timing belt so as to not loose the timing, when I took off the bottom cover I could see where the water was coming from and it was the water pump as I suspected.....these water pumps have a tell tale hole to warn you the bearing seal or bearing is on its way out before it lets go completely which is a brilliant idea, any way when I got the pump off sure enough that was where the water was coming from that little hole.
   |
Its made a bit of a mess of your shiney bits
Good you spotted it now rather than after it took your cam belt off |
There is one thing I have learned Dave.....at this stage of the build the cosseting of parts goes out of the window, a little chip here a scratch there and it is impossible to avoid even my beloved wishbones suffered....everything I do now is geared towards IVA ....more titivating can come after that.:)
|
Pleased to say the last part I needed working is now functioning as it should .....the speedo, so as it stands now everything is working A OK...water leak was solved with the new pump. I can now concentrate on finishing the dash wiring...oh and my super bodge hydraulic clutch system working good too.
Will be starting a brew tonight so see other thread for that. |
|
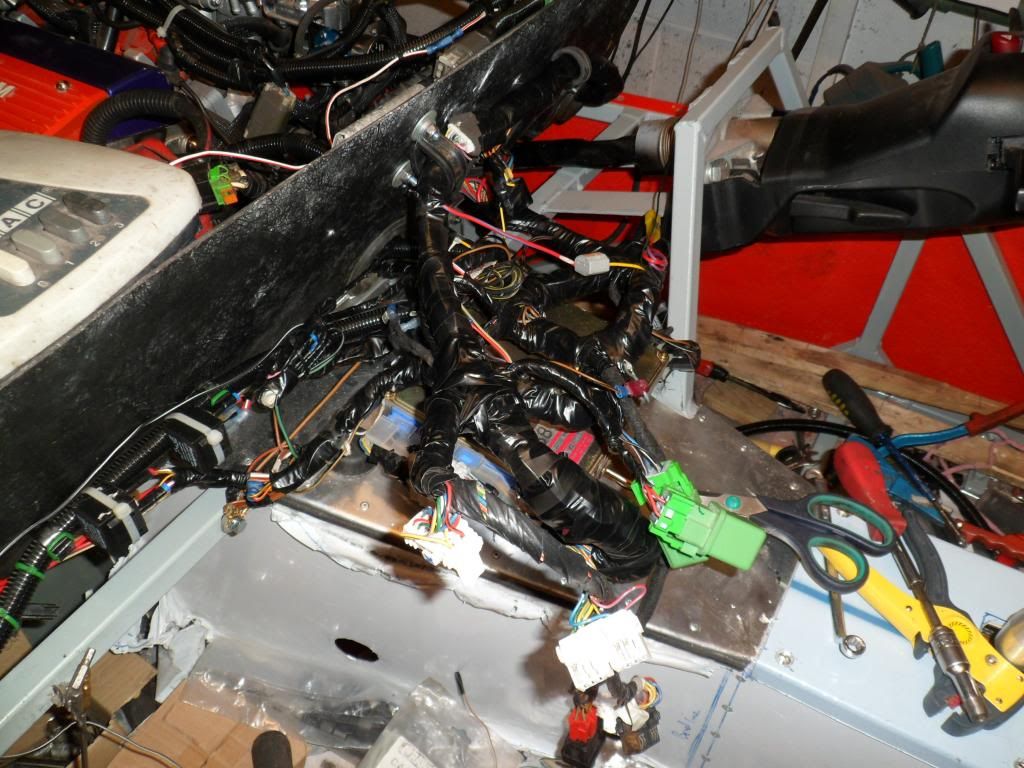
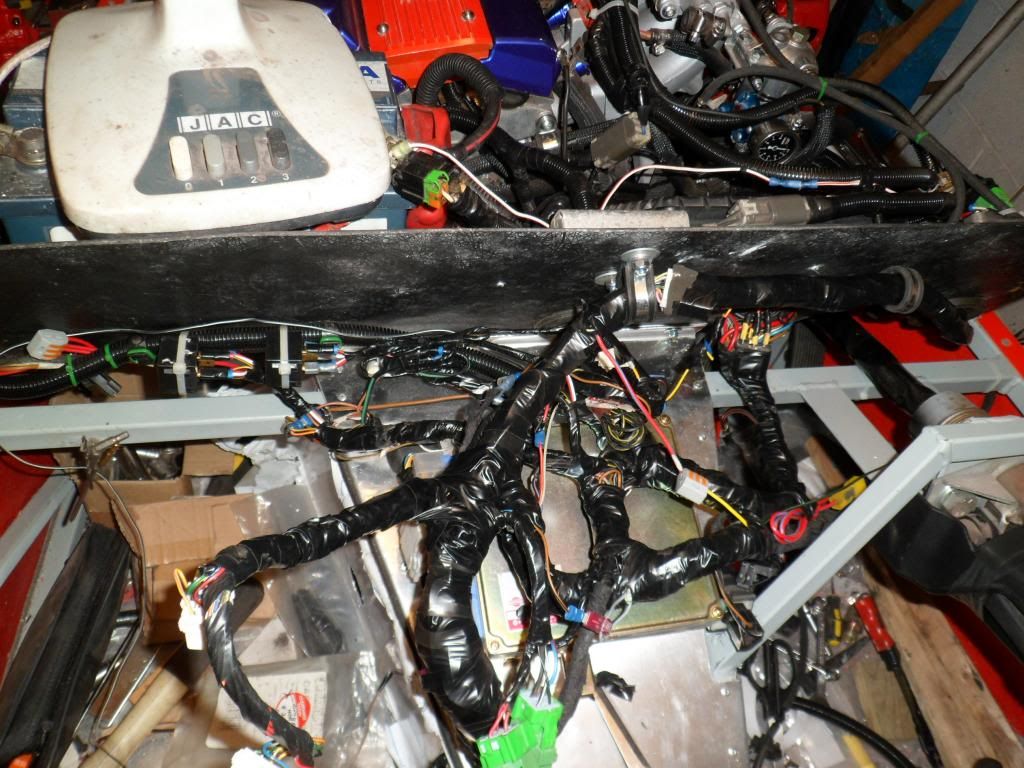
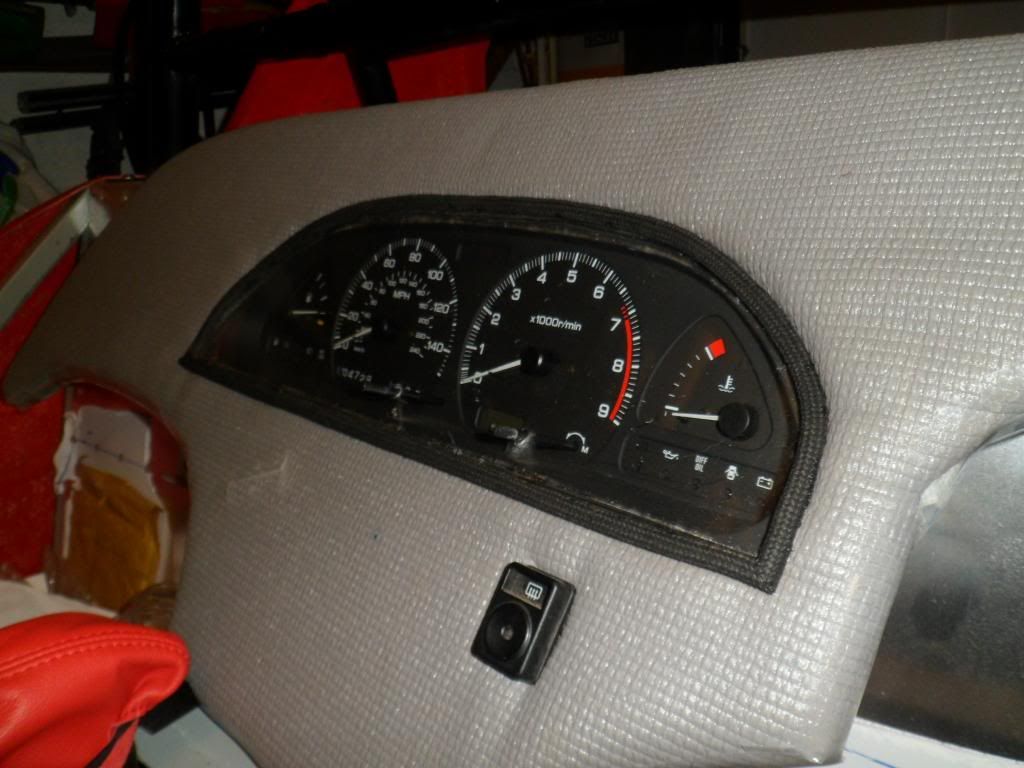
BIG job done yesterday .....although it still looks messy, it now looks something like a wiring loom ECU bolted in place, just have to make sure nothing is liable to chaff and the scuttlle will be permanently fixed followed by the dash....by the end of today it will feel like the end of the build will be well within sight
   |
|
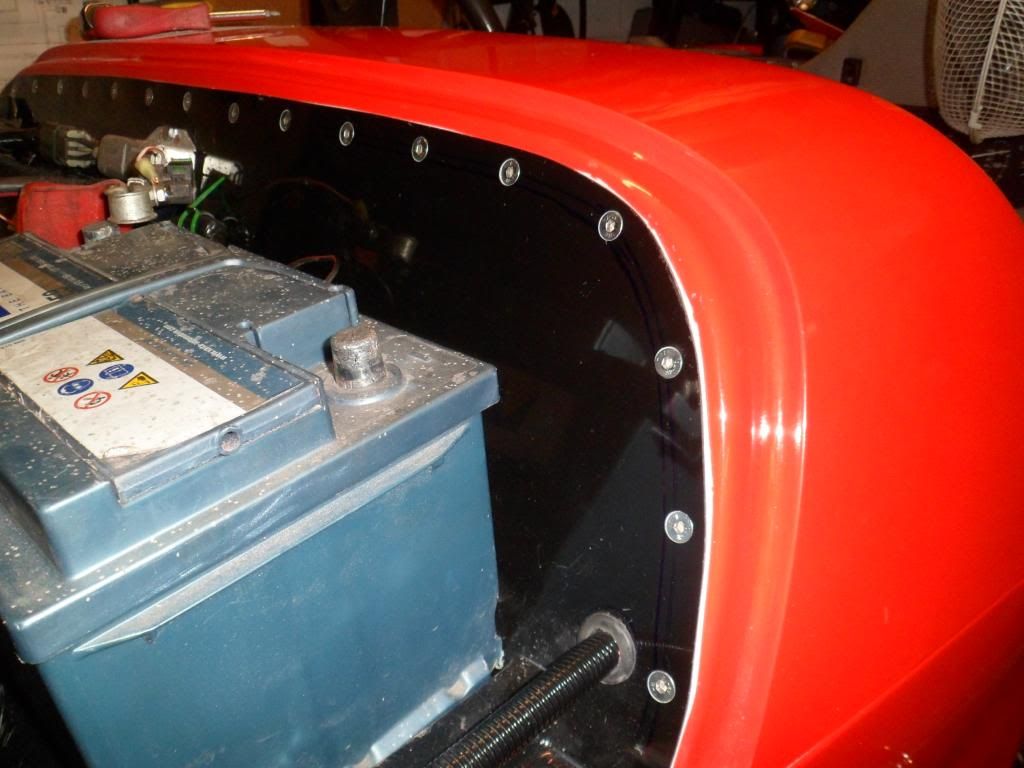
few things done today....managed to permanantly fit the scuttle, I have used double sided tape but left the upper paper on so as to become foam seating, I am retaining the possibility that I might need to remove it when it comes to a dash upgrade also have bolted up the firewall bulkhead to scuttle, thought I might as well fit the aeroscreen and edge it off,so that is done as well, all in all a productive day.....piccies
 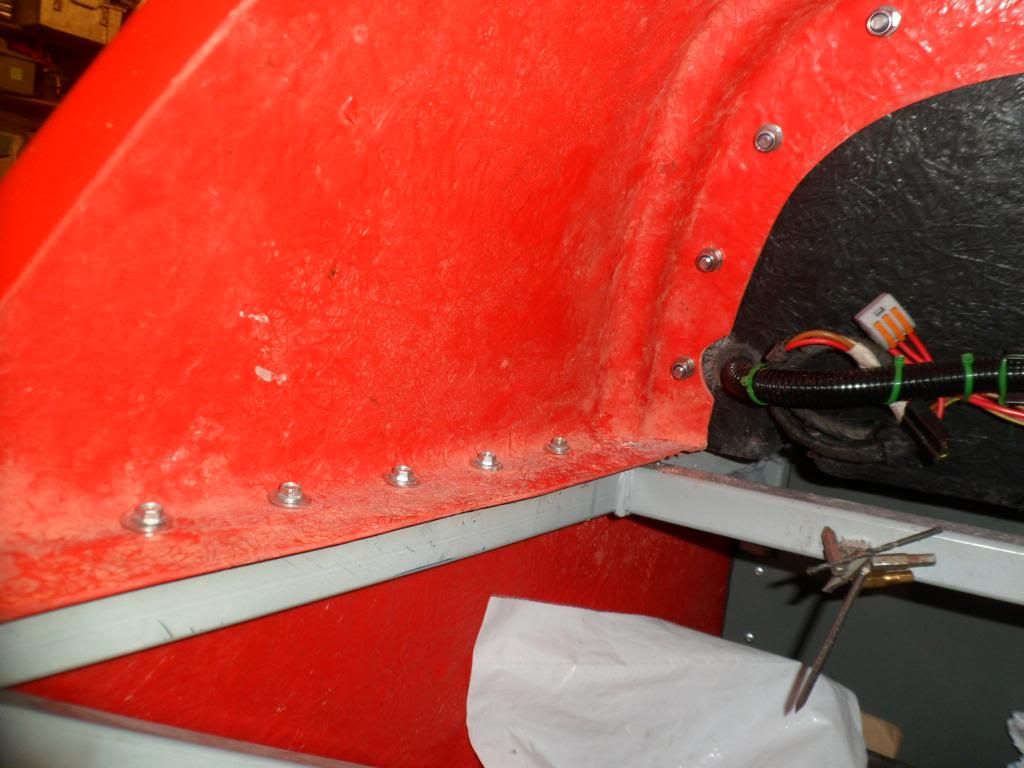 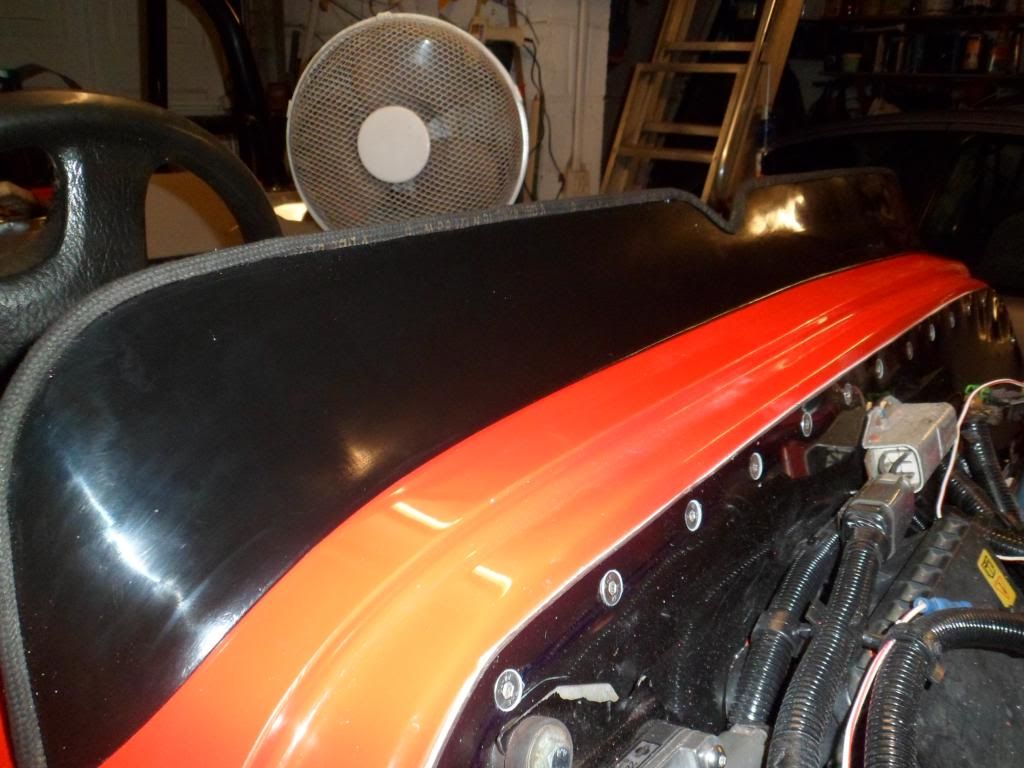 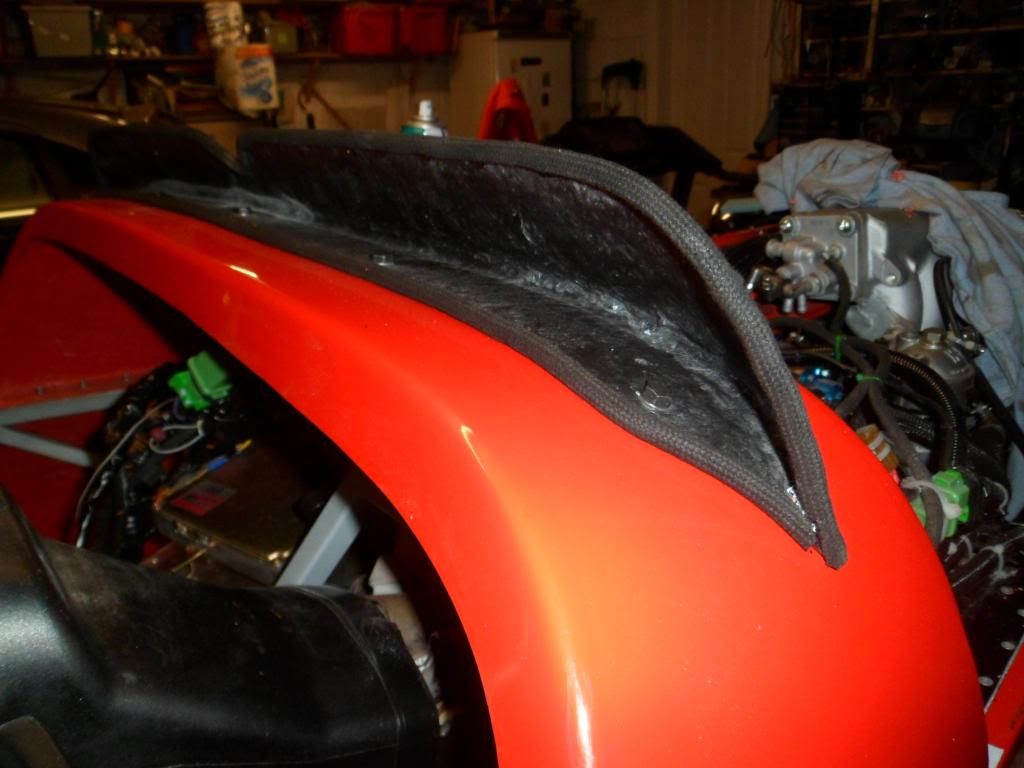 |
That's a lot of fixings :D probably pay dividend in the end although I wonder if the counter sunk ones may rip through the GRP.
I still have not fitted my AeroScree, I am convinced I will ripp it off by accident, mind you eveything is trial fitting to be taken off again anyway so I could just fit it up and take it off. TT |
re the csk bolts.....it did cross my mind TT and I think you are right BUT if there was enough force applied to do that the scuttle and bulkhead then would be knackered anyway.
Dashboard in today and fastened up. |
|
Looks like that dashboard is not coming off anytime soon! But seriously, what will you do if you need to change something in the wiring beneath the scutte? My scuttle is fixed on just 4 bolts, and I take it off quite often.
|
I don't like to think about it Albert if I do have to then I will have a good cry first:( ....I will not be repeating the exercise on the mk2 dash when I come to lose the one thats on now.
|
Its taking shape Kev,is that the injector resistor on the bulkhead,it may get rather warm when running and possibly burn the glass behind it.
|
Yep it is the ballast resistor, I gave the engine a run up today and checked for it getting warm but it just stayed stone cold, but if there is an issue with it then I will add an aluminium heat sink to keep the temp down....another suck it and see scenario:rolleyes:
|
Was not sure but remember them on Bosch systems usually bolted to the most non sensible place on the engine block where you could not get at it or test it.
|
Have been making up the permanent fixings for the nosecone bottom fixing is a simple piece of angle ally pop riveted on to the bottom of the front frame and then the nosecone fitted over it and three boltholes drilled.
Also been working on the front indicators.....not as straight forward as I thought what with the angles and limits so I found I have had to make a couple of extensions to come within IVA specs still have not decided where to mount them...have also made a couple of teardrop shapes echoing the exhaust one to spread the pressure on the outer gel coat and reduce the risk of stress fractures and will be making the same for the mirror mounts 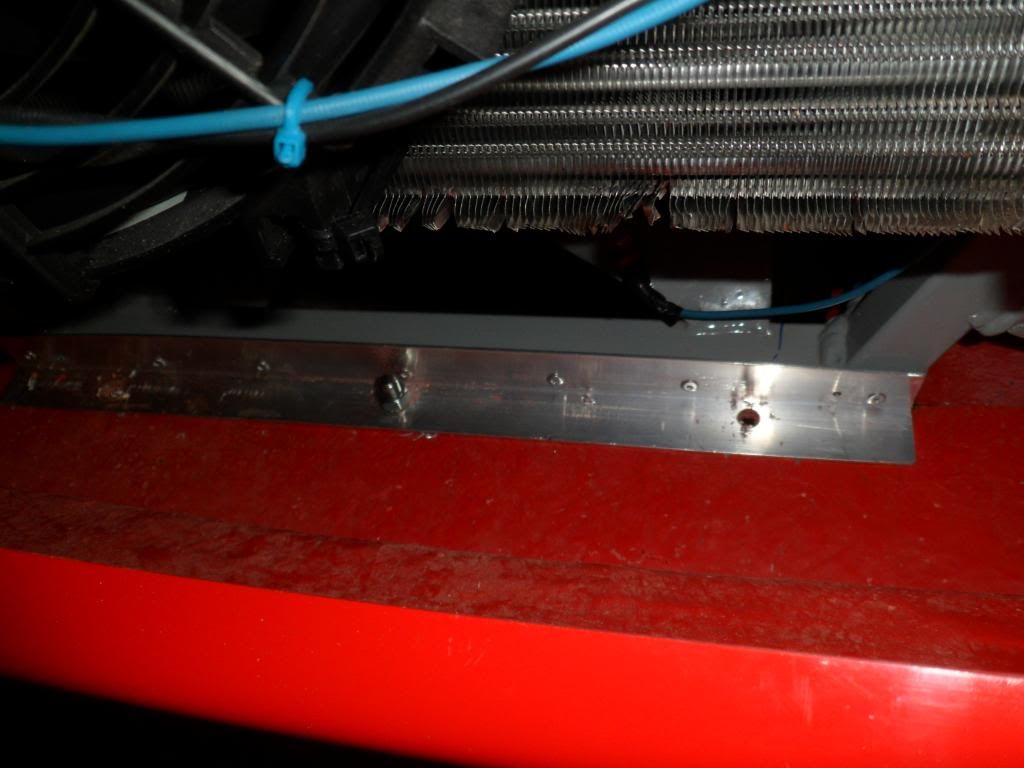 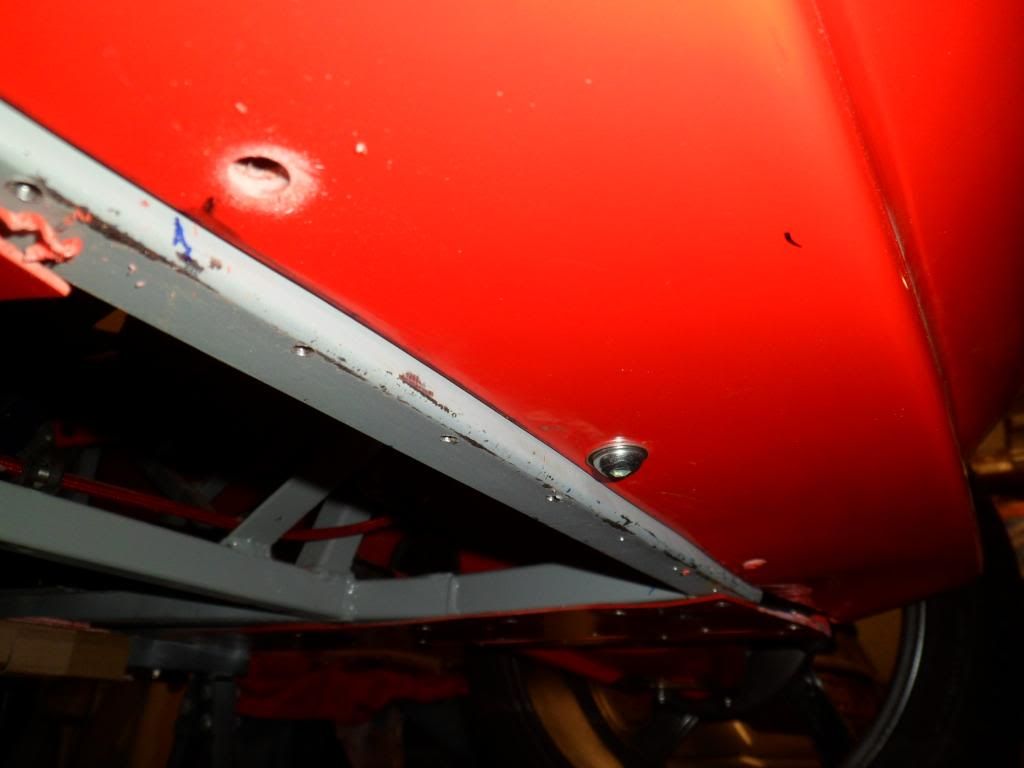 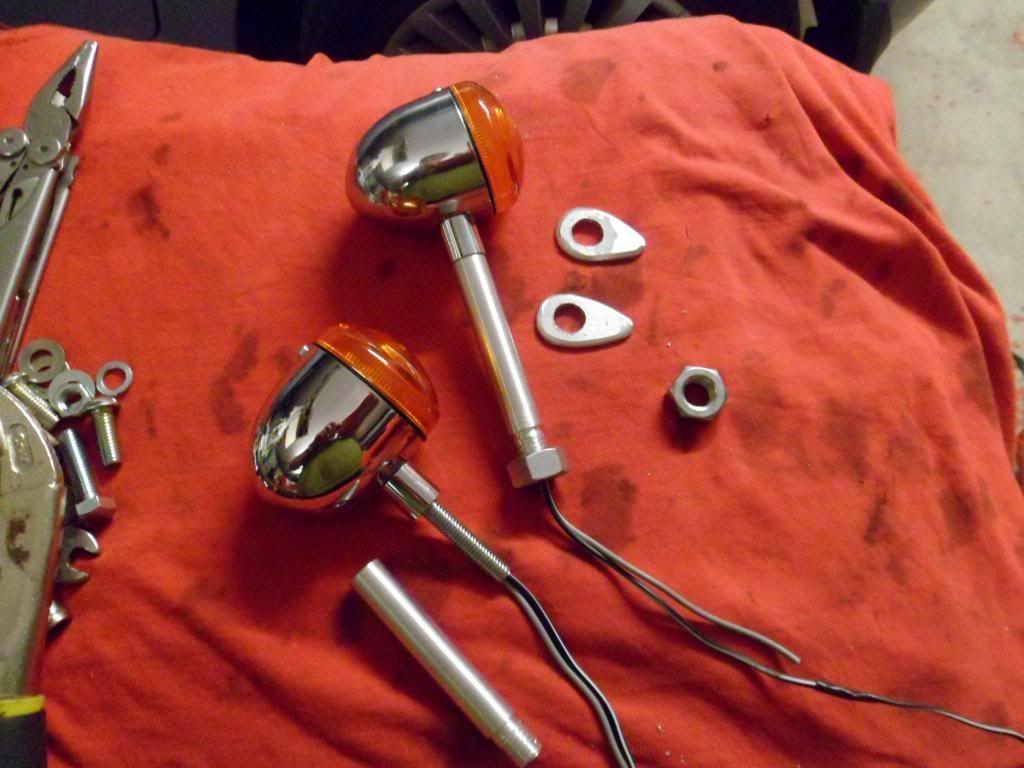 |
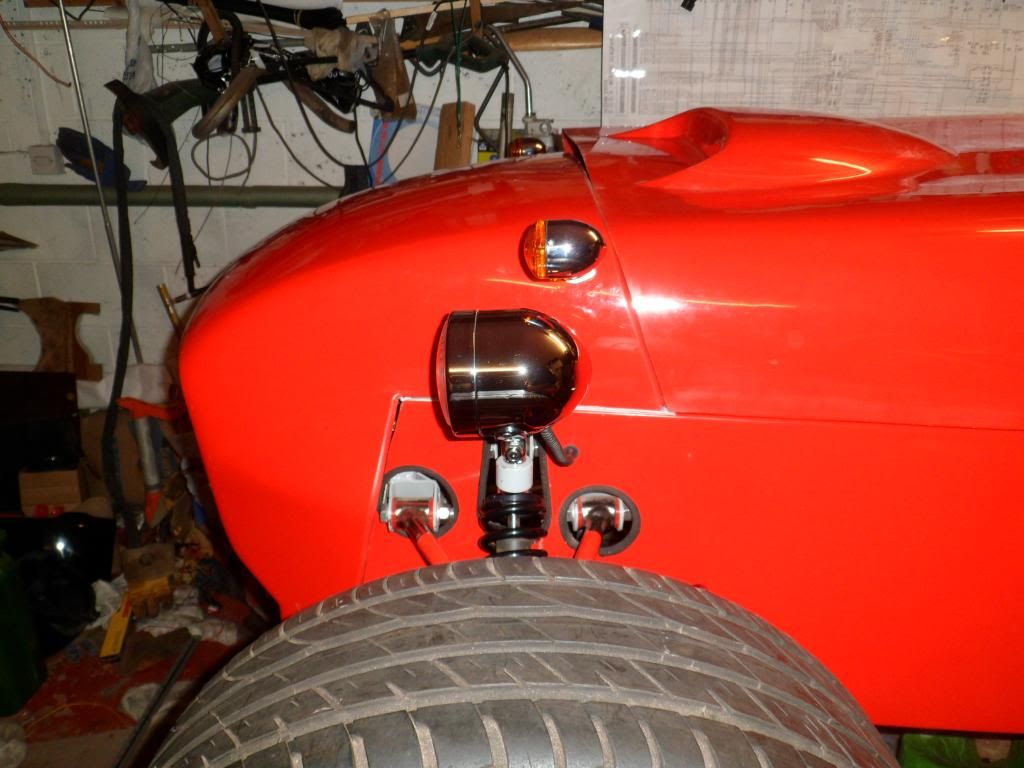
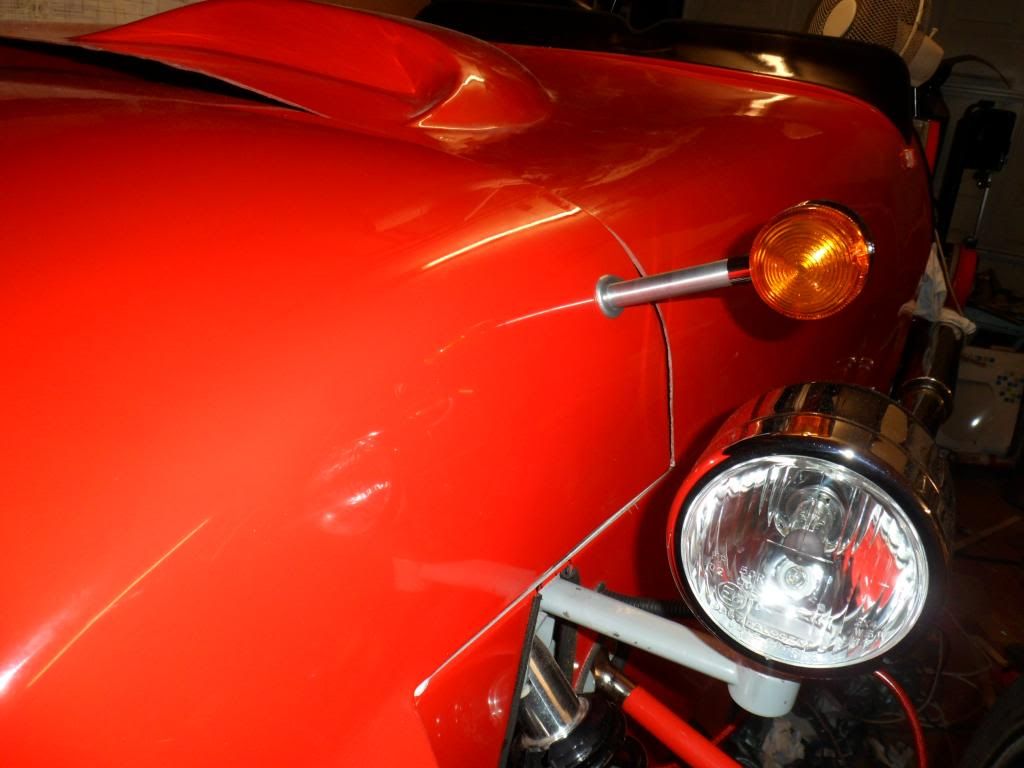
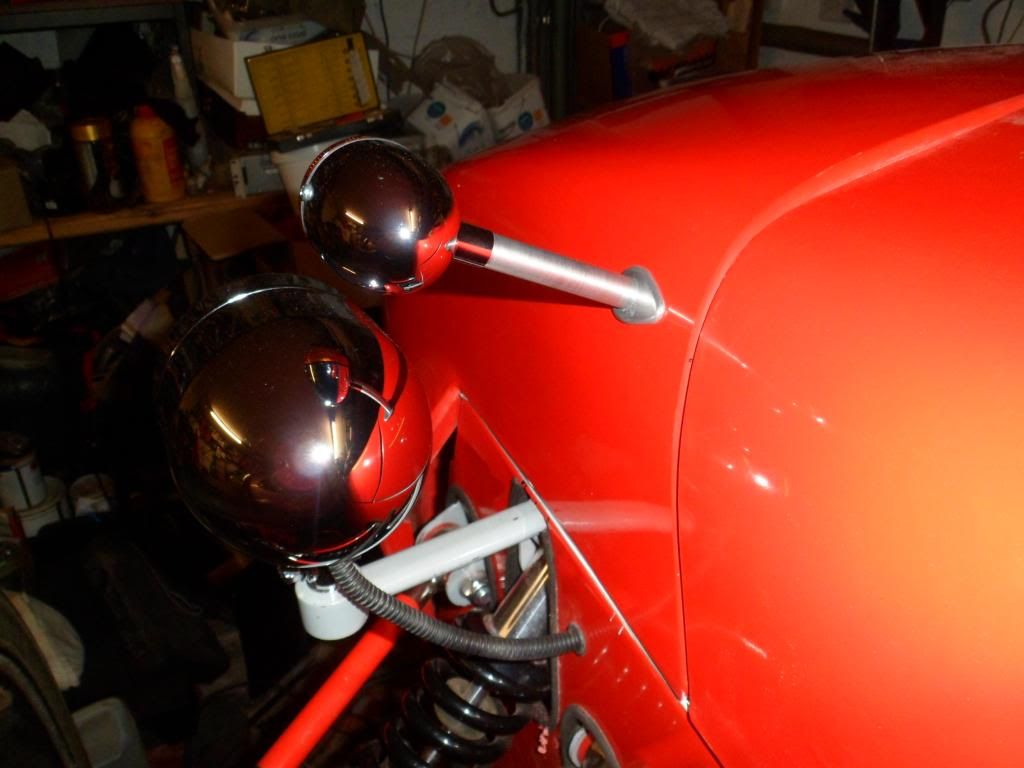
Well after considering the usual places for to mount the indicators I decided to be a little different and mount them fairly high and further back... the height was to allow them to be visible on the 45 degree rule but it also had the bonus of keeping the stubs short and they marry very well with the headlamps, another added bonus is you can see them blinking in the reflection on the headlamps should you ever forget to cancel a left on signal.
   |
Extra bonus is you get to look at more shiny bits
Russ |
|
More productive day than me then!!!! :D
|
I finished a rack unit to go at the bottom of the garage over the spare engines. should make storage easier and tidy up the space.
TT |
|
Just a small note about mirror mounting. I think I am a proficient user of mirrors, I find it easier to park a car into a tight spot in reverse, controlling the clearances with the mirrors. Not so with the roadster. The mirrors are closer to the centreline than the outer edges of the rear arches, so you do not get a view of the car's outer dimensions in them. This way they are almost useless for maneuvering in reverse, you're better off turning your head and controlling the corners directly. Now, for normal highway use the height of the mirrors is more important, as the rear arches obscure the lower part of the view. Based on this consideration, window-frame-mounted mirrors should be more convenient, once we get around to fitting a windscreen.
I've also used cheap scooter mirrors with M10x1.25 threads and mounted them like so: https://picasaweb.google.com/lh/phot...t=d irectlink Looks like the position of the mirror ended up very similar to yours. |
Albert....the main reason for mounting them there was the fact that I would have two thicknesses of fibreglas for support hence a much stronger place to mount them.
yesterday I got around to reinforcing my seat mounting points.....my initial thoughts were the flat bar that I used would be strong enough, but after having a read of the IVA manual I was not so sure, so I opted for beefing up the floor with some 3mm ally, top and bottom so now the bolts go through 9mm of ally and 6mm of steel:eek: .....I am fairly sure that will be enough 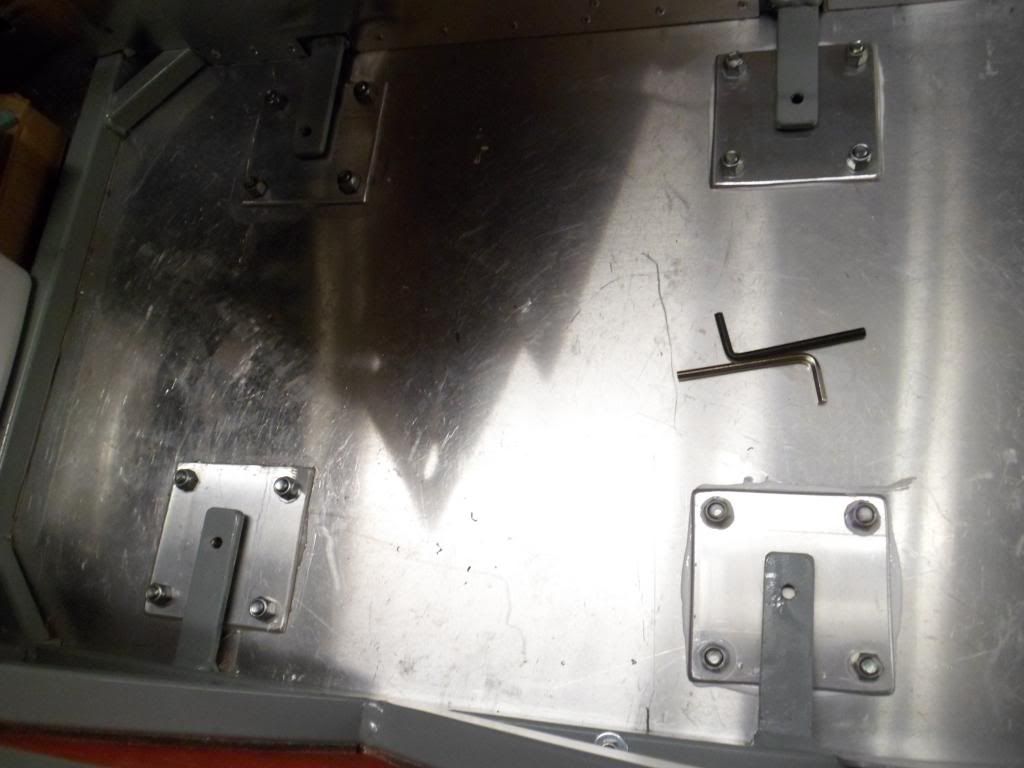 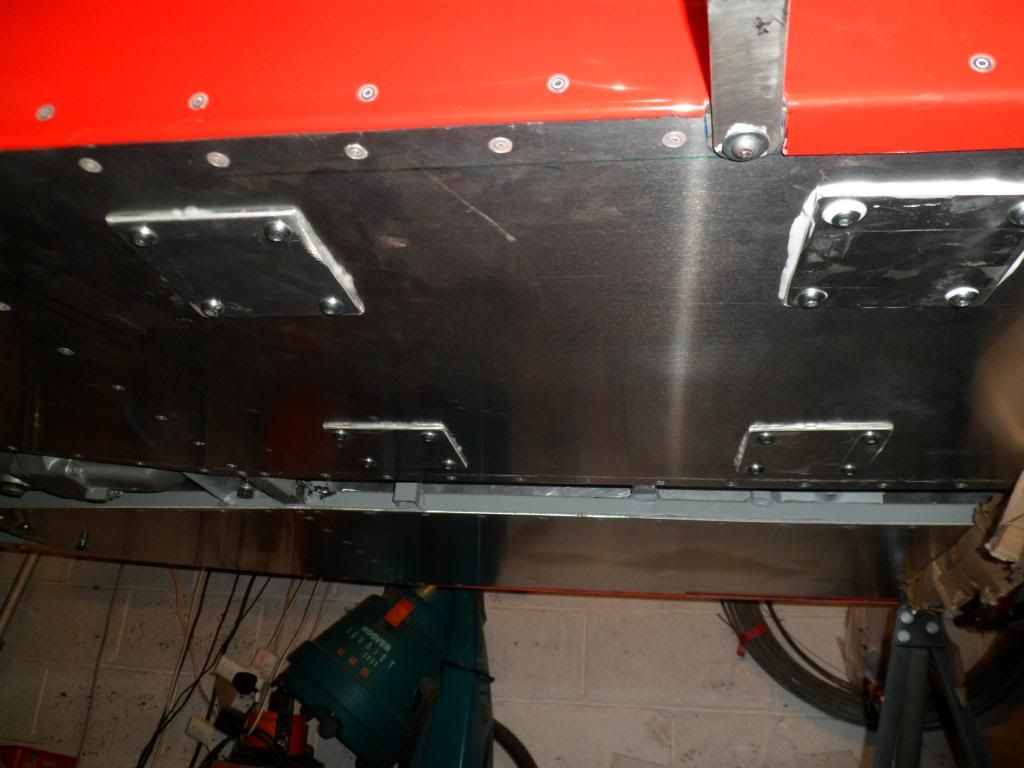 |
Don't think they will be going anywhere with that lot in place
Arfon |
Hi there, first time poster, long time lurker :D
Having finally managed to make my way through this entire thread it has prompted me to make my first post and to say that it is an inspiration to me as a dreamer (hopefully soon to be a builder). I've just recently picked up "the book" after having a weekend in a Caterham CSR 200 and trying to figure out how I could replicate "some" of the fun I had. Keep up the good work. Alan |
Cheers for that Alan ...yep it is a looong thread that is now over three years old and I happy to say the car is nearing completion for IVA but then after that there will be endless tweaks to get it just the way I want it and maybe a screen at some point.....if you are hoping to replicate any of the Caterhams I would opt for a good strong engine that will accept some tuning mods, this was exactly the reason I chose the CA18DET and I know what it is capable of.
get yourself some steel Alan and get going:D |
Quote:
Cheers Alan |
Only 3 years kev, I looked at a bill from rally design and realised it was dated July 2009! Although I started building in November 2008.
Slowly getting there but much further behind than you. |
Well get your bluddy finger out Steve......I must admit mind getting a lot of stuff prefabbed before hand has made the last 6 months seem like a breeze ....#I think because I set myself a target to get it on the road this year helped, you know PMA and all that stuff:rolleyes: .....hoping to fit the seats soon on with harnesses at the mo
|
PMT ?, sorry mis-read should have been PMA. :p
|
Yeah I know Paul... how mentsrual tension and mental attitude can easily get mixed up lol ....especially in a feminist scenario
|
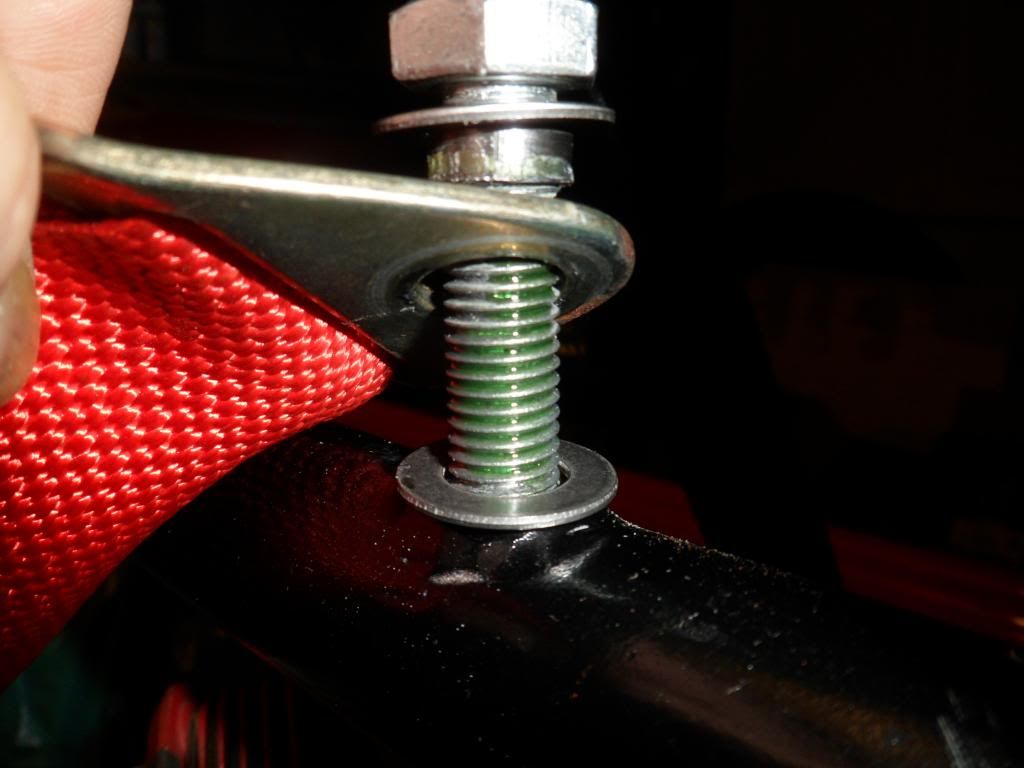
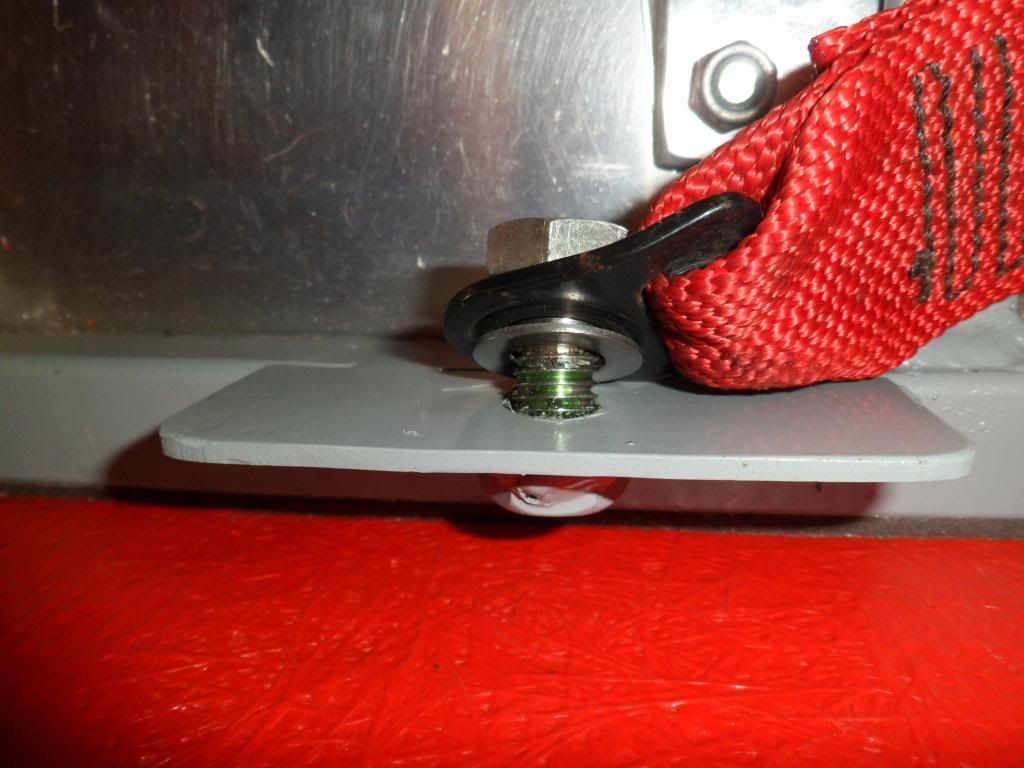
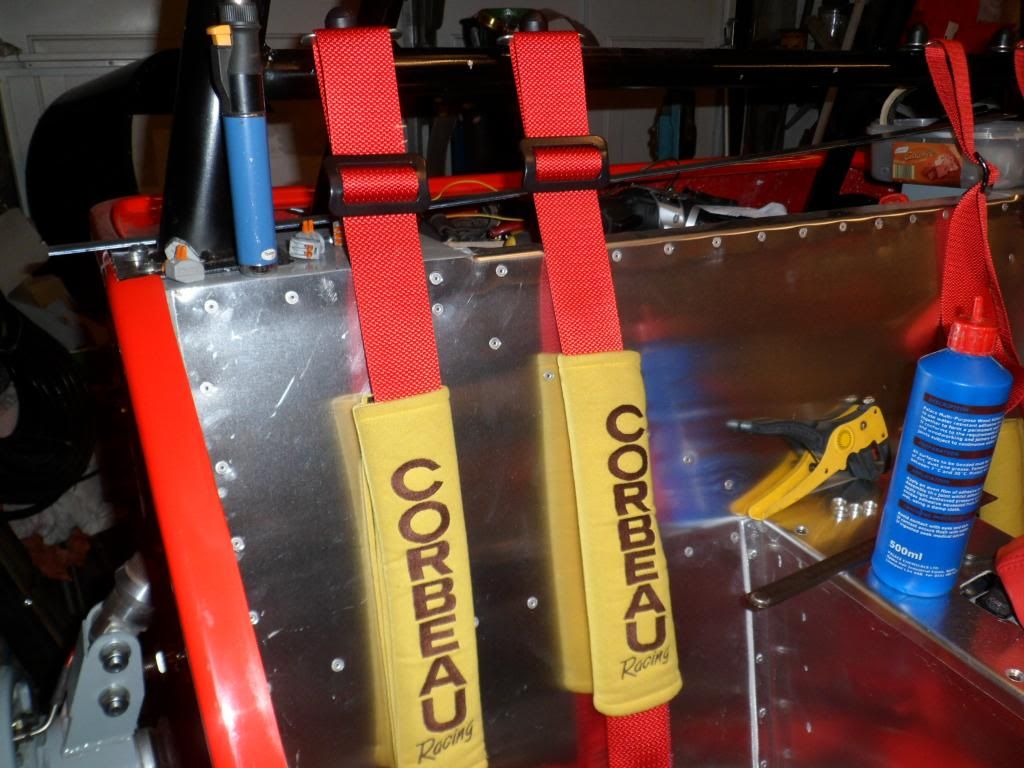
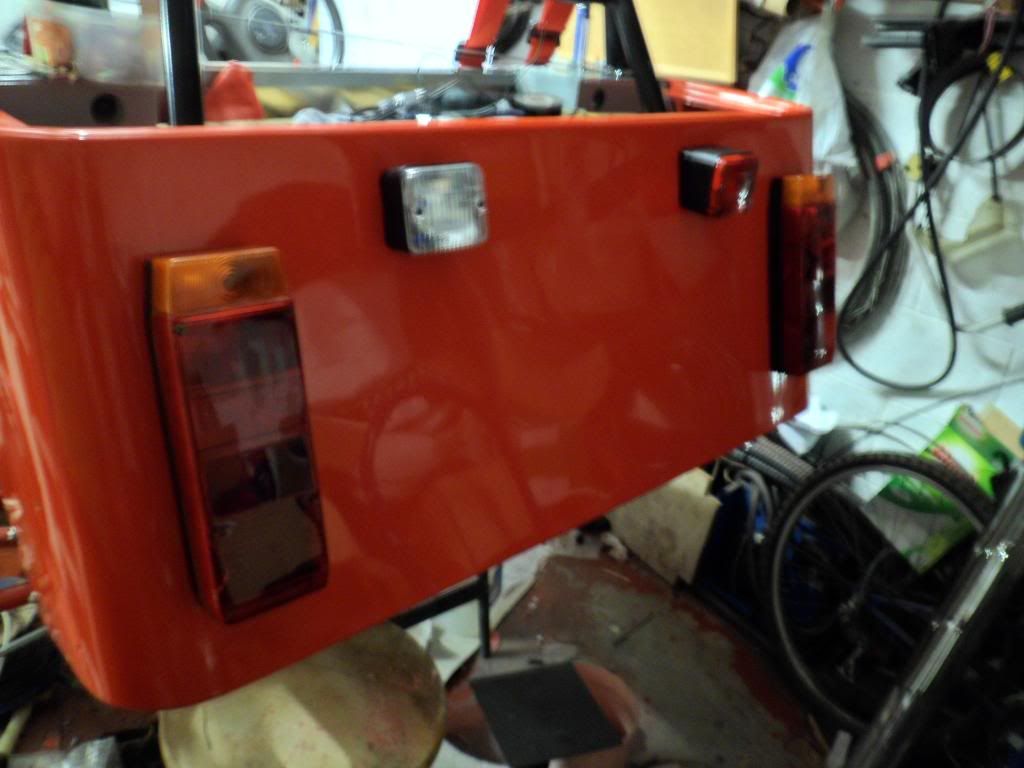
Have had a couple of days off from the build and now back all fired up to get cracking again......have now fitted all my harness's, but really need some black shoulder pads and need to make edges safe on roll bar mounts also managed to get all my rear lights fitted and wired up permanantly, steadily working my way over every inch of the car to eliminate any issues that I have missed along the way.....car is still on trestles as I still feel that it is better to work on up at chest level until I am sure nothing else underneath needs doing.
    |
is it just a wieght to make the gear change feel smoother and lighter?:confused:
|
| All times are GMT +1. The time now is 03:46 AM. |
Powered by vBulletin® Version 3.6.4
Copyright ©2000 - 2025, Jelsoft Enterprises Ltd.