chassis is looking real good , just a couple of questions what size mig are you using i have a 170amp single phase, and also what thickness is your 25x25 SHS,
cant wait to start my chassis im going to start mine over xmas hoildays ,i will get 2 weeks off and its Summer over here in New Zealand. Havnt got a donor yet but will build chassis to suit a book specs. Anyway looks great so far, keep up the good work. cheers Tony:) |
G'day Tony.....my mig is a modest 130 amp machine on a Argon/co2 mix, I think you will be more than ok with 170 amps on tap.
The bible :rolleyes: says 1.6 mm wall thickness for the shs but most people over here are using 2mm wall thickness (substantial gain in strength for not a lot of extra wieght) I can never get my head around it being xmas over there in NZ and AU in the middle of summer, any way Tony, get started now ....its amazing how much you can get done with a 30 minute session here and there, it does not take long to eat,breath and sleep "roadster":eek: |
Quote:
|
Quote:
If its red, Ronnie goes all gooey eyed :D cheers andy |
OK Ronnie.......have the tissues at the ready.....here they are my lucious red anodised mushies not a pair just some trials but perfectly usable not sure which style to go for yet, but thats the beauty of making your own, might even try gold next....well yellow actually.
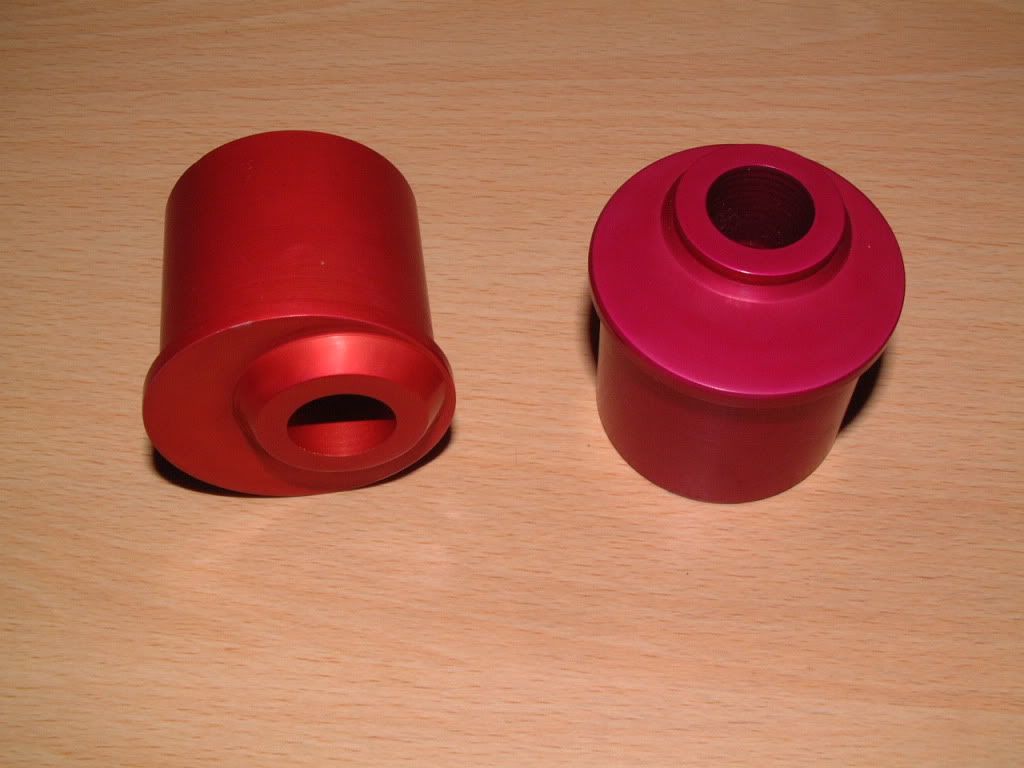 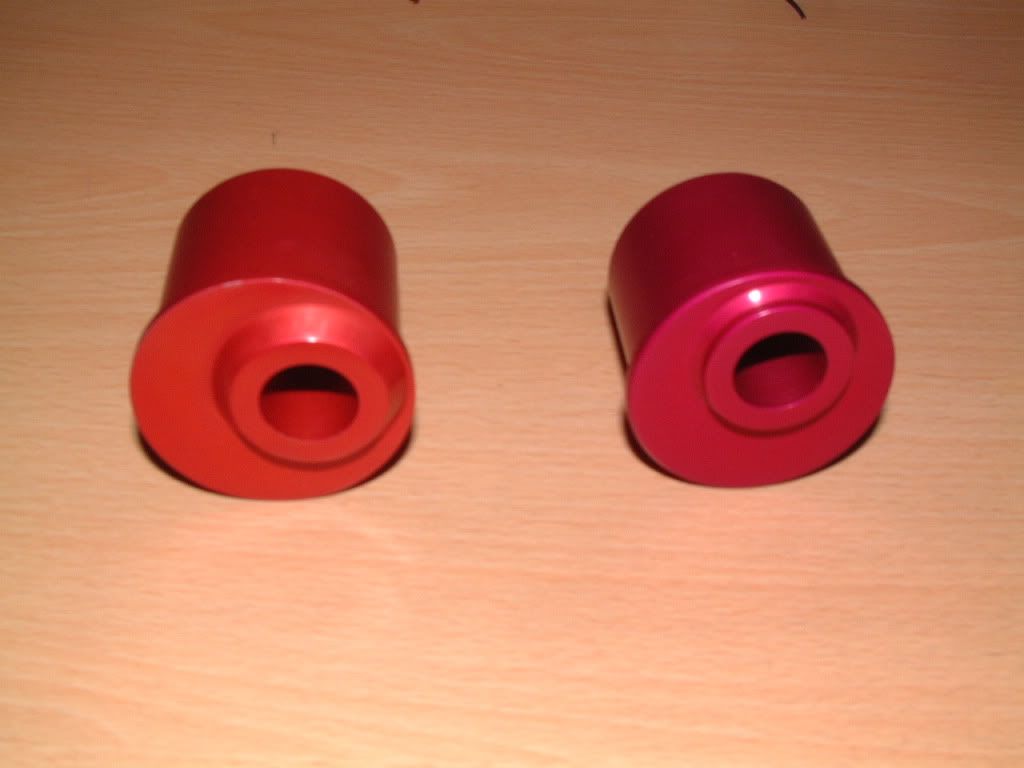 |
Looks really good Kevin, for my preference i like the colour and style of the style on the left. The pair you made for Saturn are still looking good and are about to go on the Mazda chassis to go on show down at Stafford....Cheers
Will have to come and have a look at your progress when things settle down a bit....:confused: Regards.....AndyH |
Pure Roadster porn
Cracking stuff there Kev :)
Besides the practical advantages of anodizing it certainly adds that super cool, bling factor :cool: Like Spud, I too like the Red on the left. That said, I would not say no to a pair of those in either shade :) Definately up for a pair of those in Red should you produce any spare sets :) |
thanks for the kind comments lads,;)
Ronnie.....chances are I will be knocking out a few sets if anything to help finance my build (unemployed hence the use of any scrap I can find) and I still have 2.5 metres of 50mm ally bar lying around so just let me know when and if you would like them, Incidently they are to the specs from a drawing on here somewhere just the tops are shaped differently. Andy...hope you have a productive weekend down at Stafford feel free to plug my mushies....and your always welcome to pop around anytime....the "new" eye is sometimes beneficial at spotting mishaps (I hope there bloody well arn't any) might need to come down and "borrow time" on your susp jigs soon.:rolleyes: |
hey K4kev those mushies look great, if i paid for some over the internet into your bank account would you be keen to make me a pair and send them over to here ( christchurch New Zealand ) ?
Think i may have soruced a pair of Sierra front uprights ( very rare over here). |
No problem Tony ...sent you a PM with info
|
PM sent to you Kev :)
|
Wupeeeeee....got me stuff from 3ge, caused bit of a mental barrier waiting...I know I could have got on on with other jobs but could not get it into my head that I NEEDED the stuff I bought.
Made one of my first bones ....worst one as well, being bottom rear....was very tempted just to do it ladder style ie get rid of that diagonal, but no I persevered. Tube mitre is very good but it still requires you to 'fettle' quite a lot, as using the tube thickness in the app would render it way to thin at the edges to mig so I guess everyone else has found a "halfy halfe" remedy to satisfy the critical dimensions and yes mine distorted too when fully welded but a little "heat line treatment" (a neat trick I learned at the shipyards) brought the tubes back in spec to the mm .....in effect it cancels out the initial weld contraction so a few pics using the cnc'd wooden jig  more than a couple of mm out should be 206 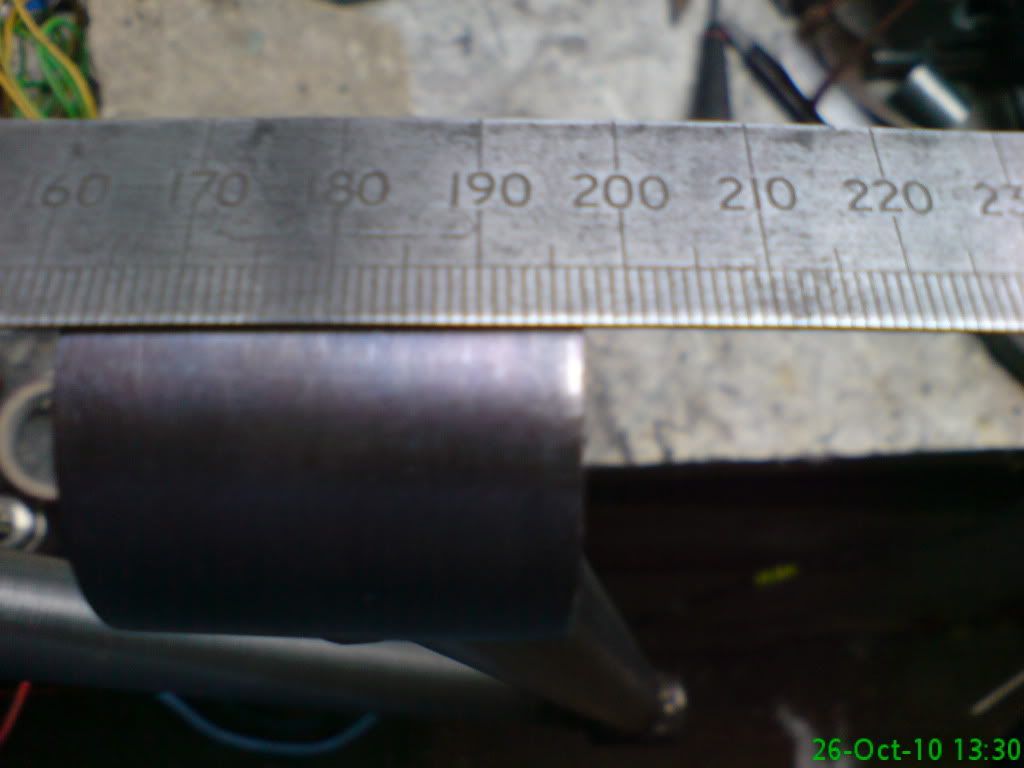 heat line treatment (has to be cooled immediatly with water but not dipped) 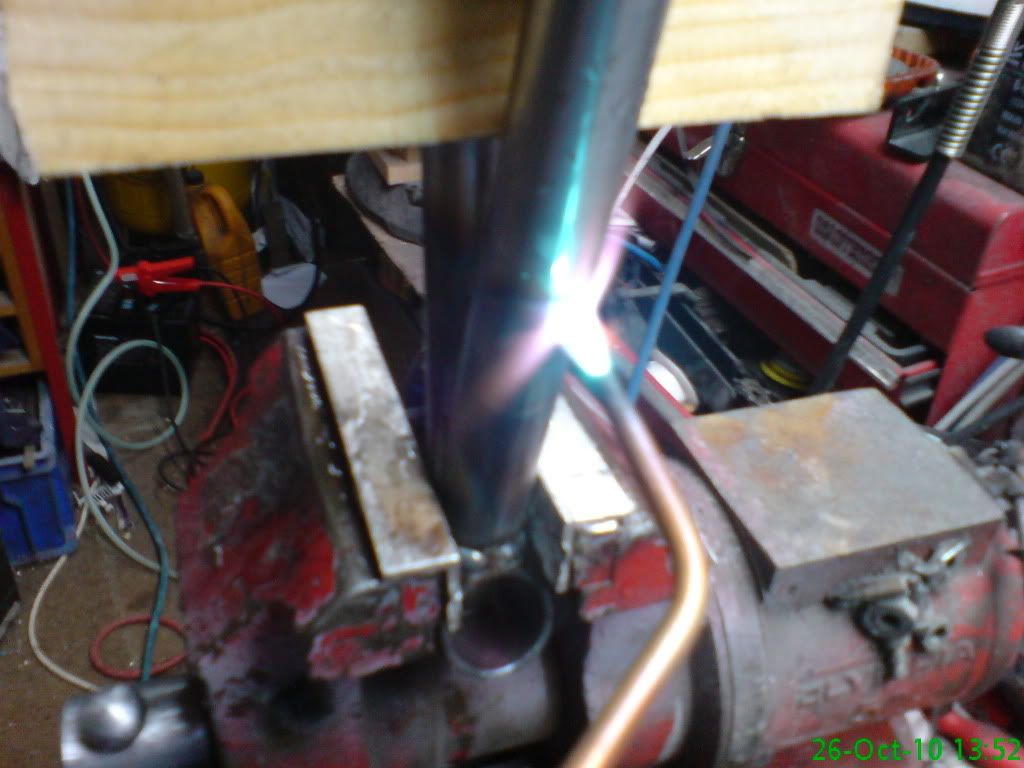 three of these treatments and a couple of strategically placed wedges and were right on the money no brute force used 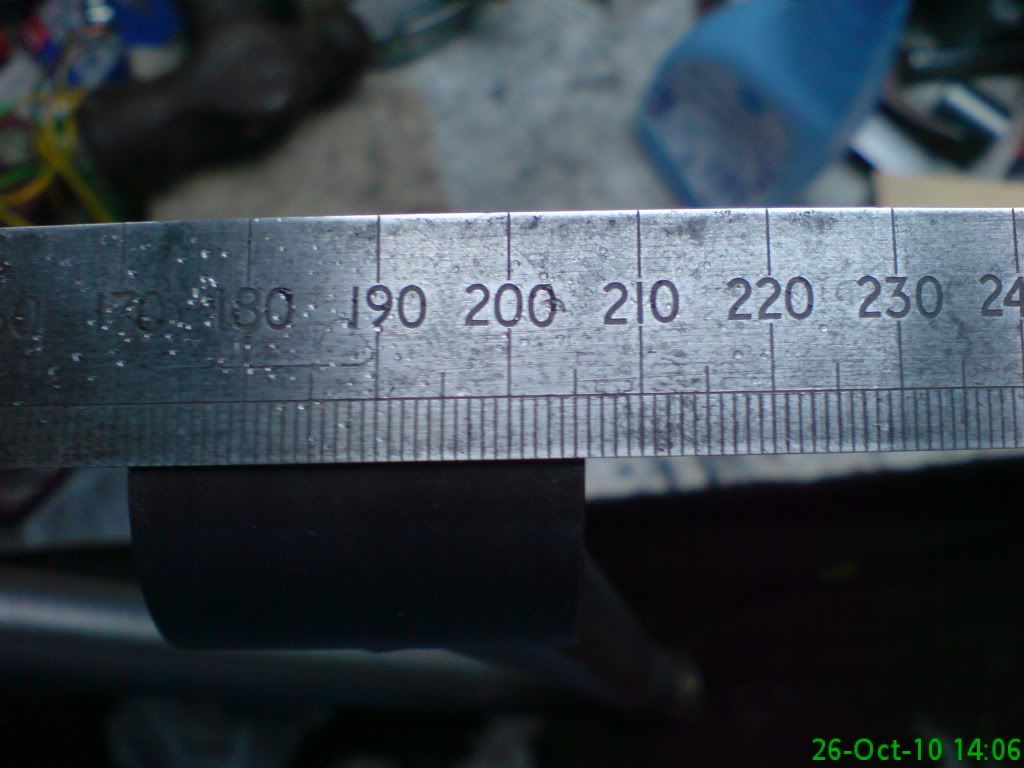 Next stage should be interesting as I intend to nickel plate the bushes and the 1st inch or so of tube for the ultimate in corrosion resistance. |
Looks more like 205.62mm to me not 206!! :D ;)
Good work I was gonna try heat rather than brute force when i corrected my distortion but im impatient so went with the latter! |
Gonna buy you a dicky comb:D :D
|
Well....been away from the build for a few months trying to master the art of electroplating (see separate thread on Nickel plating) but because of the plating op turned out so well it has given me a boost so I have been back into the garage and re established the build.....so far in the last couple of days I have made up the rear tub 1" bracing since I am going to use the glass tub and today I got stuck into cutting the trans tunnel sections so will be constructing that tomorrow.....
just a couple of piccies   |
Coming on nicely Kev
Looks like you are making some good proress there :cool:
Tis strange how easy it is to get stuck in the mindeset of " I must finish this part before I move on " :) Been thinking about having another crack at electro plating at some point .... Got as far as basic copper plating, then got hacked off trying to find the chemicals to take things further ( Had wanted to do some chrome plating ) Well done on your progress to date :) |
Cheers Ronnie....did consider chrome, but too many nasty chemicals involved to get it spot on.... nickel baths you can even put your hand in (dropped a tube in once had to fish it out) as long as you wash it straight away. Gateros plating and caswell do the best kits but as I discovered the most important ability is to be able to control the dc volts and current.
|
Bin a while now since my last update....(too cold for the shed) Anyways since becoming pretty good at nickel plating....I sensed it was time to put it to full use on me bones dem bones dem bones dem dry.... sorry couldn't help that.
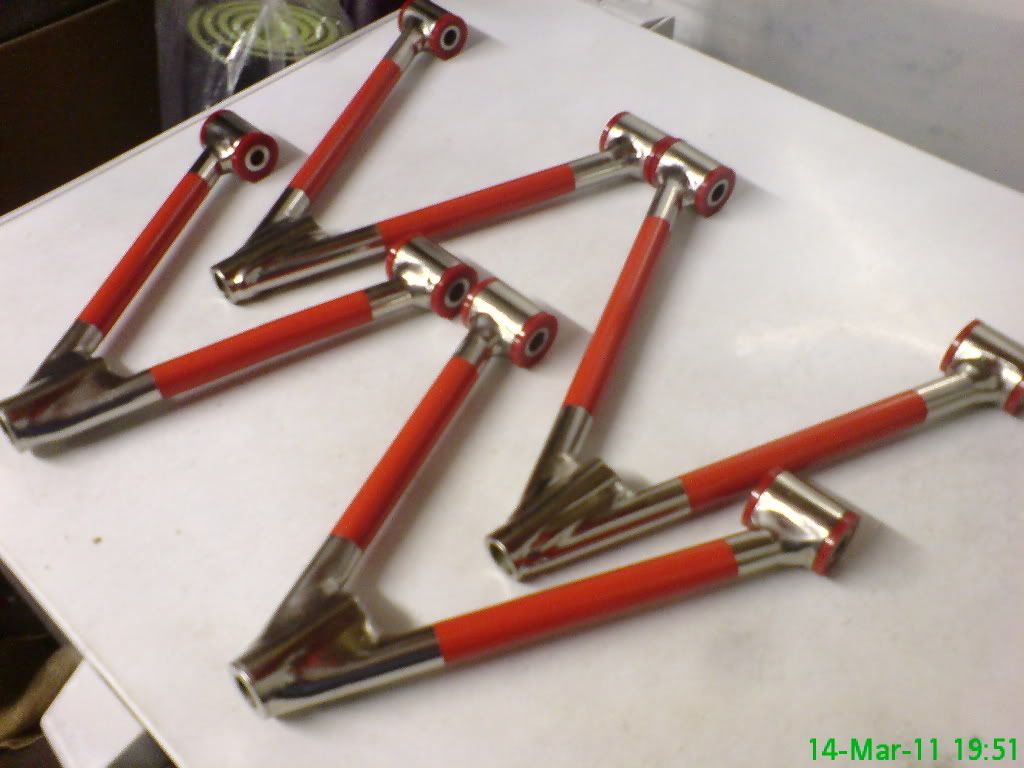
I had made a start on them before but not with the object of completing them, so a week ago I set about finishing them off......not finished yet but here is a sneak preview....I have to confess to getting totally carried away as you can see.....final picture is of a totally completed front upper wishbone nickel plated ends only sprayed traffic red (bodywork colour) clear lacquered and polybushed up, mega satisfied with the result and now working my way through the other 7 so this is what the bones looked like at the start  now a bit of welding..grinding..welding..grinding etc etc  extremities now nickel plated (2hrs per each session)  painted, lacquered and bushed up and soon to be wrapped in cotton wool  |
WOW Kev......that looks stunning :cool: :cool:
Cotton wool needed indeed, the bones will look great on your Roadster , nice work mate :cool: cheers andy |
They look fantastic, never ceases to amaze me how different the same thing can be, if you know what I mean.
Cheers Ginge |
Awesome Kev
If I were a Top Gear presenter, I would definately say that those belong in the " Sub Zero " section of the cool wall :cool: :)
Amazing what a bit of creative talent can achieve. Well done Kev, nice to see something different, one of those things that make you think " Damn, why didn't I think of that " :) |
Ta for the nice comments guys:) ...it does spur you on, been busy with the upper rears today, not quite as elaborate, but still got "the treatment" lacquer is drying as I type so piccies will go up tomoz .
Front lower wishbone should be interesting, not sure what I will come up with for that, still in me heed I think, a few days and we shall see:rolleyes: |
Had a busy and pleasant day beefing up my original welds on my rear lower bones, and also fitted the poly bushes to my other completed bones so now have complete front upper and rear upper bones that now look like this :-
   will post more piccies of completed items as I go |
Holy!.......... Sooooo when are you starting my wishbones? :D
|
more plating advice.
Do you have a favorite resource on the Interwebs for technical advice on nickel plating?
I have a classic old bicycle that I would love to plate the headtube on. The owner of our local plating shop went to prison for environmental crimes related to the dumping of nasty chemicals., so I have been at a loss as to where to get it done. Thanks Quote:
|
Hi Mcm Check out my other thread on nickel plating.
I found that Gateros plating on Ebay to be a very good source for the required chemicals and their kits are reasonably priced, another is caswell plating. The most important thing as far as I was concerned was the ability to "dial in" the voltage and current by using a "lab supply" or rectifier, it took a lot of trial and error and in retrospect wish I had gone for the "plating kit" hope this helps you. K4 |
Quote:
|
haha yeah im sticking to the epoxy mastic 121 then a coat of hammerite :D
|
I was going to buy a "ready made" chassis, now i'm thinking of making my own....
Keep up the good work... Bertie. |
Super cool
Fantasic stuff there Kev :) :cool:
Just printed those pictures .... Just off with a box of tissues, I may be gone for some time :D :o |
those look so damn cool!
me wants some!!!!! but being a cheapskate has its drawbacks :D |
was thinking today of doing something the same but then realised its not worth it. These are by far the best wishbones i have ever seen for any car ever. It seems a shame to put them on a car and get dirty!
|
After trolling the Bay for seats, several months now, my patience has paid off when I managed to win these very clean pair of corbeau's complete with 4 point harness's and very low level runners included and as usual I did not fork out a fortune for them @ £175. They will go on my ever increasing pile of parts.
The big bonus of course is their colour......red & black same as me bodywork though I do need some black harness covers preferably with red writing. 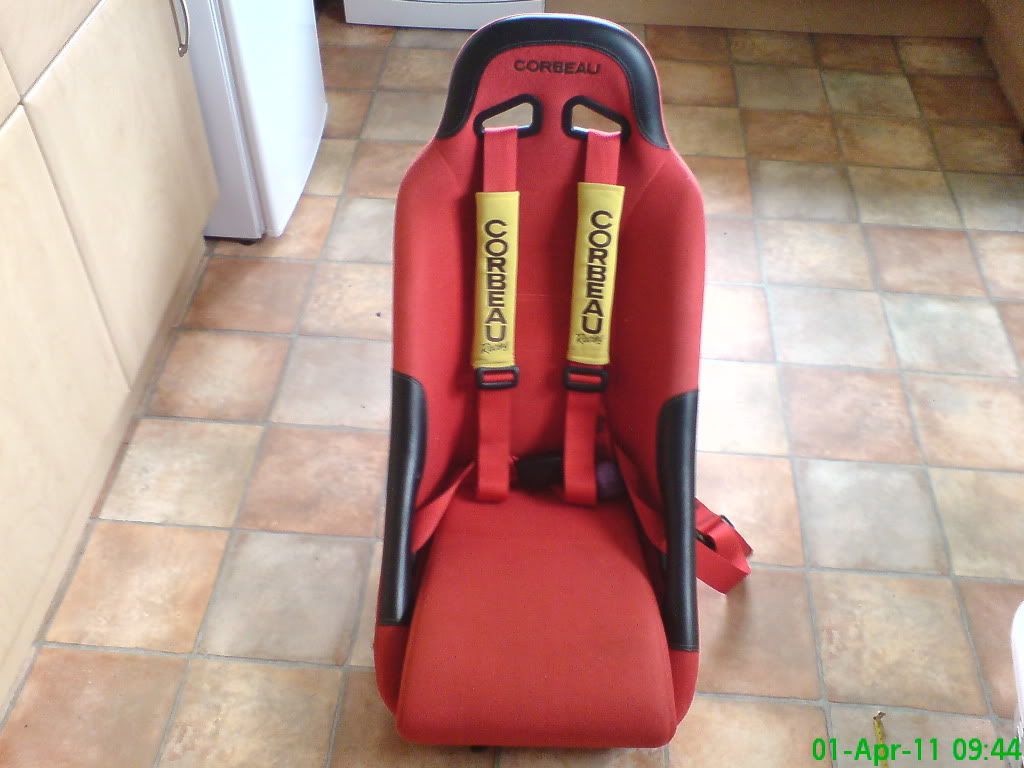 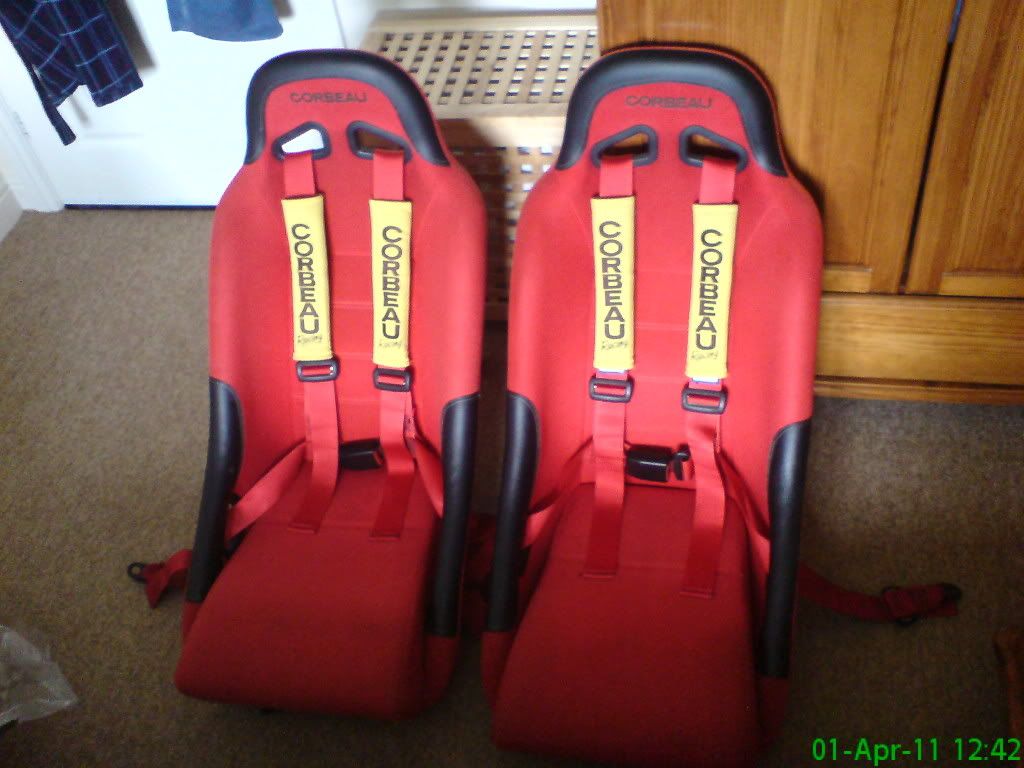 and those very low profile runners 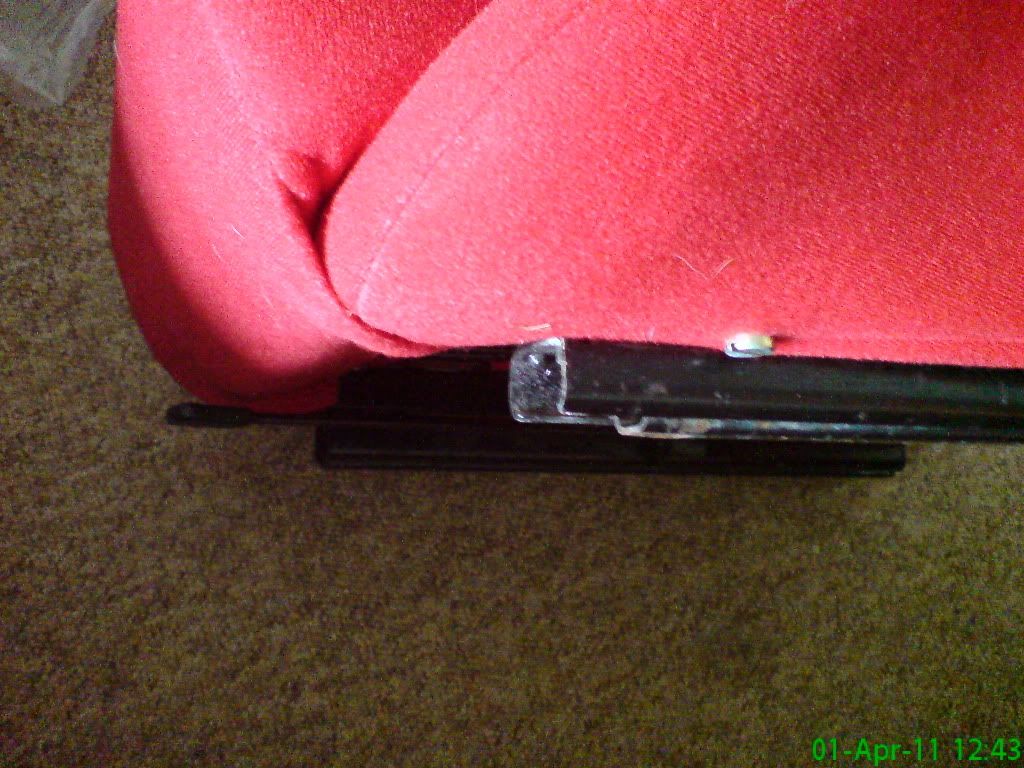 |
Inspirational thread! Like it a lot!:)
|
Cheers Chris....I'll bet your raring to go too, even handier now that Spud has the mx roadster just about sorted.
|
Yes indeed, I have a lot to do before I get started on the build so I'm up early on a weekend to get cracking!:)
|
rightyo...back to progress on my blingy bones.....the front bottom bones were always going to be difficult to get "looking good" or should I say looking the way I want them to look.....as before grind, weld, grind, weld, grind ..polish, I have also welded a small strip on the underside close to and over the bend line, as Spud mentioned this to be an area that MAY suffer from bending, so I'm playing safe.
Managed to acquire (via the Bay of course) a quantity of very hard dremel grindstones which have made the job 10 times easier, not finished this one yet but will post piccies as I go The raw welded lower wishbone less shock bracket 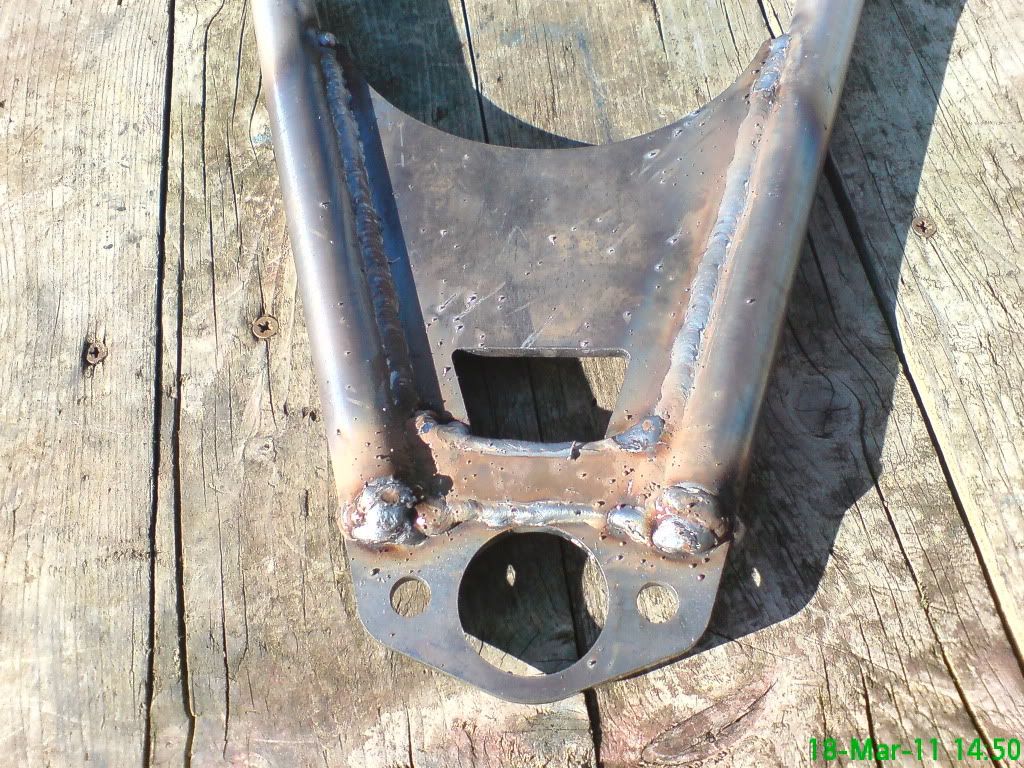 Ground and polished and awaiting shock bracket to be fixed and welded (bracket welds will be getting "the treatment" as well)  |
Great stuff Kev
Looking forward to seeing the completed results mate :)
That is a huge coincidence, here's one I made earlier 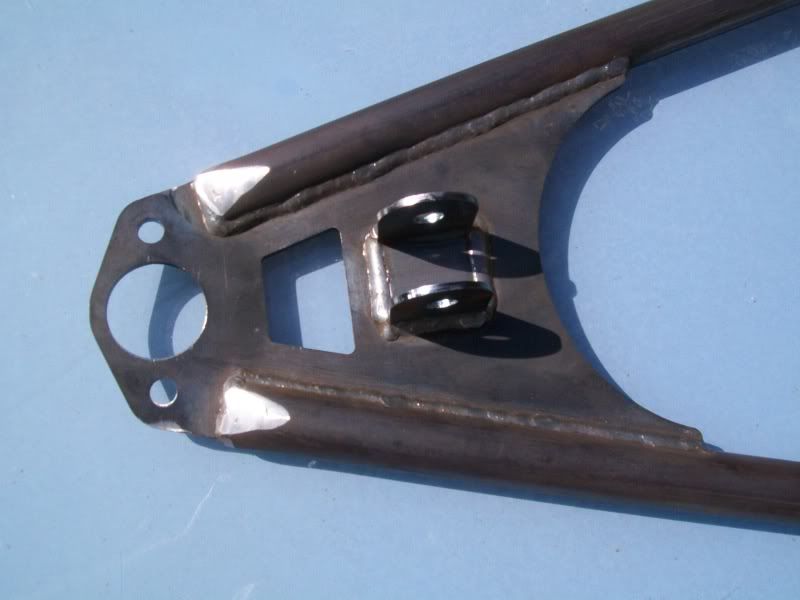 Looks like we have been working on the same job mate but there will be no prizes for guessing which ones will look the best once completed .... Your wishbones Rock :cool: The seats were a great find, just as well I didn't spot them, we would have ended up in a bidding war :o |
beauty of it is Ronnie ....they FIT albeit with 8mm worth of persuasion either side,:rolleyes: my last bid was £180 and I would not have gone over it so bidding war not
I set my target and do NOT let my heart rule my bidding.....don't care how much I want/need;) |
Update on my wishbone saga.....I am now within a day or so of completing all my wishbones and although I am well well chuffed with the results, I now wish I had not "gone to town" on them as it means the rest of the car is going to have to do them credit, .....in for a penny in for a pound eh!.
This completed lower front wishbone is complete apart from fitting the bushes. It will be nice to move back in the garage and get some work done on the chassis.....been that long I will have to check the bible to see where I got up to, I think it as chassis plates....will keep the update coming as I go here are some pics. 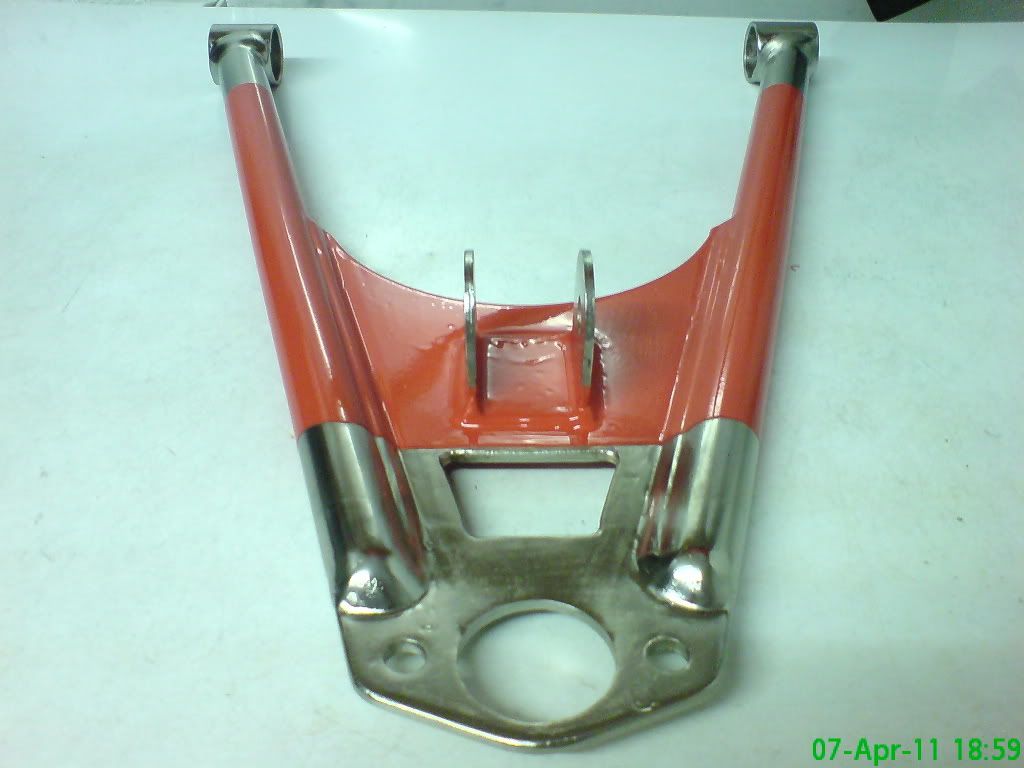 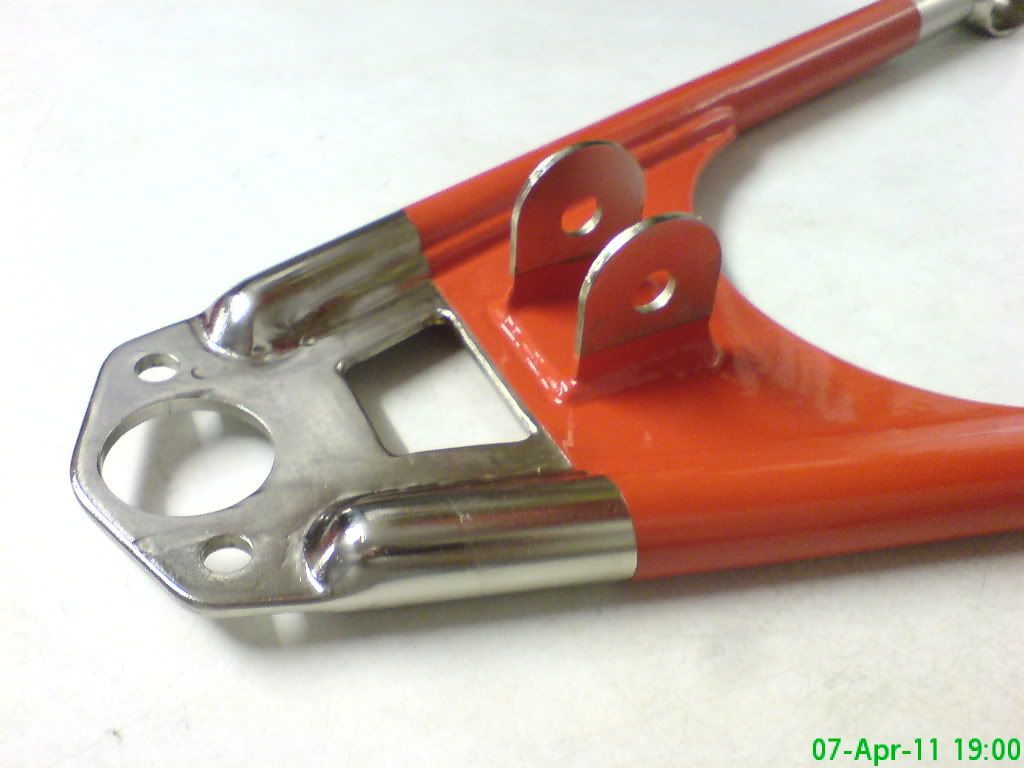 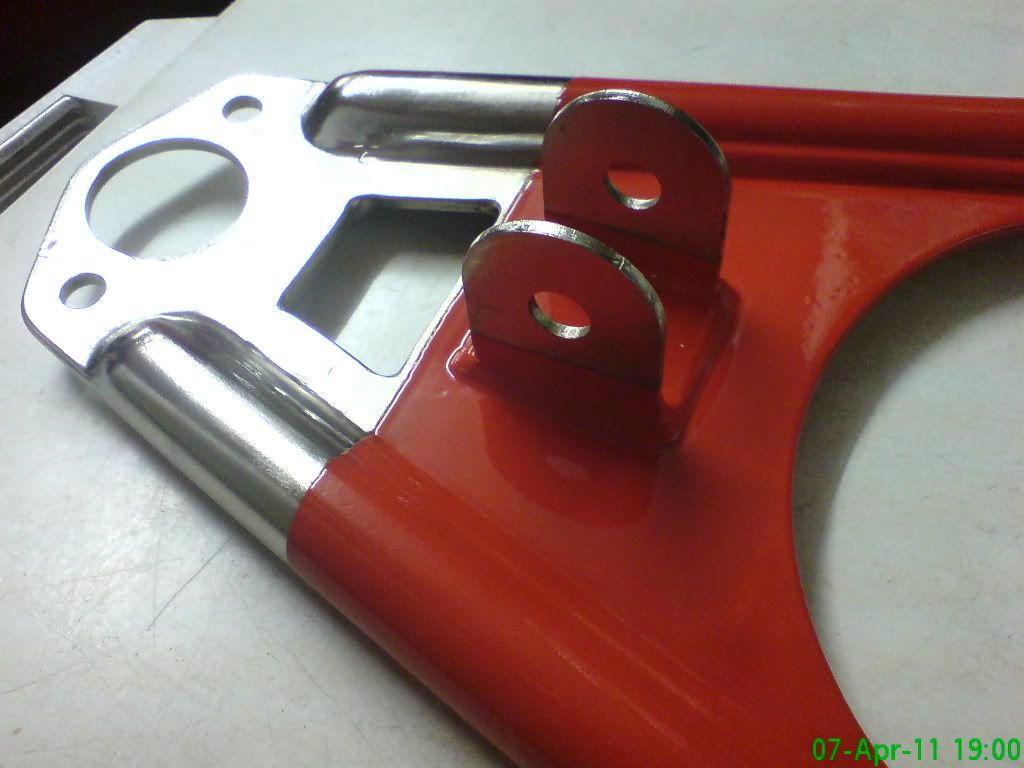 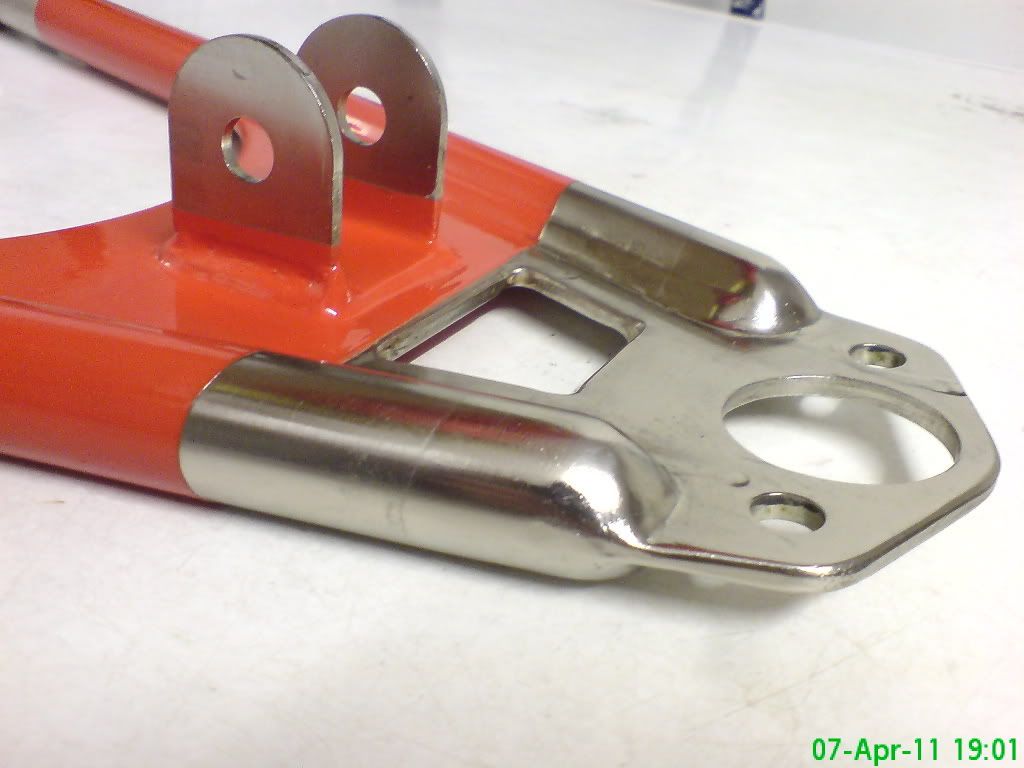 |
| All times are GMT +1. The time now is 12:16 AM. |
Powered by vBulletin® Version 3.6.4
Copyright ©2000 - 2025, Jelsoft Enterprises Ltd.