Got Some paint on the chassis...
Hi all,
At last I got some paint on my chassis and all my brackets. Everything started to get a orange haze and I had put it off long enough (didn't like the thought of cleaning all the chassis up LOL)... Gave it a few coats of 2PK Acid Etch Primer after keying all the steel up, took nearly 3 days to clean. 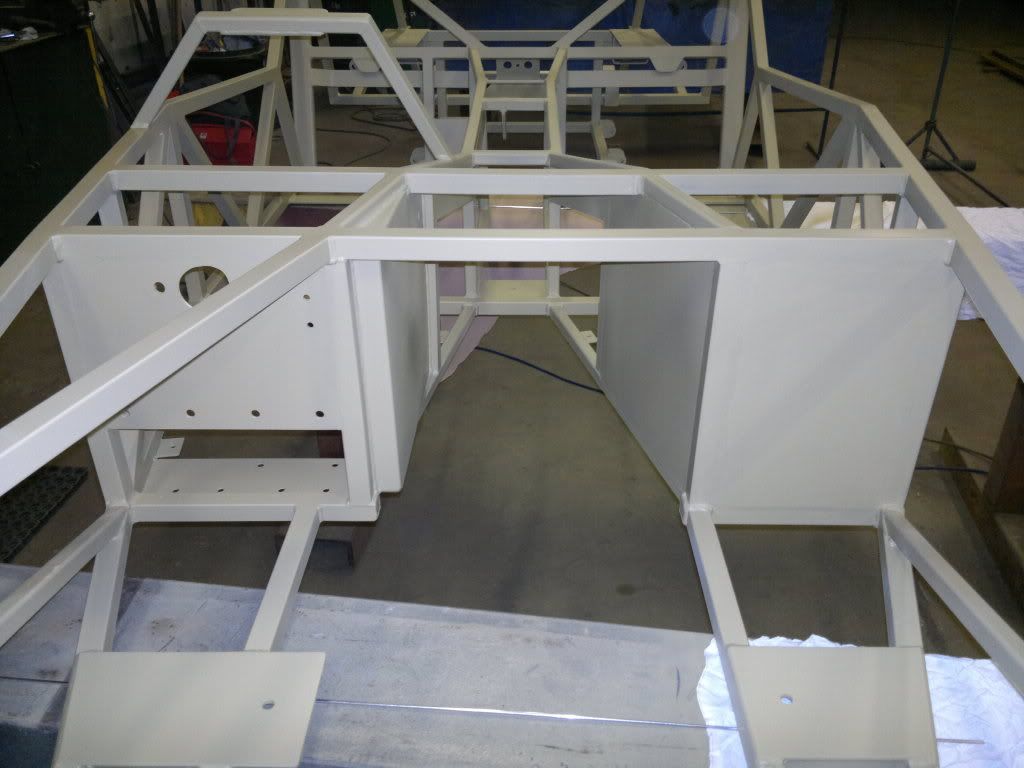 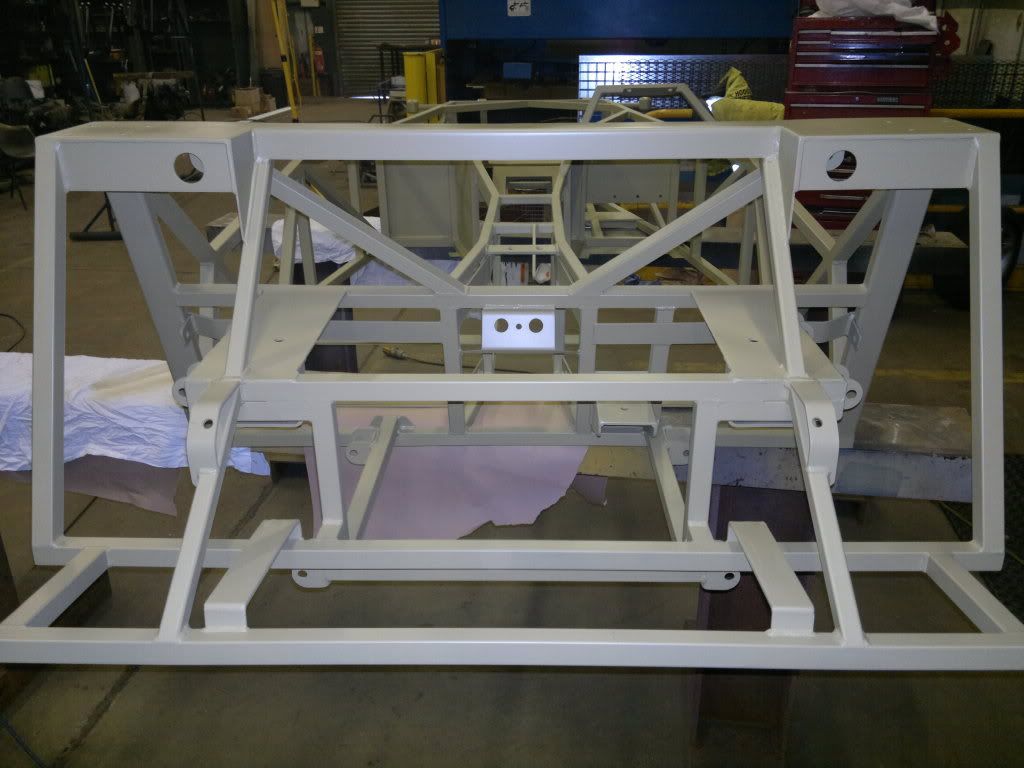  Next job is the ally panels and brake and fuel pipes. Oh bye the way TSM Locost popped in Sat morning for a recce, I believe you know him well Bonzo....LOL;) There a few new photos on Photobucket to look at if interested.. http://s1199.photobucket.com/albums/...1/MX5%20Build/ All photos now in catergories in sub albums... Bye for now Johno |
Looking good Johno! :cool:
|
looks amazing! :D - although white? dont fancy keeping it clean!!!!! nice and different, looks really fresh. :)
my renault clio race car was white inside, and was a nightmare to keep clean!!!!!!!!:eek: |
Lo all,
Nice to see new MX5 builders on the forum guys. Loads of info here just about everything if you use the search feature. The chassis certainly looks different with a coat of primer.... On the previous photos I posted it does look white but thats because of the flash Stew...:) Here's the proper colour..... 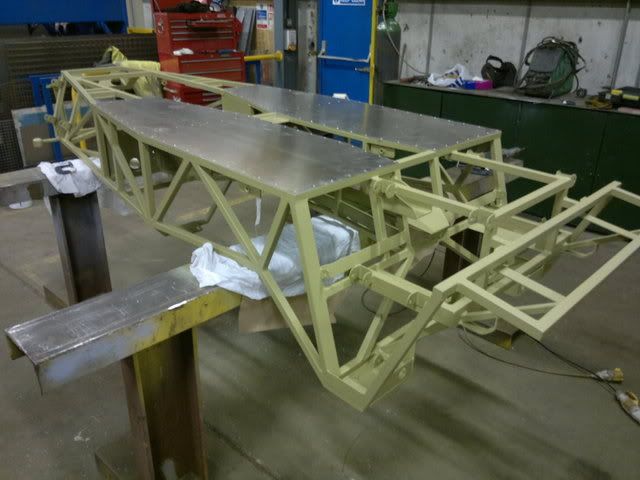 Also got my floor cut and drilled, 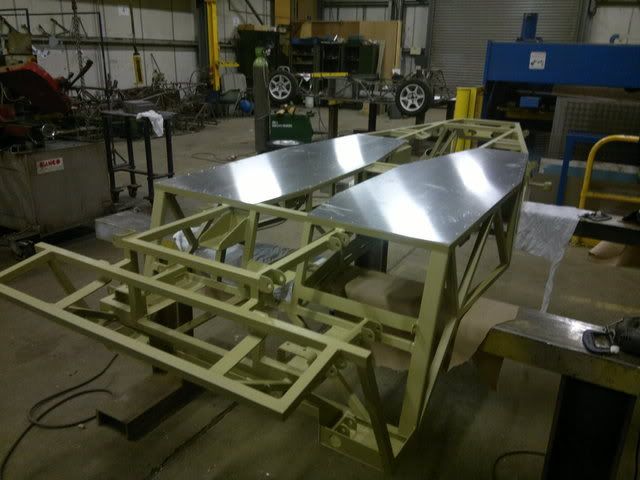 I've still got a couple of coats of grey primer then my top coat to apply yet Stew. Going to use polyurathene for the top coat but its not going to be black.;) Well CYA all later...Johno |
My bad! all makes sense now! looks very good, and very well finished, very professional. :) keep the pics coming!
|
Started ally panels....
Hi guys,
Thanks for your comments Skov and Stew. Well I got round to fitting the ally panels, It's a bit tedious with all the drilling but it's got to be done at some point I guess. I plan to drill all the holes for the panels before I give the chassis a coat of grey primer and then top coat, probably get a coat of grey on it next weekend. 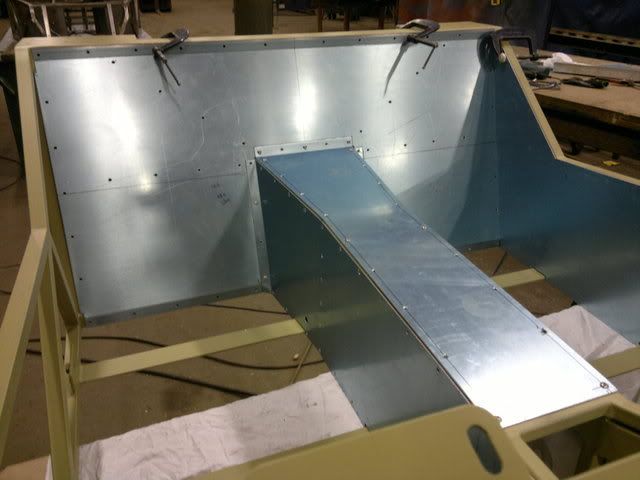 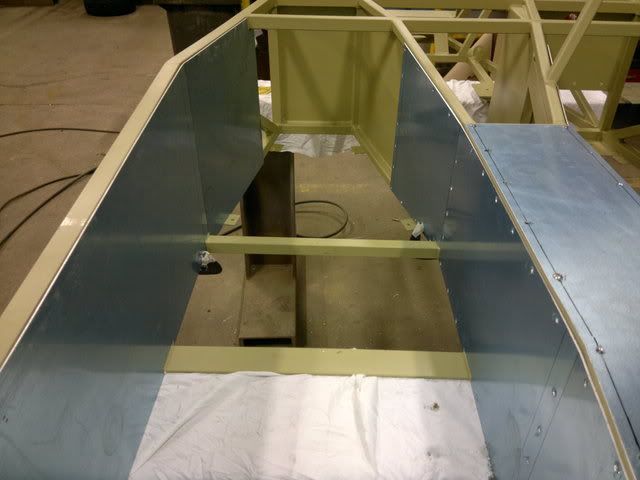  Well I guess the time is soon coming to strip my donor. The wife doesn't want me to do it as she would like to keep it......."WELL TOUGH":p http://s1199.photobucket.com/albums/...1/MX5%20Build/ Bye all...Johno....ps Stew I found how to turn the flash off at last... |
the build looks great. I hope my alloy panels inside look as good!
Keep posting the pictures! |
Hi David,:)
Yeah will certainly keep the photos coming, if it helps anybody thats what it's all about. Theres a few of us now building MX5 based Roadsters to Spuds69 design and only hope we can do him justice for his hard work. Just read his post tonight and what can you say... I keep looking at all you guys building MX5 based cars it certainly helps out... Keep up the good work....Johno ps... I'm sure you will do a good job of your panels as I have been looking at your build photos.:D |
Rear End
Hi all,
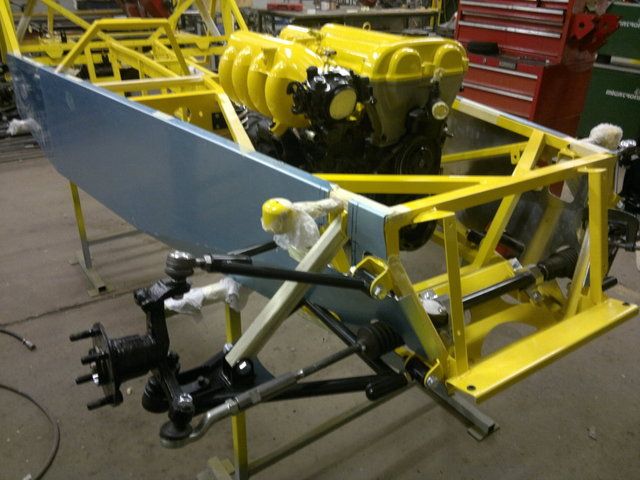
Well it's been some time since I've updated my build so had a chance today to take some photos. Came up against a little problem as I made my bottom wishbones a little too long for the MX5 build from Saturn. As I had already finished and painted my wishbones I was a little reluctant to cut them up, so I decided to design my own top adjustable wishbones and make them easier to adjust on the car in situ. Hopefully this will cure the problem but if anybody can see a problem please let me know.:) Here's a photo....    Well got more to come but will update when I get time.... Johno |
Hello johno,
looking really good. Have you inserted tube into the bottom of the rear wishbones to reduce the hole size to 12mm or used a larger 14mm crush tube on the polybush. David |
Just a quicky,
You can turn out polybushes if you can keep them cool enough, i had a play this morning, i got a can of pipe freeze given, works well but its bloody expensive stuff |
Hi David,
I ordered some 14mm OD by 12mm ID tube as you guys have done... easiest option I think. A 12mm bolt is plenty good enough for the job I reckon.:) What roughly should the ride height be for the front and back from the bottom of the chassis rails to the floor plz. anybody know for the SSC build car. Heres the link to Photobucket... sorry not many photos. http://s1199.photobucket.com/albums/aa472/JohnoSS1/ |
Quote:
|
Quote:
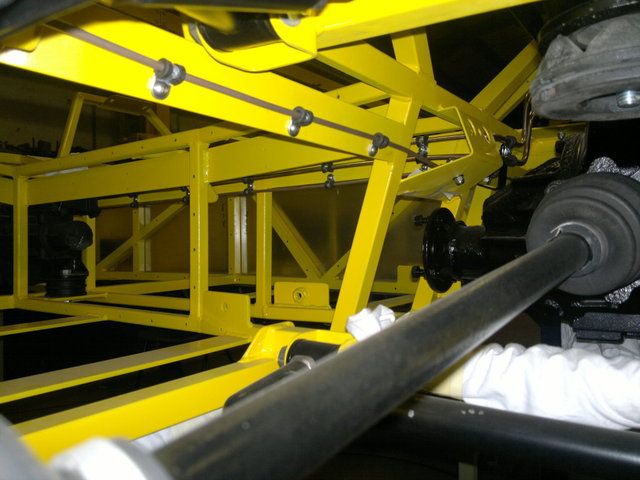
Basically I could only fit the rear pass side hub to the wishbones by putting about 10˚ of camber into it. Seems the driveshaft (halfshaft) is pushing the the hub too far out. also noticed that when lifting the hub it was stopped from travelling up by the driveshaft which then bounced the other hub up so something is not right. Seems I may need to think about moving the diff slightly. Took loads of measurements to see where I went wrong but can't real account for this issue using measurements alone! http://www.haynes.co.uk/forums/showt...1417#post71417 EDIT: It's ok I found out what the issue was this morning. |
Well been spending a bit of time on the build but not as much as I wished (Simon)....LOL
I was considering changing my diff mount with thinking how can I incoporate a second rubber mount with what I have already fabricated. I wasn't happy about a 10mm rubber mount holding the diff in place on a top mounted bracket. Then I read Nathans report on his test drive so that motivated me to sort it out. Had a play around with what I already have and came up with this... 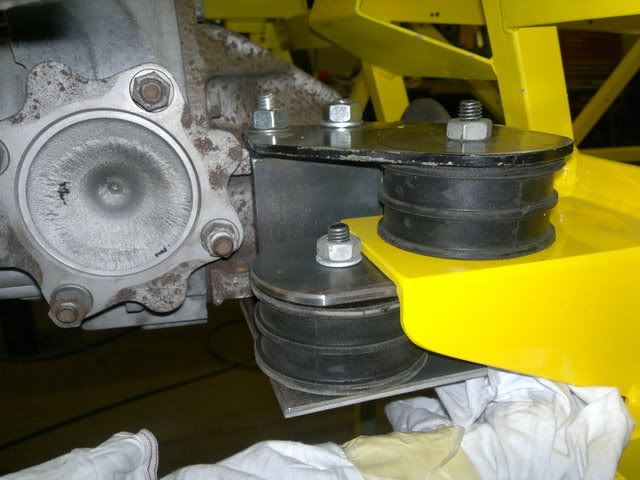 Seems more robust just a bugger to get in with it being a welded bracket to bolt to the top and bottom of the diff the same as the original frame. Also Nathan came down Sunday and delivered Lukes body kit....How about that for customer service....... Luke now a happy bunny...:) Damm nice fellow just doesn't speak proper Lincolnshre English....LOL:D Luke let me borrow his shocks and here's part of the result. 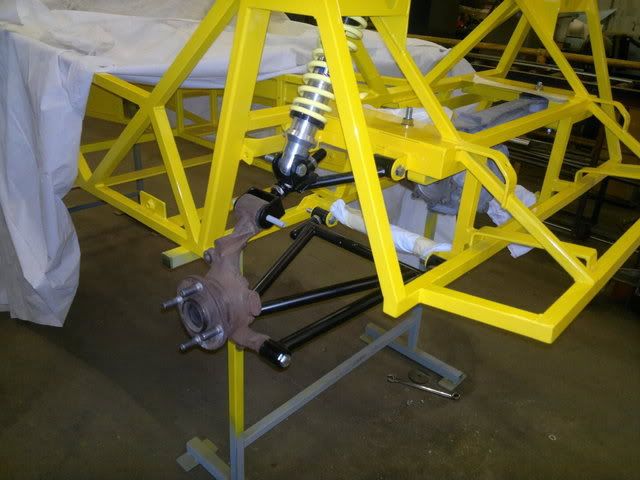 Johno |
Looks like a good solution. I like the way you have used the land mounts top and bottom,:) so one will always be in compression.
|
Well I hope so Chris, I guess only time and millage will tell...:D
Looking forward to working on the car this weekend with my friends who'll be working on their cars as well so hopefully we should have some piccy's to post next week. Luke's keen to get his bodykit on now so any advice about how to fit it would be most appreciated.;) He's opted for an unfinished kit from NTS which he plans to paint in a metallic colour after mock fitting all the panels. Well this will be my last post for berfore Easter so I would like to wish everybody a happy "EASTER" break.,,,,,:) Bye for now ......Johno |
OK I spent some time on the car the last couple of days and got a few things done.:D
Most of my wishbones were removed from the bubble wrap today and found a new home..... None of the bolts are the right size or tightened so need to order them this week but you get the picture... I know at the minute it's a sore point but I managed to mount my diff with it's bracketry and I'm pretty pleased with it. I managed to make a brace between the diff mount arms yesterday out of 3mm pressed steel without lowering the diff. I basically made a bracing strut of some description. It has the added benefit of contacting the rubber bush on top of the diff arm as the insert protrudes about 3mm anyway. 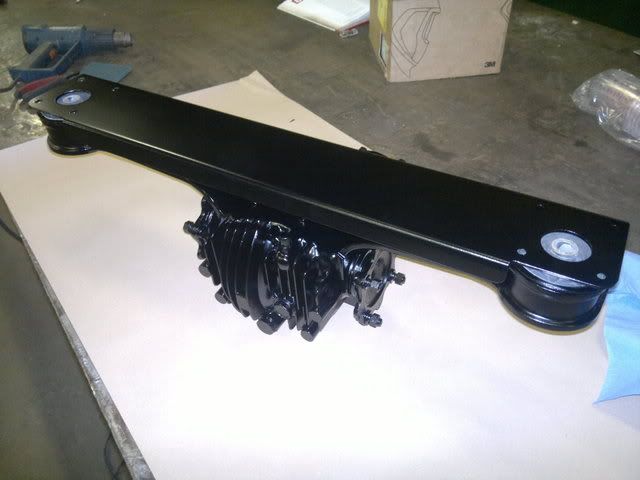 I countersunk the bolts in the plate so they did not interefere with the rubber on top of the diff. Simon got a lot done on his car this week with the rear end being all mocked up and just waiting for the front bits and pieces before he can have a rolling chassis. Out of couriosty we tried Lukes bonnet on Simons car to see if the air inlet would clear which it did with some room...pheewwwww.(thanks SKOV) 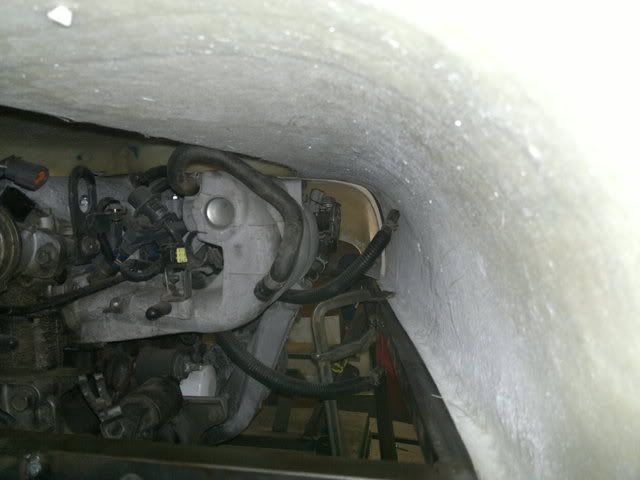 Ok pictures speek louder than words so I have updated my Photobucket tonight with the piccy's I've taken today. http://s1199.photobucket.com/albums/...1/MX5%20Build/ Well have a good weekend Johno |
Great work!
Love the Speedglas 9100 welding helmet. I have one too fantastic bits of kit! |
Hi Alex,
Yeah there great helmets. I only use it for TIG welding though as I don't want to bugger it up with spatter....:eek: Johno |
Your build's looking great Johno :cool:
If that doesn't hold the diff in place, I'm not sure what will! (triangles perhaps? :p ) Don't know how you got so much clearance under the bonnet :confused: My manifold was still touching the bonnet last time I had the engine in! |
http://i1199.photobucket.com/albums/...3032012044.jpg
Not so sure about that top wishbone. That piece of studding has got shear in every plane and might fail. It would be better to adjust it on the inner bushes and keep the itegrity and strength of the original design on the outer joints. At the end of the day that studding will be getting hammered over every bump and hammered under acceleration + braking. Just thoughts. Think Toblerone Bob |
Haha those helmets are there to be used!
See!  |
Thanks Robo,
Gonna re-think top wishbone but would still like to keep it adjustable. Do you think it's to weak solely because of the threaded rod? I was planning to change it with a machined part with threads both ends and a majority of the body inside the bush just machined to suit the insert with a close fit. I've used this setup for now just to determine my rear geometry so still playing with it. Missus won't let me have shocks yet....:confused: I know Westfield and others fit top adjusters with Aluminium inserts and have had failures and I believe Ash G had the same problem so hoping this would be stronger. Thanks for your advice Johno |
Alex what have you done... That's taboo...:eek:
My eye's are bad enough as it is without having blobs attached to my front screen whilst welding. Joking apart the screens are fantastic though. Well worth the money. Johno |
Need to get the old metal polish out and then plastic polish. Can make them back to new again no point throwing the screen guard things out as you can reuse them a good few times!
|
Hmmmmm..
Toblerone what do you mean by that? Are you saying my wishbones should be made out of chocolate......:D or triangles? Will have a look all the same and think how I can improve it.. Johno |
Hi Skov,
We put our engines in according to your measurements and Andy from Saturn. Our sumps are 40mm lower than the chassis rail which doesn't seem too bad, so if you want me to measure what we have now just let me know. Luke has placed his engine in today so we can check his as well. We are all using 1.6 litre engines so all should be the same. Johno |
Hi Skov,
Luke put his engine in yesterday and his engine clears as well...:) It even clears the throttle bkt on the inlet without having to grind it down. 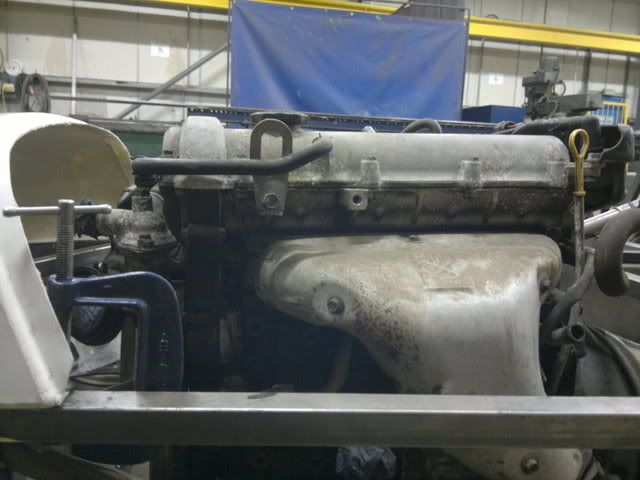 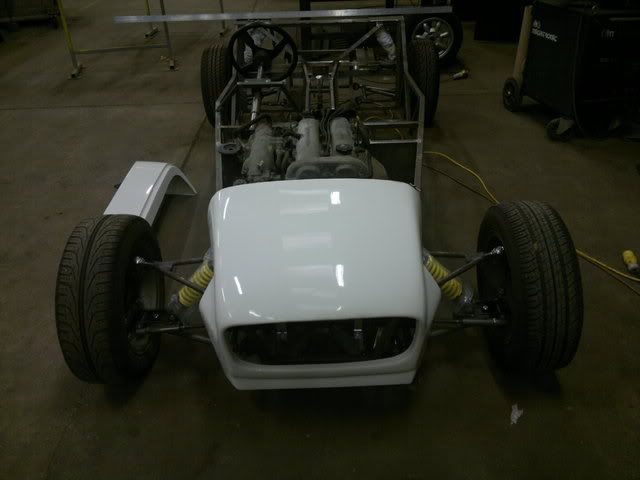 Johno |
Hiya all,
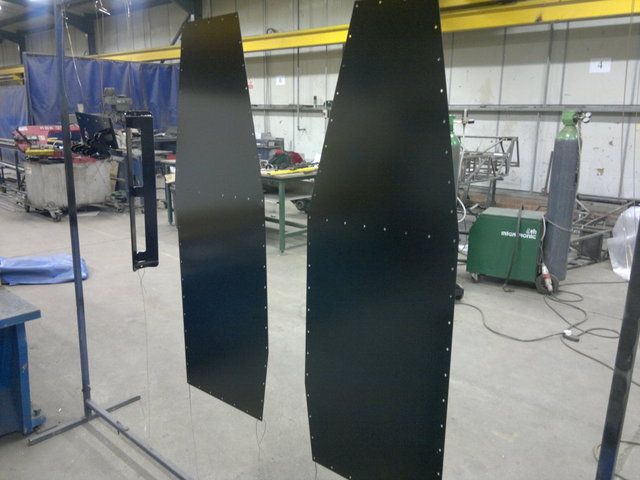
Well progress has been a little bit slow lately due to working on an engine which I have been googling up on to know how to restore it to a degree. Basically I know nothing about cars and how they work so this has been a big learning curve for me. Spent time at home working on the wiring loom in the living room trying to figure out which wires to remove (trust me don't do it with a malamute who's blowing their coat or you'll end up with fur lined wiring loom).:eek: Well engine and gearbox was sand blasted and painted with acid etch then given a coat of VHT paint. 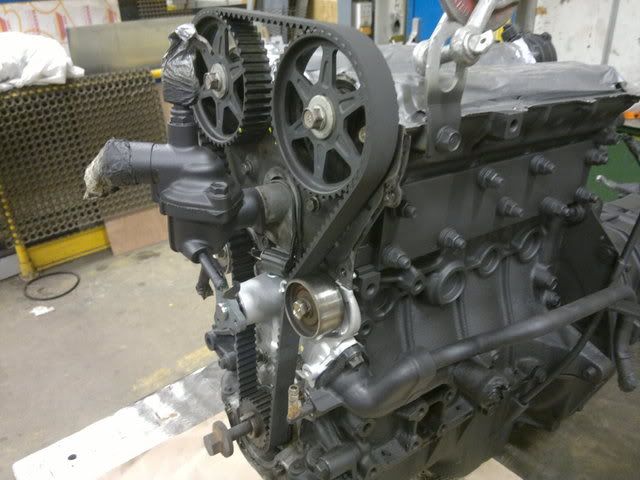 New water pump fitted along with cam belt, 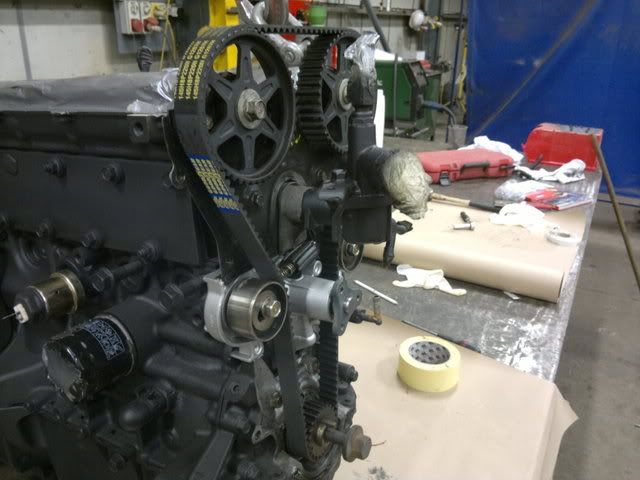 Also made ally side panels,  I made the sides out of 2mm Ally hence the reason I had to put a bend in the sheet to get it to go where I wanted it to. I've got a few other things on the go but gonna post them later this week. Robo advised me about changing my rear top wishbones setup which I have taken his advice and will post what I have come up with. Well thats it for now but should have some better piccy's by the end of the week. http://s1199.photobucket.com/albums/...1/MX5%20Build/ Cheers Johno |
Nice progress there Jonho!
Cheers Adrian |
Ahhhhh, Space....
Ebgine looks nice :) TT |
Nice work ,
I like the fold/bend line on the ali side , :cool: look forward to more build up progress pics . Its not as if you don,t have the space is it :p :D cheers andy |
Thanks all for your kind comments and input,
Yeah I know I'm fortunate regarding space and facilities but it's a pain getting the car out-putting it away each time. The best time to work on it is at the weekends (when missus lets me):D The photos are a couple of weeks old (except cam belt and water pump) as I'm saving progress photos for this weekend..... Actually got a bit more done than I've posted. I'm at the point where you just need to keep buying stuff just to keep going if that makes sense (not expensive parts just paint, hoses, gaskets, clips etc.....) Well hopefully should have some decent photos to show you by the weekend if all goes well...:) Bye for now Johno |
Assembly
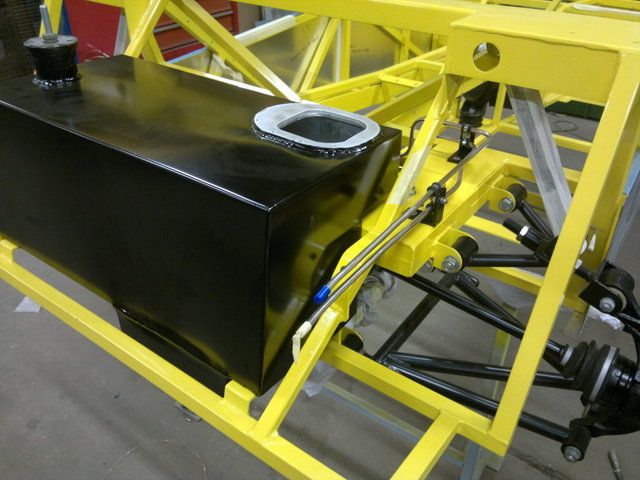
Hi all,
Well at last I can start bolting parts in... Spent some time on the engine recently adding new parts and cleaning it up and it's come out OK I think. I also got both side panels cut and bent apart from the rear end where it needs trimming. Got some of the hard fuel and brake lines in yesterday and I'm hoping my flexible fuel lines turn up tomorrow with clips. If your'e out there Voucht going to place an order with you soon for flexi brake pipes. Bottom floors are painted up ready to fit, pedal box all done and ready to go in and steering column ready to bolt in, so I'm hoping to have some good progress this week. Still got to modify rear top wishbones yet but it's on my list. Iv'e dropped the engine in just to sort out fuel connections and check clearance for all the parts and will be taking it out later this week. Ok lets be honest I just wanted to put it in so it looked more like a car...LOL 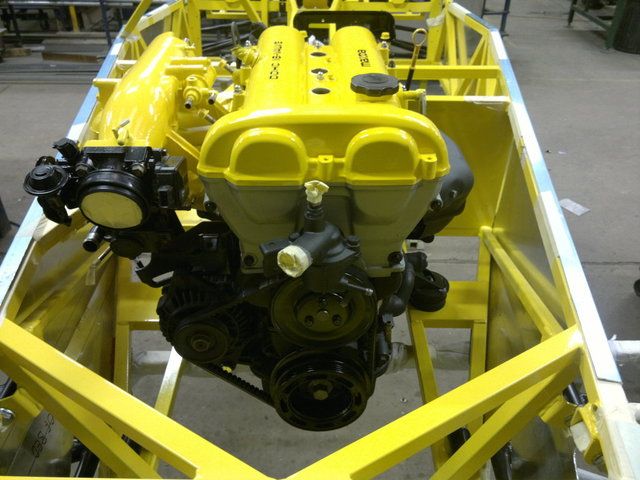 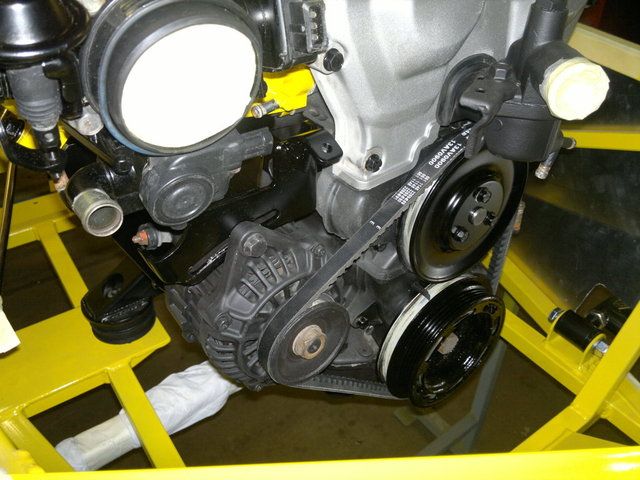 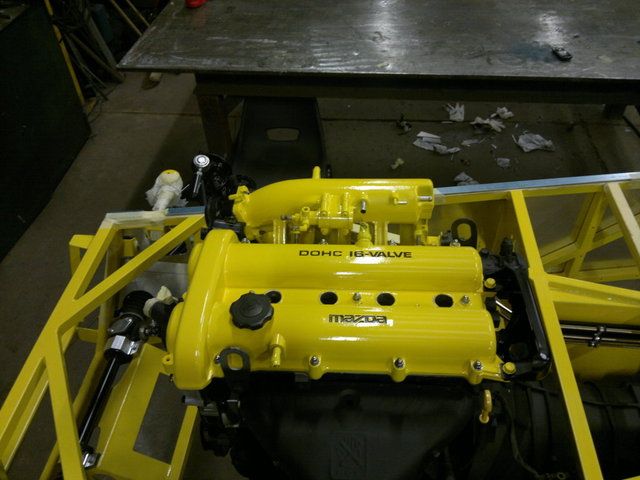 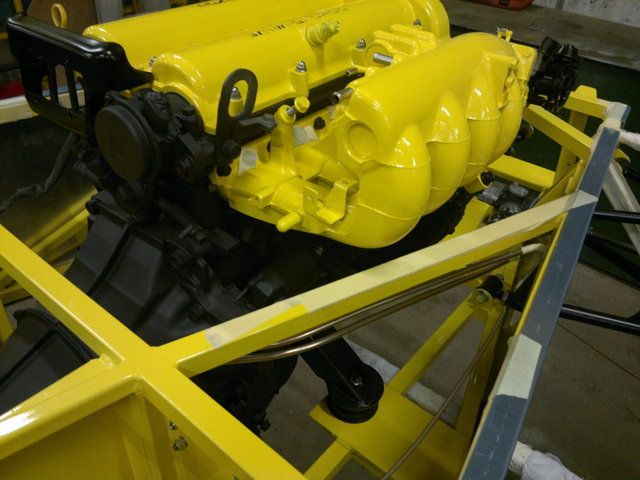 http://s1199.photobucket.com/albums/...uild/Assembly/ Johno |
Here's some photo's of my fuel and brake lines,
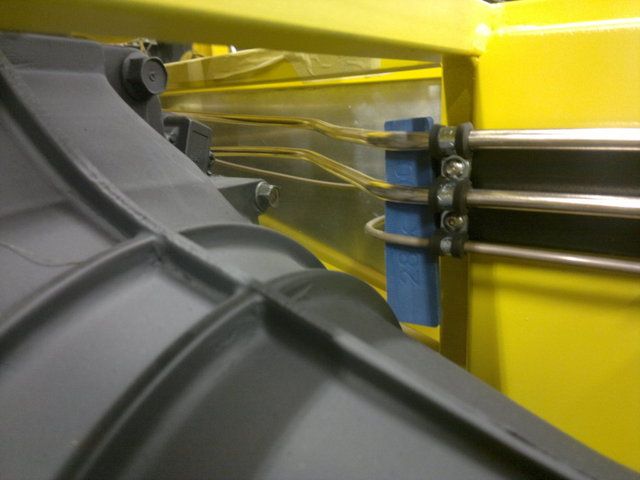 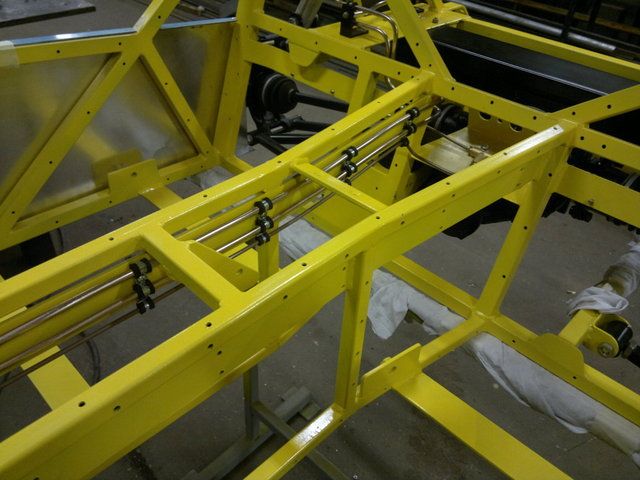 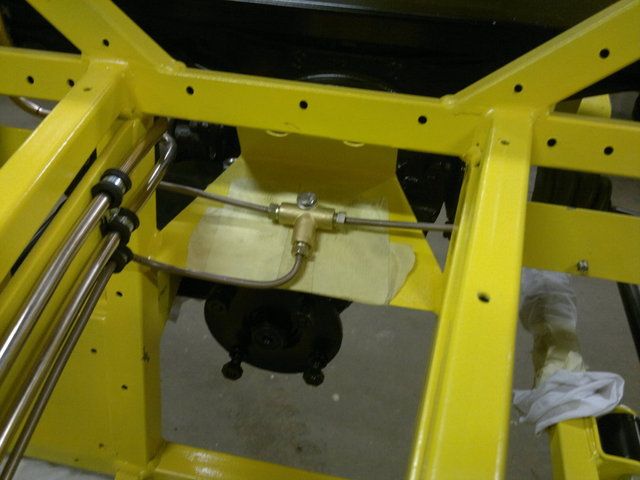 Johno 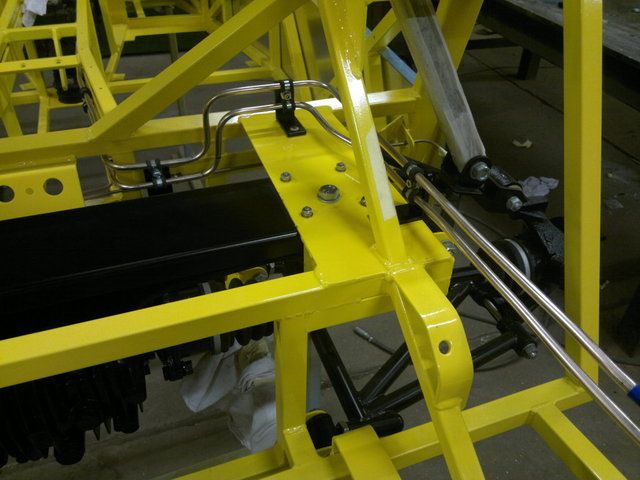 |
More photo's,
    Any issues with what I have done please let me know... Johno |
One issue, it looks too good. Your putting the rest of us to shame.
Looking great btw. Have you welded in your vin number yet?? |
Hi Series Landy,
I got to own up to that one, it's not welded in yet..... So where do most of you guys place it? To be honest I forgot to send the form away but will do it this week promise...:) I have been looking at Aero catches to secure my bonnet when I get it and I believe you have fitted these, are they any good? Johno |
Quote:
I don't know what to say, but please come and finish mine :D Terry |
| All times are GMT +1. The time now is 02:12 PM. |
Powered by vBulletin® Version 3.6.4
Copyright ©2000 - 2025, Jelsoft Enterprises Ltd.