Great stuff
That is looking so funky Kev :cool:
Green with envy mate .... How can I compete with that !! Ohh I know, I'll pop down to Cornish Goldsmiths & have mine plated in 24 ct Gold :eek: :D Going to look fab when they are on your build, that's for sure :) |
Have only just noticed the clear lacquer "runs" in the photo's.......not having any of that ...will have to wet & dry those back, I know they are not very noticeable , trouble is I know they are there, which is enough for me to want to "fix it". note : must improve my rattle can technique:D
|
How did you manage to get the 10 degree bend in the wishbone plate? Its really hard to see the bend line, is it rolled?
|
hi dz, they were 3ge plates so the 10 degree bend is there just not very noticeable.....its probably just the way I finished the ends of the tubes, the built up weld kind of extends past the point of the bend line
|
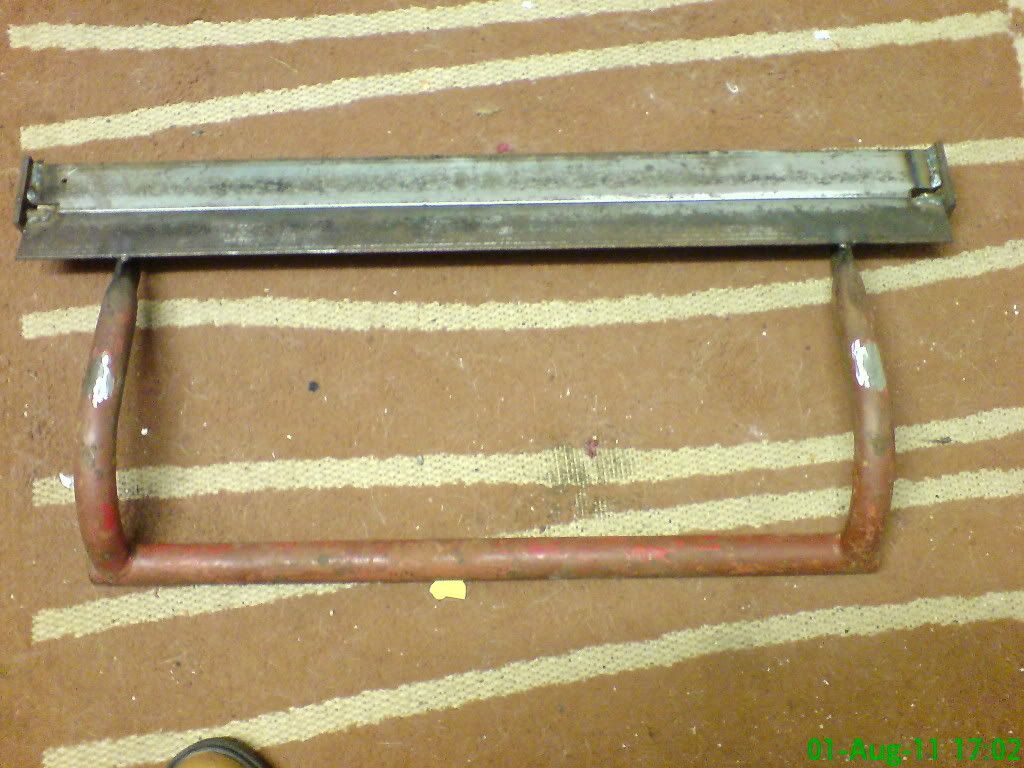
Yo peeps....just a wee update....finally can say my Wishbones are complete and will be put to one side now while I try to get back to fitting some cp components to the chassis and try to head towards the fully welding stage.
here are the finished items   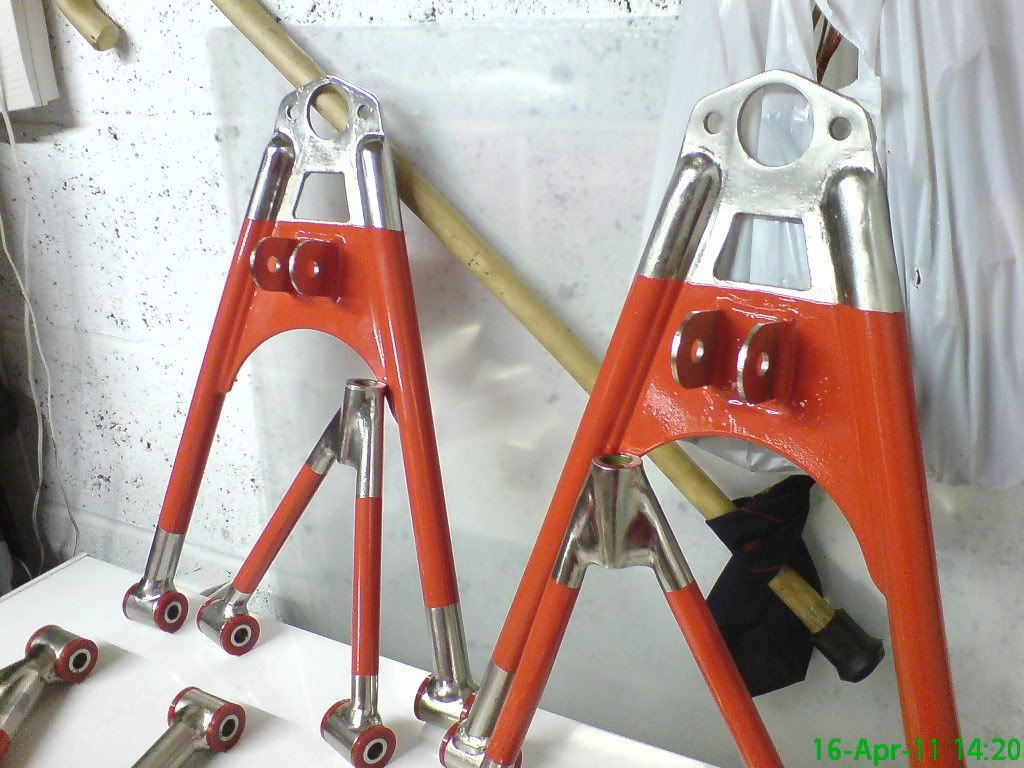 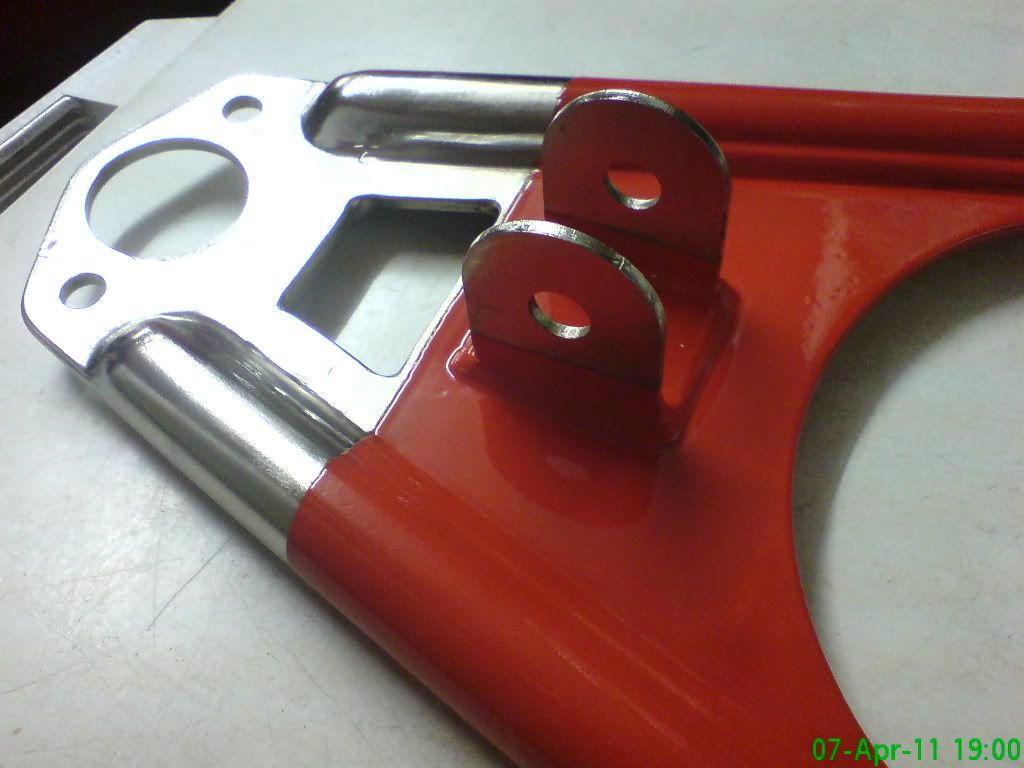 |
Those are stunning! Amazing work. Sooooo the big question is are you going to do the same kind of thing with the chassis? heh
|
Not quite:( ......however I do have a few ideas in general that will probably raise a few eyebrows tacky things like a clear cover for the cam sprocket cover along with a nice set of red verniers..... I do believe there was one on driftworks that would have fitted your RB I'll have to make mine as I don't think they did the CA18DET I do have a very interesting side pipe dating from the seventies and the exhaust will be unusual as well:rolleyes:
|
Cool i know the ones.
Nice to see another Driftworks guy here. Been on that forum for ages now think i first started posting in 2006 lol then did a username change as my car changed. |
Reached an important milestone yesterday.....after fully welding everything that was weldable while the chassis was clamped to the table. The big moment came ......releasing the clamps....would it twang, bong, jump, jiggle:( .......big fat NOWT.....not a bluddy thing....bit of an anti climax....but a nice one, so I now have a nice straight chassis just a few cp plates to go yet and welding up the suspension brackets ....nearly forgot Handy.....I still have not done the air steering yet.....will sort it out just for you mate:rolleyes:
|
Been a bit of a go slow lately.....this time of year I have to dabble with my other passion....my garden, but just recently I decided it was time to start getting some of the refurb work done, so I started with the hubs (easiest thing to get off the sierra first.
So we start with this   Having checked for ANY play in the bearings both on and off the car, I concluded that the bearings were fine and would leave alone, so the dust cap stayed in place until the de-rust was complete. I had bought some washing soda to do the electrolysis doofa .....but on having a good inspection of the hubs the rust was in its first stages of flaking so I decided to go at it with a hammer and old screwdriver and it came off very easily....about an hour saw the heavy stuff, off now out came the 3 dremels with different grindstones in them to get in all the nooks and crannies, another hour later and it looks something like this 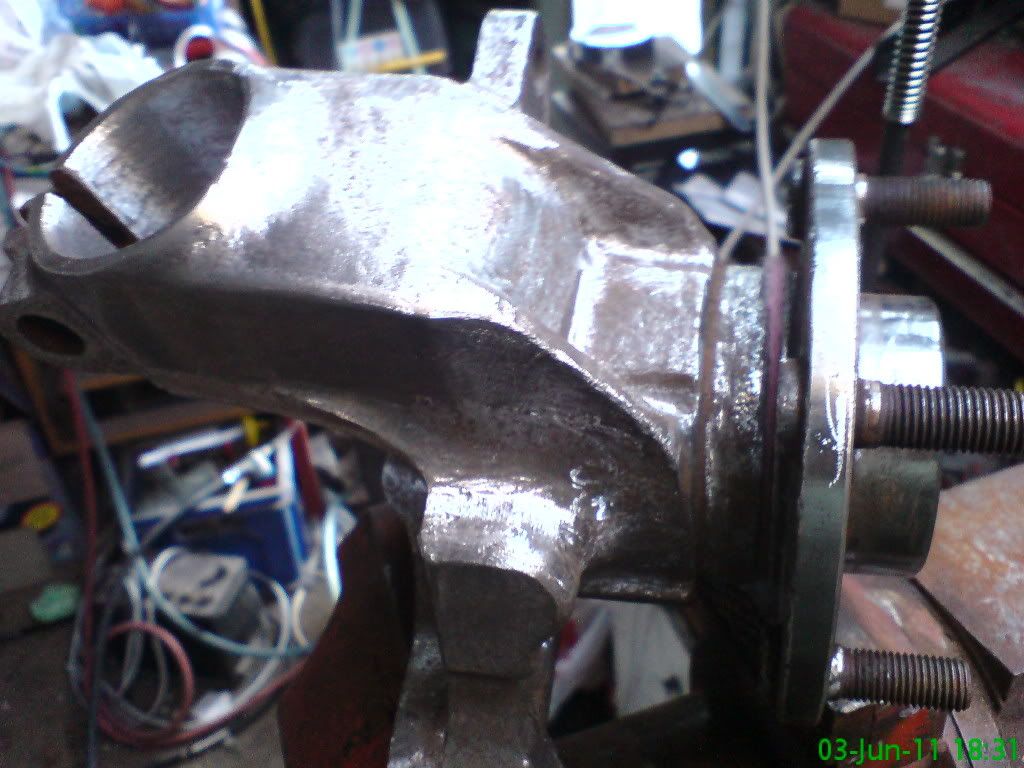 Prising the dust cap off the insides look as new as the first day they were made, the dust caps were totally fubard so I made my own replacements (see thread in another article for that) 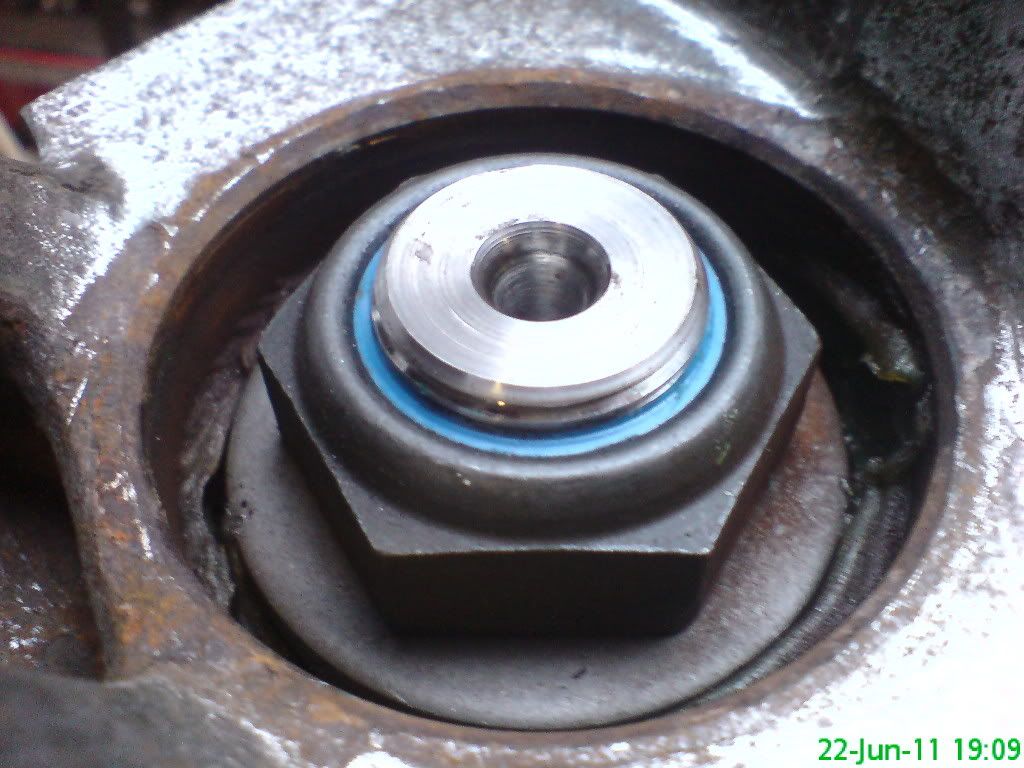 |
(This hub refurb starts on page 9)
So now the hubs were ready for a lick of hammerite smooth in silver more on those later. Now turned my attention to the discs, they werre well within the wear limit indicated by two flats(vented discs) on the outside edge of the discs job for the lathe I deem so here is the before 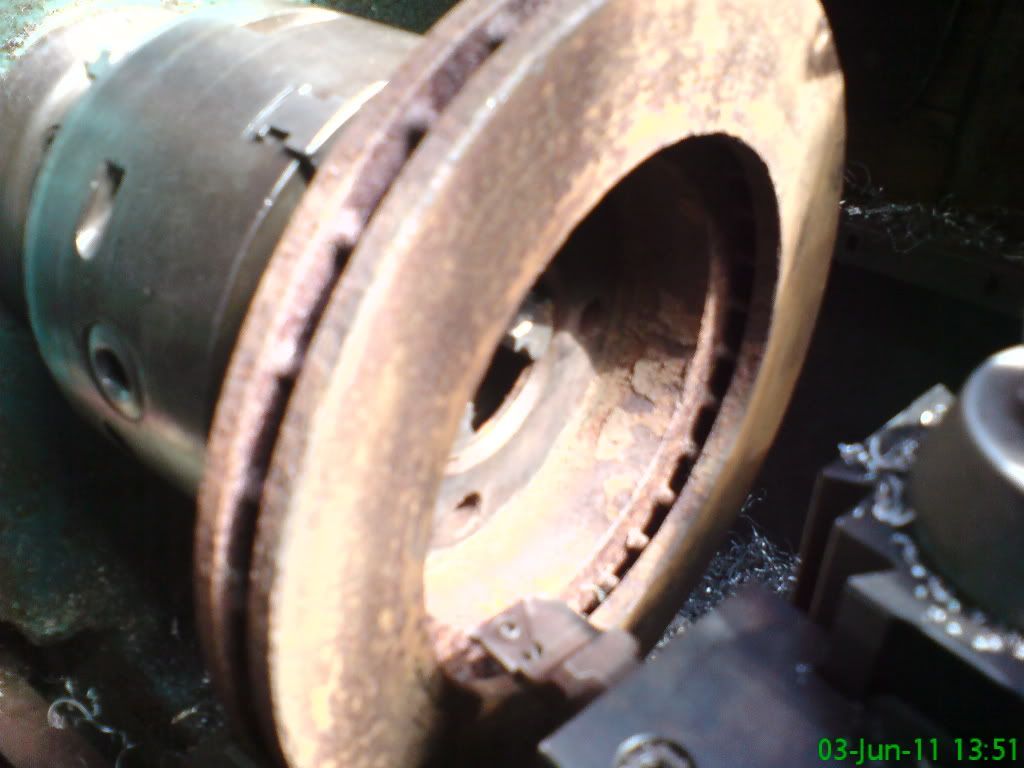  This time the rust was not so deep so all I need to do was to to skim them, got a good reading with the dti then proceeded to shave them just back to good metal...now apart from the edge which will be blasted they look as good as new 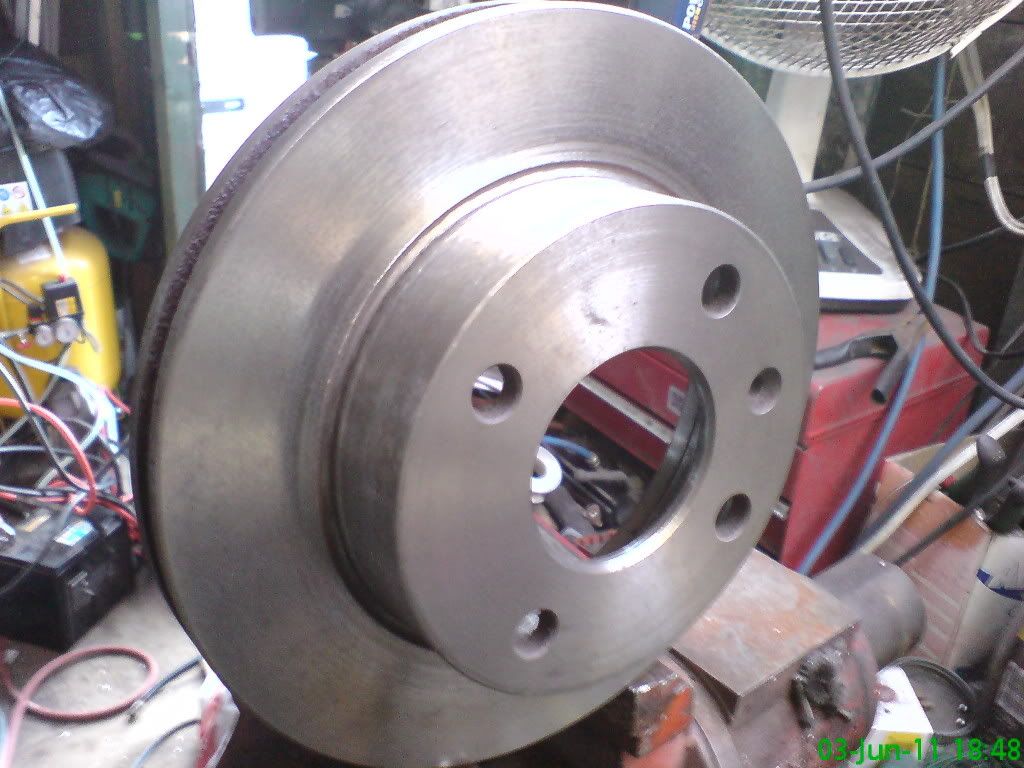 Going back to the hub carrier I mixed up 50/50 hammerite smooth with celly thinners and gave it a good 4-5 thickish coats(old dust caps lightly pressed in to keep the paint out) I will be giving them a coat of clear lacquer when all back together .....so now here is the before and after shot 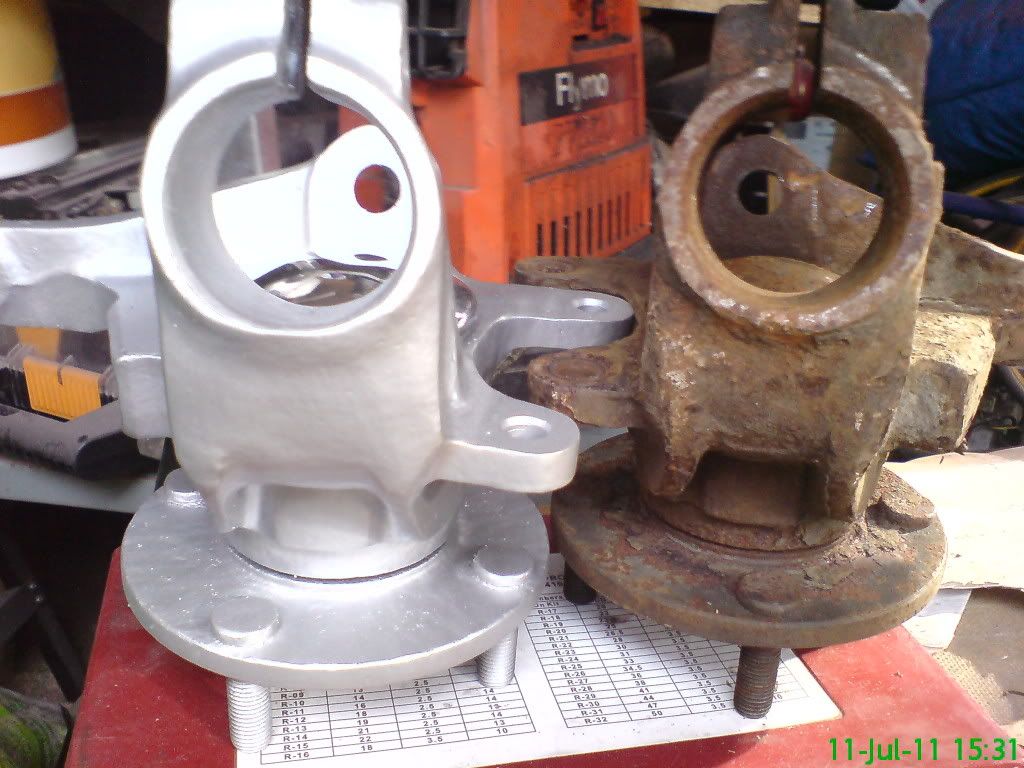 |
(This hub refurb starts on page 9)
Another little one of my gimmecky tweeks as follows.....home made dust caps worked a treat but I fancied something different so out came a small piece of 1mm aluminium and cut it the same dia as the dust caps I made and utilising my hardwood "bowl" again 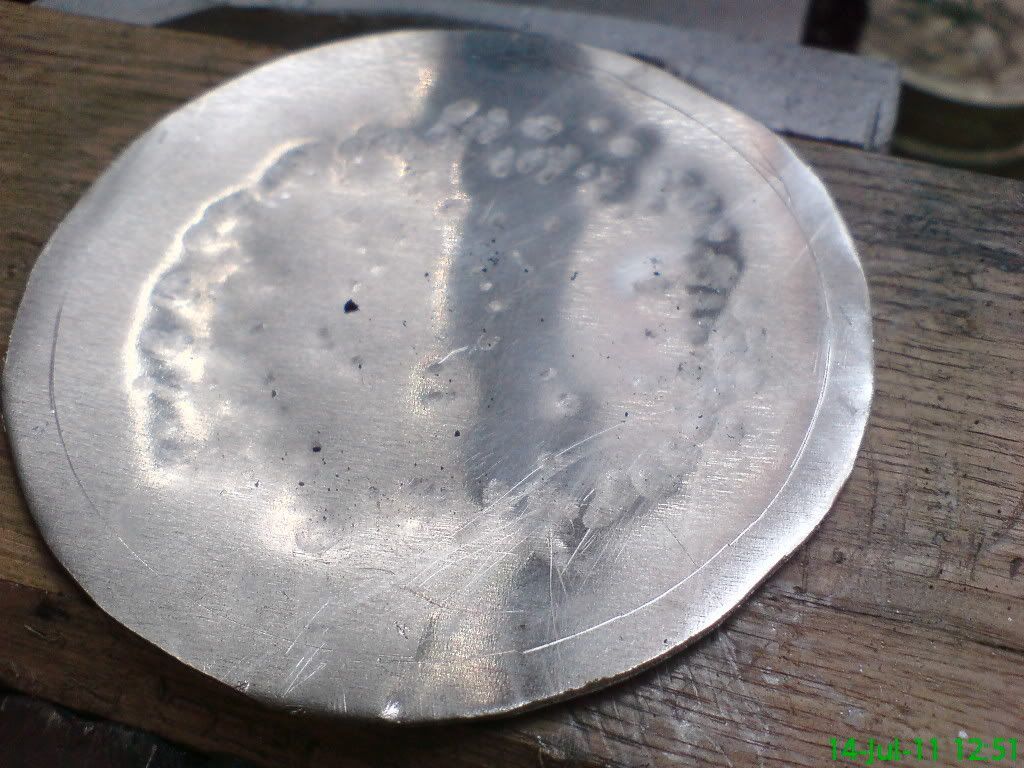 Working my way down to the bottom of the bowl and nearly finished (not) 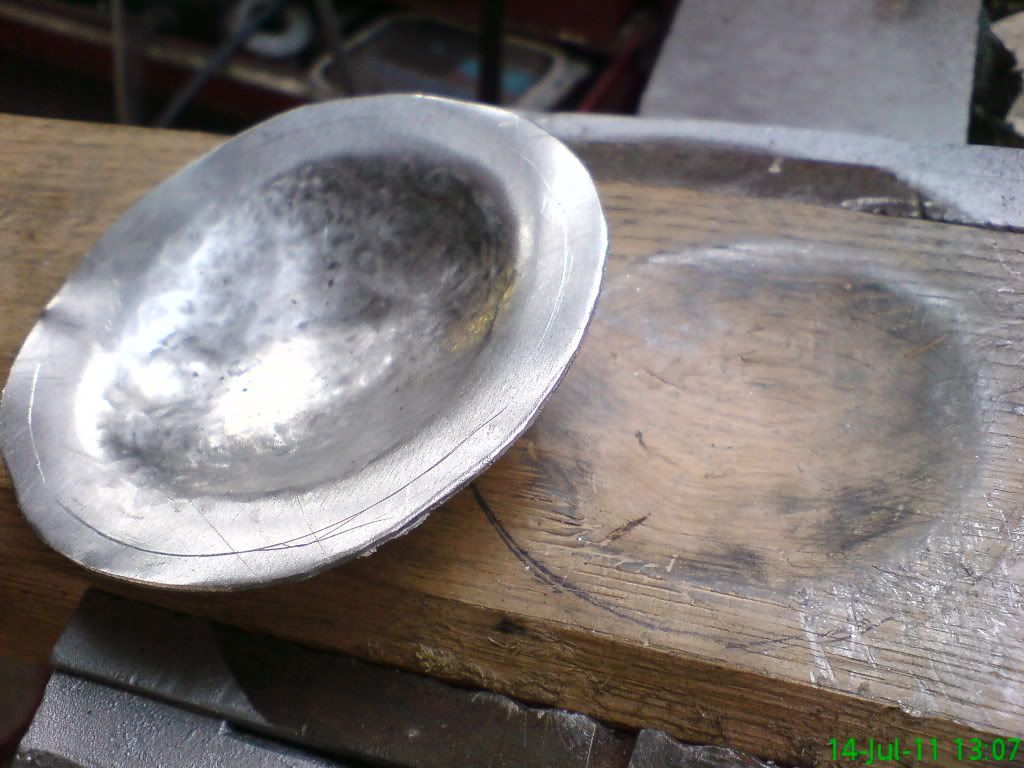 That side done now time to turn it over and use an old duff mushroom and and the back of an old wire brush as a slapper, I gently peen the ally over the edge of the mushroom to create a false dust cap 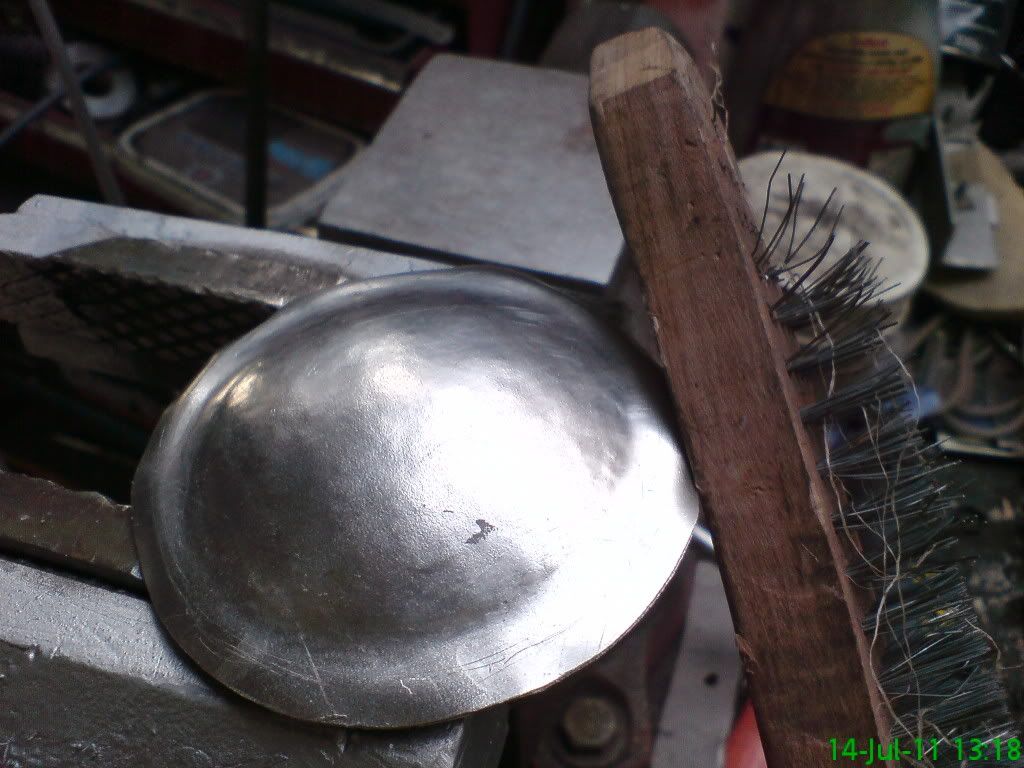 Why I hear you ask!!!....if you have followed the making of my wishbones you will realise I have foolishly (and I mean that) set a standard I need to uphold and although it will be time consuming it is MY stamp that I am putting on it and I don't care how long it takes. Anyway heres is a piccy of said false dustcap which has been polished up.....the next time you see it ,it will be anodised a fiery red along with my anodised mushies  |
Great stuff
Just caught up with this thread Kev
The standard of your work is awesome :) If only I had the patience to refurb stuff to such a high standard. Have the tools & skill but tend to take the easy route by buying new stuff :o :o Guess that is why my build is way off budget, well that & me keep changing my mind :D |
Thanks for the compliment Ronnie....I wish I could be that meticulous about keeping my shed and garage tidy ...I am totally mega untidy.
Anyway I am now finished one hub completely and here is the result  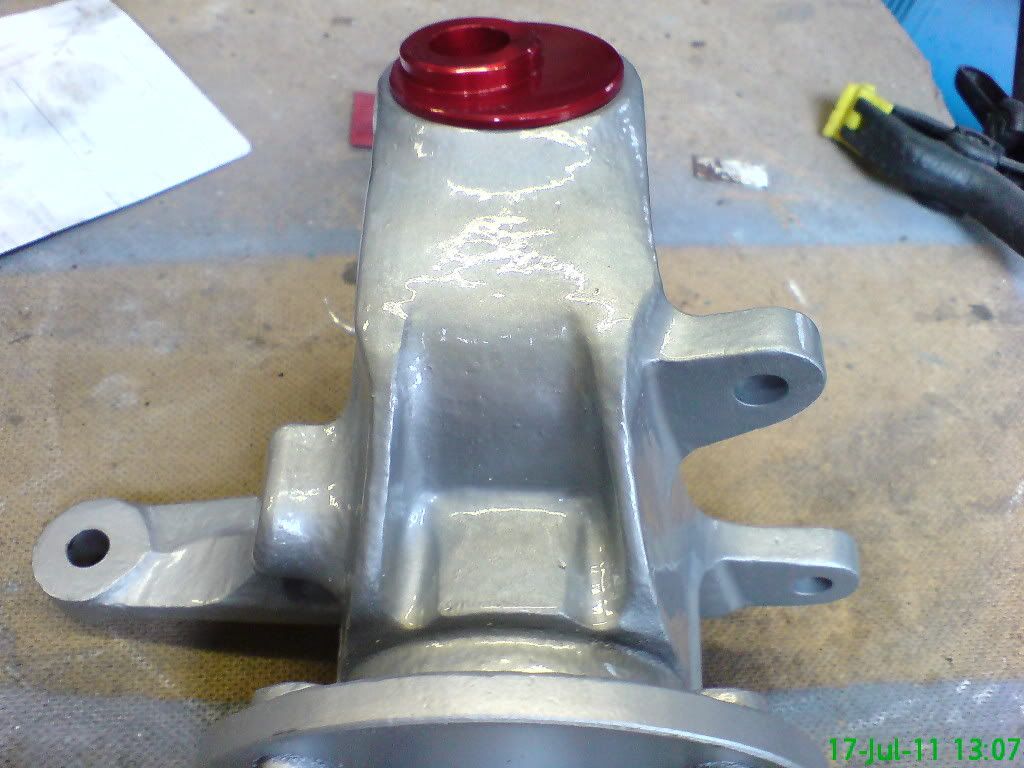 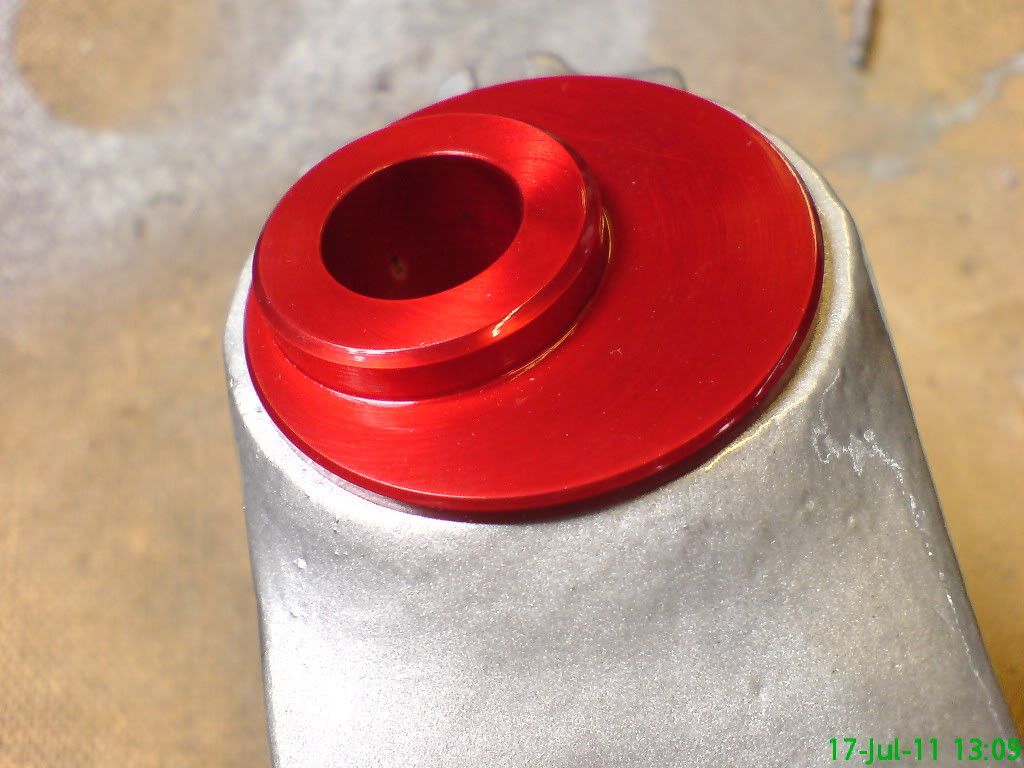 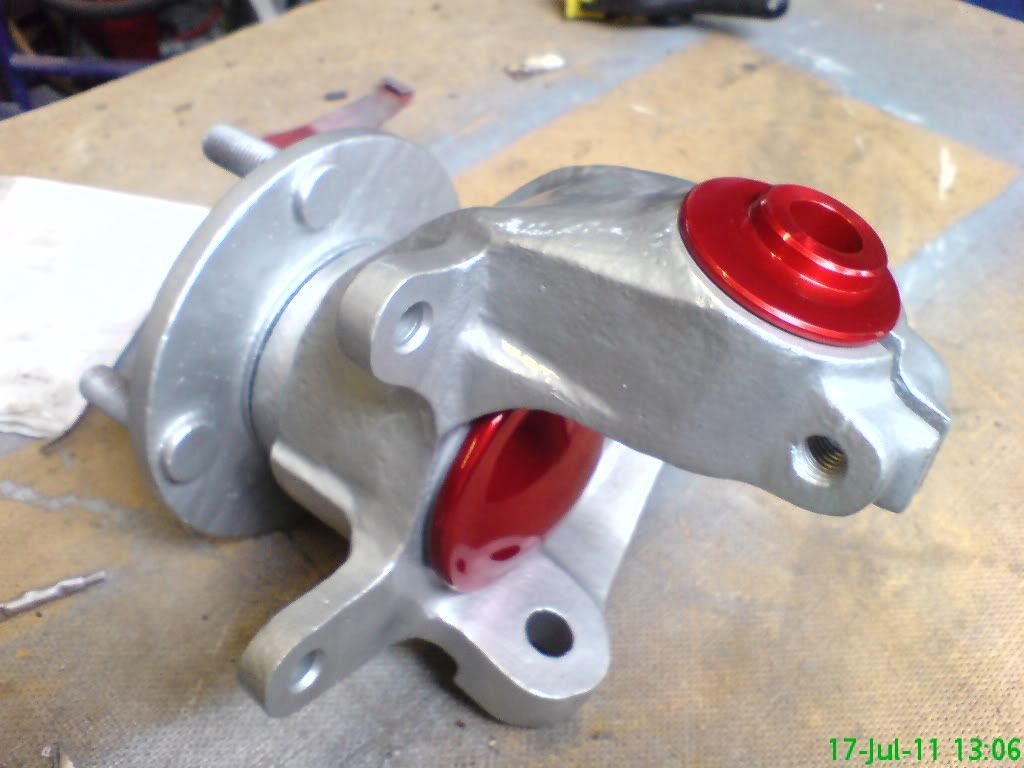 needless to say I am very happy with the result especially when you consider how they looked when I first took them off the donor.....with a bit luck I will have the other one finished tomorrow, I do find it much easier when you can take a smallish part off, refurb it and put it to one side till it is ready to put to its intended use |
superb
What a cracking job! Its attention to detail like this we should all follow, it improves the breed.
Bob |
What can I say
I am absolutely blown away with the high standard of that work Kev :)
Just had me Sunday lunch and to be honest, I would be proud to eat my dinner off of that hub assembly :D If you keep up this high standard I can see me doing Roadster re-build number 3 before I have even had the IVA test :o Very much looking forward to seeing your chassis all dressed up :cool: |
[quote=Bonzo;61317]
Just had me Sunday lunch and to be honest, I would be proud to eat my dinner off of that hub assembly :D I might let you LICK it of my hubs ....but sorry no knives or forks as it would scratch the paintwork.....oh and no onion gravy....the skins are murder to wash off:p :p |
[quote=K4KEV;61356]
Quote:
Not even plastic knives & forks :D Seriously, I really must have another go at electro plating sometime. That anodise certainly adds the bling factor ..... Hmmm wonder how many amps it would take to anodise a swirl pot or catch tank ?? Great work Kev |
I'm using a 25 amp boost charger at the mo and it is a little overkill on the small parts I am doing, however a 50 minute session gets a good depth of ano....your average 4-6 amp charger will do it in 4-6 hrs .....easiest way to do it is trial and error,,,,although if you needed some No's just ask...and I know red does it for you Ronnie;) ;)
|
New Build thread
Hi everyone hi kev I just wanted to ask you on how do you do your own electro plating could you perhaps give the details on how? THANKS
|
Hi Ricky....all details on how I did the nickel plating here
http://www.haynes.co.uk/forums/showt...nickel+plating |
New Build thread
Thanks a lot kev
|
New Build thread
Hi kev sorry I forgot to ask you do you do your own anodise and if so do you also have info on that or do you send your parts out for that
|
Hi Rick....Anodising is a lot easier... Sulphuric Acid is your electrolyte AAA always add acid to de-ionised or distilled water I used battery acid at around 15-20 percent with water ....start with lower value.... battery acid is already diluted as is
the aluminium is your anode and lead sheeting (same or more surface area as anode) as the cathode. use a largish container as your bath...I use around 2litres.... aluminium rods and wire are my hangers/conductors if it is new aluminium make sure it is very very clean (polished or not ) I use acetone as a final clean before anodising ....when finished, it will look slightly dull ...take out and clean with de ionised or distilled water then put in a dye bath (I use commercially available dye)... leave in for however long you want or whatever depth of colour you want which is a trial and error thing.... then you put in a pan of hot water on the simmer to seal the anodised layer again it is down to preference but I often use a small steam cleaner to seal. by the way you must not let the anodising bath get too hot because that will self seal before colouring stage I would say less than hand hot.... less than 50 C'. If it is an already anodised part then you have to suspend item in a bath of caustic soda (which is fun to watch as it is vigorous and quick) to remove the original anodised layer then prep as above.....think I have covered everthing there ... google DIY anodising ....there are lots of informative sites. |
New Build thread
Thanks a lot for your help most appreciated and I shall check on the net regarding anodise once again thanks
|
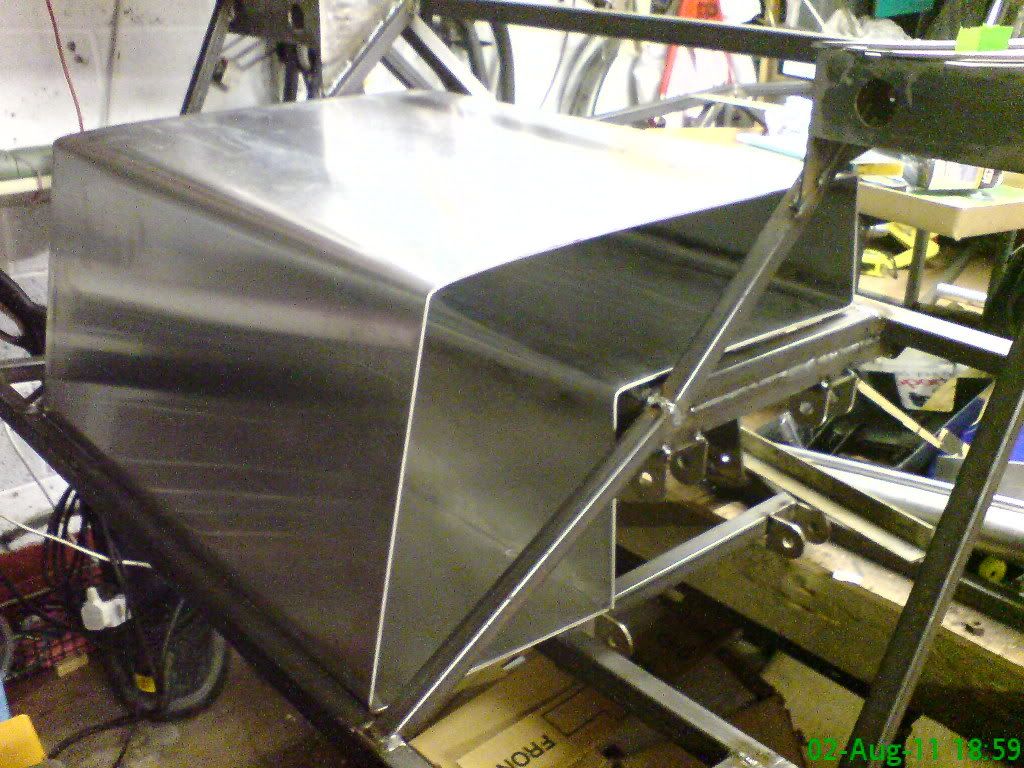
fancied doing something different to keep up my interest so I'm embarking on the task of making my own ally fuel tank.
I have always thought the book tank was way to small so at the expense of "boot" space I have decided to make my tank in a shape that utilises the area above the diff as well.....I have also decided on 3mm aluminium which might seem overkill but I believe that in a rear end collision it is far more likely to deform rather than rupture and that in its self should create a kind of crumple zone which adds further peace of mind it will have two internal baffles to keep "slosh" down to a minimum and either a sump or swirl pot in the base to cater for fuel injection, capacity is 57.5 litres might yet add a little more to the top to bring it up to 60 not sure yet Going to do this in my usual methodical way which to to make a cardboard mock up and when I am satisfied with that I will make a template then a sheet metal folder to initiate the construction proper....so for now here is the mock up in cardboard ...it needs a wee bit of fettling yet if any one is interested I might be making some more but they wont be cheap due to the amount of work involved and the fact that they are 3mm thick 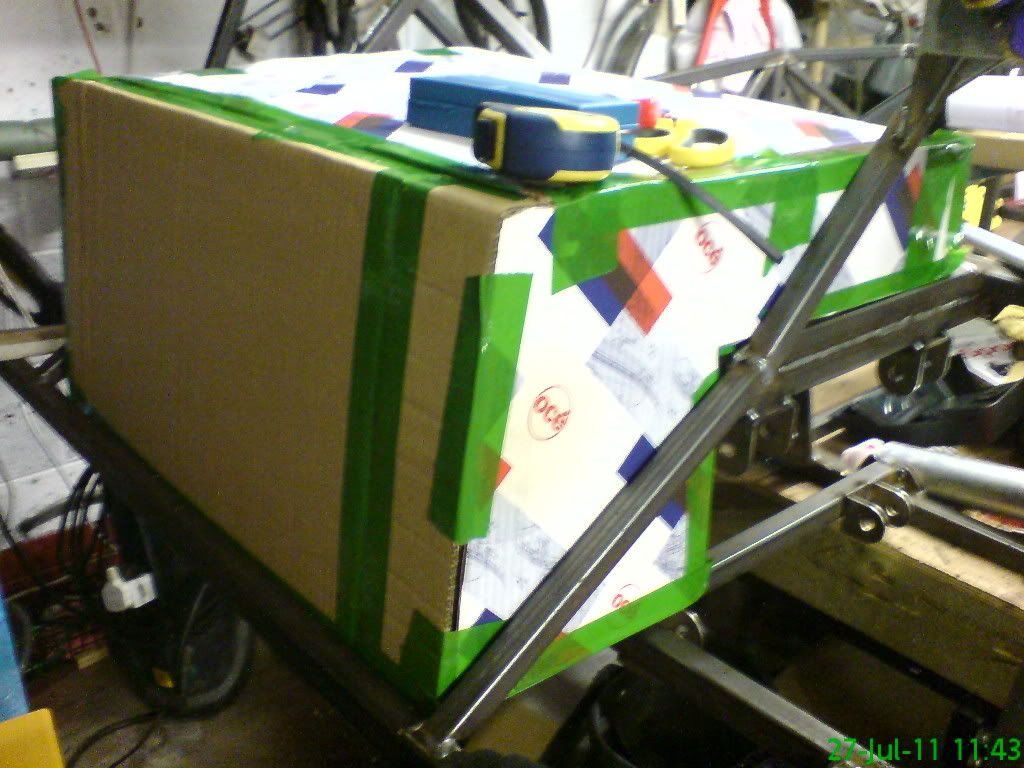 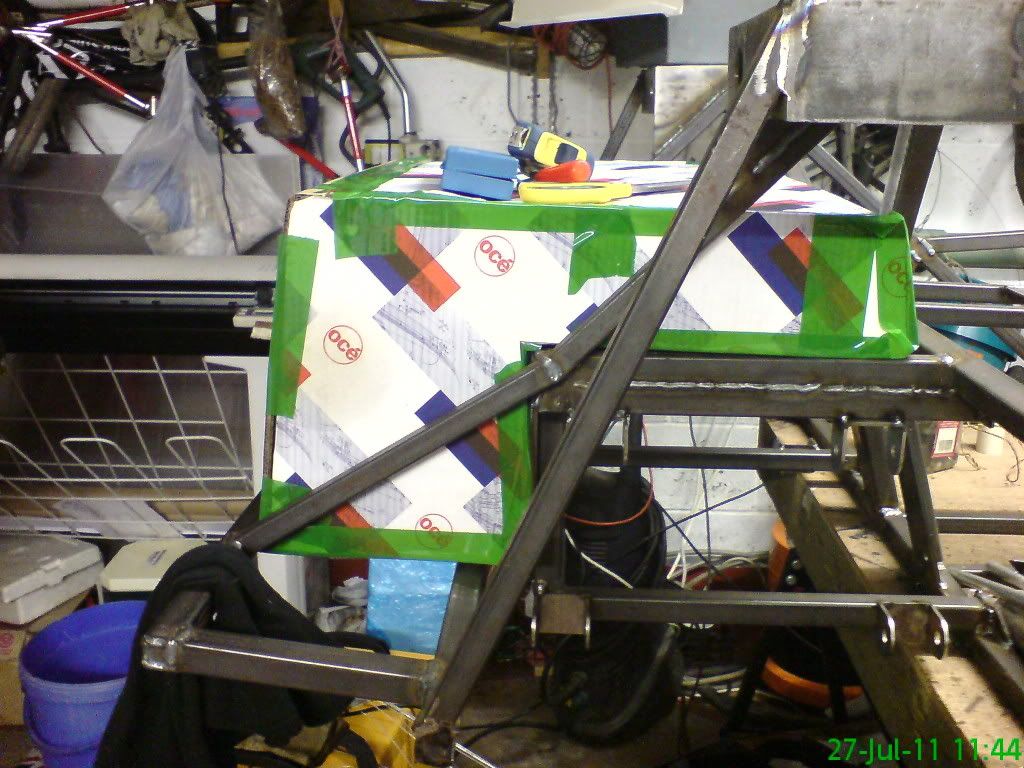 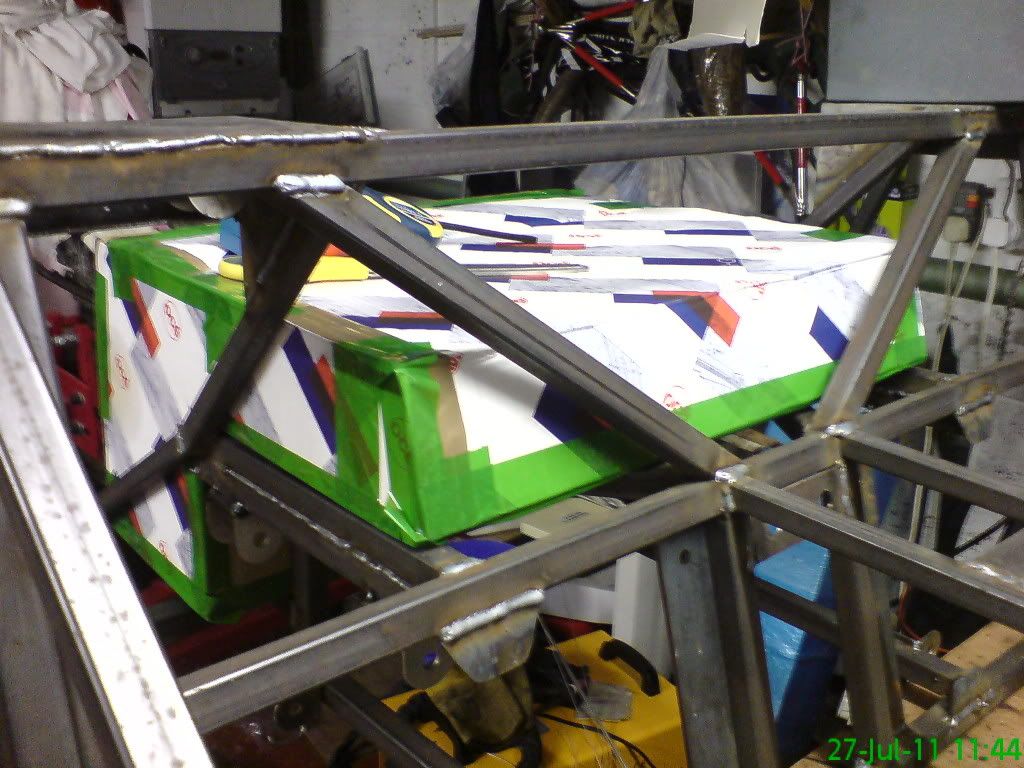 |
Would the extra weight of the fuel change the handling dynamics of the car?
|
I know people don't always consider this, but with your fuel tank (regardless of its effects on handling) is going to make maintenance on the back of the car an utter swine. Also I think someone put a fuel tank above the diff and after one drive in it, changed it back (may have been AshG) It slooshes like mad.
|
well the way I look at it is....I don't have to fill it up full but if I was going out on a jolly I don't want to be gauge watching after 100miles and I'm not too worried about the weight issue as I'm a FB at nearly 19 stone (and yes I do still fit) and if it is really that bad.... well I just make another one... but I really do not think it will be an issue...just have to wait and see
|
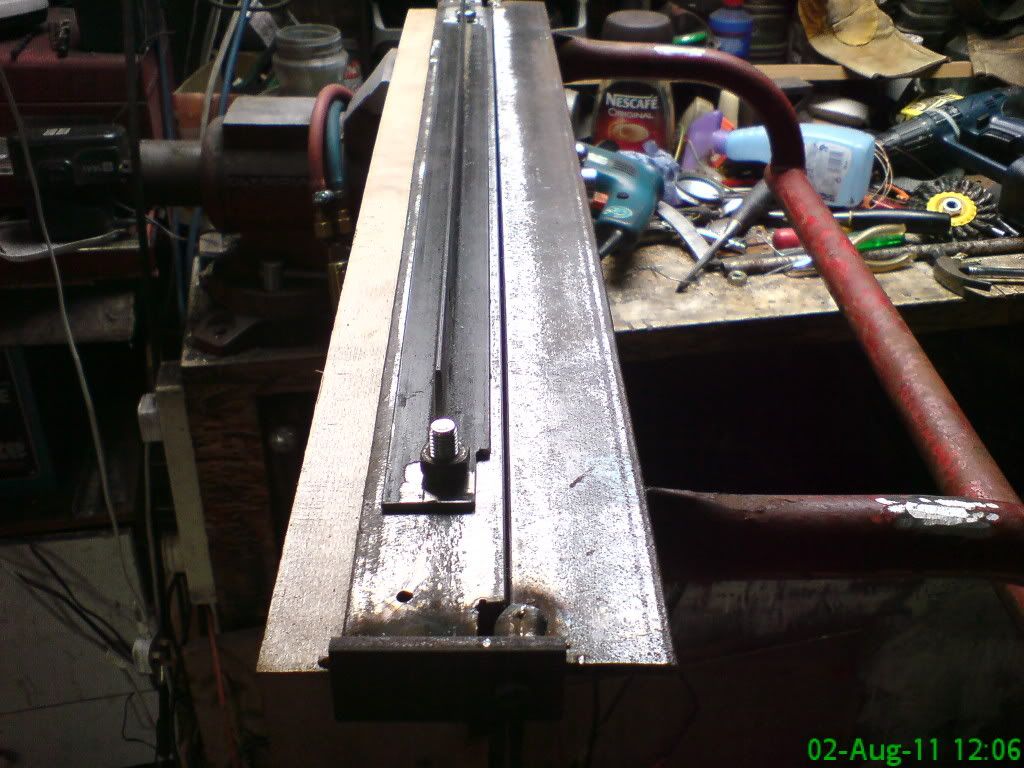
Managed to construct a suitable sheetmetal folder to help fabricate my hefty fuel tank.....as usual I scavenge my garden,trailer,loft for bits to use....5mm angle iron came from the top of my old trailer, clamp from an old defunkt piece of t shape metal from a auto garage door closer and the handle is from a triple gang mower (one of the gang hangers) so after I put it all together to represent a folder and have now started with my tank although I will have to wait a bit now till I decide how to incorporate a sender unit to measure the vertical drop in the deepest part of the tank along with baffles.
    |
Looks good,cant wait to see it finished.:)
Just a thought; if you build a small swirl pot into the bottom you wouldnt need to baffle it. |
Hi oz...putting a swirlpot /sump in anyway as my engines a turbo... the baffles will be to reduce slosh and help keep the centre of gravity of the tank from large deflections to the left or right helping to reduce the chances of the back end wanting to let loose
|
Quote:
Shall have to come through for a butchers when i get chance. Andrew |
yep..you know your'e always welcome for a biccy & a cuppa
|
Wow Kev that looks brilliant.....what sort of capacity is it?
Sven |
Hi Sven after a rehash of the exact shape I wanted it comes in at 54.5 litres or a smidge over 12 gallons so it will have pretty good range I guess in the region of 400 miles
|
Blooming heck Kev
You don't hang about when you are on a mission :) That is going to be a serious long range fuel tank :cool: My old bones would fall apart before that tank is empty :o :D |
Thing is Ronnie I will love bombing around the dales and north york moors so I don't want to be watching the fuel gauge and wondering if I will make to the next fuel station and thats if its open.....funny shape for a fuel tank I know but it was the only way to increase capacity without raising the centre of gravity of the whole tank significantly.
|
Thats looking good. just a question though , can it be got out of the car without removing the bodywork?
Bob |
Don't know yet Bob.... probably not so any diff maintainance will have to be from underneath....either that or have the rear tub removable humm one to look for when I come to it.
|
| All times are GMT +1. The time now is 12:15 AM. |
Powered by vBulletin® Version 3.6.4
Copyright ©2000 - 2025, Jelsoft Enterprises Ltd.