Quote:
|
At the battery end, I'm pretty sure the black/yellow one is ground.
The only place the battery+ goes is the main fuse box and the starter motor. Thick black wire to to starter, thinner one to fusebox. At the fuse box end the two ring terminals bolt inside the main fuse box, one either side of the main 80A fuse. Black one is battery+, the white one is alternator output. It's a bit fiddly getting them in and out of the fuse box if I recall... There's a little 'door' that opens on the side to help with access. |
Thanks to both of you for your help. I think I understand. I will have another look tomorrow. David
|
Tonight I have spent ages removing tape from the mx5 loom. There must be a couple of miles of the stuff and it's soooooo sticky.
 |
What's this?
Does anyone now what this is for. Can't find it in the loom diagram. If is on the offside close to the headlight. It's not the pop up headlight actuator as I have already chopped that out.
thanks david  |
Sorry no idea, could be optional equipment! :confused:
|
I think it might be for air con, not 100% sure though.
Can you trace the wires and see where they go? |
I was thinking it could be the air con. The terminal ends a blocked with what looks like rubber so hopefully it not needed. (chop chop:) )
There seems to be thousands of wires. I was going to leave them all in place but the loom is suprisingly heavy and I want to reduce weight wherever possible. If I had taken the loom from the donor myself I would have put a lot more labels on. I have lost the pop up headlight's, the washer system and the wipers. I just need to find the heater controls and blower motor wires. (None of these seem to correspond with the wiring diagrams). |
It's not the easiest loom to work with is it!
Part of the problem I had with the diagrams is that they don't detail any of the intermediate connectors between the different sections, which makes it a bu99er to follow. It's well worth stripping out everything you don't need though, there's a few kg's of dead weight in there! |
I was finding it very satisfying looking at how many bits I had saved last night!!
|
Would be interesting to weigh everything you lose off the electrical system x x x x x x x
|
Hi David,
Here's a link to a download for the Miata 1991 wiring diagram http://www.madracki.com/miata/wiring.html Helped me out big time when I stripped my loom. Cars really coming on now. It's a nice feeling when you can bolt stuff in and leave it there.......:D Keep up the good work and keep the piccy's coming....:) Johno ps....... I also have a PDF workshop manual for the 1990 if it's of any help'''' |
Random wires of the day!!!
Has anyone got any suggestions what this might be off??
Looks like a radio connector but it's not on any of the diagrams.. 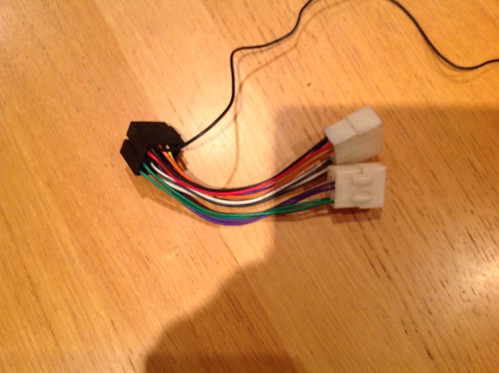 |
I just answered my own question!! I went on eBay and searched for the part and managed to match the wires to the photo
David Look at what I have saved so far!!! 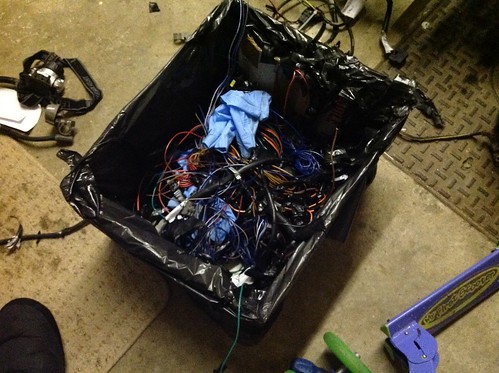 |
Fuel Pipes
Is it taboo to have the fuel pipes next to the wiring loom under the bonnet. I am trying to route the pipes but there are so many wires for the mx5 some of the pipes/wires may have to cross.
David |
Tonight I made some progress with tidying up my loom. Until.... I traced my horn wire back through the harness and it ended at a plug!!! With no other plug to match. with the aid of skov's wiring diagram I realised that there should be a horn relay here. More parts to buy!!!! :D
|
I might still have the horn relay, if I can dig it out you're welcome to it.
Post up a pic of the connector and I'll have a look. EDIT: Found it! PM me your address and I'll stick it in the post. 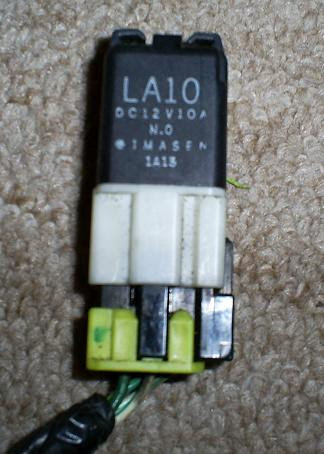 |
Connector
Here is what it looks like
http://www.autolinkmx5.com/relay-hor...sed-1131-p.asp The connector looks like this... 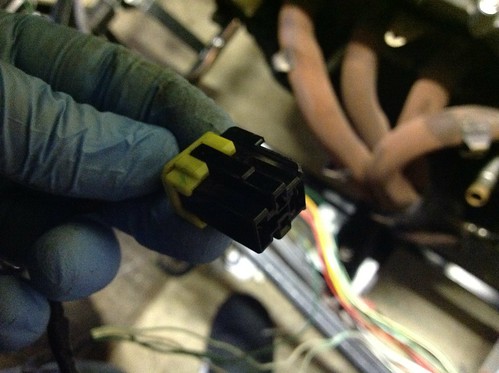 If you have the would be great please I can PayPal you some money to cover it |
You got there first.
Pm sent mate David |
Decided to put some power through my loom tonight. No sparks or fires!!! ..... But not much else either. The headlight relay seemed to click on and off with the light switch but that was about it. When I flash the lights the fuel and oil pressure gauges seem to jump to max.
Has anyone got any ideas? |
Flat battery?
Missing Earths? |
Hi John thanks for sending the relay.
The earths could be the thing. There are no lights on the dashboard at all though. Not even dim ones. David |
Check your main fuse (and the connections to it).
Headlights are about the only thing that don't go through it, so if that's gone your headlight relay will work, but pretty much nothing else will! |
The engine turns!!!!
Tonight I went out in the garage with the multimeter. I was double checked the connectors and the earth supply for the ignition switch as previously I couldn't get any power to the clocks etc. :mad:
I realised I had totally the wrong plug in there. Swapped it around for a more beefy looking one and turned the key. It turned straight away ( took me totally by suprise) :eek: I am going to put in the tank on Sunday so will get a bit of magic juice from the petrol station when I do the groceries at the weekend and have a spare pair of duds to put on afterwards.:) My horn is ready to put in as well thanks to skov for sending me his spare relay. David |
Nice one David!
Don't think I ever would have guessed that was the problem! :D Don't forget to record a video of your first start, it's traditional! Any chance of seeing some pics of your loom routing too? |
I will make sure I video the start. My loom routing at the moment is just plonked on the chassis. Now that it works I am going to tidy it up a bit more. I think most of it will be hidden under the scuttle though.
|
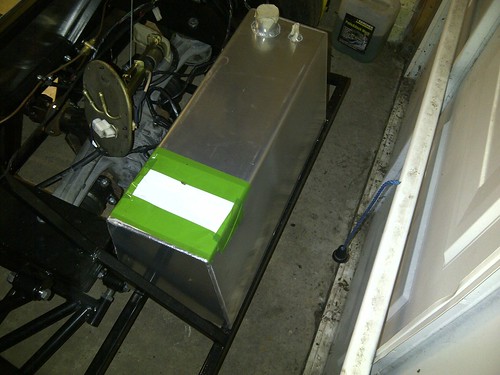
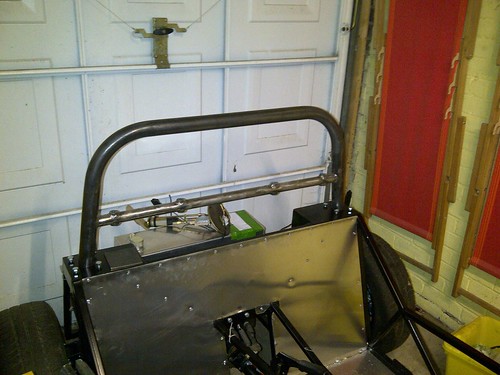
I recd my tank yesterday from Nathan that was built by k4kev. It is a work of art and will almost be a shame to hide it under the bodywork. I also got my roll bar and that will br going off the powder coaters shortly.
|
Quote:
|
New bits
Here is a picture of my Saturn/nts tank and roll bar
  |
Bulkhead/scuttle/battery tray
Hello,
In front of the scuttle there is a piece of horizontal aluminium that the battery sits on. My question is?? Does the aluminium stop short, on top or go past the rearmost (near the front of the scuttle) chassis tubes running side to side on the car. I am trying to fit this before ordering my body kit. Is there anything wrong with using rubber fuel hose if it is securely mounted and doesn't run through the interior compartment of the car. I would like to use it under the bonnet between the end of the tunnel and the engine. My fuel lines are going to be running down the near side of the car and the inlet manifold is on the offside. David |
In fact, the Saturn scuttle stretches about a third into the distance between TR9 and TR8. I made ally panels that sit firmly on those tubes, the scuttle is relatively easily removable and sits on top of it. There is some concealed space to organize wires etc. on.
|
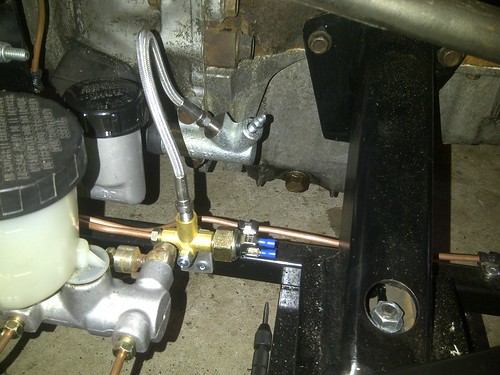
It's been quite a long time since my last post. I have fabricated a new support for the diff, completed all of my fuel lines and installed my tank.
It's been on axle stands for a few weeks so at lunchtime I pushed it outside took some super unleaded from my lawnmower supply and attempted to see if it would run. IT RUNS!!!!! I wasn't expecting it to sound like a Lancaster haha. A few niggles as the ecu wasn't earthed correctly but it now runs really nicely. Now I need a radiator ans some brake hoses. David |
Well done David, its always a happy milestone when you get it running.
See if you can put some vid up on youtube. Andy |
yay...nice one Dave....spurred me on that has
|
Nice one David!
Going to need to see some video proof though! |
I will upload some video ASAP. Skov , I don't know hoe you sat inside the garage and started yours!! Mine was very loud.
|
First start video
|
Progress
I have managed to link up my hydraulic clutch to the slave cylinder and it appears to work! I have used the same principle as skov to replace the clutch switch from being mechanically operated to using a hydraulic switch in the line.
 I also recd my seats from kit parts in hull today. Quite comfy but certainly snug!  David |
Nice one David.
What's the clutch pedal feel like on yours? Mine's a bit on the heavy/stiff side. I think I might have to change the master cylinder or make the pedal longer at some point... |
Quote:
I had the hose made by furore and they did a very good job. I am planning to have my brake hoses made there as well. |
| All times are GMT +1. The time now is 10:16 AM. |
Powered by vBulletin® Version 3.6.4
Copyright ©2000 - 2025, Jelsoft Enterprises Ltd.