They are very secure, not too hard to fit, just took my time cutting the bonnet and then bonded into place.
I'm not too sure what to do at the front, I don't really want to buy another set but I think I will end up doing that. Only idea I had was like in the Westfield Bonnet kit, using pins to locate the front of the bonnet/nose, however there is no lip like in the Westfield bonnet Photos in my sig, if you need anymore I will try and take one but I'm a little busy at the sec (getting married Friday, away from Monday) A few more pics here NTDWM Vin plate is on the offside of the chassis not to sure exactly where but he manual says not easy to remove the number. I was thinking on the engine side of the outer top rail (upside down). May be wrong though. |
+1 I've been building mine since nov 2008 (nearly 4 years) and I'm only a little ahead of you johno
|
OMG THAT'S MINT!!! :eek:
|
That is one immaculate looking build Johno :eek:
You're making mine look like a right pile of poo! Keep up the good work! |
Where did you get your brake and fuel lines from? Are they delivered straight or do you have a special machine of something?
|
speechless , very nice indeed :cool:
|
having seen johnos build in person ( although a lots been done since) I can only say that it looks even better in the flesh, has to be nicest built haynes, no the nicest built kitcar iv seen. Puts us all to shame:mad:
|
Hi all,
Iv'e kept low for a while after posting that thread regarding photos of NTS Engineerings MX5 build and sparked a heated debate regarding mounting the diff (sorry Nathan)....:o I really appreciate all your comments good or bad (it's nice to be praised by you guys though as we are all in the same boat to speak)...:) I've spent a lot of time on this forum searching through many posts to create my car so without knowing it a lot of you have helped in many ways...;) Chris the brake and fuel lines are copper nickel and come in rolls of approx 7.5 mtrs. I basically straightened them by hand on a table before placing them in the car. I used a blupoint pipe bender to create the 90 degree bends in the 8mm fuel pipe and used one of the hand held pipe plier things for the brake lines. Thanks Series Landy for your'e advice on the Aero Catches. I checked out your'e build quite some time ago and see you were using them and decided that's what I was going to use so thanks for the heads up... Nathan if it wasn't for you and Andy we wouldn't be building a car at all. I persuaded the other guys here (Tony, Luke and Simon) to build a MX5 based car on the original SSC plans ( but to be honest I didn't realise at the time the car hadn't been built...LOL) Your'e carbon products look the muts nuts m8 but you need to have some time to youself and not worry about others... Glad to see you are back on the forum though. Well it's nice to be back on here (thanks Handy Andy) and share what I have done. Keep up the good work Johno. http://s1199.photobucket.com/albums/...uild/Assembly/ |
Well said!:)
|
:eek: That sir, is simply STUNNING :cool:
I can,t wait to see it in the flesh one day :) with regard the placement of the Vin number.... I stamped my vin number onto a 3mm plate (to avoid crushing the chassis tube ) & welded it onto BR11 just below the drivers knee area & also will be putting a chassis plate with axle weights/vin number etc onto the engine bay scuttle on the offside close to where the steering column comes thru from cockpit to engine bay area ( which reminds me ...must rivet that in pronto :o ). I look forward to seeing more photos of this great build. cheers andy |
Hi Andy,
Thanks for that, the only problem I have with placement for the VIN number is I have made internal panels to cover all the box section...DOHH I know this is the passengers side photo but it's the same on the drivers side...:) 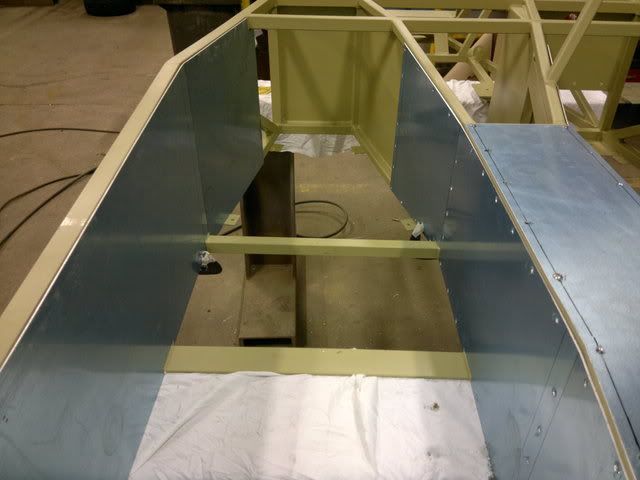 Can I put it in the engine bay or should I leave the panel off for SVA? Well when me and the guys here get our cars done where coming up North for some of what do you call them .."Monkey Burgers" Must be a Northern thing...:D Thanks for your help Johno |
:D Yep its a northern thing the monkey burgers....well its more associated with Hartlepool, it,ll be good to have a get together.....just stay away from the moors ( ref Ashg,s saga,s LOL)
The VIN plate position I used is the Bottom Rail that crosses the width of the chassis BELOW the drivers knee,s , .....the rail in front of that plate you have welded in to support your seats/runners, or do you intend to cover that chassis tube too? I "think" you can have the Vin in the engine bay but my train of thought was like most modern cars the Vin is usually visible on top of the dash panel looking thru the screen etc so went along that route .....just my own way of doing it, not saying its the only way/position ;) keep the build pics coming :cool: ps....with the internal panels, they look really good but ( said politely ) they "might" create more sharp edges which the IVA tester will be checking. cheers andy |
Hi Andy,
Sounds like a good place to put the VIN. Sorry for being a bit dum but I leave the book at work and have no idea what chassis part is what.:o With regard to the internal panels I have DA'd the edges and plan to pad out the transmission tunnel and make pads for some of the side panels so my knees will have some skin left on them...:D With the Alu panels being 2mm it's easier to put a blunted edge on them as per IVA requirements. Thank's for the heads up though. Johno |
Well it's been a few weeks and I've hardly touched the car, but I did manage to get a day on it yesterday.
Mounted the fuel tank with its bracket for the first time after painting, just got to fit an earth strap and vent valve which I'm going to incoporate onto the original MX5 fuel sender flange. 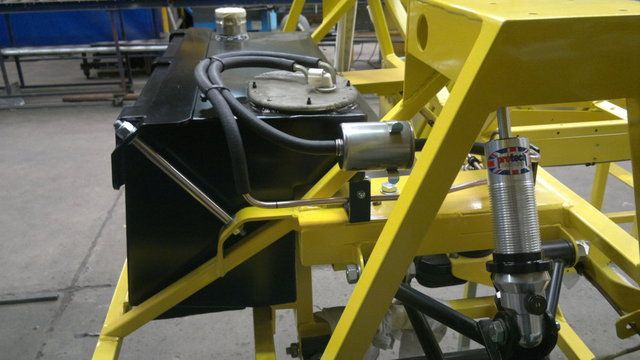 I'm going to fit another Terry clip and probably a Jubilee clip to a bracket behind the fuel filter to make it more secure, will see what it's like when I've fitted the Terry clip first but not sure if this will be good enough for IVA (will it need a Jubilee to make it impossible to come loose)? Got my front brake pipes installed at last. I've left them long at the front untill I decide where I'm going to fit the bulkhead connectors. 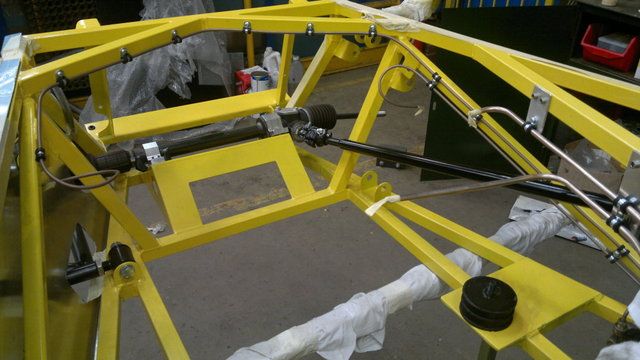 Also fitted some brackets to my fuel pipes in the engine bay which will be painted later with other stuff. All I need to do is cut them to length and either flare them somehow or solder a olive to create step for my hose clip. 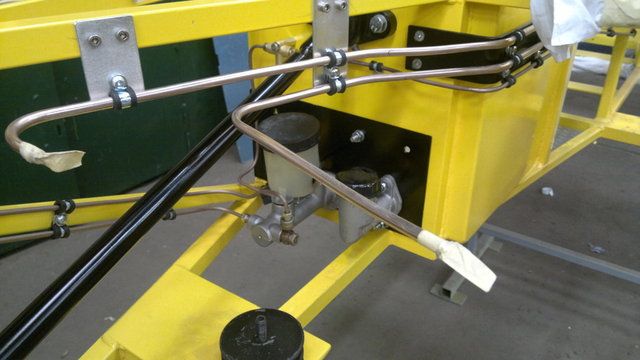 Fitted my steering column to make sure all parts in the engine bay area are clear of the shaft. 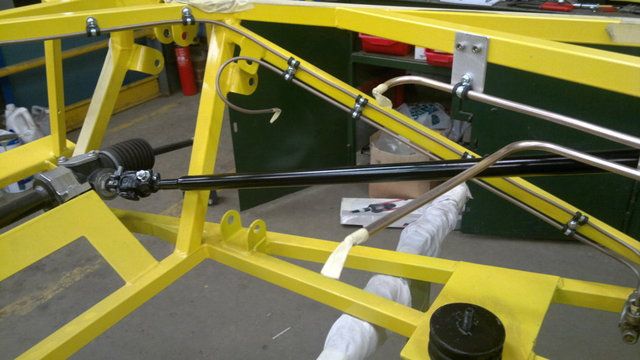 Oh bugger 4 picture rule kicked in...LOL Johno |
Few more photo's,
Fitted my pedal box but not quite right yet. Need to fit a washer behind the circlip on the MX5 brake cylinder to stop the bolt coming out and also fit a rubber gator which Tony acquired from Newark. 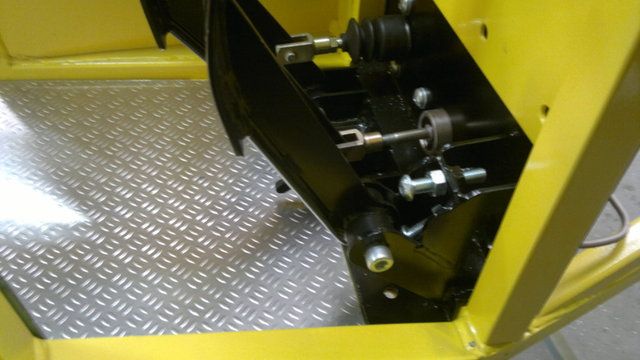 Cut up some Ally plate for the pedal box floor area which needs fixing in place. Not quite so harsh as "Chequer Plate" but still with a raised surface for some heel grip. 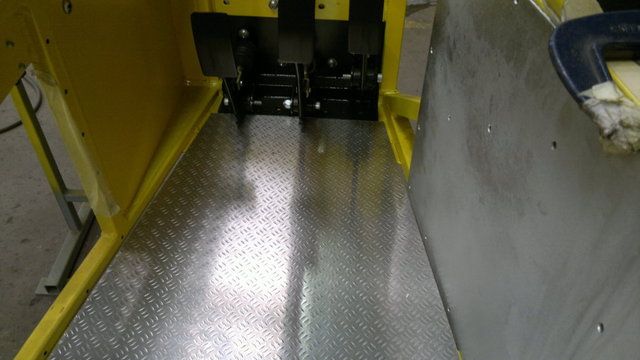 Here's another shot of my fuel tank setup..... 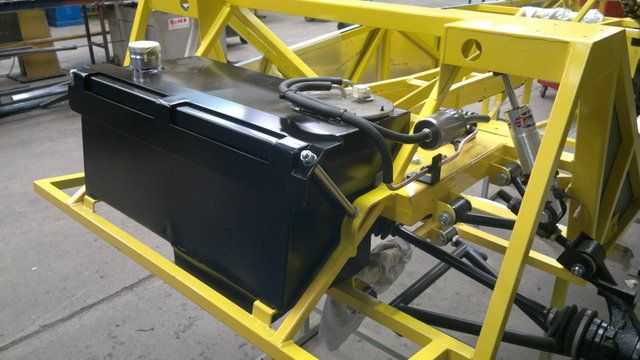 And another of my front brake pipe setup.... 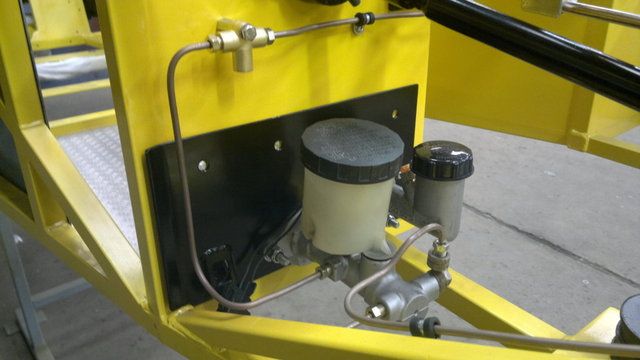 Well that's it but not had too much time available to work on it. Now I've had a day on it I now feel like getting on with it. I see the comment about the right angle drive for the speedo cable on CTW50's build thread has helped a few people which is great. I have been in contact with the Admins on here about the possibilty of including a MX5 dedicated page to focus all the MX5 topics in one area. With the Sierra becoming a bit of a "rare beast" to say the least I thought this would help ongoing builds as well as new people choosing this option. So I would like anybody who thinks this would be a good idea to back me and push the idea forward..... Well that's it for now... Johno http://s1199.photobucket.com/albums/...1/MX5%20Build/ |
Beautiful build Johno, lovin the pics :)
|
Your build pics look like show photos from an instructional book about how it's supposed to be done. A pleasure to look at!
|
The quality of your build is wonderful. Looks very professional, as in factory build professional!
|
Thanks guys,
Appreciate the nice comments. I had a play tonight with fitting a sort of cable fixing rail and got a bit carried away... After I finished and thought about it I'm now not sure if this is acceptable. I've "P Clipped" a solid piece of aluminium at intervals of 300mm or less (mostly 150 to 200mm) where I think I need my wiring to go. I plan to run all my wiring in varying sizes of conduit and then cable tie it to the ally bar. I've seen pictures and videos of wiring cable tied to the box section on Westfields in conduit and loom tape so though this would be OK. Should have asked the question on here first I guess....ggggrrrrr Here are some photos to show you what I've done. 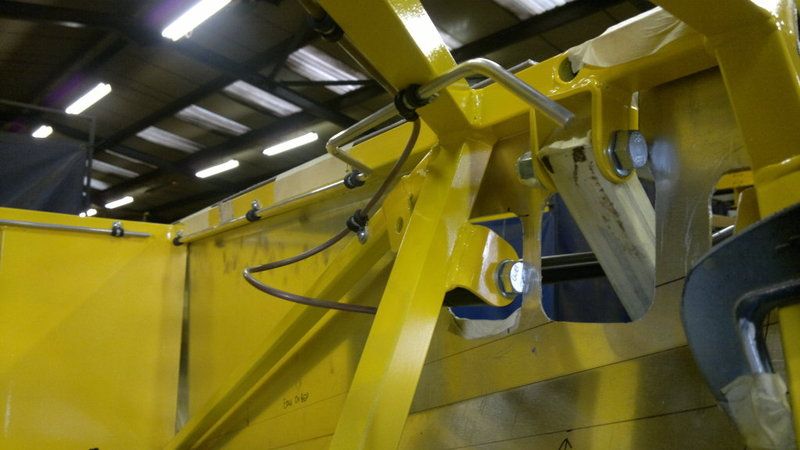 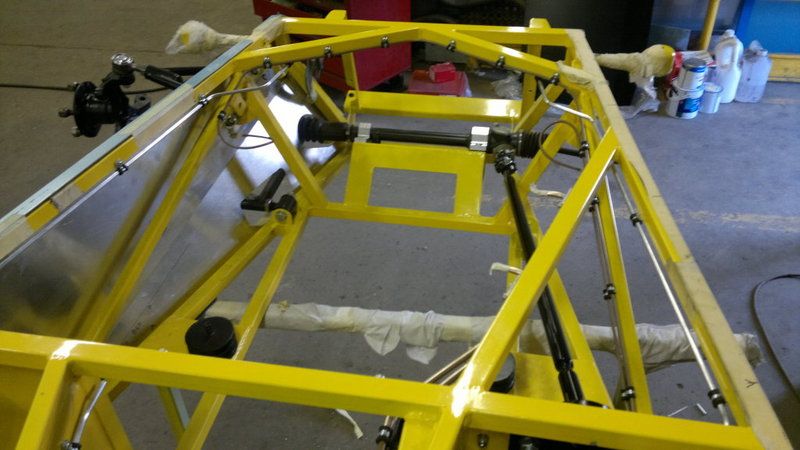 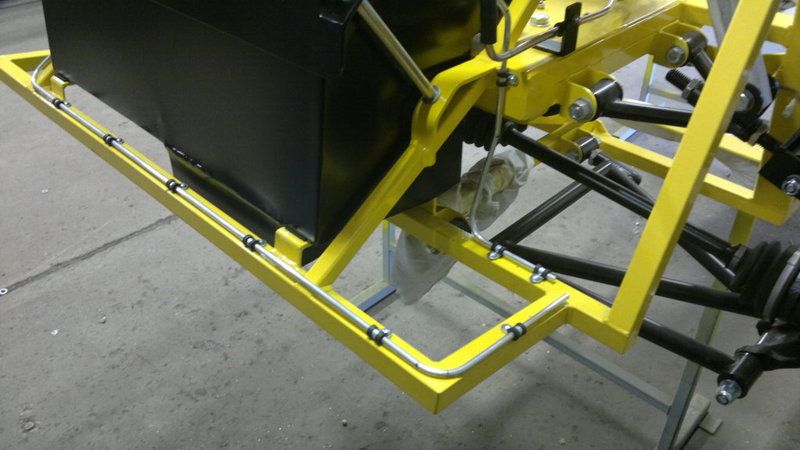 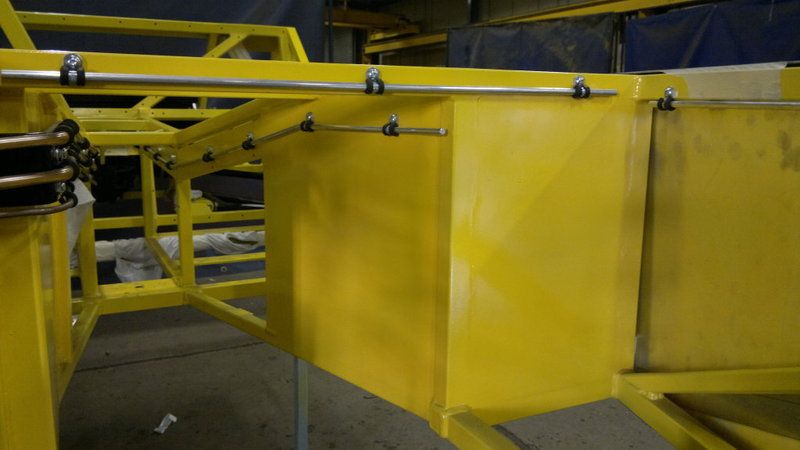 Oh I also managed to flare my fuel line ends tonight with a Sealey brake flaring tool. Seems to have done the job... Any thoughts would be most appreciated. Johno |
I feel like crying every time I look at your build photos you make mine look like an explosion in a scrapyard by comparison:o
|
Very smart work indeed Johno..... keep it up bud
|
The guys are engineers and they dont know how to build something horrid.:) If there was a clip 2mm in the wrong place it would make them ill:eek: I Like it.
Bob |
Quote:
The pics look like they belong in the "Book" :cool: Keep the build progress & pics coming, they are an inspiration to us all . cheers andy |
How did you straighten your pipe? I think that's one aspect that makes it look so good.
TT |
Hi all,
Really appreciate all your comments (Deezee, AyJay, Dualist, Kev4Kev, TwinTurbo, Robo and HandyAndy) means a lot to me as you guys have a lot of knowledge amongst you all.....:) There's an old saying "beauty is in the eye of the beholder" I'm enjoying working on the car at the moment as it gives me a bit of a distraction from a few family issues at the moment. I believe everybody is proud of what they have achieved (I have) so each build is unique so thumbs up to all you guys.:D TT with regards to the brake and fuel lines I just spent a bit of time straightening them out on a table from a roll before fitting them. Because I have my P-Clips so close to each other it helps to keep the pipe straight.;) My wiring harness support pipe is from straight 1/4" aluminium solid round bar in 4.5mtr lengths which I then bent with a cheap "Blue Point" pipe bender, (made quite a few mistakes there)....:eek: Both the fuel and brake pipe are copper/nickel which I believe is a little bit more stiffer than normal copper which I believe may help. Well I hope that helps...Johno |
Just a bit of a progress report,
Spent some time Sunday Putting my brake callipers back together, I purchased a seal kit for the front from Bigg Red knowing some seals where perished only to find I should have ordered some for the rear as well.. I stripped the car down a bit so I was able to flip it over to fit my floor, bloody thing is getting damn heavy now. I left one of my rear callipers on to sort my handbrake cable positioning. Just needs some clips to hold it in position but seems to be OK with the routing, also needs a bkt near the diff washer to connect to the cable bkt. I have ordered some new cables as mine are shot to bits and hopefully should be here sometime this week. It's a nice feeling to know that you can bolt parts on and leave them on for good. While she was on her back I took some photos (sounds rude) of the rear end and diff mounting area. 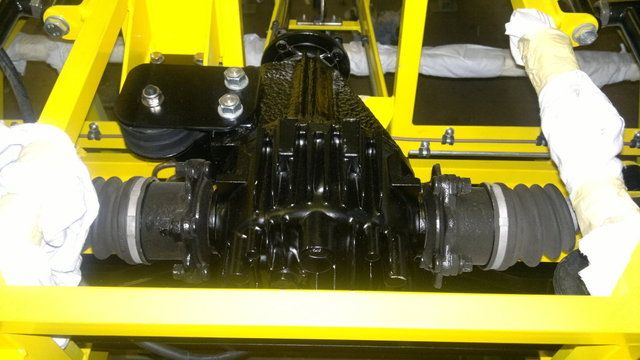 Here you can see where I have routed my ally bar under the diff hangar area 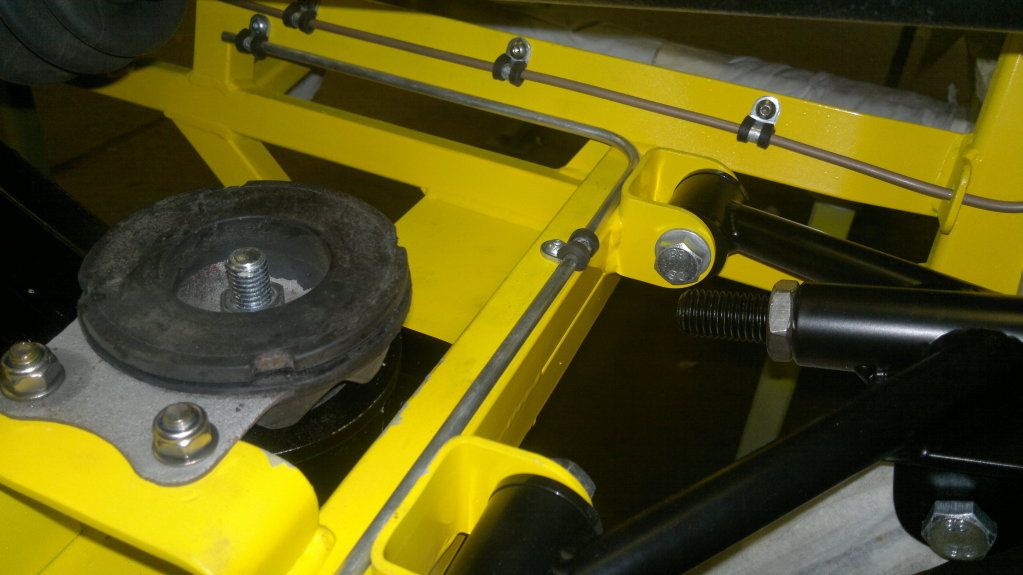 Oh and my floor fitted at last bonded in place with "Tiger Seal" and blind rivets. 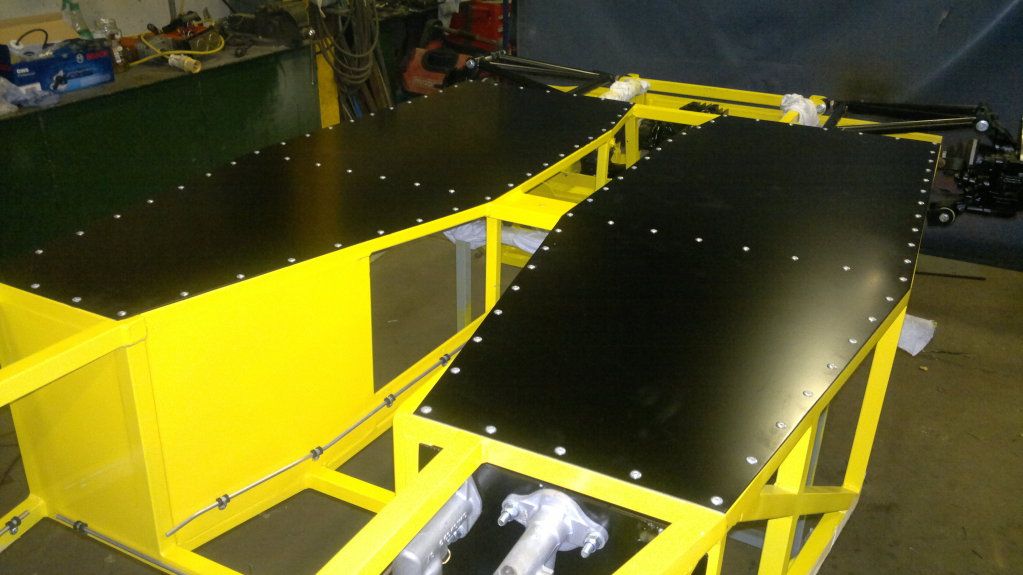 Hand brake cable position... 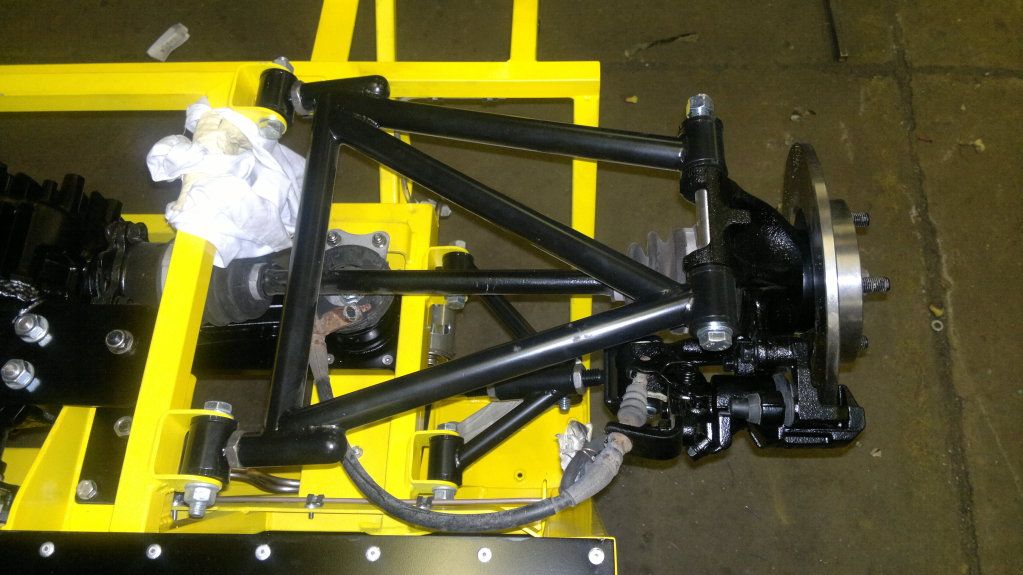 I've updated my Photobucket with loads of photos bu haven't put them in any order yet..... http://s1199.photobucket.com/albums/aa472/JohnoSS1/ Bye for now... Johno |
Sorry nearly forgot,
I said to Tony and Simon I would post some photos of their build as well on here. Here's Tony tonight fitting his floor panels.. 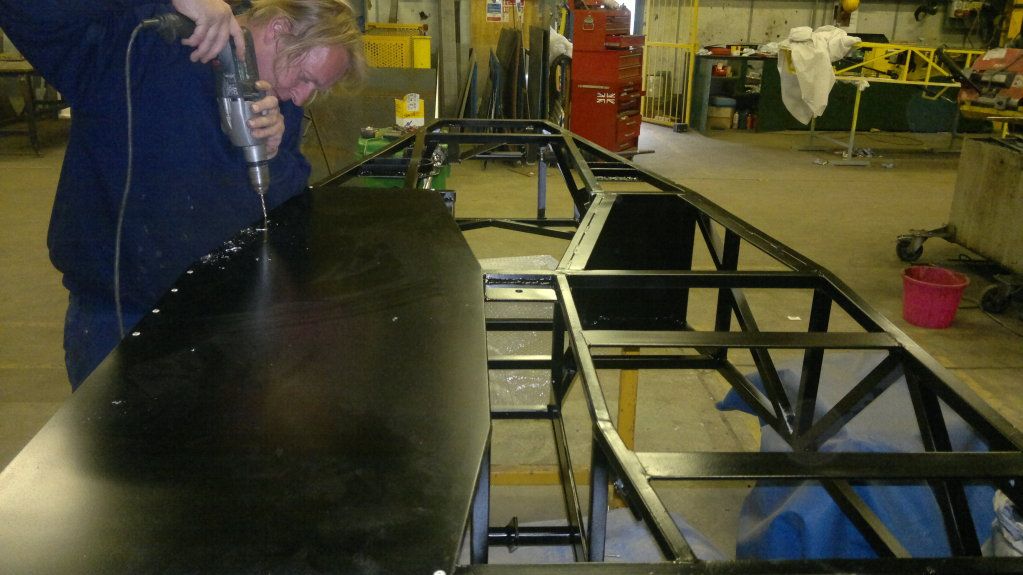 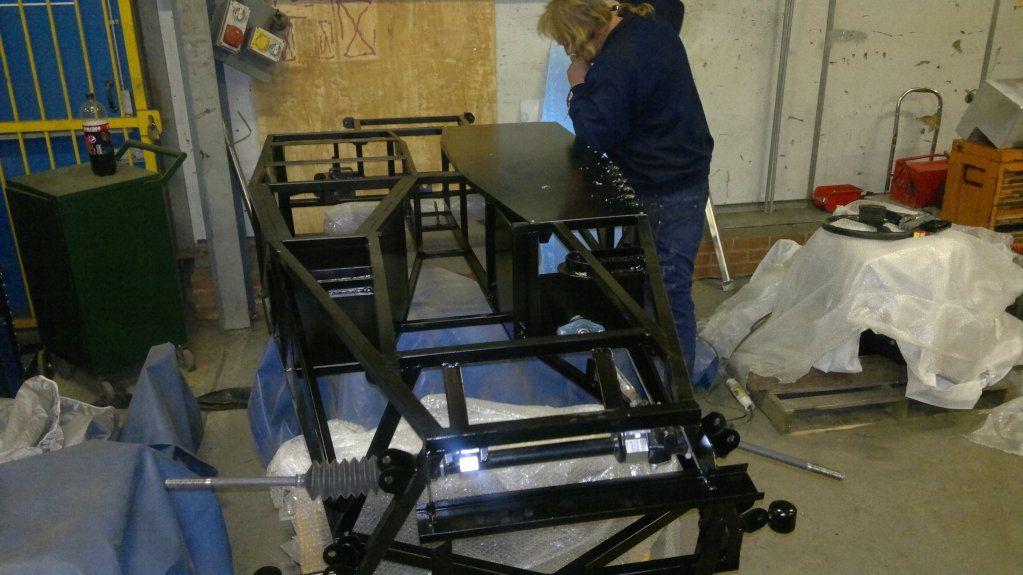 Here's Simons pedal box (he's very proud of this...) 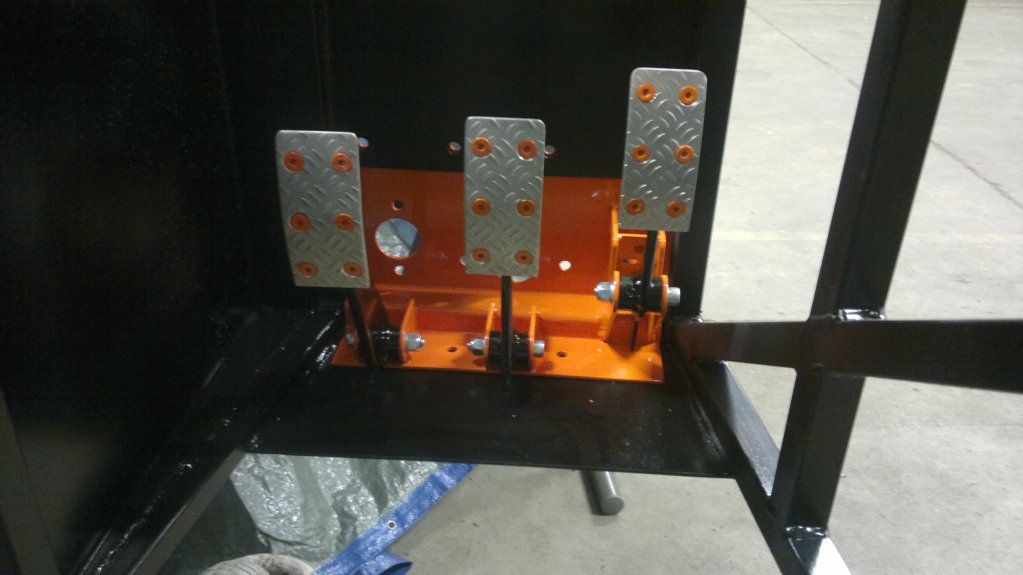 The pedals have been covered in what we call 3mm thk aluminium "Rice Grain". Very grippy and looks cool too. Well they've done loads more than that but will post more photos at a later date... They're a bit shy:D Johno |
looking mint as ever, i keep looking for faults but cant find any, well apart from the rusty old handbrake cable;)
Keep up the good work |
Hi all,
Had a frustrating week........ Ever had days where you just stand and look at it and get nothing done, well this week was my turn. Recieved new rear handbrake cables this week so I thought a couple of hours one night should sort it.......WRONG!!!! No matter where I routed them I couldn't get them to clear most things moving...LOL I tried over, under and in front of the diff but I couldn't get the cable away from SB rails on full movent of the shock (without springs) in full compression. I tried brackets of all sorts vice gripped to various parts of the chassis to no aveil. I then removed one of the clips on the cables to see if I could bend this to help. I placed it in the vice and tried to bend it into a different position thinking this might help. Wrong again! clip wasn't having any of it as it started turning into odd shapes... So I reluctantly put the clip back on before I ruined it.....Sigh!!!!! back to square one. Two evenings and I acheived nothing. Three evenings later I put the cable back in the calliper and routed the cable back over the diff again but this time it looked differnt. When I put the clip back on I had put it on back to front (MX5's have a clip with a hole for fixing at 45 degrees to the cable) and all of a sudden it came together... A simple bracket bolted to the bottom of the diff cage and it was sorted..LOL Tony smiled as he said "Know where to weld the bracket on know" Here's a photo of the offending item in place. 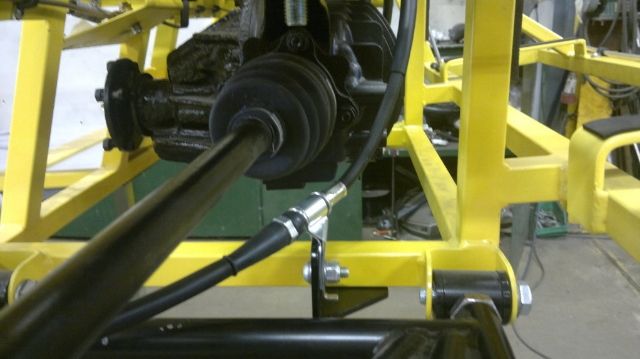 Here the you can see the clearance I've now got at ride height. 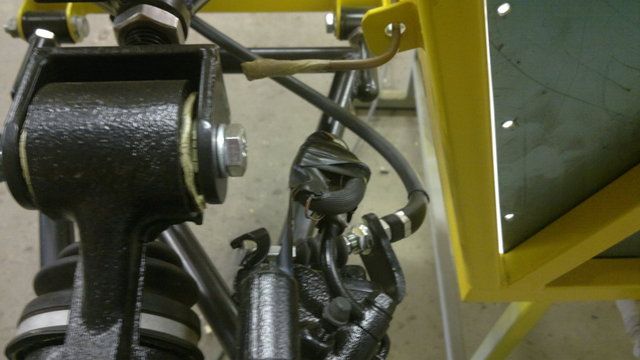 The cable now also clears the wishbone on full travel. Both cables in place. 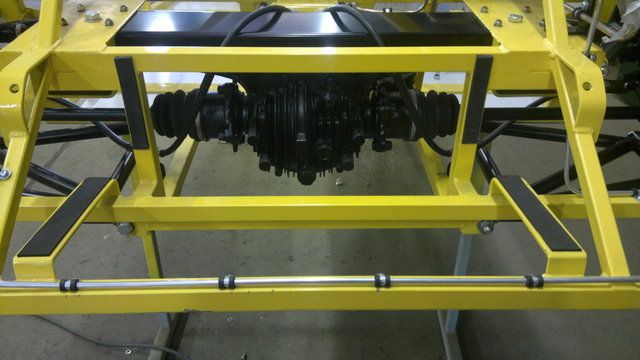 Just need to clip the cable to the diff brace and add some sleeving to avoid chaffing problems. Hand brake fully installed (not finished yet though) 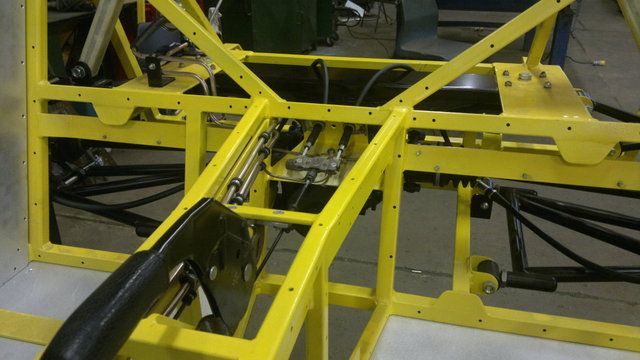 Johno |
Sorry 4 photo rule kicked in (nearly finished).
I also had some time on the pedal box. It's bolted in place but not quite finished yet hence no nylocs fitted etc... I'm using the MX5 master cylinder which fits nicely to which I have fitted a washer behind the circlip to hold the clevis bolt in place, and fitted a rubber boot to cover the bolt. 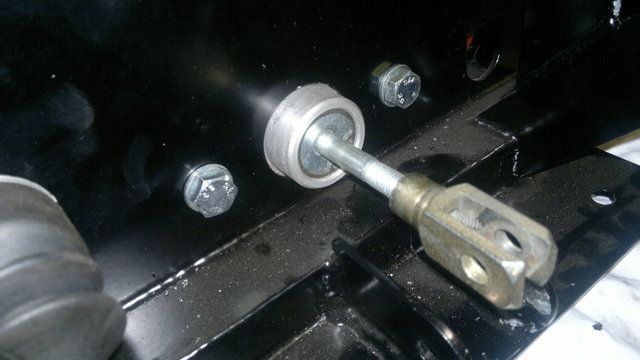 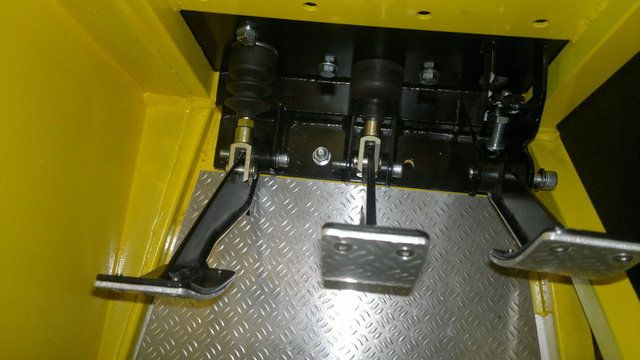 I'm going to use the original throttle cable but just need to move the throttle bracket on the engine to make it all fit. 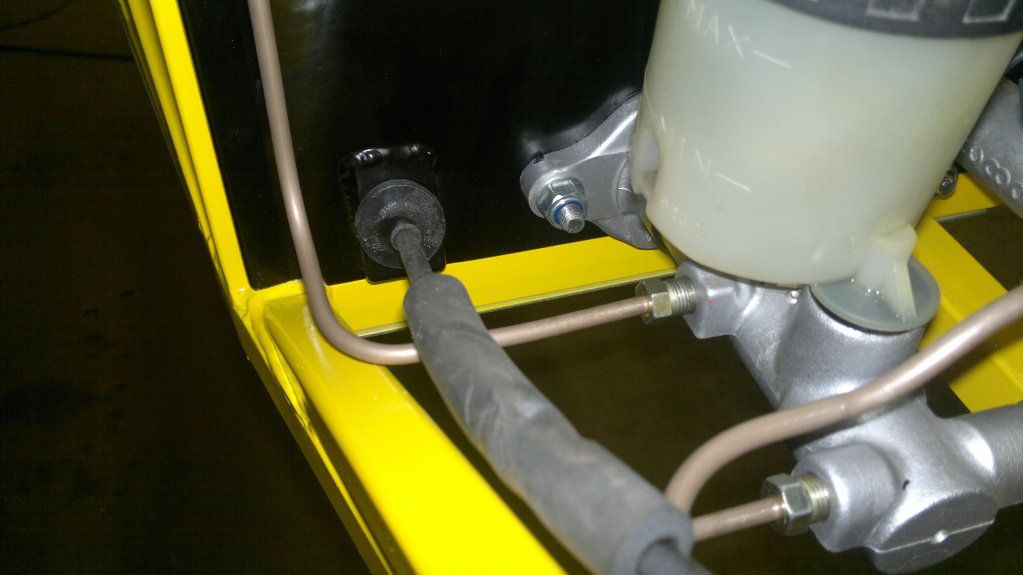 Engines's going in soon to sort out cooling and air. Bye for now....Johno:) http://s1199.photobucket.com/albums/aa472/JohnoSS1/ |
Sorry nearly forgot,
Hi Nathan how's things with you? you Northener....:D Had to get new cables anyway for the handbrake as they were shot to bits with rust....:eek: Plus they didn't look good.... I just used the old ones for mocking up. Engines going back in this week for cooling and sorting the air side of things. Looking forward to that part of the build:D Well I hope you got your'e life back on track now and are moving on... Hope to hear from you soon..Johno |
Hi Johno
I have just got up to date with this build thread :o Can only say one thing. WOW You chaps are doing a fantastic job with the build. :cool: Love every aspect of the build & can't wait to see the end result. No need to rush mind, good things take time so if I have to wait a couple of weeks, so be it. :D :D Seriously, well done Johno |
Hi Bonzo,
Thanks for that.;) Lol a couple of weeks for the next part of the build you mean...:) Really enjoying working on the car now as I get to bolt bits on and leave them there... well almost...:D Things are slowing down now though as I am getting to the fiddly bits I guess, so I have spent some time researching what to do next. Johno |
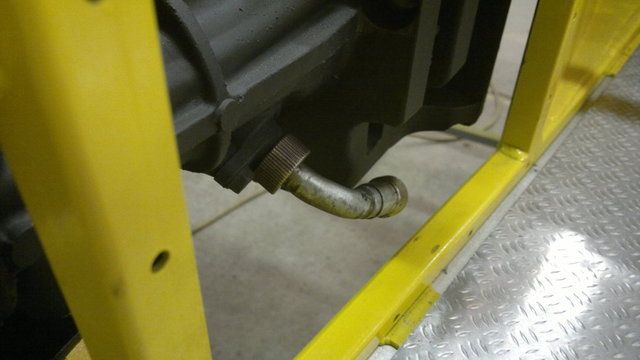
Just a heads up really,
I purchased a Toyota angled drive for my gearbox as I plan to use the MX5 instrument cluster in some form or another. I'm pleased to tell you the drive fits but the gearbox housing needs some attention. In order for the drive to work properly you will need to cut away some of the PPF mounting framework on the gearbox. Here's a picture of the drive before trimming... 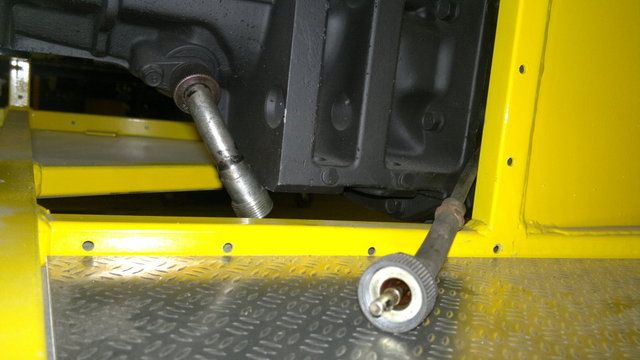 As you can see it will either point the speedo cable too low below the chassis or foul on the PPF framework. I removed some of the framework (bonus saving weight...) to allow the drive to point the cable forward to where it should go. 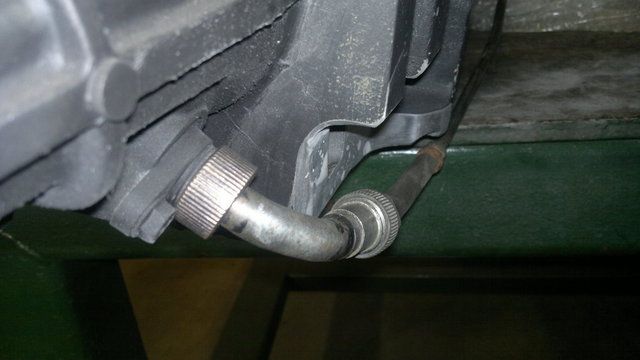 The framework is all excess baggage now anyway so no harm has been done to the gearbox. I haven't refitted my engine in the chassis to show you the final result but will as soon as I have done it. If anybody is interested there are more photos on my Photobucket site. http://s1199.photobucket.com/albums/aa472/JohnoSS1/ Johno |
Good info that, mine hasn't arrived yet but it's rather different than yours, should be interesting to see how they compare.:)
|
Hi Chris,
What have you got coming then?;) I bet you've got some cunning plan sorted before hand? It's not coming from Australia is it......mmmmmmm Can't wait to see what you are gonna do this time....:D Johno |
Hi,
Well had some good news this week, I got my VIN number. Just need to get a plate stamped/engraved and weld it to my chassis somewhere. Also spent some time on the car doing odd jobs, firstly I repainted the engine bay and then put my engine back in for good. Fitted the throttle cable and started work on the air intake and coolant side of things. Heres the bracket for my air filter I made yesterday.. 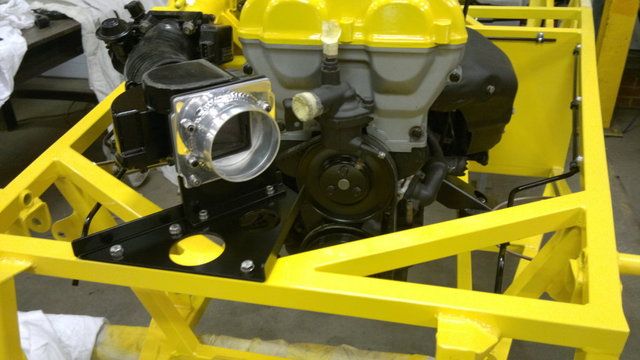 Air filter in place... 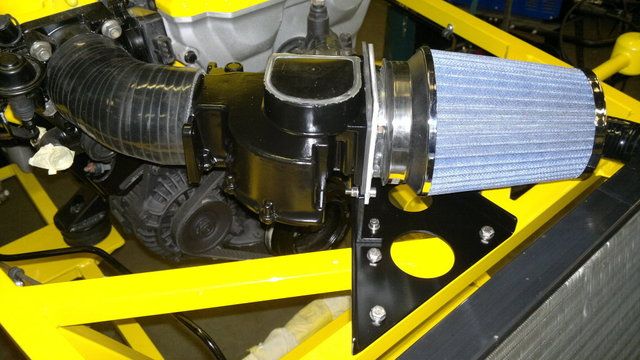 Radiator fitted with top cooling hose mocked up... 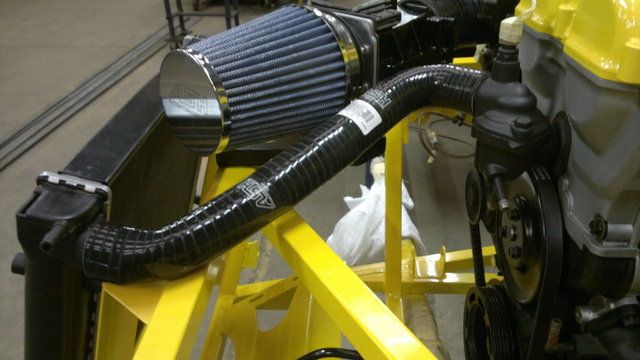 Throttle cable installation with original MX5 cable.... 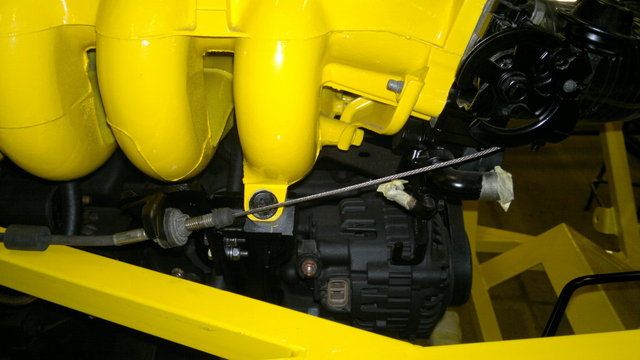 Photobucket updated today as well...... http://s1199.photobucket.com/albums/aa472/JohnoSS1/ Johno |
Well I said I would post a photo of my speedo drive once my engine was in so here it is.......
 Plenty of room now so just a few clips and all is good I hope. Might as well use up my photo allowance... 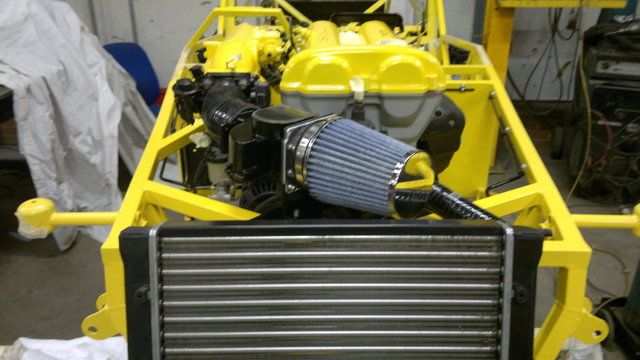  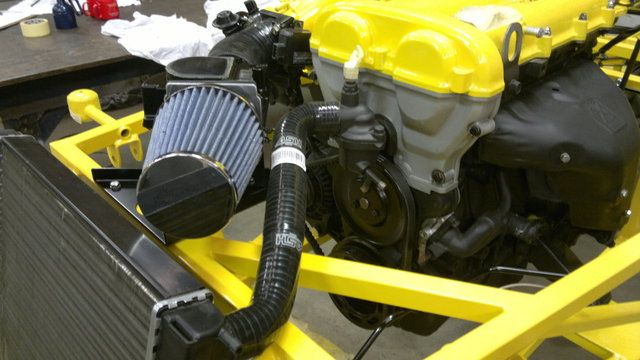 Well thats it for now but I got some more bits coming this week to finish of my front cooling side of things. Well until next time cya...Johno http://s1199.photobucket.com/albums/aa472/JohnoSS1/ |
Painted the engine bay again :confused:
It already looked immaculate! Starting to think you might have a touch of OCD :D Out of curiosity, where are you planning to take the feed off for the idle valve? I'm struggling to figure out a sensible routing for mine. |
Hi Johno,
Nice build you've got ! i like it very much ! What kind of cooling hose do you use ? It looks like it is flexibel ? regards, Wim |
| All times are GMT +1. The time now is 02:12 PM. |
Powered by vBulletin® Version 3.6.4
Copyright ©2000 - 2025, Jelsoft Enterprises Ltd.