few more bit added......those bloody D1s and 2's are real buggers :mad: with those compound angles.....but got there in the end.
When is the best time to start fully welding the chassis ? before shifting it forwards or after. 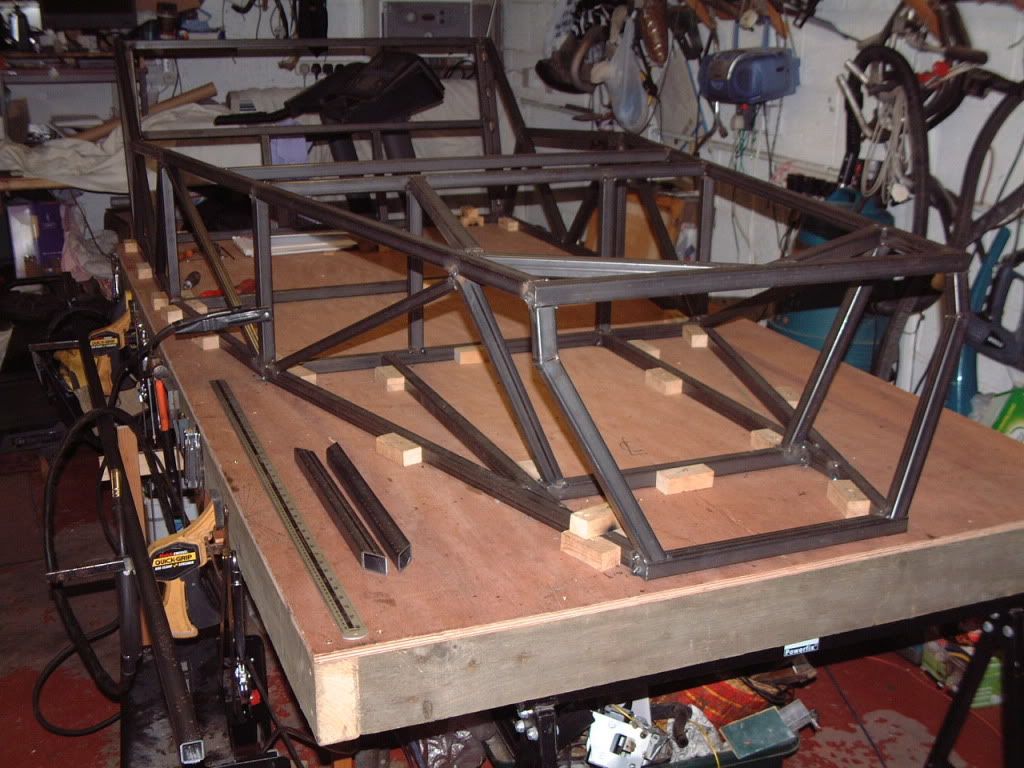 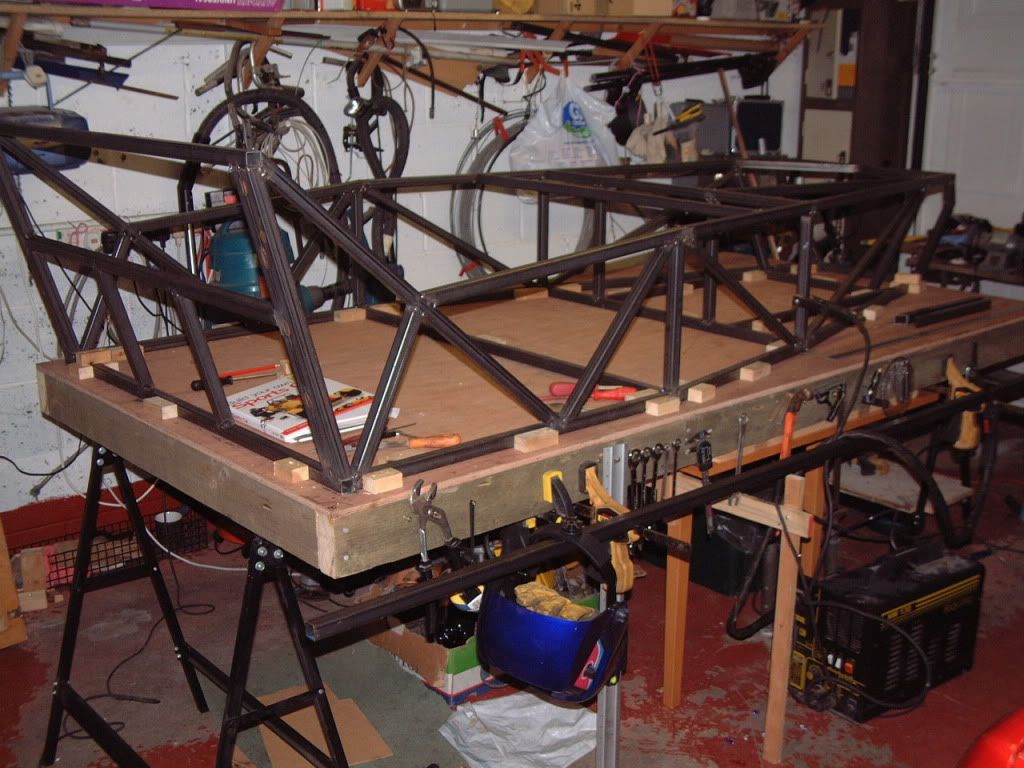 |
Making progress there... I tack welded the whole chassis together including the transmission tunnel and steering support before I started fully welding as I needed to start moving the chassis around to fully weld all the little awkward to get areas :)
|
Okay.....lets play spot the cock up!!!!:eek: these last two pics have a glaringly obvious boo boo that I have now rectified, I,m sure one of the Andy's will spot it.
Glad I found it before it is fully welded. |
Quote:
I like a challenge so had to respond to this...... I reckon the error is that the 2 SB4,s are in the wrong place ;) May I ask what the 2 pieces of steel in the foreground on the table are? are they parts SB5 & SB6 ? can,t quite see the compound angle in the photo :) Nice work there Kev :cool: cheers andy |
Well done bud....I thought if anyone would get this it would be Handy, yep its my one and only cock up thus far but like I said already rectified and sb4's moved further in to the corect 178mm apart and not 178mm to either side of C/L......yes Handy sb5 & 6 thats what they are but I have not yet completed the compound angle that goes to sb2 should be fun getting it right
I have spoken to a guy down in Blackhall Rocks who is going to supply me with 6m of 25mm and 6m of 19mm seamless tube for £40:D hope to get a good few hrs on the chassis this week. ttfn K4 |
Kev...
A little tip....( sorry if it sounds like teaching granma to suck eggs ) When cutting the compound angles on SB5 & SB6......totally ignore the 17degree "View B" in the cutting diagram on page 166, the 17 degree,s is what you actually end up creating by making the compund cut 52 degree,s / 27 degree,s. lay the tube on the table in the position as in the diagram, bottom sketch, ( as you have already cut the 52 degree angle) then turn the steel 1 flat away from you then scribe the 27 degree angle on the uppermost face( upper sketch), then turn it back 2 flats towards you, scribe the 27 degree line from top right hand point of the steel ( scribe line goes from top right down to bottom left ), then turn steel 1 flat away from you and use a steel ruler to scribe the 2 lines together. When cutting it, cut each scribe line on 1 flat at a time, turning the steel in the vice to complete each cut......result = perfect compound angle. Hope this helps, The other side is in opposite hand. cheers andy |
Update
Cheers for the tip Handy.....I have already been using an almost identical method as you describe and I agree it works very well. Now approaching some of the CP's and as usual I search and scour the shed,loft and garage for 3mm plate and find one piece so annother hunt in the shed throws up a compressor tank that is box shaped, I check the thickness of the plate and yep it is 3mm .....champion me thinks as I know I have another one of these lying around somewhere, should be enough to get all of the 3mm components cut out. Cutting it was going to be a pain in the harris but then me thinks.......open the bandsaw and use it like a powered fretsaw.... flippin heck, what do ya know!....it works and now working my way through all the CP parts. so heres a few more pics new old stock compressor tank butchered for 3mm plate 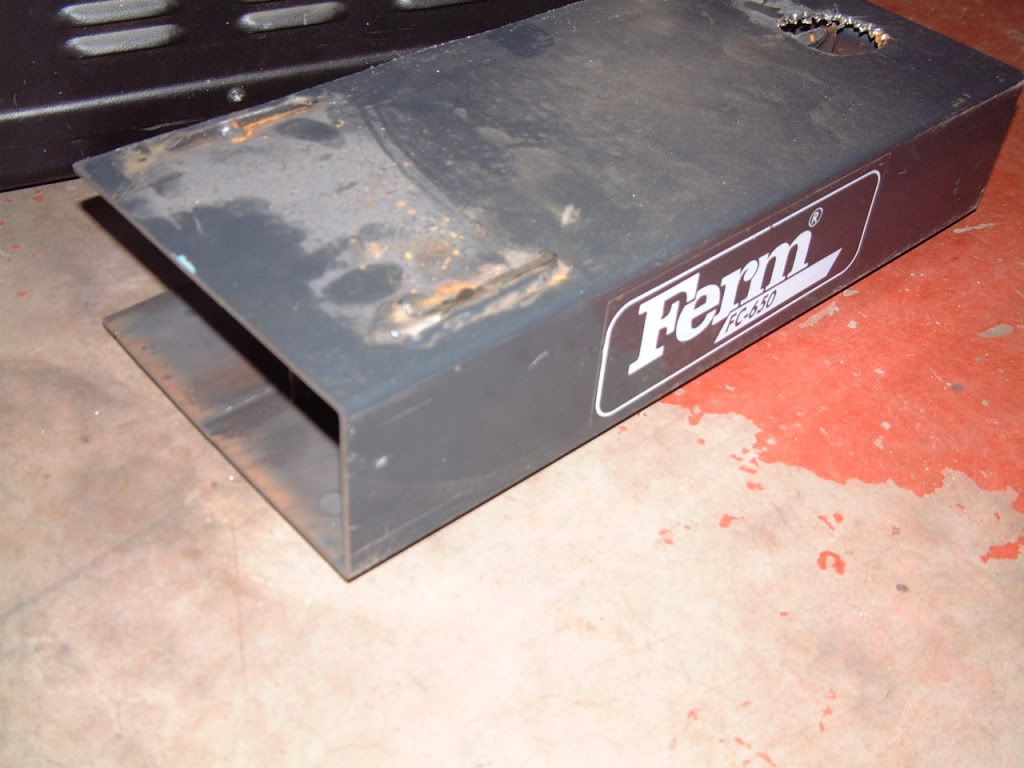 using my metal bandsaw as a powered fretsaw 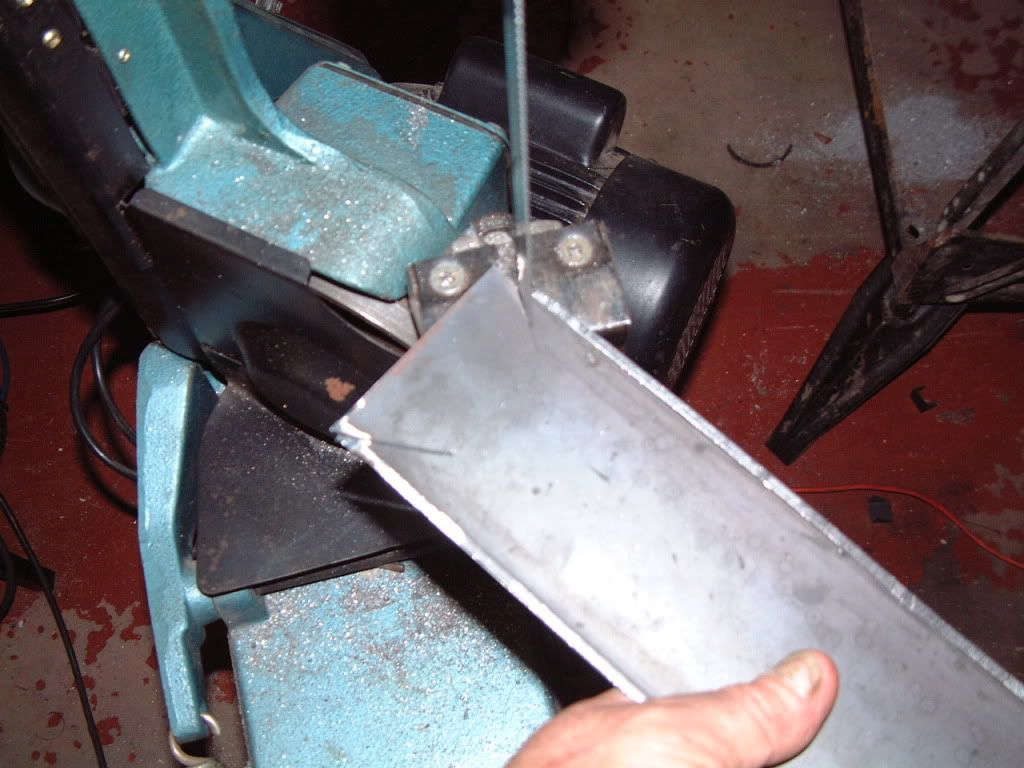 chassis continuing to grow 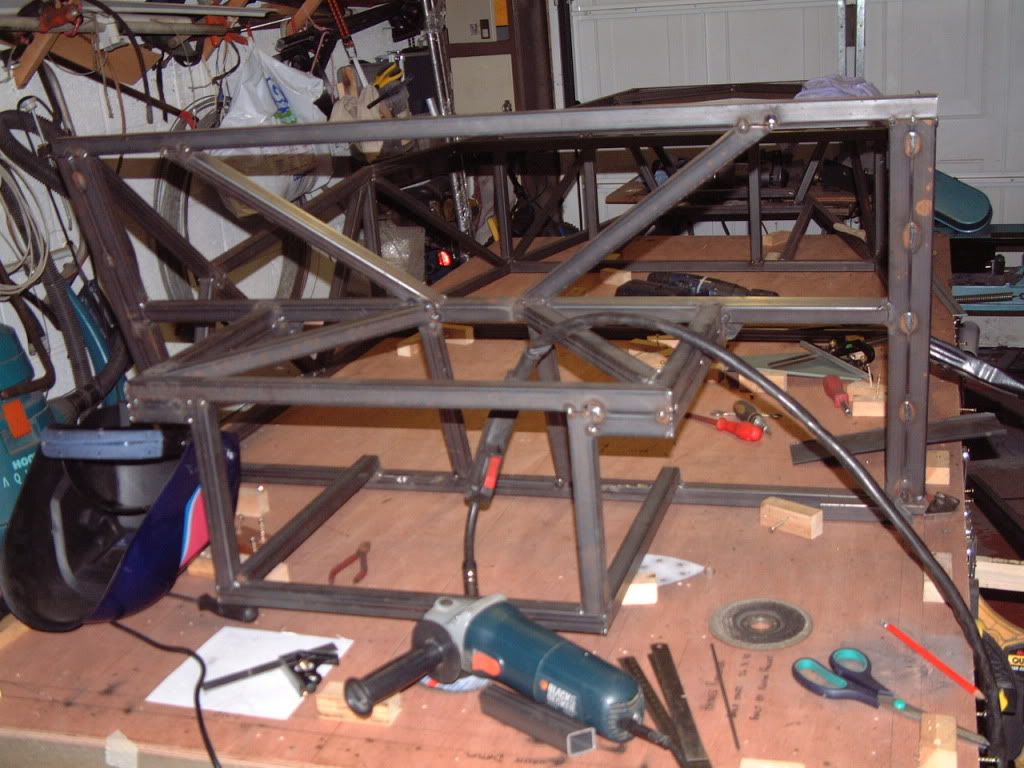 |
Nice work Kev :cool:
Very "Thrifty" using the old compressor steel :D Your chassis is looking great, its soon coming to life ..... question???? have you sat in the drivers seat area yet? :D :p sorry if my "tip" was teaching granma to suck eggs .... cheers andy |
I am so tempted Andy ...I don't think it will be long before I do the ritualistic sit in and brum brum it air steering wheel style.
I will always be grateful of any tips Andy..... wether I know them or not so do not let that stop you from offering advice, all advice is invaluable with a project like this and the willingness of people on this forum to share thier tips, cock ups etc will make this build much easier than it ought to be. Think I might be "mushrooming" tomoz coz I have just recieved my red anodizing dye this morning, will post piccies when finished them. |
Quote:
If you are "mushrooming".....for goodness sake , don,t show the photos to Ronnie :eek: he,ll end up doing himself a mischief :D Keep up the great work, will have to pop up sometime for a cuppa & a Natter :cool: cheers andy |
| All times are GMT +1. The time now is 10:22 AM. |
Powered by vBulletin® Version 3.6.4
Copyright ©2000 - 2025, Jelsoft Enterprises Ltd.