
 |
Well done on finishing. You've completed your car a lot quicker than I done.
|
Well you guys have the IVA to deal with. I just said screw it, and put it on the road.
Just took it and weighed it. With a full tank it was 1390lbs or 630 kilos |
Light weight. Mine was 740kg with a full tank fuel and me in it.
|
Took the car down the road to Balanced Performance today to get an alignment and tune. Everything went well, the alignment went perfect and actually resolved an issue I was concerned about with one of my rear uprights. So that was good. As for the tune that went great as well and I got the expected numbers... sort off. Peak was 152hp 128lb, but the air temps were pretty high, so they dialed it back to 143hp 124lb. The takeaway was that I could run these number pretty safely but I really need to add an intercooler and cowl off the front radiator. Then we can look at pushing further if this resolves the air temp readings. But I'm fine with this for now and can look into that later.
Here's one of the dyne pulls. Turn up the volume. http://youtu.be/e7DbKyHTQDg |
Did bit of work this week. While researching the issue of why the gas cap was difficult to remove on my JAZ fuel cell. I realized that my fuel line plumbing was not exactly correct. I never thought to leave any sort of vent on the fuel cell. The cell would puff up with the added gases during a hot day, thus creating the potential for an epic fireball. So I made a trip to Summit Racing on the way back from a trip to Savannah with my wife, to pick up the needed fittings. First I disconnected the return line I had installed on the fitting on top of the tank. Then I added was a anti-spill fitting to the top vent fitting (prevents fuel from spilling in a roll over. Next I stuck the return line into a gas can and turned on the engine till it pumped all the gas from the tank to the gas can. This made life a million times easier when it came time to remove the cap I had installed on the second fitting on the sump. Once that was done I made up another steel braided fuel line attached it to the existing return so that it could reach the correct fitting. Thankfully I mentally worked through this process while on vacation and it was much easier than I had feared when I first realized my mistake. Finally after filling up the tank and driving it around, I realized that the new vent was now letting a bit of gas out under heavy braking, so for a short term I attached a silicone line to it so fuel won't make its way onto me.
Another fun fact I learned while draining the fuel, If you are using a 8 gallon jaz drag cell, and in my case a 6" long sender then a 1/4 tick on the fuel gauge will equal round about 1 gallon of fuel. This means that when my gauge reads empty, there is still almost a 4 gallon reserve. Not really ideal, and may be something I go back and correct later on by finding a 7-8" sender... if they exist. Lastly, this morning I took the car to the monthly Caffeine and Octane car show hear in Atlanta. Had a great time and got a very positive response. Seemed to always be a crowd checking out the car, and that was pretty impressive when you consider there were probably 500+ cars of packed tight over a 1/4 mile worth of parking lot. Also saw a Westfield and a "Real 7" in the mix. 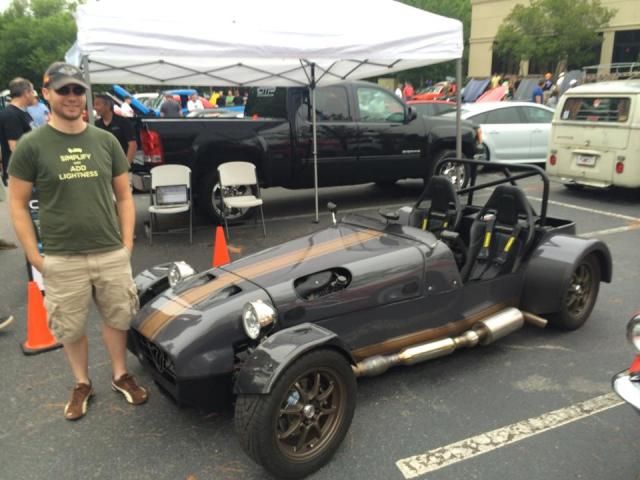 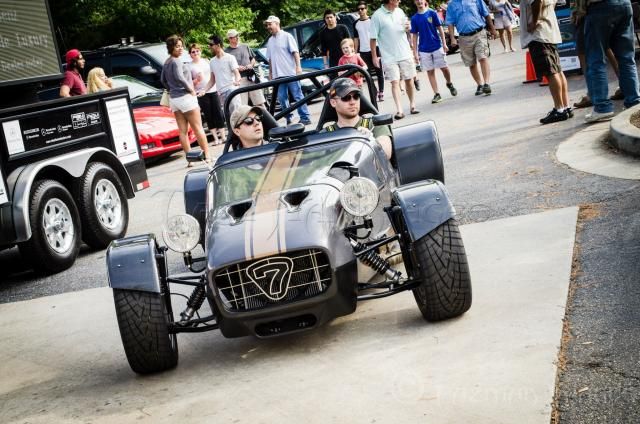 Check this out some guy did a 360 degree shot of the car when I was out looking around. Pretty cool. http://100digitalcreativity.com/360d...-106&v=45&f=90 |
Ok well now I'm just getting fancy.
After a few longer drives, I realized that having gps as well as a way to know if someone is calling me would be really nice. If you have ever driven in the Atlanta area you know its a must have. I once was heading north on a road only to find a few miles later I was block south of where I started without ever turning and without noticing any major change in direction... apparently there are a few worm holes in the atlanta area. Ideally I would have just used my phone, but trying to fish it out of my pocket with the 6 point harness was damn near impossible and keeping it balanced on the tunnel wasn't happening. So I went to best buy and took a look at navigation units and found exactly what i was looking for. Here's a few of the key features: - Voice Guided Nav - Bluetooth (will be able to see if someone is calling versus wondering if that vibration in my pocket is vehicle related or phone. Doubt talking to someone will actually work. - Realtime traffic updates - Weather (oh yeah this feature pretty much sold me) Brought it home, and saw the it fit perfectly between the dash and tunnel. I just need to find a method for mounting it. So I fired up the 3d printer and after a few revisions, I had a good solution. 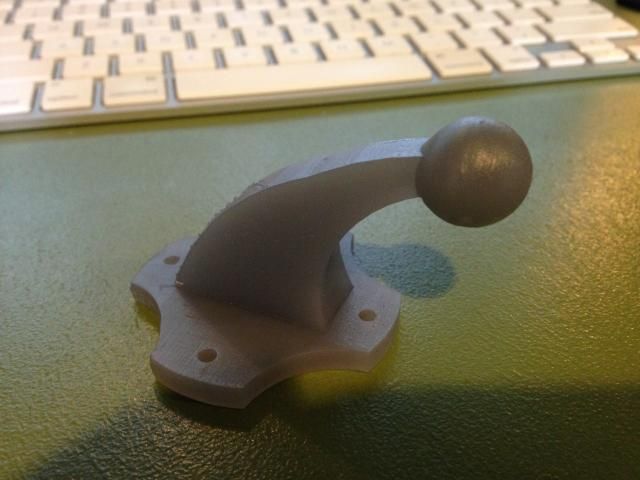 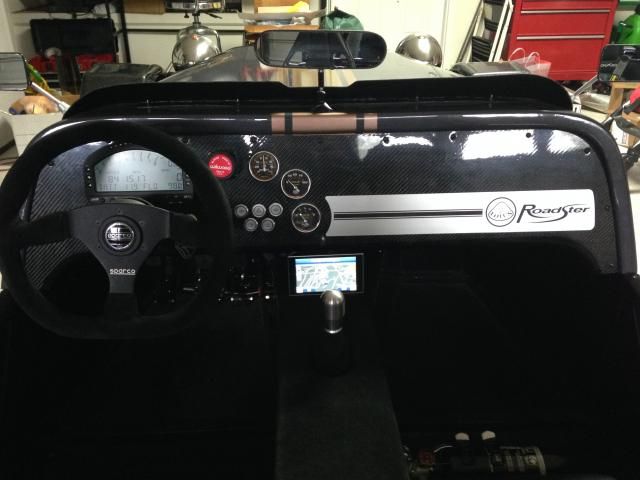 |
Another shot of the nav.
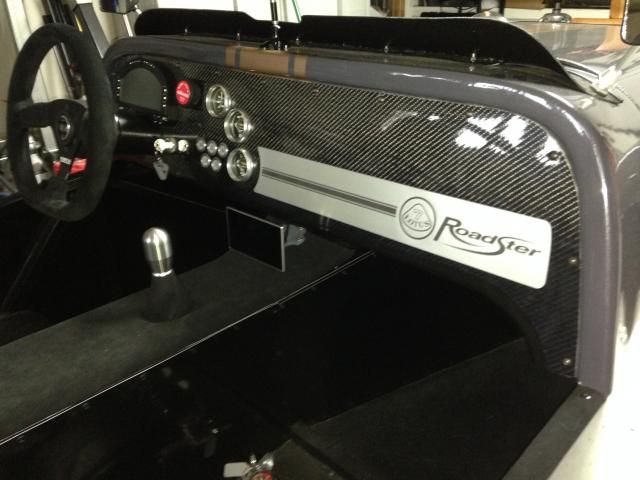 Finished up the rear panels in preparations for the vinyl cover. I covered the particle board with a healthy coat of resin which gave me a nice smooth finish, then gave it a coat of gloss black spray paint. This should do a decent job of sealing out moisture. 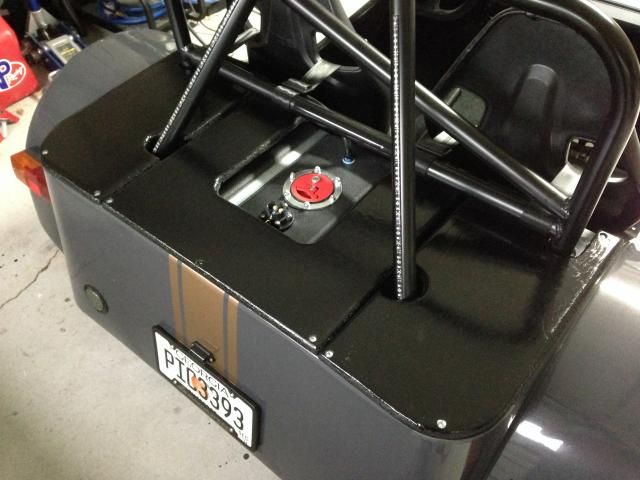 Finally I decided I need a keychain to match. So I took the seven logo and 3d printed out a key ring, then gave it a nice coat of gold paint. 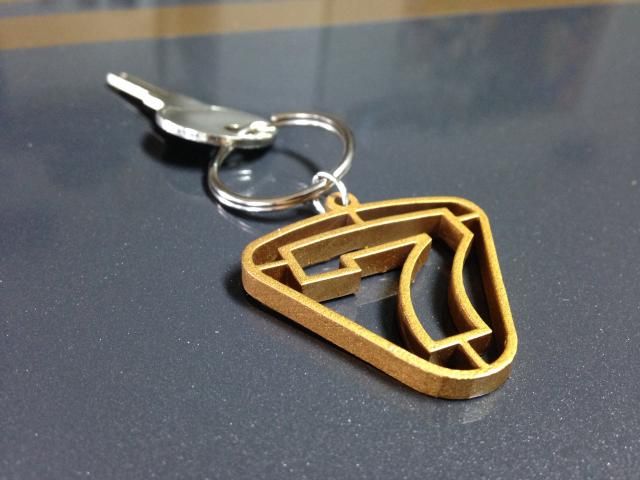 |
|
Been making some tweaks to the car. If you have checked out the build log, you would have seen my engine looked like this.
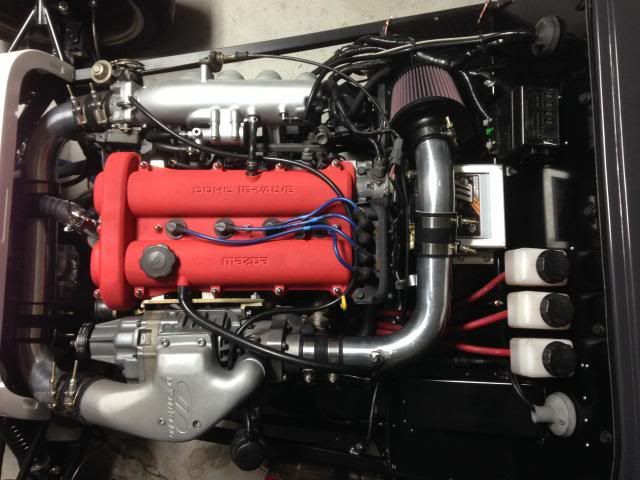 Well I had done this pretty early on before I knew what the color scheme would be for the car. So last week i decided I wanted to do something a little more fitting for the car. So I tracked done a valve cover for a early 90's Mercury Capri, with a bit of work these can give it a nice vintage look and since the used the motor from the miata they are almost a direct bolt on. I then proceeded to strip, clean, paint, and modify it to work with the miata. So here it is, its not perfect but pretty darn good. 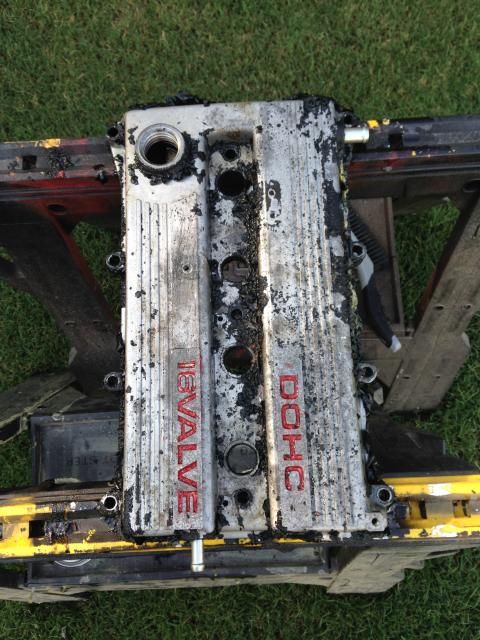 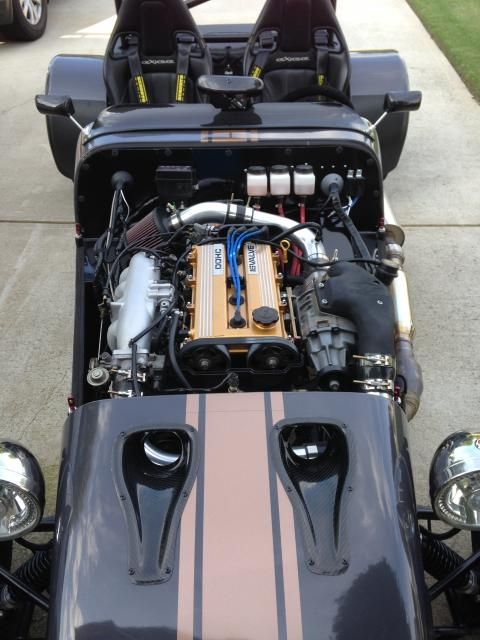 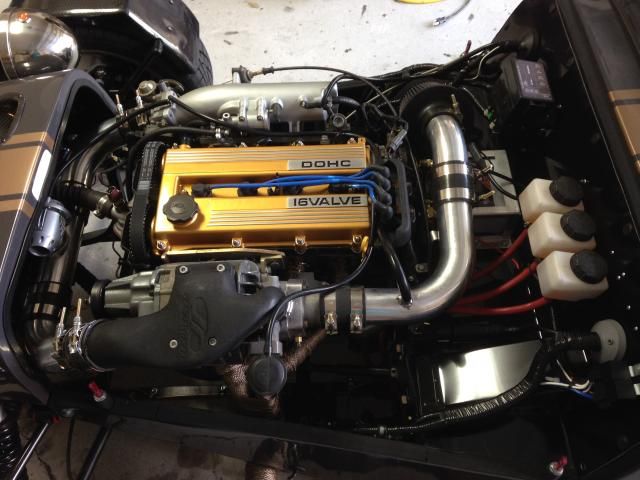 |
Been slacking on keeping this build log sync with my other build logs. So here it goes.
Sept. 2 2014 It never ends. After months of searching I finally tracked down an off the shelf intercooler that would actually fit the 7. Its a tiny but thick thing from a Toyota MR2, but it fits. I totally lucked out and found an ebay store the same day from a guy that was unloading a bunch of lightly used carbon fiber oil cooler ducts. One of which fits nearly perfectly and has duel inlets. I did some initial recon and it will fit once I assemble some new piping. But since I'm intending to use the car for the next few weekends,I'll wait to install till I'm clear of everything. You can start to see how this will be configured, I think it will get enough air flow from the NACA ducts to work. At least shouldn't get worse. 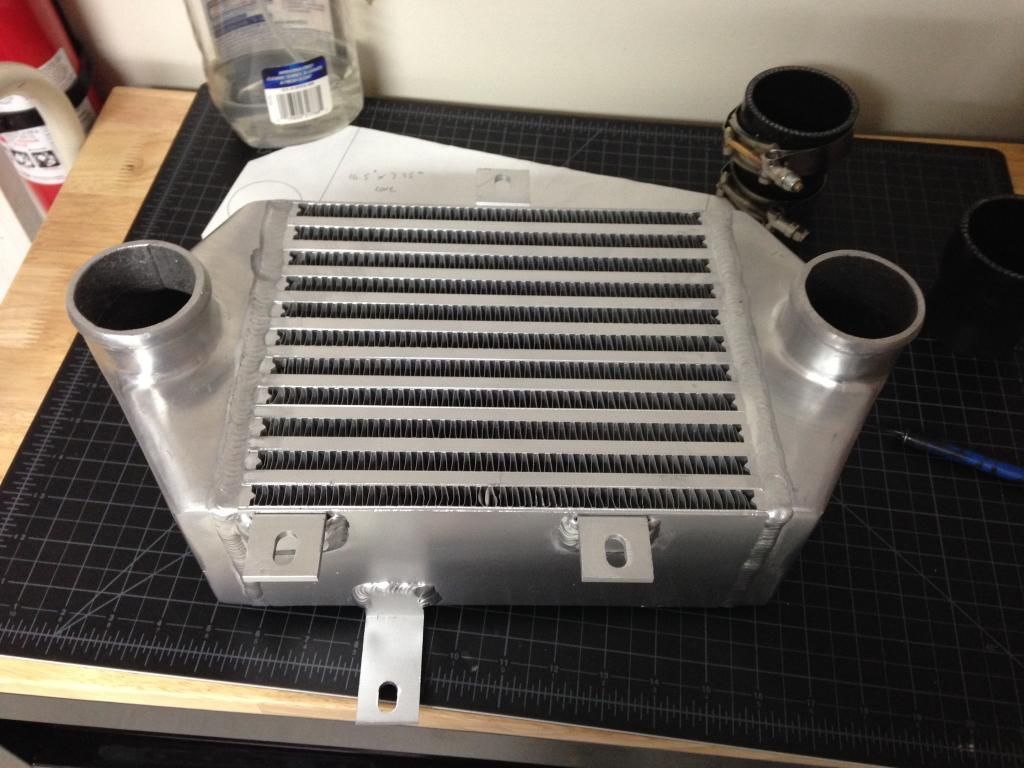 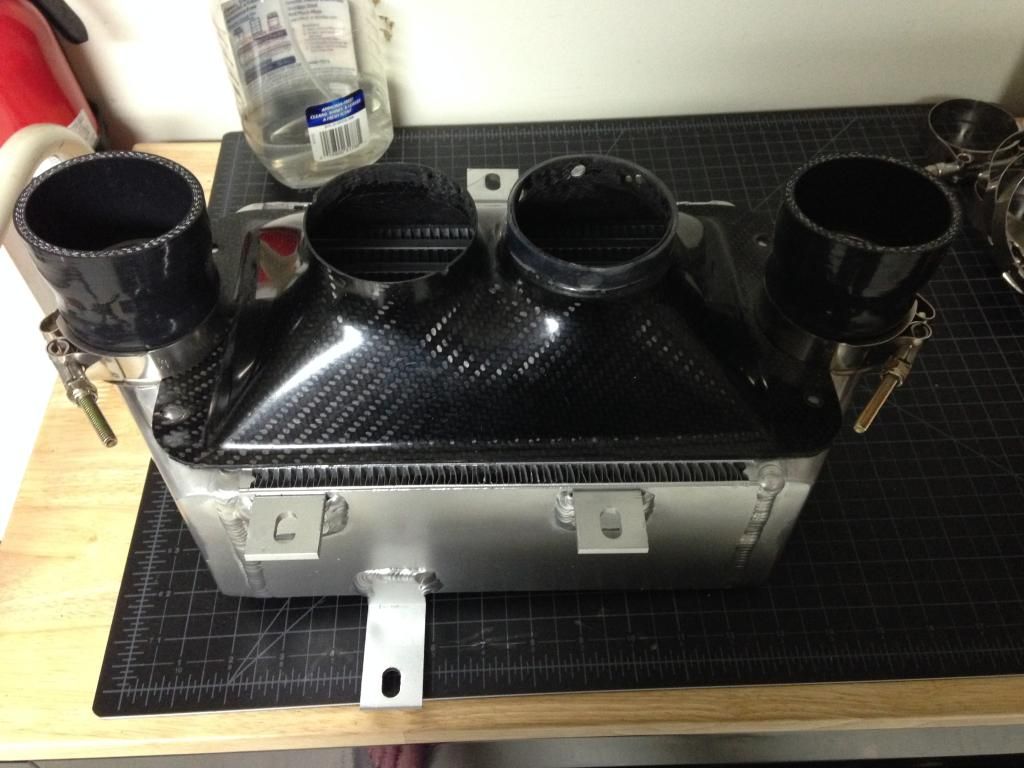 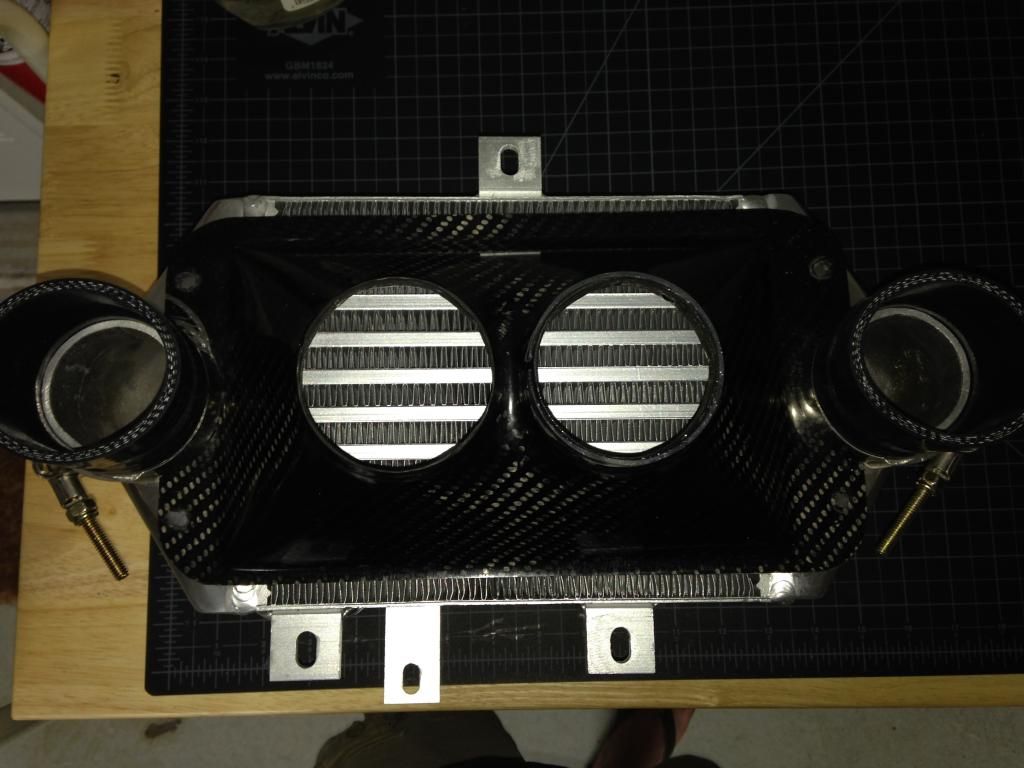 |
Sept. 19th 2014
Finished up the intercooler setup today. This thing just fit, and really is a cool setup. Now I just hope it works the way it was intended. Did a long drive this past weekend of about 200 miles and managed to cook the teflon coating off the supercharger. So it was time to do this install. 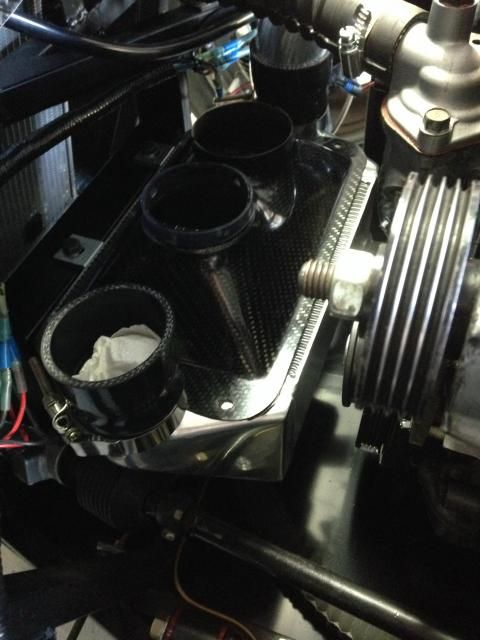 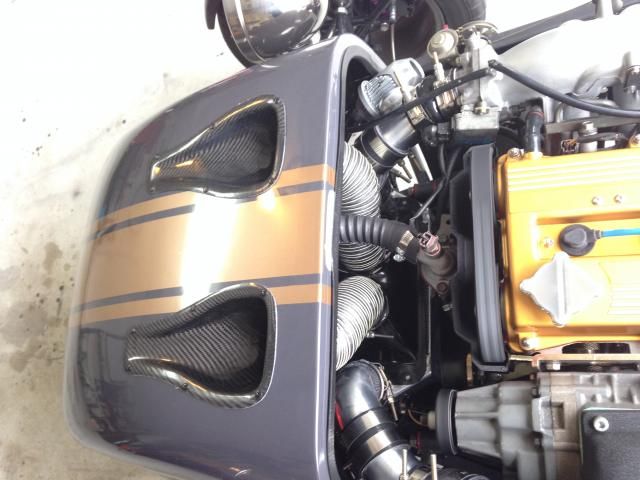 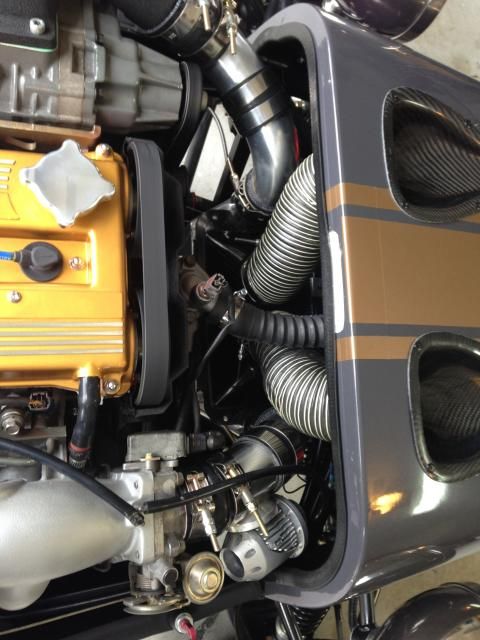 |
Oct. 6th 2014
Just got back from the second dyno tune to adjust for the intercooler and it was a great success. Air temps were 100 degrees cooler that the previous tune. And because of that and finding a few areas that were leaking boost, I am now making 25 more hp and 10 torques to the wheels. Final numbers were 167hp 136ftlbs, there is still room to hit the 170's but the injectors are maxed out at this point. Blue lines are from a few months back. 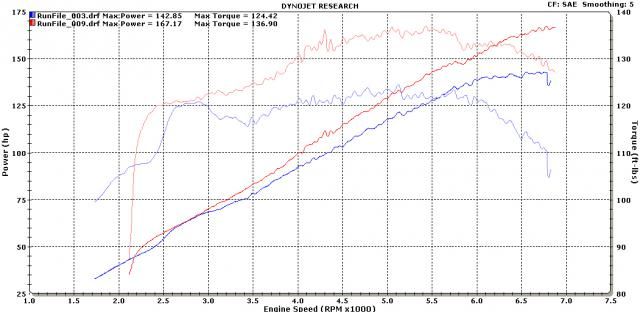 Shot taken at a recent car show. 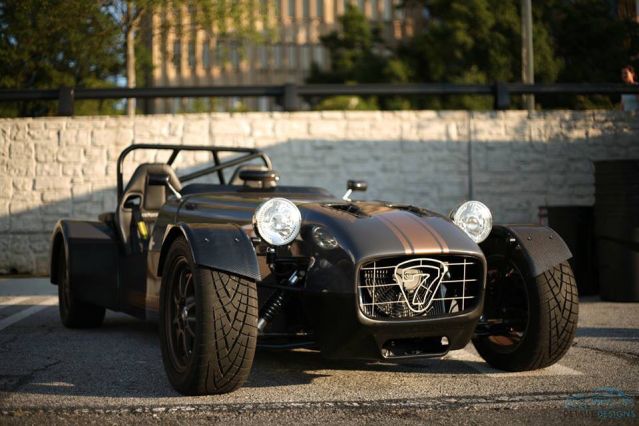 |
So I completed my first track day in the car and did more or less a shakedown of it. Everything held up extremely well other than the cooling system. During my second session the engine started getting super hot... I mean really hot. I was seeing temps over 260 degrees, so at that point I shut it down and brought it in. Thankfully doesn't appear to be any head gasket damage, so I think I got lucky.
So I have now been addressing that issue. I have ducted the radiator, will be switching to a water/ water wetter mix, and performing a coolant reroute on the miata motor. I regret not doing the coolant reroute before, because I did not leave myself much room to pull it off. With all that said, the car is very fast. So I'm happy. Video: This was from the very first session, so disregard the terrible driving. https://youtu.be/-ymMPKPA4HU 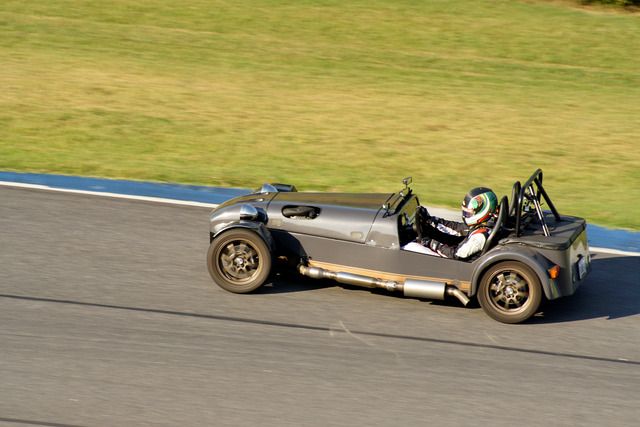 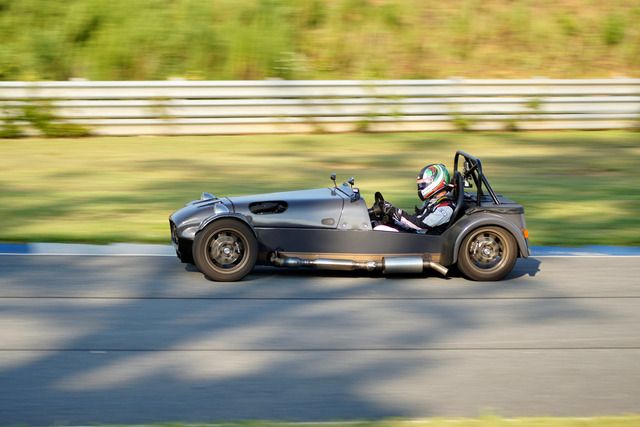 |
| All times are GMT +1. The time now is 03:48 PM. |
Powered by vBulletin® Version 3.6.4
Copyright ©2000 - 2025, Jelsoft Enterprises Ltd.