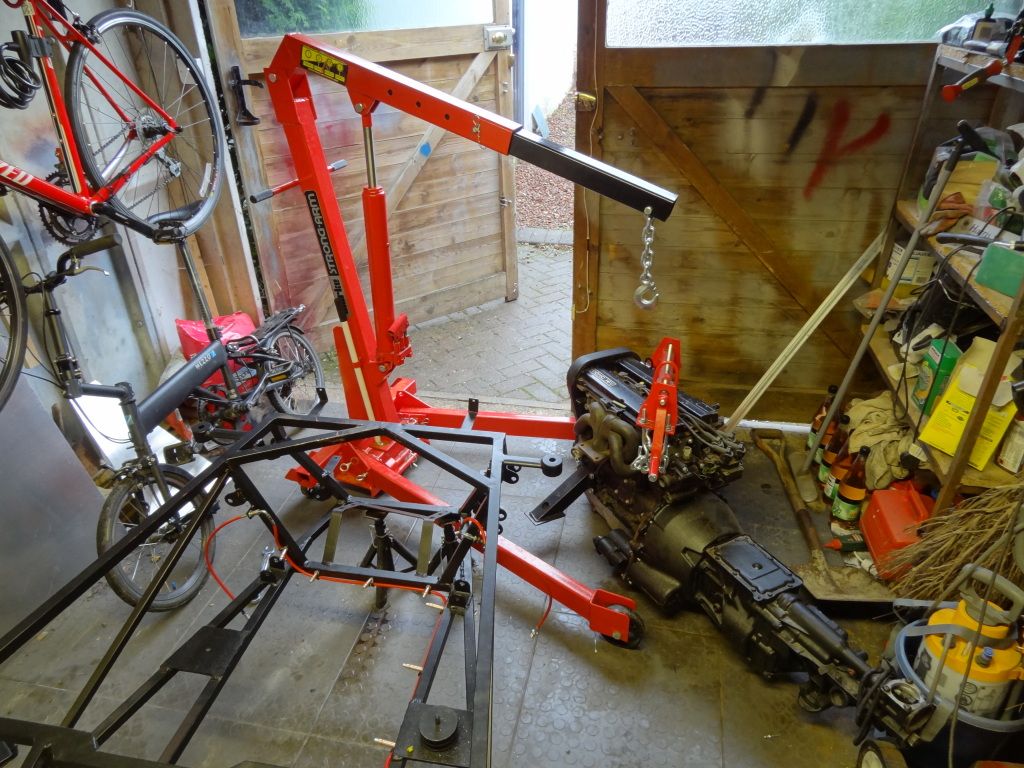
I have to say it's not been too bad up until recently when all of the parts started arriving....but soon they should all be in place and give me a lot more room. I'm looking forward to moving out so I can get my own garage without all of my parents stuff in the way....
|
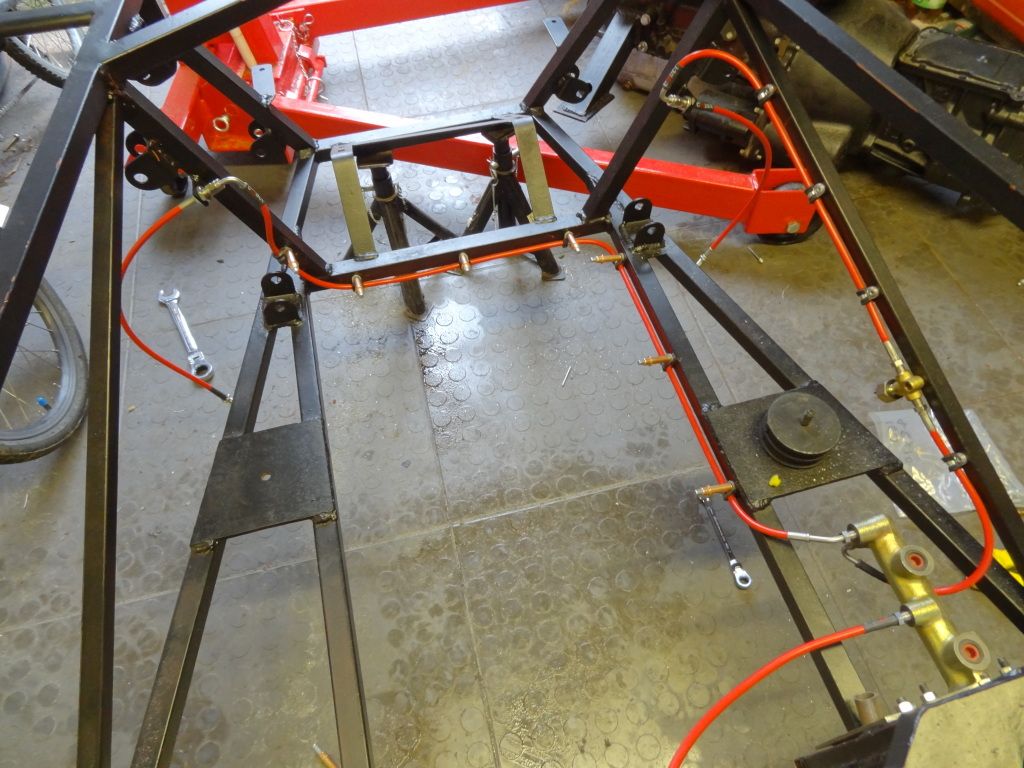
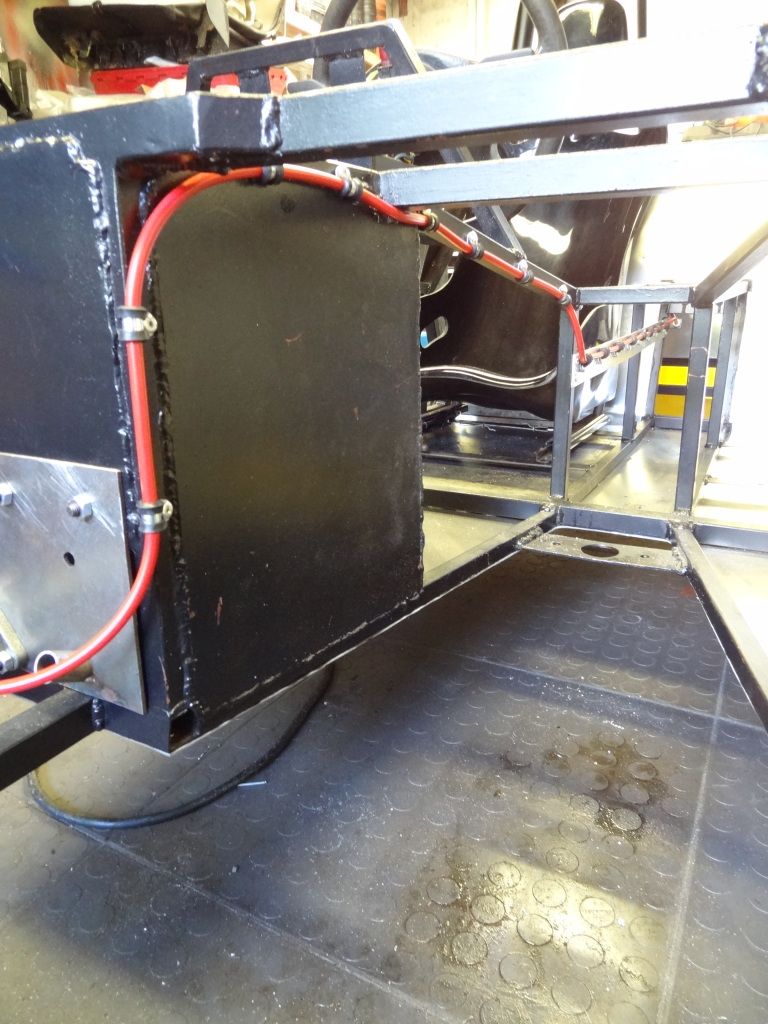
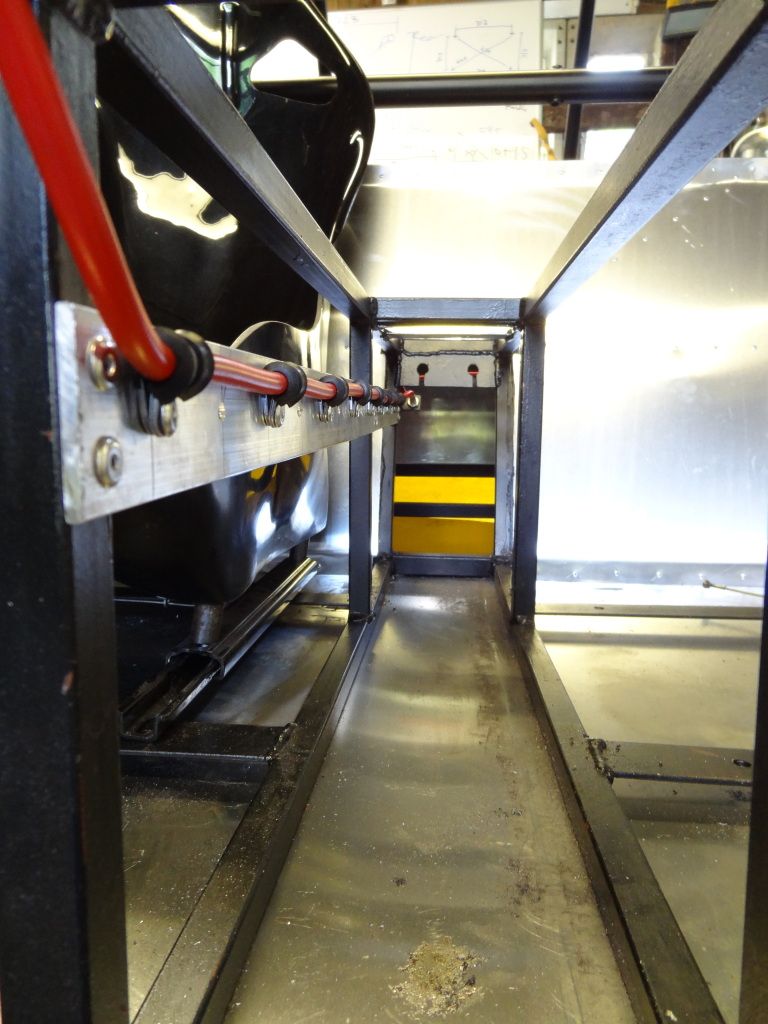
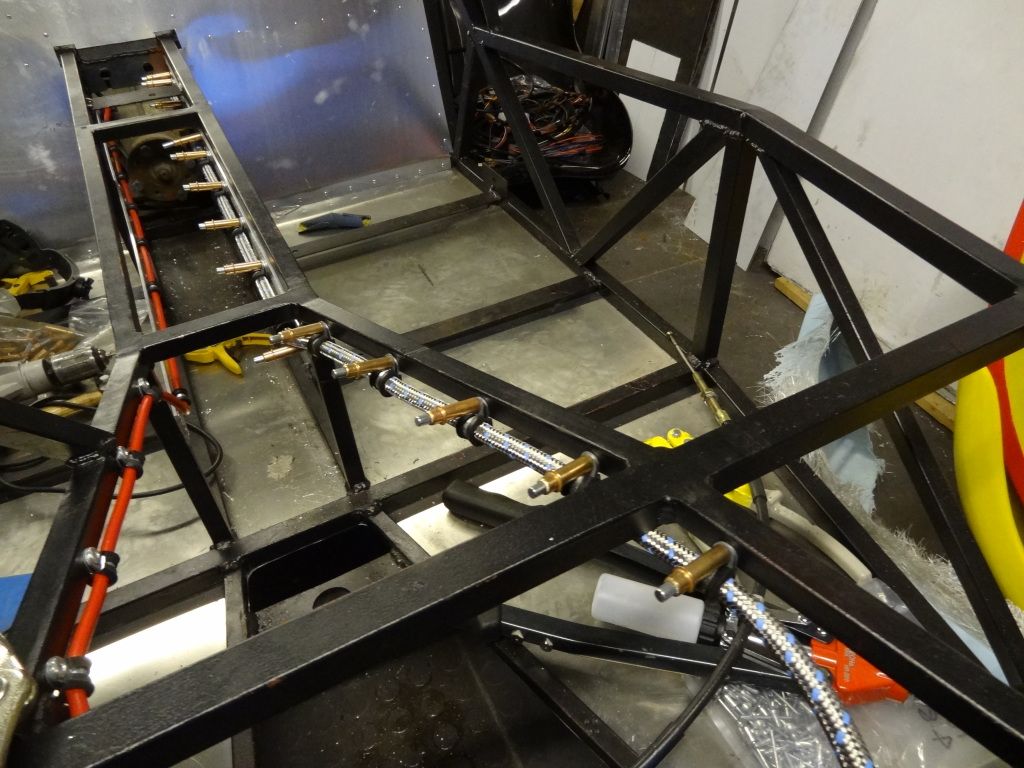
I've now managed to get all brake lines mounted except for the one down the tunnel, I need to drill holes in some ali strip and then rivet that into the tunnel. The rest of the brake lines are held in with Cleco fasteners until I get round to buying a new riveter tomorrow, here are some more pictures:
   |
   |
Very neat Simon, really!
And thank you for the pictures, it is very nice for me to see the first complete brake line set from us fitted on a Haynes Roadster :) And I'm glad that everything looks to be fitting well now! Could you, when you have time, show a picture of the bulkhead fitting through the additional bracket you welded under CP14 please? I'm dying to see it! Thanks. Hope to fit my own brake line set before the end of this summer (which has not started yet in Sweden :mad: ) And the rest of the car looks terrific too :cool: I'm amazed how quick you go with your build, congratulations. |
Do you have a certificate to say the hose is suitable for brake fluid? I got asked this on my IVA. They wouldn't accept a reciept either, Chadderton wanted an actual certificate of conformity! They just accept that copper is suitable, but asked about my flexi hose to the calipers.
|
Sylvain, I will make sure to take a picture tomorrow off it, I was holding off until I had the aluminium strip in place to make it look a bit neater. Feel free to use my pictures on your site if you like, I can send full res pictures via email if you'd like to use them and some more up to date ones when I have them riveted in place instead of held with clecos.
Deezee what did you say about your flexi lines? Did you get away without a certificate? |
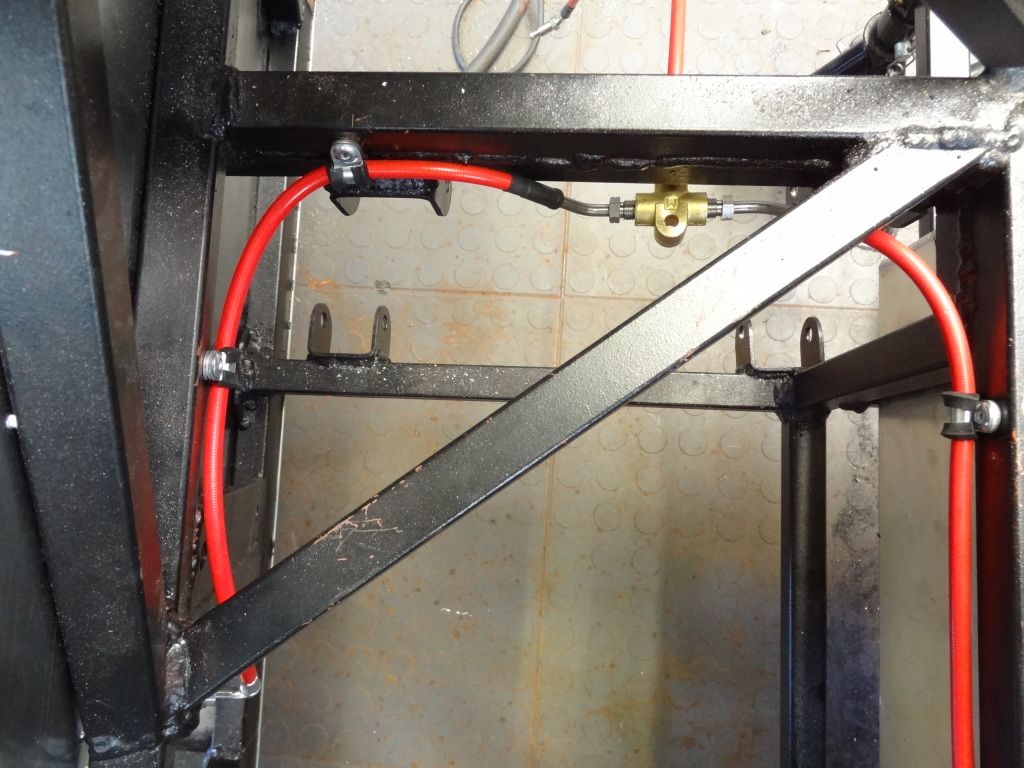
Sylvain, as promised here are the pictures of the bulkhead bracket.
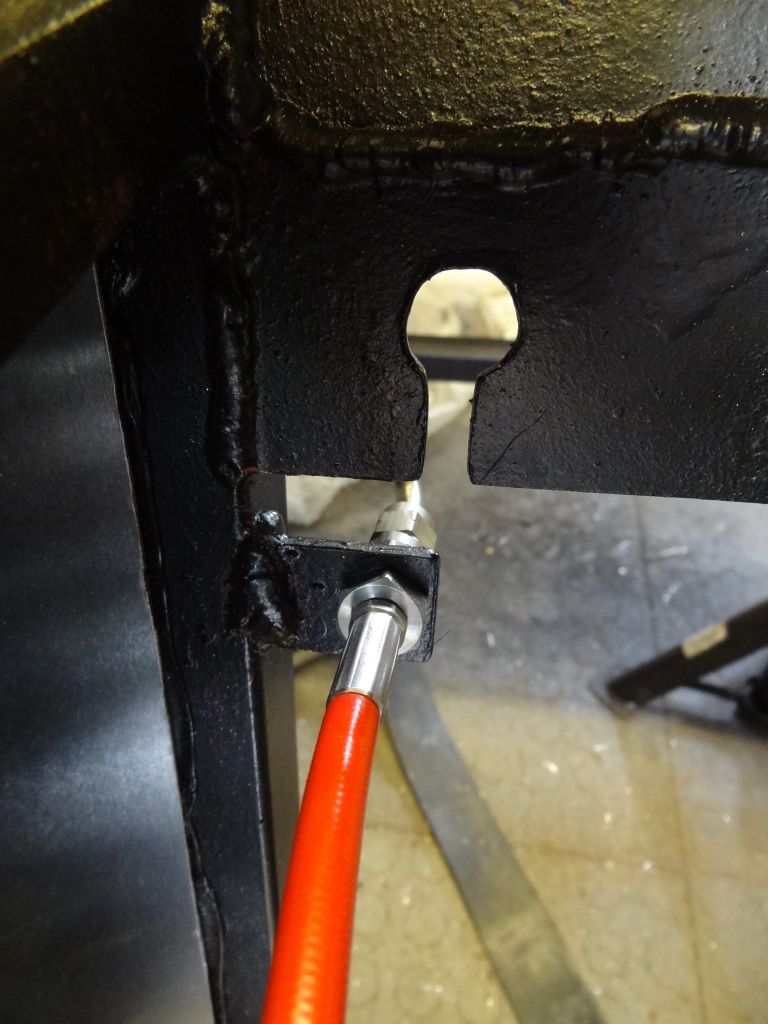  |
Ahh very nice. It think it is a great and neat solution rather than tuning around CP14. Thanks for the pics :)
Quote:
Sorry... more seriously, regarding the certificates, no worries, the hoses are road approved and I will supply you with all the necessary paperwork, including the certificate saying the hose is brake fluid resistant. I sent you an email regarding this. |
Sylvain....it might be a good idea to put up a pdf or jpg letter of the conformity of the pipework for those of us who have decided on that long pipe down the trans tunnel.
|
Quote:
Thanks. |
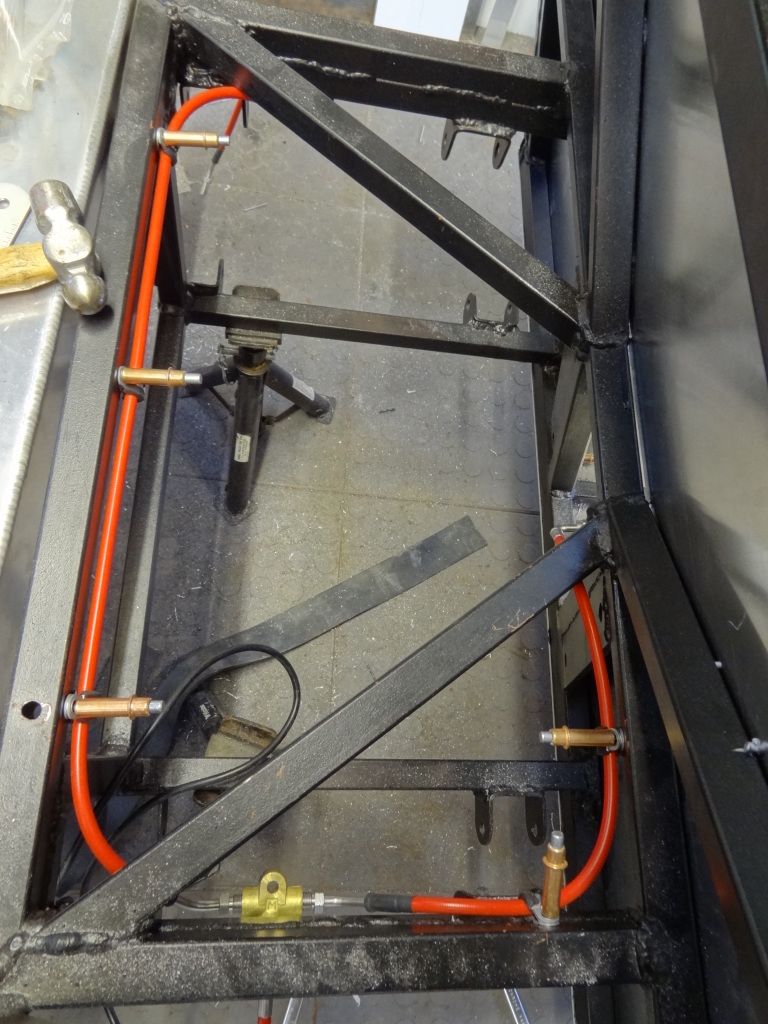
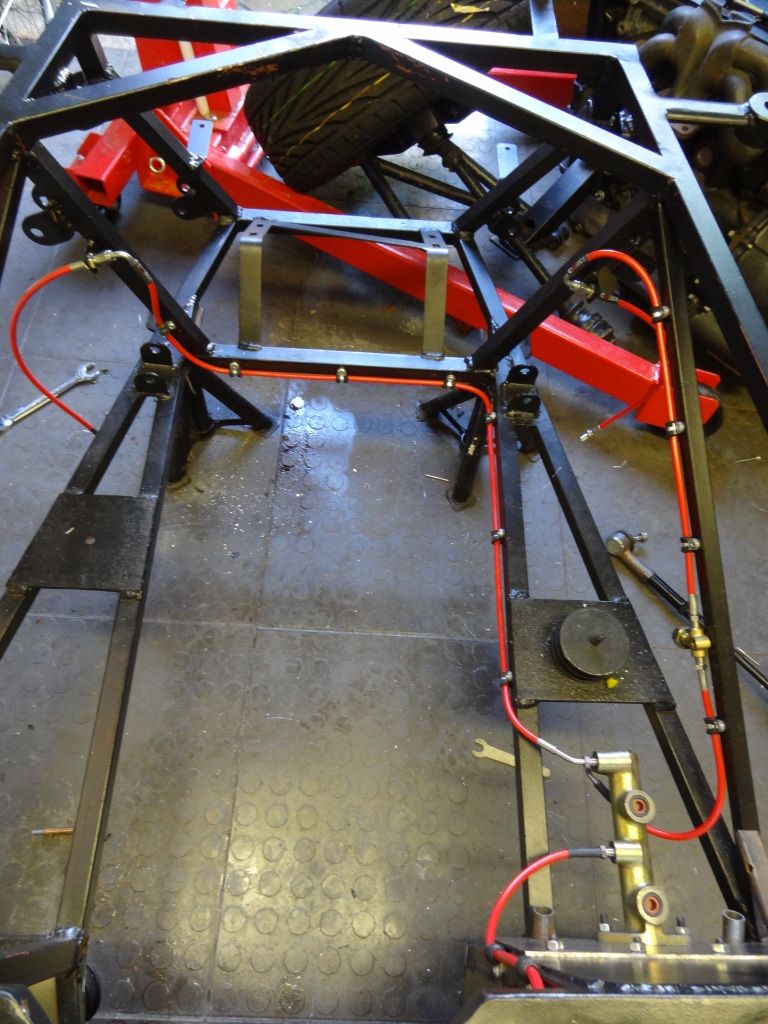
Well after buying a long armed riveter from axminster tools I have now managed to rivet in all of my brake lines, I have to say I am very happy with the job, they look good and weren't difficult to install, it's nice to be able to fit parts rather than fabricate them. Here some pictures:
    |
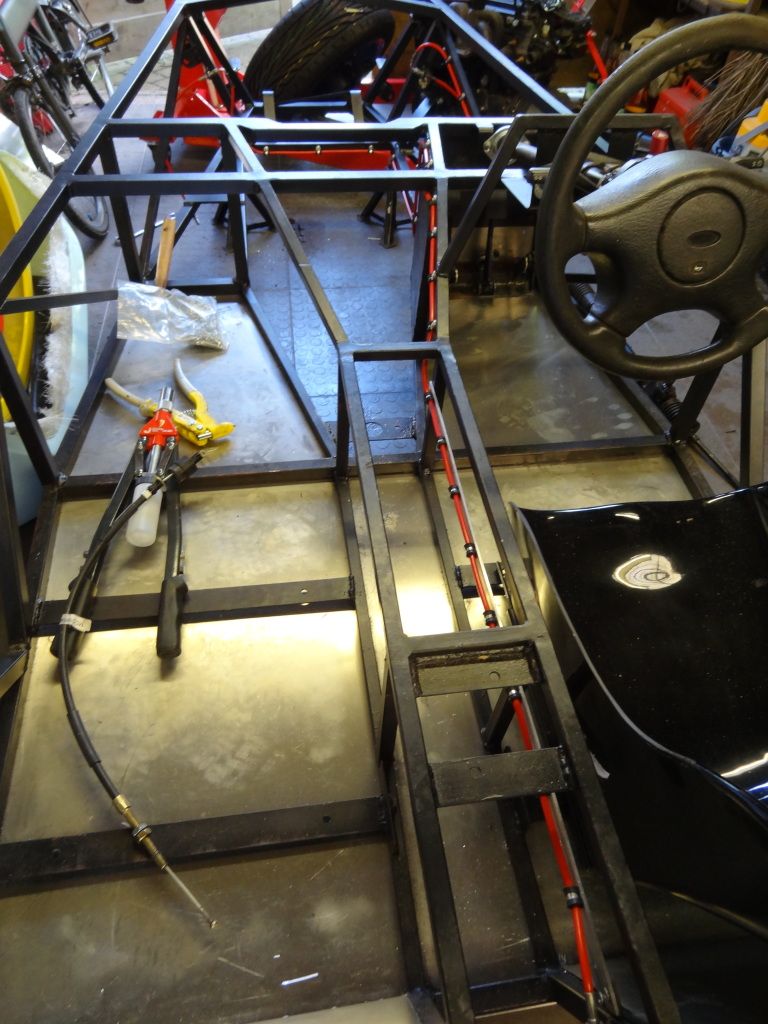   |
Now that the brake lines are done I've started running the fuel line, again I've used another 40mm strip of aluminium running the length of the straight part of the tunnel to run the fuel line:
 I just need to figure out what what round the fuel pump goes before I mount that... |
The lines look ace.
TT |
Quote:
Well I've now finished riveting in the fuel line and have created the fuel pump and filter mounting plate and now how them mounted. I just need to cut the fuel line to join it all together and order another 4 hose finishers so that everything matches. 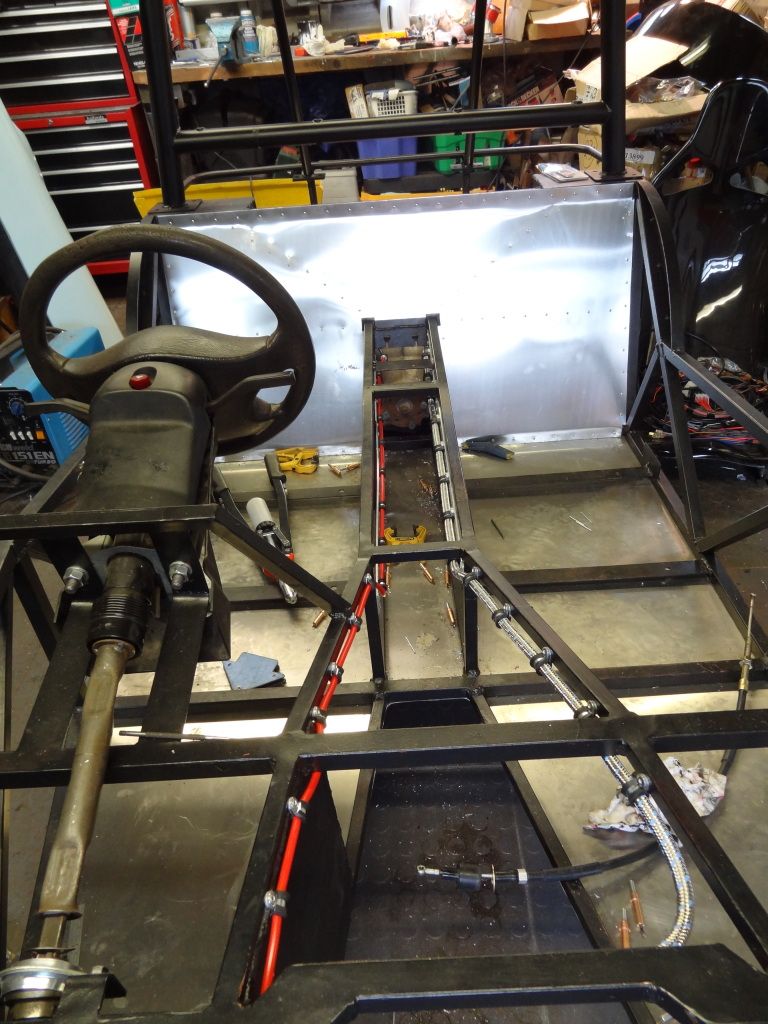 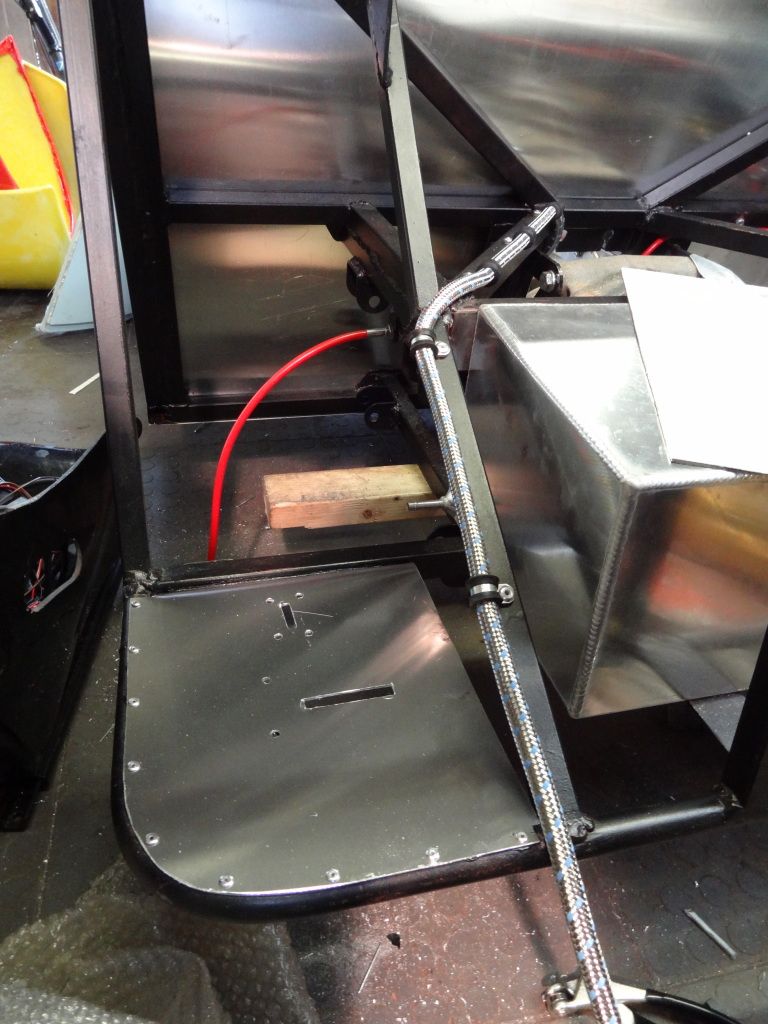 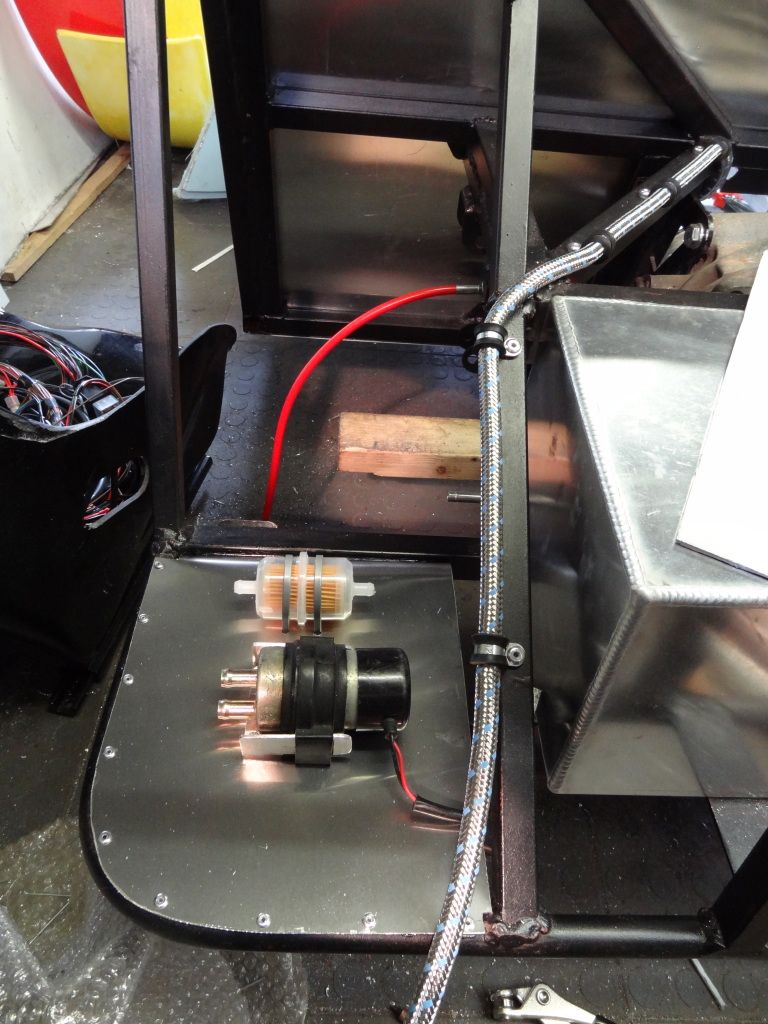 |
One thing to say :cool:
Top notch installation of all your lines. I bet it makes life easier with the flexible lines..:) Is there still plenty of clearance between gearbox and pipes as they look a little bigger than hard lines...? Looks like this could be the way to go for new builders. The only other question is this OK for the IVA with using all flexible lines? In my opinion it should be as we use flexible lines between callipers and chassis. Nice build:cool: Johno |
I haven't actually trial fitted the engine/box with the lines in place yet, but when I received the lines I messed around with the brake lines and there was plenty of clearance if I used current routing, there should hopefully be plenty of clearance for the fuel lines but tomorrows job will now to be to refit the engine and make sure!
It will also give me a chance to measure up for the drive shaft and get that ordered on Monday morning. I will take some pictures tomorrow with the engine and box fitted. Also the flexible lines will be fine with IVA as long as the correct paperwork is used as you need to have a certificate of compliance for the hoses to ensure they are to the correct standard. The lines were very easy to install, however it did require a bit of effort before hand to decide on routing, what fitting and fixtures I wanted, if I wanted a hydraulic or micro switch brake light, thread sizes ended up being a very big deal as it turned out I ordered a Sierra master cylinder instead of a Fiat 124 (supposed to give a better brake pedal) and the threads were different, I only found out when I received the lines but Sylvain was very helpful and provided a really good service and got the fittings changed for me. |
hi tatey
those brake lines look excellent. 2 questions, is your rear brake set up discs or drums?, and how much did the pipe set cost? cheers martin |
The rear setup is drum and it cost me about £260 (including delivery and VAT) for full brake line setup + stainless braided fuel hose + hose clamps/finishers + rubber lined p-clips for brake and fuel hoses + stainless braided hose for master cylinder to remote reservoir + push fittings for master cylinder + brass t-piece. It's definitely a more expensive option than copper lines but definitely seems worth the extra money!
|
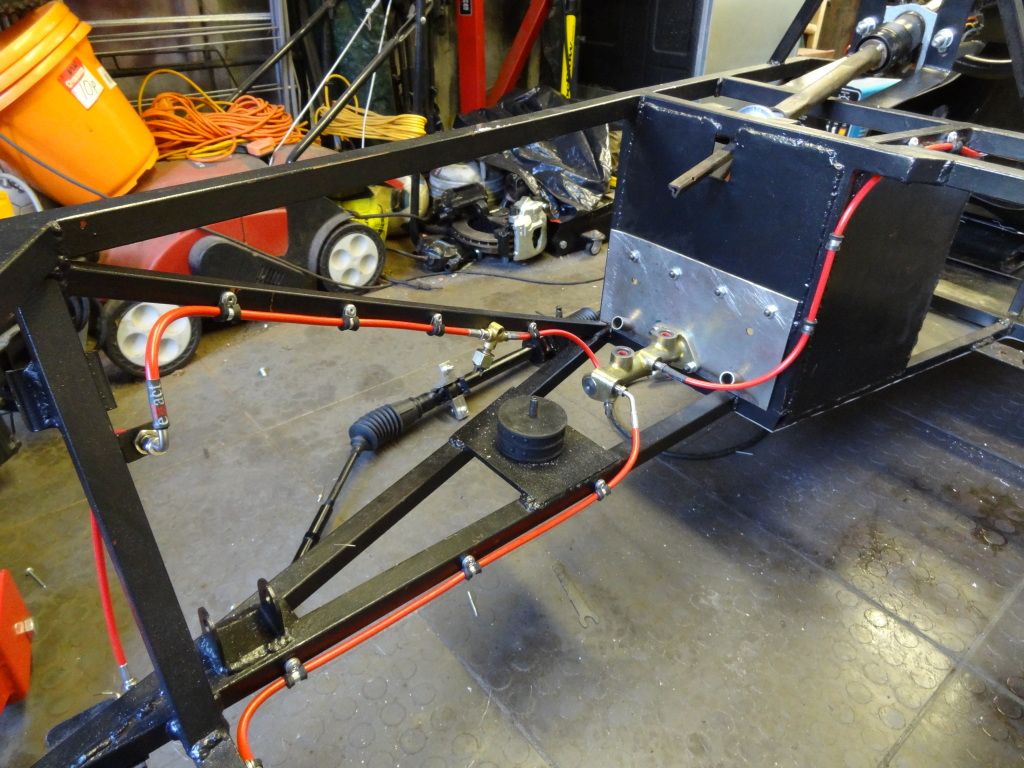
I've just been out and refitted the engine and box and everything has copious amounts of clearance except for the two p-clips either side of the gearbox by the reverse switch, it should take 2 seconds to move them, to increase the clearance, I also need to trim a bit off of aluminium strip to allow for the reverse switch as at the minute it is touching and preventing the gearbox mount from being in the correct position, again a 2 second job to do, but other than that everything fits perfectly.
|
I haven't had a chance to do much work to the car over the past week as a few of my mates are back from uni and I've been busy mountain biking, visiting a car show, learning how to row and more importantly, spending time at the pub!
However today I went to my mates house and he gave me a hand sorting out my scuttle as it needs all of the excess fibreglass cutting off with a dremel as well as applying a bit of clear gel coat to a few air bubbles in my carbon aeroscreen. I also decided while I was there that we'd try and make a boot panel and dashboard, so I've now ordered some carbon fibre fabric, some epoxy, a bit of 3mm coremat and finally some mould release wax. The plan is to have the top ply carbon fibre, the next coremat with a couple of plys of fibreglass on top, that way it should look like carbon but bring the cost down as fibreglass is about £5 per square meter compared to £30 of carbon fibre... The plan is to make them next weekend so I will see how it goes and take some photos of the process. But hopefully I will have a carbon dash and boot panel for £85 with some carbon left over. |
Well it's been a busy summer working at the Olympics and back down at Triumph but I got back on Friday and started uni on Monday but have finally managed to do some work on my car! The fuel tank securing brackets are now finished, they are made out of 3mm x 40mm aluminium with some 3mm x 50mm rubber strip between the tank and the brackets to make Mr IVA man happy, I was surprised at how good they came out, they seem to look the business and the tank is going no where! I just need to make some compression limiters for the top bolts and they will be complete.
I have also moved the position of the fuel line and brake hoses that were running very close to the gearbox (they were touching...), I just need to cut out a recess in the aluminium strip for the reverse switch and they will be complete. I think my next task will be to run the wiring, secure it in place and then continue making body panels. I have held off making the carbon fibre as I am currently trying to locate a vacuum pump I can use as my test piece contained a lot of pin holes in the surface which I wasn't too happy about, so I think the wait will be worth it. I think my university has one, so I just need to find someone who will let me use it. 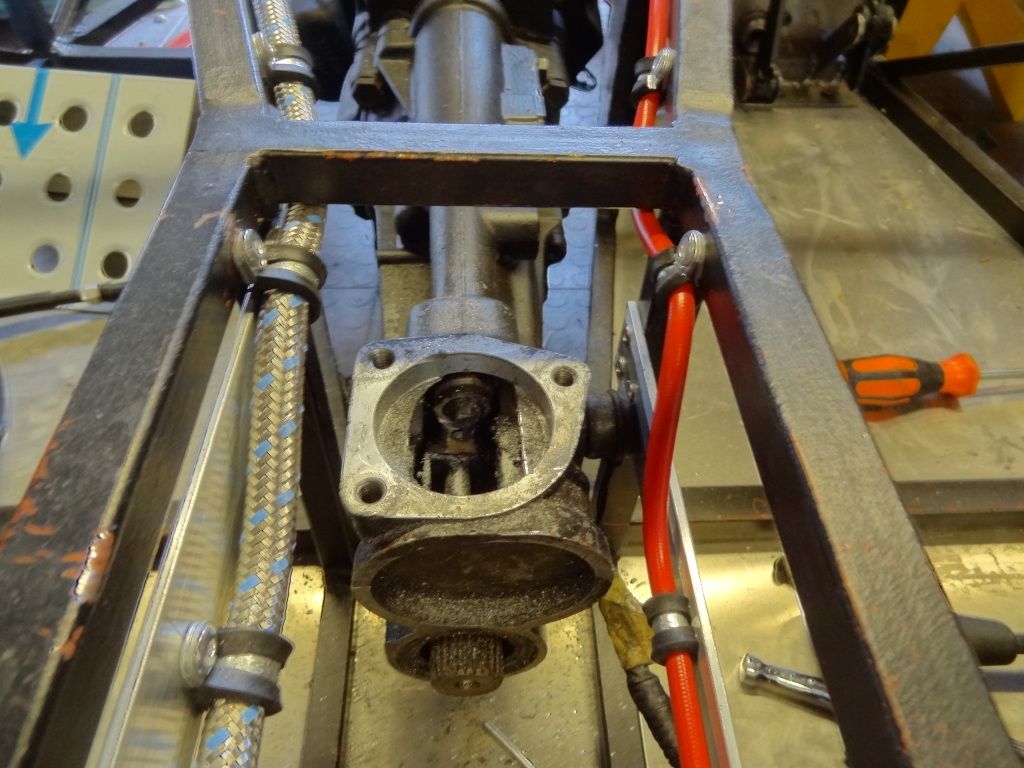 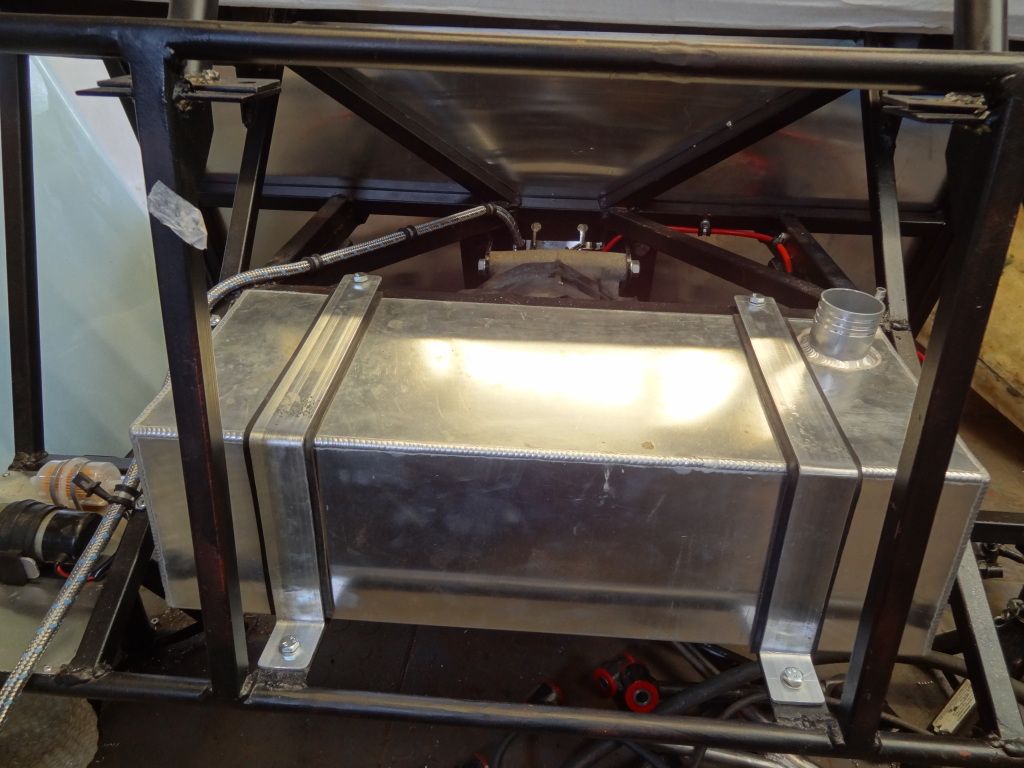 |
Good to see you back Simon.
I tried to find you in the crowed while I was watching the Olympics, but no chance :D The fuel tank brackets look very nice indeed. Like it :) I will PM you about the loom you ordered for your Roadster. |
Well I've now ordered my propshaft from Dunning & Fairbanks for a total cost of £138 delivered including delivery, it should be here in a week or two.
I have also started the task of running the loom and its safe to say it is going to require a bit of a learning into car electrics! I don't think it's going to be too difficult but I've never really done any wiring before so it's all new to me. I am first looking into the routing as I have now figured out what each part of the loom does, and then I will get it all in place with p-clips and then start crimping components together once I buy a decent set of crimps. |
Good luck with the loom it can be quite daunting at first. Remove as little as possible, the car audio system, electric windows and central locking is easily removed and takes out quite a bit of the loom. But dont forget you've got a lot of room in the scuttle to tie away the excess in the loom and can be done quite neatly.
All the Best........Andrew |
Spud, I took the easy option and ordered one from Premier Looms, £170 well spent if you ask me...it comes with wiring instructions with all of the colour codes on it so should be relatively easy to do, whether it is is another mater :p.
|
Eeek! My body loom is about 10 wires running along the transmission tunnel to the rear lights, fuel sender and fuel pump, about 10 wires running to the front lights and radiator fan, Sierra's fusebox in the middle, and a reshaped engine loom. Took a while to sort out, but was not complex at all. I don't see how a pre-fabricated loom could justify such a cost, you will still have to splice it with stalks, senders, switches, etc.
|
I didn't have a sierra loom to start with Alga and I priced up building my own, bearing in mind I wanted all of my cables to be different colours so it would be possible to fault find at a later date along with a couple of small fuse holders etc with all of the crimps needed along with the trunking, cable ties etc it seemed stupid not to go for the ready made loom.
|
I've now finished my right hand side tunnel panel and fitted my OBP passenger footrest, I was going to start the rear tub and other panels this weekend but have decided that I will wait until my 10m of corrugated cardboard arrives (only cost £5 so I think it should be worth it. I've also ordered some rivnuts and some more nuts, so I should be able to start fitting bodywork shortly.
|
Quick update, I've been working on the rear panel as of late and it's safe to say I need some more practice at sheet metal work as I'm not that good at the minute, but hopefully by the time I've finished all of the alu work on the car I will be a dab hand...I just need to sikaflex the panel and roll the bottom end and it will be complete.
My new exhaust has arrived as well, it is one from CBS that a member on LB sold to me for £110, it's in really good condition and has only covered about 3,500 miles (he bought a bigger one for his BEC install), it is also repackable and the mounting system can be hidden so it should look a lot better than my original silencer. I am hoping to make up a bracket for it this Saturday. My propshaft also arrived late last week and has now been installed, which has also allowed me to tighten up the rear hub nuts so my rear wheels no longer wobble about like no ones business, they still need torquing up but I won't be able to do that until I run the handbrake cables. I will try and get some pictures this weekend as it is starting to look a lot more car like now. |
Another update with pictures! I've now installed the clutch cable which is nice and secure, but it seems that the cable is slightly too long as it is off the adjuster when in the correct position, I need to look into this and decide what I'm going to do, worst case I can cut the end of the cable and shorten it using a solderless nipple.
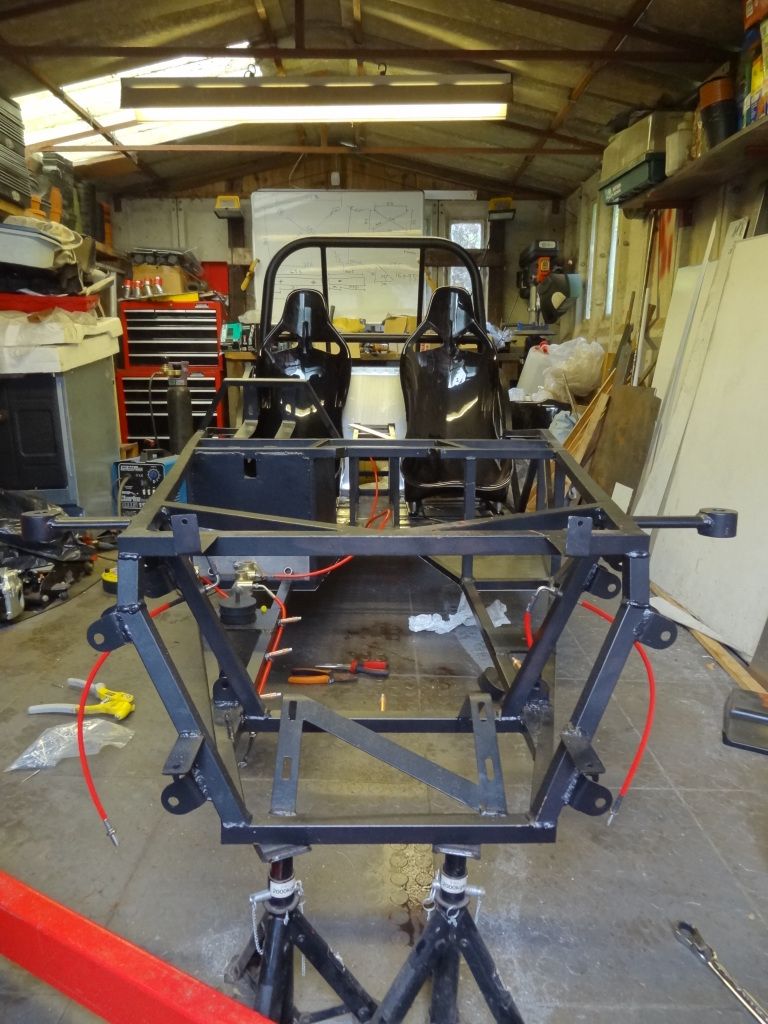
I'm in the process of fitting the handbrake cable, I have got it fitted on side I have now created an adapter to go from the handbrake to the half moon on the cable, I am just trying to figure out what length I want to cut the cable to, knowing me I'll end up cutting it that bit too short. I may also need to modify my rear uprights to give clearance between the handbrake cable and the upright as at the minute there isnt enough space to allow the handbrake cable to sit flush against the back plate, I am going to see if it will be possible to install the handbrake cable to the back plate first and then install the back plate to the rear upright. I have also started fitting the bodywork, the nose cone is now bolted in place by the use of rivnuts, I made a tool using a couple of nuts and a bolt instead of buying a rivnut tool, I am sure it is a bit more fiddly than a proper tool as you need really need 3 hands to use it, but I'm not planning on using that many rivnuts. My next job on bodywork is to finish the rear tub which requires a few rivets to get it in the correct place and then I will roll the bottom edge and rivet that. I then need to put the scuttle in the correct place and buy some bonnet catches, I am planning on using the lockable flush fitting type which are about twice the price of the usual ones but stop someone trying to steal my bonnet and I think they look a lot better. After this I will continue making more transmission tunnel panels and the side panels and then I can start mounting lights to the bodywork and then finally vinyl wrap it all. I am starting to get better at vinyl wrapping and I have discovered why the edge of my wrapped rear wheel arch lifted, it was because there was an excessive amount of tension left in the vinyl when wrapping and to alleviate this I just need to apply some head to the edge using a heat gun. I also bought a teflon coated squeegee which works wonders with the vinyl. Here are the pictures so far (excuse the mess of the garage): 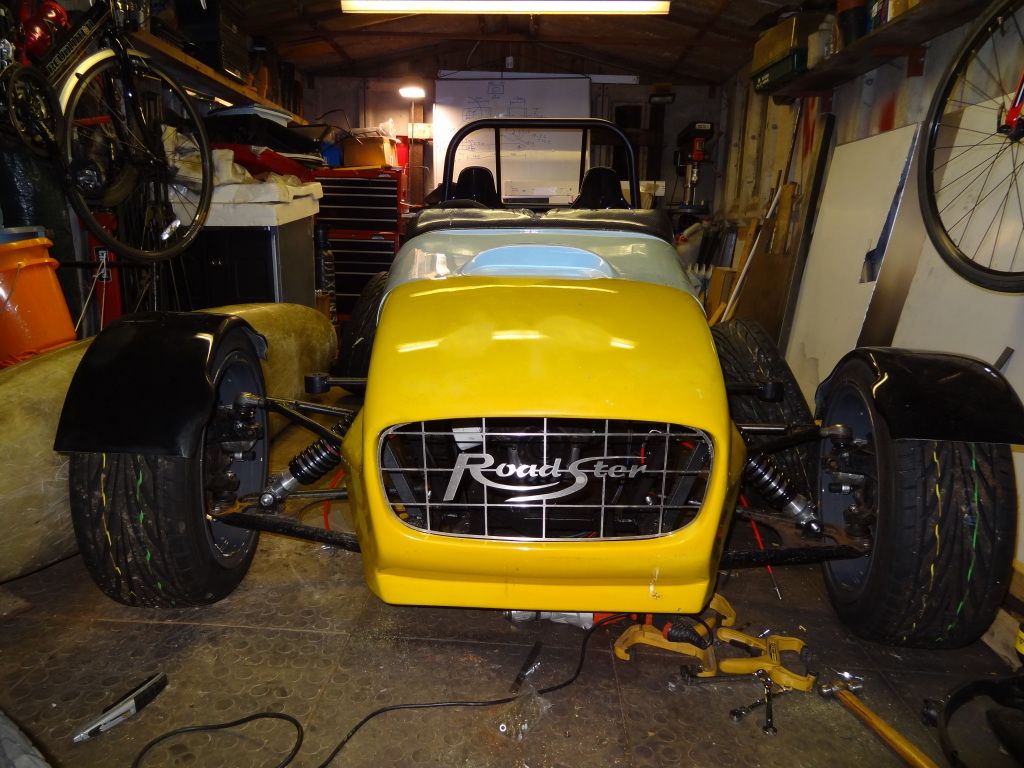 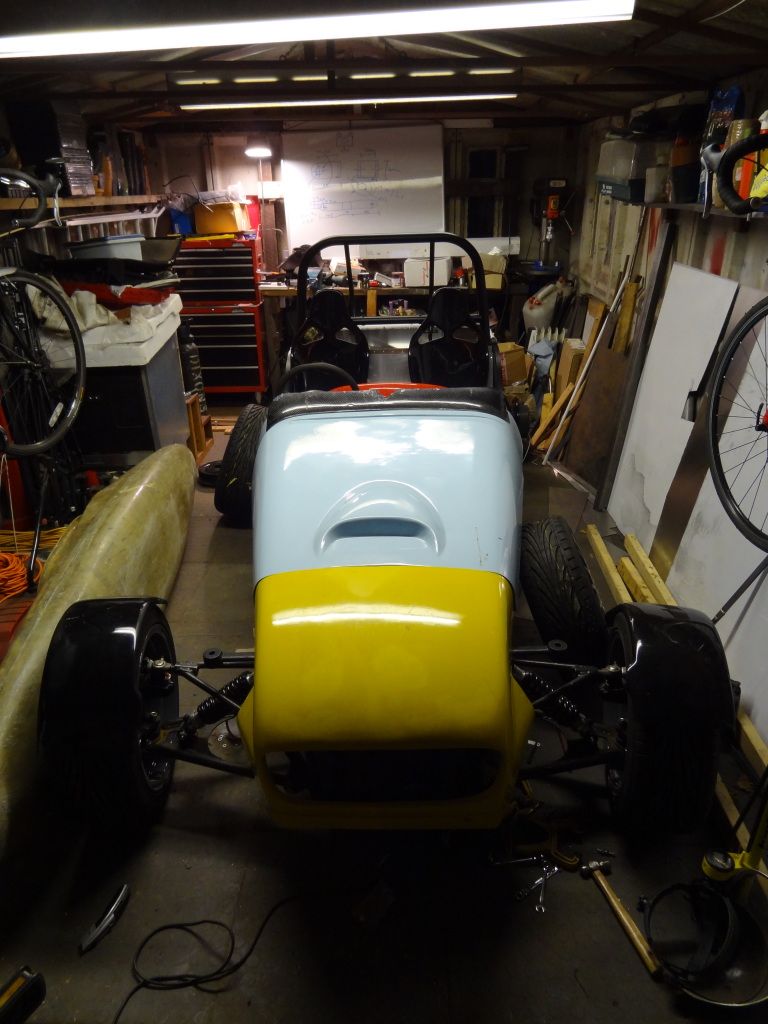 |
It looks great Simon. I've always looked at your build thread with great interest, and we can see you are really going forward.
Congratulations and keep on the good work :) |
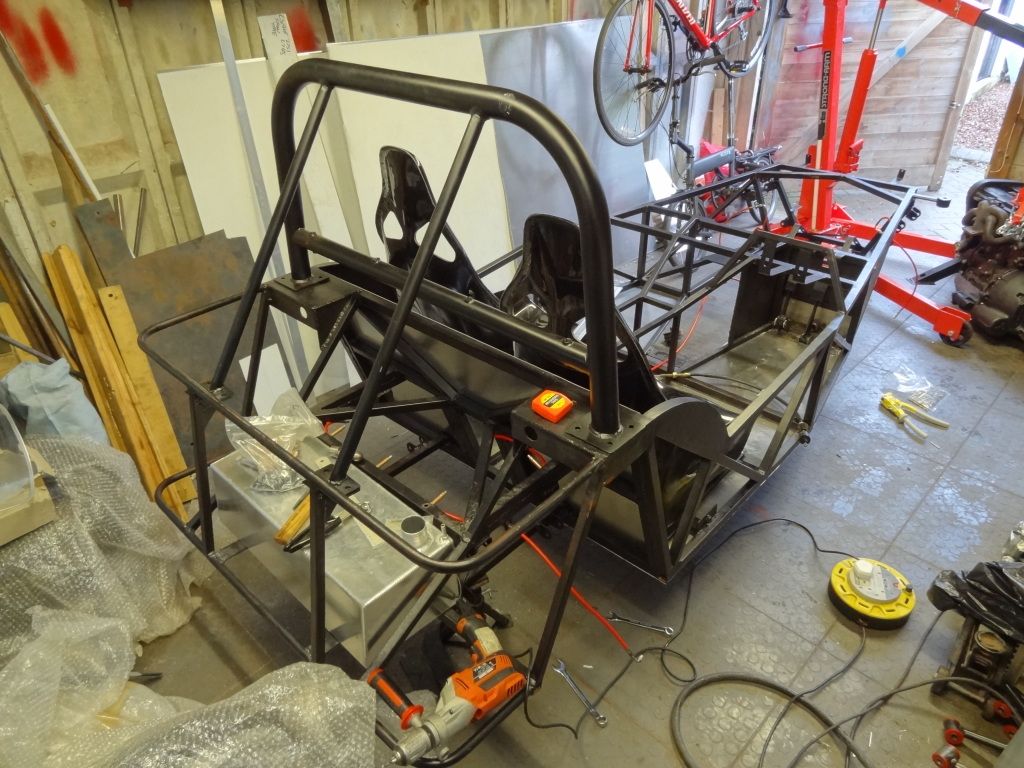
Scuttle is now in place with rivnuts and fasteners, the holes in the fibreglass just need tweaking slightly to get a flush finish with the side panel, but this will be done when I've made and fitted the side panels. My next job is finishing off the rear tub which I still haven't gotten round to doing yet, at least now my bodywork can sit on my car instead of being propped up against a wall.
|
Quote:
|
My scuttle stretched to abont an inch too wide before I fitted it. I clamped it to the chassis in summer, it flexed to 1 cm too wide in an unstressed state within a couple of weeks, and it easily flexes 1-2 cm more without much strain. Looks like NTS bodywork was made out of a single layer of 600 or 400 g/m^2 CSM, it's pretty light and flimsy.
|
My scuttle is very flexible and it was about an inch too wide, so I drilled the holes for one side of the scuttle, fitted the rivnuts into the chassis, bolted it down and then flexed the other side of the scuttle into the correct place. I am tempted to in the future remake everything out of carbon fibre but that will be a long way off.
I've now finished the rear aluminium panel and safe to say it was a bit of a ball ache, I am not a fan of creating panels I have to say, but it's done now and I'm reasonably satisfied with it, here is a picture: 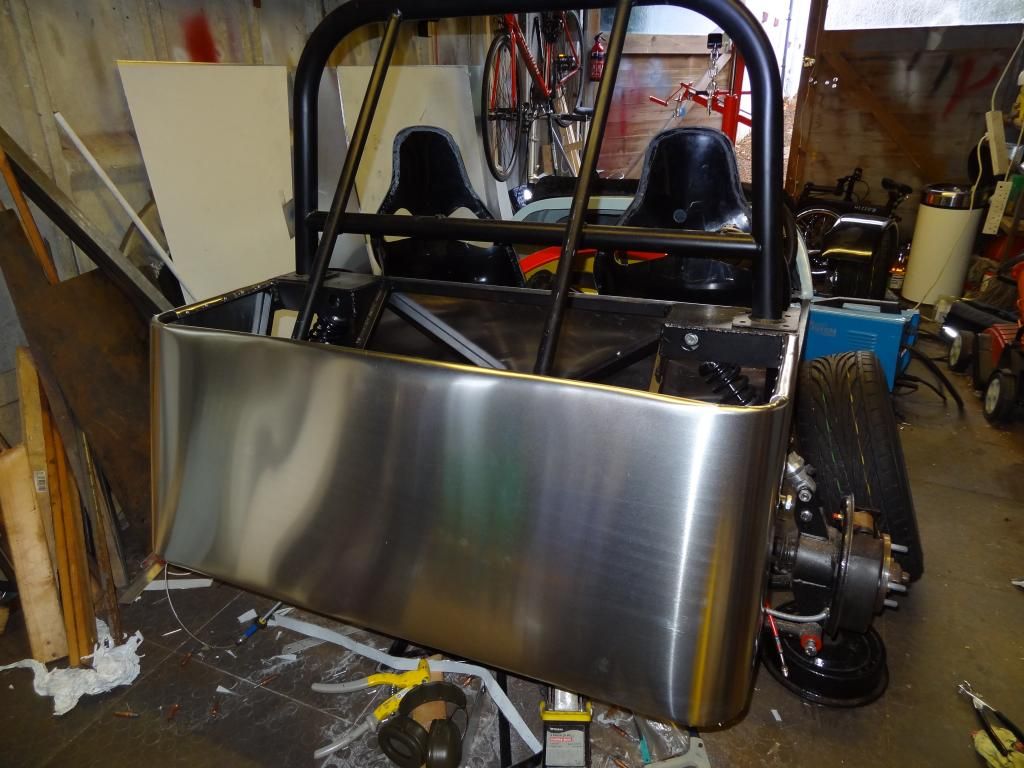 It will be vinyl wrapped like the rest of the body panels. I think I have also decided I will be vinyl wrapping my carbon aeroscreen with dinoc carbon vinyl as it looks a bit crap due to the large amount of resin at the bottom of the screen with a number of airbubbles/disturbed fibre strands, it only cost £5 and will look reasonable once wrapped. |
Rear panel looks good. That's one job I didn't enjoy much either!
|
I really hope the side panels are an easier job...
I've now fitted the wing mirrors, although need to buy some fine pitched M10 nuts, I will have every fastener under the sun by the time I've finished this car... Still need to finish off the handbrake cable, all that is left to do is to put the cable through the nearside brake shoe and cut it to length, but I couldnt for the life of me get the nipple through the hole (the offside was no problem at all)...do people take the shoe off to do this or is there a method I am missing? |
Quote:
|
It's very rigid once bolted down, its just quite easy to flex if you grab both ends and push together when not attached to anything, attaching the bulkhead and dash should increase the rigidity even further.
|
| All times are GMT +1. The time now is 04:31 PM. |
Powered by vBulletin® Version 3.6.4
Copyright ©2000 - 2025, Jelsoft Enterprises Ltd.