Tkpm,
You absolute star. I would never have found it and the tip about the fuse box thanks. A picture as well, paints a thousand words. Thanks again. Ginge |
Also, it's easier to enlarge the hole and drop the fusebox inside, rather than pull the whole loom out through it.
|
engine loom is seperate anyway.. either the three plugs behind the battery, or near the glovebox depending on year.
The front lighting loom will need withdrawing through the drivers bulkhead gromet into the car. then unbolt the fuse box and pull everything through into the engine bay. for the cluthch cable, its easier with two peeps. pull the pedal right up hard, this releases the tensioner lock. then rotate the quadrant round to release tension in the cable. now 3 options. 1) try and unhook the slack cable from the quadrant. 2) get helper to unhook cable from fork. 3) gently release quadrant, and unhook from fork yourself. TT |
Almost certain that the Vin number is only stamped on the floor next to the drivers seat on the Sierra.
The only other one is on the Vin plate riveted to the slam pannel. Will you need the clutch cable ?? ..... You may find it a tad to long for the Roadster. I bought an early Capri one for mine ... looks to be an ideal length & as a bonus, has an adjustable section at the gearbox end . ;) |
All great news men thanks.
If the Capri clutch cable is a better option I think I will cut my losses and leave the Sierra one where it is. I have got the slam panel and am going to cut the VIN plate from by the drivers seat so no more VIN plates to find? As to the wiring (my nemesis at the moment) I have found the grommet that takes a yellow relay and a fuse into the car under the battery box and pulled them through but as yet cant find a plug that separates the engine loom from the rest of the wiring. I am going to undo the fuse box and try to remove as much wiring complete as I can but will probably end up cutting it somehow. The important thing here I think is I will have all the connectors, which are labelled. Cheers Ginge |
31 Jan
I wasnt going to go in the garage but the mind of information from the forum about removing the Sierra wiring spurred me on, and it only took an hour. I managed to work out how to separate the engine loom, just three plugs and a bolt holding some positives onto the battery connector, which thinned the spaghetti out a lot. Then I started cutting some wires inside the car. Two big cuts really, one was where a bunch goes into the drivers foot well, and the second being the lump that runs across the dash to the passenger side of the car. It is all out now complete with fuse box in a heap in the corner of the garage. At last, it weighs a few Kgs too! SWMBO is on a fitness drive so we are all of out for a walk this afternoon, but I hope to cut the VIN out later, remove the rear number plate (which I forgot all about) and lower the Sierra onto the trolley I borrowed from SteveS, Then I need to phone the scrappies to collect it on Wednesday (the Army only works half a day on Wednesday!). Then back to building not dismantling, I cant wait. |
Quote:
 |
Alga,
That is exactly how mine looks only not in the kitchen, my Mrs would do back flips! :eek: |
Mine was gone shopping and I used the time to untangle the mess, neatly roll each loose end, and sweep the floor afterwards. ;)
|
Just cut the VIN plate out from by the drivers seat, the Sierra is good to go now.:) I will lower it onto the trolley tonight or tomorrow ready for collection Wednesday or early on the 8th.
|
I'm also planning to cut out 4 of the seatbelt mounting 7/16" UNF captive nuts and use them on the lower harness mounts.
|
Ginge I don't know if it's just me but when I klick your "build pictures" link nothing happens. Is it me or is the link u/s. On the old DII I could get onto the bay but not on the new one it's Shiiiiiiiit.
|
The link is fixed now.
I don't know why that stopped working, do they have a 'life span'? John.W Im not in work for two weeks now but you can find me at 26ENGR-38HQSqn-PlantSgt Cheers Ginge |
The Build is looking good, I wish I could get started but i'm still trying to get ready for the new Rally X season, starts middle of next month and I need to fit a roll cage and change the engine in my Golf.
WWW.rallyx.de 3REME-CIV-TSC keep up the good work John |
1 Feb
Well I got me self into gear this week. I had some cash in the build account and a week off coming up so I decided to spread the love and ordered stuff from several companies. Three sheets of 8 x 4 ally from parkers, Some suspension components from 3GE, Some build components (Maxi ball joints, engine mounts etc) Now I am skint until I sell a scooter or sell some more pictures. 3 Feb I popped down to see the scrappy after work (12.30pm I know, I know, Wednesday is recce afternoon in Her Majestys Armed Forces and I went and recced the scrappys) I only went to inquire when he would be able to collect and he said we will be around this afternoon. So I shot home and removed the last brake pipe connectors, number plate and tax disc. Then gingerly (stop sniggering at the back) lowered the Sierra onto the trolley borrowed from fellow forum member SteveS. One good shove and the Sierra is now outside on the drive awaiting collection. Nicky returned from the school run and had a fit until I explained it is getting picked up in an hour and a half. He best turn up now! 9 pm and it is a no show by the srappy. I am right pi**ed off, but what can you do, he is picking it up for nothing. I will ring at 9 am ish tomorrow. The thing is I only pushed it out of the garage because he said he was coming tonight and now I cant push it back in so it will be sat on the drive all night and tomorrow until he collects. I promised Nicky that I wouldnt do s**t like this and now she is p***d. Tomorrows another day. 6 Feb Would you believe the Sierra is still on the drive, I am getting some savage ear ache! Apparently he is having problems with his Hi-Ab, he best not bump into Nicky as he will have more than a problem with his Hi-Ab! I have a little confession which I can now reveal, as the issue is fixed. Always remove the rear drive shaft nut whilst the car is on the ground! I can hear Handy Andy saying it now! Well, Ginge knows best and I didnt undo them. I thought after studying the Haynes Manual that the break back plate would come off the inboard end of the drive shaft.... it doesnt! The upshot being, I had two driveshafts off the car with break back plates flapping about. I didnt mention anything on here as I had a plan. Off to REME workshops on Thursday, I walked up to the stores counter and asked for a 42mm socket, the store man didnt even bat an eyelid, just asked what it was in old money (1 and 5/8) and produced the socket. Happy days! Off I trot home and here is where Im lucky, I used my air gun and after a while both nuts are off. The one that is reverse threaded was a lot harder to remove but they are both of now. Next week should see some proper progress as I have a week off, I will update pictures as I go and the Sierra best get picked up!! |
7 Feb
I got some time in the garage yesterday and constructed a frame for the roadster to sit on. My theory being I still need to turn the chassis upside down as there are some welds to do on the underside. I had a look back through the build diary and noticed a gap in the pictorial history so went into the garage this morning and took some pics. The chassis so far, all the suspension mounts are on, diff mount on and one side welded and the steering rack mount done, only one picture here, there are more on photo bucket. You can see the frame I made as well. It is bespoke to my garage as the floor slopes two ways. So the chassis is dead level now when it is on the frame. [IMG] 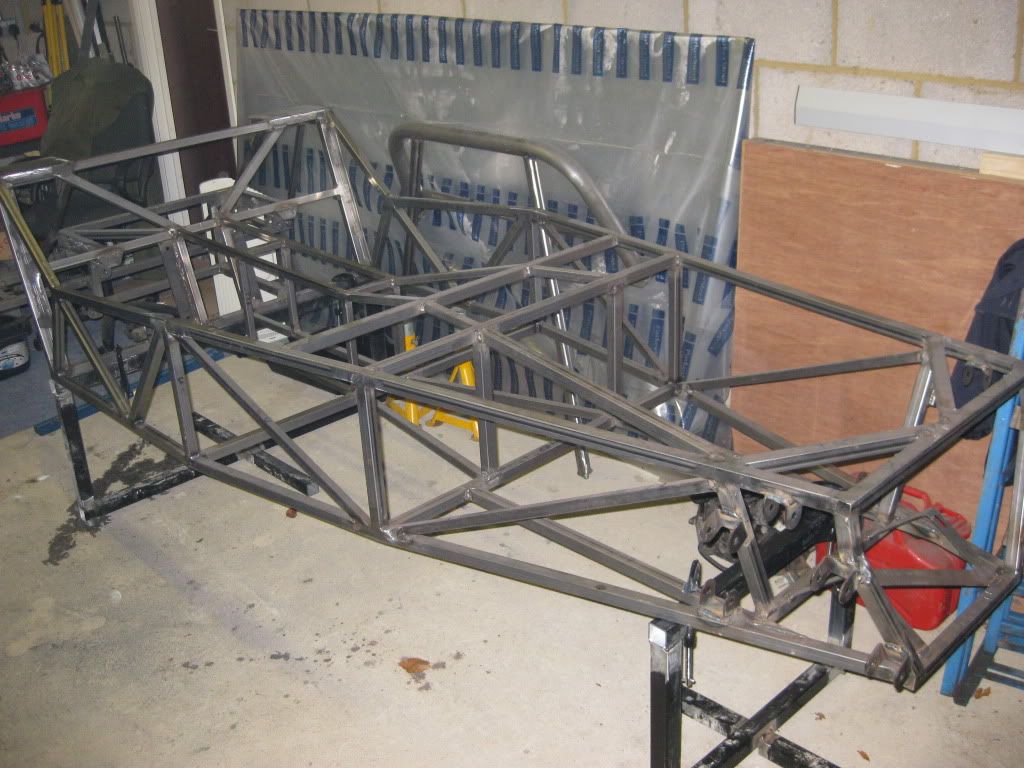 [/IMG] [/IMG]A pile of goodies. [IMG] 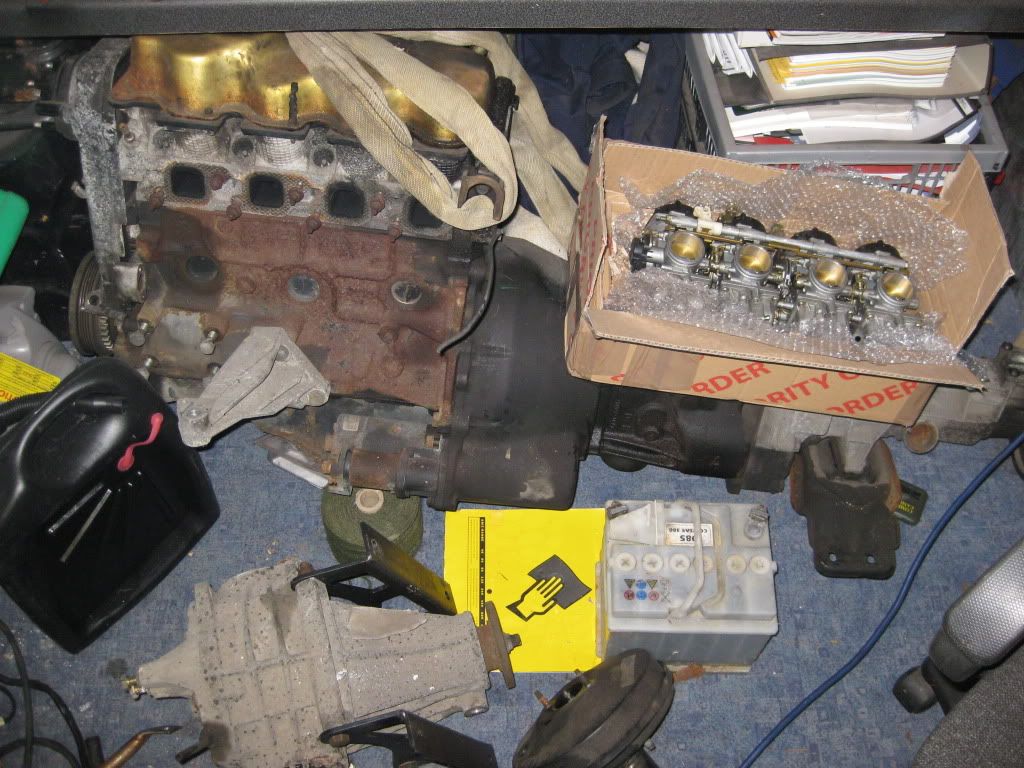 [/IMG] [/IMG]This lot requires cleaning and overhauling. [IMG] 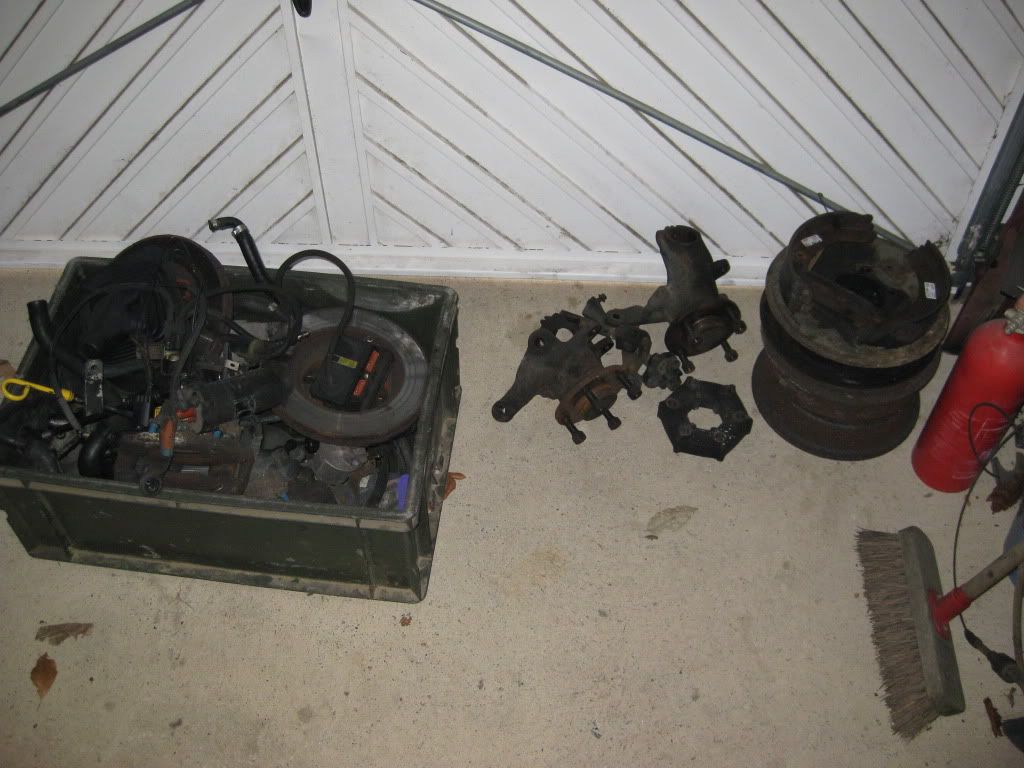 [/IMG] [/IMG]I am off to my father’s on Tuesday and we are going to draw all the ally panels on Autocad and print them so I can modify paper templates before cutting the ally. Once we have done them if anyone wants a copy of the file just let me know. Thanks to Pete (sorry I don’t know your forum name) who sent through the three he had done already. Cheers Ginge |
Looking good there Ginge :cool:
In the same boat as you mate ..... Now in the process of dragging a mountain of stuff out, all in need of a good clean & refurb :eek: It'll be interesting to see how you get on with the side panels. I almost attempted to do them when I fabricated & fitted the rear tub, unfortunately my mind & body wern't in a good place at that time :o :rolleyes: Keep up the great work. |
looking nice Ginge :cool:
lots of cleaning in the coming weeks :eek: don,t forget you might need to remove TR5 , i had to as was keeping the standard carb set up, tho not sure if its ok to stay there with bike carbs. We ( spud & me, Saturn ) will be making ali panels too, so will watch your progress with the drawings etc. like the chassis frame/stand :cool: cheers andy |
Andy,
The cleaning will happen slowly as this coming week is for building. I have done a few measurements and hope to keep TR5, you watch I will be cutting it out be Wednesday, The bike carbs I got are well spaced to the head so I should be able to get them quite close, watch this space. Once I have all the ally panels drawn on Autocad you are more than welcome to them, as is anyone. The frame is working a treat, I can step in and out of the chassis and once I have clamped the frame to the chassis I can drag the whole thing around the garage. Cheers Ginge |
A little more to add today.
I started by adding the handbrake chassis plates CP12 &13 then avoided the steering wheel support frame and fitted CP16 & 17 instead. I spent a good hour messing about with the Steering Column Supports (SCS). I bolted them to the steering column and tried sitting in the car but I think I am sitting to low because I cant see over the steering wheel! Will crack on with it tomorrow [IMG] 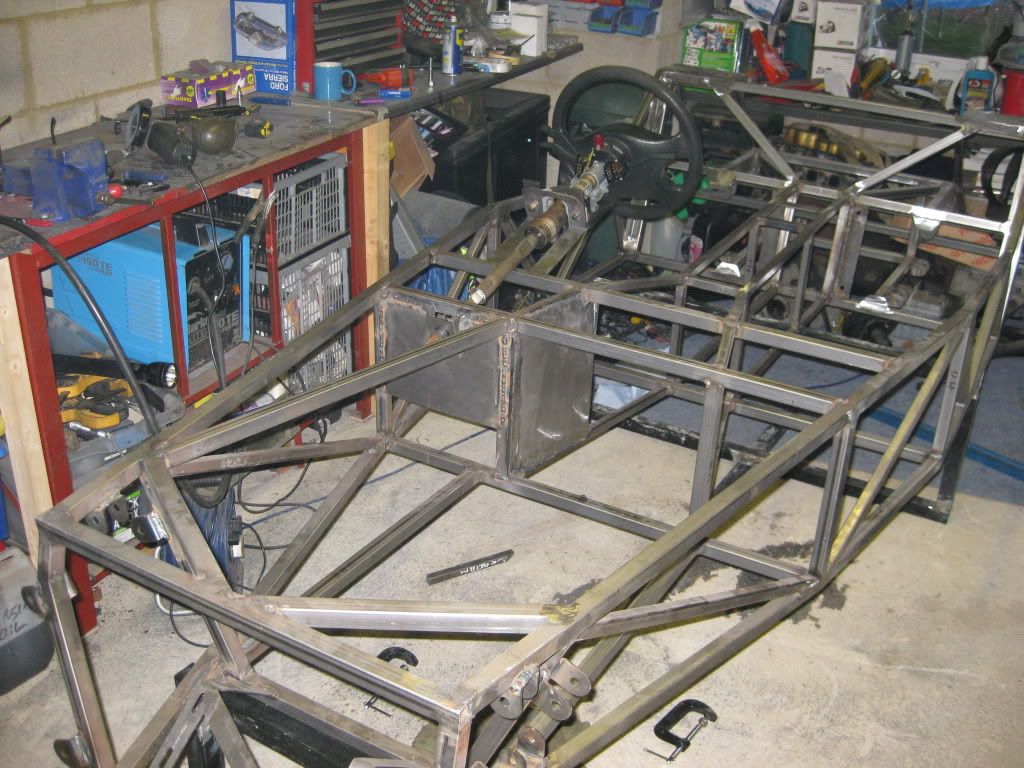 [/IMG] [/IMG] |
Ginge did you use the green string to lift the engine out or is it just proping it up and where can you get those handy big green boxes?
Chassis is looking good |
I see someone else has found a good use for government issue ear defenders :D. They've come in so handy for me when grinding, and i see you're taking advantage of more government issue green boxes :p.
The progress is looking really good. May I ask why you haven't gone for the steering column support that in the book (using 25x25mm box), or are you and I'm just being silly? |
Tatey,
I will be using the standard steering column support in the picture the steering column is just resting there it is tomorrows job.:confused: Those green boxes have been salvaged by legitimate means and are not on anyones UET,:D the ear defenders are my current issue ones I really must get another set. |
Legitimate means my arse :p. Although the saying does say 'There's only one thief in the army, everyone else is just trying to get their stuff back' :p.
Who decided to paint the rocker cover that ghastly shade of gold? :eek:. Will you be stripping down the engine or just giving it a lick of paint? |
Tatey,
I intend to strip the engine down and replace bearings etc. As I have found out it has done 186000 miles not 86000 miles. The rocker cover is my first engine project. The boxes where in a hanger that was just about to get knocked down, and I mean JUST. The wrecking ball was about to be lifted and the QM said just have one last check in there, I ran around found them and through them out of the window! |
Before you spend a lot of cash on a cvh ,( i priced mine and was looking at over £500 ) check this LCB smithwrecker has 65k cvh + type 9 for £ 150.
|
Mike,
Its the old, slightly newer engine thats unknown verses the old engine that I have driven debate. I must confess that I have not priced anything up but how much can some bearings cost? Oh and piston rings...and a gasket set....yeh thats about it. In my defence, your honour, the Sierra only cost me £150 and it pulled really well with no smoke, I know that doesnt qualify it as a good engine, but its a start, also I currently have no money as I have just spent £900 on roadster parts!:eek: I see your reasoning though. |
I'll be completely rebuilding my CVH, including getting a head skim due to a blown head gasket, i've priced up all of the parts and it's come to a total of £150:
• Engine degreaser - £5 • Engine paint - £6 o Black enamel for block o Print red spray paint for rocker cover • Piston rings - £32.50 o http://cgi.ebay.co.uk/FORD-SIERRA-SA...t _1306wt_939 • Big end bearings - £17.50 o http://www.enginestuff.co.uk/product...ducts_id/66593 • Head gasket set - £30.50 o http://cgi.ebay.co.uk/FORD-1-8-CVH-H... t_1357wt_1165 • Head skim - £20 • Oil - £20 • Spark Plugs - £10 • Thermostat - £5 • Oil filter - £5 • Timing Belt - £10 • Sump Gasket - £8.46 • Core Plug Set - £7.50 • Air Filter - £10 • HT Leads - £12 o http://cgi.ebay.co.uk/FORD-SIERRA-1-...ht _643wt_939 • Water Pump - £10 o http://cgi.ebay.co.uk/Ford-Sierra-Sa...h t_840wt_939 Total = £150 Which to me seems like a bargain, since I'll have a completely rebuilt engine which i know should last a good while + I get the joys of getting it started for the first time as I got the engine for free with the rest of my bits. I have however contemplated just scrapping this engine and buying one which should be a runner, but then i'll be wanting to strip it down and replace bits it in anyway, so why pay money for a new engine and rebuild it a few months down the line, when i can just rebuilt this one now and get more satisfaction from doing so, or possibly waste my time and money and go for the second option anyway :p. |
Tatey,
That list is awesome; if I had the cash I would click every link now. Thanks for posting it, it has saved me an evening looking it all up. Cheers Ginge |
You're welcome Ginge, it took me ages to find all of the parts I needed for a complete rebuild, so it's always good to know i can save someone some agro.
The parts which haven't got links for are either easy to find or easily available on ebay. Hopefully i'll be rebuilding my engine in a few months. |
8 Feb
I managed all day in the garage today and cleared up some outstanding jobs. Steering column support. Done. (just needs the open ends of the top tube plating) Lower seat belt anchorages. Done. Foot well plates CP16 & 17. Done. Plate up the ten open ends on chassis tubes. Done (they took ages) Flip the chassis over and fully weld up suspension mounts. Done. I thought most of my welding was done but I have now realised I still need to fabricate some headlight mounts and I forgot to fit CP14 the hand break guide plate. Of to my old mans tomorrow so probably no work on the roadster. 9 Feb I managed to get all the aluminium panels drawn at my fathers place on Autocad and printed out, once home and collected the kids from school I cut the passenger side transmission tunnel and the two transmission tunnel top pieces and stuck them on with masking tape. I had to modify the forward top of transmission tunnel as my steering wheel support frame encroaches a little, but it is easier doing it with paper rather than ally. [IMG] 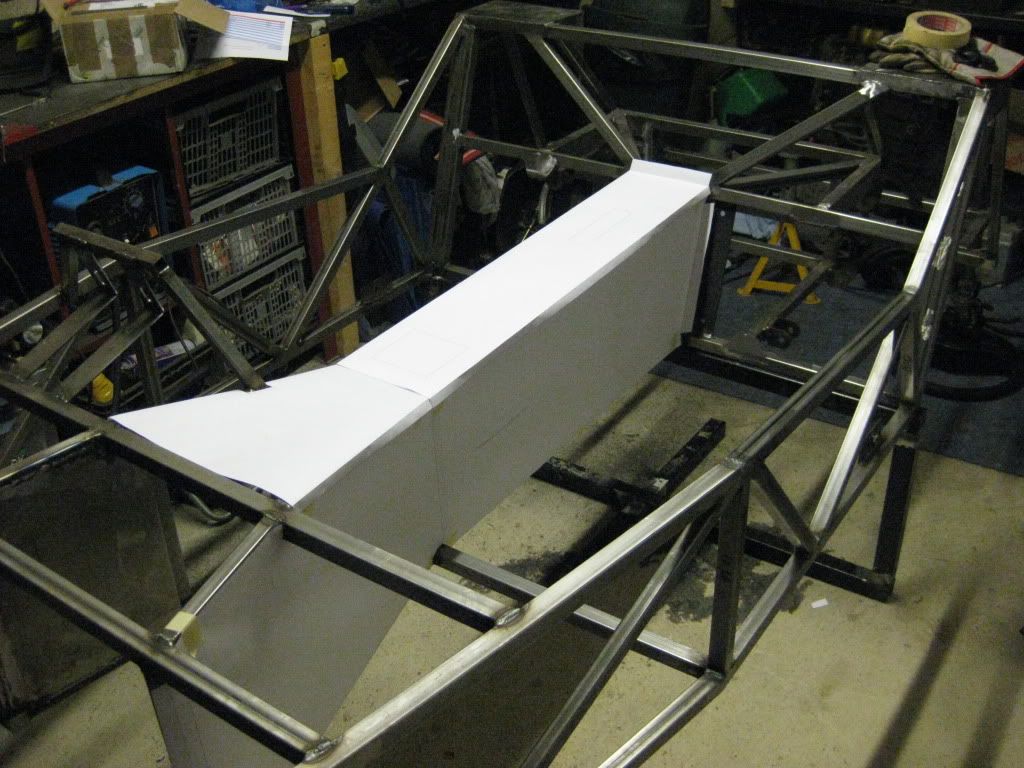 [/IMG] [/IMG]I have created some tabs / flaps so I can secure the transmission side pieces and the transmission tunnel top to the seat back, just to give them a little more support / rigidity. No work tomorrow I am of on a school trip to the Southampton Maritime Museum with James and his class, Nicky volunteered herself ages ago and now has tonsillitis, so as I am off work I get to go on a school trip! Pigging Sierra is still on the drive, I forgot to ring them today. |
Have a nice time at on the trip ;)
I spend all day surrounded by 1500 little darlings, fortunatly in the last year and a half my office has moved from a major through corridor to a secluded little know of limits stair well. Got any pics of the chassis closing caps? TT |
Quote:
|
Not a lot to see really, I cut a piece of sheet steel so it fitted snugly in the end of the tube, held it in with a magnetic welding clamp then welded all the way around and finished as always be going berserk with a flap disk.
[IMG] 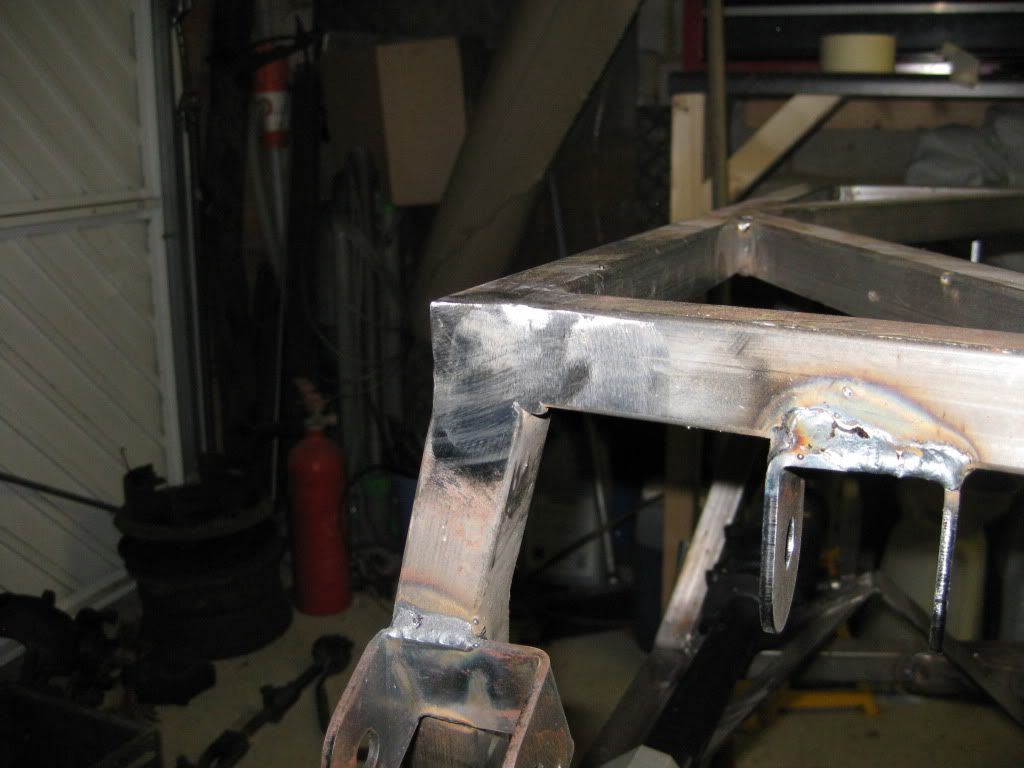 [/IMG] [/IMG]and the other side of the front frame. [IMG] 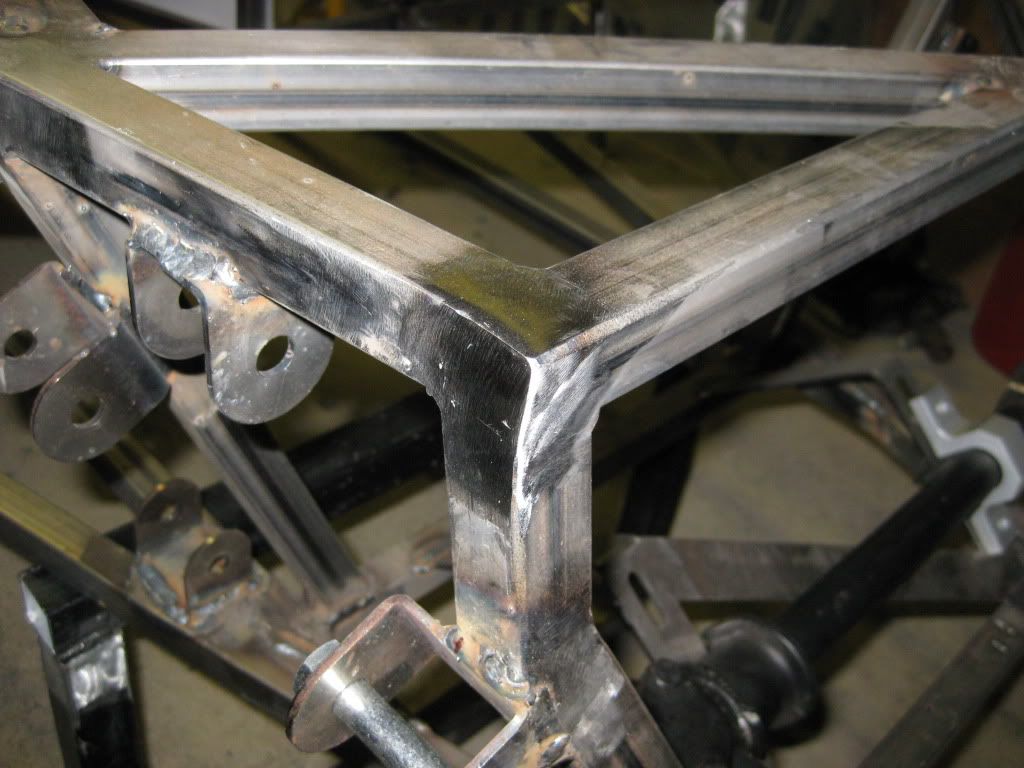 [/IMG] [/IMG]Cheers Ginge |
"........(just needs the open ends of the top tube plating)"
That just sounds so wrong! D.:D |
you been busy:D
i see an ali clamp on the steering rack, you only got them today :D nice tranny tunnel template :cool: cheers andy |
Quote:
|
Hi Ginge
Things are moving on nicely there :cool: :) Green with envy mate ........ Another few days of tidying up, then it will be full steam ahead for me ;) I am very highly motivated at the moment & full of beans ..... Long may it last :D |
Quote:
if its the former, i had the same prob, the flap disc sorted it ( on the rack 3mm plate). and don,t forget the packer underneath the clamp. cheers andy |
Sorry Andy,
What I meant was the large ally clamp doesnt fit over the steering rack the small one is tight but the big one needs some taking of the edges. Just re-read that and it still doesnt sound much clearer. A picture tomorrow may be. Cheers Ginge |
| All times are GMT +1. The time now is 11:18 AM. |
Powered by vBulletin® Version 3.6.4
Copyright ©2000 - 2025, Jelsoft Enterprises Ltd.