I've made quite a bit of progress since my last post, I've now sorted out the handbrake so it works (just need to cut the cable to length when I'm 100% happy with it...
I've finally got round to cutting bolts to length and fitting washers were there weren't before and trying to sort out other little niggles I've now continued working on the transmission tunnel and have now completed the tunnel top, the driver side tunnel panel and the tunnel front top panel, I just need to make the passenger side panel and then it can all be bolted/riveted into place, then I will just need to make the bulkhead panel and both side panels and all the aluminium work will be complete. I am slowly getting better at dealing with the ali, some bits have got little niggles where I missed with the hammer or stupidly didnt put any wood on top when using a g-clamp but I can remake those panels in the future if it still bugs me. My bonnet catches have also arrived now, £90 worth of lockable aerocatches, they look the business and hopefully they won't be too difficult to install, I have also ordered myself a Dremel 3000 to make cutting the holes a bit easier. 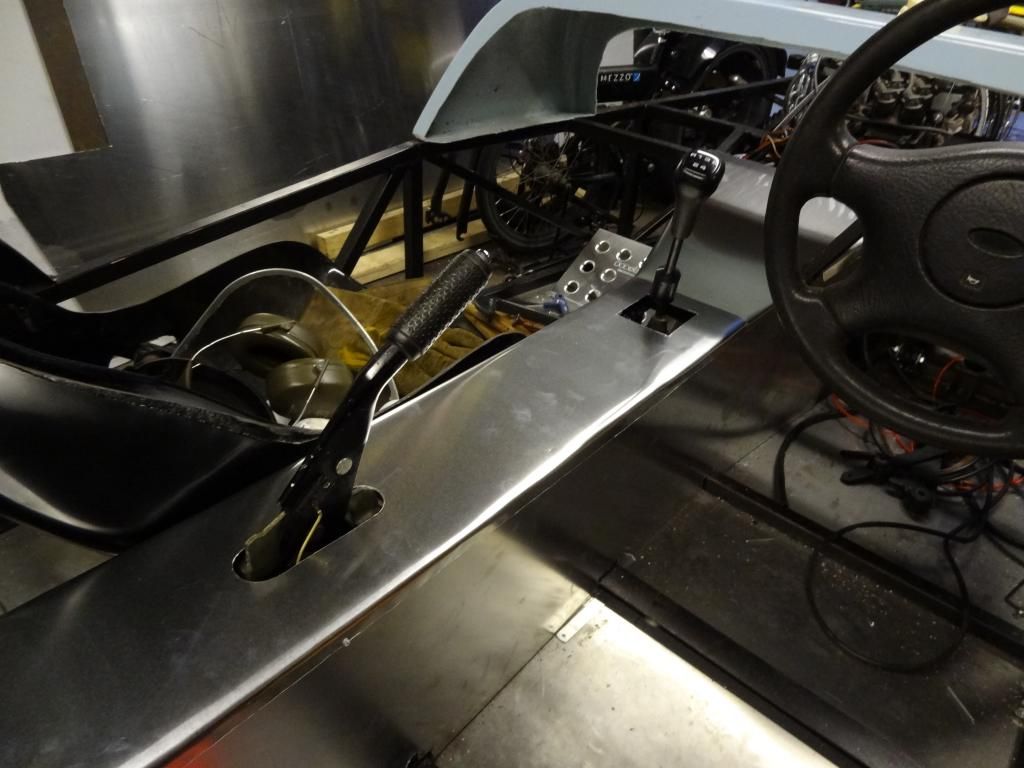 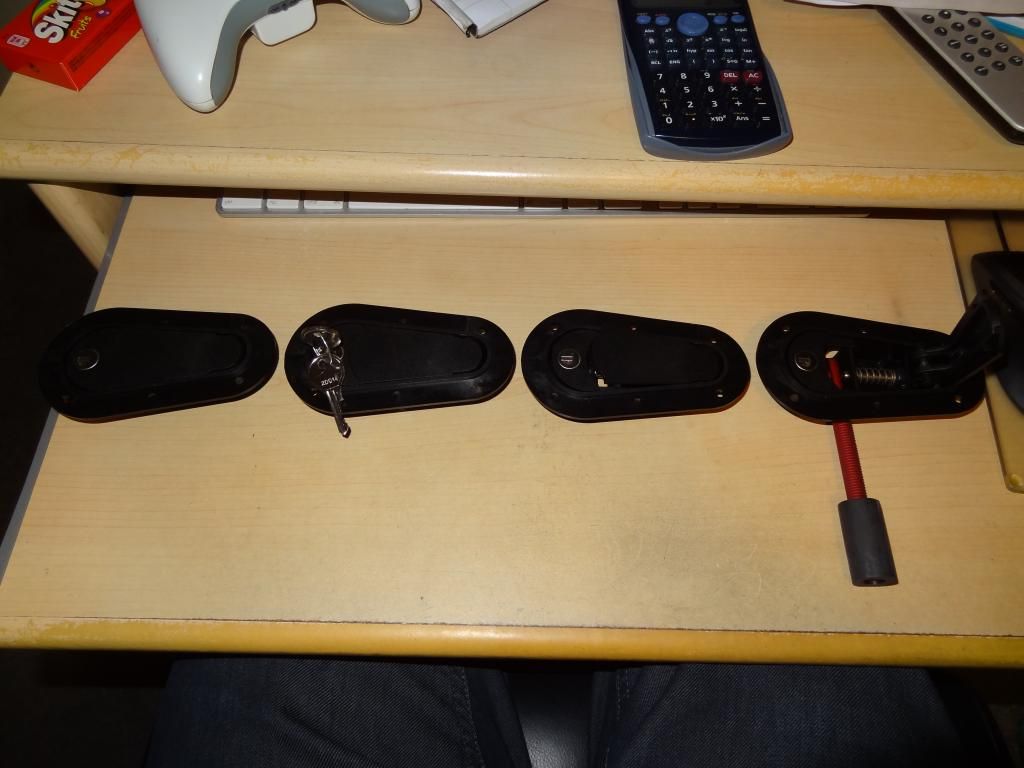 |
I've been spending the majority of my time working on installing my bonnet catches, which do look good, but are a right pain to install :rolleyes:, to get them roughly in the right place is easy but getting the bonnet to sit flush against the side panels is the biggest pain as you end up moving a bracket which then moves the pin position and then you need to alter the angle the pin sits at, I have got 2 finished on one side so the bonnet sits flush, and I have started on the other 2, hopefully these will go a bit quicker now I know what I'm doing, I then just need to buy some rubber edge trim/foam to sit on the bonnet edge/scuttle and nose cone mounting surfaces so that the bonnet sits flush with the top/sides of the scuttle and nose cone. I have to say though I have no idea how I managed to cope without a dremel....
I will try to get some pictures up later on today. |
Please post pic, as i'm going to fit the same catches over christmas hols.
Terry |
Terry,
Just need to wait for the sikaflex to dry and I'll put the bonnet back into place to take some pictures, I'll have some later on for you |
Terry,
Pictures as promised, I used the following pictures from someone's build on LocostBuilders: http://www.locostbuilders.co.uk/view...php?tid=161450 However I ended up making the box section bracket as it didnt look to be possible to do it the same way he did due to the angle of the bonnet.   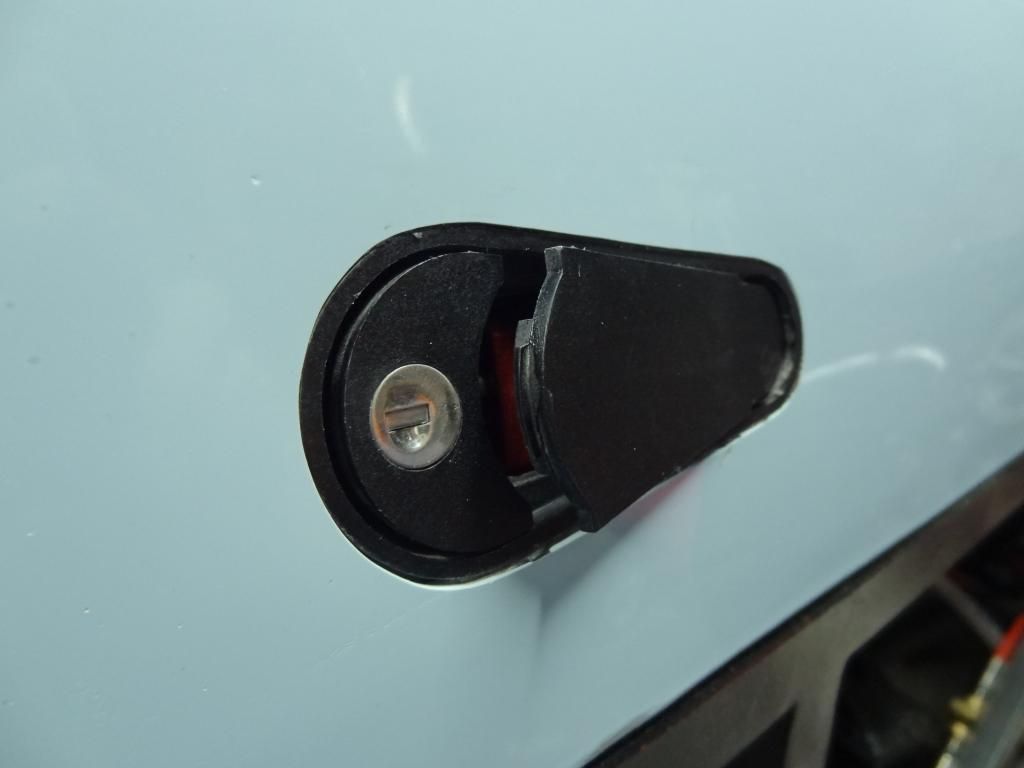 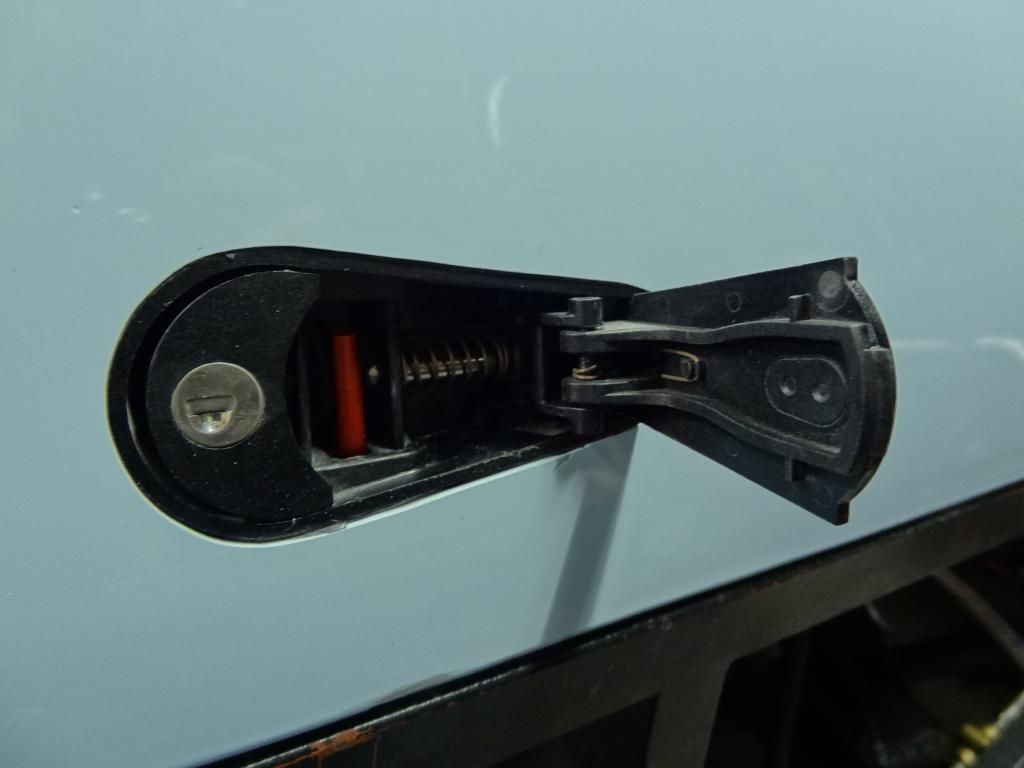 |
  |
Thanks Tatey, the pictures will be very handy.
Terry |
Those are really nice catches, where are they from? Anyway those catches wont keep the sides of the bonnet in line with the side panels, they are good for holding down but not locating. I saw an ali bonnet on a kit car that was held down with straps and the guy had put a couple of tapered pins in the top chassis rail looking up on each side. They passed through the bonnet return underneath purely for locating purposes ,all the straps had to do was hold the bonnet down , the tapered pins kept it in place.
Bob Edit. Something along the lines of this x4 but with a bit more taper. Screwed into a rivnut on the top rail would do the job http://www.xionglian.chinafastener.c...05115119_X.jpg |
Terry, you are more than welcome.
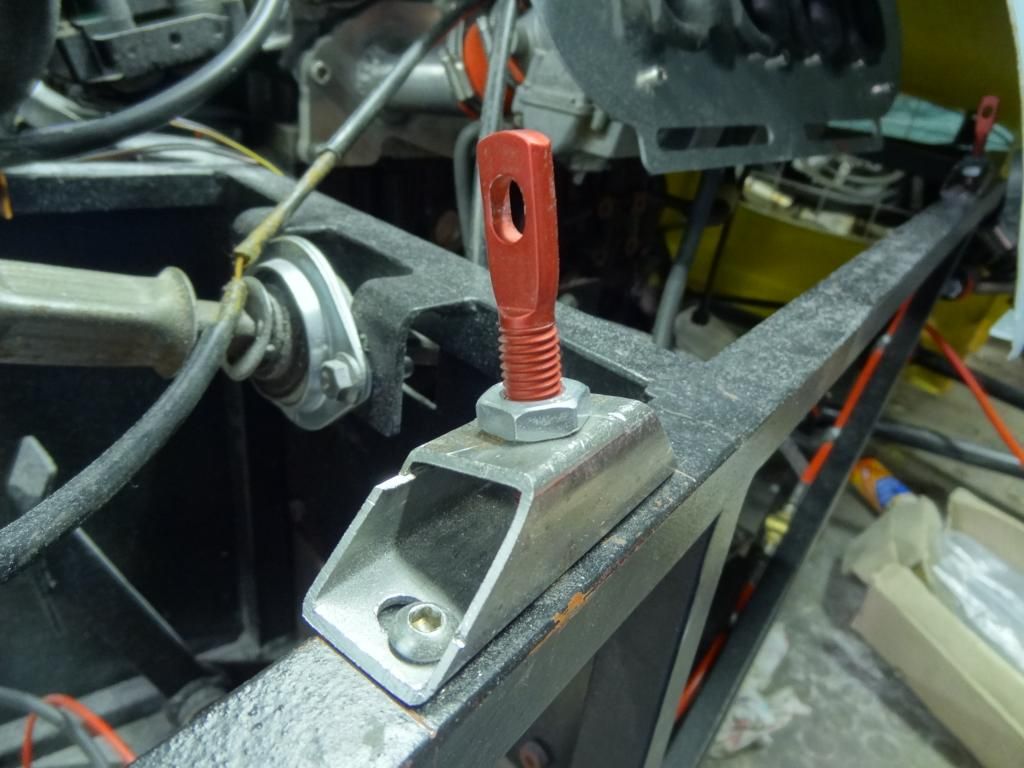
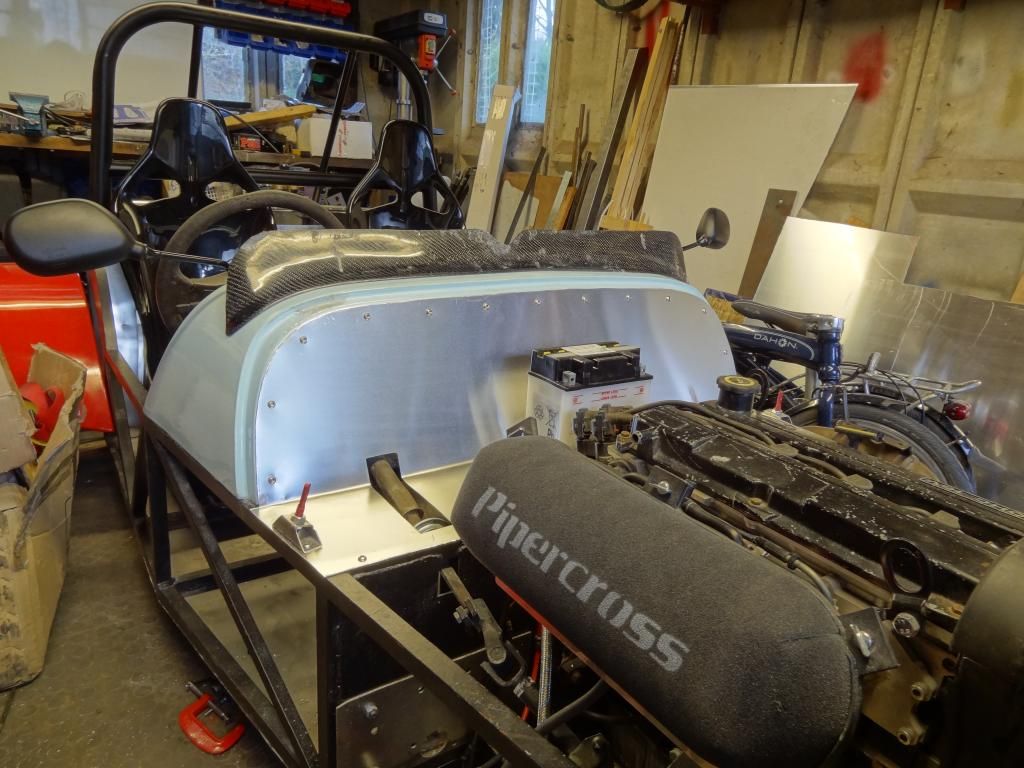
Rob they are called AeroCatches, you can buy them from ebay and a few other places, but they cost £45 a pair so aren't cheap...They are the flush fitting and lockable variety, you can get non-locking flush and lockable/non-locking surface mounted so you just bolt them on instead of bonding them. The way the brackets are set up allow for the lateral positioning of the bonnet as the bonnet is flush up against them so it stops them moving side to side and the brackets have slotted holes to allow them to be moved inboard to line the bonnet up correctly. I agree that if it was just the pins then this would be the case as you then have no adjustment. 1 thing I do have to mention though is be careful when you put the brackets on and fit the bonnet, the bottom flange of the bonnet needs a recess cutting in it which goes to the edge of the bonnet and my bonnet had an air bubble in it where the fibreglass hadnt been pushed into the gel coat, and when the bonnet was fitted the gel broke off (you can see this in the first picture, the front bracket), however as I am vinyl wrapping my bodywork it isnt an issue for me as I can easily sort it out with body filler, however if you have decent bodywork you need to be careful. |
My panals are not that good, they have a shed load of air pockets along the edges. So mine will be vinyl wrapped as well. Thanks for the warning tatey.
I got my catches from the exeter kit car show, can't remember what i paid for them, will have a look for the reciept. Terry |
While I'm waiting for the sikaflex on the final catch to cure I thought I'd put some pictures of up of my inlet system that I finished off yesterday:
It is made up of a custom aluminium inlet manifold from FastDan on Locostbuilders, a set of ZX9R bike carbs and a Pipercross sausage filter with a backing plate to match the carbs. I just need to get round to repainting my cam cover :eek:. 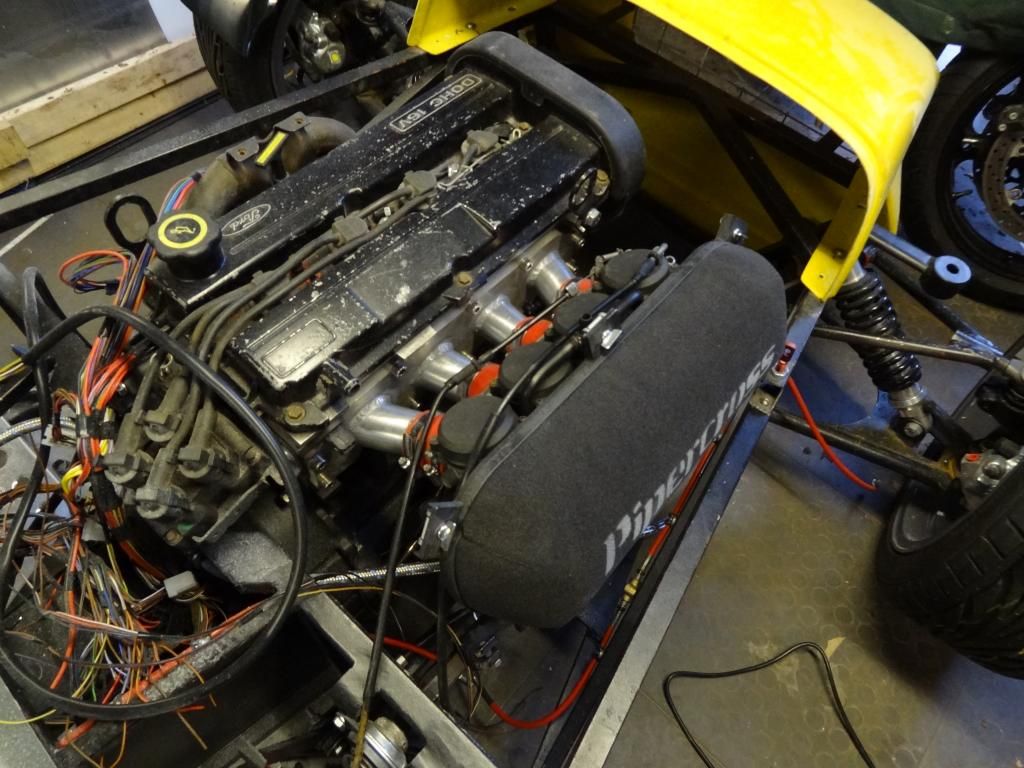 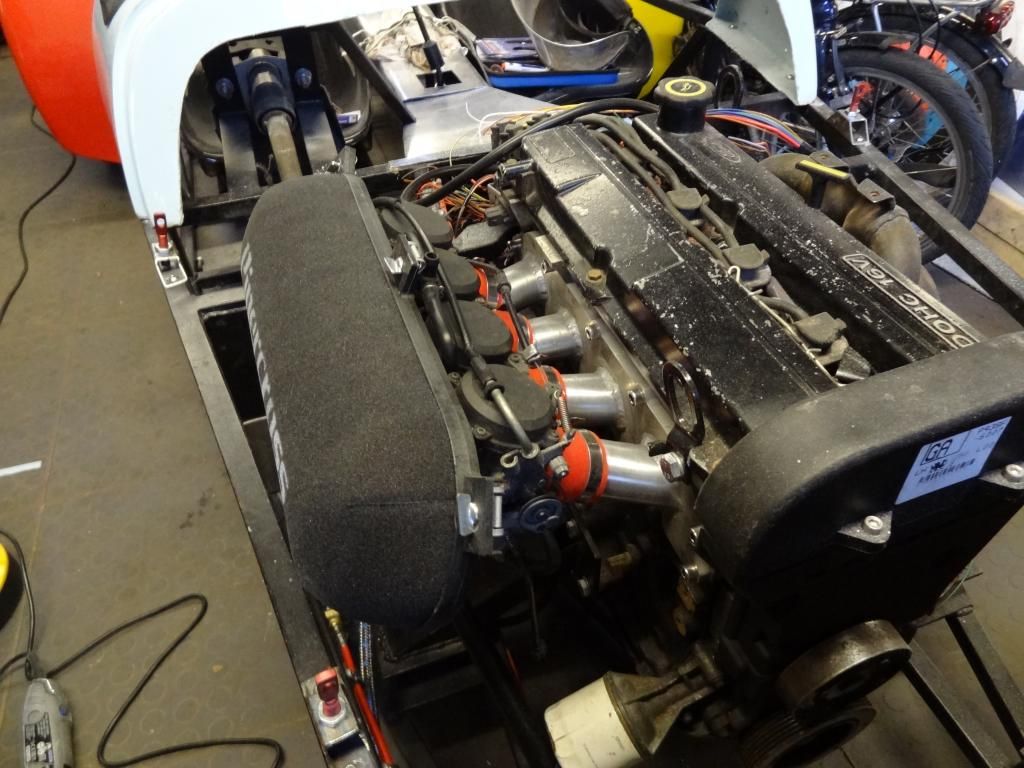 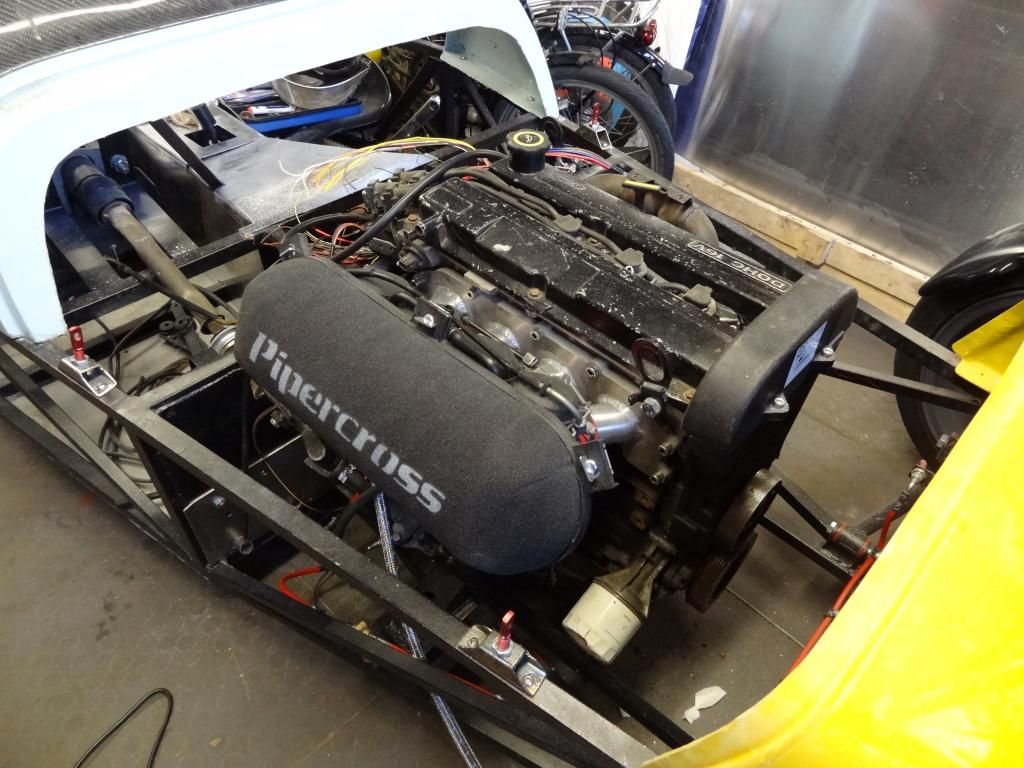 |
You need to get your edge trim on the bonnet and make sure the catches still work. Good job though :)
I have used the normal rubber over centre latches, but may also add a few tapered pins to aid location. TT |
I am keen to get some rubber trim but I'm waiting until I have a long enough list to buy from CBS to try and save on postage costs, so far it consists of:
Self-Adhesive Non-slip grip tape Ultra flexible fuel filler hose + hose clamps Edge Trim Seats + Bodywork Centre mirror 8mm to 10mm hose reducer * 2 - Nylon 4 hose finishers (2 * 8mm hose, 2 * 10mm hose) (red) 10mm fuel hose 1m Flexible exhaust tubing Also need to decide what parts need edge trim, what size it needs to be and what length and I am sure there will be a few other bits to add to the list... |
The bulkhead panel has now been made and it was a bit of a nightmare to bend that large of a panel, I ended up having to clamp it between a 1.5m long bit of 50x50mm box and some angle iron and clamp it in a vice and then go at it with a bit of wood and a hammer.
   As I always manage to do with these aluminium panels, I missed with the hammer and it has a nice crease mark in the middle where there was a massive dint, but I'm sure I can find something to cover it up and then if I still aren't happy with it when I have finished the car I will make a new panel. |
like the use of button heads there Simon, they give a pro finish, I am using a lot of them in my build, little touches like that can make a difference to the overall look.....making good progress there bud, keep it up.
|
Tatey
I have some non slip self adhesive you can have if you like. Is it for the pedals? David |
Thanks for the comments Kev, after working at Triumph for a year the use of quality fasteners is now engrained in me, costs slightly mort but the little things really do seem to mater.
David, the self adhesive grip tape is for the pedals, I'd be very grateful if I could have some. |
You are more then welcome. I bought mine for my pedals but when Nathan delivered them he had painted them and put the grip tape on. I will dig it out and arrange to get it to you somehow. Where are you based Hexham??
|
I'm in Stocksfield, so 10 miles east of hexham. If you let me know how much it will cost to post I'll happily bank transfer you the money. Once again thanks very much!
|
Don't worry about the cost. Drop me a pm with your address and I will pop it in the post ASAP
David |
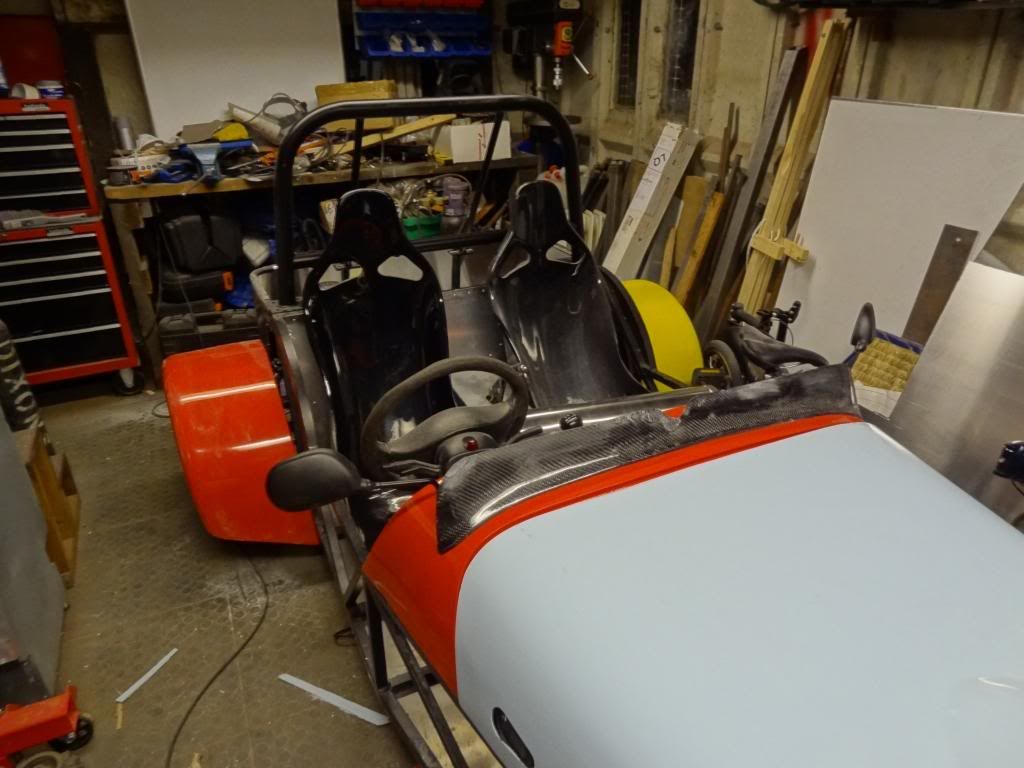
I've now finished wrapping the scuttle and I am liking the red now that there is more on the car. There are a few imperfections in the wrap on the scuttle, mainly around the corners with the lip at the front, I am sure I will eventually be able to crack this but for the moment it will do, it will be completely hidden when the bonnet is on and isn't that noticeable when it isn't.
  |
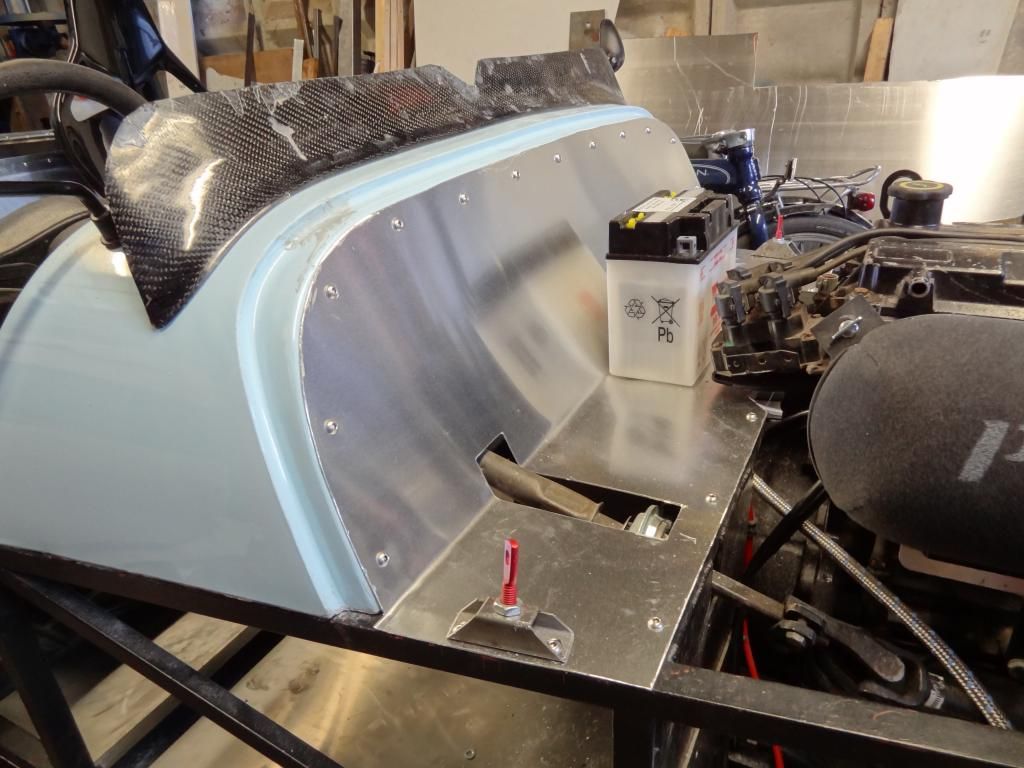
I've now finished the bracket for the brake reservoir, I originally made it out of the same ali as the rest of the panels but it was a bit too flimsy and I wasn't happy with it, so it has now been made out of the same ali as I used for the floor, which is 2mm thick and hardened was a bit of an arse to bend as you can see on the bottom edges which arent flat, I think I will give it another seeing to with the hammer to see if I can tidy it up a bit. I now just need to buy some 10mm to 8mm push in reducers for the master cylinder, cut the pipes to length, and then put a couple of rivnuts in place for the two t-pieces and the brake system will be complete.
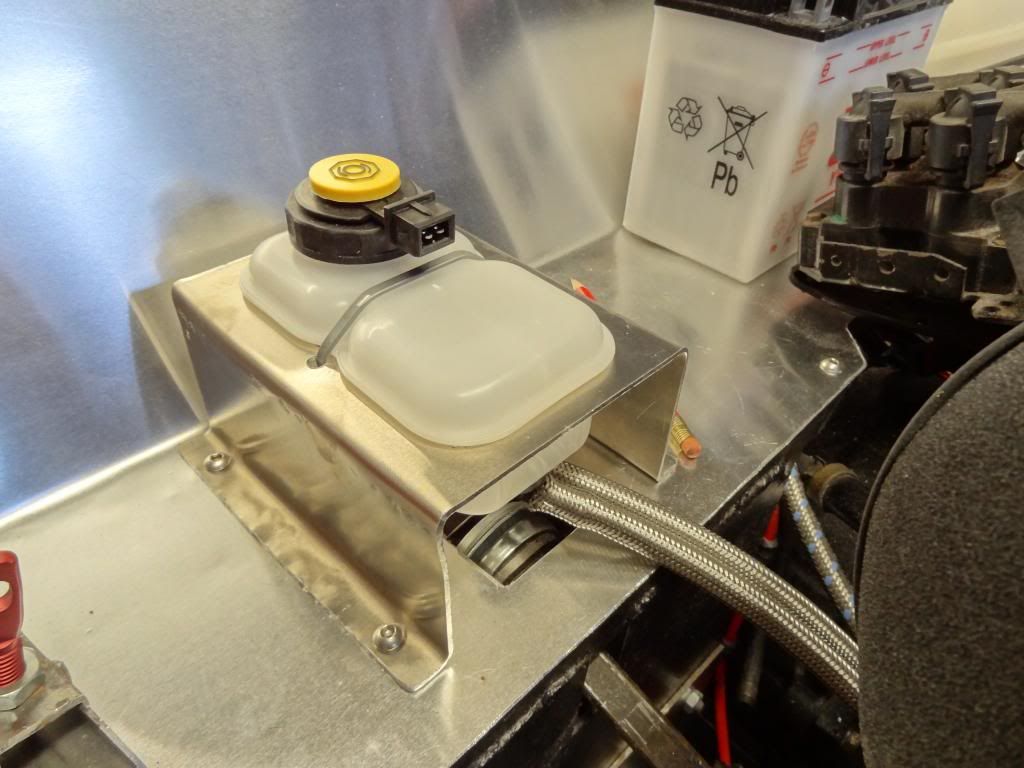  |
bit by bit Simon ...it is coming together....I would put a grommet or piece of rubber tubing on the cable tie that holds the reservoir as it will cut through with vibration from the engine, just an observation bud :rolleyes:
|
I honestly didn't even consider that Kev, thanks for the input, will get a couple ordered later on today.
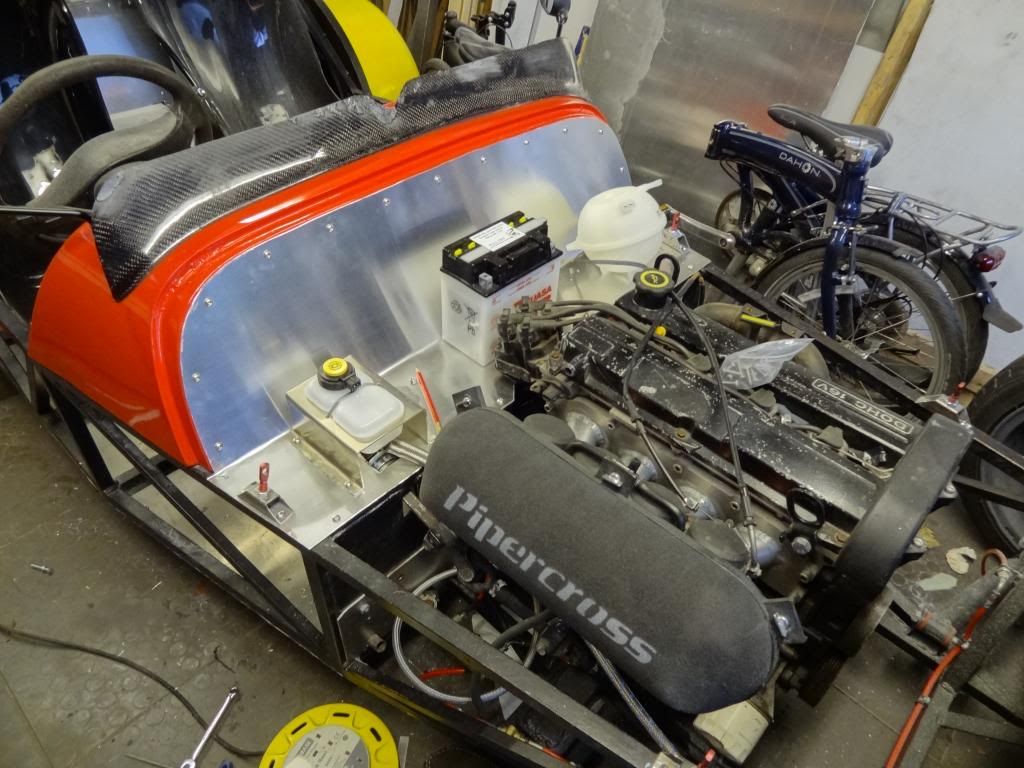
I think the next job now is to make a bracket to mount the polo header tank you can see on the right of the second picture, cost me £6 brand new including postage and even comes with a level sensor so I could implement a low coolant warning on my dash. However it didn't come with a cap and the cap has just cost me £6 to buy... Then once that is mounted I can decided how I want to route my cooling system and then buy all of the silicon hose, joiners, clips and the like, looks like it's going to cost a fair bit but buy cheap buy twice... I've also looked into the cost of getting my bonnet and nose cone vinyl wrapped as it looks like it will be beyond my ability and I got a quote back for £140 with them providing the vinyl, which isn't too bad and will be a last resort after attempting them myself. |
I vinyl wrapped arches ,scuttlle ,bonnet and nose. The nose cone is a nightmare to do well and although it looks ok would not pass close inspection due to small wrinkles at the compound angles. Its ok for now and gets the car looking good for very little money.
However it will def. be a professional spray job when I get the dosh together.:rolleyes: :rolleyes: |
Ayjay, what was the bonnet like to wrap? If it wasn't too bad then I may wrap the bonnet myself and get the nose professionally wrapped to get the best of both worlds.
I have now finished the bracket for my header tank, however it does oscillate a bit if you pull it down and let go, I am hoping once the hoses are on they will act like a damper to stop this from happening, if it doesn't then I'll make a new bracket with more than one support arm. 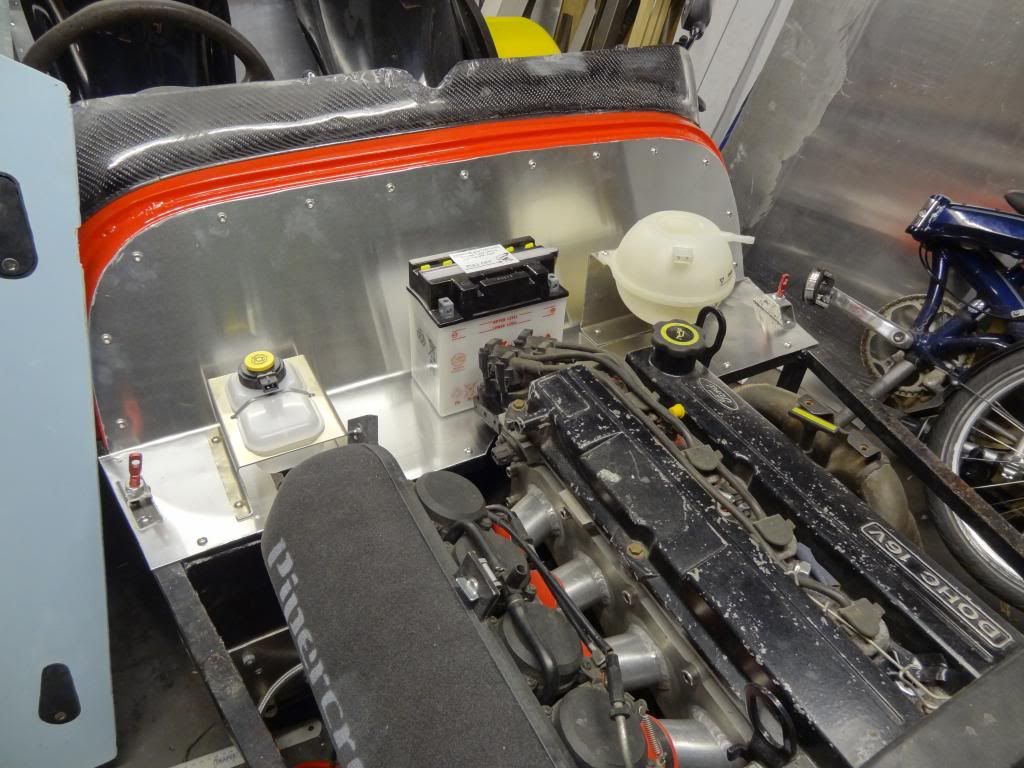 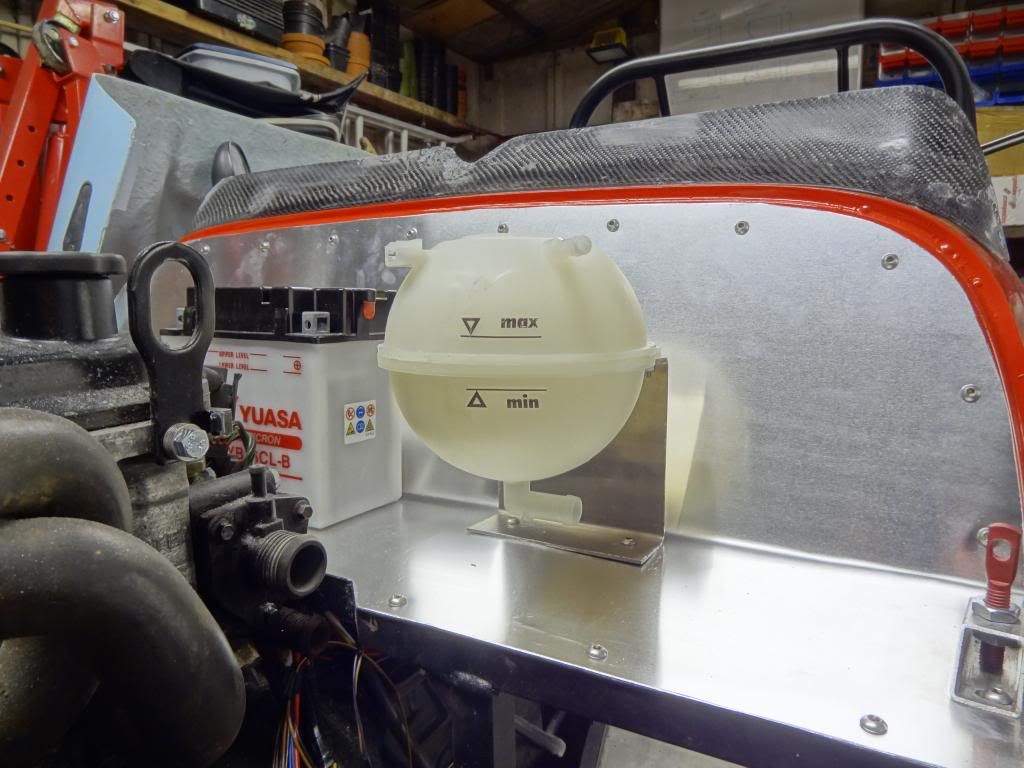 |
The bonnet is easy compared with the scuttle. There were no compound angles visible on the outside surface so no wrinkle potential. However your power bulge complicates things .Make sure the surface is nice and warm before starting as well as the vinyl. The little vinyl smoothing tool that you can get on ebay works better than any other sort of squeegee.
Hope this helps:) |
I'm guessing it will be a case of applying it to the middle and working back first and then move forward onto the scoop and apply heat to the vinyl to stretch it around the scoop?
I have a Teflon squeegee that seems to work quite well, however I have seen in a video on YouTube of what was essentially a nylon wheel with a handle that allows you to push the vinyl into concave surfaces like the edges of the scoop after applying a bit of heat, it looked like a brilliant tool but I can't find it anywhere. I've now provisionally placed an order for some of my cooling system, I've gone for silicon hose and polished aluminium lengths, however I have only ordered the hot coolant hoses and the expansion hoses to start with as the cold side of things is a bit complex as you are joining 4 different hoses together that have different diameters and point in different directions so I'm going to have a go at the easier side first to get the hang of dealing with the silicon hose. |
Quote:
|
Quick update, I've now finished applying the body filler to my bonnet and I've hosed it down to remove all of the fibreglass dust so I should be able to attempt wrapping it on Wednesday when I have a day off.
I have placed an order for 2/3 of my cooling system and when they arrive this week and I fit them then I will place the remaining order for the rest of it now I have decided what I want. I've also managed to remove the large bubbles in my scuttle on the flange that the bonnet sits on, this was done by applying a lot of heat and pushing it into place, it now looks a lot better, its not perfect by any means but has been a good first attempt and will happily see me through IVA. My header tank cap arrived however it turned out I ordered a mk4 polo cap instead of a mk3 so a new one is now in the post and I will be sending the wrong one back. I have also started making the passenger foot well end panel out of aluminium and should finish it by tomorrow morning if all things go to plan. |
Well my silicon hoses arrived yesterday and I've started fitting them now, although only sent me 1 length of 8mm ID hose instead of 2 so I haven't been able to finish the expansion hoses. I am impressed with the way they look and all hoses should be running down the same side of the car and will be in top of each other so should make for a tidy looking install.
My new header tank cap arrived today as well, so that's been fitted. I just need to order the remaining bits for it as well as some big p-clips to secure the top hose to the chassis rail. 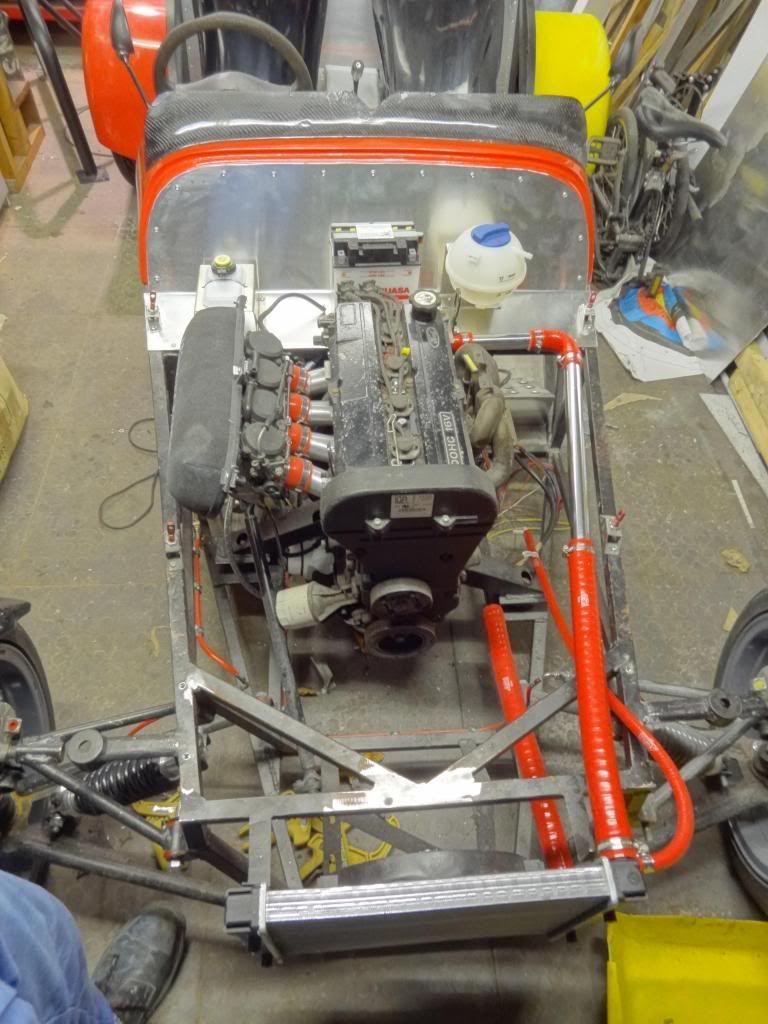 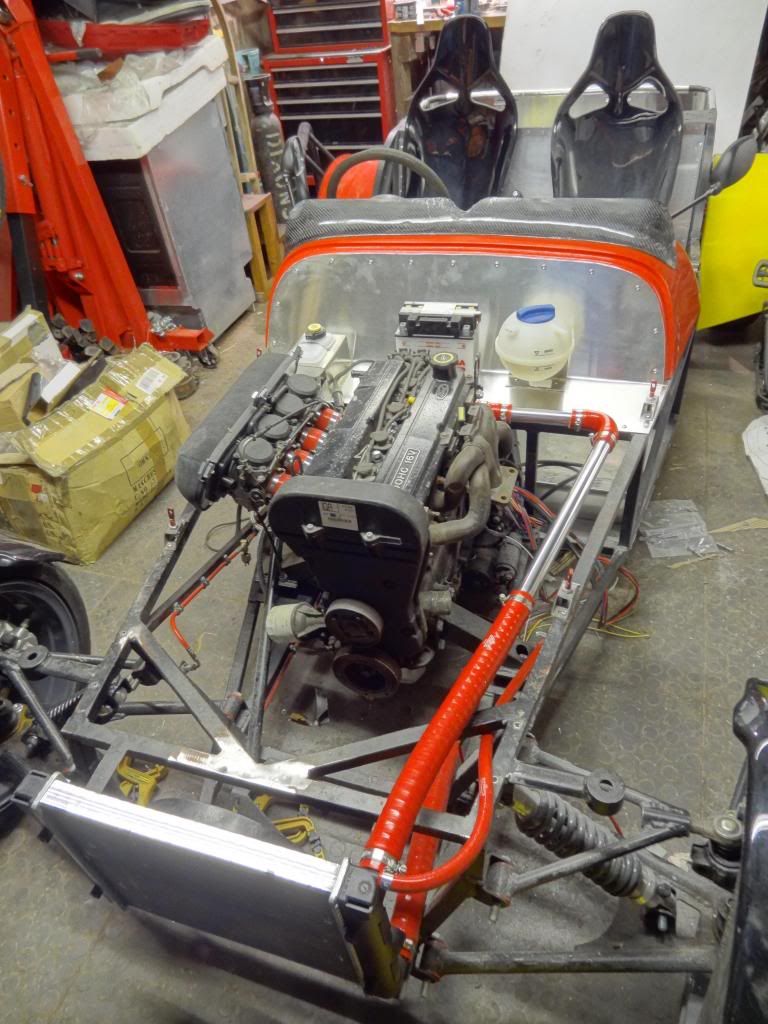 |
I'm very impressed with the progresses you made on your build, Simon, and how nice your car look :cool: you are far ahead of me now!
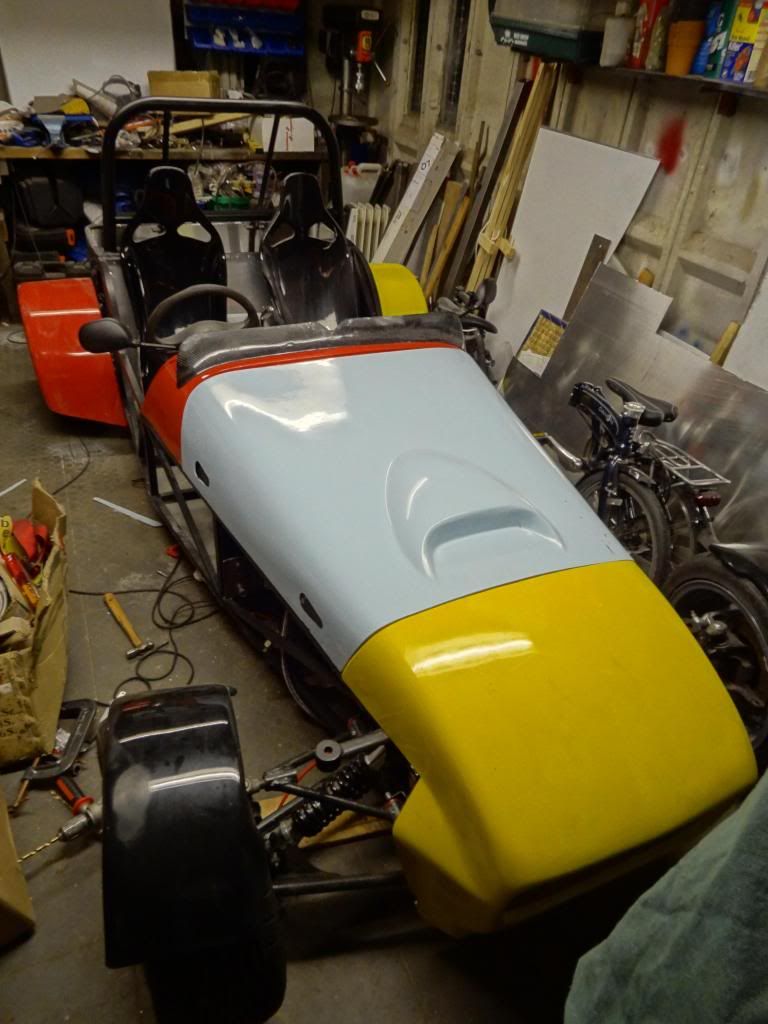
The orange colour of your silicone hoses and body work should be due to your camera or the lightning of your garage, because even the brake lines (that I know are really red), look orange on your pictures, so I guess everything is more red than it looks here :p Anyway, congratulations for the good work :) |
Thanks for the comments Sylvain, its much appreciated. And I can confirm that everything is bright red and not in fact orange, those pictures were taken without a flash in my poorly light garage, just need to get the engine started and I can take some pictures of it outside!
|
Well it's been a long while since I've updated this, I've now moved out of my parents house but as I'm living in an apartment I don't have a garage, so my car is 15 mins away from me so progress has been slow.
I've been trying to get into the garage to little odd jobs that I can complete while I'm at my parents house so I've finished assembling the brakes, I just need to modify one of the brackets to make it IVA compliant and buy some larger push in fittings for my master cylinder and then my brake system will be complete. I've made the passenger side transmission tunnel panel now and I've finished my dashboard, getting the 19mm bend radius on the bottom was a right nightmare but i've discovered a rubber mallet makes for a really good tool when making panels as you dont mark the aluminium when you hit it (previously I was using a piece of wood on top with a ball pien hammer). 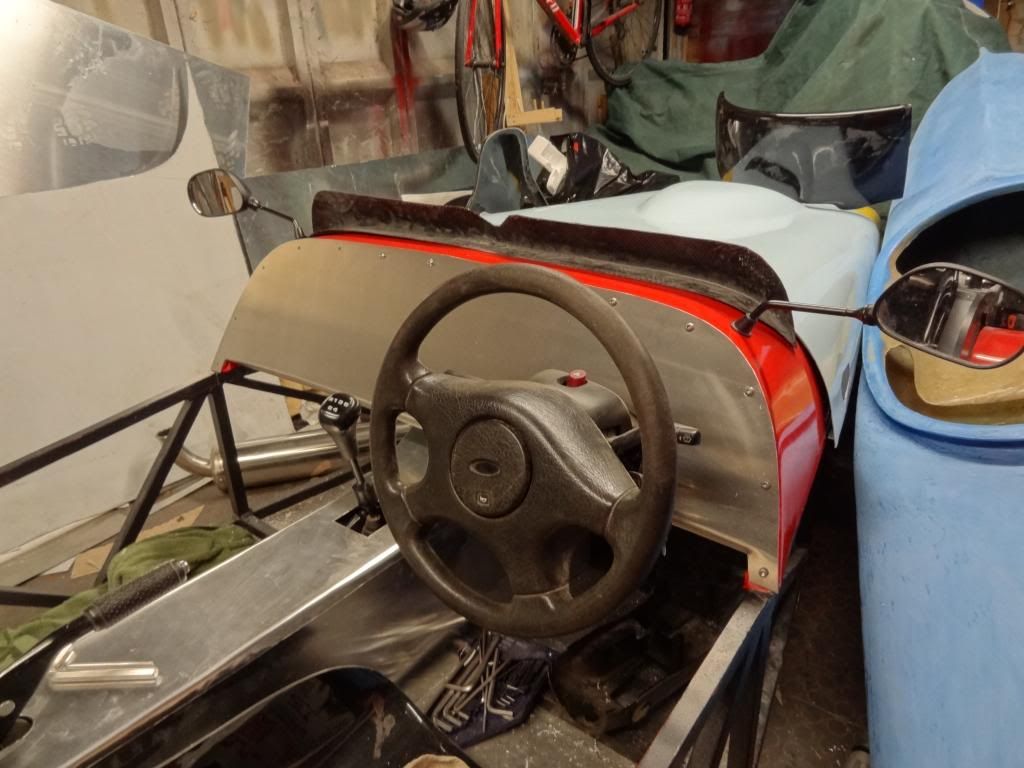 The next job on my list is to try and tidy up the garage! As I am not living at my parents now it has been used as a bit of a dumping ground, and with it being a single garage with 5 push bikes, 1 motorbike, a kit car, 2 sets of tools, a kayak and all of the other crap that seems to accumulate in there it is getting a bit tight, so when the weather improves I'm going to take everything out and try and get some order in there as at the minute I spend half of my time looking for tools. |
I've now managed to finish off my wing stays, they just need a slight tweek when I can roll the car out of the garage to get the fully in the right position, then I will be fibreglassing them to the wing stays as I don't like the look of fasteners going through the top side of them. They need a polish up and some edge trim as well, but I will do that once the car is nearing completion as its pretty tight in the garage now so they tend to get knock about.
 I've also fitted my fog light, reverse light and number plate light after lending a spare number plate my mate had. 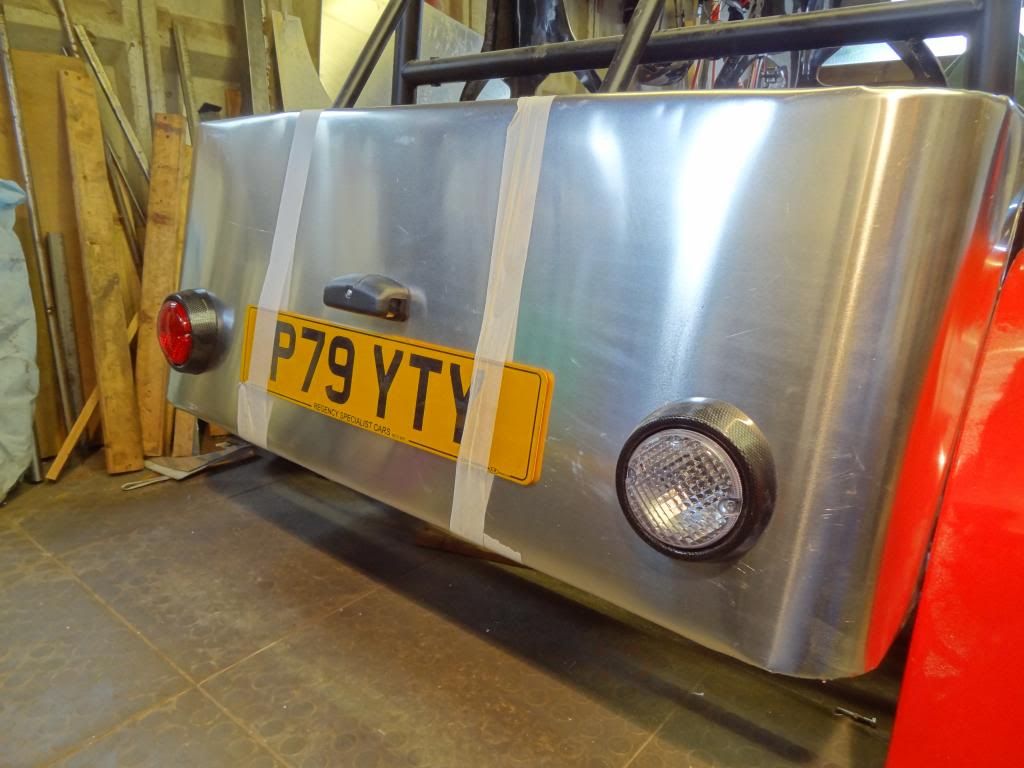 The next job will be to install the rear arches so I can mount the remainder of the rear lights. I still need to order some more aluminium to make the side panels, but that will have to wait until I have some more money and in the mean time I have a lot of jobs that can be done without spending any money which is always good. |
Your fog and reverse are the other way around, that's how they are on the continent.
|
I wasn't sure which way they should be and as they are the same size and swappable thought i'd just put them on this way, I'll get them changed later on, cheers.
|
Fog light right or centre reverse to left.
Daft thought,will the rad not go in front of the engine inside the chassis,would save hose length and make it less likely to damage stuck out the front. Good progress Simon. |
Paul, I think I would fit in front if the engine but you may get overheating problems as you won't be able to channel the air through the rad. I don't know if people experience issues with them getting damaged.
|
It works ok Simon,the Teamtrain car we built has it there and its no probs even without a fan,the zetec does like to run fairly hot for good performance.
Twas just a thought.......;) |
| All times are GMT +1. The time now is 06:11 PM. |
Powered by vBulletin® Version 3.6.4
Copyright ©2000 - 2025, Jelsoft Enterprises Ltd.