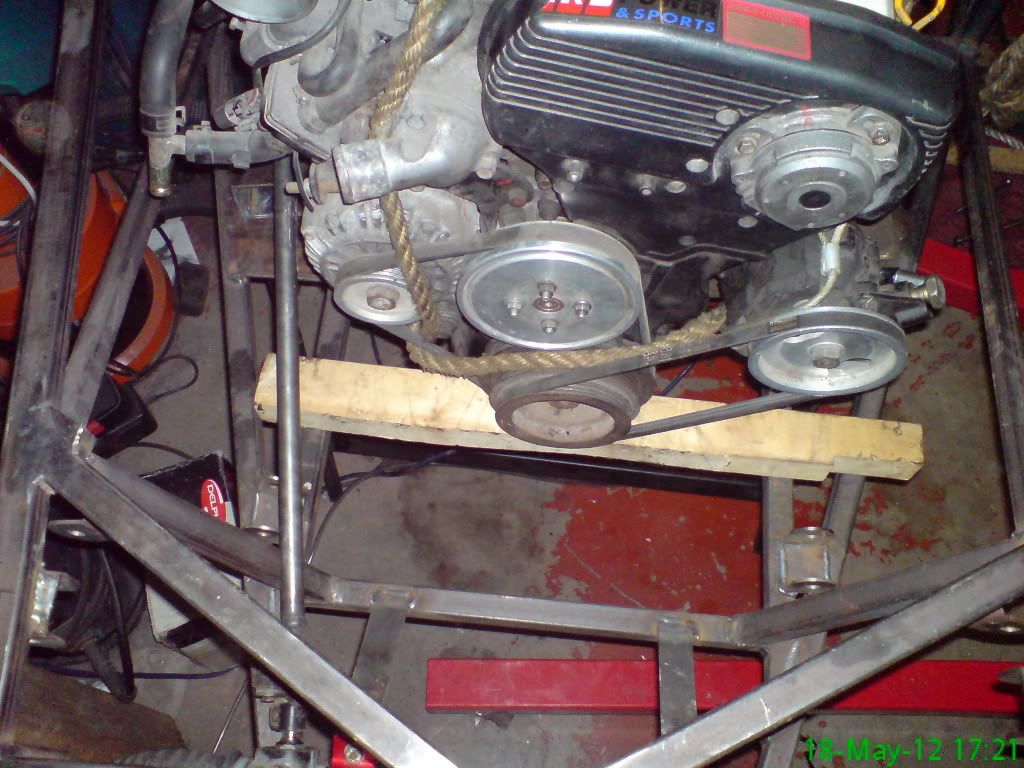
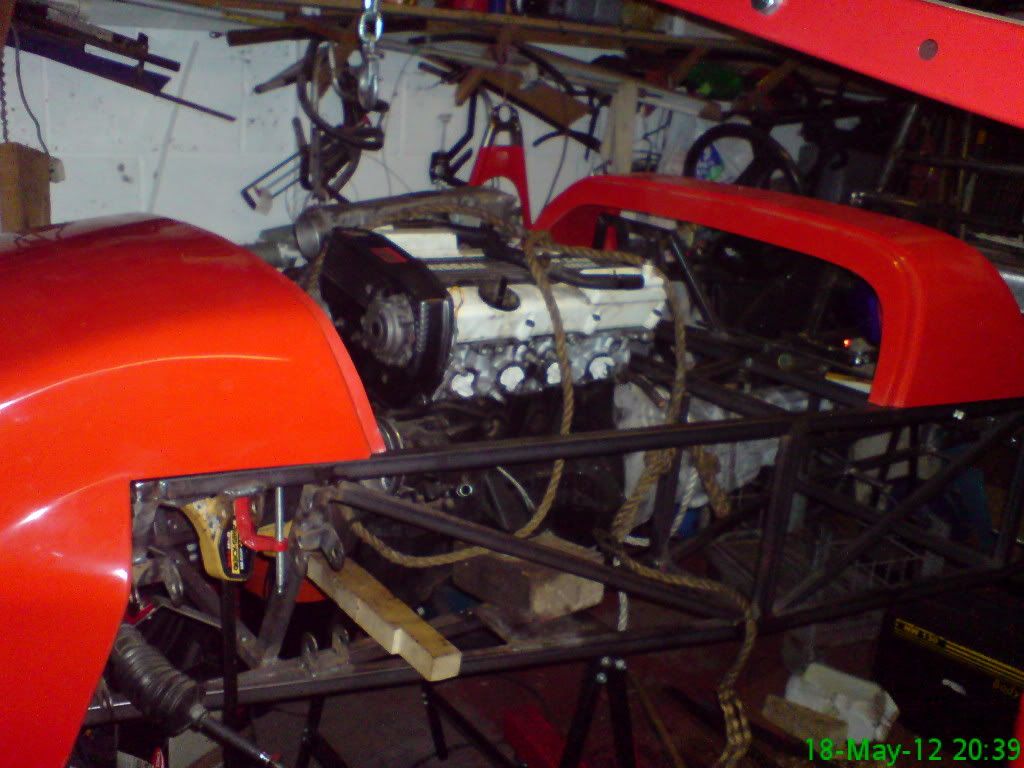
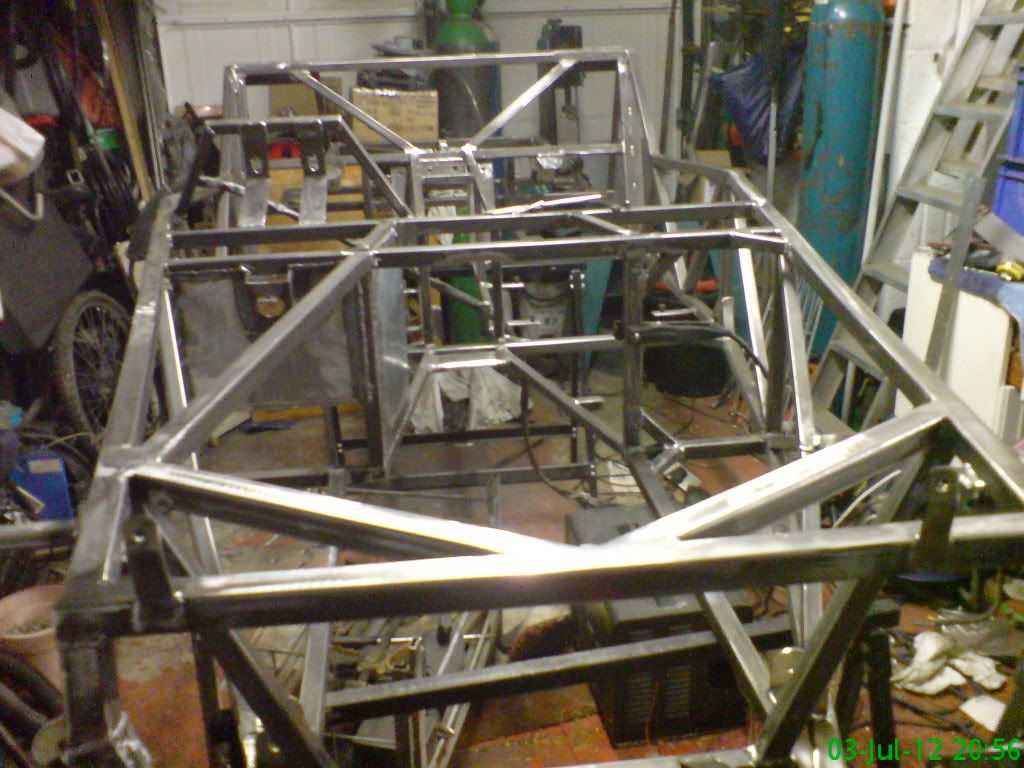
I have managed to get the ca18det engine in and up to now there are no conflicts and the amount of space I have is amazing.....tho I think the bonnet is going to require a small power bulge to accept the plenum and the obligatory sump chop to help with ground clearance.....even offered up some body parts.
   |
nissan??.. what engine u using???
|
Its the ca18det from the nissan 200sx s13 which is a 1.8 turbo kicking out 170bhp in standard form but I have several tuning mods to do, maybe after the IVA:D
|
hmmm, nice...
|
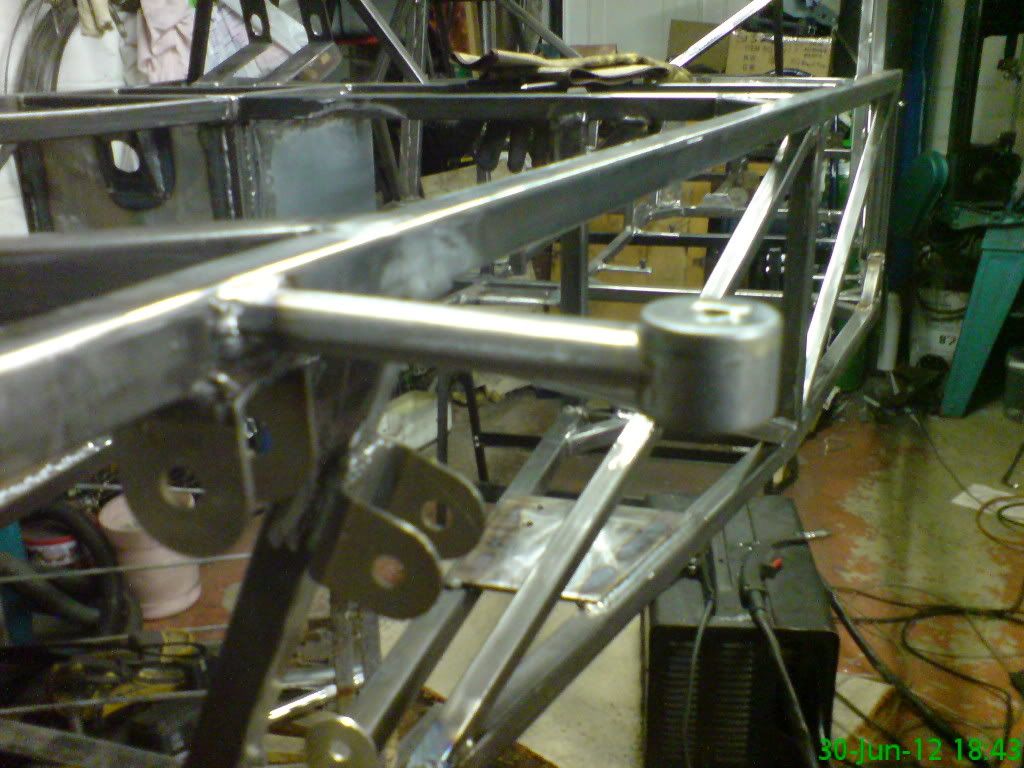
I've decided to use the land rover engine mounts again ....if they are strong enough for a V8 then they will be ok for my engine, after a rummage around my loft I came across a real beefy tow bar mount so I cut it in half on the bandsaw
I then took a small strip of ally and bent it to the angles required for the nissans engine mounts then off down to shed to drill 10mm holes and use the oxy gear to put some heat into the point of bends (remembering to add the thickness onto the dimensions) took some heat and a big shifty spanner to bend it, but it did work out fine. All I need now is the mounts which are on there way to me, when I get those on I can finalize the last pair of small gearbox mount near the back end of the box and then soon after that and a few small bit and pieces I will be ready to paint the chassis....only one piccy today 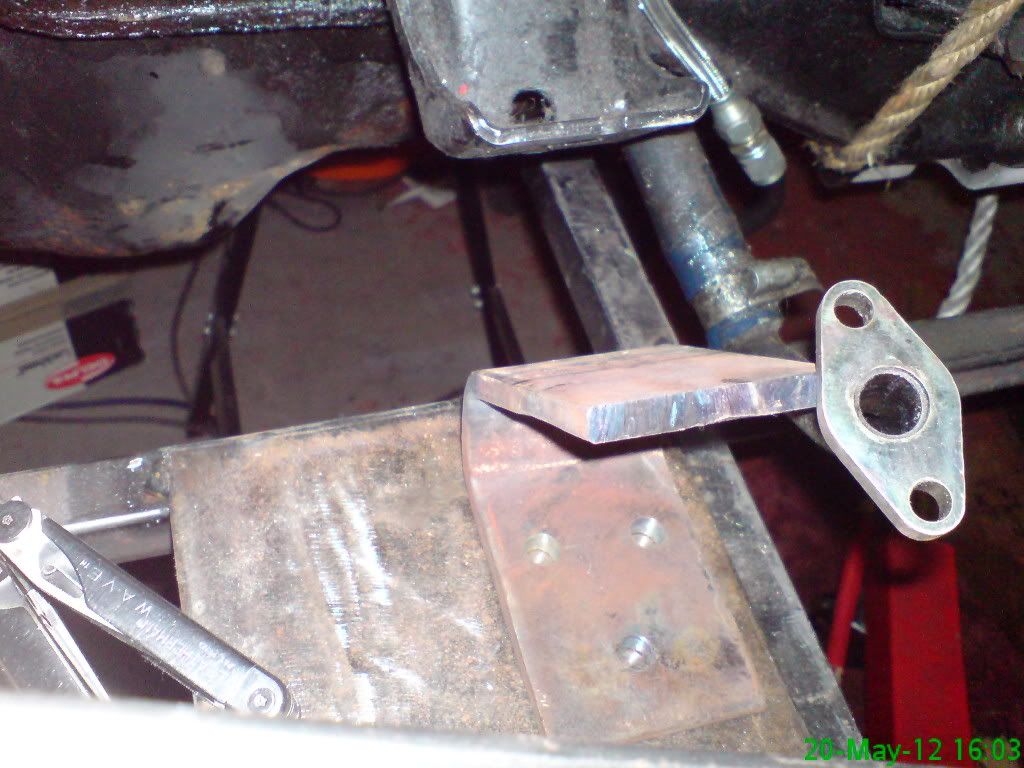 |
Cool.....:cool:
Looks a nice lump in there and with bags of room.... Cars going to look stunning with your wishbones and red bodykit. What do you plan to do with regards to the plenum chamber, I know you said a power buldge but you going to make one or buy one? The 1.6 MX5 has a similar problem with this even with the large NTS bonnet scoop but the 1.8 seems to be ok...:confused: Look forward to more piccy's.... Johno |
Hi Johno...jury is out on that one, might even be a bit different and vac form a teardrop bulge from lexan or acetate and I have not ruled out a cut and shut on the plenum or manifold tubes, since it is a bit down the line I may worry about it then:rolleyes:
|
Got my landy mounts yesterday and was able to finalize exact engine alignment/fitment and have to say it is very solid now that the mounts are all fixed, I think I might employ a vibration dampener at some upper part of the engine. Another good thing is I was able to measure the exact distance between rear diff flange and g/box output seal and is 537mm....that's a bloody short propshaft so will defo be putting in a few extra bits in to act as a prop catcher should things go bang in that area
main mounts now in 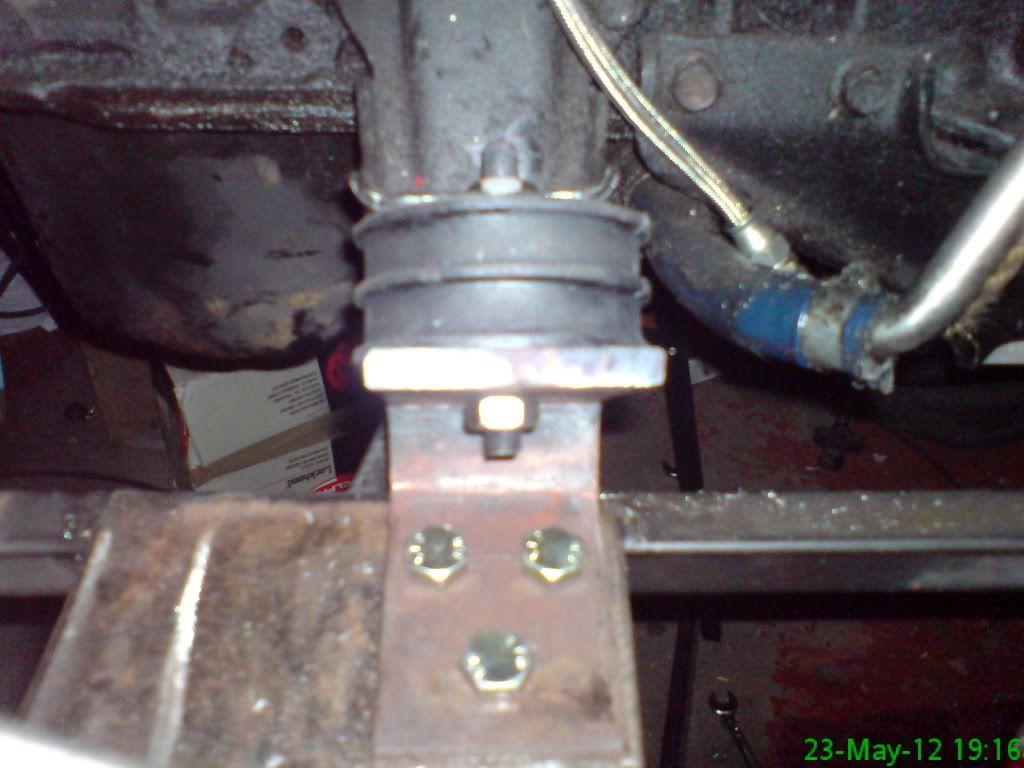 two small supplemental gearbox mounts....it all helps  |
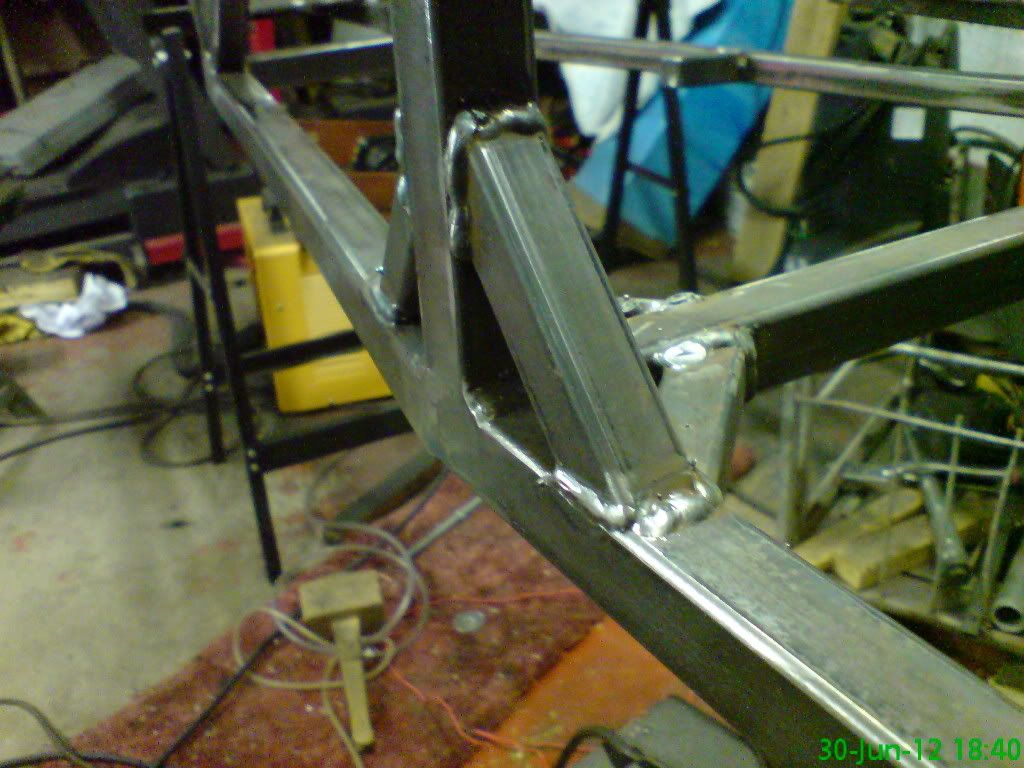
Not got much done lately as been busy in the garden....did however get around to mounting the radiators and acquiring an electric fan for a tenner off ebay also been adding some extra reinforcing with 20mm box section any where that I have ground back the welds to accept fibreglass panels and also around the engine bay area will get some piccies of that later.
here is the rad mounting my charge cooler rad is going in front of this with the fan sandwiched in between them. 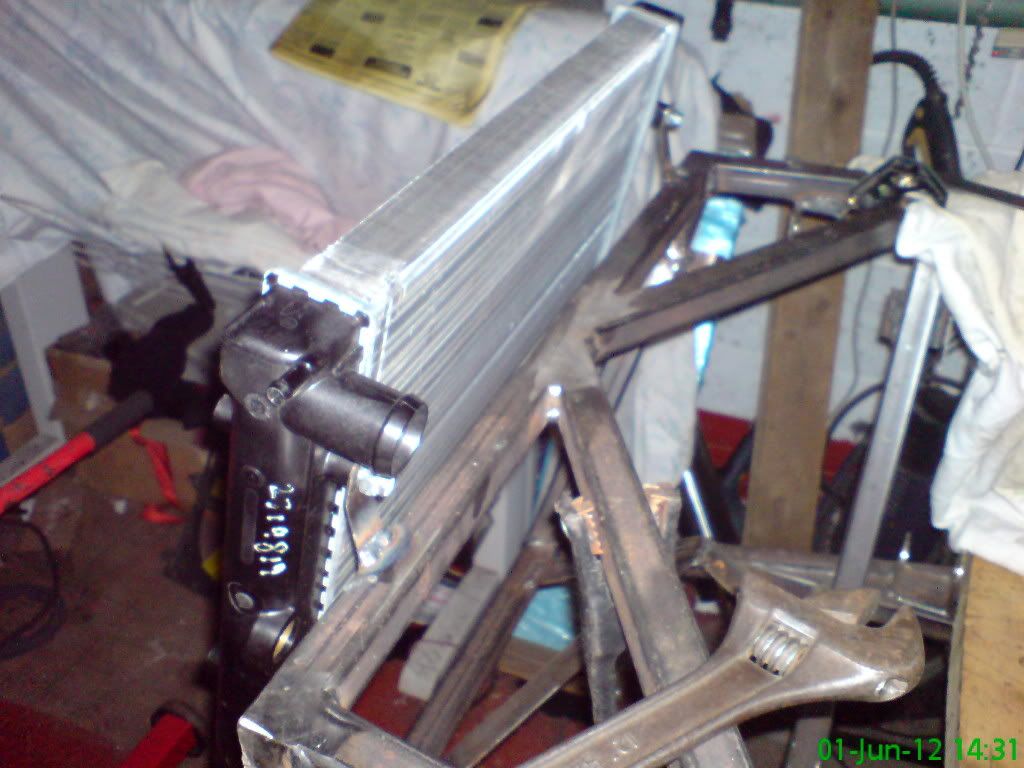 |
Got your PM from this morning, will reply soon.
Regarding your radiator, it looks like you are going to install a blower fan in front of the radiator. My advice would be, if you still can change, to rather install the fan as a puller, behind the radiator. It is much more efficient. A blower fan (installed in front of the radiator) is a big obstruction to the natural airflow. As a general rule, a blower fan should be installed only if there is not enough room between the engine and the radiator to install a puller. Just my opinion though, and I guess you certainly have good reasons to install your radiator this way :) |
I think you may have a valid point there Sylvain ....looks like I will be making a shroud to convert it into a puller:(
|
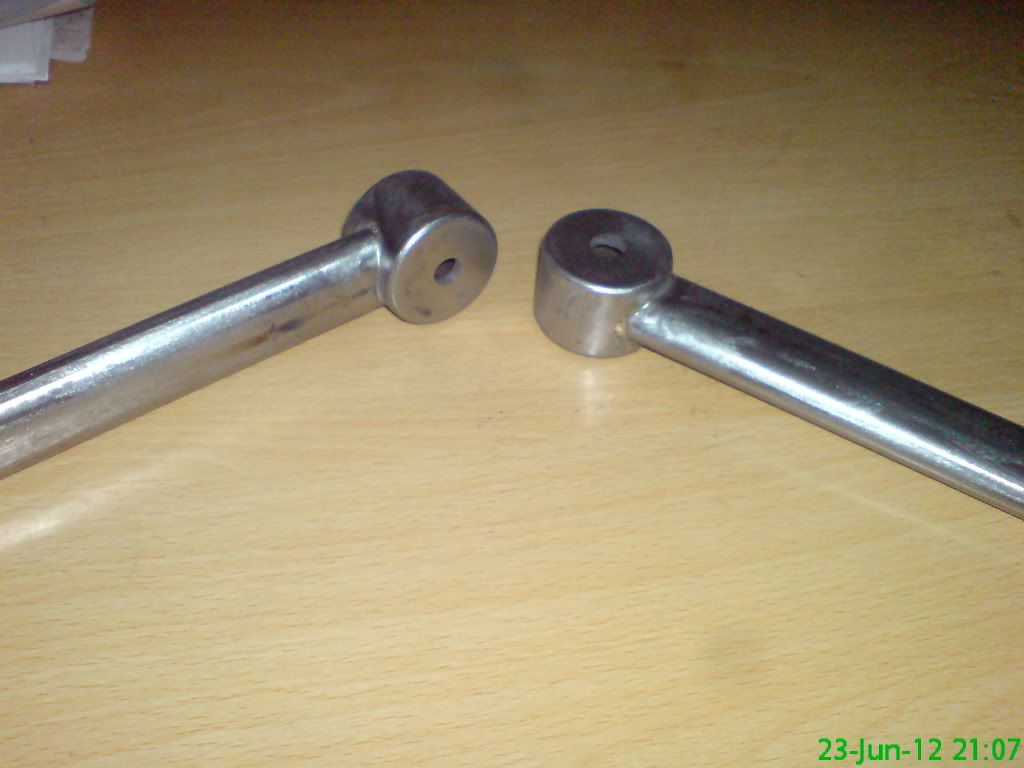
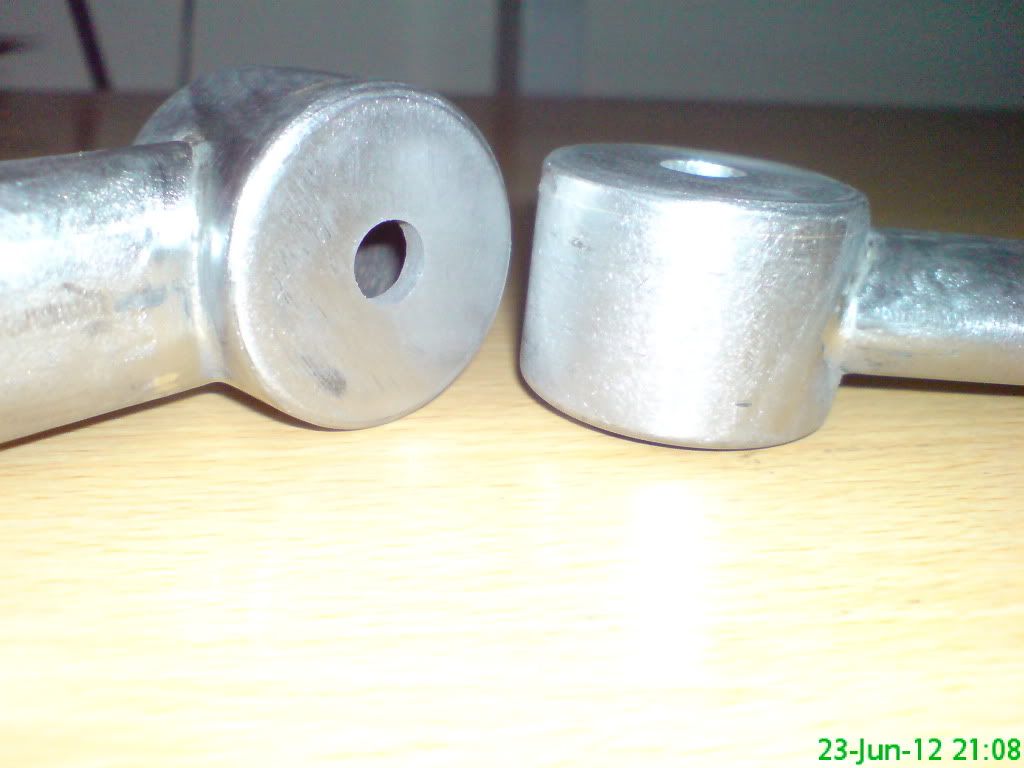
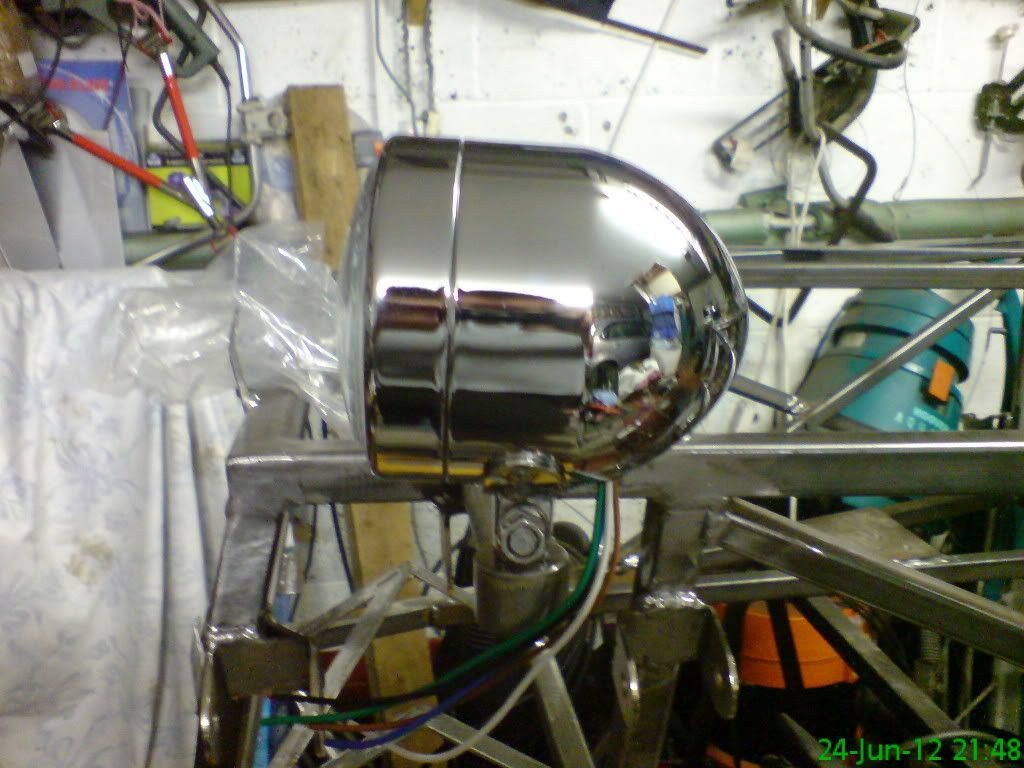
Just when you think you are ready to paint the chassis you find another job to do....this time it was the headlamp mounts....so here is a set I made up yesterday and will be fitting today and hopefully final prep of the chassis to prime.
  |
Hi Kev,
They look very nice indeed :cool: Looks like the old grinding and polishing gears been hard at it again. Have you got your lights yet? If so what type. I was looking at some on SVC's website like the type on the Caterhams but bloody expensive though.. but they do look nice..:) Johno |
Wow! :eek:
Very profesional finish on those brackets, are they reamed out bar or tube with a welded on end? Also, how long did it take you to get your welds smoothed out that much? Makes my build look like something done by an ameteur in a cramped shed with poor quality tools. "Cough, cough, ahem..." |
Quote:
  Hi Oscar....if you look closely you will see a thin yellow line which is where I have silver soldered both the caps and the oval tube (actually a bit squashed round tube done with a vice)....they are on show so I wanted them to look good. |
Started on the worst job to date.......chassis prep for paint....am I hacked off....what a manky job that is ...I know this, if I thought about building another it will be in bright steel....I have 2 angry grinders one with flap disc one with wire brush and interspersed with grinding disc too .....black and decker powerfille....hand wire brush black and decker drill with rotary wire brush and detail sander......and I have had to use them all:eek: ....hope to complete the job tomoz......az effin wrecked:(
|
got the headlamp brackets fitted and welded and very happy with end result.
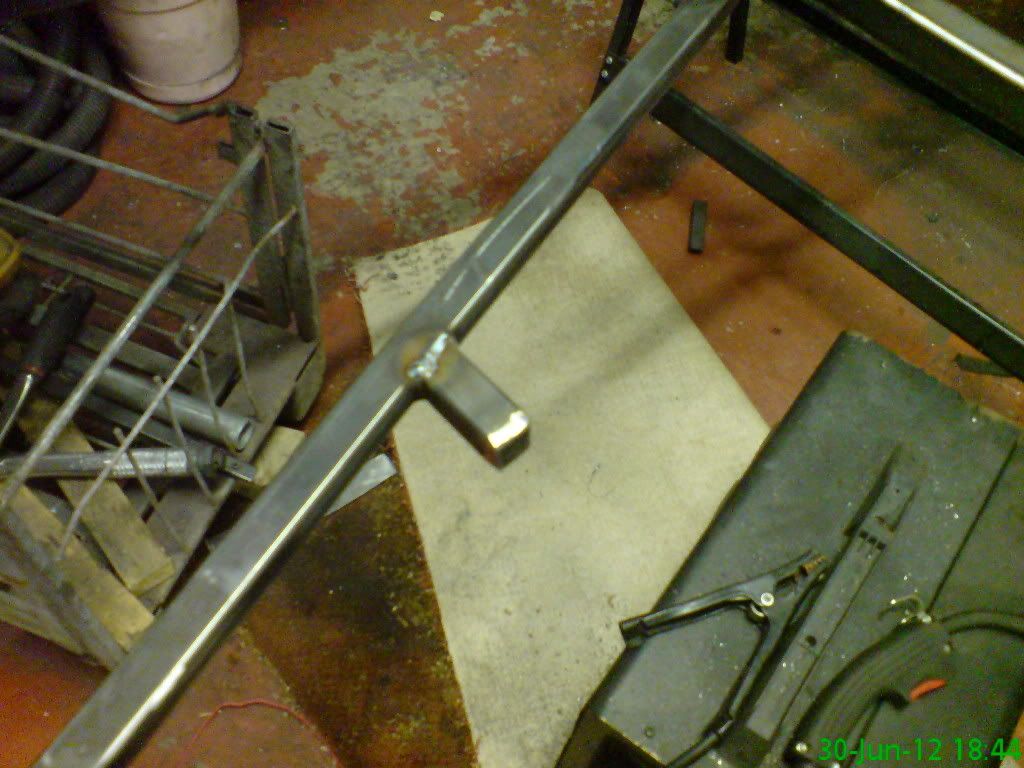
 Been doing a LOT of chassis preparation and still finding bits to weld and I have been beefing up the chassis hopefully to help it cope with the extra power of the CA18DET engine ....will get some piccies of that very soon. |
here are a few shots of my extra bracing that I have put here and there and also two small stubs in each cockpit to assist getting out of the car....I remember when Spud took me out , how difficult it was to get out of the car.....so this is why they are there to put a heel onto them to push yourself up and out of the car.....as to whether they are any good then time will tell when I fit the floor and seats.
    |
Looking good Kev,
I like the idea of additional bracing, i think it was Enochs build thread i seen he used plate as webbing. i think i will add some too! |
Any extra bracing will give a little extra peace of mind especially if you intend to upgrade to a more powerful engine and it is at the cost of a couple of kilograms of extra steel ....I would say it is a win win situation.
|
The stubs to assist in getting out of the car is an excellent idea, especially if its a bit damp out, and you have a bare ally floor. I think i will incorporate this in mine when i eventually get everything and start it
|
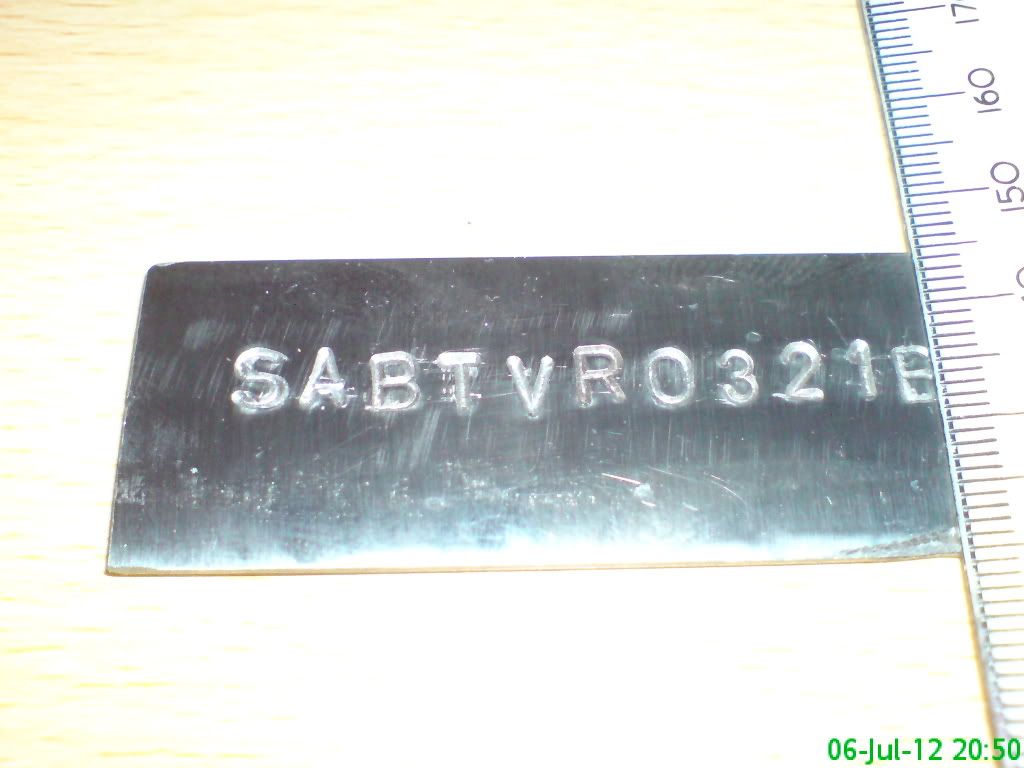
Made a trip down to Stockton yesterday and within 1/2 hr I came away with my chassis number:D .....just needed proof of id so on the way back I nipped into machine mart and got some letter stamps and the result is below ....obviously I am not showing the whole number for security reasons, but after a few practice attempts the actual one I did first time worked out well so this will be the final thing that I weld onto the chassis before painting.
 |
At last....once I have welded the above plate on.... my chassis will be ready to paint....feels like a milestone in the build, must have gone over it about 4-5 times and always finding something else that should or needed to be done, so this is the last time you will see it in this colour.
 |
Nice one kev what did you have to take with you to get your chassis number
|
Hi Dave ....I took along my sierra's log book which is in my name, but I think anything with your name and address on it like your drivers licence or a utility bill
I think the womans name was Julia or Jullietta she is the only one there that seems to know what to do.....at first I was told I had to build the car then present it.....but I TOLD THEM:eek: that this was incorrect and that other persons had been to this office and came away with a vin number so do not take no for an answer even if you have to wait. |
Think I will go get one on monday when am off
Have run out of jobs to do on the car till I can get the materials I need so will give me a sense of moving forward with it lol |
I sent them a letter using the template on the forum and got one in 2 days from the Newcastle office. I didn't give any ID or vehicle details
David |
I suppose some dvla centres are good and some bad
Still not painting yet as I discovered yet another job I had not done, mind you I am pleased I am finding them now rather than after painting, the job was a prop catcher ....kept it very simple with 25mm box...now I might get some paint on it tomoz simple prop catcher 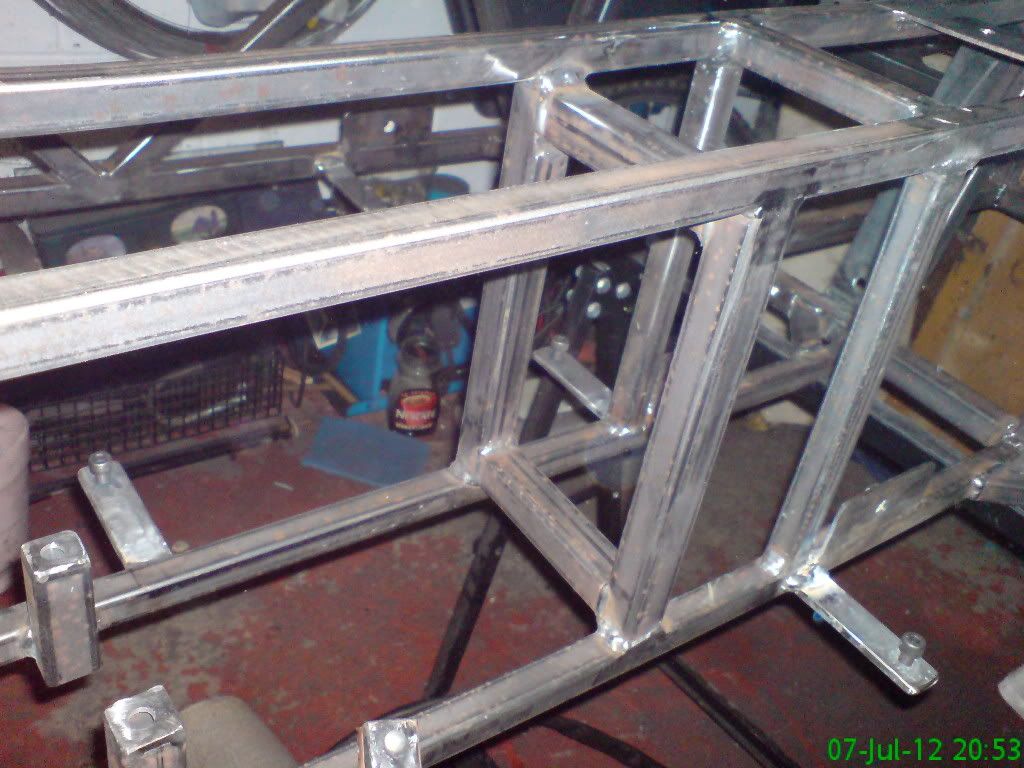 |
Looks good,
Are you going to weld in the pedal box? Like the aditional items.. TT |
Hi TT...just going with book method of nuts and bolts and will then see how it looks and "feels"....would probably try a bolt up stiffener if there are any flexing issues
|
[quote=K4KEV;75637]I suppose some dvla centres are good and some bad
Still not painting yet as I discovered yet another job I had not done, mind you I am pleased I am finding them now rather than after painting, the job was a prop catcher ....kept it very simple with 25mm box...now I might get some paint on it tomoz simple prop catcher Your nearly there:cool: . Nothing worse than spending time painting a chassis and getting into the build to find yourself buffing of the paint to add a kin bracket. A dry build is probably the only way to avoid it:( but its all time and thats hard to come by. Bob |
sure thing Bob....any brackets after paint will be riveted or bolted on eg flexy brake lines which are going to be anodized anyway.....starting to get excited again like I did when I put the first piece of steel on the table.:D
|
Looking good Kev :)
Glad you had an easy ride with your local DVLA, some of the offices don't seem to have a clue. Guess it shows that it is probably best to go in person if at all possible. ;) Where do all those little welding jobs come from ? Must have flipped my chassis at least 3 times & kept finding missed welds, mind you, I am as blind as a bat without my reading glasses. :D :D |
Queer thing is Ronnie, you tell yourself you are going along one length of tube to the other then on to the next one and before you know it you have digressed to the other side of the chassis and missed out all the ones you intended to check:mad: but the obvious worst is finding one after paint ....do you weld it or not:eek:
|
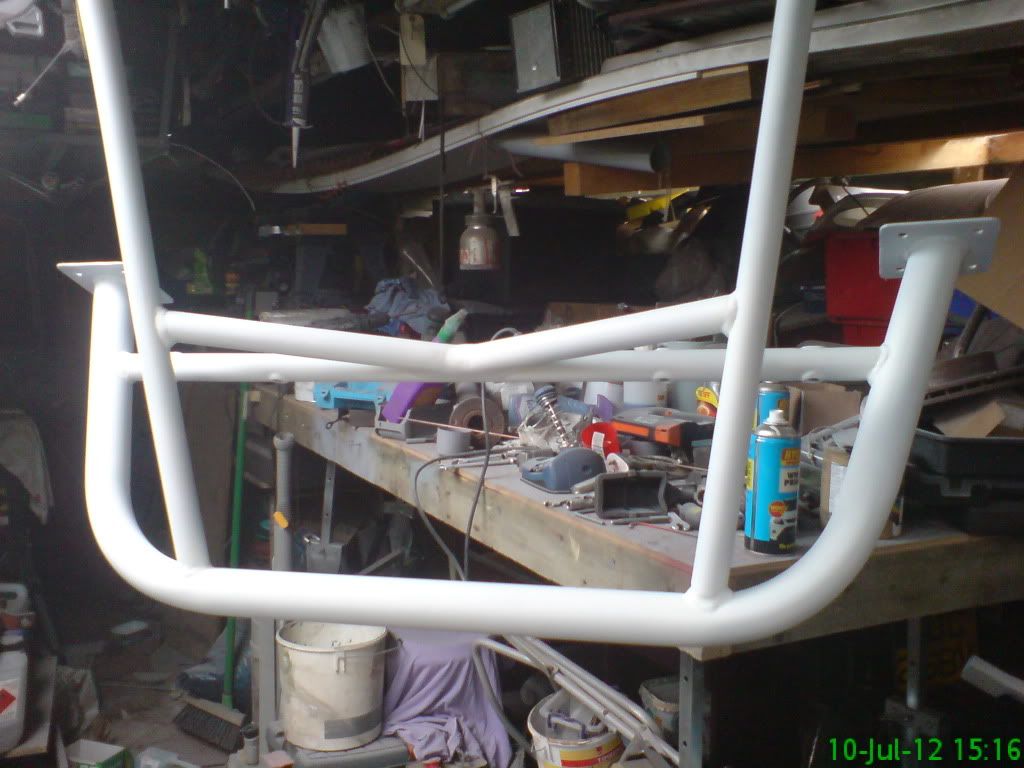
Well everything is prepped and ready to paint ...well in primer first of course so here is a piccy of my roll bar (upside down in my shed this will be the first item to get the rattle can primer then it will be sprayed jet black to match my arches
at some point tomoz it will be in primer will post when that is done 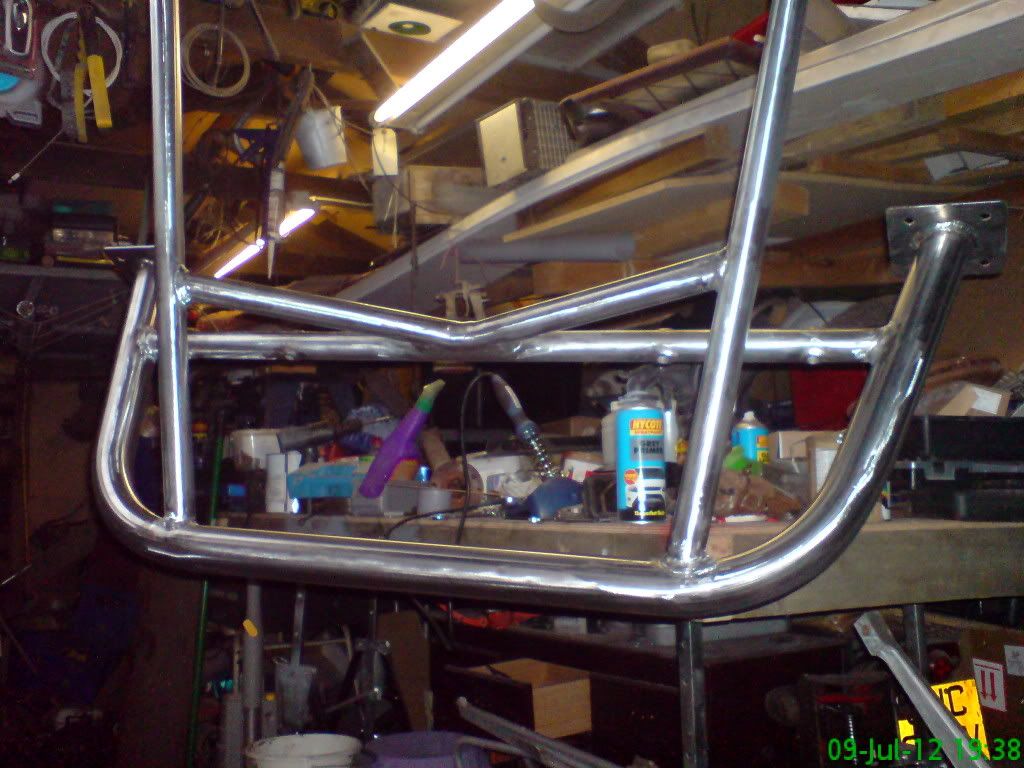 |
well I have managed to get a few coats of primer onto my roll bar ....I am using grey and white primer ...that way you can see what you have covered will soon start on the chassis.
 |
May I please have your roll bar Kev :D
I am liking the look of that very much. :cool: Why not set up a big tank so as you can Chrome plate it. :cool: :D |
That's looking very nice indeed....:cool:
I like the addition of the two horizontal braces. I must say you really do liking polishing stuff, there's gonna be no rust bleeding through that roll bar....:D Nice work Kev...:cool: Johno |
+1 for the Roll bar appreciation, may have steal steal... I mean take into consideration, the idea of the additional bracing!
|
Cheers for all the nice comments guys....it does help push me to keep the level I started when I did my w/bones.....the 2 extra braces are there for a reason which I will divulge post IVA but I also thought it was a bit different, have just finished with the jet black on the RB but was knackered and I did not have my phone on me so no pic until tomoz....ready for a couple of cans now:D
|
| All times are GMT +1. The time now is 01:22 AM. |
Powered by vBulletin® Version 3.6.4
Copyright ©2000 - 2025, Jelsoft Enterprises Ltd.