Could you drill holes through it so you can use a long piece of pipe as a tommy bar to try and twist and pull? Problem is holding the can tight enough without damaging it.
Cheers Stot |
I think I would be tempted to try rusty end squashed in a vice first and try to get some rotation out of it, failing that cut the rusty bit off just shy of the stainless and used a stout screwdriver to force the rusty bit to crumple inwards the only other way is to use a die grinder to grind a strip through inside of the old steel till you meet stainless then just rip it out .......a few methods there for you:D
|
Quote:
Bob |
Cheers everyone! I chopped it off and got my Dremel and trusty screwdriver out!
It is now out!  |
Today I ran the engine for a good ten minutes to check for leaks. None that I could see. It didn't get hot enough for the fan to kick in but the t's and p's seemed to be ok. The only warning light I have is for the brakes (presumably as there is brake fluid in).
I plan on doing a bit more work tomorrow and maybe taking it for a bit of a spin (on the drive). I will make sure I record it and will put a link on here. David P.s I have installed the horns  |
interior panneling
What is the minimum thickness of ally i could use on my tunnel sides? I was considering 1mm. Does this sound thick enough?
also... how have people panelled their chassis' on the drivers side next to the pedals? On my saturn chassis there is a metal plate on the side adjacent to the prop however I was think of putting the ally on the inside of the cockpit. Have you all bent the panel to go from the inside to join up with the steel plate? Any pitcure would br great as I don't want to have to redo this once it has been done (like everything else on the car lol) Thanks David |
fairly sure I am on 1mm Ally.
The front steel section is on the outside face to give an extra 20mm of foot room. TT |
Quote:
|
no, steel in the footwell and ally on the tunnel
TT |
Quote:
  HTH Cheers Stot |
Actually yes it's like that IIRC.
|
Yes, that's the standard book design.
I used 1 mm 1050A ally for the tunnel, side panels, bonnet and rear. |
Build update
its been a while since I updated my build. I seem to have been doing lots of little fiddly wiring jobs and nothing too exciting. I had a bit of spare aluminium that I decided to use to make a tunnel cover.
Here is how I did it.  I stuck on a thin camping mat that I got in the sale from Argos for £3  I then got my lovely wife to do some stitch detailing on some leatherette and stuck it over the top   I still need to make a gaiter to go around the handbrake and then back doing some oily jobs again. |
Wow that looks ace!
|
Excellent David, looks very neat! I love it :)
|
Nice work David, that looks sweet!
My wife refused to let my leatherette anywhere near her sewing machine! |
Thats looks well lush mate.
|
Nice one David,;)
It's a nice feeling adding finishing touches to the car especially after weeks of fiddling with Japanese coloured spaghetti stuffy....:eek: Been there buddy, feel for you...;) |
More wiring problems
Tonight I thought I would put a multimeter to the switches for the clutch and the brake lights.
It seems they are both push to break switches but the hydraulic ones are push to make. how do I overcome this problem or am I reading this incorrectly? Can you get push to break hydraulic switches? thanks David |
Quote:
You're right that the OEM ones are push to break and the hydraulic are push to make, but it's not a problem. In the MX5 the switches are pushed in by default, and released when you press the pedals, so they operate the opposite way round :) |
Fantastic thanks
David |
Roll bar
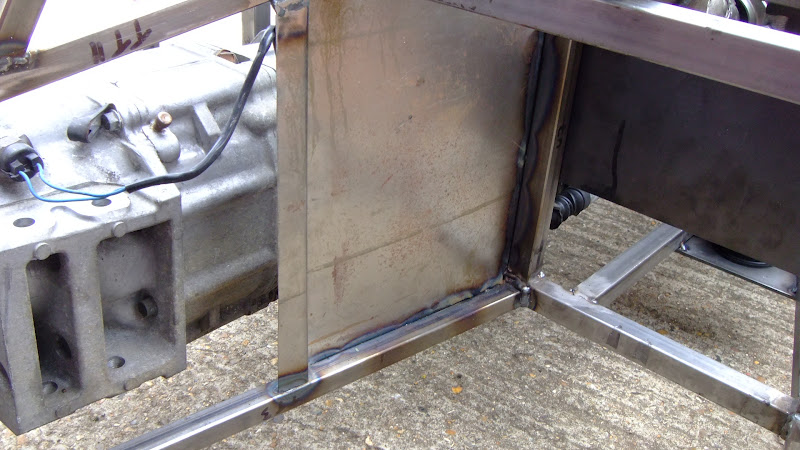
I spent a little more time on Sunday working on my car. My mate came around with his tig welder so managed to get the roll bar stays welded in.
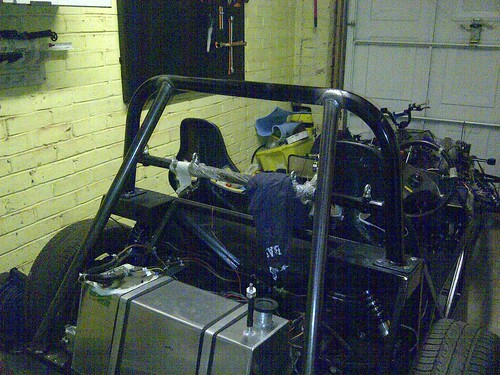 Now I just need to add a bit of paint. I have also put in the passenger seat supports so I can bolt the seat in. David |
Looks good! That's how I will be bracing mine.:)
|
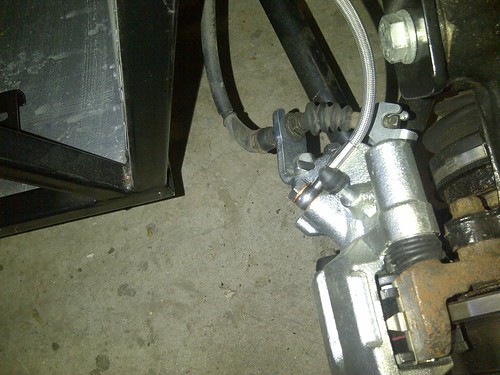
Handbrake brackets
Here are the brackets that have been shortened.
 |
Quote:
Cheers Stot |
Bodywork Ordered
Ive just ordered my bodywork from AGM!!
All orange except the front cycle wings that will be black!! AGM ar loking at making a aeroscreen with a section in the middle for the rear mirror similar to the Saturn one. Roll on 2 weeks!!! i have arranged to collect it in person to make sure there are no imperfections etc. David |
Nice one Dave ...you might have to be thinking of IVA soon or at least download the form.
|
Quote:
I am at the point where everything works. I Just need to attach it under the bodywork (and hide 2 miles of wire under the scuttle!!) Im still trying to put off the water pump as the timing belt needs to come off. I think I will hire a trailer and get a garage to do that bit at the end. I can get it done all in for 200 quid by AK motorsports in rowlands gill. They also have lots of industrial estate roads nearby.(private) Handy for testing it. I can also paint my garage while its away. David. ps I printed the forms for IVA out ages ago lol. Have you got your test date yet??? |
Wow....:D
Good choice on the AGM kit buddy... biased of course...:p Looking forward to seeing it in orange and black(always a good match). |
Quote:
|
Quote:
I asked him if he would look at making an aero screen that would be compatible with the agm kit. He said he is going to do this very soon. Similar to the Saturn one. Not sure if yours has been sorted yet but could be worth a look. Have you got your rear arches yet? David |
I've been shopping around for a pair of rear arches. My mate with a Polish franchised Tiger has bulletproof GRP panels of about 4 mm thickness that have supported the weight of the whole car on the kerb once, and my flimsy NTS arches suffered quite a lot of damage from much less significant stresses, I've been asking various suppliers what weight of the laminate they use for the rear arches. Here's the result:
AGM: 1x600g Gillham: 2x450g Equinox: 2x600 (as indicated on their web site). I've ordered from AGM nontheless, because of the fast turnaround, reasonable shipping cost, and the price which is roughly half of the price of competition. They should arrive at my home in a couple of days. |
Quote:
Yes I have my rear arches now (wife got them from Equinox for a surprise)..:D With regards to the aeroscreen, PorkChop AKA Dave very kindly bought down his bubble aeroscreen made by Aerodynamix when he visited me. I must say it was top notch quality (carbon) and seemed as though it would fit the AGM body kit. |
Westfield to the rescue
I have been wondering about how to make the cycle wing stays to fit the mx5 uprights for some time. I had a look at GBS, MNR and westfield's solution. From the pictures I could find the westfield ones seemed to be exactly what I was looking for. Before I attempted to copy their design I dropped a quick email to them on Wednesday night. I got a phone call back on Thursday at about 9.30am to say that he would do a pair for me. £36 each powder coated and could have them at donnington to collect on Sat or Sun.
I decided instead of trying to source materials, get my mate around with his welder and then send them to be powder coated I would buy them. I collected them at the show. Russell the guy I was talking to showed me around the Honda version and pointed out what they had done with their MX5 cars. Here is the end result. The only parts I have ever purchased for my build that didn't need any fettling or adjustment. they went straight on (5mins/side)!! Before fitting..  After fitting...  I also managed to get hold of a few odds and ends like black rivets along with a big roll of carpet (most awkward to carry lol). There seemed to be a lot of seven type cars and i'm sure one of them was a Haynes roadster but I didn't recognise it from here. David |
So are these only held in place by a single bolt? Or is there something i cant see here that keeps the the fenders moving front to back.
|
Quote:
|
ah so there are two tabs, one going at 90 degrees to the one we can see
|
Quote:
David |
from and still in Rotorua
|
I have bought some 2 inch exhaust pipe that slots together. What size of clamp do I need to join this. Ie how are the clamps measured? Diameter or circumference? I'm confused.
David |
| All times are GMT +1. The time now is 12:06 PM. |
Powered by vBulletin® Version 3.6.4
Copyright ©2000 - 2025, Jelsoft Enterprises Ltd.