Just read through your whole build. Really nice fabrication work and welding! Keep it up - I'm following with interest.
|
Thanks a lot. Its slow going.
|
So ive been slowly tipping away doing a few bits and pieces
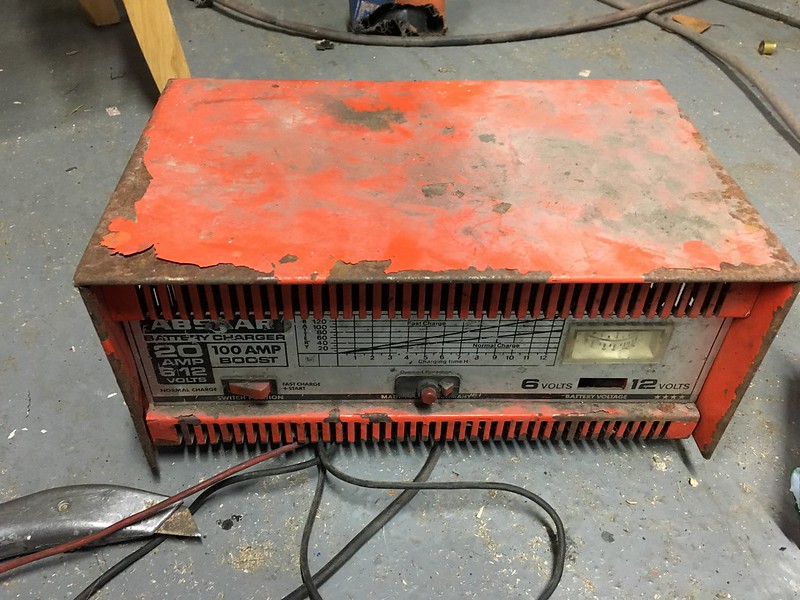
Mostly stripping and cleaning the hubs with wire brushes in the drill which is a pain Another kit car builder dropped in last weekend and suggested electrolysis rust removal This is something i was hoarding stuff for but was too lazy to actually do so not long after that fella left i got cracking 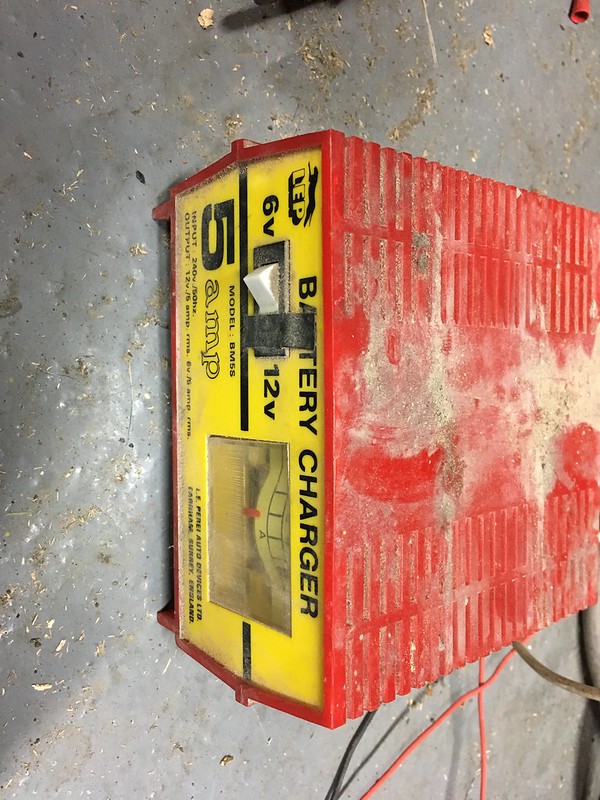 Untitled by stephen harborne, on Flickr Untitled by stephen harborne, on Flickr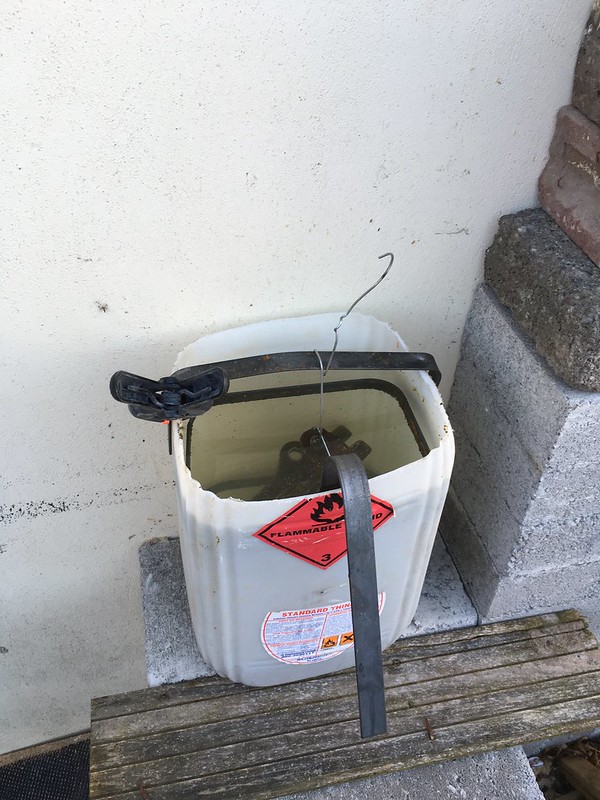 Untitled by stephen harborne, on Flickr Untitled by stephen harborne, on Flickr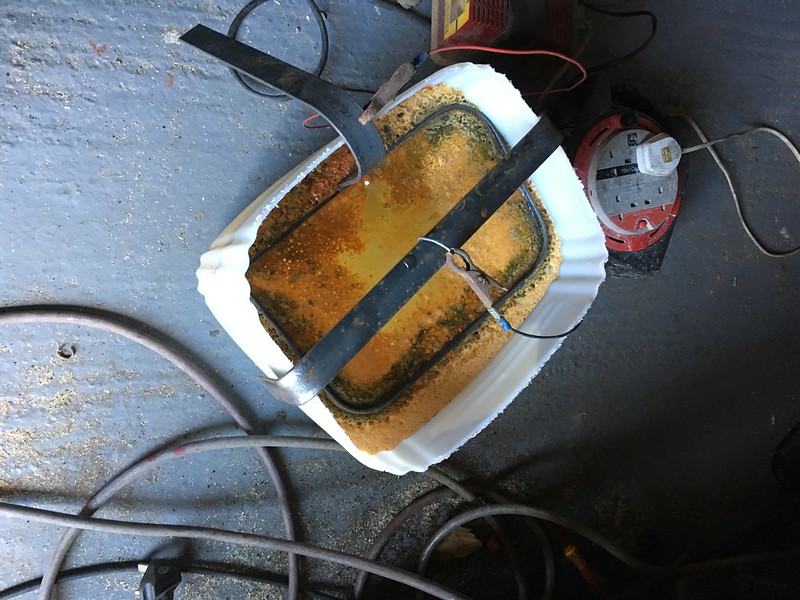 Untitled by stephen harborne, on Flickr Untitled by stephen harborne, on FlickrI gave a part 6 hours and it was quiet clean which made me happy |
So then i got impatient
 Untitled by stephen harborne, on Flickr Untitled by stephen harborne, on Flickr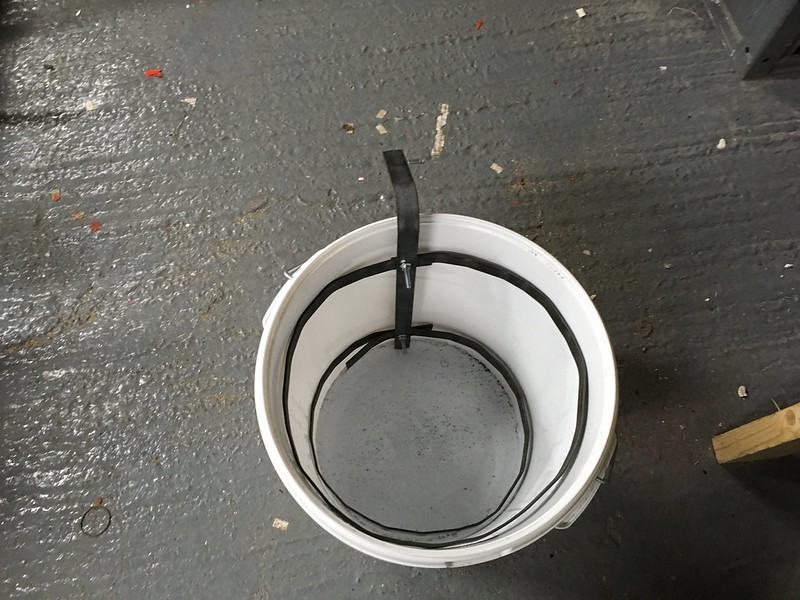 Untitled by stephen harborne, on Flickr Untitled by stephen harborne, on FlickrAnd started on another bigger one I also did a bit of filler work on the bonnet 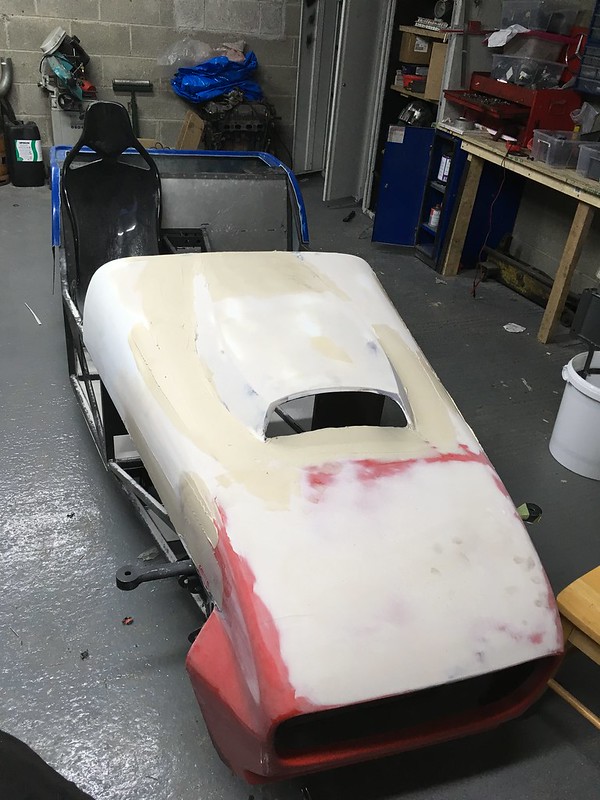 Untitled by stephen harborne, on Flickr Untitled by stephen harborne, on Flickr |
So i Gave the knuckle 24 hours in the bath
And i have to say i am delighted with the results compared to the effort and time it took with the drill and wire brush When i took it out of the bath it still had some flakey bits so i gave it a blast with the power hose to remove what was left Then i dried it and ran over it with the wire brush and gave it a coat of kurust Also the process removes all the grease and grime and crap 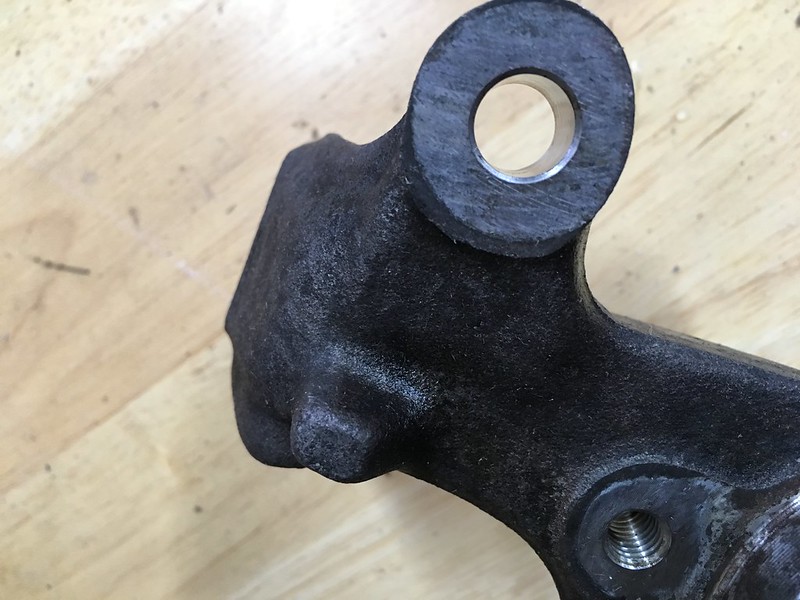 Untitled by stephen harborne, on Flickr Untitled by stephen harborne, on Flickr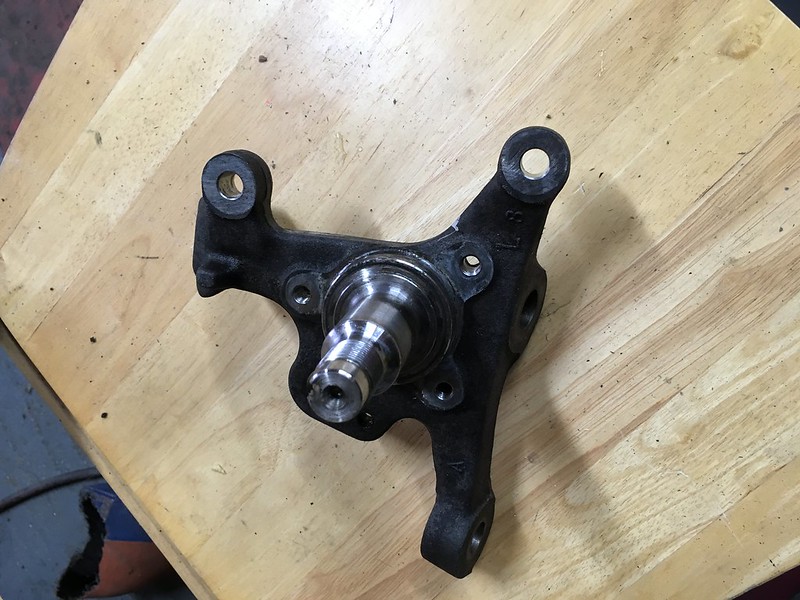 Untitled by stephen harborne, on Flickr Untitled by stephen harborne, on Flickr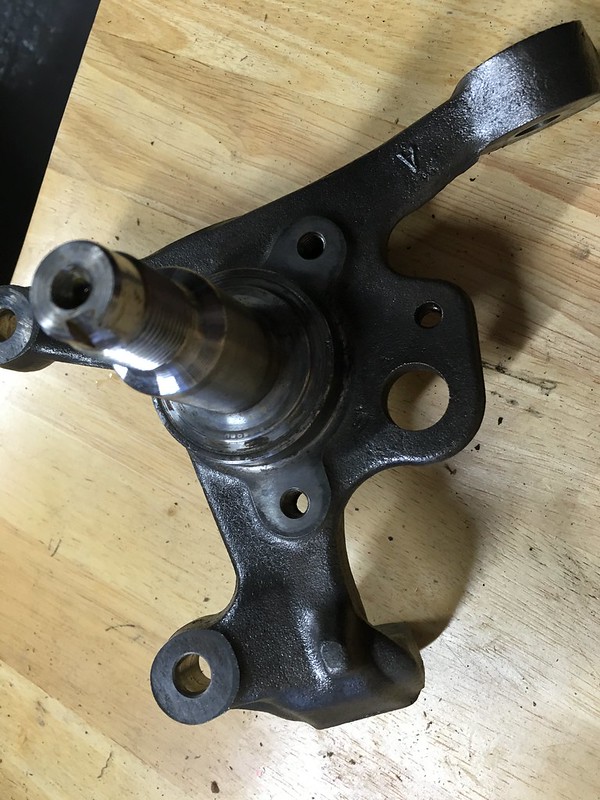 Untitled by stephen harborne, on Flickr Untitled by stephen harborne, on Flickr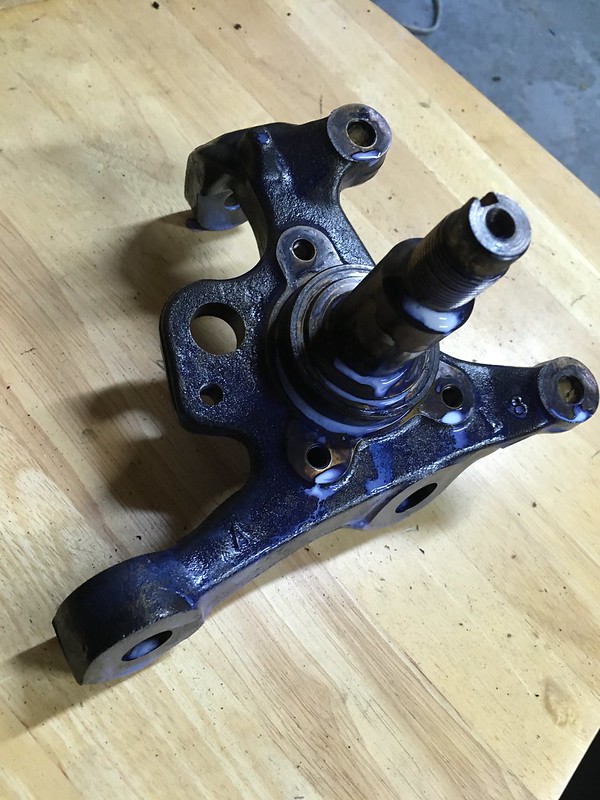 Untitled by stephen harborne, on Flickr Untitled by stephen harborne, on Flickr |
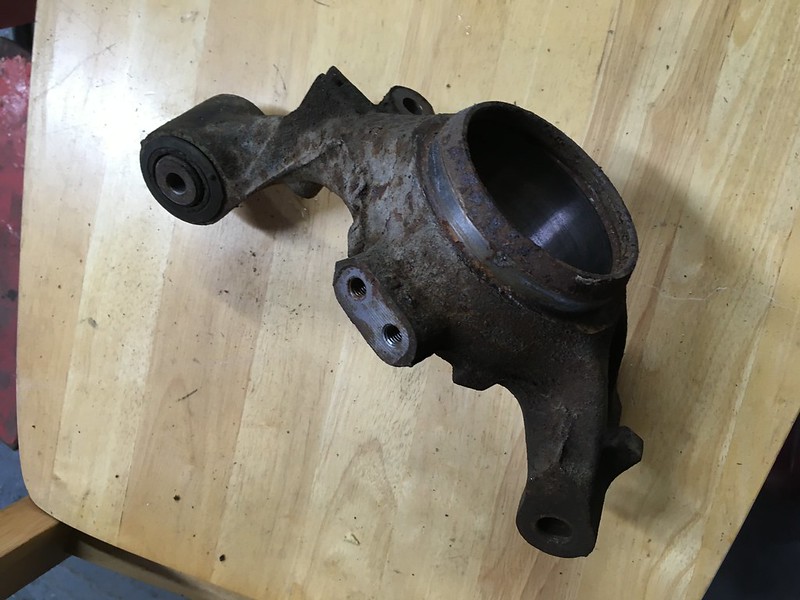
This is what it looked like before
 Untitled by stephen harborne, on Flickr Untitled by stephen harborne, on Flickr2 on the go now 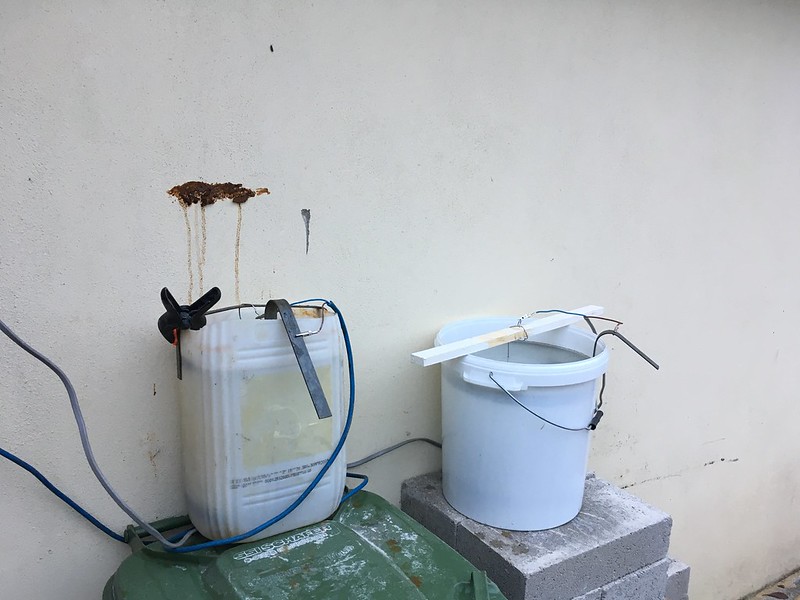 Untitled by stephen harborne, on Flickr Untitled by stephen harborne, on Flickr |
Brilliant - welcome to the club - worked for me as well on loads of rusty bits for my build :)
|
Wow - I've been toiling away with a parts washer, pressure cleaner and wire brushes! That looks a lot easier.
|
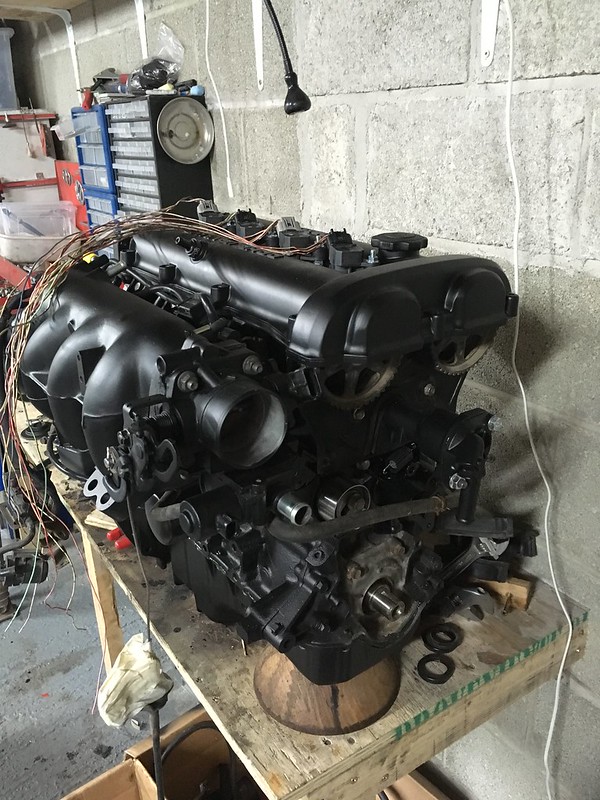
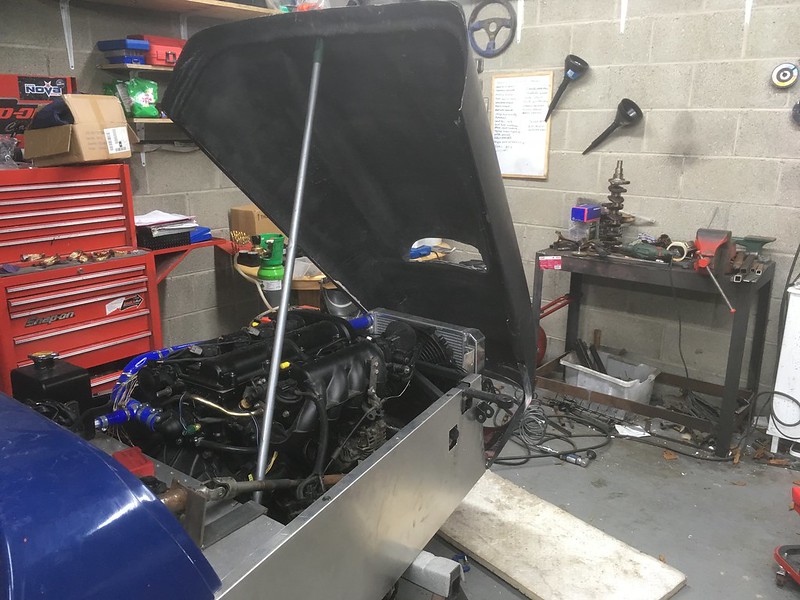
So ive a serious pain in my face at the moment cleaning and painting and reassembling the engine
Before 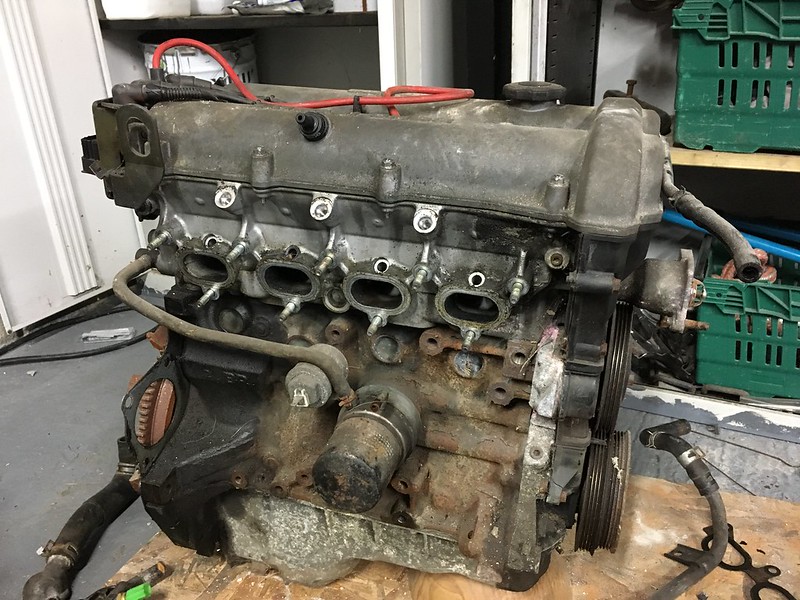 Untitled by stephen harborne, on Flickr Untitled by stephen harborne, on FlickrCurrent 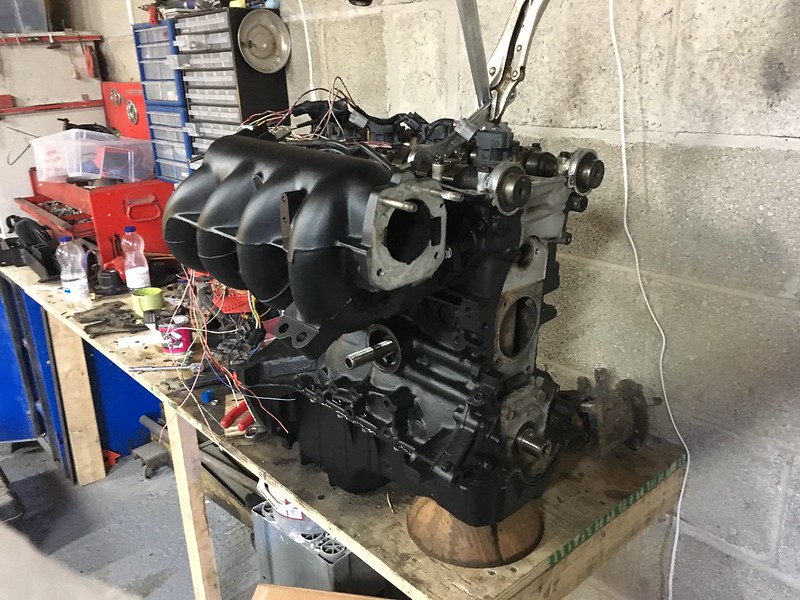 Untitled by stephen harborne, on Flickr Untitled by stephen harborne, on FlickrIm also doing a coil on plug upgrade as i had all the parts i needed so it didnt cost me anything 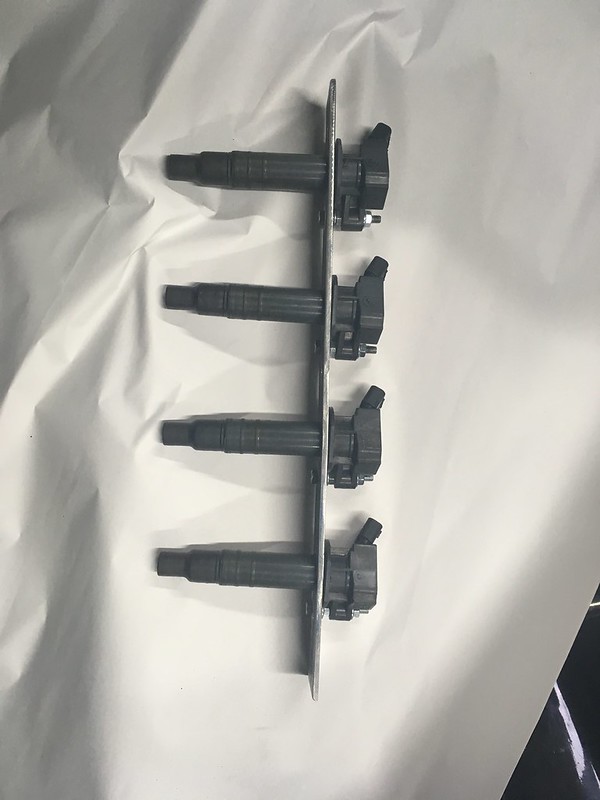 Untitled by stephen harborne, on Flickr Untitled by stephen harborne, on Flickr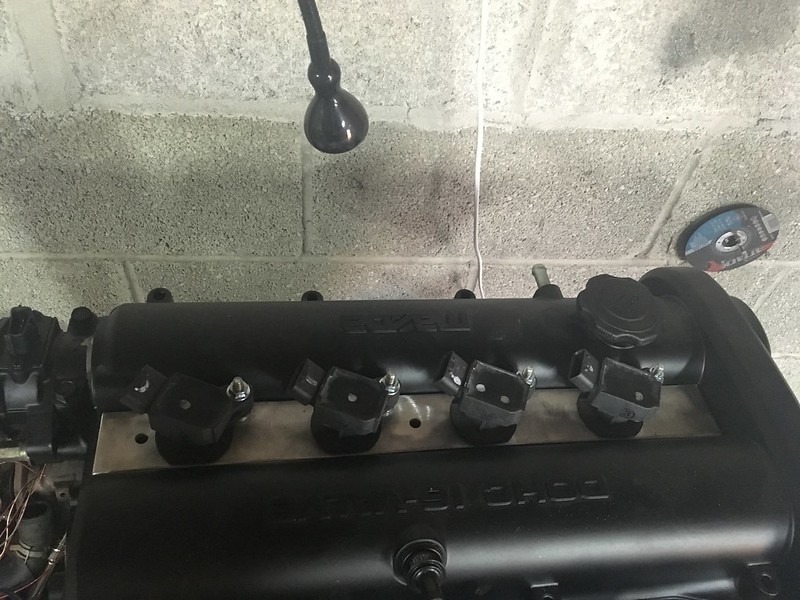 Untitled by stephen harborne, on Flickr Untitled by stephen harborne, on Flickr |
Some more progress
 Untitled by stephen harborne, on Flickr Untitled by stephen harborne, on FlickrIm also going to do some kind of diy coolant reroute Havnt got it fully figured out yet 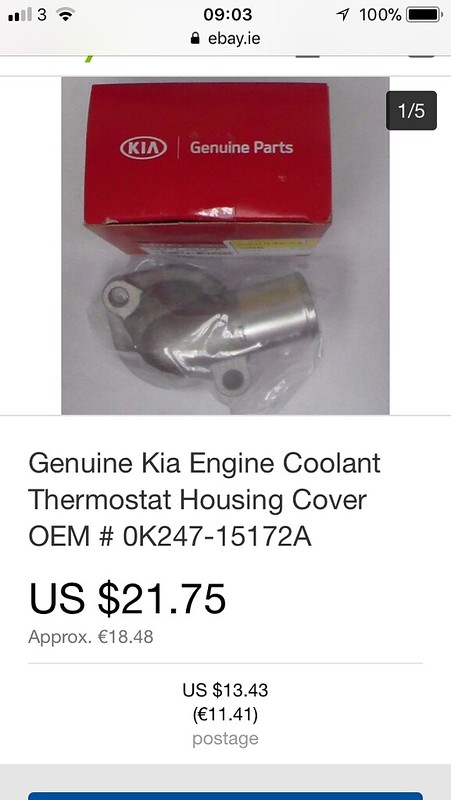 Untitled by stephen harborne, on Flickr Untitled by stephen harborne, on FlickrThis part fits nicely of the back of the engine like so  Untitled by stephen harborne, on Flickr Untitled by stephen harborne, on Flickr |
Finally got the engine back together mostly
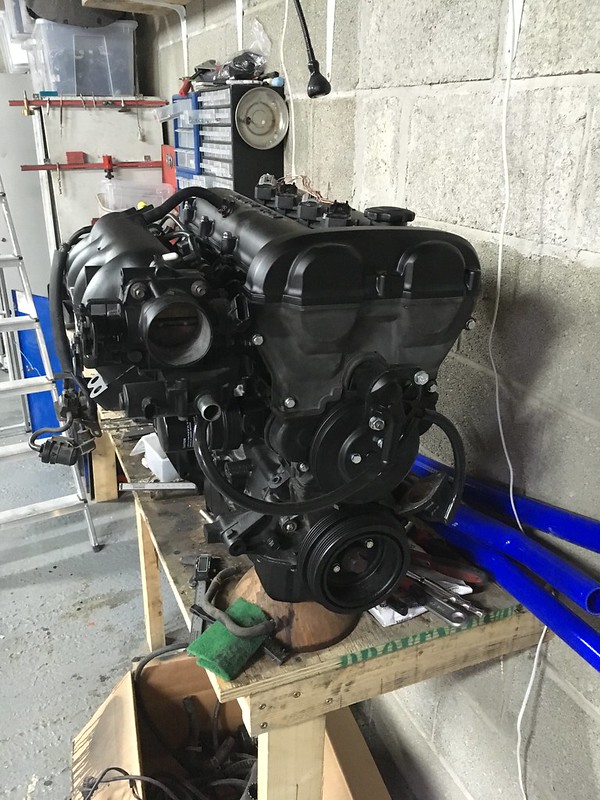 Untitled by stephen harborne, on Flickr Untitled by stephen harborne, on Flickr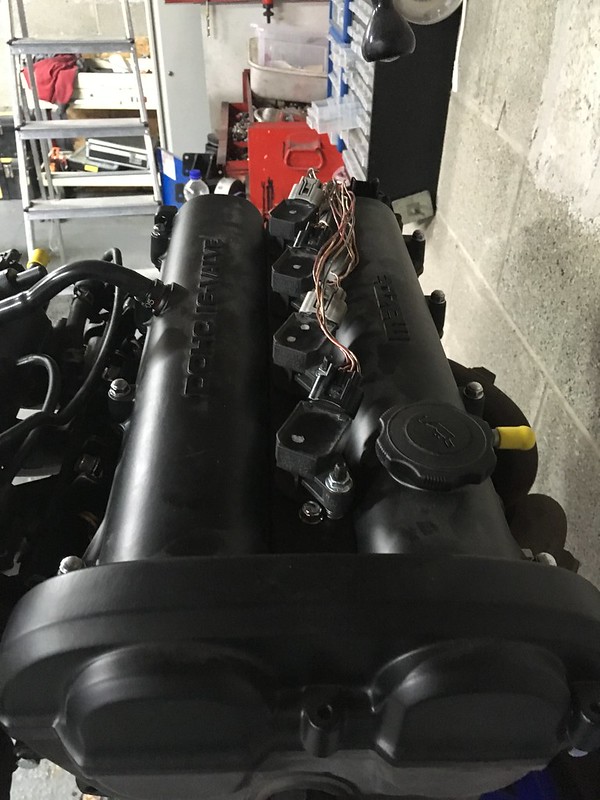 Untitled by stephen harborne, on Flickr Untitled by stephen harborne, on Flickr |
Scrubbed up nicely :)
|
Just read you entire build, great work!!
Im just starting mine (mx5 just stripped) Keep up the good work, and posts |
So ive got a bit done recently
First i built an spacer for the new rear coolant pipe for the reroute to move it out from the block 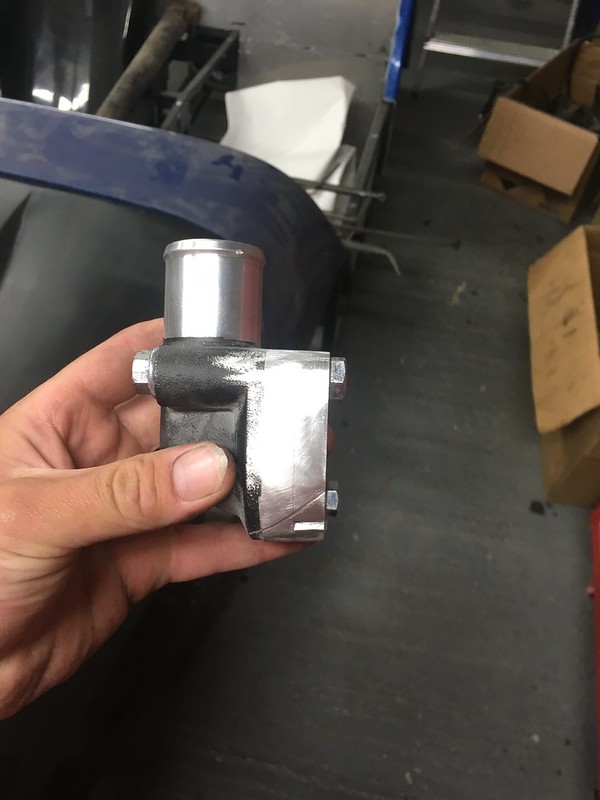 Untitled by stephen harborne, on Flickr Untitled by stephen harborne, on FlickrThen i filled in the the hole in the side coolant connector 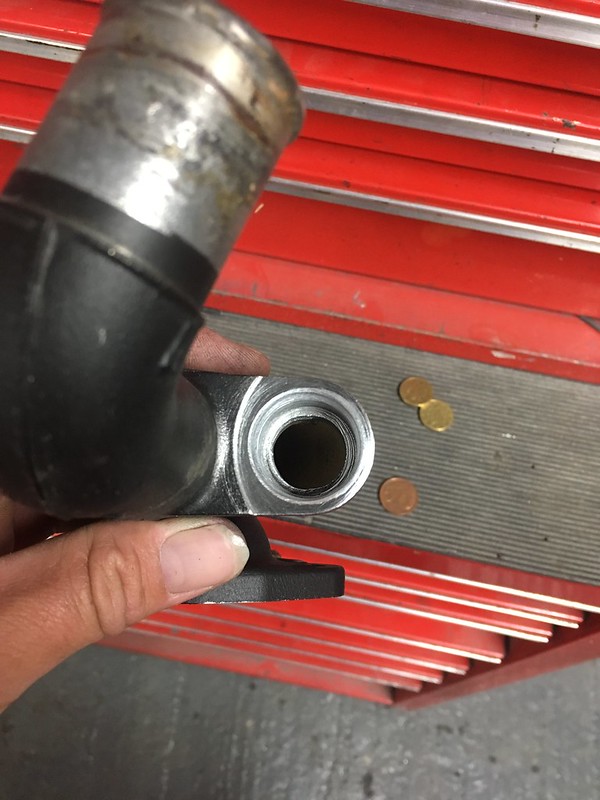 Untitled by stephen harborne, on Flickr Untitled by stephen harborne, on FlickrUsed a 20 cent to stop the epoxy running into it 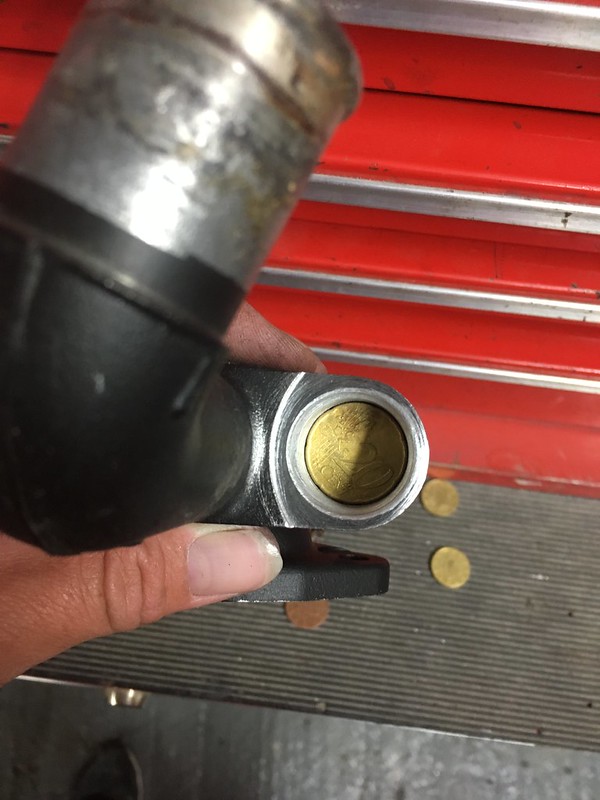 Untitled by stephen harborne, on Flickr Untitled by stephen harborne, on FlickrFilled with epoxy 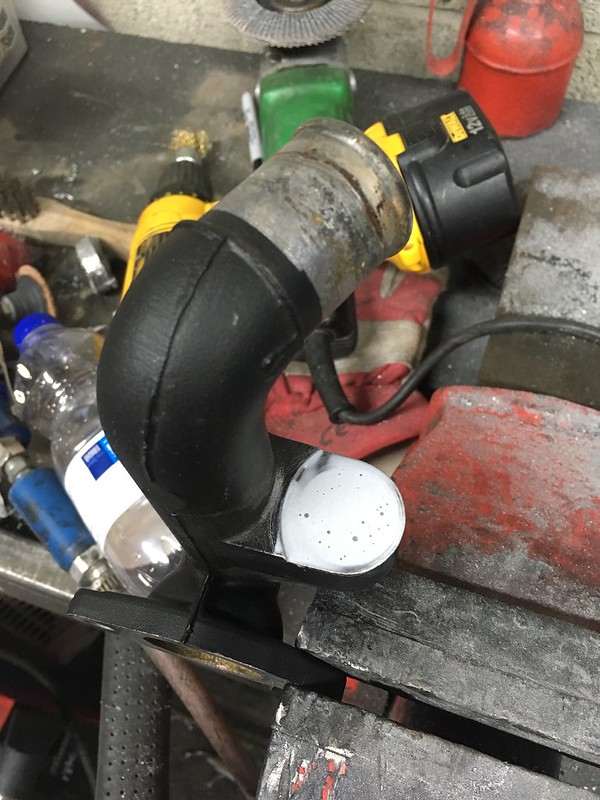 Untitled by stephen harborne, on Flickr Untitled by stephen harborne, on FlickrThe hole was a feed for the interior heater so is not needed |
This is the coolant reservoir That i got
It only has this mounting point so i made a bracket to hold the whole thing 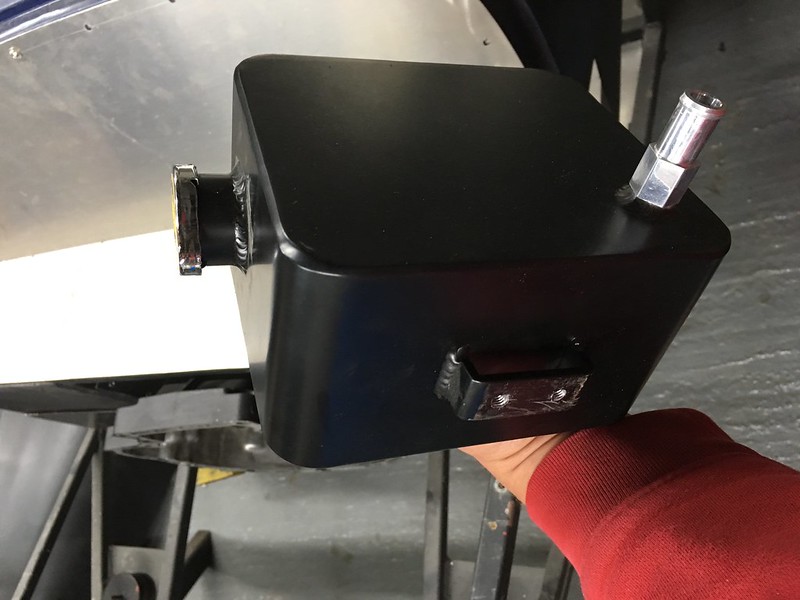 Untitled by stephen harborne, on Flickr Untitled by stephen harborne, on Flickr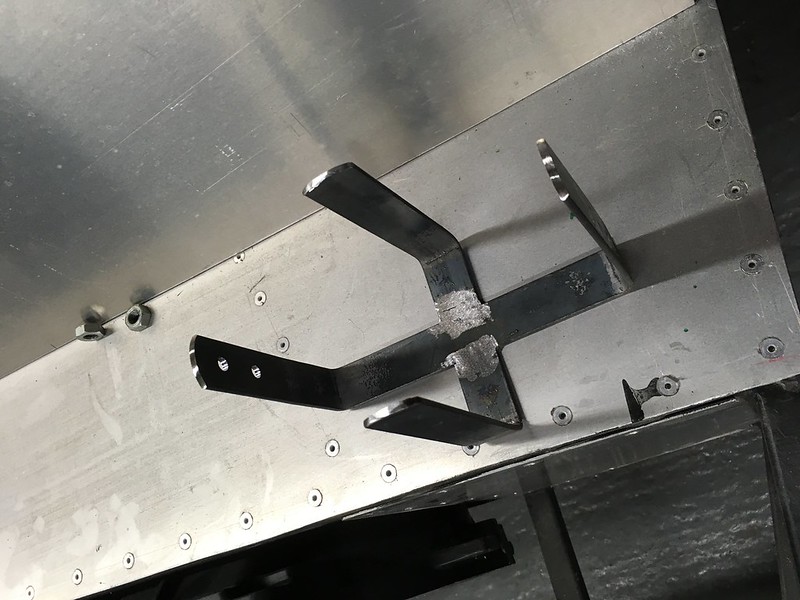 Untitled by stephen harborne, on Flickr Untitled by stephen harborne, on Flickr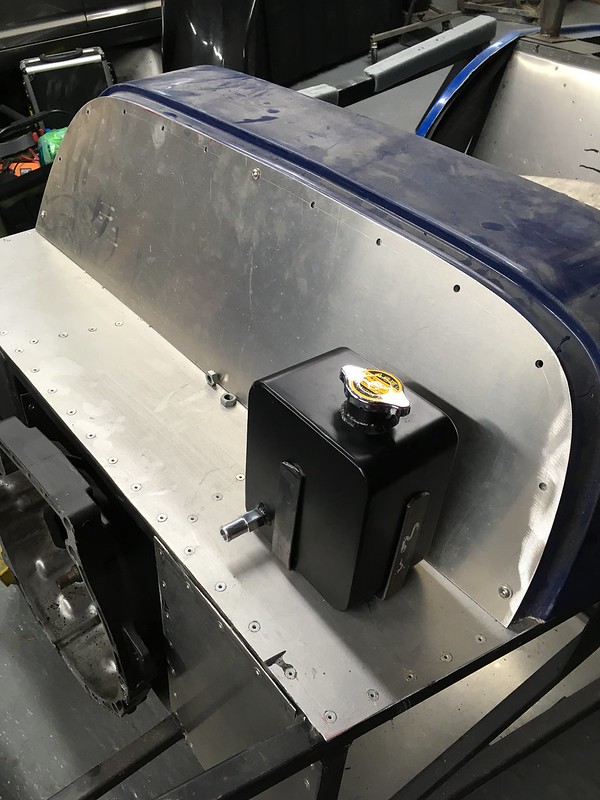 Untitled by stephen harborne, on Flickr Untitled by stephen harborne, on FlickrI also removed the old mounting points for the heat shield from the manifold and cleaned and painted it 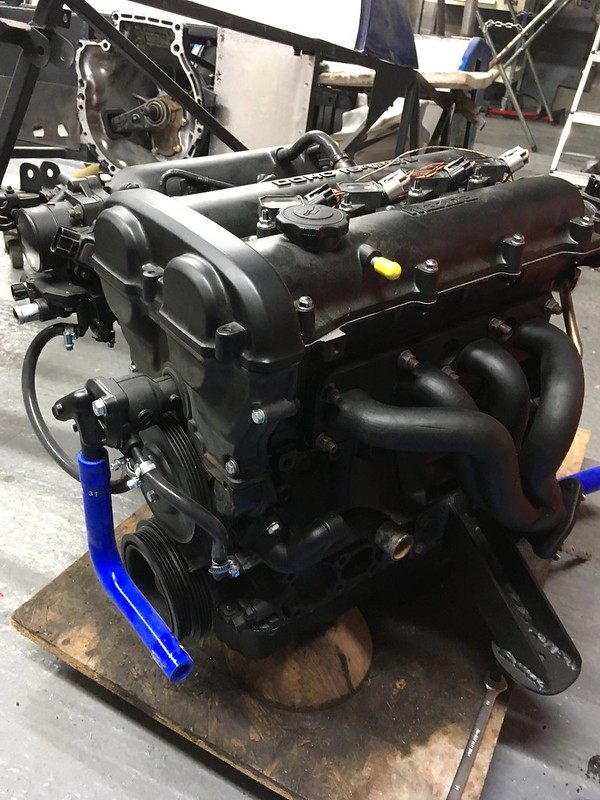 Untitled by stephen harborne, on Flickr Untitled by stephen harborne, on Flickr |
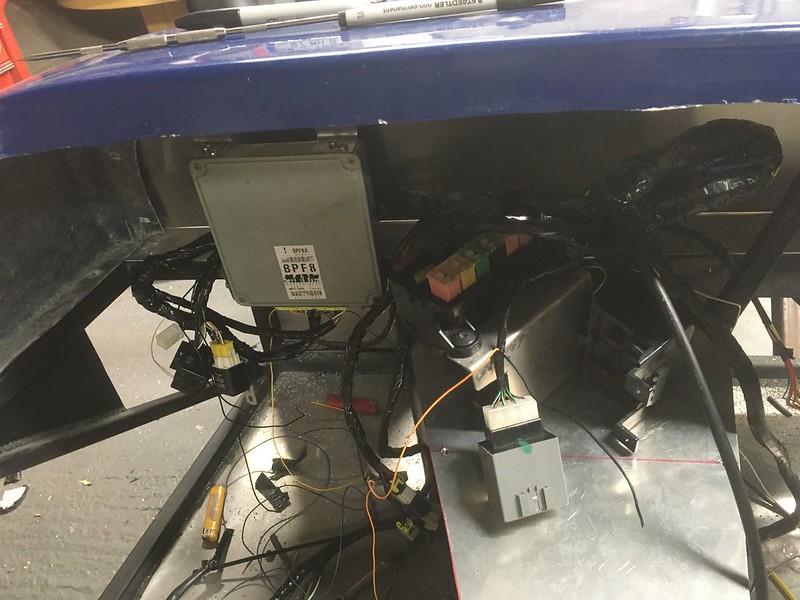
I also started on the pedal box
 Untitled by stephen harborne, on Flickr Untitled by stephen harborne, on FlickrI also mounted the ecu under the dash 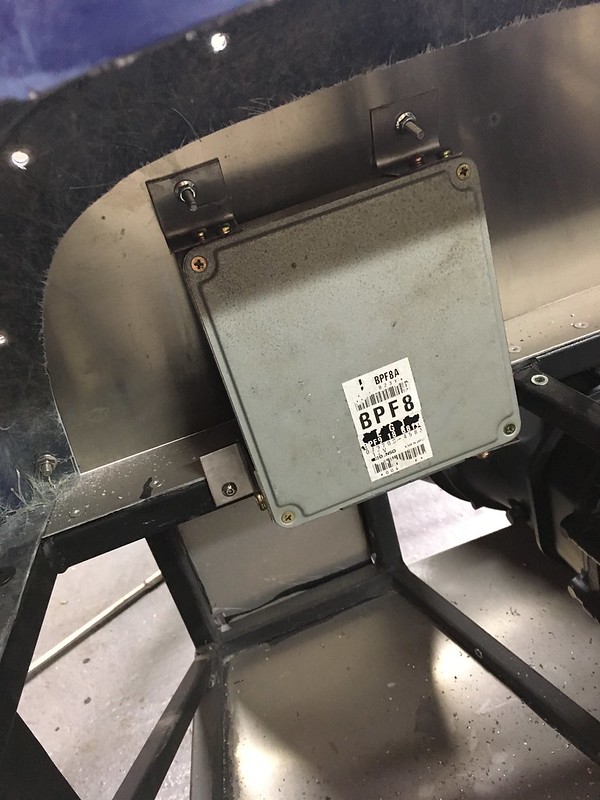 Untitled by stephen harborne, on Flickr Untitled by stephen harborne, on FlickrAnd made a bracket for the accelerator cable 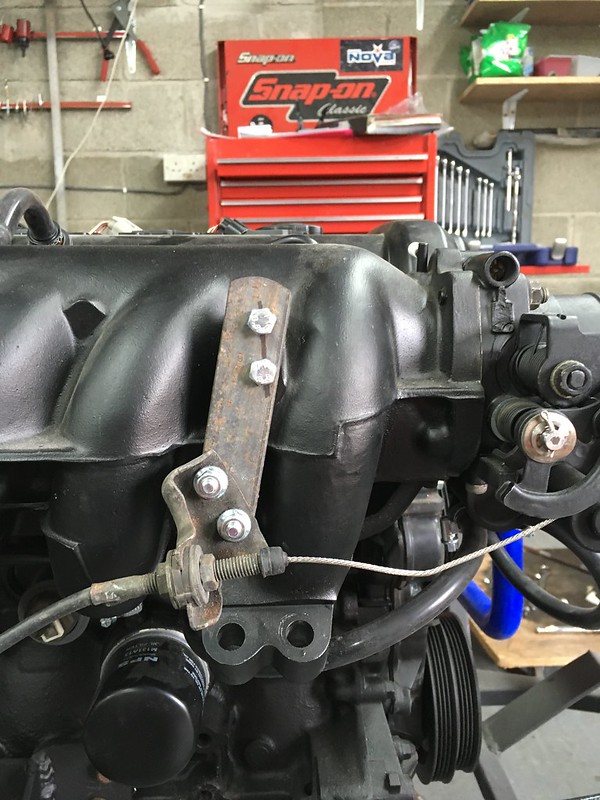 Untitled by stephen harborne, on Flickr Untitled by stephen harborne, on FlickrAnd the engine is back in 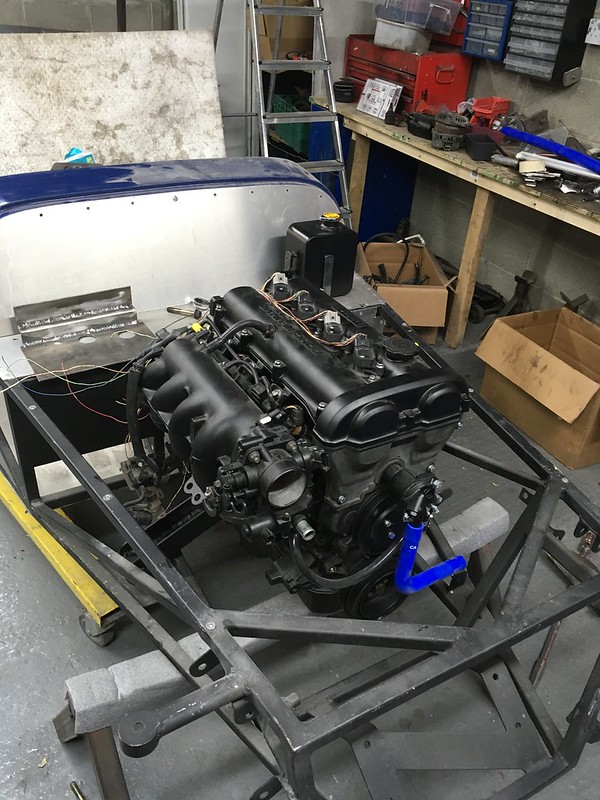 Untitled by stephen harborne, on Flickr Untitled by stephen harborne, on Flickr |
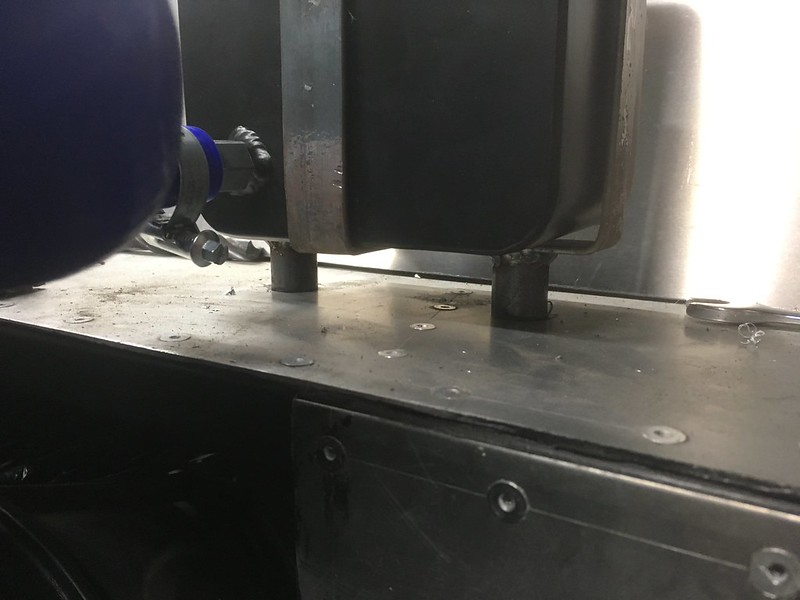
Next up was to mount the radiator to the chassis
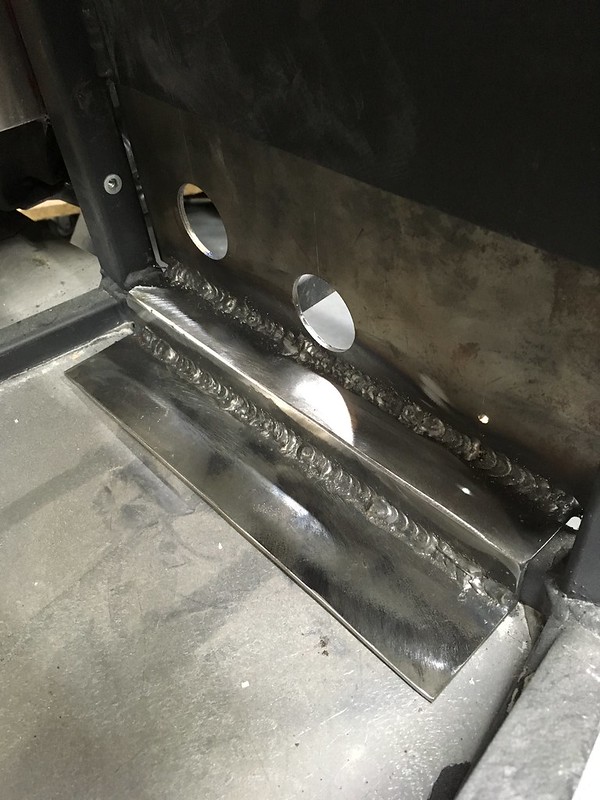
I was originally going to use a spurious golf rad which was not great looking to be fair then coolex had nice ali rads for a polo for quiet cheap at the national kit car show so i picked one up I Got two brackets bent up for it to mount it to the chassis 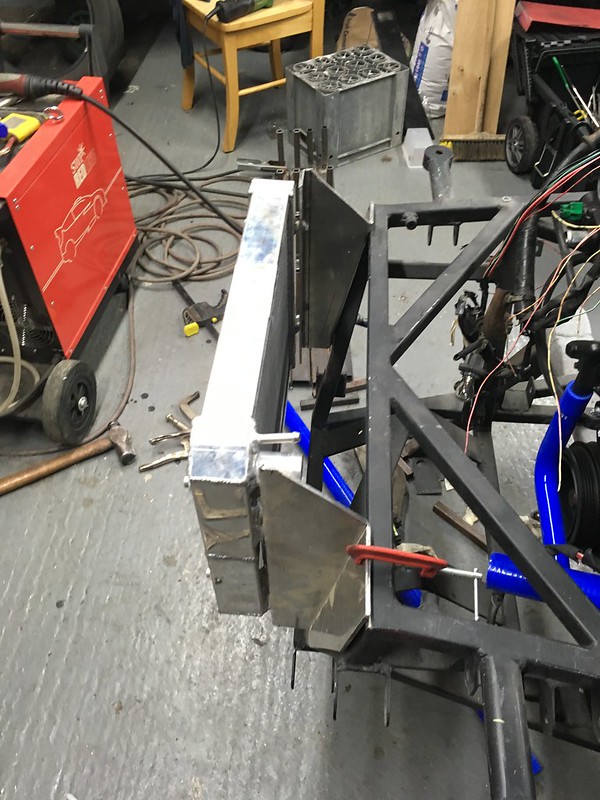 Untitled by stephen harborne, on Flickr Untitled by stephen harborne, on FlickrClamped in place to check everything lines up 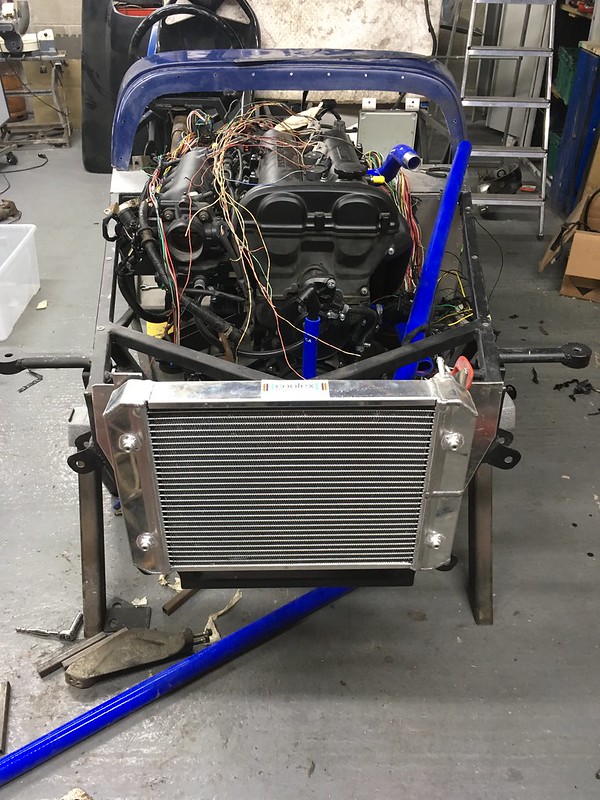 Untitled by stephen harborne, on Flickr Untitled by stephen harborne, on Flickr Checking the fit of the nose cone 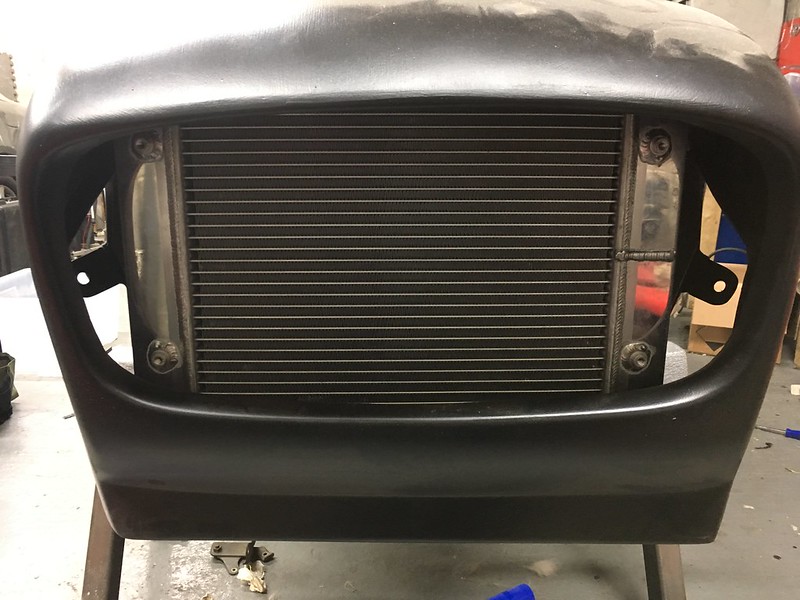 Untitled by stephen harborne, on Flickr Untitled by stephen harborne, on FlickrI decided to add two new pieces to the chassis rather than drill through the existing chassis 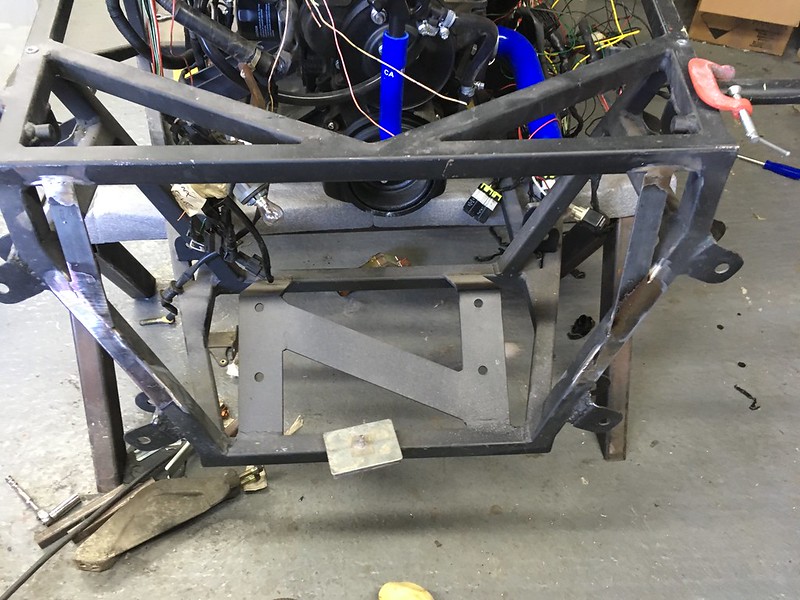 Untitled by stephen harborne, on Flickr Untitled by stephen harborne, on Flickr |
Then i started on the piping for the cooling system which i picked some of it up at the kit car show
And some of the rest of the parts came from aliexpress I picked up the wrong size pipe so i need to get some more 32mm id piping 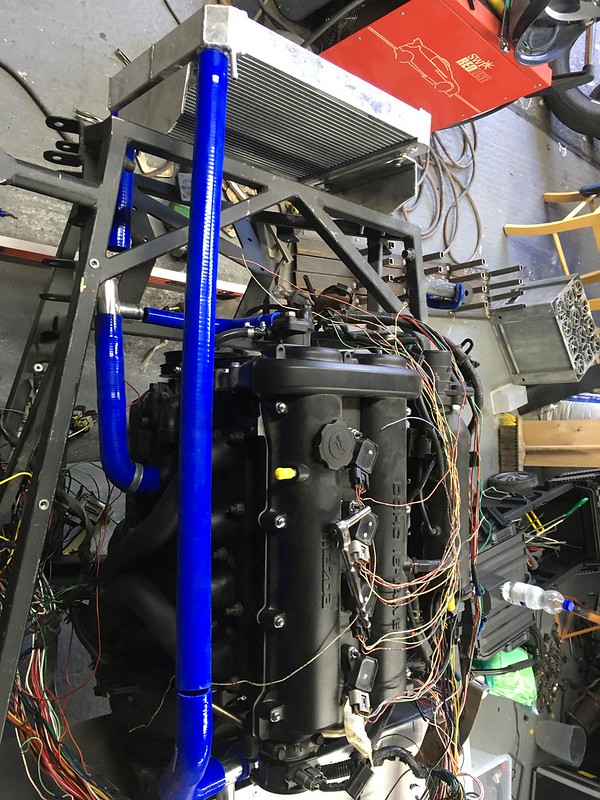 Untitled by stephen harborne, on Flickr Untitled by stephen harborne, on FlickrThen i started on the wiring which is a whole other can of worms  Untitled by stephen harborne, on Flickr Untitled by stephen harborne, on Flickr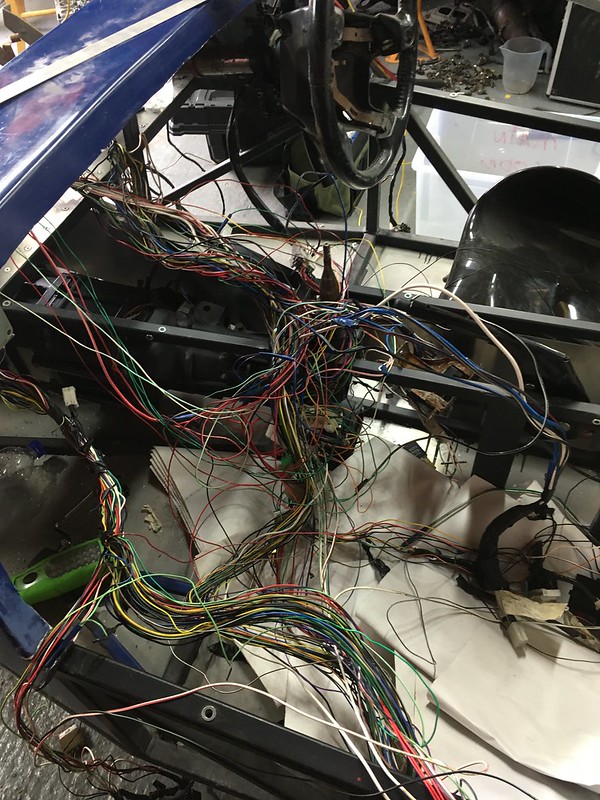 Untitled by stephen harborne, on Flickr Untitled by stephen harborne, on Flickr |
Wiring is one of my next big tasks. Are you going to shorten/remove unneeded pieces on the stock harness?
|
I have most of the unnecessary wiring stripped out now.
The car i stripped had almost every extra electronic thing available so i reckon i have about half of the origional wiring removed I just needs lots of organising and adjusting. If your gonna strip the unnecessary wiring make sure you have a good wiring diagram |
I've been scrounging to get good copies of the Mazda diagrams, but I think I'm going to spend the time color coding them (the ones I have are all black and white). I also labelled everything as I took it out of the car, so hopefully that will help the process. I am intimidated though!
|
the wiring diagrams are black and white or the loom is all black and white
|
 Untitled by stephen harborne, on Flickr Untitled by stephen harborne, on FlickrFinished the fabricating on the expansion tank bracket 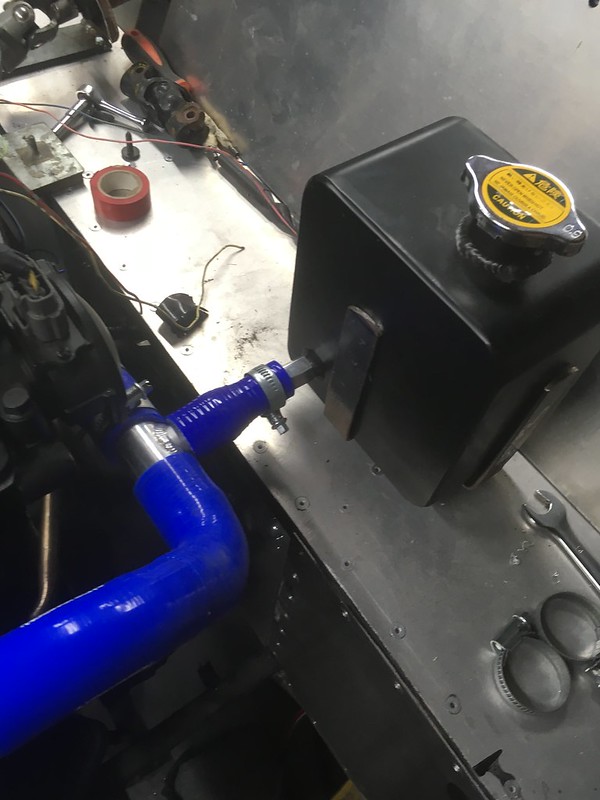 Untitled by stephen harborne, on Flickr Untitled by stephen harborne, on Flickr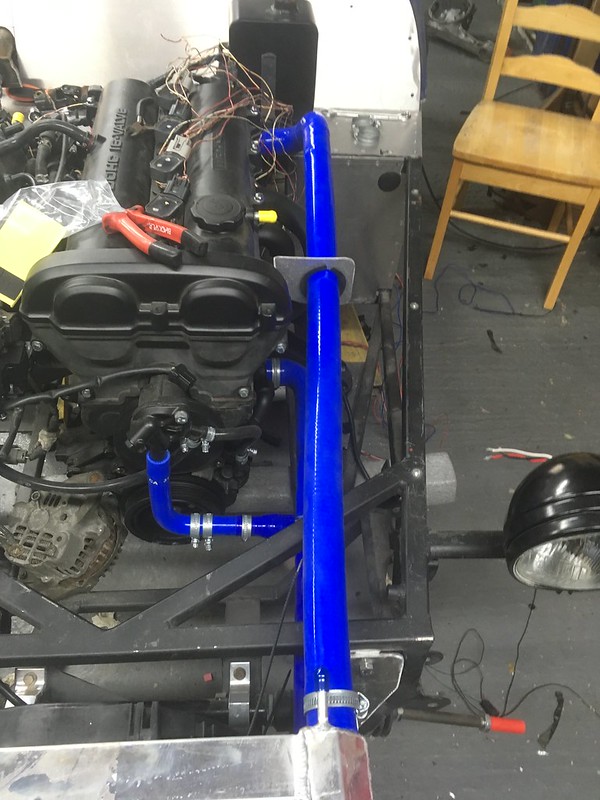 Untitled by stephen harborne, on Flickr Untitled by stephen harborne, on Flickr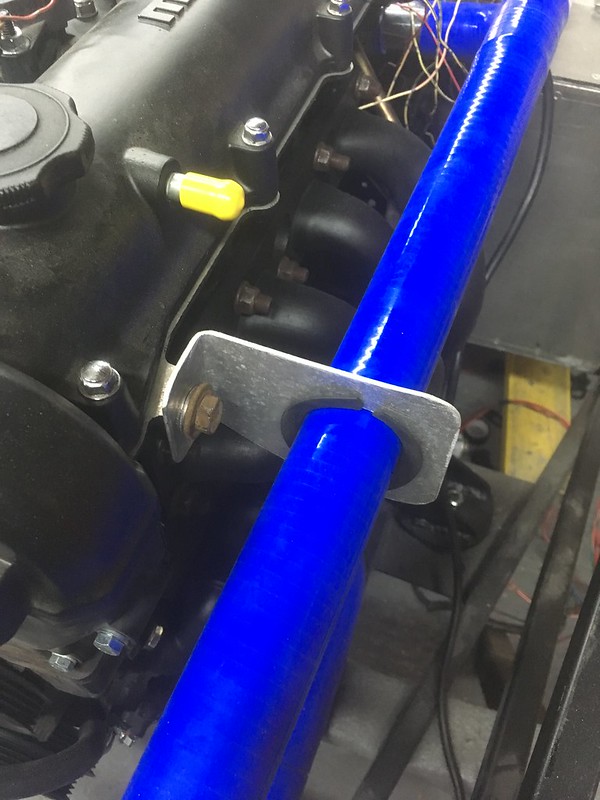 Untitled by stephen harborne, on Flickr Untitled by stephen harborne, on FlickrBracket for top hose Cooling system nearly finished i just need a new thermostat and a few jubilee clips |
 Untitled by stephen harborne, on Flickr Untitled by stephen harborne, on FlickrI had to move the steering wheel a bit closer to the seat 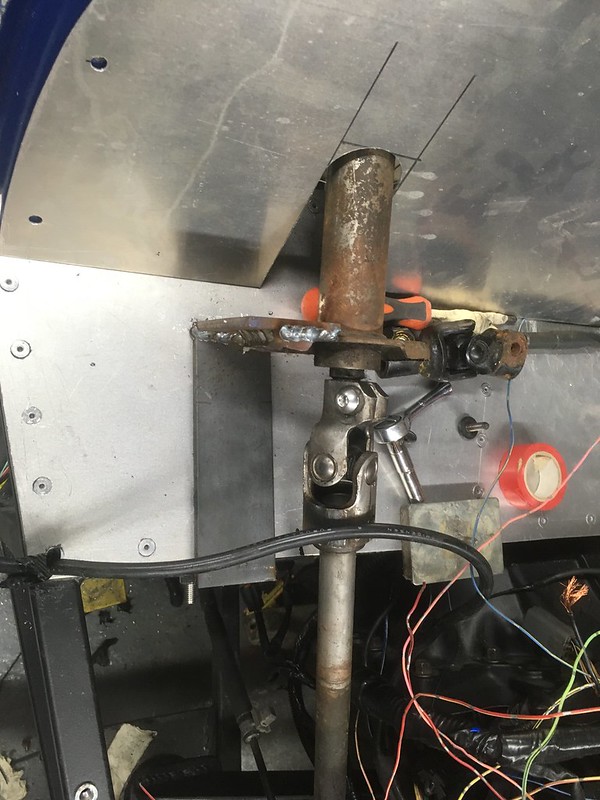 Untitled by stephen harborne, on Flickr Untitled by stephen harborne, on FlickrAnd i made a supporting bracket for the steering shaft 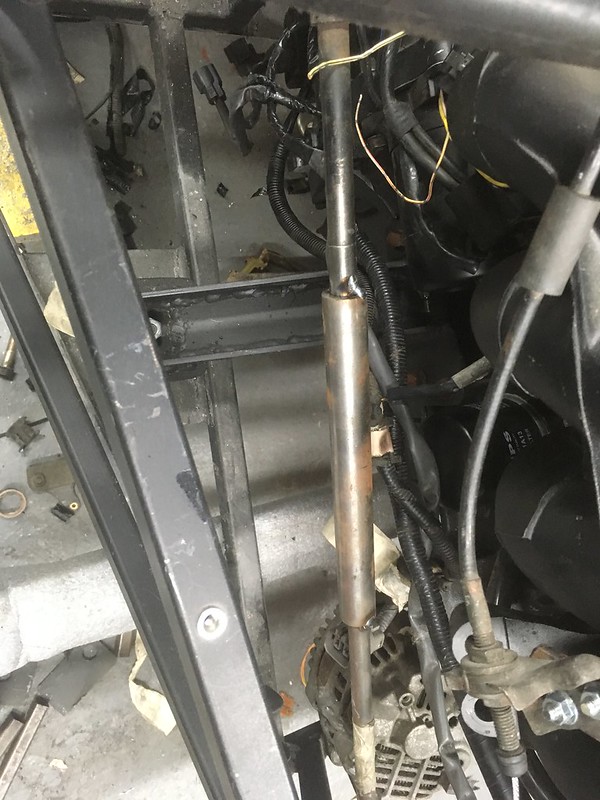 Untitled by stephen harborne, on Flickr Untitled by stephen harborne, on FlickrAnd i tacked the steering shaft extension in place |
 Untitled by stephen harborne, on Flickr Untitled by stephen harborne, on FlickrMore wiring  Untitled by stephen harborne, on Flickr Untitled by stephen harborne, on FlickrI got my rear lights they are for a defender I got all clear ones 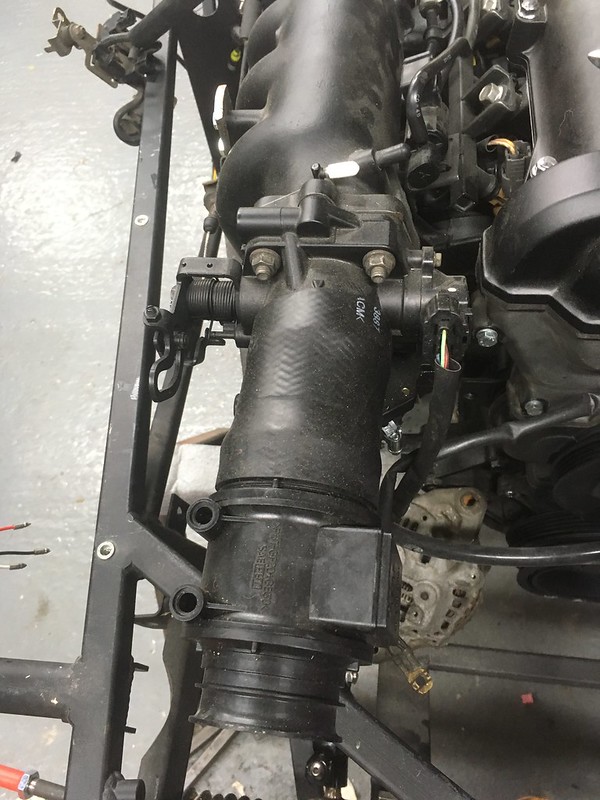 Untitled by stephen harborne, on Flickr Untitled by stephen harborne, on FlickrMounted my maf using some turbo intercooler piping 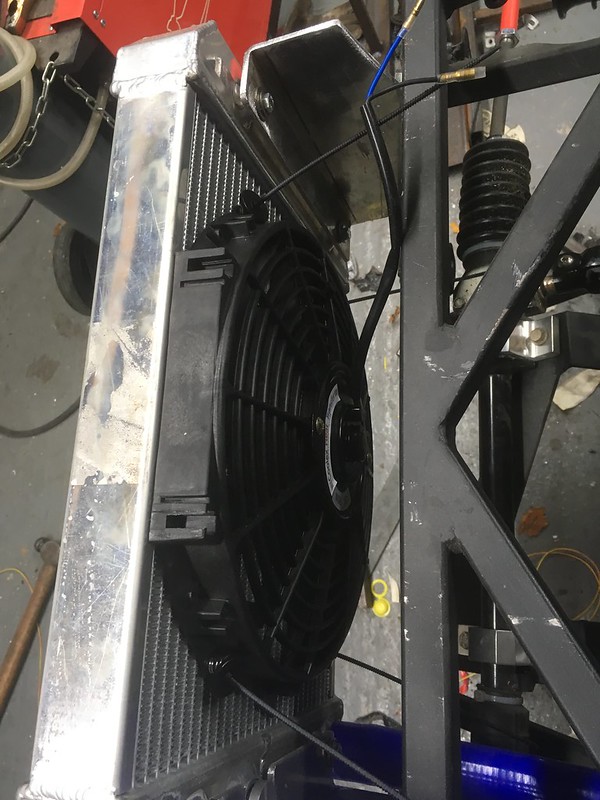 Untitled by stephen harborne, on Flickr Untitled by stephen harborne, on FlickrMounted my fan aswell |
Chipping away at it ;)
Are the lights 'E' marked? TT |
As well as E marked ensure that the fog light has an f or a b mark as well as mine failed the test on the first visit
Arfon |
The wiring loom is color of course, but the diagrams I have are black and white print. They have codes, but not easy to work with...
|
Been away from the build for a while
Next on the list was too hinge the bonnet at the front So i made a steel frame for the front of the nose cone which i riveted in place the fibreglassed over to give strength 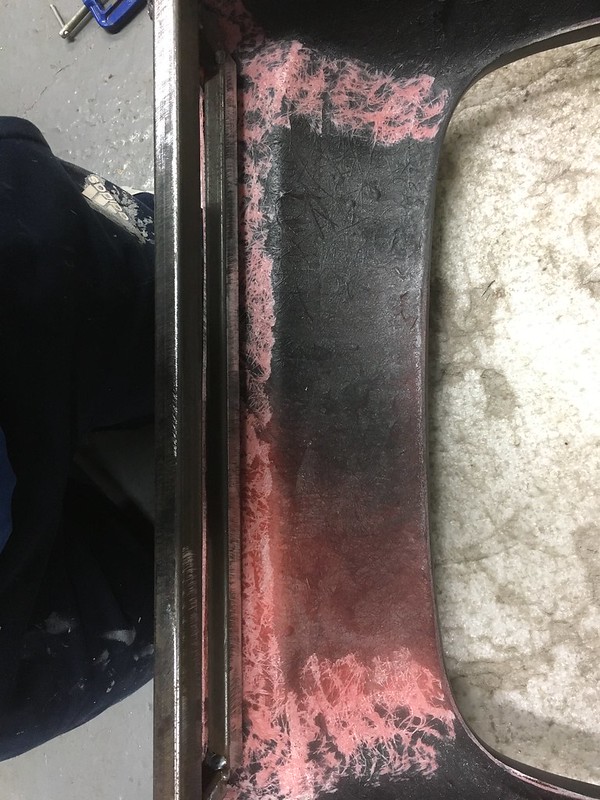 Untitled by stephen harborne, on Flickr Untitled by stephen harborne, on Flickr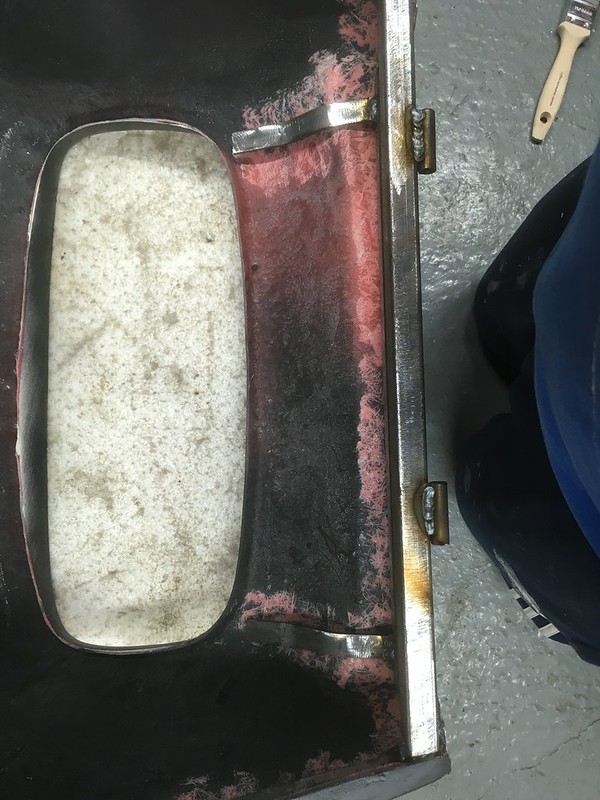 Untitled by stephen harborne, on Flickr Untitled by stephen harborne, on Flickr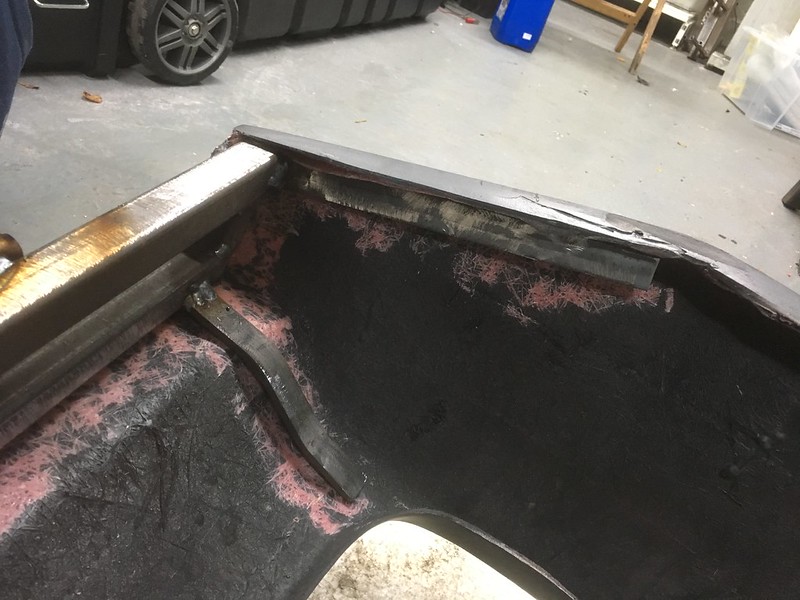 Untitled by stephen harborne, on Flickr Untitled by stephen harborne, on Flickr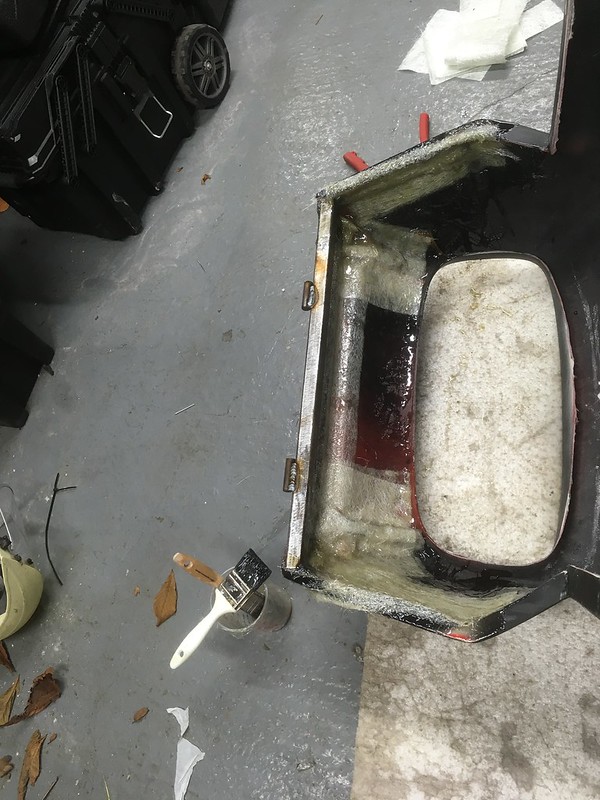 Untitled by stephen harborne, on Flickr Untitled by stephen harborne, on Flickr |
Bonnet now in place
 Untitled by stephen harborne, on Flickr Untitled by stephen harborne, on Flickr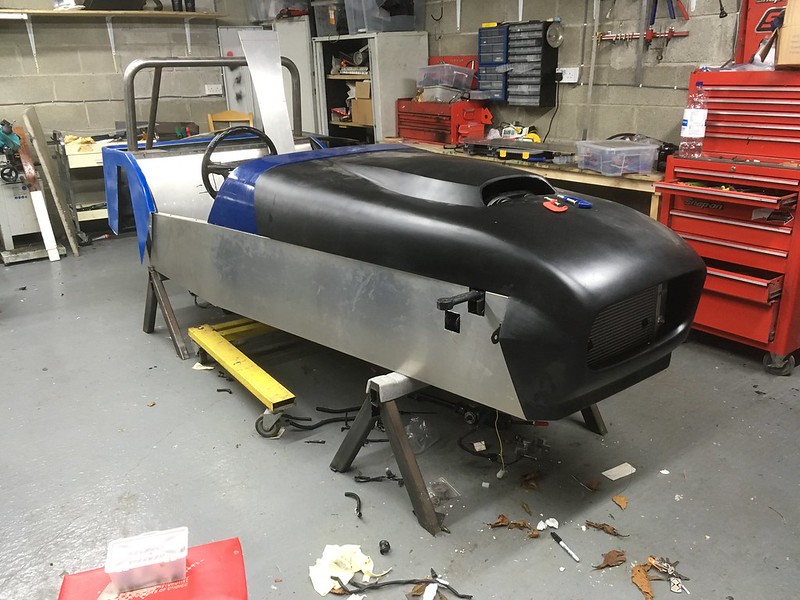 Untitled by stephen harborne, on Flickr Untitled by stephen harborne, on FlickrBonnet in place passenger side gap to scuttle panel  Untitled by stephen harborne, on Flickr Untitled by stephen harborne, on FlickrDrivers side gap This will not do 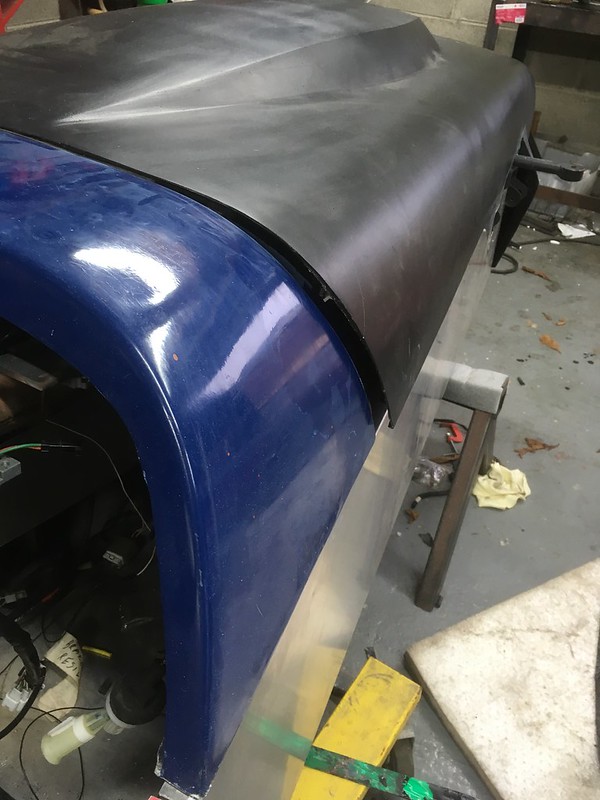 Untitled by stephen harborne, on Flickr Untitled by stephen harborne, on Flickr |
Along came a grinder
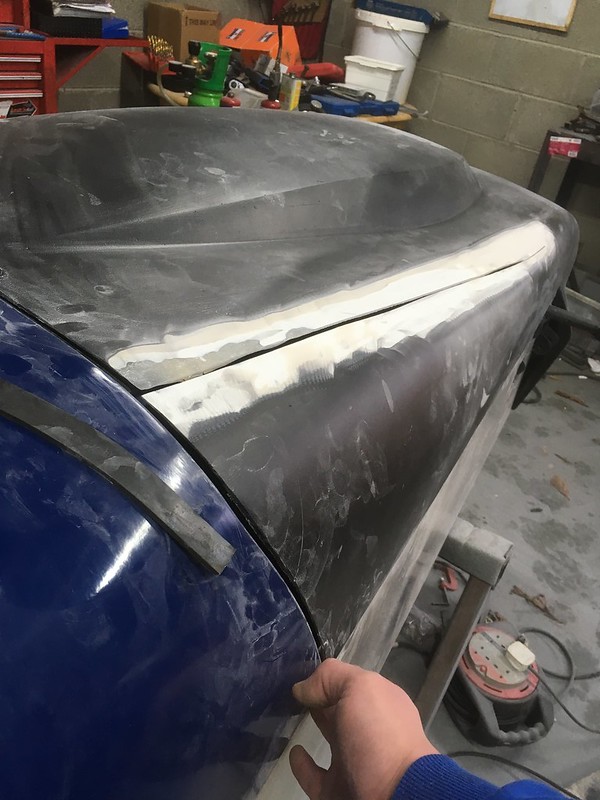 Untitled by stephen harborne, on Flickr Untitled by stephen harborne, on FlickrAnd the i cleaned up a bit 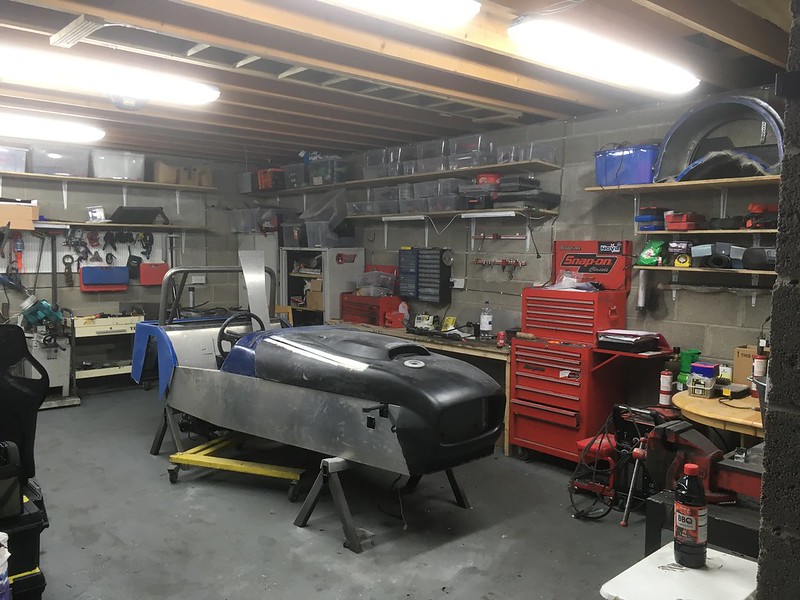 Untitled by stephen harborne, on Flickr Untitled by stephen harborne, on Flickr |
Quote:
once you get into it its not too bad |
Don't think I have seen a flip front on a Haynes, Looks good.
Could the gap not be "Brought together" or pulled in with a fastening? TT |
Quote:
Being colour blind, a black and white diagram with codes is fine... But trying to suss out the real wires is a pain ;) I seem to recall 90's peugots amazingly printed the circuit reference on the wire! TT |
I really love the front hinged bonnet, I bought a bonnet that was a second and the return at the edge was poor, so I cut the return off, countersunk holes right along the edge of the bonnet and riveted in an ally rerun then went over the rivet heads with filler sanded back and painted it. No it isn't perfect but it did allow the bonnet to be held closer to the correct shape as I mounted 4 vertical pins from the chassis which then pick up on the ally return.
Arfon |
It lives again
https://youtu.be/6oTIjozuTWQ Im happy out considering since the last time it ran ive changed the timing belt and done a coil on plug conversion plus lots of other wire chopping There is one coolant leak on the plates i made for the coolant reroute which i just sealed up and maybe i need to get some gaskets to do it properly |
I also did some wiring and due to the fact i like my fingers i made this to split the conduit
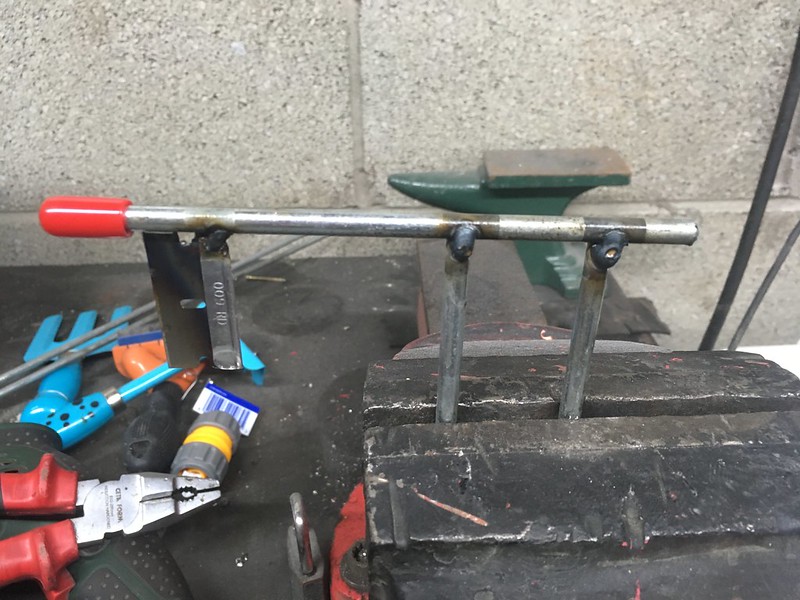 Untitled by stephen harborne, on Flickr Untitled by stephen harborne, on Flickr Untitled by stephen harborne, on Flickr Untitled by stephen harborne, on FlickrGot the side and head lights working aswell 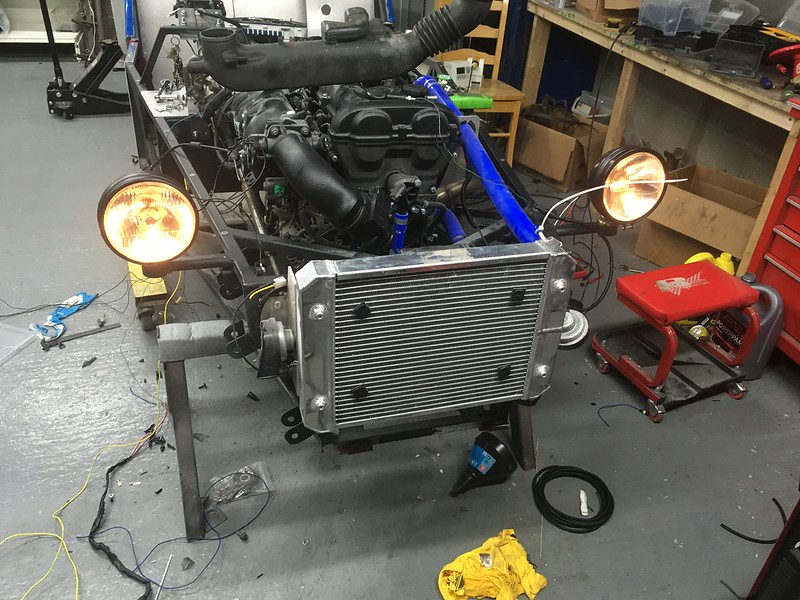 Untitled by stephen harborne, on Flickr Untitled by stephen harborne, on Flickr Untitled by stephen harborne, on Flickr Untitled by stephen harborne, on Flickr |
Quote:
There would of been too much pressure on it and it wouldnt of been right in the end anyway The nuclear option is what will make me the happiest |
Quote:
|
Picture kind of reminds me of a cow for some reason..
|
| All times are GMT +1. The time now is 11:36 AM. |
Powered by vBulletin® Version 3.6.4
Copyright ©2000 - 2025, Jelsoft Enterprises Ltd.