Maybe I should invest in some cardboard to reduce the cooling efficiency :D. How is your roadster coming along?
|
Rolling chassis for past couple of years since I last saw you Simon,change of job and other kak have stalled it but sorting bits and pieces.
Have new job as garage service manager to start soon so wages are better and want to get it sorted for my own satisfaction,just got 2ltr Zetec for nothing and set of Mondeo wheels,nice little tickle ! |
We'll it's been a long while since I've updated this, I've been moving forward with the wiring and have the loom in place with cable tie backs riveted to the chassis and cable ties, which means in the future if there is anything that needs adding it will be quite easy.
I started off using insulated crimps but I wasn't happy with the quality of them so I have bought some Superseal connectors which Premier Looms confirmed will be fine with my setup. I have gone for a number of 4 way, 3 way and 2 way connectors to connect the headlights, radiator fan, indicators, rear light clusters, fuel pump, reverse switch and number plate light. I've also ordered a special set of ratchet crimps to create these connections which are yet to arrive so they are delaying me some what. Here is a picture of one:  I have also ordered the remaining bits (except hose finishers) that I need to finish off my fuelling system. I have bought another set of ZX9R bike carbs, these are the E type kind and therefore have a TPS built in, I didn't realise when I bought my original ones that I needed a TPS, it can be done using a MAP sensor but again my inlet manifold does not have the adapters on them, so I have a spare set of carbs if anyone would like to make me an offer. I think once I have finished wiring up all of my connectors I will buy myself a Megajolt ECU and a digidash, I should then be able to start my engine. I still need to finish off my cooling system and sort out all of my body work but everything seems to be coming together now. |
I've now managed to wire the headlights, radiator fan, reverse switch, handbrake switch and horn. I'm waiting for a few more connectors to allow me to wire up the rear lights. I've also tidied up the loom slightly by running some cables down the sheathing for the reverse switch/handbrake switch.
The fuel lines are now complete after my 10mm fuel hose + 10mm to 8mm inline adapters arrived, I just need to order some more 8mm fuel hose as the braid has become a bit knackered at for the fuel filter hoses + some hose finishers to complete it. Below are some pictures: 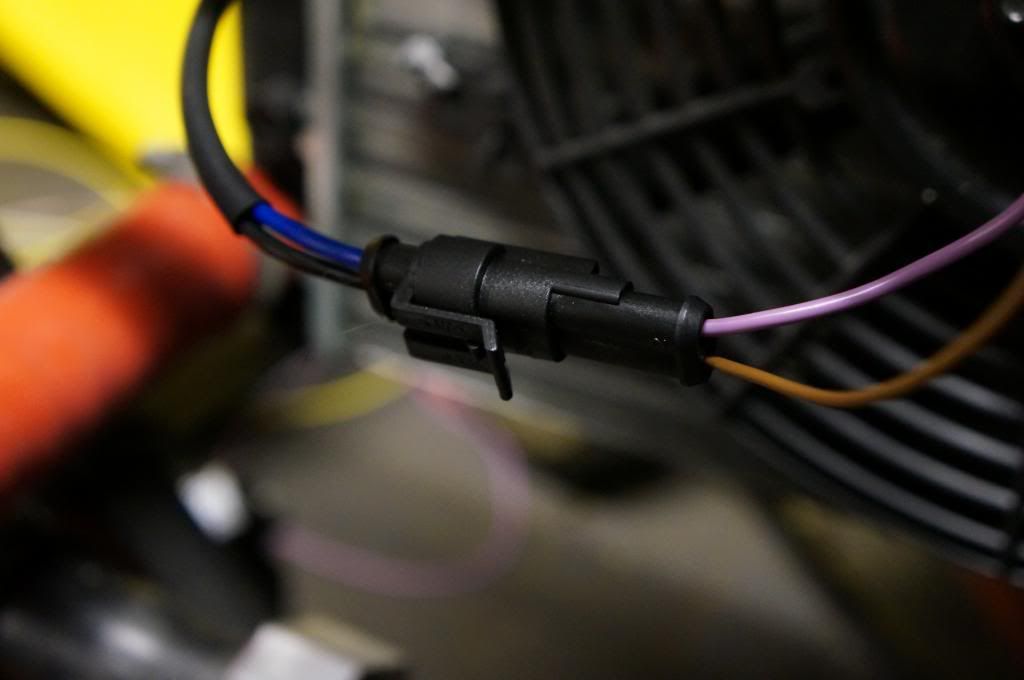    |
I've now wired my reverse and fog lights, fuel pump as well as soldering/heat shrinking all of the column cables, I have left out the wiper switches as I wont have a windscreen, but my loom has them in, so it gives me the opportunity in the future to put them in if I want to.
I have also drilled and tapped my offside mushroom/upright as well as reaming out the upright. I've continued running my loom and have ordered some non-adhesive loom tape to allow me to tidy up the column wiring as it is just a jumble of wires at the moment. I have also now mounted my front indicators and also now need to fill a hole in my nosecone where I drilled the hole in the wrong place :(. My next job is to drill and tap/ream the nearside upright and then fibreglass the wings to the wing stays. I still have a few more wiring jobs to do like welding bolts to the chassis to act as earth points and adding connectors to all of my earth leads, connecting up the front indicators and mounting the rear lights. I also need to order a fuel tank sender and wire that up. So I'm managing to make a fair amount of progress at the minute now that I have finished my exams at uni, I will have officially finished my degree next Thursday after giving a couple of presentations, but only having another 2 weeks until I go on holiday for 2 weeks and then start my job the week after I don't have too much time so I'm trying to fit in as many jobs as I can. Then I have the task of deciding how I will get my kit car down south, I am thinking of just hiring another long wheel base transit van and stripping the car down completely putting into the back of the van and then rebuilding it, which will allow me to do the final fitment as I don't own a car with a tow bar to allow me to tow it. |
sounds like you are going to have a lot on your plate over the next few months....... good luck with it all bud;) ;)
|
Cheers Kev, I honestly don't think I have ever had a clear plate...but I guess that's half the fun otherwise I'd be bored. :p
I've just finished drilling/tapping the nearside upright and reaming it out for the bottom ball joint. One question I do have is that there appears to be a slight amount of play between the top ball joint and the wishbone, am I right to think that I require a locking nut to remove this play? If so what thread size is it? |
yup....M18 x 1.5:D
|
Thanks Kev, just to confirm they are a right hand thread? I'd go to the garage and check but I've literally just bolted everything back together.
|
I have just been doing catch up on your thread tatey . You have been busy, its all coming together well;) . I noticed you are multi colour on the f/g at the moment. What colour scheme are you going for?
Bob |
Well done on all counts Simon especially the degree,well worth the effort.;)
|
Bob, the F/G and aluminium is all getting vinyl wrapped gloss red, you can see I have already done the scuttle and one of the rear arches. I will be giving my nose cone, bonnet and other rear arch to a professional wrapper to do as it is a real pain in the backside and I don't have the skills to do it to the standard I want.
Thanks very much flyerncle, it'll be a proud day when I collect my scroll in July. |
It's a good feeling Simon,been to two at city hall with the daughter and the dragon,both got degree's.:eek:
|
Well I thought it was time for some more pictures, however I've found that the jobs I'm doing don't take very interesting photos.
But I have now finished modifying my wing stays (in other words bodge until they fit correctly...), I think the wing stays I purchased off of ebay were for a different sized wheel and wing, meaning that they have required a bit of cutting and shutting to make them fit correctly. So my plan for the future is to possible make some fancy carbon fibres ones that will be made to measure, but that will be a winter mod after the car is on the road. They have now been primed and painted and will be fitted to the car later on so I can sikaflex my wings to them and then fibreglass them on top of that to ensure they don't come off during use.  I've managed to do a few other odd jobs like ensuring my hydraulic brake sensor is fitted correctly to my t-piece, this required cutting down the threaded section of the sensor to allow a copper washer to be used to allow adequate sealing, I still need to test the system with some brake fluid to make sure I have no leaks, but before I do that I need to create a new bracket for the rear brake line t-piece as at the moment it is not as far as I can tell IVA friendly as the t-piece is supported by the three brake lines, not the other way around. I can provide a picture if people are unsure what I mean. I've also discovered that I have issues trying to tighten my headlight nuts, meaning I have a droopy headlight at the minute, it appears that it is the equivalent of a 21.5mm across flats nut (whatever that is?) but the headlight brackets don't allow me enough space to get a spanner in there, any tips would be appreciated as my car looks a bit 'special' with its one droopy eye... You can also see the indicators I have fitted which will need extensions made for them to pass IVA.  My non-adhesive self amalgamating loom tape arrived on Saturday so I have now taped up the column switch cables which has made it a lot tidier.  Finally I have put in a 90° elbow to remove a kink in my brake hose, I just need to buy some hose clamps to secure everything.  I have also got my aluminium battery tray and rear view mirror arriving today so hopefully by tonight I will have fitted those as well as my wings. |
Well my battery tray arrived which give me the issue of where to mount it and the best solution I came up with since I have installed a foot rest in my passenger footwell was to move my header tank to the front of the car under the nose cone and mount the battery tray on the bulkhead which seems to have worked well. It has actually reduced the complexity of my cooling circuit and has made it a neater install.
  I've also installed my rear view mirror which is near to useless (could really do with a convex mirror) but should hopefully get me through IVA.  My carbon aeroscreen still needs a lot of work doing to it and I am still undecided if I will be vinyl wrapping it or not as it is pretty poor quality with looks of imperfections. I will see how I feel about it when it is fixed in place and with some edge trim. I have also sikaflexed and fibreglassed my cycle wings to the wing stays and once the epoxy cures I will put them back on and then the wings just need a polish and some edge trim and they will be complete. My next job is to finish off the cooling system, I am just trying to locate all of the bits I require. I also need some more dremel accessories to aid me in finishing my aeroscreen. |
Hi Tatey,
Do you have a better picture of the headlight problem from underneath? By what you are saying I'm guessing the wire passes through the thread and stops you from using a socket (are they SVC lights?) If that is the case I have the same setup and no way can you use a spanner.:( But I might have a solution if the above is the problem.. I've bought a long reach socket which I intend to cut the bottom 1/2" drive off. Then I'm going to cut a slot all the way down the socket to allow the wires to pass through. On the bottom of the socket I'm going to weld on a large nut also with a slot in. This way I can tighten the nut (with the wires hanging out the bottom of the socket) with a spanner on the tacked on nut. You just need to leave enough spare cable to pass through the socket. That's what I plan to do on my lights (not tried it yet though but have bought the socket):eek: Sorry but did that make any sense....:eek: ps... cars looking good..:cool: |
Johno they are SVC and yes the cables going through the thread is dropping me using a socket. Modifying a deep socket sounds like a good plan, have you tried dissembling the lights to remove the wires allowing a normal socket to be used? I tried to the other day but couldn't find my 3mm Allen key.
|
Quote:
you are not half plodding away there Simon keep it up mate. |
Quote:
I was able to pull the wires back into the light and tighten the nut fine. The main reason for trashing the socket was when it came to setting the lights up. If I left enough slack in the cables inboard of the chassis I could alter the lights angle without removing the wires, just perhaps only cut a few cable ties. It would be a pain disconnecting the wires each time just to set them up..:) |
Kev I would thread the wires through the socket but since using the superseal connectors it wouldn't be possible as the connector is very large, I need to cut a small slot in my headlight brackets to allow me to take off my headlights in the future. Ill do some head scratching tomorrow and see if I can come up with any solutions.
|
[quote=Tatey;90706] It has actually reduced the complexity of my cooling circuit and has made it a neater install.
I was just wondering if it was a good idea not using the pump over tapping on the thermostat housing that goes to the hose connection on the expansion tank. It keeps the engine purged all the time even with the stat closed, normally has a restrictor in the pipe with a 2mm ish hole. Just thoughts. http://www.emeng.gentlyhosting.co.uk/Cooling/Part1.htm Bob |
No worries Kev...:)
I just thought if you have enough cable to pull below the socket you can tighten the nut up without any problem with the wires still connected. I plan to take my car to a local MOT station before IVA and thought this would help them out if I supplied the modified socket.;) I plan to have my cables connected via heat shrinkable butt connectors with the inbuilt resin to make them watertight so I could setup my lights without disconnecting them each time. |
[quote=robo;90717]
Quote:
If so then my cooling circuit is not complete yet and I am planning on using both of the expansion feeds (radiator + thermostat housing). I just need to order some extra alloy pipe to run to the thermostat housing and I have some extra 8mm hose and a T-piece to finish the run. |
Sorry I thought I was looking at the finished job:) . Land rover disco 300 tdi do a tee with a check valve to do exactly that job , it stops the water thats being pumped back to the expansion tank from the thermostat housing being fired straight back to the top of the rad. It also acts as an ejector tee drawing from the top of the rad, god knows how it does it but they do work.http://img.photobucket.com/albums/v3...rtankhoses.jpg.
Bob |
Well it turns out I had an old 21mm spark plug socket in my tool box that never gets used and is perfect for the job as it has a 21mm hex end for it allowing you to a spanner on the end without having to weld on a nut.
So out came the angry grinder and I cut a 5mm slit in the side of it which allowed me to put the cables into the middle of socket, however one thing I didn't consider prior to doing this was that the cable sheathing may be large than the hole in the centre of the socket, it was. So it mean that when turning the socket it would grab the sheathing and turn that too, so my I though, oh I'll just drill a bigger hole...1 shattered 9.5mm drill bit later and I've come with the tip of drill the hole out first and then cut the slit otherwise the drill bit catches on the slit and if your drill is torquey enough like mine is it will just shatter the bit. So instead I took the front of the light off and pulled the cable through so that it was just the 4 cables that would go through the socket and not the cable sheathing, this does mean that it's a lot harder to align the lights, so I think I will eventually buy a new socket to drill out first and then cut the slit.  |
Well I think I've managed to figure out what bends/hose joiners/alloy bends/alloy pipes/t-pieces and whatever ever else I need to complete my cooling system, however it is going to cost another £100 to get everything :eek:. I just need to confirm with my supplier the bend radius of their 180*° 25mm alloy tubes, which I should get tomorrow.
I've also been preparing my nose cone for vinyl wrapping by applying a bit of body filler to fix some imperfections/previous owners mounting holes. I'm going to try and drop it off at the wrappers tomorrow morning, but it all depends how long they think it'll take to wrap. |
Quote:
With any luck I'll get my makeshift light adjuster done tomorrow. I'm using a 1/2" drive socket which I'll cut the drive off and tack a 20mm nut to and Dremel the threads out, should be plenty of room for the cables. |
Sounds like a good plan Johno.
After receiving a quote of £400 to vinyl wrap my rear arches, scuttle, nose cone and bonnet and realising I could buy a new set of bodywork for £30 more I've been looking into other options to colour match my bodywork, with it looking more and more likely that I will paint it all. I've learned tonight that you can buy specialist HPLV spray painters that are designer only for spraying, with prices starting at £100 for ones which can be used to spray cars, namely the Apollo Spraymate, and the price goes up for more professional setups. However they negative the need to own a bulky/noisy expensive compressor which I don't think I'd end up using. So I think in a few weeks when I have moved my car down south and have a lot more room in my parents garage I will buy an Apollo Spraymate from axminster + 2.5l of cellulose paint, primer and some etch primer and give it a shot. A classic car magazine ran an article back in 2006 about the electric HPLV spray painting setups you can buy and they were pleasantly surprised and that you can get a good finish from using them. So I will try and post a review with pictures when I eventually get mine. I'm also trying to source the bends required for my exhaust system. I will be running one down pipe to my silencer and require a 45°, 90°, 6° and a 10° bend with a bit of straight to make it. I have decided that I will go for mild steel and weld it together myself and wrap it with the aim to eventually get a custom manifold made by MK Engineering. I can easily source the 45° and 90° degree bends, I have sent some quotes out to a few companies to try and get a 6° and 10° bend made up (these bends are to try and keep the exhaust as close as possible to the side panel). I am also having to wait for a week before ordering my cooling system bits as Autosilicone Hoses have not got the technical dimensions for the distance between centres of the 25mm 180° bend that I require to join my top hose to my thermostat bypass hose as per the Westfield cooling system design. I need this dimensions to make sure that it will actually fit because if it doesn't then I need to rethink it all. However they don't keep the dimension on file and are out of stock so can't measure one for me. So tomorrow I am going to crack on and find some other work that needs to be completed. |
Well I've just ordered the 4 bends I need for my exhaust system at £5.34 each, they are press bent so are are not cosmetically sound, however they will be wrapped with black exhaust wrap so they will be hidden anyway. I've also order 2*500mm of 2" 1.5 ERW to allow me to join it all together, they are supposed to be getting sent out later on today so it means next week I may be able to tack it all together when I get back from holiday.
I did a bit of head scratching this morning to decide how I could make/buy two spigots for my Sierra master cylinder for my remote reservoir, and the easiest option I came up with was to use the dust caps that came with the master cylinder and epoxy some metal 8mm hose joiners to them and drill and hole through the cap, the caps fit snugly in the M/C I am just hoping that they will be compatible with brake fluid, I have put one in a small cup of brake fluid to see how it will react. I now just need to buy some more P-clips to allow me to tidy up the braided hose for the reservoir and the brake system will be nearly complete. I've also remade my transmission tunnel top piece (the bit that goes under the scuttle) as I wasn't happy with it at all as it was very rough and the sides were not straight/the same length, so I scrapped it and remade one which I'd say is nearing perfection in my eyes lol. Bending aluminium with a rubber mallet definitely seems to be the way forward as it leaves no marks and gives a nice bend. I've also drilled the 5 holes for my relay holders into this panel, I have 5 relay holders, but a few of them will not be used as they are for wipers and screen wash etc, but will be good future proofing. Finally I am currently sikaflexing my transmission tunnel side panels on, I considered riveting them on but decided it would take too long and this way if I want to take my panels off it will be possible without leaving lots of rivets inside the chassis members/having to attempt to match up holes. |
I made a bottom plate for my hedlamp bracket so that I can get a spanner on the nut. I will drill a hole in the thread anyway so that the wires can exit into the mount tube and be hidden from view. Then just need to cap the nut with something.
TT |
I considered doing that TT but the threaded length wasn't long enough to exit out of the bottom of my headlight bracket and I really didn't want to modify the bracket.
|
Hi Tatey,
I sorted the headlight socket adapter this weekend. Basically I cut most of the socket away apart from 20mm from the top and left a spine of about 20mm from top to bottom of the socket. The bottom part where the 1/2" drive goes I didn't touch. The 20mm at the top I cut a slot in for the wires to pass through. I tried it on mine and it works. You get a good half turn on the nut before you have to pull it down and get another bite on the nut....(that sounds wrong).....:eek: I forgot to take a photo but will post one soon and all will become clear.:D |
Hi Tatey,
Here's a couple of photos of my modified socket. You can only give it about half a turn at a time but good enough for adjusting. 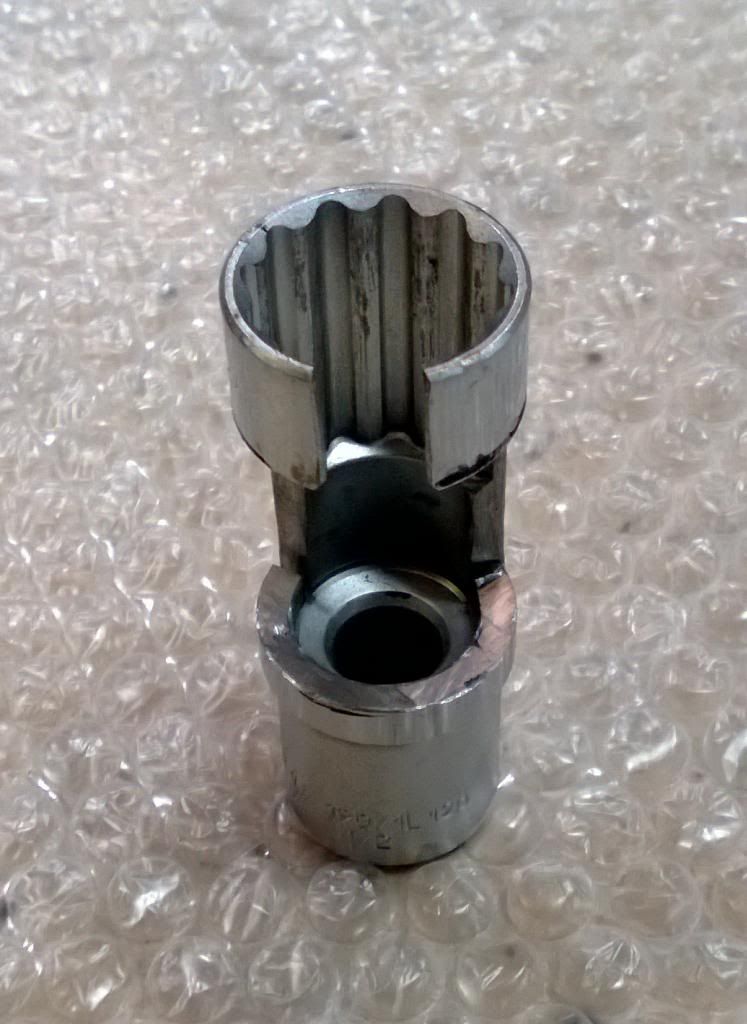 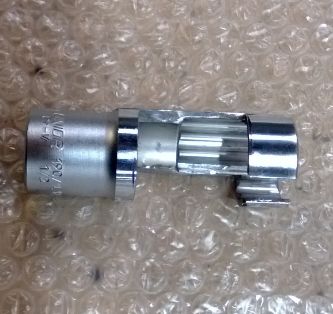 Hope this helps...:) |
Well it's been 2 months since I've managed to do any work on my kit car due to working down in Hinckley at Triumph and my kit car being located 200 miles north at my parents in Newcastle.
This was the first weekend that I had nothing else on so I decided it was time to put some work in! Out came the hole saw and in went the fuel level sender, I may have mounted it slightly too far inboard and it now fouls my tank straps, but the straps happily sit on top of it, so at the moment I think I will leave it where it is and if it annoys me in the future I'll change my tank strap arrangement or get a larger fuel tank and move the position of it then. The next job on the list was the exhaust, the exhaust bends had already arrived (2" mild steel ERW) which meant that I could cut and weld it myself instead of paying for someone else to do it. I decided to go for cheap bend which means they have some necking which will restrict my exhaust some what, but I am planning on upgrading to a stainless system later on anyway so it is a decent temporary fix. The most difficult part of the exhaust was making the matching flange for the manifold, it was only difficult because it took some time and a bit of fettling. After tacking everything together and chopping the bends to suit it all went together quite nicely, I then fully welded everything together and put it back on the car and I have to say I am quite impressed with it. The exhaust is also rock solid which I originally felt might be an issue as the rubber mount I have used seemed a bit too compliant. The welds still need to be dressed and the exhaust needs wrapping but other than that it is complete. Let me know what you think.  |
Apologies for the severe lack of updates on here but there hasn't been any work done on my car since the last update as I've been working in Hinckley with my car being up in Newcastle, I was supposed to be going away with the army for 12 months next week but that was cancelled last Thursday so I am now on the hunt for a house with a garage so I can finally finish off my car! It may be a couple of months until I find one, but rest assured that my car will be on the road this summer!
I hope everyone is well and I look forward to getting back into the game. |
Nice to see you have not given up .;)
|
Hi Simon!
Nice to see you're still alive ;) So finally, my car might be on the road before yours... it is going to be a tight finish :D Have you noticed that some members want to be added to the members location map? As you were the one who managed that and started the thread, perhaps you can have a look at your original thread? Thanks, and good luck for all that is coming :) |
Well good news, I'll be moving into a new house on Friday with a garage! So on Friday I'll be driving up to Newcastle to pick up the Haynes, last Sunday I spent the day stripping it all down so it'll fit in the back of a long wheel base sprinter. I've also finished planning my cooling system so once pay day hits I can order the rest of the bits I need and on my way up to Newcastle I'll be picking up a sheet of aluminium to make my side panels, I'm hoping I'll be able to make reasonable progress on it now, I'm determined to get it on the road this summer!
I'll make sure I get some picture of it all in the back of the van. |
Well the move went well, I just need to source some fluorescent lights and an extension cable to get power to the garage and I'll be all good to get to get cracking on my build. I also managed to pick up the aluminium I need to create my side panels. So hopefully next week I'll be able to get some more pictures of the build.
|
Hi Simon,
Good to see you back. Considering the long break you took, I could say proudly that I'm now ahead of you in my build, but actually, I'm not even sure :eek: ! Good luck mate :) |
| All times are GMT +1. The time now is 04:36 PM. |
Powered by vBulletin® Version 3.6.4
Copyright ©2000 - 2025, Jelsoft Enterprises Ltd.