Looks brilliant Stot
|
Nice work Stot...:cool:
Me thinks you have too much time on your hands to keep coming up with so many new ideas...:D Love your work just keep em coming buddy...:cool: :cool: |
I'm fitting my flexi lines at the moment, I ordered them from Sylvain but I measured my rears wrong.
 2 choices. Buy new rear lines or reposition the bracket and make new hard lines. One is free if you have extra copper line and the other isn't so this is what I ended up with. 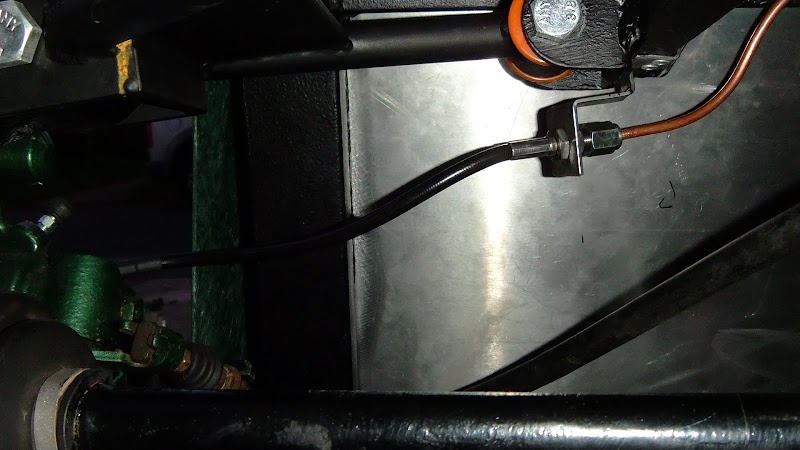 Only problem is that I am going directly into the caliper with a fixed fitting rather than using a banjo and when the line is compressed it gets closer to the seat back. I angled the bulkhead bracket toward the rear slightly to help it want to bend away from the seat back. The rear caliper on the MX5 doesn't have a 'seat' at the bottom of the inlet so the only a fixed fitting or banjo will work as they can seal with copper washers, an angled swivel wont.  It doesn't touch so It should be fine but it may settle in so Ill have to keep an eye on it. None of this is Sylvains fault, I measured wrong in the first place. The lines are great and are as good as any quality UK made, crimped lines. Front is great though.  Cheers Stot |
Your car is coming along there really nicely. I had to re order my rear flexi hoses as well this week as they were too short! I used russ from furore. Ordered them at 3 pm and they were delivered by the postie the next day.
David |
I'm really sorry for the bad planning on the rear lines. They look to fit OK now, but if I can do anything, do not hesitate to send me a PM.
BTW, your car looks stunning, and the last things you did with the wheel caps, whaow, I just love it :) |
Quote:
I would say that banjos at the back with a 90 degree on them would probably be best for any you do with MX5 calipers in the future though to avoid the possible issue of them rubbing on the seat back. Thanks for the comments on the car, I'm trying to make the little things make the biggest difference to the build. :D Cheers Stot |
Thank you Stots
Quote:
I usually say (as banjos are more expensive, involve more parts, and are a pain to bleed) that "banjos should be avoided except when there is not enough room to fit tubular fittings". It actually looks like with this set-up, we are very close to this exception where banjos are needed. A 90° banjo will give the same angle as a straight tubular fitting, but a 45° or even a 60° banjo should do the job.  MX5BrakeLinesBanjo45° par Voucht71, sur Flickr Hopefully your experience will serve future builders ;) Thanks. |
Can't the hubs be swapped left to right to put the calipers at the back?
TT |
Quote:
 (calipers are on the wrong uprights in that pic.) You would need to change the position of the upper shock mount too. I already had the chassis and bones fully welded at that point so carried on as normal. Flipping them would help with the handbrake cable rubbing issue too and If I were building again I probably would try that option. I'm happy that my current configuration is acceptable if not the ideal. Cheers Stot |
Stot,
You are a true inspiration to us all. I watch your build thread with interest, and has given me a few ideas, and inspiration. keep up the great work. |
I spent 6 hours re-trimming and affixing my GRP side panels today which was a suspension off job.
Car looks exactly the same as when I started which is disappointing.... :rolleyes: Cheers Stot |
Hey mate just been looking through your Blog.
How does your missues put up with you disrespecting her build and chopping it up only joking mate, tidy work keep it coming Arfon |
Arfon, I wanna know how he keeps his missis in check! Mines moaning like hell and ive only got the dry fit almost done!
Although it may have something to do with using her mark todd horse rug as an oil spill mat? |
I just promised her that one day she may be allowed to be a passenger in it and she lets me do what I like!
Tonight for example she let me take a look at the exhaust. I got 2 90 degree bends to hopefully marry up the manifold with the silencer. 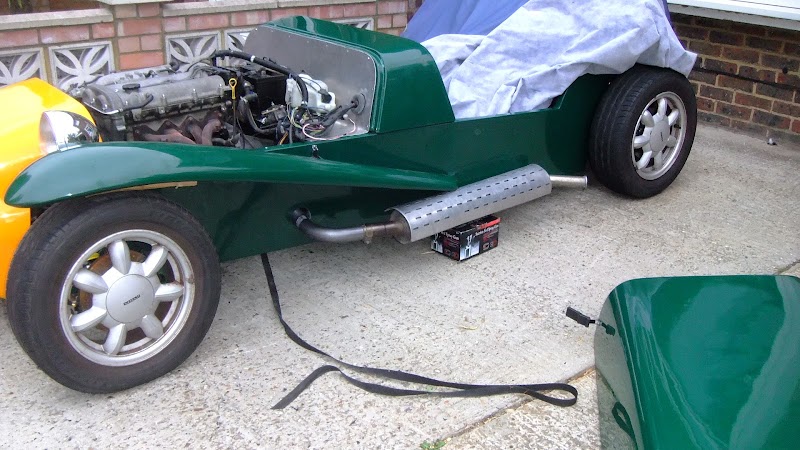 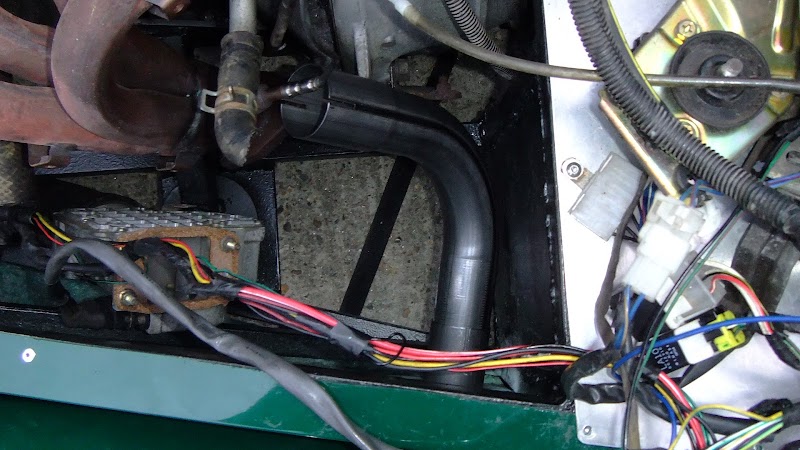 Not too far off. I think I will take some pie cuts out of the first bend here to bring it round to meet the manifold. 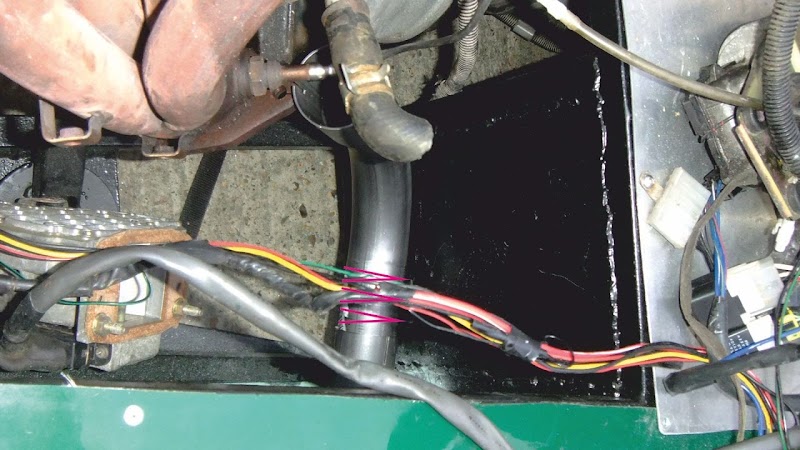 Or put one of these in there.  Pie cuts will cost nothing mind.... Cheers Stot |
Another 'finishing touch' half way through the build....
 Who can guess the full meaning then? :rolleyes: Cheers Stot |
stots build thread
would that be "haynes 7 build your own"
|
Quote:
 Cheers Stot |
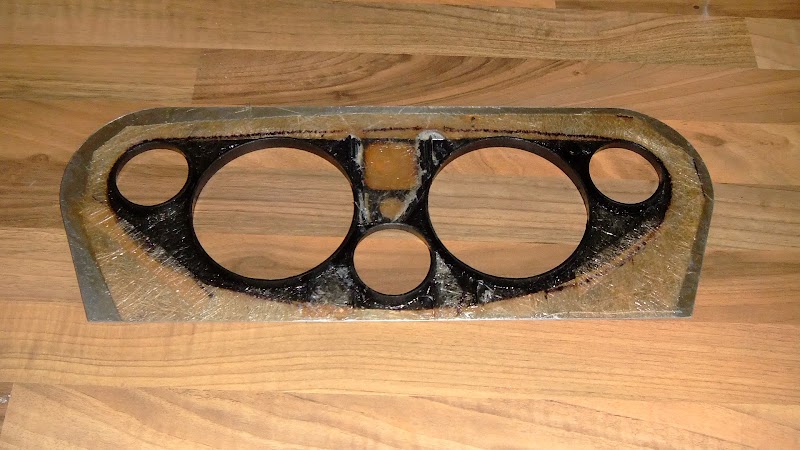
Back onto something of substance today. I bought on ebay one of those GRP dashboards with the IVA curve at the bottom but it never turned up so I decided to make one out of the spare half hard ally I had.
 To get the IVA curve I riveted the bottom onto some 36mm water pipe and rolled it round With the thickness of the ally and the spring back I get a 40mm diameter, so 20mm radius. 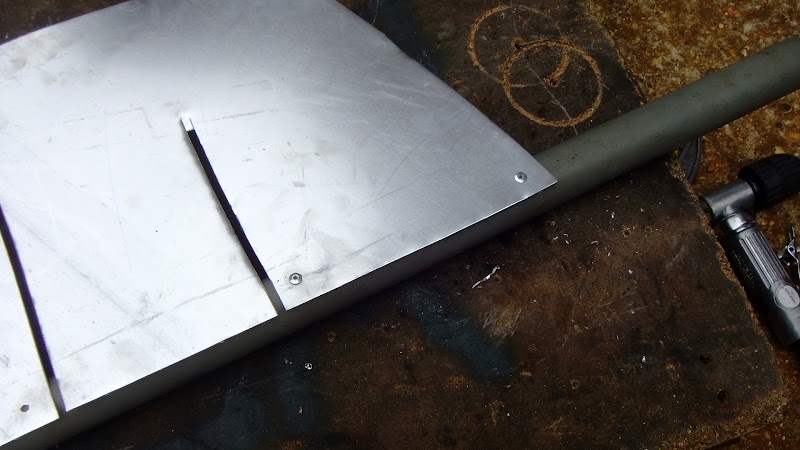 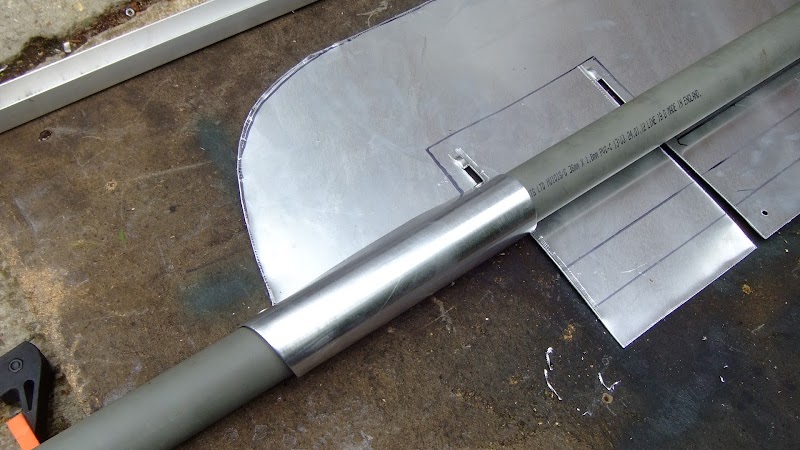 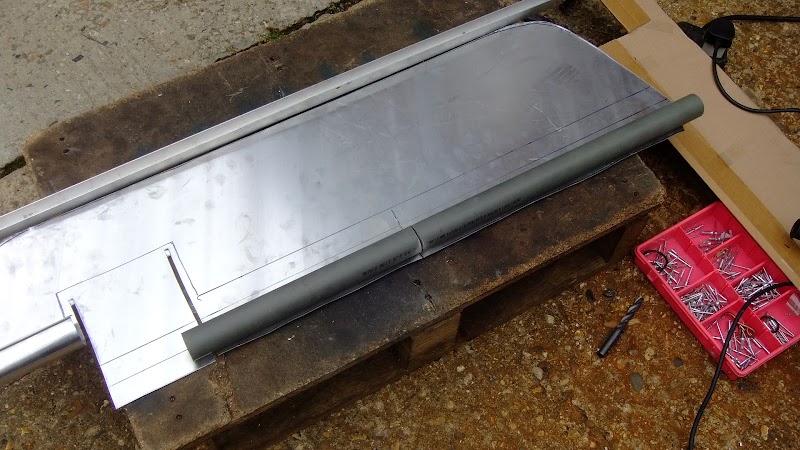 I had to do this in smaller sections. You could probably do it in one if you have 2 people and a metal bar to rivet it to but I have a break in the middle of my dash anyway so you wont see any joins. |
 A bit of fettling with the grinder and it fits lovely. 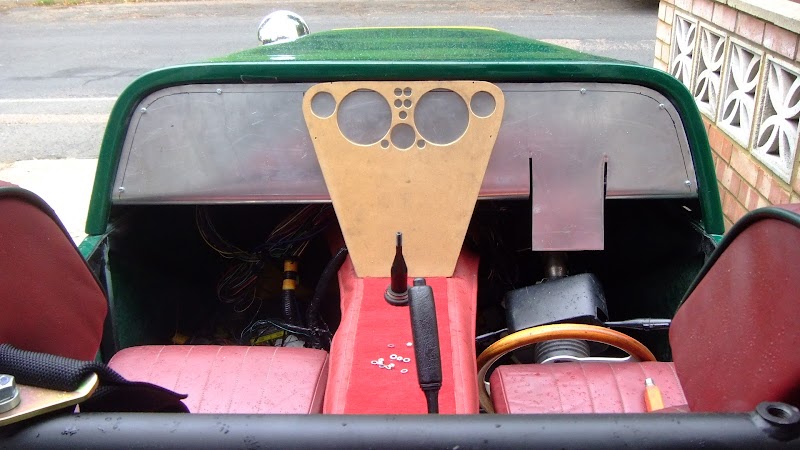 Cheers Stot |
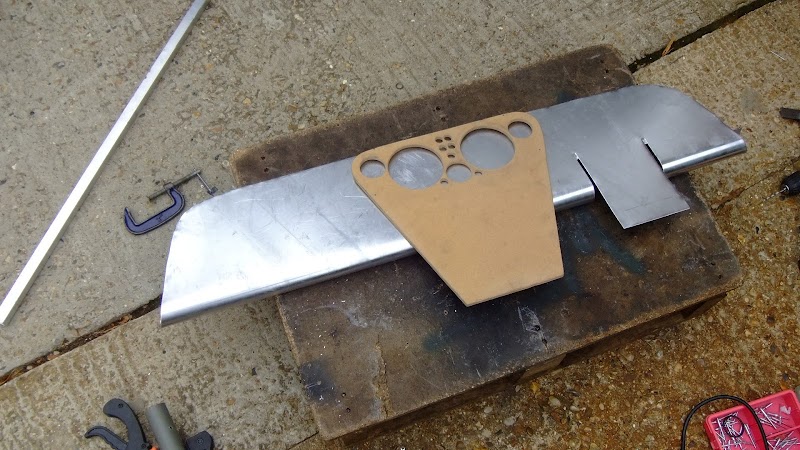
I am going to finish the dash panel in a synthetic burl walnut veneer so I thought I should test it out.
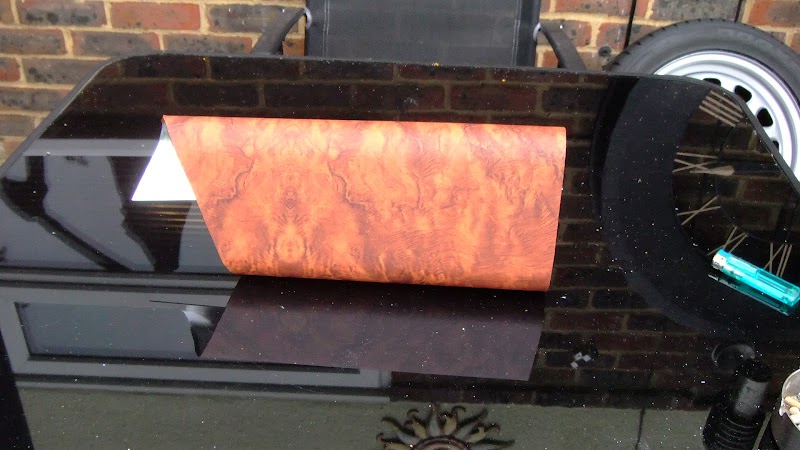 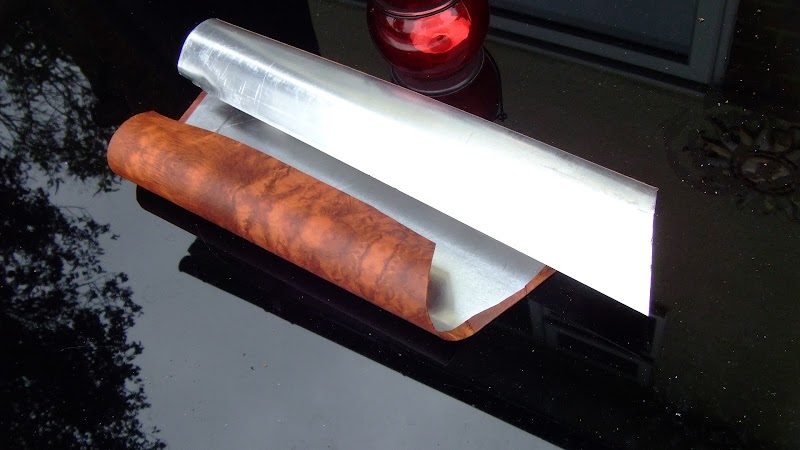 Really happy with that. The center section will be covered in red leather to match the sides and tunnel. :cool: Cheers Stot |
Such a lovely classic build, so many fine details to like about it! The ally dashboard is one of them.
|
The centre section is coming along. I trimmed out the original facia from the MX5 and have mounted it into a piece of aluminium that will then be mounted to wood.
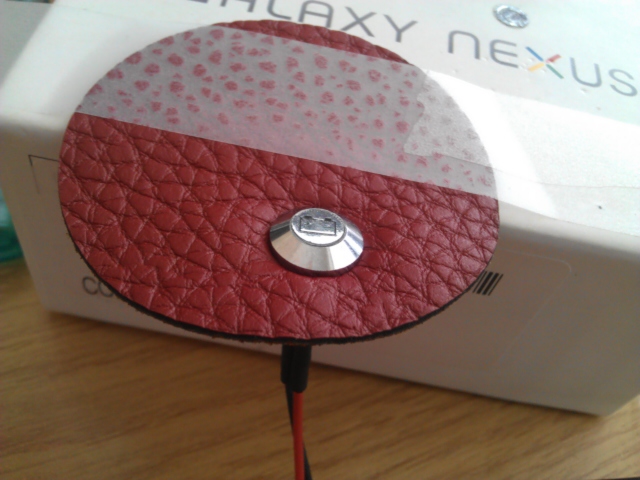
  I have a friend that's been testing laser cutting my leather for me. 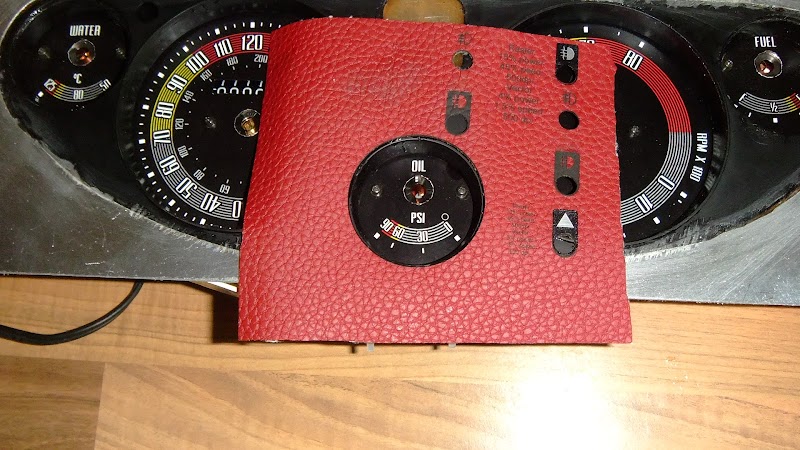 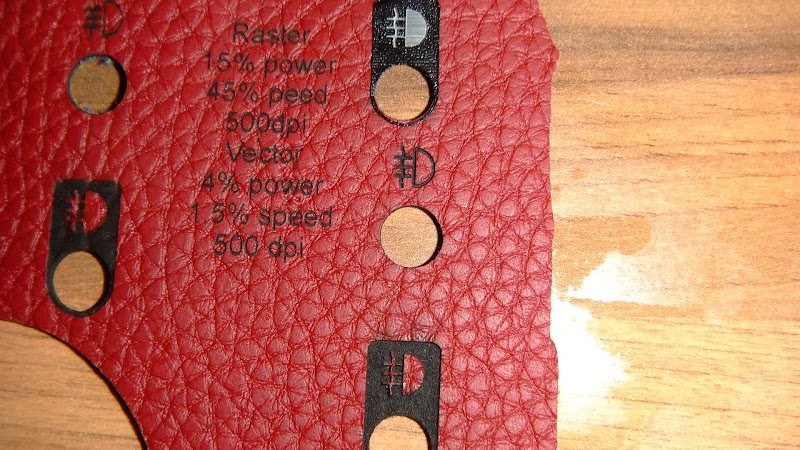 Came out nice but the silver one at the top may be a better option once LEDs are in. |
I got some wide angled LEDs and some chrome panel mounts for them. The LEDs were too piercing as they were so I sand blasted them to diffuse the light more.
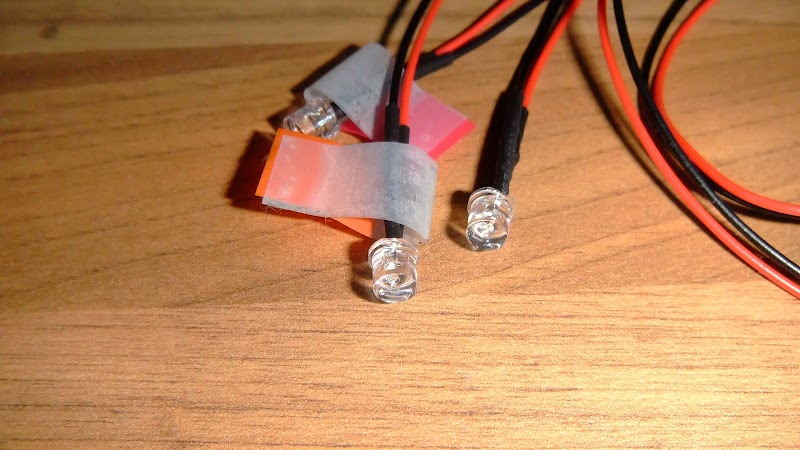   So I have the ingredients, now I have to put them together! Cheers Stot |
You'll be glad you have piercing LED when trying to read the indicators in broad daylight. The Sierra cluster's indicators are impossible to see during the day.
|
Quote:
Cheers Stot |
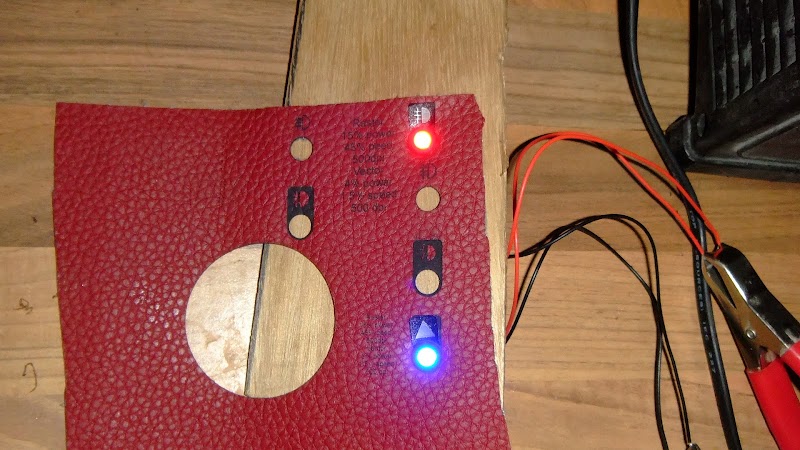
Another idea for the warning light logos.
   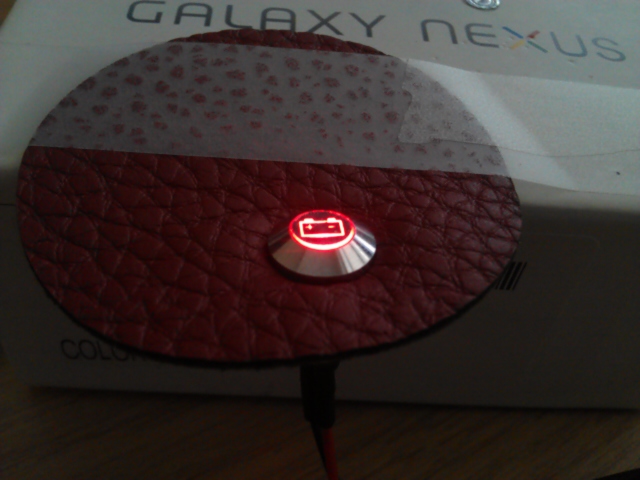 These are only 5mm but they are easy to make out and not too bad as tests go. Cheers Stot |
What you can do is connect a relay so it's coil is fed from the sidelights. When the relay is off the panel lights are fed from the full 12 volts going through the n/c contacts on the relay. When you switch the lights on the relay switches over to the n/o contacts which have either the 12 volts via a resistor - or preferably - through a voltage regulator of about 5 volts. Hey presto - bright lights during day time, dim lights as son as the side lights go on. Remember though that some panel lights eg handbrake warning lights are switched negative.
|
Quote:
Cheers Stot |
I engraved my made up chassis number into a length of steel.
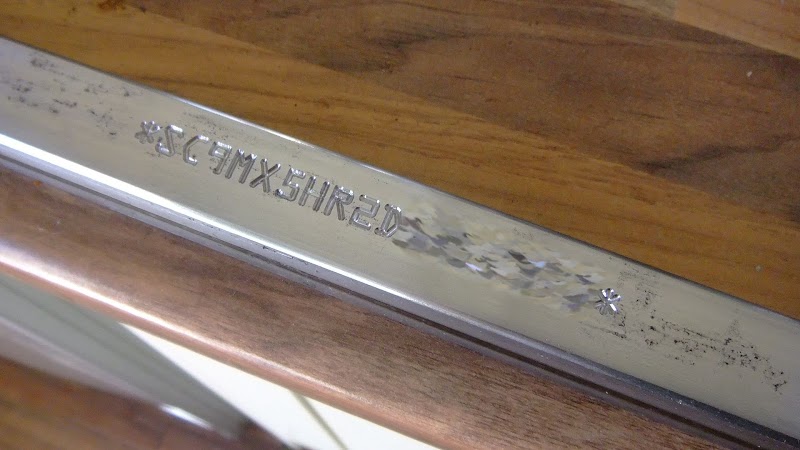 Ill cut it out and weld it onto CP16 or TR8. Cheers Stot |
Made a new MDF section for the center console. Had to come up with a way of mounting the dash in it so I bent up some aluminum strips that go where the old cowl attached and can be screwed down to hold it in place.
  I also finished trimming the dash and covered it in the synthetic veneer. 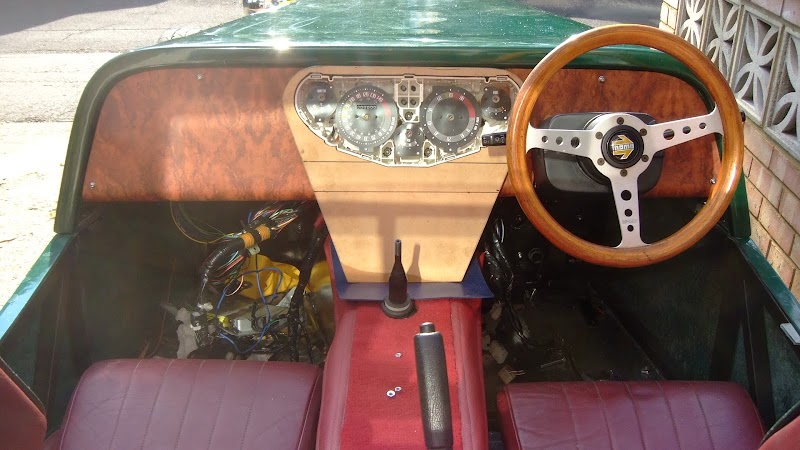 Another week before my friend with the laser cutter gets back from holidays and I can get the center covered. Cheers Stot |
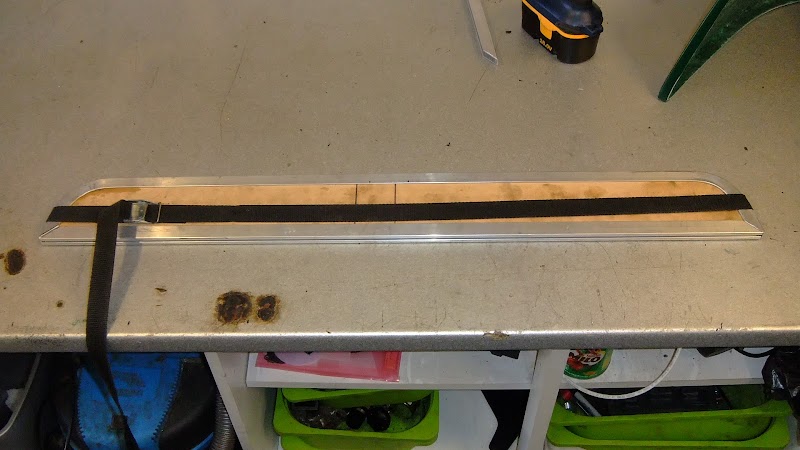
I made a windscreen surround tonight. :D
 Came out nice. Cheers Stot |
Moar info please! What size of channel did you use, how did you choose the height of the glass? And how did you bend the channel so cleanly?
|
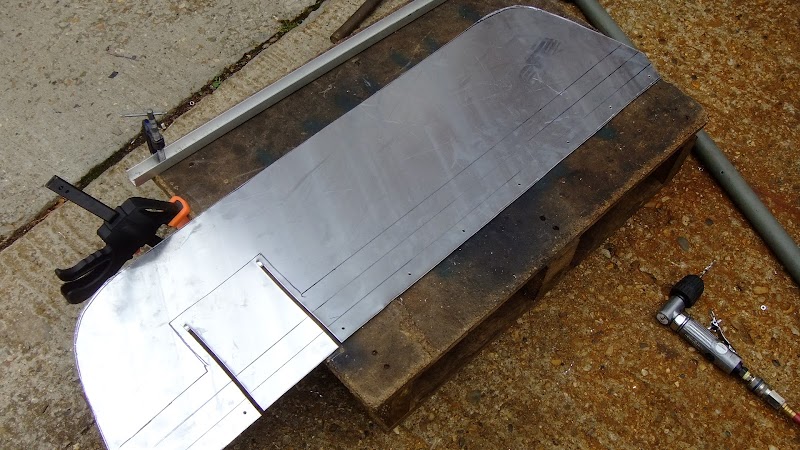
Well it just so happens that I was making a fly screen version and took some photos.
I got the channel from a localish company that make the Caterham and Ariel Atom cars but they don't deliver so I had to pick it up. Really hard stuff to find but I'm sure aluminum extrusion stockists can probably get hold of it. Looks like this, has a 9mm channel and the bottom section has a channel for a seal strip. 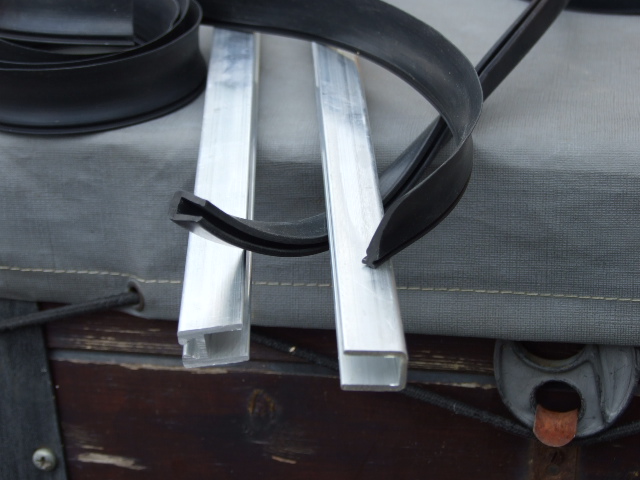 I made a form from 9mm MDF, put the channel on the top edge, clampped some steel plate with packers around the frame and held it in a vice while I slowly bent it round. 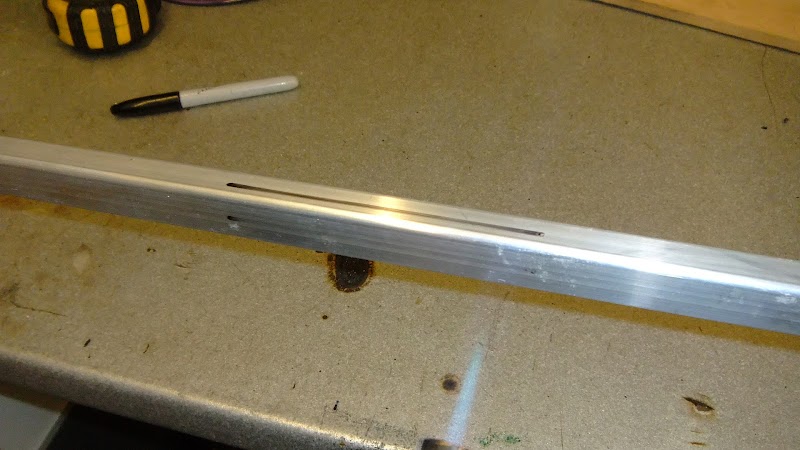   |
  If you are slow and sure the bend comes out perfect but one on this one didnt however you can panel beat the annealed channel and file/sand it flat if it does wrinkle slightly as shown in the pics below. Before:  After:  For the height I used trial and error. I basically had someone hold the MDF in place and sat in the drivers seat and took the view that the top rail being in line with the upstairs windows of the houses opposite me, ~20m away, worked well which was 13" as it turned out. My fly screen is 4" and when sat in the drivers seat I can still see the nose of the car above it. |
Today I also finished my steering column extension. As well as welding it I cross drilled it and pressed in 4 roll pins.
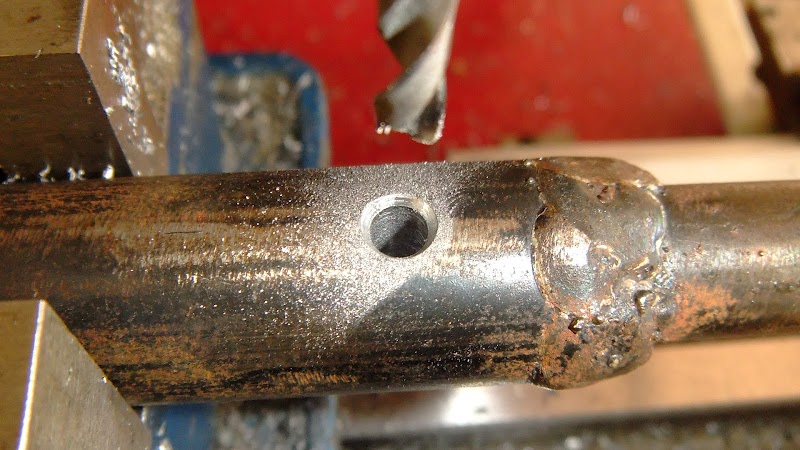 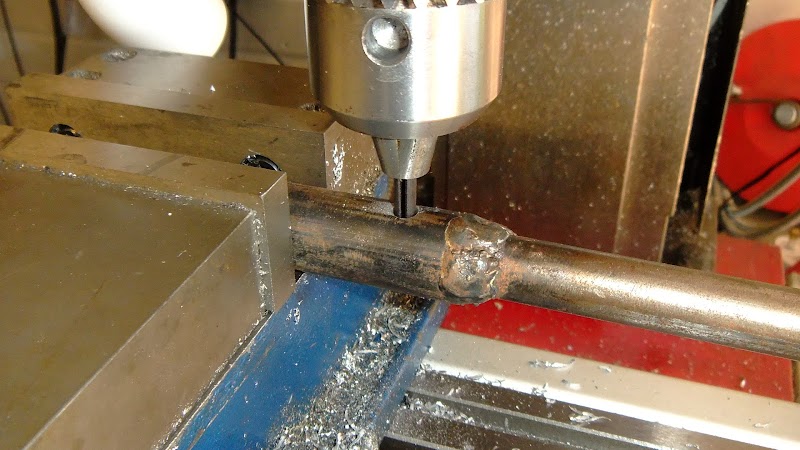  I welded the roll pins in also. Its not going anywhere. Cheers Stot |
Is there a requirement for a screen surround/channel? I have just bought a piece of 6mm polycarbonate and I intend to fix it at sides and bottom leaving the top edge clear.
|
As long as you can radius it to requirements it should be fine. J15s have an open top on their screen thingys and people have passed with those.
Cheers Stot |
Quote:
|
Quote:
Cheers Stot |
Another productive day. I got my exhaust downpipe all tacked together.
  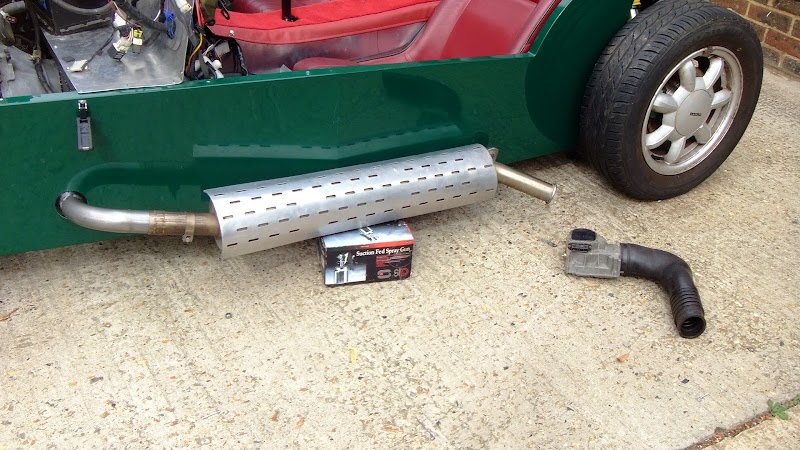 Got my brake and clutch pedals in place properly whch included turnong up new push rods for them.  |
| All times are GMT +1. The time now is 01:22 AM. |
Powered by vBulletin® Version 3.6.4
Copyright ©2000 - 2025, Jelsoft Enterprises Ltd.