were the from GBS or from KPD?
The two seem to have parted company. TT |
Tatey
check out Richardk pics on the LCB forum he calls his car the bruise he is a tall guy like yourself. and he has a taller rollbar and it doesn,t look out of place at all.. cheers les g |
|
Hi Ginge,
I was admiring the photo's of your building. They are fantastic ! The radiator you used, i guess it was a VW polo radiator ? Is it a certain model or do you have a partnumber of it ? Did you bought it at a local vw dealer or somewhere else ? Greetings from Belgium ! Wim |
Hi Wim
I do believe that Ginge used the Polo radiator :) Here is a link to the one I bought Polo Radiator I bought the Polo Mk3 Radiator as it has a thicker core & if memory serves me right, Ginge used the Polo Mk2 Radiator. May be worth contacting the seller for a shipping price ;) |
As Bonzo said.
I used a mark 2 Cheers for answering Ronnie, I am so busy at work, odd really as there are no wars ongoing in Wiltshire at the moment!:D Cheers Ginge |
Wim, Ik gebruik een radiateur uit een VW Golf I betaal ik hier in Nederland iets van 50 euro voor.
Sorry guys just a little talk between belgium and holland:D |
Quote:
Is dat een prijs voor een nieuwe ? ben je langs de plaatselijke VW dealer gegaan of via webshop ? W. |
Is there a big difference between MKI, MKII an d MKIII ?
Thanks. W. |
Take a look here: http://www.aaronradiator.co.uk/catal...ator-81-1.html In short, there are Mk2 radiators that have 380x323 cores, and Mk3 rads are all 430x322, putting the width of the rad at about 52 cm, which might be a bit of a tight fit.
|
Wim ik kan die dingen zakelijk inkopen vandaar maar ze kosten bruto bij een automaterialen zaak nog geen 100 euro een orginele bij de dealer zal wel meer kosten denk ik. Als jij er niet aan kan komen dan laat het maar even weten.
Sorry guys:D |
Quote:
Thank god for Google translate.....:D |
Quote:
W. |
its all double dutch to me :D :D
sorry , couldn,t resist :o cheers andy |
23 May
Spent all of yesterday in the garage, moved the seats up into the attic along with the nose cone which has been in my way for a while now, did it all while Nicky was taking No. 1 daughter to ballet! Then spent all day drilling 329 holes in the floor and chassis,:mad: OMG I think I have got vibration white finger! Once I had drilled all the holes I then had to de-burr both sides of the ally floor. It is all done now the floor is ready to stick and rivet in once I have got the head light mounts finished and the chassis painted. A little note on drill bits, I always used standard HSS drill bits but when I started drilling holes for the floor two or three weeks ago I snapped two 3.2mm drill bits after doing 10 holes each. So I forked out on some 3.2mm Cobalt drill bits on line, they were not too expensive under £20 for ten but one drill bit did all the holes and shows no signs of getting blunt. Worth the investment. No pictures this week as it would just be the same sheet of aluminium you have seen before with a hole every 30mm! Cheers Ginge |
Spleki im niken ablet un luanga de la foregni
TT |
1 June
Well I can chalk up another 7hrs on the build; it was a good bank holiday Monday. I started by fabricating the head light mounts, these are made from scratch two lengths of tube left over from my roll bar rear stays and some 5mm plate. I used 5mm plate as I wanted to have enough material to create a nice radius. Fabrication eat into the build time as it is quite time consuming making four round pieces of steal, welded them on top and bottom of the tube then drilled a hole in one end of each for the head light bolt then used a hole cutter to make a big enough hole for the socket that is required to do the nut up. Finally hacked away at the oval that was attached to the chassis to allow the new end piece to fit nicely. [IMG] 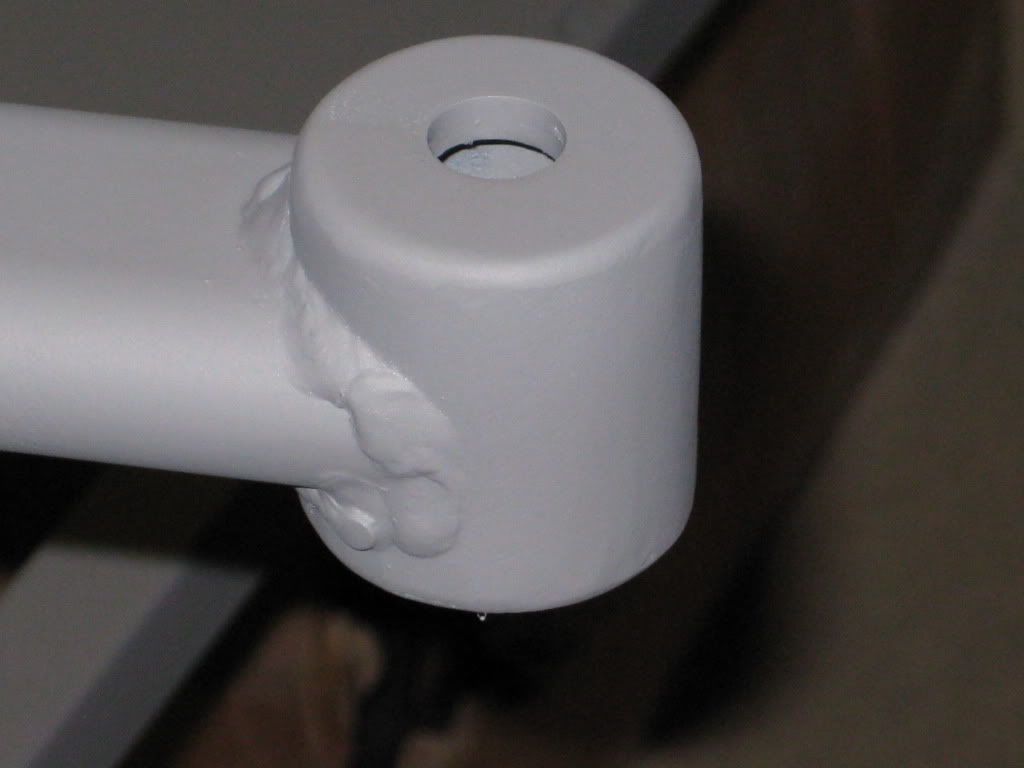 [/IMG] [/IMG]They have turned out as I expected which is nice, and like all the small components I have attached to the chassis recently they are man enough to jack the chassis up on! I then spent ages cleaning up the chassis back to the bulk head, as it where, ready for the application of some paint, between coats I set to re-assembling the front up rights, the bearings I got had two nuts in each box, seems a little bit of a waste but saves them stocking left and right I suppose. Really glad I had the Haynes manual for the Sierra as I confused myself trying to work out how the bearings went back in. Glaringly obvious when you look at the exploded diagram! Last two pictures are of the front 1/3 of the chassis primed and the uprights which are getting the odd coat whenever I pop in the garage for a smoke. [IMG] 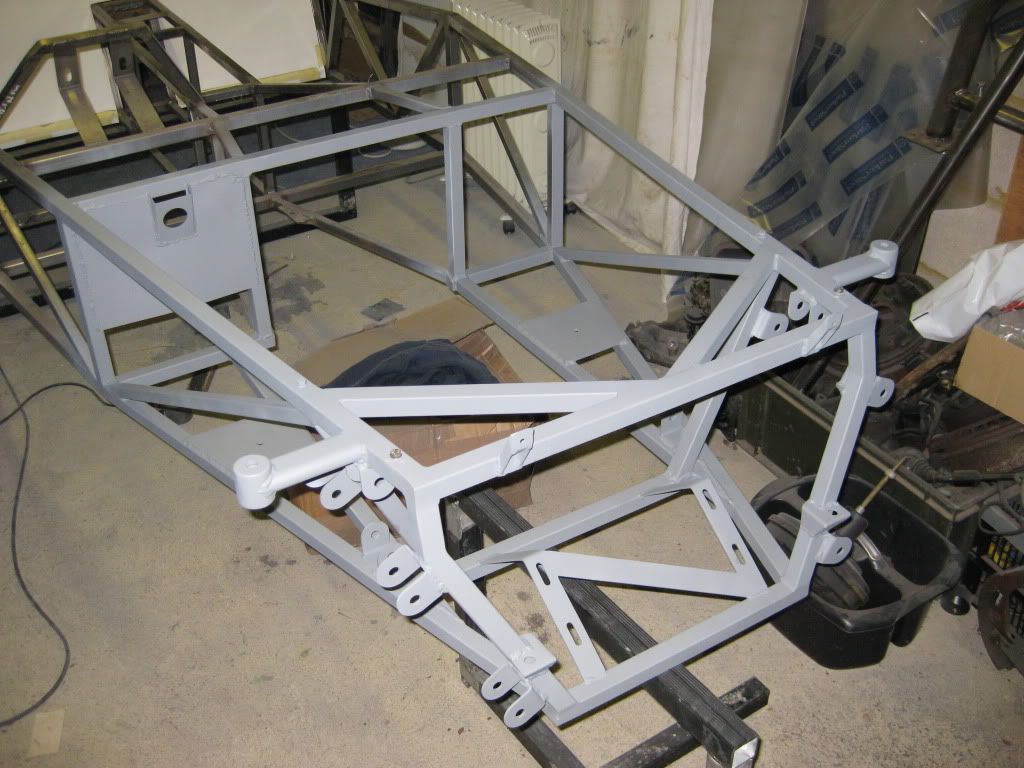 [/IMG] [/IMG][IMG] 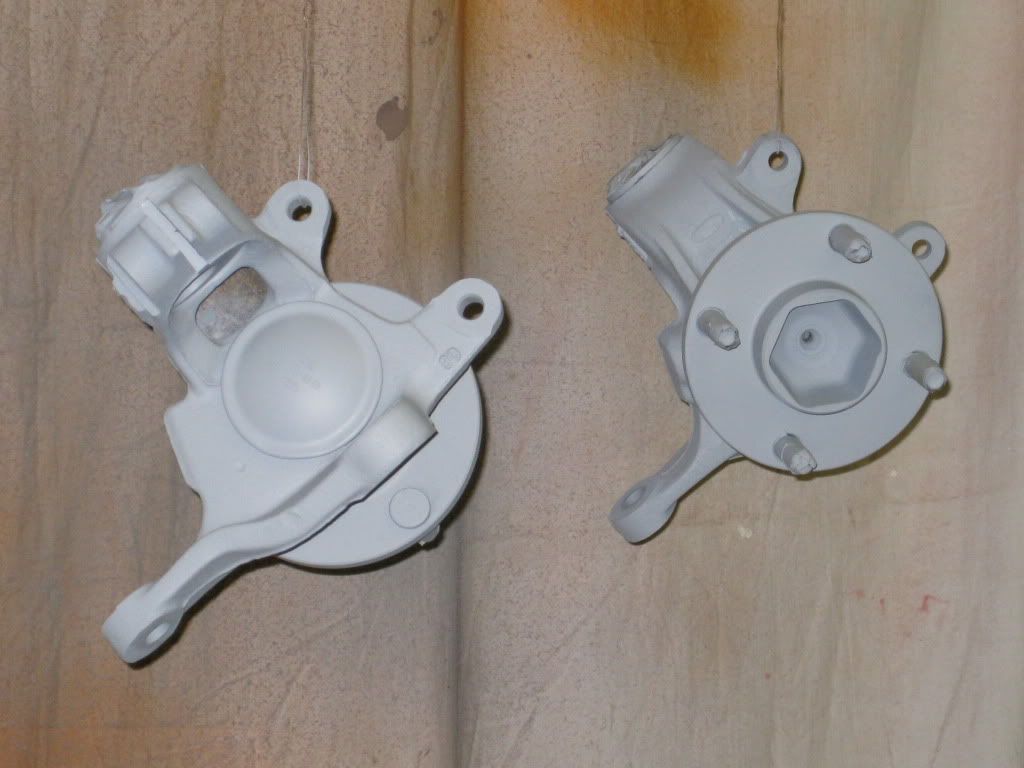 [/IMG] [/IMG]Next weekend I must press on with chassis painting and the electrolysis process. Cheers Ginge |
Good progress Ginge, chassis is looking very nice.
D. |
Why thank you, I cant wait until it is rolling
|
Looking really smart Ginge :cool:
Just one point if I may? :o what are you doing with the passenger footwell ? what i mean is the bulkhead between passengers feet & the engine bay, As this isn,t mentioned in the book, I welded in a 3mm plate to create a bulkhead, also used 3mm plate for CP15 & 16..... Just a thought before you fully paint the chassis ;) cheers andy |
Andy,
Good question, well presented, dont really know, havent thought about it. I will probably use Ally, so it goes faster. No one will get in it with me any way! Cheers Ginge. Mrs Ginge (Nicky) has just given me a funny look as if to say well I was planning to have a ride!!!! stop sniggering TT |
Quote:
Well, I reckon Mrs Ginge should make a point of MR Ginge being a passenger now & again after that comment :p :D No worries, Ali is good too , just remember to rivet it in before the engine goes in :D cheers andy |
Hi Andy
Its Nicky (Mrs Ginge) I'd love to have a drive if.....oops :D when, its finally finished. You'll not get anything out of Ginge at the moment, he's glued to the tele watching the new series of Wheeler Dealer on Discovery Realtime. I expect he'll check in during the advert breaks, but other than that you won't get anything out of him for approx. an hour when normal service will resume! Nicky |
Quote:
:D Touche ( said in french accent lol) Nice one Nicky :D cheers andy |
Woah, woah, woah
What was that all about,:eek: she needs to get back on her running forum! Or get a log in.:D Cheers Ginge |
My wife doesn,t drive :D :D
My Roadster is safe :eek: :D cheers andy |
My wife does drive but doesn't seem very interested in the car although she is really supportive of me and my silly ideas:D . I do have a list of people who want a ride in it though.
D. |
My roadster, once finished, will be safe!
My mrs has a mini cooper sportpack in the garage, under a dust sheet, which is looked after better than me!!!!! I am not allowed to touch that, except to check fluids and run it every few months (its done 300 miles in the last 5 years!!!!) So she can keep her hands off my car :D |
Ginge, all looking good but just an observation of your front uprights, the part of the upright where the track rod end attaches hasnt got a radius on the edge. If you get a picky examiner it may pose a radius problem.
Some people have passed fine with standard uprights but i just didnt want to risk it on mine so i smoothed off all the edges with a flap disc, the test fee is high enough without having to fork out for a retest for something stupid :) |
Mark,
Thanks for that, I subconsciously assumed, that Ford manufactured parts would be OK.:o Obviously having thought about it that is not necessarily the case.:mad: I will be softening the edges this weekend.;) Thanks for the heads up.:D Cheers Ginge |
looking good ginge. wont be long until its finished at this rate.
|
Nice work Ginge. The attention to detail is brilliant.
Cheers Gus |
Gus,
It is the time it takes though; I cant get motivated in the evenings so it is just one day per weekend at the moment.:( I hinted to Nicky the other day by saying 3 more days on it and it could be rolling, End of June then she said!:( Cheers Ginge |
Nicky sounds like my wife......:eek: :D
I just say "it,ll be done " ;) cheers andy |
5 Jun
The kids are away for the weekend at my mothers, as we have a do to go to tonight, so Nicky has been distracting me, to that end I havent got much done. Didnt even look into the electrolysis apart from knowing I need a larger tub than I have. I did manage to get the first coat of paint on the front of the chassis, the primer is still grinning through so it will get more orange and etch and prime my front lower wish bones. [IMG]  [/IMG] [/IMG]I took the advice of Mark and used a flap disc to produce a radius on the bit of my front uprights that the track rod ends attach to, and then re-sprayed them. [IMG]  [/IMG] [/IMG]I need to get down to Halfrauds with my new trade card and purchase some more paint. I recon on and off only 2hrs on the car today, Cheers Ginge |
Looking good there Ginge. May only be two hours worth but it was a good two hours and that's what counts.
D. |
How many cans of paint and primer do you reckon you'll use for the whole chassis and suspension? I'm tempted to go with the cheap option of alkyd paint brushed on.
|
Alga,
Paint it on, by god, paint it on.:eek: I have started something that I might struggle to finish. My thinking was I like the engineering aspect so much I want to show off as much of the chassis as I can, so I decided to prep and prime the chassis myself then get a pro paint job. The pro paint job will cost £500, too rich for me (should have done more research). The orange you see on the front is one can and that needs another coat. I think I will plod on concentrating on the bits you will see more than the bits you cant, it will all be ORANGE though in the same vain as Ronnies RED. Possibly the most long winded answer in forum history.:D Cheers Ginge |
Ginge, we havent had an update from you in over 4 and a half months! Where are you?! :eek:
|
Tatey, you could be more active too! There are 23 guys waiting to be added to the map in the builder locations thread! ;)
|
| All times are GMT +1. The time now is 11:18 AM. |
Powered by vBulletin® Version 3.6.4
Copyright ©2000 - 2025, Jelsoft Enterprises Ltd.