Also fitted my finished steering column.
 Cleared up the wiring behind the dash So I can start mounting it up.   |
And had a general cleanup and take stock of the state of the build.
   I haven't felt like I did much lately so glad to get that all done. :cool: Cheers Stot |
Looking very nice!
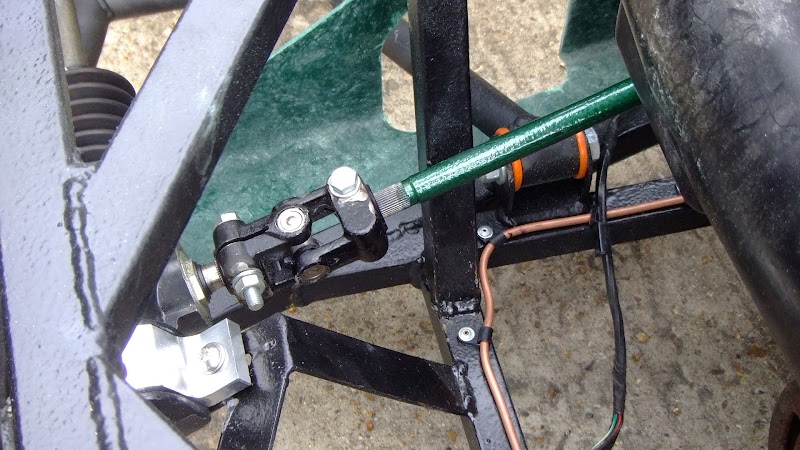
Don't know how you carry on with only one headlight, would really bug me not fitting the pair to match :o That steering column end, does that UJ change from the sierra to the Escort size splines? If so, are they available on the open-market or a bespoke part by yourself? Looking for some way to replace the dodgy old rubber donut... |
Quote:
The steering link is an escort spline at both ends. My steering gear is MX5 but you can buy column shafts from rally design and maybe remake your extension to get rid of the rubber donuts? Not sure I haven't played with a sierra build. They do do these though which is Sierra to Escort. Cheers Stot |
Had another play with my badge the past couple of days. I machined an aluminum one.
 I first tried using gelcoat to colour it like my other badges but it doesn't stick to the aluminum and the colour came out in nice molded pieces. :rolleyes: So I gave it an acid etch primer coat and went at it with some Humbrol enamel model paints.  The colour sits in there as I originally intended so as long as it dries nicely I should be able to sand the surface back to aluminum and polish it. :cool: Cheers Stot |
Actually Stot...I rather like the look of the plain machined version, bit o lacquer and it would look real techy:cool:
|
Quote:
Cheers Stot |
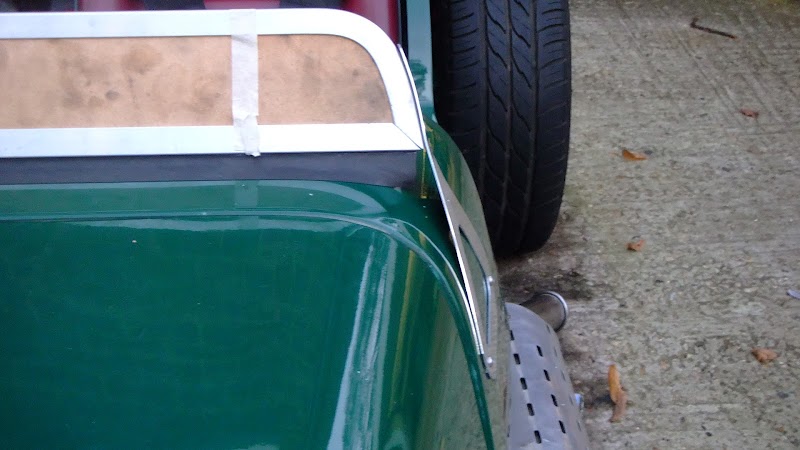
I made up some windscreen brackets today. Made them out of the 1.5mm 5251 H22 which is what I used for on my floor. I think it should hold the windscreen fine but if it seems too flimsy when I fit it Ill get some 3mm.
A set for a full size screen.  And a set for the flyscreen. 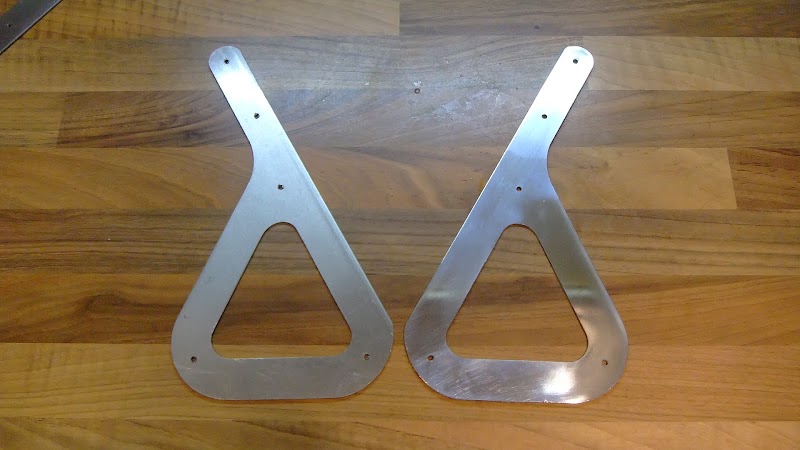 All the scuttle mounting holes are in the same place so I can swap them around easy enough. 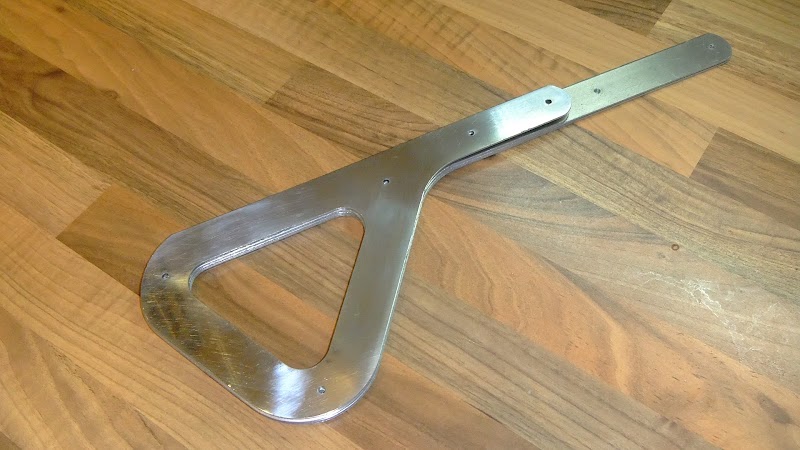 Cheers Stot |
The model paint wouldn't dry in the end. A week later it was still wet :rolleyes: I decided to 'cold enamel' it which is basically filling the voids with a coloured molding resin. That worked 100% better.
 Ready for the nose then. :D I have also been working on the bezels for the dials. I got some chrome bezels from ebay but they are designed to go behind the standard MX5 acrylic shield so I got some laser cut acrylic discs and glued them up with some clear setting epoxy. 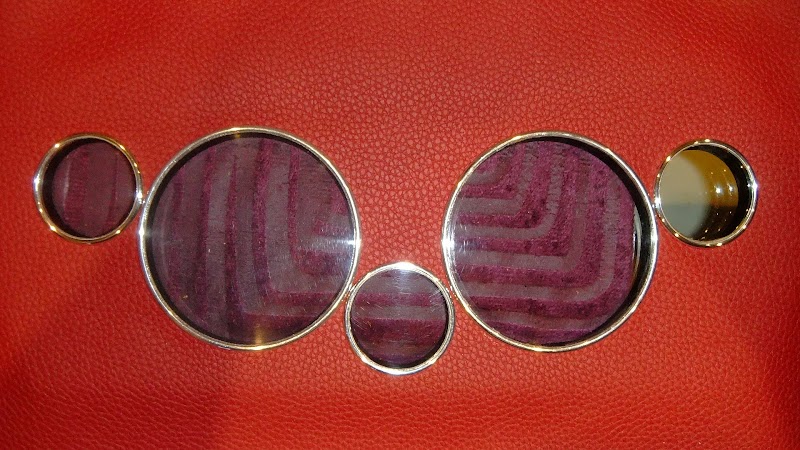 Its turned out well so far but I'm waiting for the laser guy to properly cut me the leather so I can mount up my warning lights and finish making the center dash. Cheers Stot |
The LED bezels finish it off nicely.
 Shame its going to be at least another week before I get the laser-ed leather to make it up properly without the pulling and wrinkles. :( Cheers Stot |
Still going up another level with every installment
Arfon |
That's going to be one very nice dash...:cool: :cool:
This build certainly raises the standards again and again.:) Do you plan to fit the fly/aeroscreen before SVA and then change to full window screen afterwards if so are you going to fit wipers or just take it out on sunny days? I'm thinking about fitting a window screen after the test and what you have come up with is a damn good idea with the straight swap...;) |
Cheers Arfon, Jonno. I have to say though I'm not spending nearly as long on the bits you dont normally see like you guys are.
Yeah my plan is to fit the flyscreen for IVA then I can add the windscreen at my leisure after that. I already have all the gear for the wipers. I managed to pick up a full wiper set from a Morris 1100 for £5 so it would have been silly not to. :D Saying that I wont be taking it out in the rain so it will be more for bug removal. I didnt bother curving the bottom screen channel to fit the scuttle but you could. The jig to bend it would be more complicated though because of the weatherstrip channel along the bottom. I think I will make up some aluminium brackets that will hold the frame together from the back and fill that gap like the red bits below. 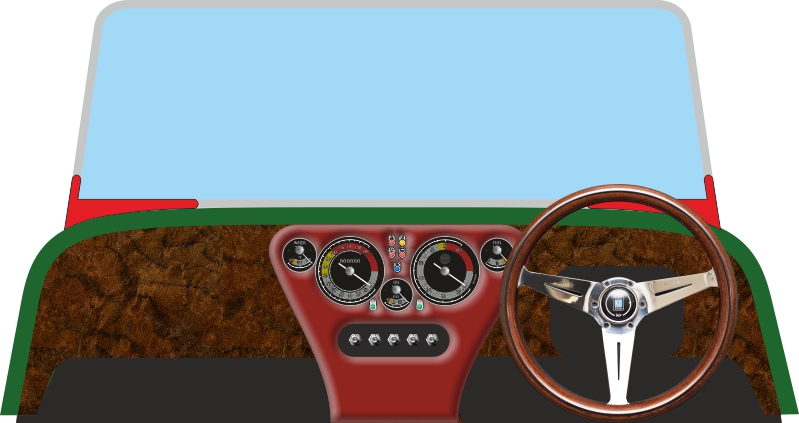 Cheers Stot |
I can't afford to park my car up in the rain, it has got to be a daily use vehicle. I am just really lucky that my little mx5 came with an LSD. Should make winter driving a little easier. I have been looking into a custom wet gear set up, like the ones on the gbs zero, need a heater though, you can buy the crappy electric ones, but I prefer a proper one. Any ideas ?
|
I used my Jester as a year round vehicle and that had a fiesta heater in it but to be honest it didnt do much. Thick socks and a big jacket are the way to stay warm in these cars.
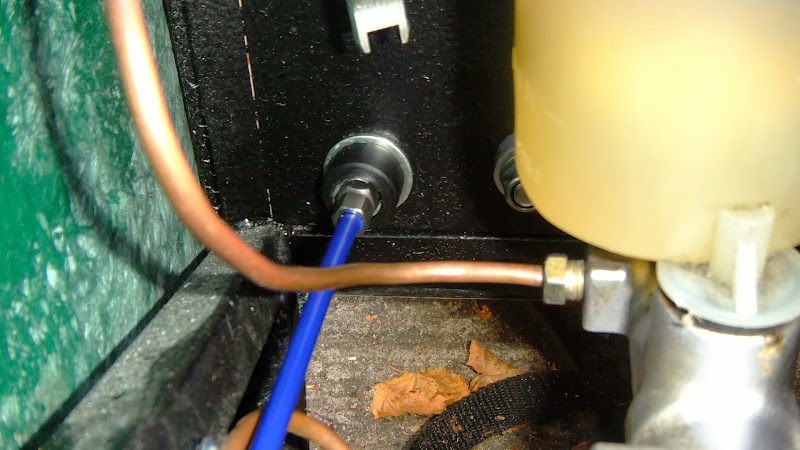
What you will need though is a demister. Im making a demister from an old 120mm computer water cooling radiator.  Ill make some simple ducting for it and plumb it in to the radiator lines. Its kind of the same lines as these. Cheers Stot |
Please don't finish your car for about another 6 months, you are way too handy ! Lol:D
|
I made an air filter adapter today to suit one of those ASH filters. I cut a 3mm plate to match the gasket with a groove in it to fit a 76mm pipe. Sat the pipe in the groove and welded it from the inside.
 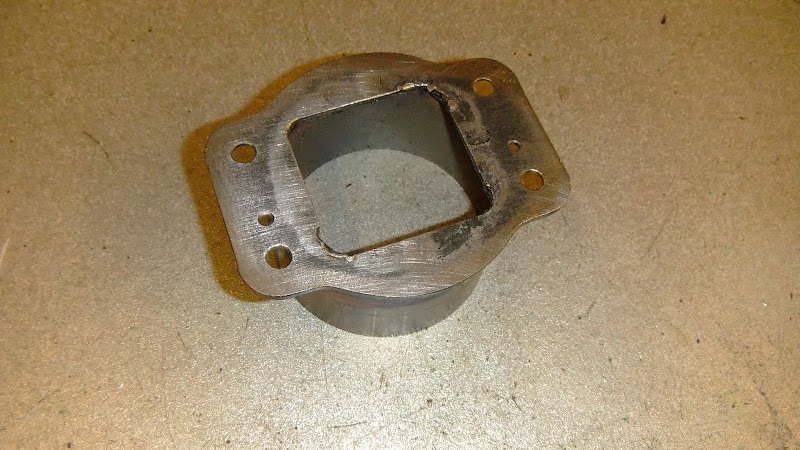  Worked out about £22 all in. :cool: Cheers Stot |
Tried out my flyscreen today. Couple of issues. I have mounted it at the wrong angle slightly. I have some BRG gelcoat so I can repair the holes if they are not hidden by the brackets when its all fitted. Second I need to make the brackets slightly longer in the middle section so I can 'fold' them in to the bodywork a bit more.
  I think I will remake them from 4mm or 5mm. Not sure whether to just make some cover plates for the corners or make a solid filler that I can put the seal strip into. 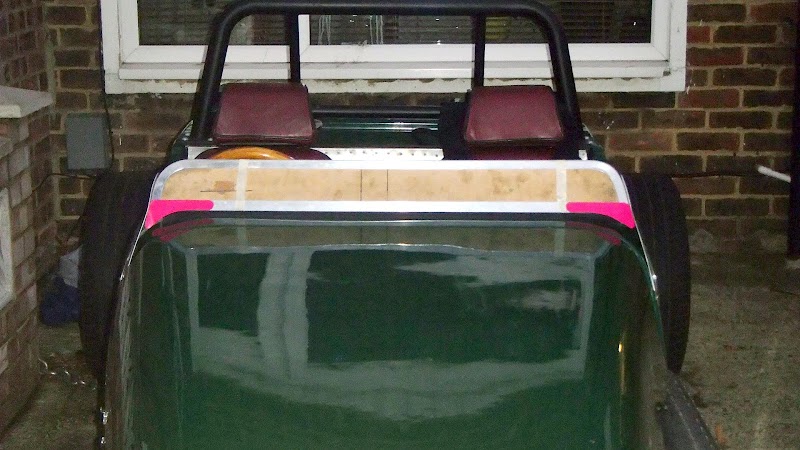 Ill probably end up trying both. :rolleyes: Cheers Stot |
I have put the Air filter in position today and lengthened the air flow meter cable to reach.
 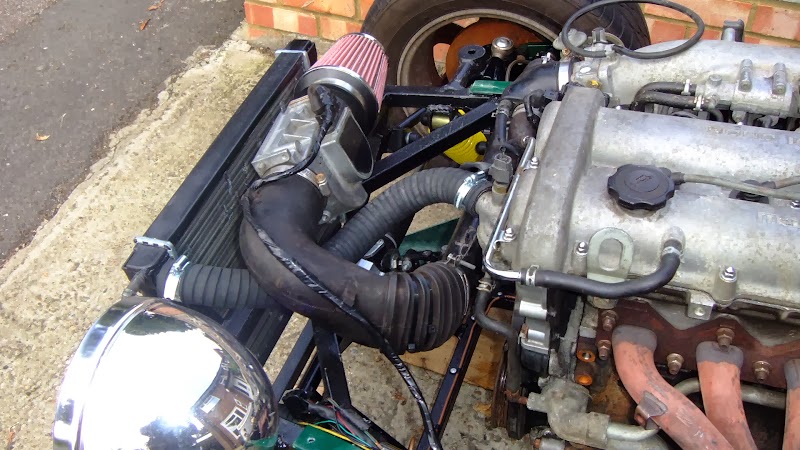 Ill probably get an aluminum U bend to replace the rubber part so that it doesnt try and crush when it bends round. I have some sip ties holding it open at the moment. I also carried on a little with my dashboard. Stuck the aluminium parts to the MDF and rounded the edges with a rasp. I added some extra MDF to the back at the bottom so I can radius round a bit. 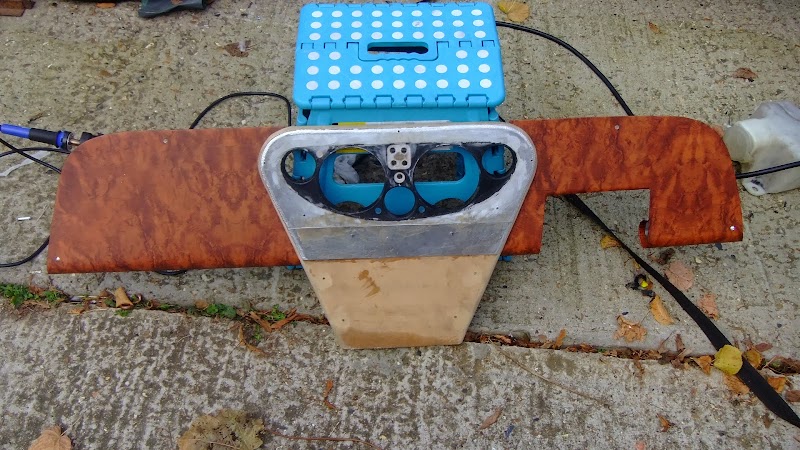  |
I didn't add the aluminium to the bottom section so I could add some padding at the bottom. I used some mousemat material.
  I test covered it. The final cover will have a stitch line going left to right to hide the transition from aluminum to mousemat, but to be honest you hardly notice it anyway. 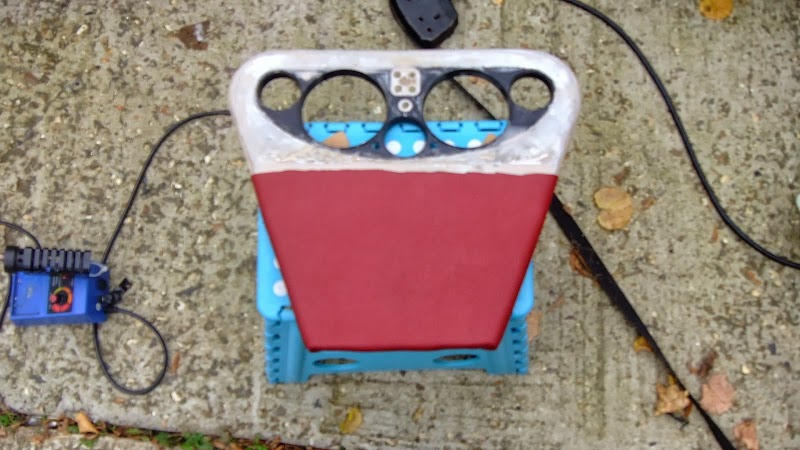  Really want that laser cut piece now! Cheers Stot |
Looking good,
But I would personaly try and find a better location for the air intake as it's going to get very hot air. TT |
Quote:
Thanks TT. I was going to shield it from the radiator at the top there but the alternative at the moment is by the exhaust manifold and this should be a cooler option. I may end up putting it below the radiator just above the steering rack so I can duct from the oil cooler vent. Cheers Stot |
Well today I did two things. Firstly, I made up a couple of bracket bolts for my throttle cable.
   The lower one is some M12 threadded rod with an M7 hole in it that takes a lambretta cable adjuster. The upper is the same thing without a thread. I finished them with some nut covers with the ends drilled. Now what that meant, now that the radiator is plumbed in, the clutch is pressured up and the brakes are mostly bled was that I could do my first drive! I say drive... It was moving under its own power ok! Cheers Stot |
Well done Stot hope your wife made you some sandwiches for that trip:D
|
And a flask of coffee, tidy job there mate
Arfon |
Well done on your first drive. Its amazing how quickly you are putting your car together especially with all the nice touches you are adding to it.
David |
Cheers guys. Its nice to see it under its own steam! Not too far to go now.
Exciting thing happened last night, II got an email to say my lasercut was ready! Went and picked it up this morning and set the sewing machine free again when I got home.  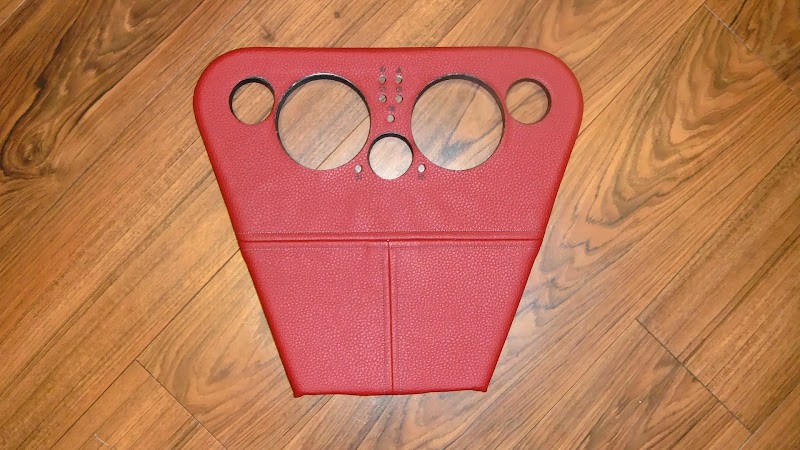 The engraved logos came out pretty good. a bit scorched in places but passable. I put the sewing lines in just to give it some interest and to hide the transition on the MDF rom hard to padded. Looks even better with the dash parts fitted... 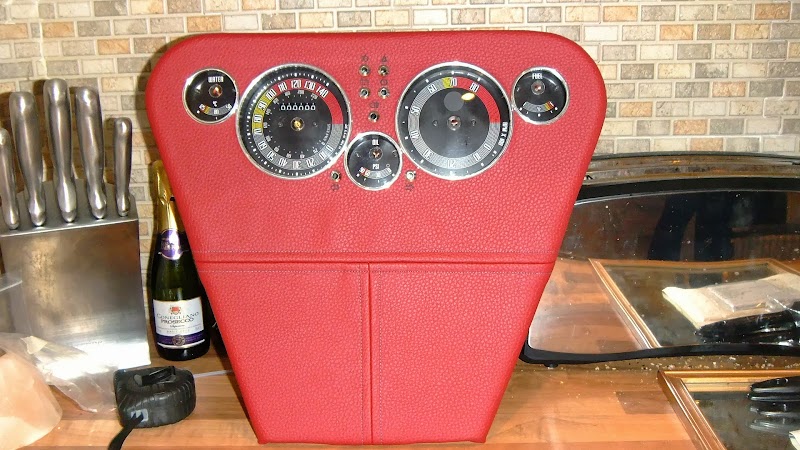  My friend that did the laser cutting was asking if there was a market for this type of thing. I don't know, how much would you pay for a piece of leather with cutouts for a standard Sierra/MX5 dash? WOULD you pay for that? Cheers Stot |
I think I'm getting to the finishing straight now after a busy weekend. In general I got the engine running nicely and made a start on the electrics. The dash is all working, I had cut the tach wire while removing the headlight flip stuff from behind the dash but that was easy enough to get back.
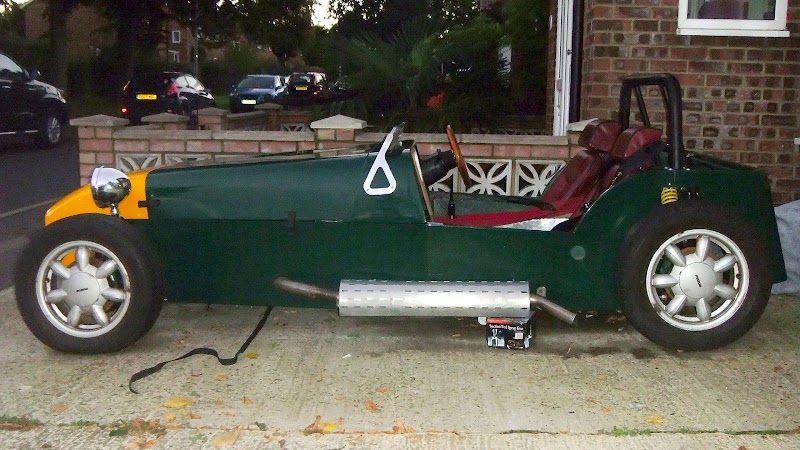
Exhaust is all in and welded up where need be. I currently have it hanging with a rubber strap at the rear.  I may make up a bracket to take a bobbin at some point I'm not sure. Got both front lights on now, and even have them working!  And I made a cover for the rear of the tub. 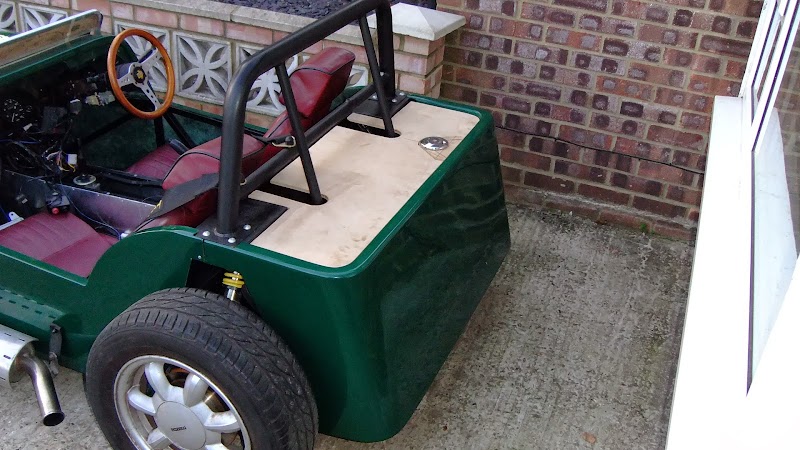 I have the filler on the top there and its on a separate piece that stays attached if the rest is removed.  There will also be a leather cover for the back with the filler cap showing through at some point. Cheers Stot |
Its dark when I get home from work these days so as I cant work on the electrics in the dark I thought I would have a go at a rear tub logo.
 So it should look something like this.  Ill get it cut out at the weekend. :cool: Cheers Stot |
Quote:
You will be on the road in no time at all! David |
I cut the badge today. Had an issue with it moving on the last cuts so its a bit funny at the right of the 7 and top of the S but nothing major.
Freshly cut. 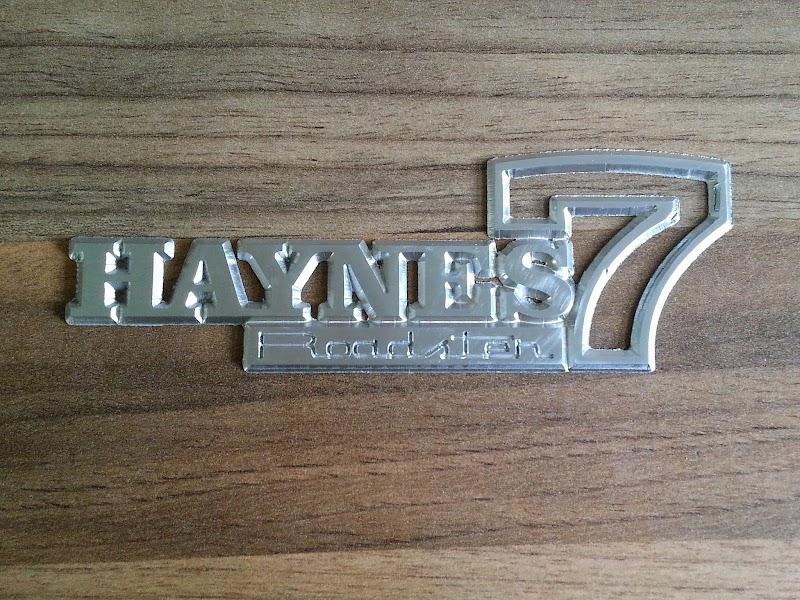 Painted and polished.  Unfortunately its too small for the back of the car. It needs to be almost twice the size to suit really so maybe ill put it on my dashboard. 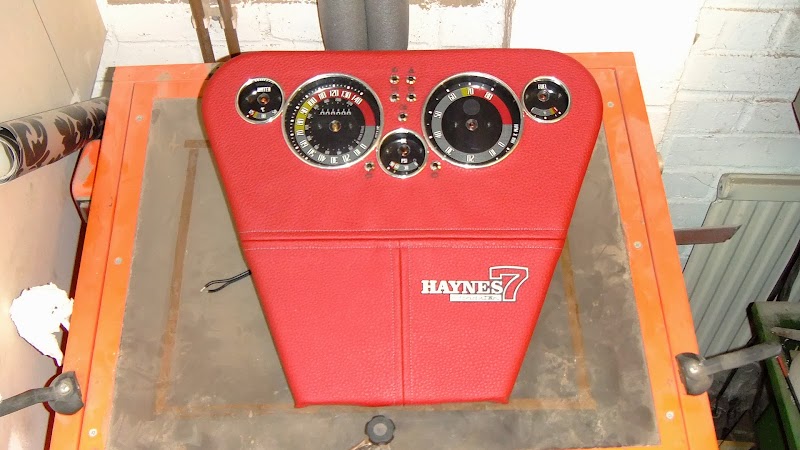  |
All my engine bay and front lights wiring is in place now too and zip tied to the chassis rails.
  Ive trimmed up my nosecone grille too, looks like the nosecone has a slight twist in it to me too as the top is level in this pic but the grille hole seems to be lower on the left.  Still I couldn't have made that part better myself. :D Cheers Stot |
looking real good Stot reeeeaal good.....looks like a candidate for spring finish:D keep it up dude
|
VERRRY NICE! Yet again.
|
Cheers guys.
Kev I'm aiming for early December purely because I have some time off then so it would be good to get the IVA done then. Quote:
I made its big brother today. 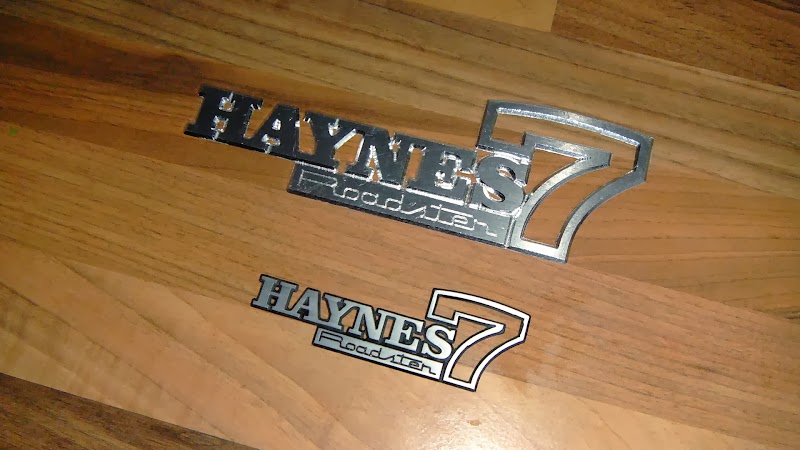 This one is 1.5mm sheet and should be a better fit for the back. The tool paths on this one were simpler so I don't have such sharp points where the lines meet but as its bigger they don't need to be as sharp to look good. This cut the machining time down to 1 hour 6 mins for something thats twice the size. I just need some more paint to finish it. Cheers Stot |
Some very nice work there indeed buddy....:cool: :cool:
I'm guessing with a bit of tweaking you can get the twist out of that nosecone fairly easily.....some strategically hidden packing...:D Keep up the good work Stot and looking forward to your next instalment...;) |
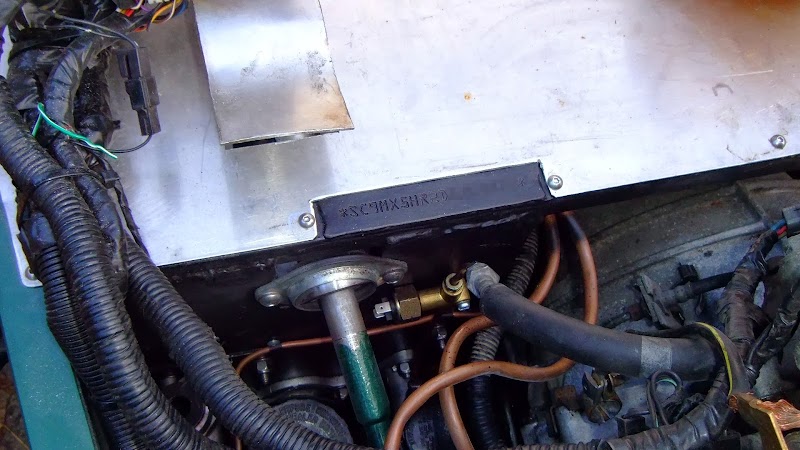
I welded my chassis number in this week. Really should have done this before I painted the chassis!
 And I bought some jaguar style grille. Needed a nice way of mounting it so I cut some aluminium tabs to be fiberglassed in. They have rivnuts in the end for the grill to screw on to. 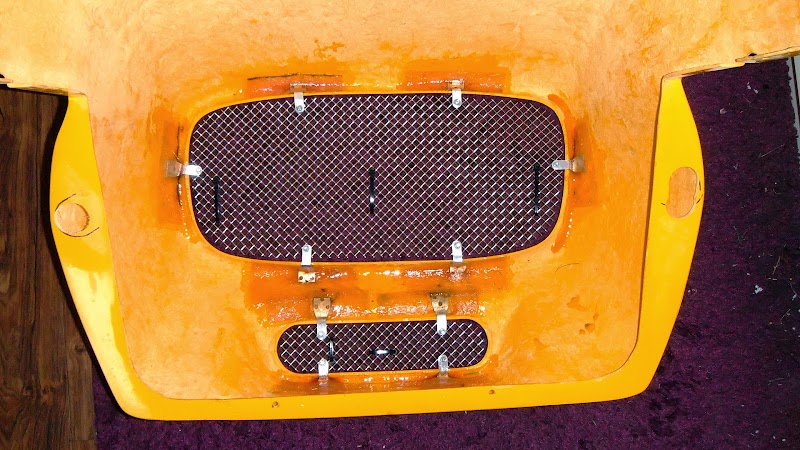  Ill finish the edges of the grilles with some chrome U trim to give it a fitted look. :cool: Cheers Stot |
Could you try and do a sh.t job of something to make us all feel better :o
TT |
Quote:
However in the mean time, I made some lock stops for my steering rack.  The step in them is to sit over the threaded end part. 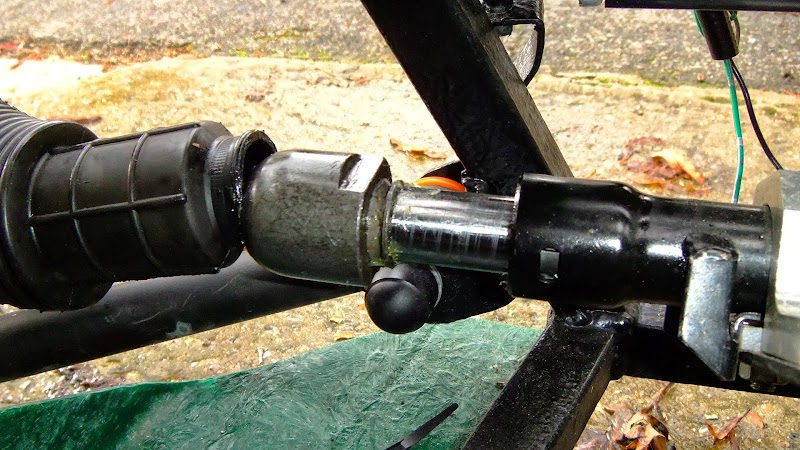 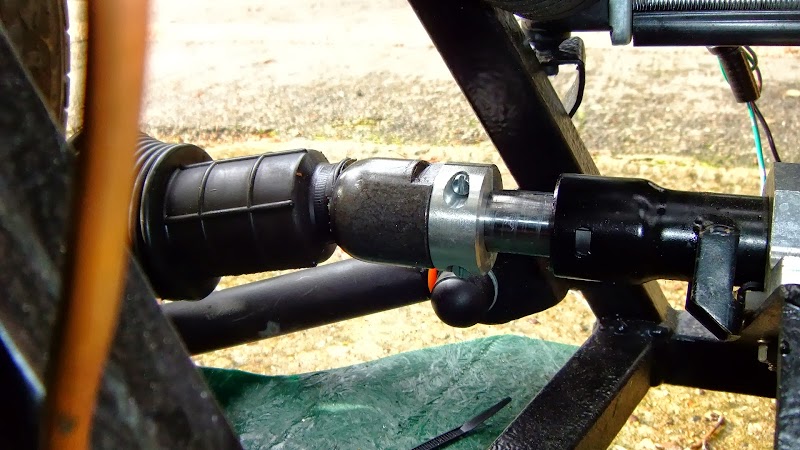 They are sized to match the original knuckle so slip inside the tube this end as needed.  Cheers Stot |
You have just reminded me that I need lock stops on my car. i may just fit jubilee clips for now:rolleyes:
just as matter of interest it passed IVA with front cycle wings touching the headlamps at full lock. They checked it with me in the car and when I was asked to move the steering from lock to lock I suddenly remembered . I made it look as if it had reached the end of its lock and no one seemed any the wiser:o :D |
| All times are GMT +1. The time now is 02:43 PM. |
Powered by vBulletin® Version 3.6.4
Copyright ©2000 - 2025, Jelsoft Enterprises Ltd.