Yes they are working wheel rate out by squaring MR before they have accounted for spring angle whereas hyper coil are accounting for spring angle for MR and then squaring MR.
 So my CPM would come out at 163cpm using that method. If I reduce distance D2 by not using the centre of the tire but the lower ball joint to 15" say I get a cpm of 182cpm! It certainly doesn't feel like I'm driving a modern day ground effect or downforce racing car! lol There must be more too this we aren't aware of. |
Found this, It's a discussion about exactly this with some seemingly knowledgable people trying to get to the bottom of the Staniforth correction factor for angle. I'm not sure I'm able to apply it but I'll give it a go.
http://www.ten-tenths.com/forum/showthread.php?t=126399 There is this as well, but to me this is as clear as mud. I assume this is from Staniforth's book. http://enderw88.wordpress.com/automo...g-rate-theory/ |
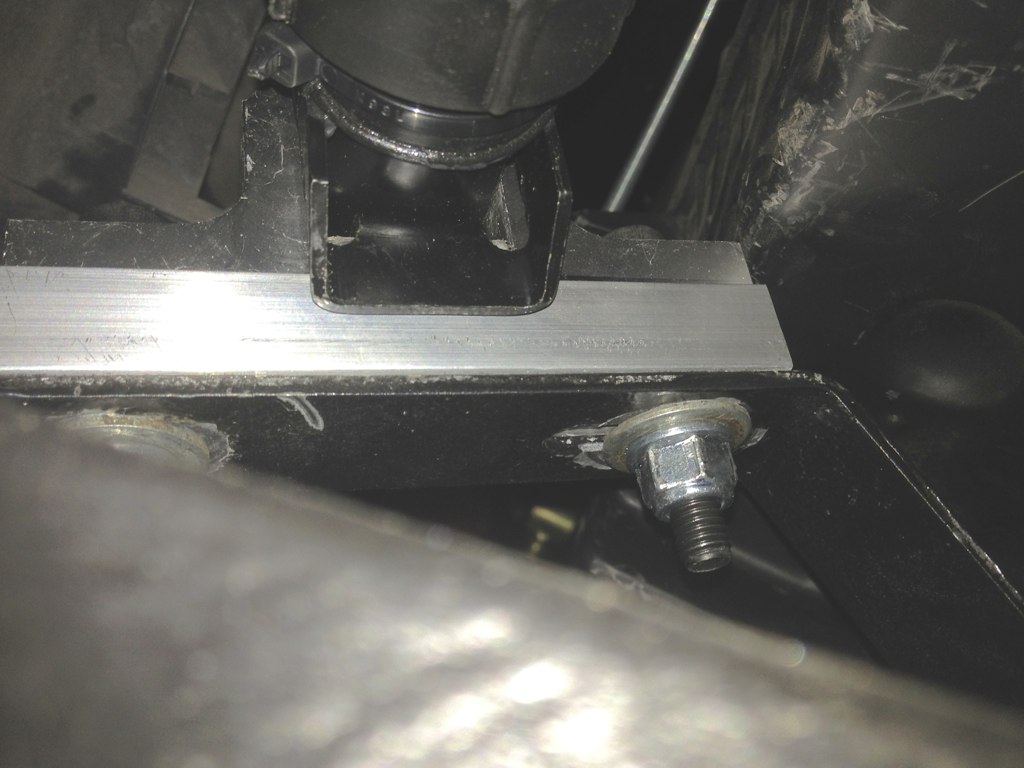
An observation and hope I am wrong,I don't think the IVA tester will like the fact that the locking nut for top suspension joint holds the flexy pipe bracket as well.
|
Quote:
|
Last night I made some spacers for the rack just to make sure mr IVA man didn't fail me due to the rack boots touching the wishbones. I'll probably remove them after the IVA as the contact is only very slight. I'm using 12.9 strength M8 hex head bolts with washers and flanged nylock nuts.
  |
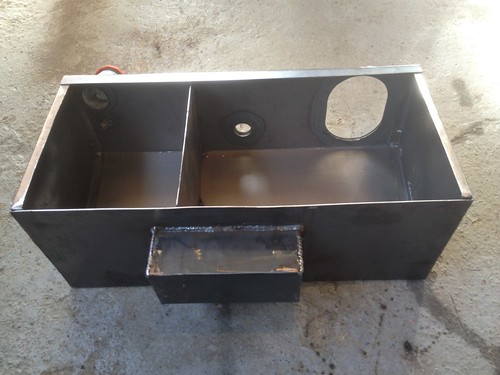
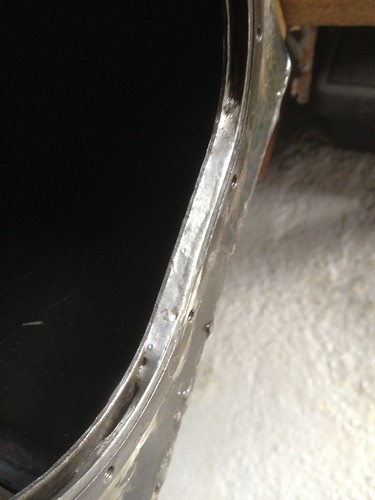
I've decided to give making my own fuel tank a go. The one I was using had a few small leaks but the main issue was keeping the steel flanges from the mazda tank attached to the ali tank. In an effort to resolve this I decided I'd make a steel tank. I wanted to originally but never thought I'd be able to. So never one to shy away from a challenge I made some tank end plates and a sump and tested them with fuel and they didn't leak! I took the end plates to a local fabing place and had them bend some sheet steel to fit by end plates.
 They did a good job and it was something I'd never be able to get even close with but there were a few gaps to deal with.  It was made in two sections as it wasn't possible even for them to bend it in one piece, but it made it really accessible to install the baffle and sump in the right place.  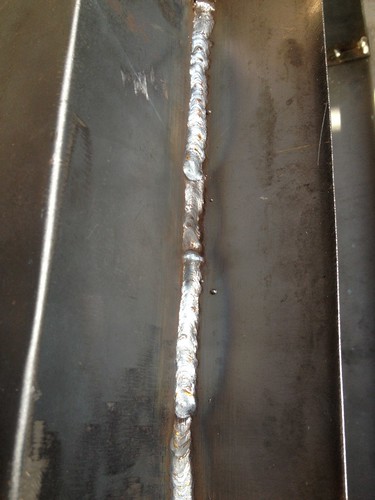 |
   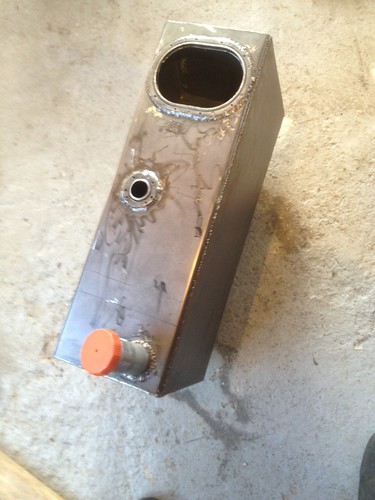 It's still not finished as I did have a few small leaks but it's getting there. To be honest I'm surprised it's gone as well as it has. |
I was getting a lot of leaks around the pump/sender flange. Fuel was creeping around and under the old flange behind my welding (I think). I've now managed to come up with a technique to fill this gap with plumbers solder.
 Needs finishing off. :) |
Finished all the brazing needed and made a new rubber gasket from some rather expensive Viton rubber, Im using studs with nylock nuts and washers rather than the mx5 crappy screws which after being fitted and removed 100 times are pretty useless now. These studs are doing the job but they too are starting to show there excessive use so Ive ordered some M4 12.9 strength allen bolts off ebay for a couple of quid to turn into new studs as I have already broke one of these softer ones and dont want to be drilling and tapping if another one breaks.
I ground back the welding around all the flanges too to tidy it up a bit, I was also getting contact between some high parts of the welds and the sender unit cover. 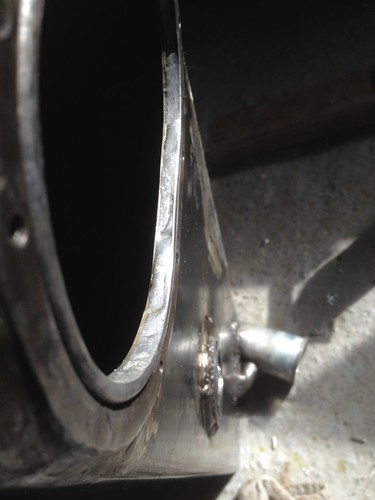 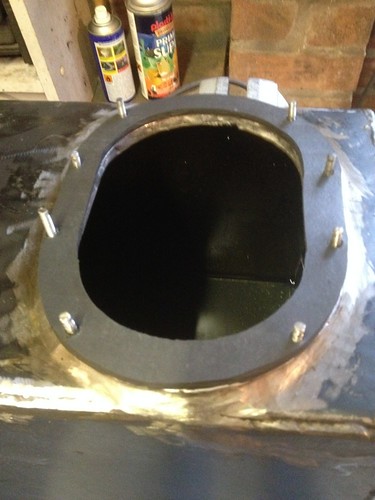 I put a couple of gallons of petrol in it last night and had the tank upside down and shook it about this morning after leaving it overnight. No leaks! Woohoo! Just a little chuffed with myself! No Goo, no JB Weld, no tank sealer or anything just metal rubber and the mazda donor parts. Mission accomplished! Just need to sort out a tethered fuel cap, weld an earth stud on, sort the vapour drain routing, do a little more tidying up and then paint it with the same paint I used on the chassis. Got the steel delivered the other day as well so I can finish the roll bar this weekend and then Ill paint that too. :-) |
Nice work :cool:
|
I think I'll name it Tankenstien!:D
|
Got my tethered cap mount installed, my 2012 Honda Civic now has a Mazda MX5 fuel cap! ;)
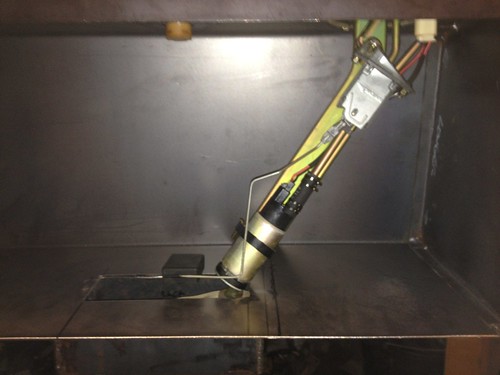
 Started welding on various mounts, this one holds the non return valve in place.  I did weld all sorts of brackets on as I decided to do away with the tank straps but I forgot to take any more pictures. Didn't get to paint anything this weekend even though the weather was perfect. Just took ages to get the last part of that roll bar cross in place so it didn't look odd. Only remembered to take a pic after I'd put everything away and it's a pretty bad one that makes it look wonky but here it is anyway.  As a treat for the missus on Mothers' Day I got here to hold the roll bar in place on the car while I tacked the mounting plates on. |
That's some impressive work, giving me the itch to try making my own tank now...
The fact I can access leak testing equipment and TIG welding through work will probably help me too! |
Quote:
|
Better Image of the roll bar all cleaned up.
 And my proposed rear stay positions on the car.  Got a quote for powder coating it of £40 but I need to make sure it's nice and clean so it doesn't need media blasting. |
Finished the tank. Paint job is pretty awful, looks like someone poured the paint on and spread it around with a stick but that epoxy mastic paint is fairly difficult to get even when you have all sorts of nooks and crannies to deal with, but it should help seal it up just incase I missed any longterm tiny leaks.
 I now have no tank straps, it simply bolts on to the chassis, all the pipe clip brackets are now welded directly to the tank including the drain. I also attached a couple of handles as I intend to take it to a petrol station and brim it and the handles will make it easy to lift it into place on the car.  Left it testing today, inverted with 4 litres of fuel in it. It better not show any leaks when I get home.:rolleyes:  |
Just realised it was my build threads 3rd birthday on Monday!
|
I'll let the pictures speak for themselves.
    Tank doesn't move with the new brackets, absolutely brimmed it at the garage, no leaks and my car still starts. Thank goodness for that, I was beginning to really miss starting it up and having my little tootle arounds. 8 gallon capacity almost on the nose by my reckoning. |
Finished by roll bar and supports. Took a while to do but I'm really very happy with it and would quite happily be the crash test dummy that tested it! But let's hope it never needs to be tested.
   It's all CDS btw there's a guy called tom (tube bender) iirc on ebay selling the stuff fairly reasonably priced. The 45mm hoop itself cost me £60 and 5 metres of 38mm cost around another £70 I think all delivered foc. I had some crazy quotes from some companies who are just taking the p**s with their prices. |
Quote:
Keep posting the photos David |
Quote:
Quote:
Quote:
Yesterday though I did take it for a spin up the neighbours driveway. No one was home so I did my first ever donut by their green houses, felt great and surprisingly controllable. Can't wait to get it on the road.:D |
As promised, nothing done this weekend. Only body lights and interior to finish! Honest!
 |
Quote:
I've just realised I've got a problem there as well! My car now looks like it has been taken to bits. I most likely going to have to move my radiator upwards. Cheers David |
Quote:
http://www.ebay.co.uk/itm/151080230038 30mm x 15mm x 250mm |
Quote:
All part of the fun of building a car. I kind of hoped my car was nearly finished but now it's in lots bits in the garage. Thanks for the link David |
Quote:
|
Actually I think I have enough aluminium bar and a spare mazda bend somewhere if you want them.
|
Well that's the backend sorted, black matt/satin powder coated the roll bar. Refitted it immediately. It looks to tall in all these pictures but looks fine in person. Can't figure out why?
    |
Quote:
Ps the roll bar looks very good. David |
Quote:
|
My face very, very early this morning!
 |
Quote:
|
Quote:
Oh, sorry, wrong kind of doughnuts. My bad. |
Quote:
|
Fitted a 3mm steel sump guard this morning....
 More of a rock (speed bump) slider. Got the car on a very level surface today sump guard clearance is 60mm:eek: , FF bottom rail is 108mm. Then I spent the rest of the day playing with the backend bodywork and discovered my tank drain was in the way so I'll be moving that.:rolleyes:  Red body work looks great with the black everything else. |
Quote:
|
Just like that!
 |
Tommy's clean shaven.....:p
|
No progress on the car, but I have now got all my lights and mounting equipment. Excited!
 Ordered the from Caterham in the end, they are a bit more expensive than other suppliers but after a very bad experience with the quality of other suppliers I went direct to Caterham, and as I'm trying to emulate the look of a Red Caterham R300 I splashed out a little.:D The quality of these Caterham parts are outstanding I'll post pics as soon as I can. In other news I've used my new found metal working skills to secure the rear entrance of my new premises, all in 3 and 2mm steel with half inch bars behind the window. Looks a bit like a prison cell!:eek:  |
Quote:
What are you doing in your new premises? Is this for work or to store you car in? David |
| All times are GMT +1. The time now is 02:57 PM. |
Powered by vBulletin® Version 3.6.4
Copyright ©2000 - 2025, Jelsoft Enterprises Ltd.