Quote:
One thing I did think was that I could have conceivably held these together by cutting a gland down the middle for a zip tie or even an o-ring rather than drilling and tapping for bolts. The force on them isn't trying to separate them, just crush them against the knuckle so a zip tie should hold them fine. Cheers Stot |
Ayjay, i'm sure we can sort something out similar to Stots' solutuion
Arfon |
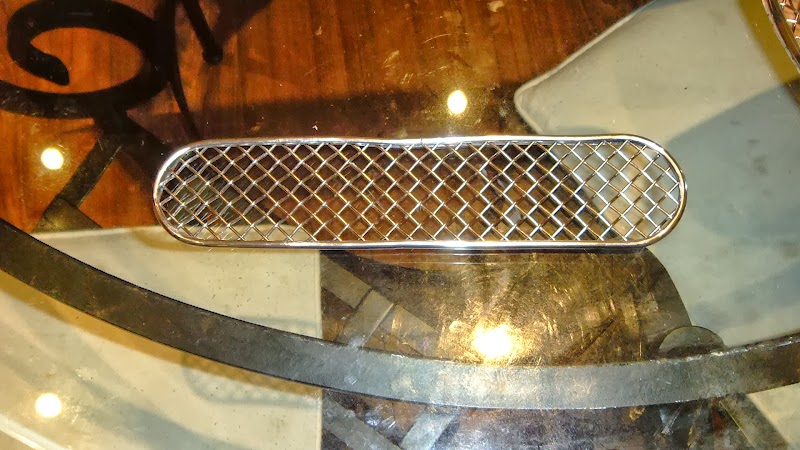
Got my chrome U trim today. Its not flexible at all along its length so I couldn't wrap it round the edges like rubber trim so I had to come up with another idea.
It comes in a coil wrapped sideways so I decided to trim one side off so that it was more like a J section that a U section. To do that nicely with an even cut all the way along I made a little jig out of some scrap MDF.    The profile was cut/filed into the MDF so that when put together the trim could pull through it. I used a piece of breakaway blade in the middle and clamped it all in a vice. Pull the trim through and voila, perfectly straight cut for the full length. |
Super-glued it around my grilles and it looks the biz. :cool:
  Cheers Stot |
Not fully screwed in but as good as I had hoped.
 Cheers Stot |
Last part for the grille. To mount it I used some 8mm wiring grommets and turned some 5mm id 6mm od crush tubes to make bushed mountings.
  Hoping to get at least the rear wings and lighting done this weekend. Cheers Stot |
Quote:
    Cheers Stot |
Quote:
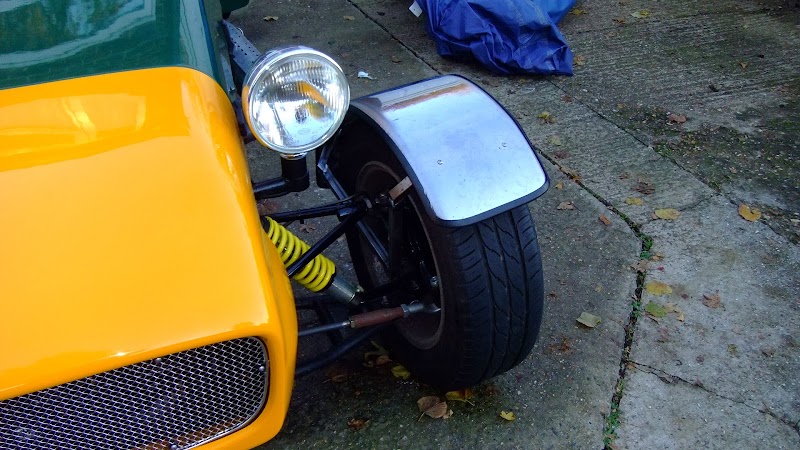
 Still need wiring but good progress this weekend. I even managed to first fit one of the front wings before I lost all the light.  I need to figure out how I'm going to solid them up now. Probably going to be a bracket that bolts on to the headlight brackets up front. Thats how Lotus did it soooo... Still not sure about IVA for these. Cheers Stot |
Have you checked them against the template in the IVA manual. They look like they might be a bit short on the front edge.
|
Yeah the 30 degrees bit is what would fail it, I cant get them any further forward.
I may ask someone to lend me some cycle wings for the test...... Anyone reading?..... Ill make you a bonnet badge.... :o Cheers Stot |
They need to cover the wheel dia. not the tyre;) They look OK to me.
However if you feel you need cycle wings I have a spare pair( no metalwork as yet though)you can use-- in black. |
Quote:
Also what poundage did you get were they 250? And we're the 14" ones correct for the front, what poundage did you get for them? Regards Mick. |
Hi Mick,
I ordered these standard GAZ shocks from Rally Design and they fit nicely. About 1/2" little less droop at the rear than the custom extended ones NTS/Saturn supplied which didnt concern me as these are a cheaper off the shelf option. Front = 14" open, 9.5" closed - 140/095/B12 Rear = 11" open, 8" closed - 110/80/B12 Springs I went for Front = 350# - 8" - RD1.9/350/8 Rear = 250# - 7" - RD1.9/250/7 Although looking at Skovs latest posts about spring rates he is hardening up the rear somewhat having driven his a while now. Cheers Stot |
Hi Stot thanks for that information I think I'll go with the same ones then, one other question the front top wishbones have unequal legs am I right in thinking that the longer one goes to the rear as the brackets don't seem to sit squarely on the uprights either way round but seems better with the long leg at the rear.
Regards Mick. |
Quote:
I had it the other way round at first and it caused a ridiculous amount of bump steer until I noticed the problem. Cheers Stot |
Thanks for that I must have looked at that with my eyes closed should've gone to spec savers LOL.
|
Hi Stot I went to Equinox today to get some body parts and mentioned to Dave that you wanted to borrow some cycle wings and he said he might be able to help you if you get in touch with him.
Regards Mick. |
Quote:
I have a spare brain--it wont cost you an arm and a leg.:) Need some more valves for your head?:D My missus has a spare tyre(or two) |
Mrs ayjay isn't reading this then. Don't know if you are brave or loopy
Arfon |
I thought someone had been taking extra brave pills!
Russ |
Thanks to anyone that was offering the use of front wings but I know Ill need to drill and or glue them so I was hoping for an offer of a lend of some front wings and stays complete. :D :o
Instead I am taking a slightly different route and bought one of these for £16.50 delivered  With a view to cutting it in half to make the front cycle wings. I have a 2m length of 20x20 left over so I can weld some stays up out of that. May even look half descent polished up! Cheers Stot |
What is it?:confused: :confused:
|
Oh yeah. 4x4 stainless spare wheel cover.
 Cheers Stot |
Nice one Stot.....what a cracking idea....its a spare wheel protector yes ! front cycle wings at less than a tenner each effin brill dude, it probably would be possible to mod a set for the back too.
|
ah beat me to it.
|
Quote:
Not sure it will be wide enough to make rear arches, its probably only ~8" wide but as a bonus it does come with trim all the way round it! I may even need to IVA it on the 165 14" Mazda wheels if its only 7.5" wide. Even new they are ~£60 which for a pair of stainless steel arches still sounds a good deal. Cheers Stot |
I have been fitting the LEDS to my dash recently. All of them worked well except the brake warning/handbrake light. It wouldn't go out when the handbrake was down, but a bulb would. I figured out it must have been the resistance across the bulb was causing a further drop of power that the LED wasn't creating so I added the bulb in parallel with the LED and the LED then goes of as expected.
 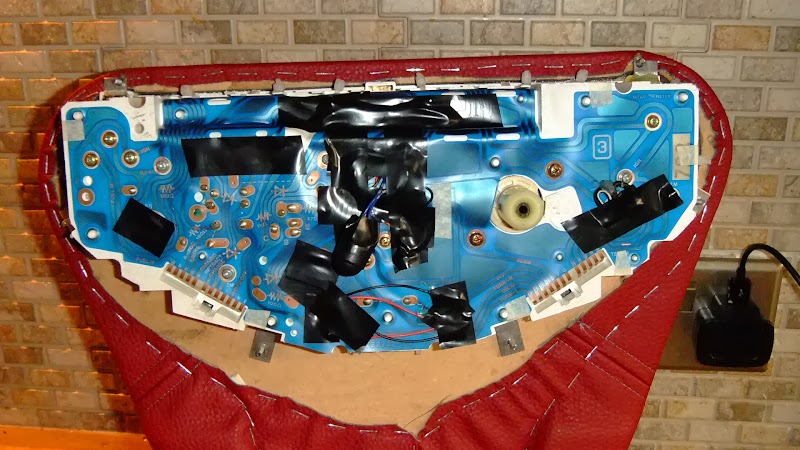 I spoke to Skov about putting a resistor in there to create the resistance needed in place of the bulb but it worked out I would need one or two of those ruddy great big rectangular ones like you put in the indicator circuit when using LED bulbs so I covered the bulb with a bolt cover so it doesn't illuminate behind the dash and ill just leave that in there! While messing around with the dash it turns out that the epoxy I used to hold my 'glass' to the bezels wasn't sticking to either the glass OR the bezels and they all fell apart so I had to come up with another solution. I decided to try and hot glue them. Started off by keying the edges of the perspex discs and dabbing hot glue around the edges.  I keyed the inside of the bezel a little too and laid them down in position on some grease proof paper on a flat surface.  |
Then I got out a hair dryer and melted the glue and pressed the bezel into position.
  This left some glue that squeezed out as you can see but some white spirit and a good rubbing action and you can get rid of the excess inside and out.. 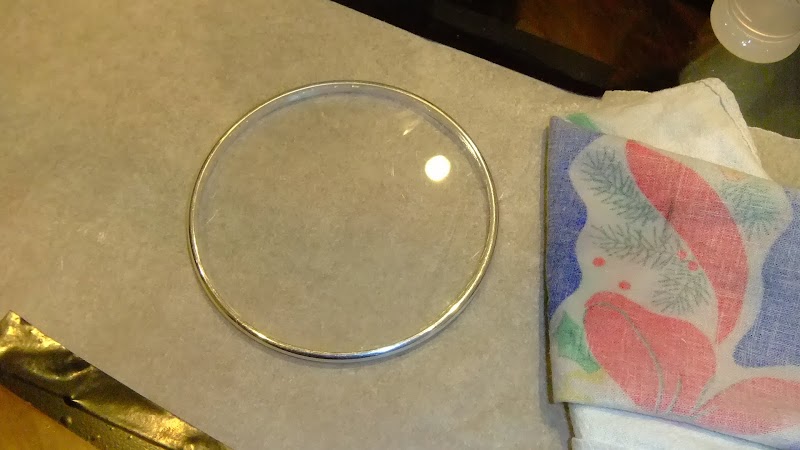  Seems a lot more solid than the epoxy versions and being hot melt glue it has just the smallest amount of give so should hold up to any vibration or flexing. Cheers Stot |
Made the first wing stay today. I had some 20x20 left over and as they are temporary I made them out of that.
    For a temporary solution its pretty good. If you bought a new 4x4 ring and took your time this could make some nice wheel arches. These ones are 9.5" wide but you can buy them in different sizes but for £16.50 for the pair I couldn't go wrong. Cheers Stot |
Loving the dash!
Are the warning lights ok like that for IVA? For some reason I thought the legend had to be on the light not next to it? |
Should be fine. It just needs to be clear what the warning lights are but the logos don't need to be on the tell tale.
Quote:
Cheers Stot |
Right I have been quiet long enough.
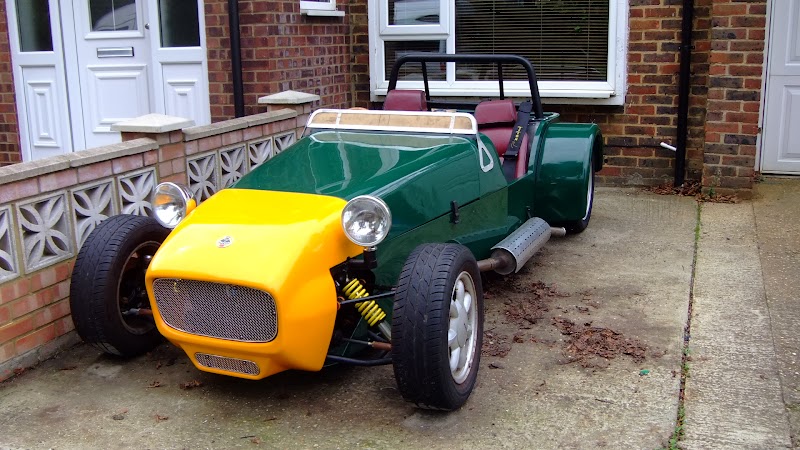
I have been procrastinating because of rain and the fact it took me 6 weeks to get my proof of age letter from Mazda... I have a trailer now for the car so I can take it to the IVA and to carparks for some testing.  Weekend just passed was the first sunny weekend without rain round my way so I managed to get the car out for a bit of work. I managed to spend more time getting the electric winch on the trailer working, even though I dont even need it! Changed the front brake discs because I had a pulsing when braking and that is now gone. I left the old brake pads in because I remember someone advising that their IVA man suggested using old pads over new pads for the test as they will have better bite that unbedded new pads. I have the car on the trailer in the garage again for now.  Things I think I have left to do. Finish fitting the flyscreen. Paint and cover steering rack extensions. Paint the wing brackets. Get the headlights/dashboard illumination working together. Fit interior carpets/sides. Fit both sets of harnesses. Refit the dash. Replace a broken bonnet strap. Replace all fluids. Double Check and tighten all bolts. Apply for IVA. Not too much really if the sun will come out and play! Cheers Stot |
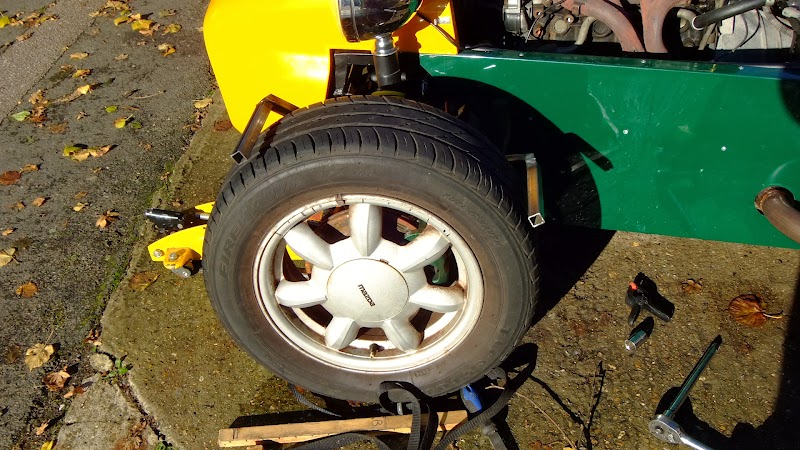
It looks excellent. Whats the origin of those rear wheels ?
|
yey Andy.....had wondered where you had got to, tell you what mate, get your iva off now cos you can always defer the date if you are not ready in time, plus it give you impetus to crack on......do it bud:D :D
|
The wheels are 15" VW G60 Corrado steelies. They look fairly similar to the original Lotus wheels which is why I like them and the4 x 100 PCD matches MX5 hubs so win win.
They are a lot heavier than the MX5 wheels with PROXES T1-Rs on though! Ill need to weigh them when I get the chance. Kev, I might just do that now I have my Mazda letter. That was causing me a downer because I had to chase it 4 times. Paid 13th Jan and didnt get it til last week. I got a new toy in the workshop too, a laser cutter. I have been mucking around with that too. Made a set of card gaskets to fix my compressor for example. I also made some test leather dial faces which look awesome in the light but you would need to front immuminate them for actual use. I may etch my mirrors with "Objects in mirror are getting further away"... :D Cheers Stot |
now why do I get the inkling that your 1/2 way to a diy cnc plasma cutter:p :p
|
Dont think I have the room for a plasma one but the laser is great for the little things.
I was thinking an aluminium badge filled with coloured leather might be cool in the interior somewhere. Heres the dial I did.  Cheers Stot |
cool:cool: ...although illumination during the night might be an issue....I like the way you are always thinking outside the box mate ...its brill and refreshing.
|
Cheers Kev,
It would need something like this above the dial but behind the cover for illumination.  I used this on my Jester which had metal MK1 Fiesta dials so no rear illumination. Leather dials would be great on the right car I think but you are limited to bright background with black marks. Cheers Stot |
The leather instrument face looks brilliant. Adds an element of steampunk elegance.
|
| All times are GMT +1. The time now is 01:22 AM. |
Powered by vBulletin® Version 3.6.4
Copyright ©2000 - 2025, Jelsoft Enterprises Ltd.