Not quite a build thread....
Hi all,
Not been on this forum too long I know but as far as I can see it's very helpfull for all builders I'm sure. With this in mind I'm going to upload my photos on Photobucket and hope what I am doing may be of some interest or help to other people. :) The build is based on "Spud69's" Saturn based car for a MX5 with a lot of advice from Andy on certain areas. Gonna keep this short but if you want me to do a full build thread for reference for others it can be arranged....:eek: Keep up the good work guys.... Johno http://s1199.photobucket.com/albums/aa472/JohnoSS1/ |
Some great stuff there Johno :cool: :)
Photos are a great help to everyone. That is certainly one aspect of my own build that is sadly, very lacking :o :o |
Green 7
Johno. you could have asked me to wipe the mud and water off the car. Good pic's from your phone.
Looks like a lot been done since my visit 2 weeks ago. |
Some cracking ideas there realy like the steering rack bracket
Arfon |
Looking good and another not to far from me in peterborough lol :)
|
Hi Johno,
Some nice build pics there, some good progress to. Our chassis and bits are off to powder coaters at the moment and we are making extra effort to crack on with the mx5 build as well as the single seater. Race on i guess......:) All the Best.....AndyH |
Hi all,
Managed to weld all my wishbones up Sunday apart from shock absorber brackets, shouldn't take too long I guess. Decided to TIG them up and then regreted it 6 hours later...with making sure I removed all the scale and contamenents it seemed to take ages...:eek: Oh well I need to move on to the next project which will probably be the pedal box I guess. Got the pedals laser cut a few weeks ago as per book so going to mock that up this week (Andy if you have any photos that would be great:) ) Also got my steering extensions machined as per book and found out Sunday that they are are a tad too long... should have read forum before jumping in and getting them all done...LOL Well guys thanks for the support and keep up the good work..:D ps.....Andy race on...(what have I just said):eek: Added some more photos today with domed caps welded to all my threaded inserts on my wishbones and a picture of my donor car. http://s1199.photobucket.com/albums/aa472/JohnoSS1/ |
Just waiting for some more bush tube for the pedal boxes John and i'll get them made up.
AndyH |
Steering rack support looks good BUT have you mounted the rack to see how it fits as the left hand side has some lugs that side either side of the mounting face of the original rack support design.
|
Hi Ozzy1,
You are correct about the lugs on the left hand side, I trial fitted the rack Saturday and realised there was something not quite right but was going to wait until I got my ally clamps before doing anything to it. Had a quick look today after reading your post so it looks like I'm going to have to cut in another slotted hole with the edge of the hole ligning up with the inside of the bracket....:o Cheers for that matey.. |
I have just fitted my rack with the ally clamps, I had to cut a groove on the one side and space up the other side to get it square. Hope this helps.
Shaun |
More progress On MX5 Build
Hi all,
I have uploaded new photos of my roll bar and parts taken off Tony's car and mocked up on a chassis.:cool: The roll bar I mocked up today but if anybody can see a problem with it please let me know (will probably make a standard one for SVA and change later), also do you have to have supports from roll bar to chassis as not all 7 styles do? BUT! I have a question for all you MX5 builders? Do you use the donors brake servo or just a master cylinder? Thanks Johno http://s1199.photobucket.com/albums/aa472/JohnoSS1/ |
I think you only need rear roll bar supports if you are mounting your harnesses from the crossbar on it.
|
Just the Brake master cylinder John, the cars are not heavy enough to need a servo and feel much more responsive without one. Also the original clutch master and slave cylinder.
Should be able to get the pedal box finished today and put up some pics. AndyH |
Any ideas when you will have mx5 pedal boxes on the market??
Cheers David |
Hi,
Thanks for your replies everybody. I got to work on my pedal box today too Andy. Not drilled holes for master cylinders yet as I need to find out which one I need to use for brakes, but its all coming along slowly.:D ps.. Also modified steering bracket..Thanks for heads up ozzy.;) Thanks Johno........ http://s1199.photobucket.com/albums/aa472/JohnoSS1/ |
Hi all,
Well its been a while since I updated my photos and haven't done too much on the car recently do to work load, but I did managed to tack the rest of my fuel tank up today. Used the original MX5 unit and all I need to do is fit the fuel vent system and weld it up then test it. Hopefully this weekend I will be able to add some photos of the tank in place with brackets to the chassis. The bushes arrived from Saturn yesterday (originally wifey ordered Sierra set...Sorry Andy for the mix up:rolleyes: so hopefully we will have a rolling chassis soon). http://i1199.photobucket.com/albums/...8112011207.jpg |
Welded MX5 Fuel Tank
Managed to get my fuel tank welded today. Simons calculated it to hold about 37 litres but should be more now swirl pot added.
Just got to add Mazda fuel vent to return to the carbon canister if it fits in the engine bay somewhere.  Tank needs a bit of a polish to remove all the scratches...    |
Quote:
|
Engines in....
Had a good day today,
Nearly over the dreaded "Man Flu" and got the engine mounted in my chassis.     Going to make gearbox mount tommorrow night and with any luck mount the diff the following night... http://s1199.photobucket.com/albums/aa472/JohnoSS1/ Cya Johno |
Great stuff Johno
Been following this build with great interest :)
Looks as if you have some tip top work going on with the build :cool: Very impressed with the fuel tank, just goes to show what a difference a steady hand makes when using the TIG weder .... Been a while since my hand was that steady :o Great progress all :) |
Thanks Bonzo
Hi Ronnie if I may call you that,
Thanks for your kind words about our builds. We realize "without sounding clever or big headed in any way" that we are fortunate because of the trade we are in and of where we are building them, but I would like to thank so many other people on this forum for their unknown help because without you guys our builds would have probably not got off the ground...:) Most nights I (cough)..... we:rolleyes: are looking on this forum for help along the way for the next stage in our build. We don't want to directly copy anybody's hard work so we are trying to put our own personality into our cars doing things a little different in some way. I have been putting pictures on this thread to show what we are doing hoping that it may help somebody along the line somwhere or for someone to point out to us that we have done something wrong. All of what we have done so far has been drawn up on Autocad by myself "not brilliantly" but enough for us to work to so if anybody needs info on what what we have done please let us know. We only hope we can put as much back into this forum as we have taken out.. Johno, Tony, Luke, Martin, ohhhh and errrr nearly forgot someone errrrr...Simon. |
Hi Johno
I think you guys have bought a great deal to the forum & will continue as your build progress :) :cool: Great to have the environment that you have, I really miss the access to all of the CNC equipment that I had become used to. Particularly miss the Lazer, turret press punch & press breaks :( Watching all of the different build styles take shape are a godsend & I guess that is what drives people to leave their own mark on the Roadster. Ronnie is fine by me, folk have called me a lot worse :D |
Modifications....
Hi all,
We made some progress this week, Luke has been working on the fuel tanks for the other 3 cars (slight mod to swirl pot). We have decided to weld the fuel filler pipe to the tank once we have fitted the bodywork to see where we prefer it. Simon and Tony have been welding their chassis's up today and have virtually finished them. Myself, Tony and Luke looked at the position of the hand brake last night and decided to modify the transmission tunnel to suit our requirements and move the hand brake closer to the gear lever. I played around with the footwell area tonight to try and give more room for the pedals mainly for clutch and brake pedals which seems to have worked. So not too bad a week... We will post pictures soon.... |
This weeks progress.....
Just a quick update for this week,
1, Footwel mods. 2, Gearbox mount. 3, Transmission tunnel mod. 4, Hand brake fitted. 5, Pedals fitted. 6, Steering fitted. 7, Lower harness mounts fitted. I think thats it for now. 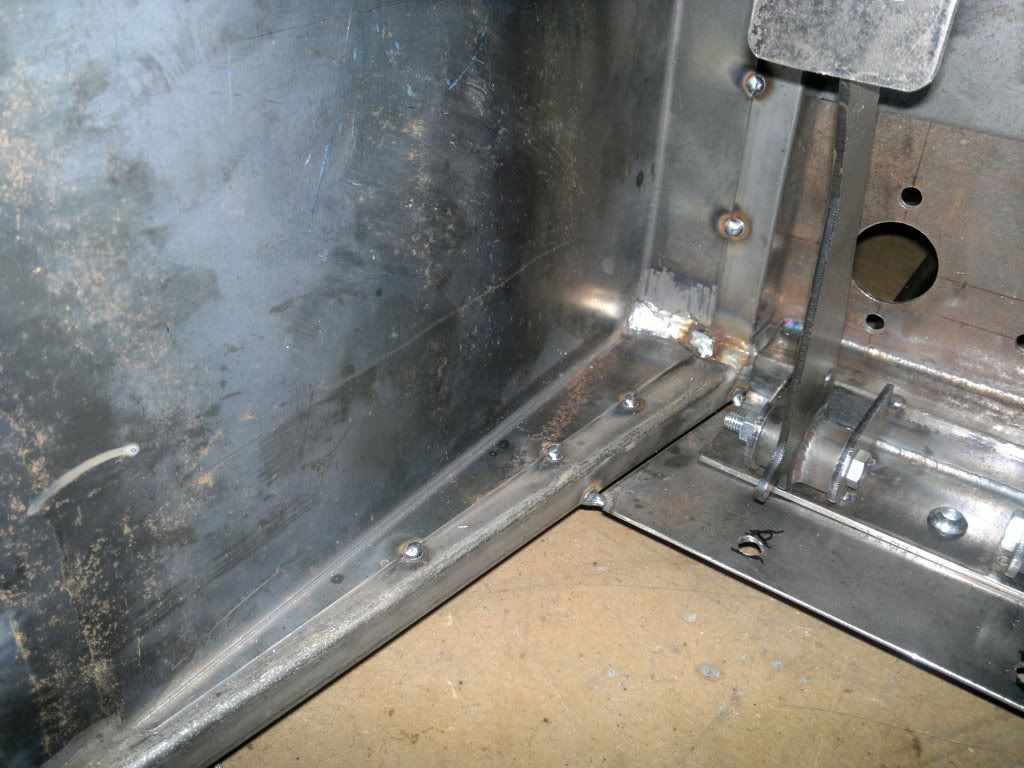 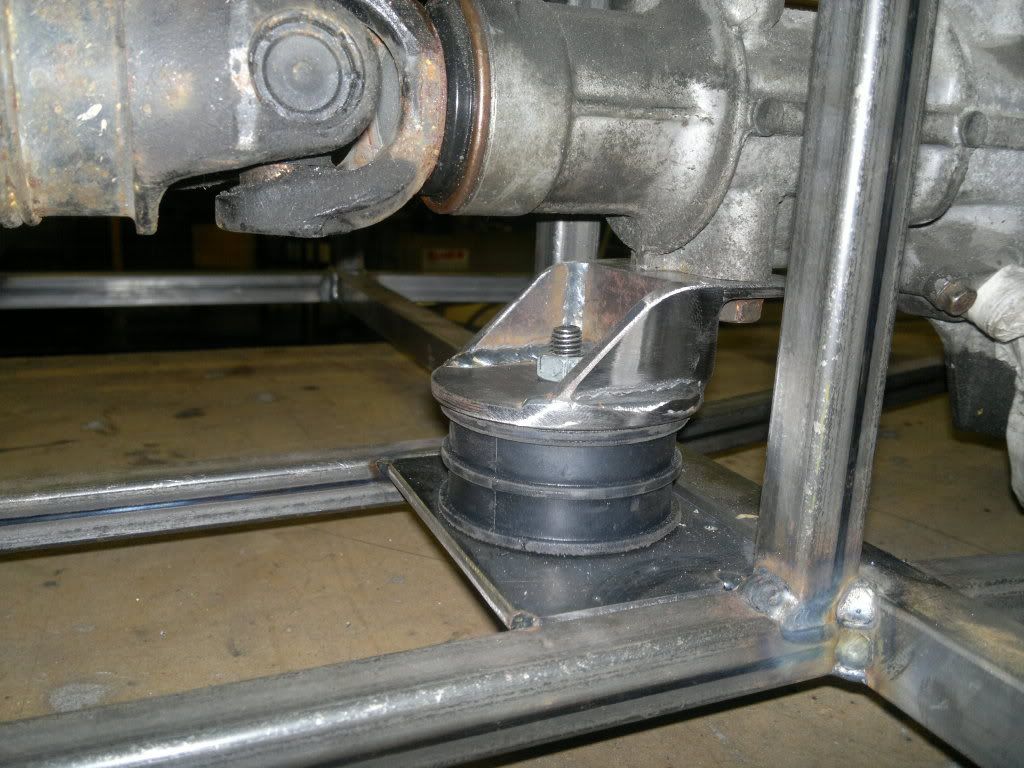 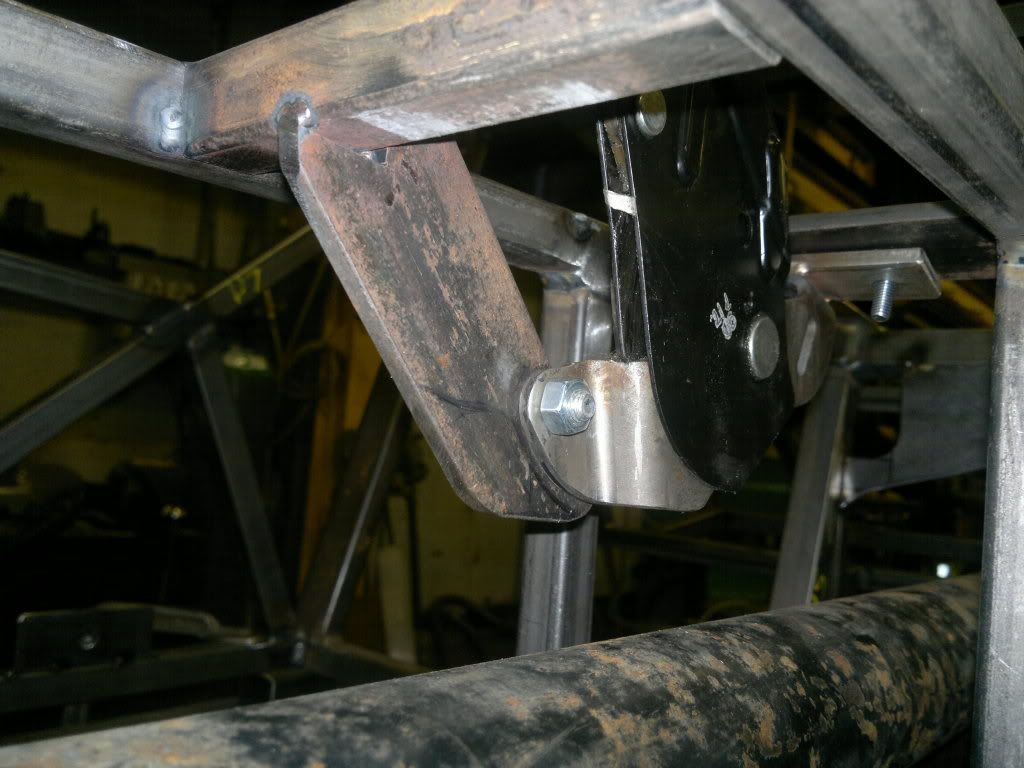 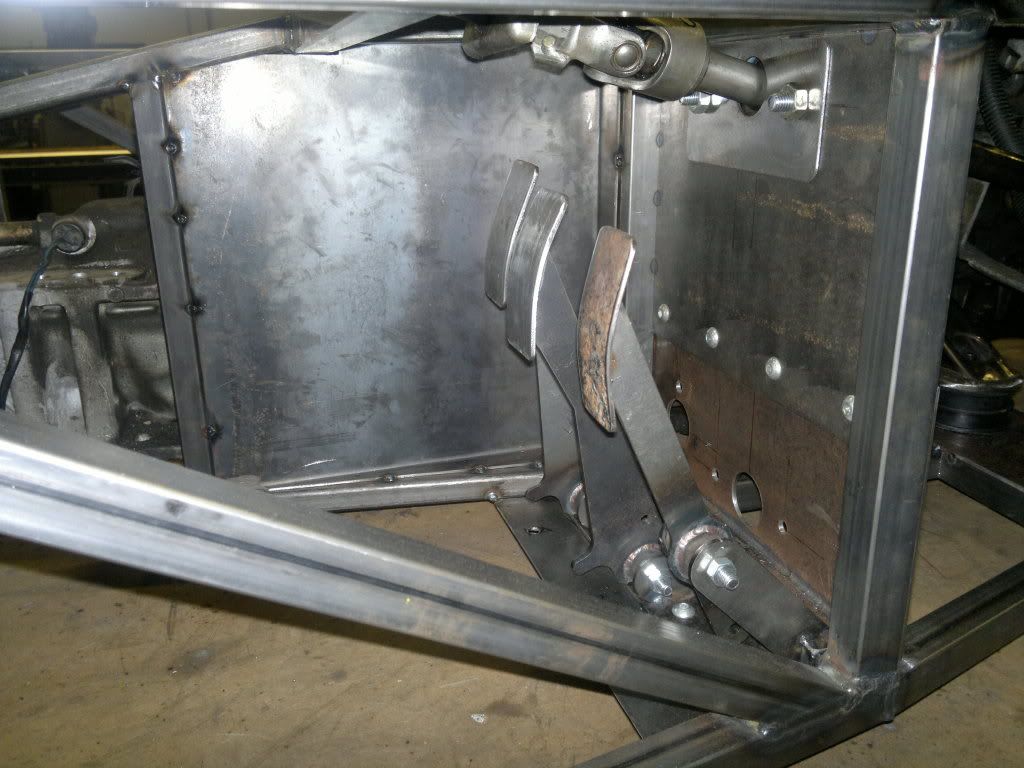 http://s1199.photobucket.com/albums/...1/MX5%20Build/ Johno |
Cnc?....
Hi Ronnie,
We have no CNC equipment all is manual.:eek: The only thing that is CNC is the brake press but its faulty at the moment so everything is done by tape measure and marker pen so we don't have it too easy. Thanks Johno |
The Diffs In......
Hi again,
Managed to mount the diff this afternoon after a struggle with the beast. I tacked up a diff mount with a Land Rover mount supported off the rear of the seat rails. Oh and I fitted panels in the passengers footwell area. Soon going to have a lot of welding to do. Must go now and order some parts for the clutch and brake cylinders. I have updated photobucket today so you can see the progress for the week. Johno and co... http://s1199.photobucket.com/albums/...1/MX5%20Build/ 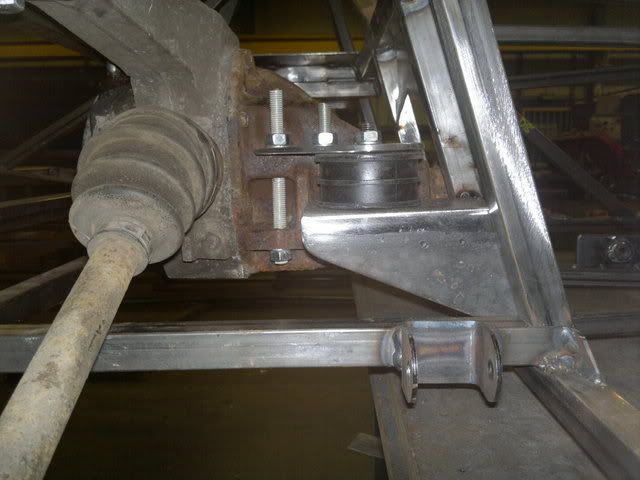 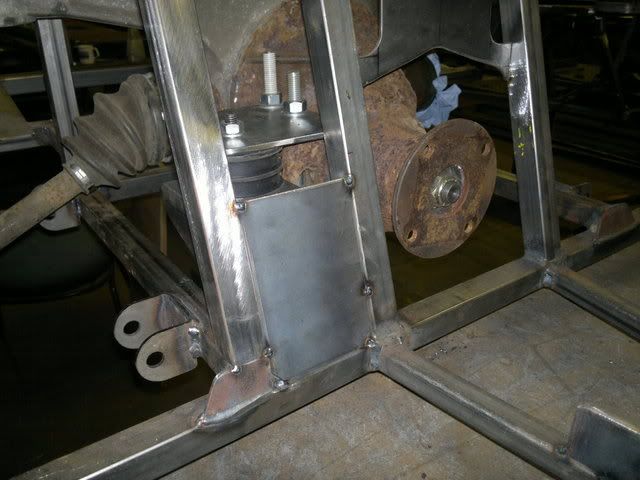 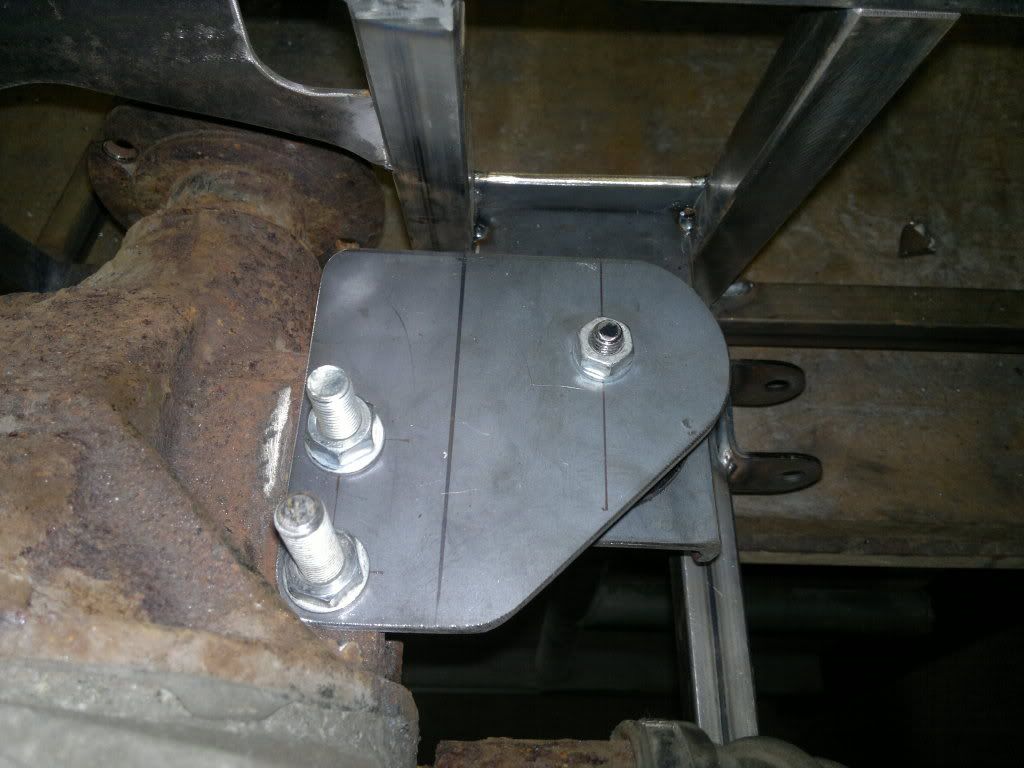 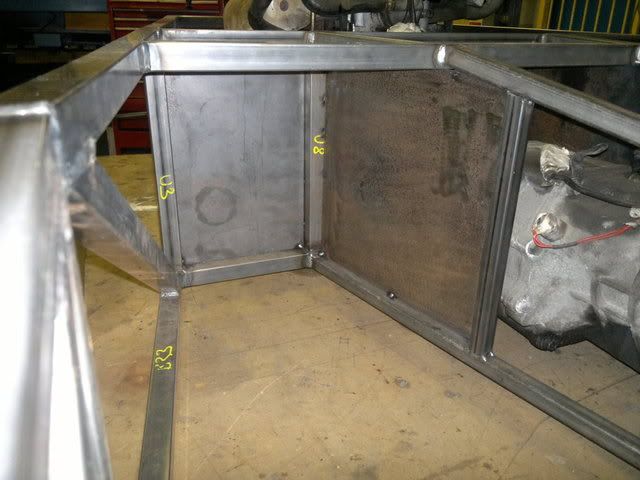 Oh nearly forgot...Andy did you get the old girl running under her own steam and have a play with the cones again? |
Great stuff Johno
Some more terrific work on the build Johno :)
Must say, you are all cracking on at a fair ole pace .... Methinks you''l have all of your builds completed before I have even started my engine for the first time :o On the subject of CNC machinery. After many years of dockyard slogging & nearly as many working with structural steel fabrication, I settled for a regular pay packet & went to work for a quite large industrial engineering company. The CNC marlarkey was a whole new world to me. Needless to say, with many projects on the go at home I soon went out of my way to take the time to learn how to programme some of that stuff ;) Still can't get used to being back to using the tape measure, scriber & straight edge to mark things out .... Makes my brain hurt :D |
I got a wheel on..........
Chuffed to bits :D
Got a wheel mocked on the car tonight and I got that funny "GRIN" on my face for some reason. Boy is it a nice feeling to know "I did that" . Makes the hard work worthwhile. Made some front light brackets tonight as well just got to weld some captive nuts in the top and weld all up. Nearly forgot,"HI Bonzo" and I'm glad you like what we are doing. We all appreciate what you think of our build. There's a lot still to do but where getting there one step at a time... Speak to you soon.... 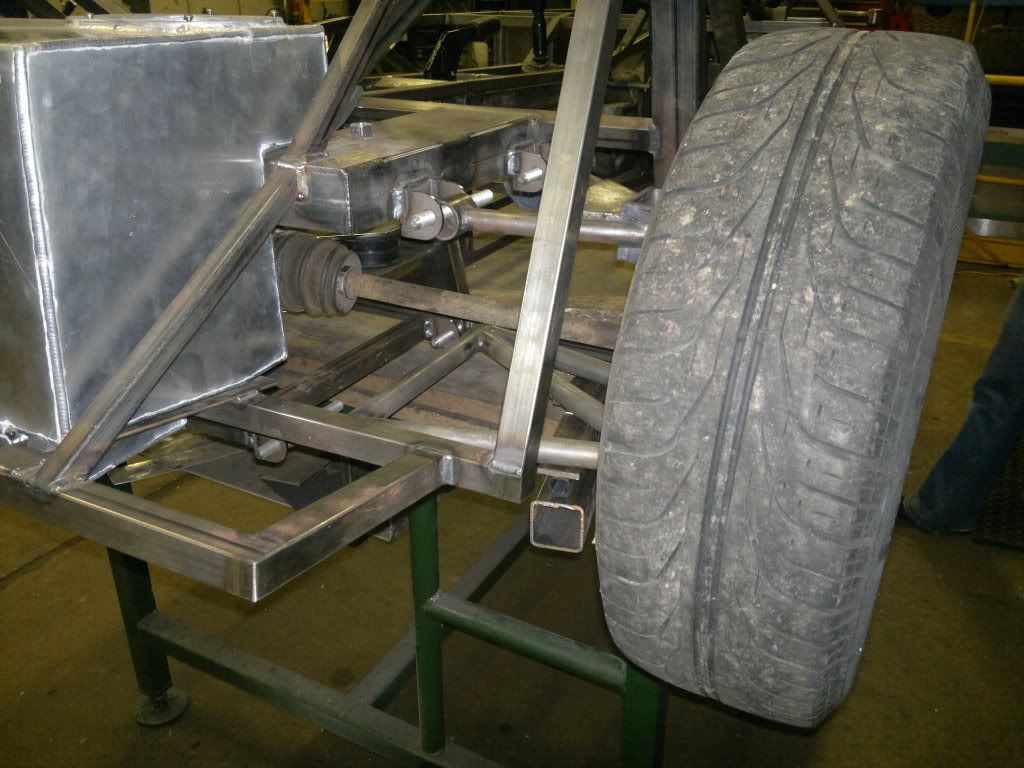 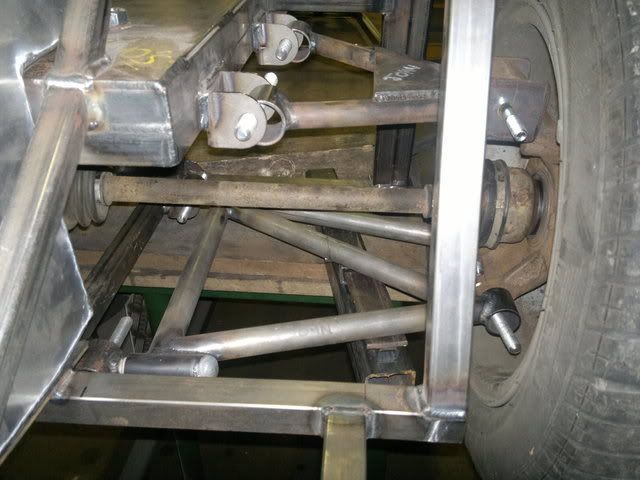 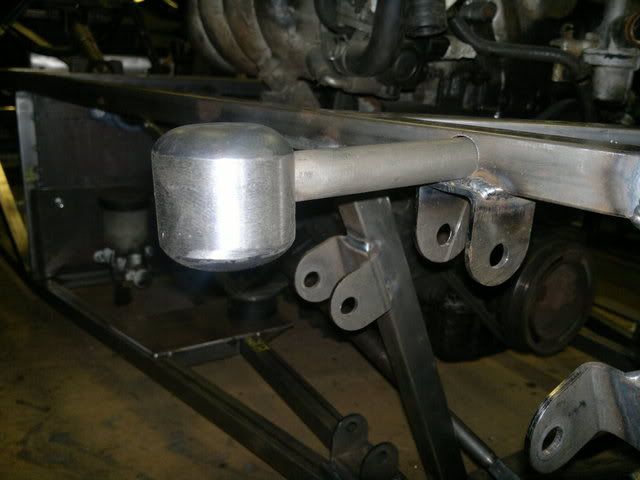 http://s1199.photobucket.com/albums/...1/MX5%20Build/ Thanks Johno |
Quote:
Excellent......AndyH |
Still got a grin....
Hi Andy and Bonzo,
Thanks for the comments, good to know you both like the car. It seems to be coming on real quick now but I'm putting less time into it at the moment strange that. I see you noticed I have a bit of play in the suspension area Andy :p , didn't want to put the bushes in until I got all the welded bits done on the chassis (saving the best untill last). I was a bit concerned about the front light brackets drilling through the top chassis rail as I did but both sides of the tube will be welded and will be no different to a crush tube I guess. I looked at old posts and it said 120mm from centre of light to edge of chassis rail is that correct? I guess also it will clear the GRP bodywork Andy without any modifications as I cant find a good photo of this. Will not weld front light brackets untill I hear from you guys. Thanks for your support Johno.... ps.. gonna order some more bushses tommorrow so hope you got some in stock Andy.....;) nearly forgot you fired the old girl up yet Andy?????? |
Hi Johno
Great to see your latest build progress :) Wouldn't worry too much about drilling the tubes for the headlight stalks, as you say, they will act as a crush tube. Here is a picture of my build with the lights fitted. This was taken a fair while ago, sadly not much progress since then ( Engine change & remount the Rad ) :( My headlamp stalks are 125mm from chassis rail to light mounting centre, as you can see, there is plenty of room for the bodywork & good clearance for the front wheels. Those headlights of mine are like dustbin lids & are about as big as they go :D 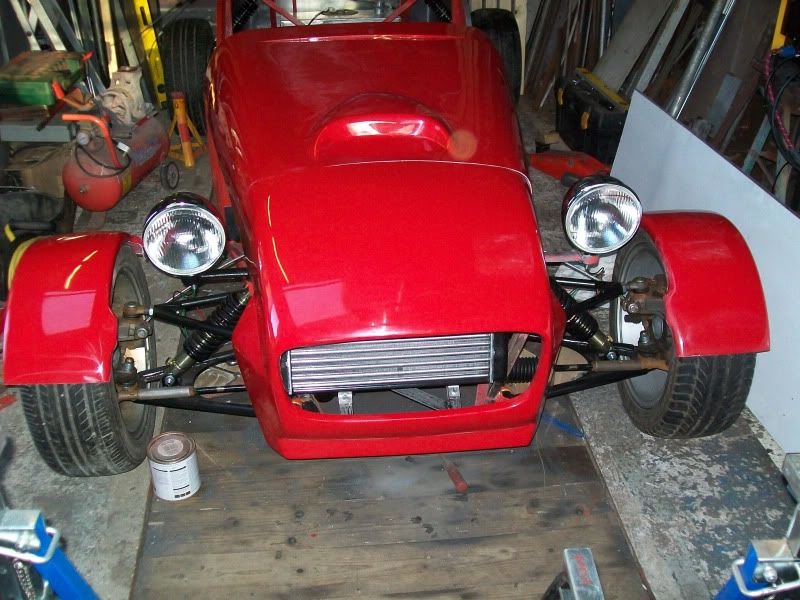 Hope that helps. |
Ronnie has beaten me to it John, the crush tubes (due to the amount of colours available) are ordered in on demand but only take next day. Just waiting for an order of crush tubes coming - people seem to be buying a lot of them at the moment.
Anyway must sober up, got foster team coming to see me and the misses at 10:30 and too much to drink last night - you've got to have some stress relief at least once a week.......;) Got the mx5 all wired and cooled up and ready to fire yesterday but it would hardly crank, got a lack of earths so will try and get it sorted later on today. Hopefully have it out and about tomorrow. Cheers John / Ronnie.........AndyH |
Soon got to paint chassis...
Hi all,
Hi Bonzo car looking really good:cool: . Missus wanted red car but still not sure on colour I want (still thinking yellow and black) will see. Thanks for the dims you guys, tacked up the lights today at 120mm from centre of light to chassis rail with a jig for the others to follow, centre of light to centre of light is 894mm I think, is this within SVA requirements with Spuds kit? Hi Andy had to read your post a couple of times before I realised it was children fostering and not "Fosters"...LOL;) me had to many STELLAS when I read post. Managed to get a few things done this week but not spent too much time on her. I've updated photobucket so you can have a look, see what you think. One question, what is the deal with the "VEE" cut shape bracket in front of the throttle pedal pivot (guess it's something to do with spring return or stop?) I've done something different with the throttle pedal using the original MX5 cable, just need to add spring for return. Also I have moved the throttle cable mount below the inlet chamber and fixed it to its support bracket. Yes I know the diagnol brace is wrong to book (for the eagle eyed of you) but have yet to add aditional parts. Also Simon perfected his anodising technique today so gonna have some cool ally coloured parts for car soon...Well done Matey. http://s1199.photobucket.com/albums/aa472/JohnoSS1/ Home made clevis for throttle using original MX5 cable.... 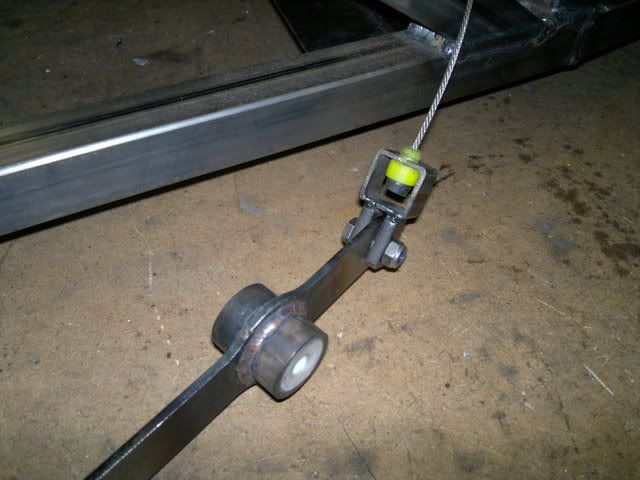 Return and full throttle stops.... 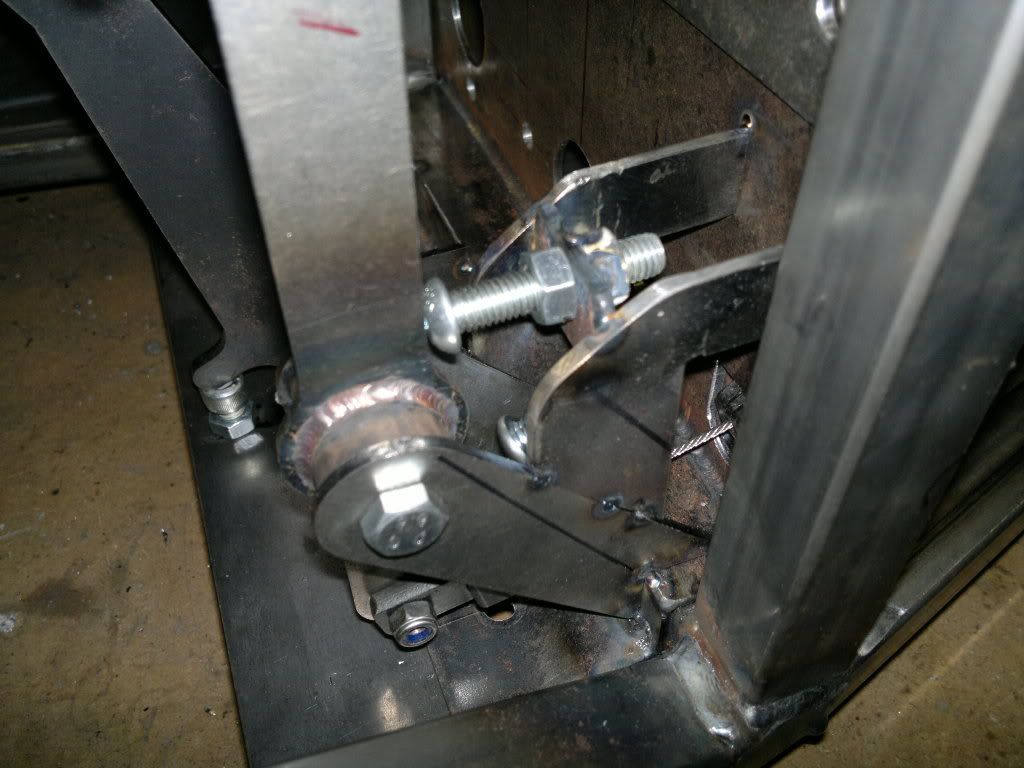 More to come tommorrow...Johno |
anodising
thanks Johno,
The anodising went well, after one complete failure, heres a pic of the ali angle i tested! looks quite good although not perfect yet. its quite simple to do if anyone wants to try, or if anyone has tried it would be good for a few tips as im doing Johnos steering rack clamps next, and then if all goes well might build a bigger tank and try and anodise his fuel tank!!! and if his works well ill do mine:)   regards simon |
The "V" cut bracket is a pedal stop John, clamp it to your pivot bolt then rotate it to stop the pedal coming too far forward.
AndyH |
Fuel tank mounted....
Hi all.
Got a few things done this week. Strengthened all the pedals with some round bar welded to the front after reading some horror stories of bent pedals whilst driving. 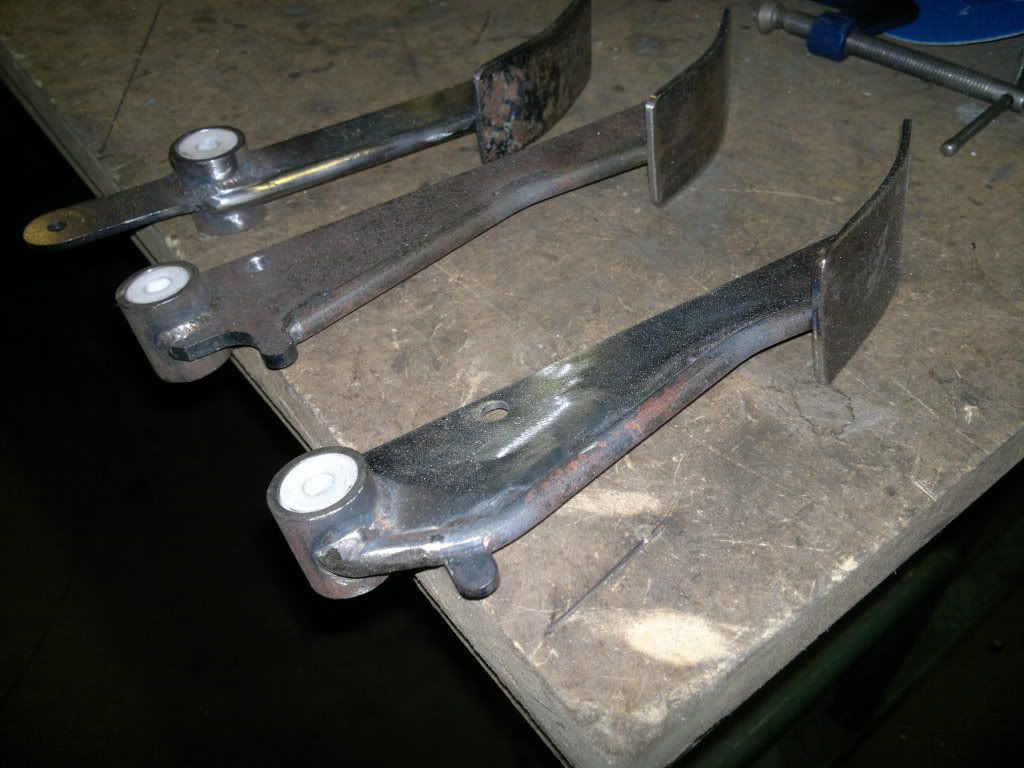 Was going to mount the fuel tank with straps but ended changing it after it took up valuble space of whats left of my dwindling luggage space :eek: (if thats what you call it). 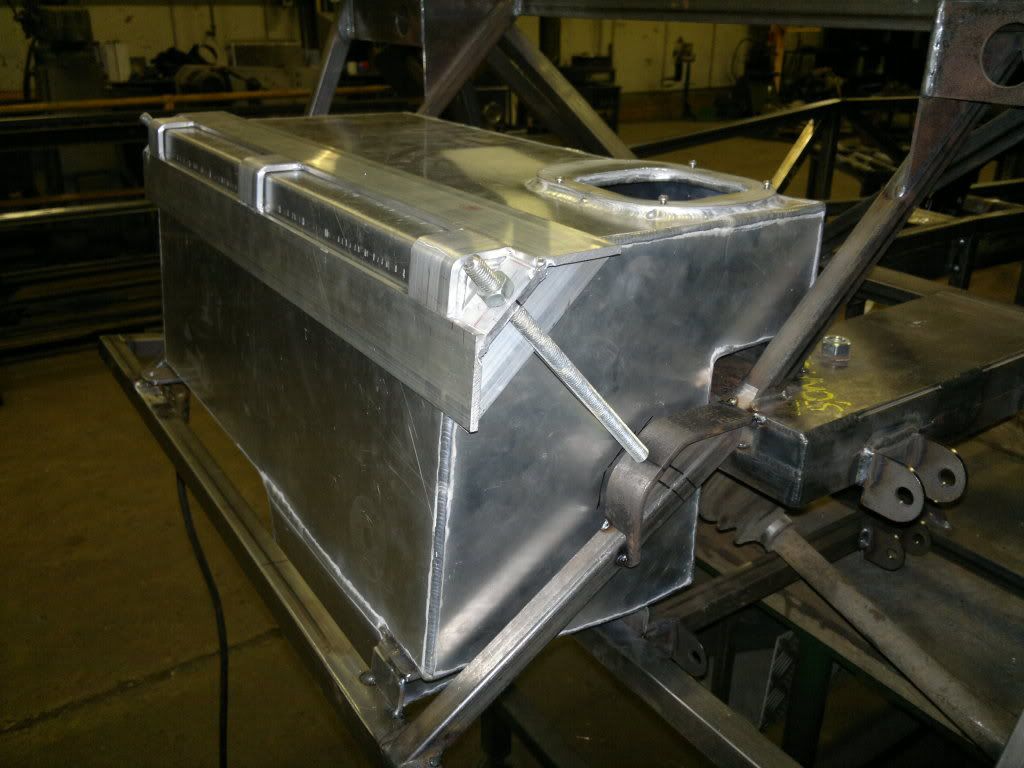 Only tacked up at the moment and needs tinkering but seems quite solid. 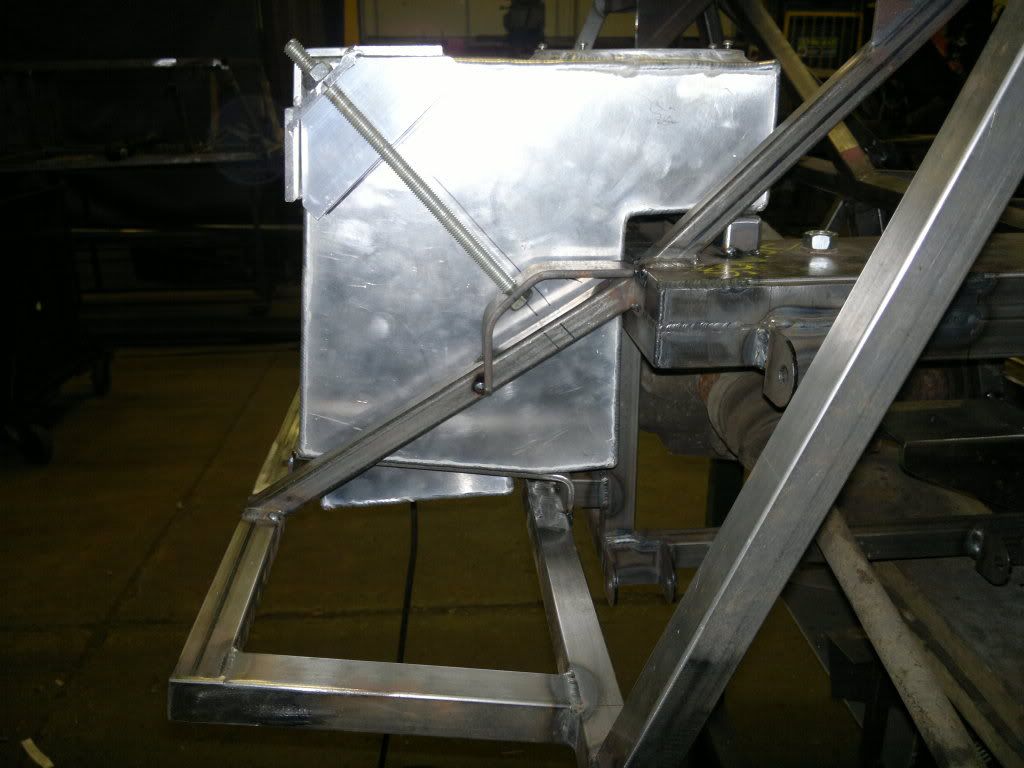 Hopefully going to take engine out tomorrow and weld up the rest of the chassis... http://s1199.photobucket.com/albums/...1/MX5%20Build/ Johno |
some nice work going on there :cool:
I like the tank mounting & a nice touch on strengthening the pedals:cool: cheers andy |
End of week progress..
Hi Andy,
Appreciate the comments....;) Removed the handbrake system off Tony's car today and trial fitted it to my chassis and realised it needed to be modified. Good job I haven't got round to welding up all of the car yet. Tony came up with a good idea to fit the handbrake system this morning, as you can see by the photo we altered the bracket on the seat rail to angle the gaiters up slightly and back. The aim of our build is to use as many parts from the donor car unaltered as possible which we believe is true to the build from the book. Also it enables us to exchange parts for new or if damaged. The rest of the guys at work are catching up real quick now and it looks like this week most of the chassis will be complete, so going to order ally sheet this week for panels and floor. Managed to DA fuel tank and weld up tank mount today as well as modify handbrake system and tack brake pipe brackets on (I seem to remember a post Andy about these should be fitted before painting...LOL) easy to forget made brackets weeks ago but only tacked them on today. Well heres a few piccy's of this weeks progress... Tank D/A with 60 grit first to remove scratches, and mount bracket welded and cleaned up. 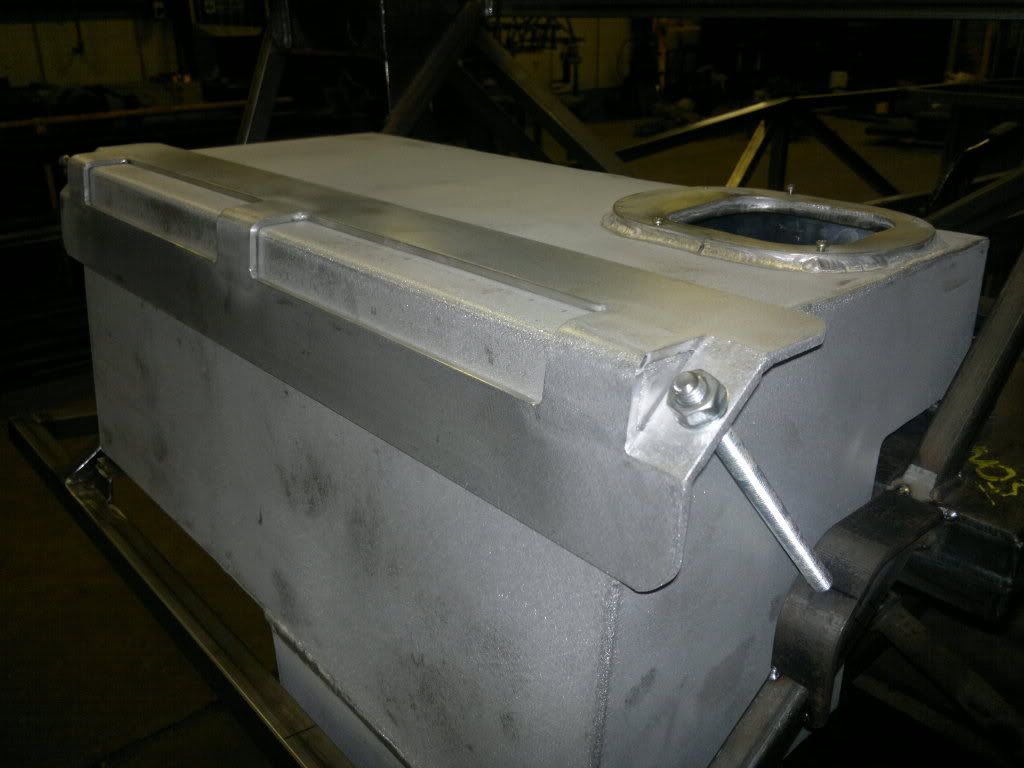 New hand brake mount to Tony's spec.... 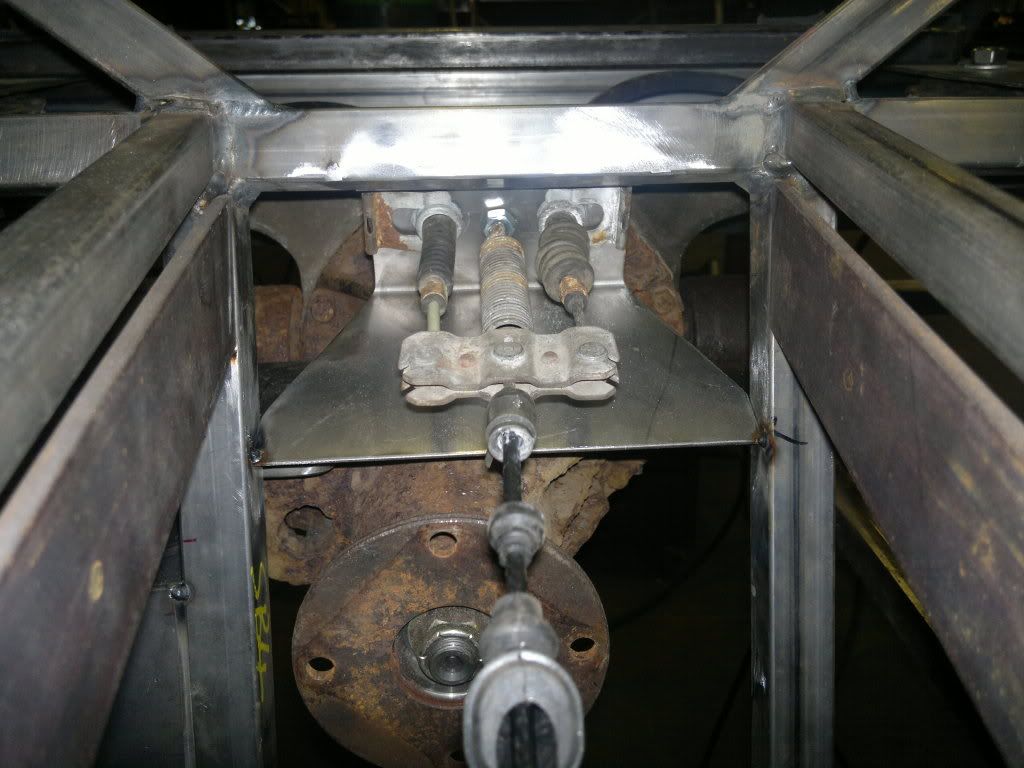 Pedal box finished... 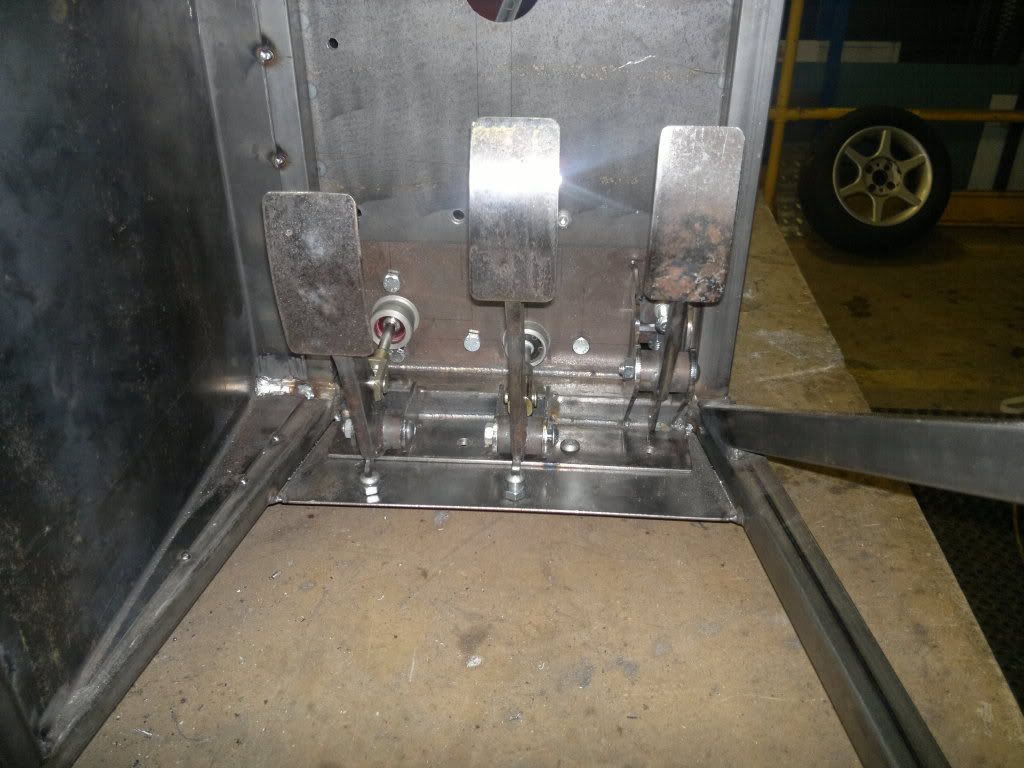 Well I updated photobucket tonight for you all to see. http://s1199.photobucket.com/albums/...1/MX5%20Build/ Johno |
Hi all,
Not done too much on car lately due to work load but I have updated Photobucket with the latest photos of my build. :o Have changed a few things that I was not happy with such as brake pipe plate positions, radiator mount position etc.. Going to organize photobucket into catergories so old links will no longer work soon.:rolleyes: Hopefully tomorrow I will undercoat the chassis with etch primer... Thanks Johno http://s1199.photobucket.com/albums/...1/MX5%20Build/ |
| All times are GMT +1. The time now is 09:17 PM. |
Powered by vBulletin® Version 3.6.4
Copyright ©2000 - 2025, Jelsoft Enterprises Ltd.