New Build thread
Hi peeps
Finally decided it is time to start my build thread....official like...now is this the right place to start one as I do not have a website or blog. Anyways....been lurking for long enough. Got me donor 1.6 pinto powered sierra, ....got me chassis steel,......got me welder an big gas bottle (awaiting delivery of a auto welding bone dome) Got me ANIMAL engine that will go in after IVA a CA18DET 1.8 turbo from a nissan 200sx but need to check if it needs a crank regrind as they are well famous for the big ends going usually due to drifffffting:rolleyes: got me 8 x 4 plywood to make table, got me workspace 1/2 a double garage and big shed (12' x 24') important bit(actually very very) the wifes blessing:eek: and now the bestest bit .....awaiting a nice new shiny shiny traffic red and black 10 piece body kit from you know who S..A..T..U..R..N ...yaaaaaaaayy feel like a kid in a toy shop......had to sell loads of gear to save for that...and got in before price hike (cheers for that Andy) so piccys soon to follows build table to start with .....well I think that might be the best place to start;) |
Good luck :D
I have started the hard way..... Build table built..... few components scrounged/"aquired" Sounds like you are well on the way :) Cracking engine btw :D What gearbox are you using? the donor? |
Quote:
|
Oooh... Black and red, will look a bit Like Coozers motor. Not another Orange one :D
Still got to decide on my colours.. TT |
Thats a good start Kevin - will be good to be able to read another build blog.
TK has just received a red body set too but his is all red - seems to be the second most popular colour. AndyH |
Thanks to Andy, I have my red body work sitting in my workshop waiting to be fitted.
I could not make my mind up between black and red or just red, but went for just red in the end, but i'm going to put a black satin strips down the the bonnet. Terry |
Fantastic another nissan nutter! i will keep an eye on your build :D love the ca18's
|
Quote:
Want to shift your donor box? :D (pm'd) |
Hi Chris....pm repied to
|
I know you still need a few components for your engine and i was talking to a friend of a friend the other day who strips a few jap motors, anyway he has an engine and gearbox with all the ancillaries, think its got a rebuilt turbo too.
I can give you his no. if you want it, not sure how much he charges for things though, but may be worth a look as he is only in stockton too. |
Hi Mark
I did give Jap City a bell but he only had s14's in, so yes please pm me his name and no....what could be better than having 2 engines liying around the garage:eek: think I might start a CA shop, seen the first few bits of body work the other the day when I popped in to settle up with Andy...I think I defo made the right choice with Traffic red & black...better calm down here I'm getting a woody:o |
I have sent you a Pm
|
Thanks Mark will defo be checking that out
|
It has taken me a while to get started but here are the very first things I have fabricated for the roadster.....a pair of quite blingy mushrooms in a rather dashing cobalt blue.....took me best part of 2 days as I really took my time and made sure of all dimensions, all to the figures of a part somewhere in the forum.....not only that I have anodised them to prevent any electrolitical corrosion (disimilar metals + current + road salt ) which I had once on a citroen bx hydro ram, I might be looking at knocking a few out for sale, but not sure of price yet ......just testing the water....really enjoyed making them, lathe work in very satisfying mentally
As well as my sierra I now have a 200sx that has been partially broken but I should glean a lot of useful parts from it for when I put the ca18det engine in. here's the mushy's 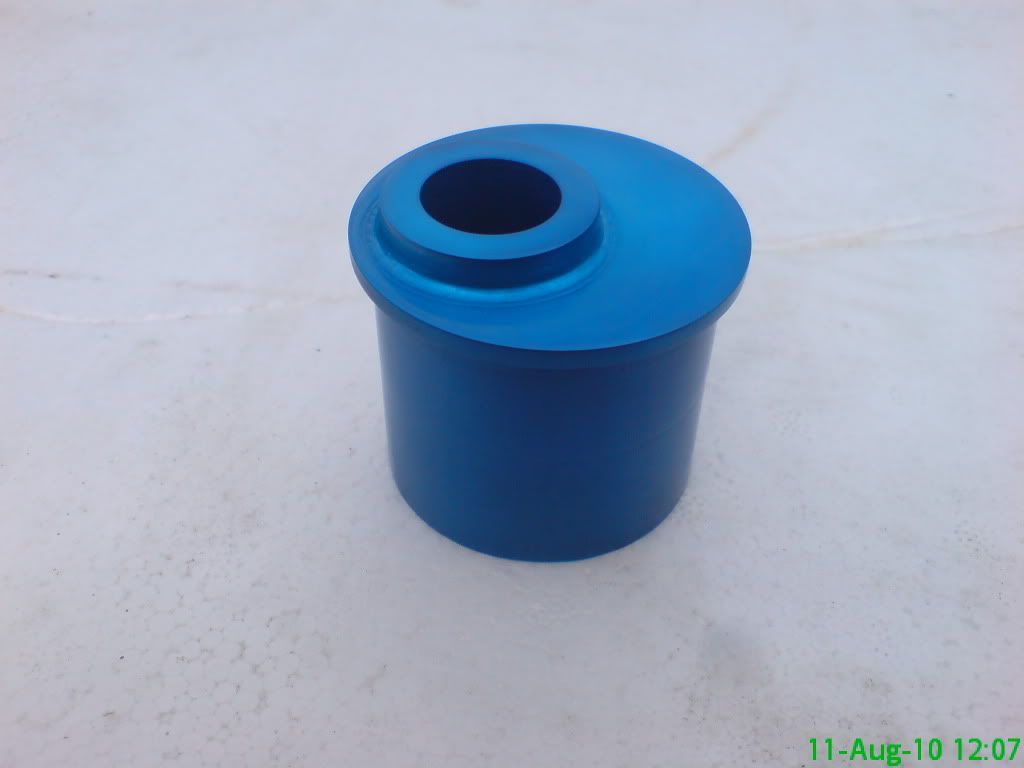 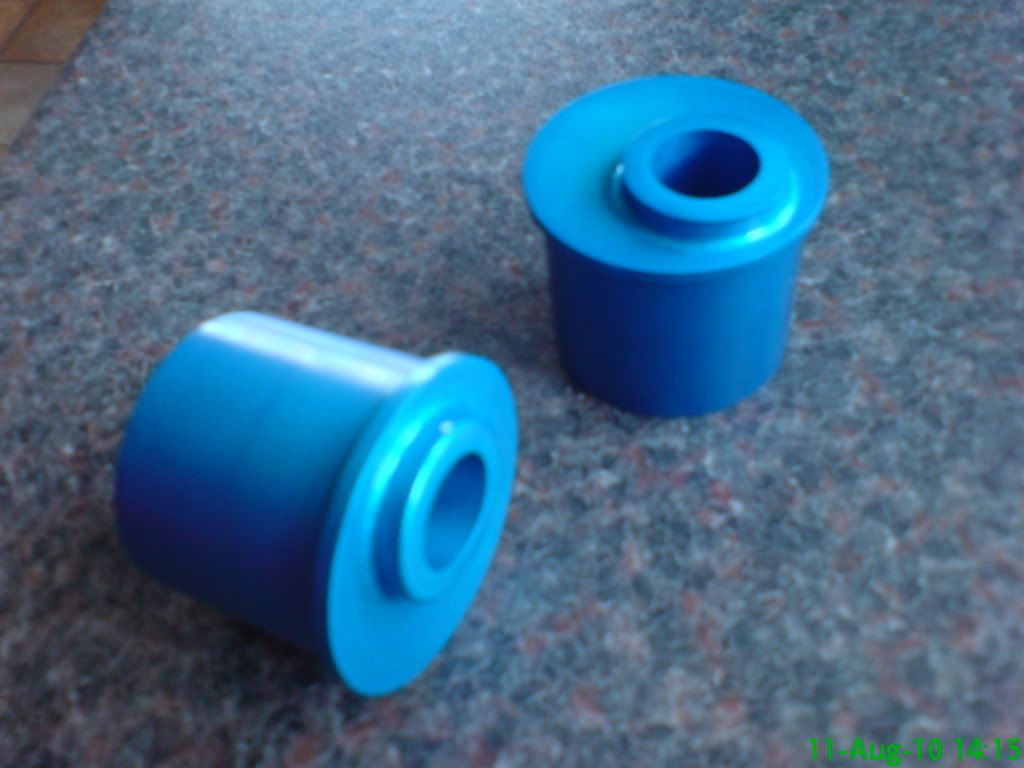  |
And so the saga begins.....a couple of days ago I had a few bits of timber to hoy together, so after a lot of sawing and screwing:eek: I now have a fully flat and zeroed table....spent tonight putting the dimensions onto the board and managed to cut a couple of bits of steel....the relief of starting is immense. I hope to post regularly during the project.
K4  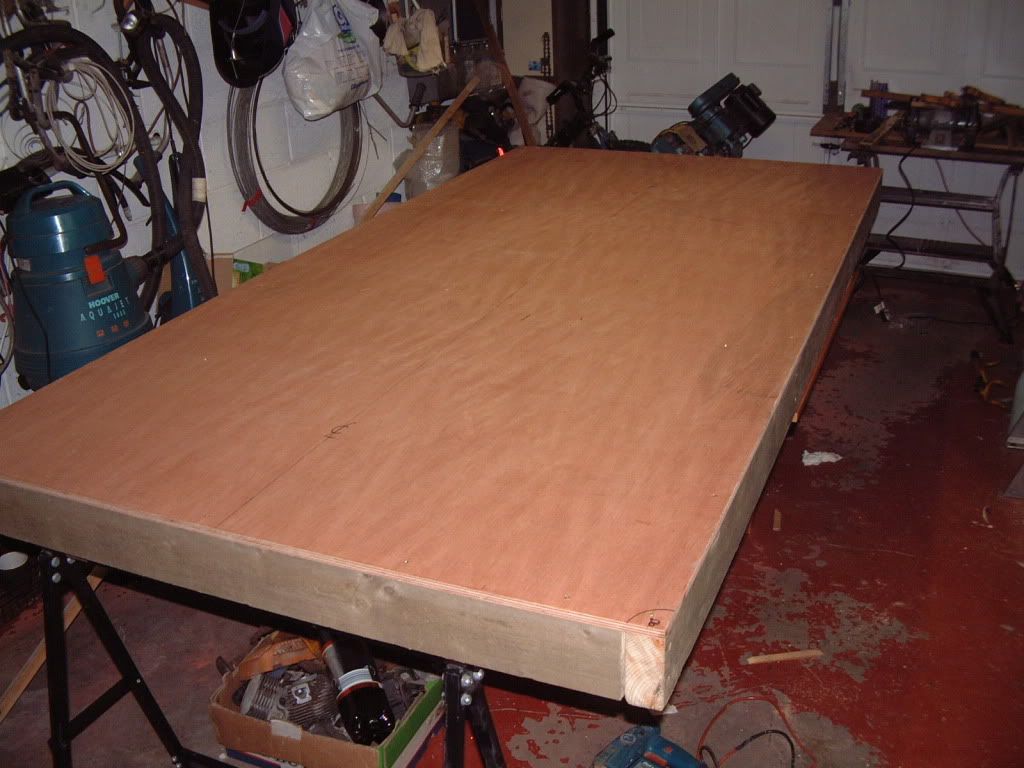 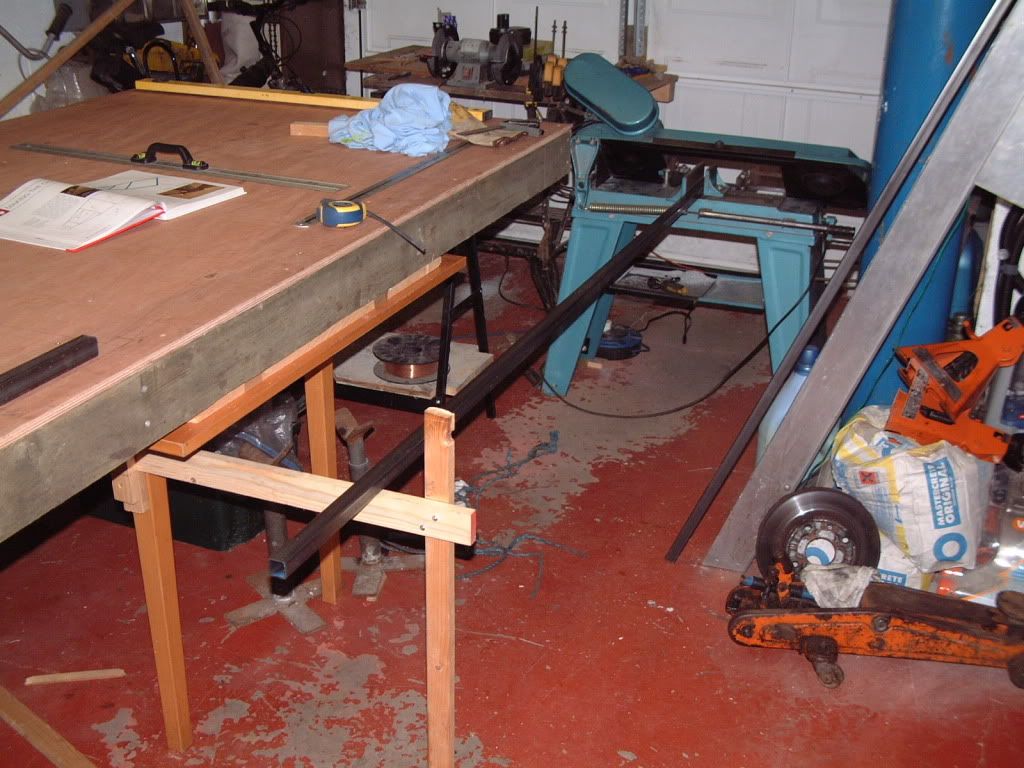 |
Nice Mushrooms
TT |
They are very nice musshys, got a pair in here that Kevin made. Very nice anodising and well made.
Glad to see you have started Kevin, look forward to more pics. Cheers...AndyH |
nice work Kev :cool:
your build table looks nice enough to use as a dining table after the build :D best wishes for your build, look forward to your build updates. cheers andy |
Ta for the compliments guys.....aint no way I am going to be posting every day but while I have the bit between my teeth here is a 24hr later update
metal bandsaws don't half rock 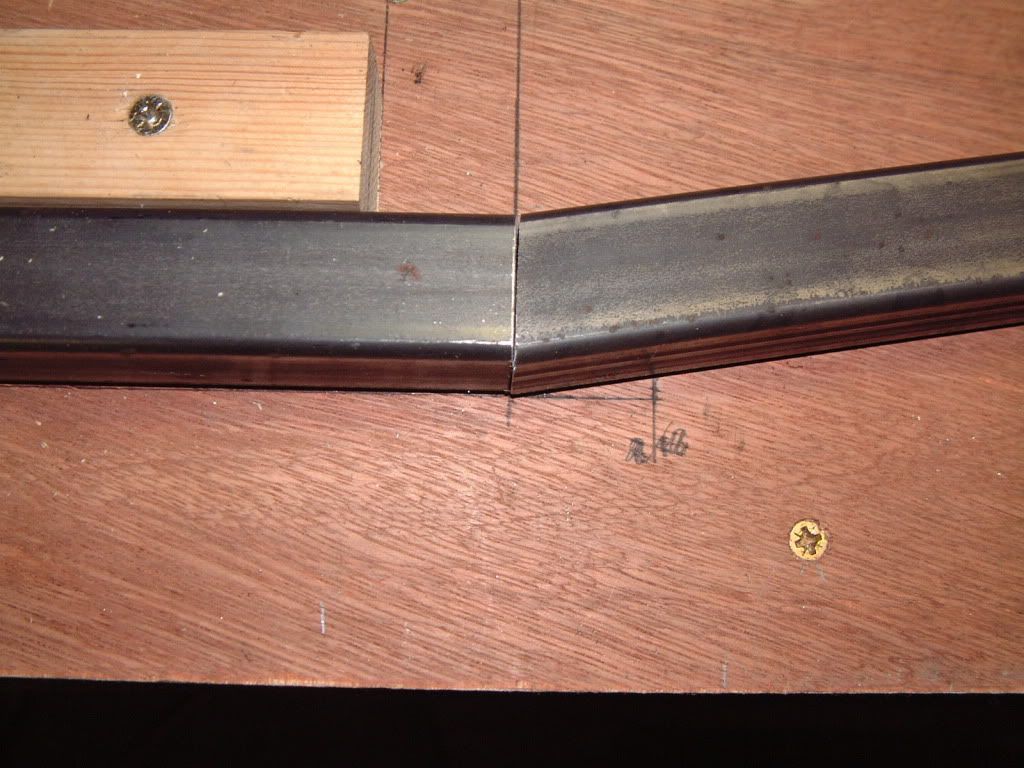 picking that real nasty angle on BR8/9 and using a steel rule to transfer to steel 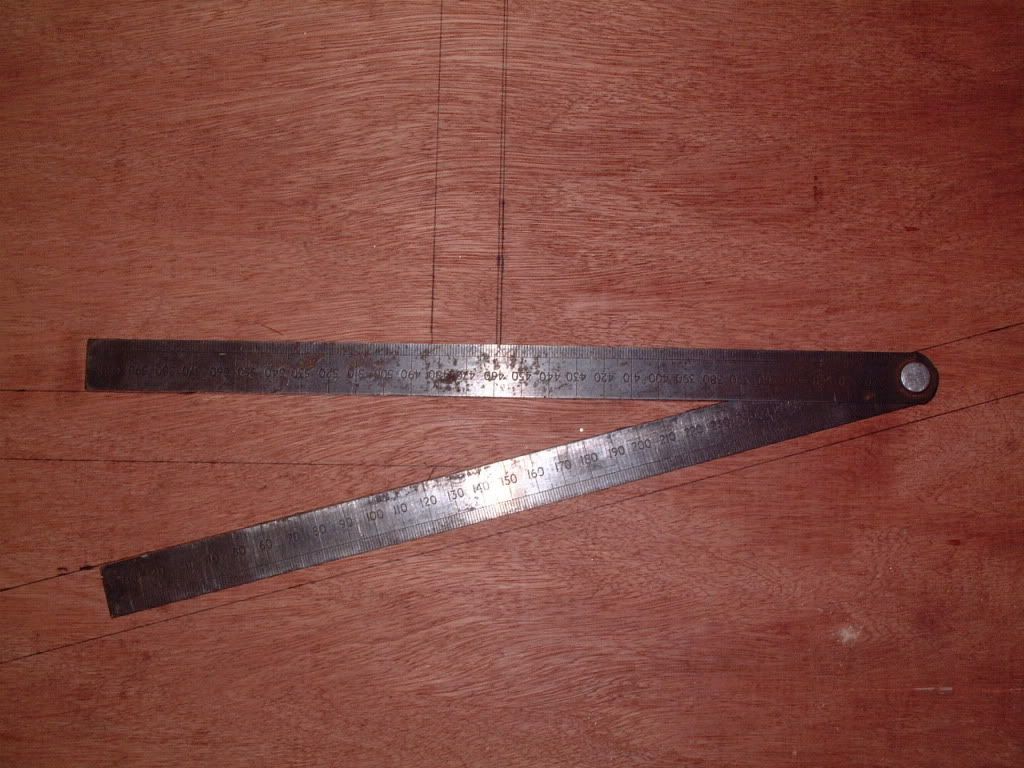 ready to start tacking maybe tomoz 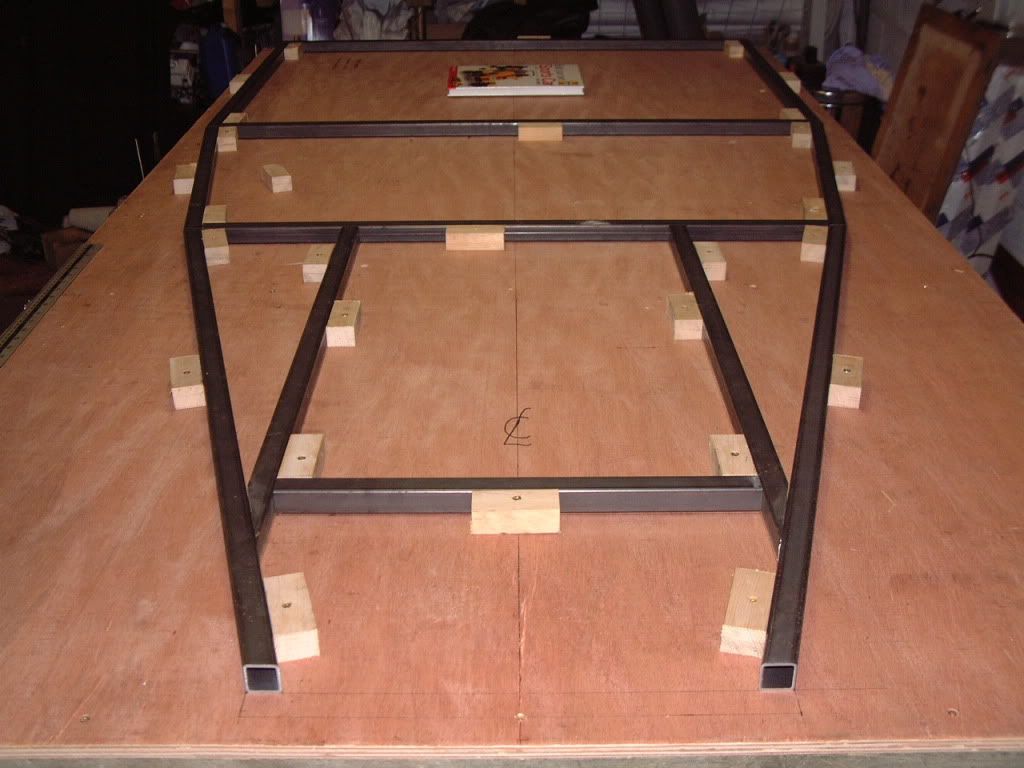 tidied up a bit 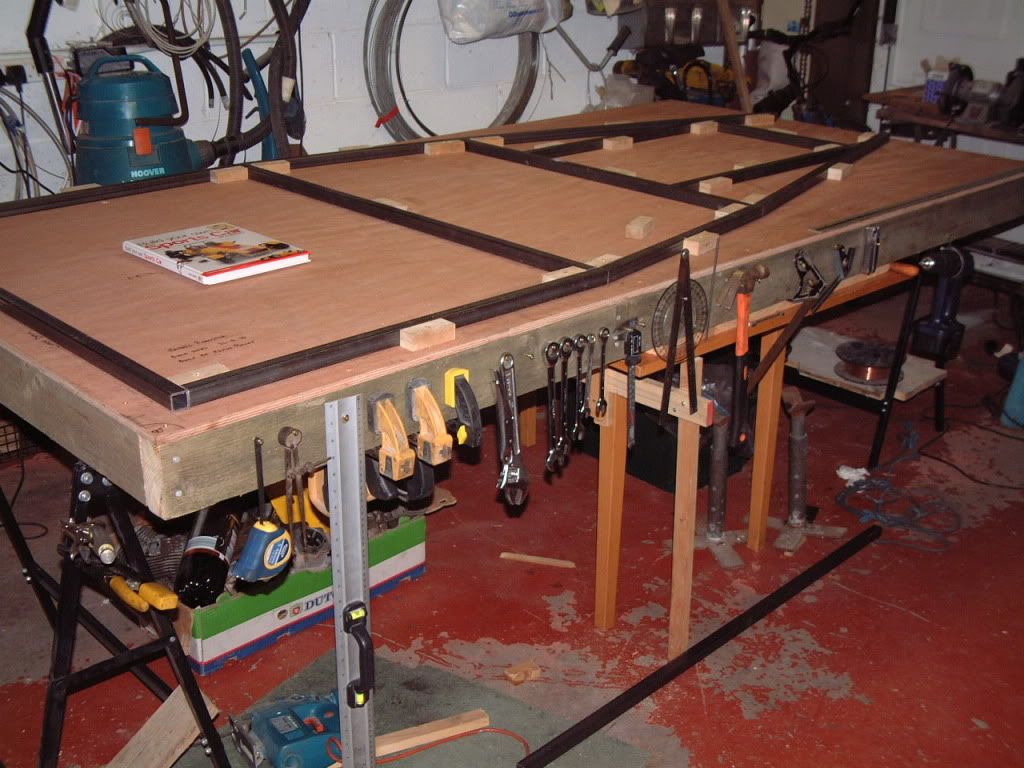 even at this early stage it is easy to say the metal bandsaw is THE tool for cutting box section and anything else come to that. did have more piccies but I understand I am limited to 4 per post suppose I could have just posted again. need to get a little practice on the welding front as it is some 30 yrs since I welded in anger and that was stick on steel upwards of 12mm thick and usually around 300-375 amps. I have used my mig for small bits and pieces it is only 130amps but is fan cooled and does not cut out.....need to calm down ...I am buzzin at the mo ttfn...gonna have me a pint. |
I like the idea you have done with the most used tools hanging on the side of the bench. a simple idea but an effective one.
|
Nice work Kev, looks like you are really enjoying yourself :D
as you are close to welding some bits together......depending on which gearbox you are fitting, keep an eye on where you place part "U7", its easy to place it in the slightly wrong place ;) :) keep the piccies coming...when you get chance or have put the welding torch down long enough:D cheers andy |
Yeah, yeah, most chassis build pics I've seen had had U7 in the wrong place! Mine too!
|
After trying to get some practice migging in before I work on chassis I have come to the conclusion that my el cheapo regulator is not up to the job....so a quick look on fleabay tossed up a very expensive looking regulator that was due to end around 2 ish this morning....well I aint stopping up for that so I chucked a cheeky £10 bid on it....and yes you guessed it , I won......for £5.99p :eek: (£10 postage tho) so tacking up might be on hold now till next week.
Ok then do dome other stuff I think, I'm going to make another set of mushies and will be anodising in red this time to match the bodywork, can cut some steel as well, or break the doner, bloody hell where to turn next:D |
Well done Kevin, looks like we've got another HAndy on our hands - or we're ll tight gits up north.
Them red mushies (must be magic ones) will look good in red. All the Breast.....AndyH |
Quote:
|
the overwhelming urge to start the chassis was too much, so I nabbed an old oxy gauge I had lying around and rigged up my mig and after a little mucking around with flow rates I got what I was listening/looking for.....that familiar cackle you get when a mig set up is running right.....test piece looks like a modern sculpture
 And so another roadster is being born.....so far I have not cocked up any measurements, angles are all coming out flush, everything is staying put. Up to now I am having a dream start and progressing well.... here is where I am at with the chassis so far. Decided to use the build table itself to do the front frame 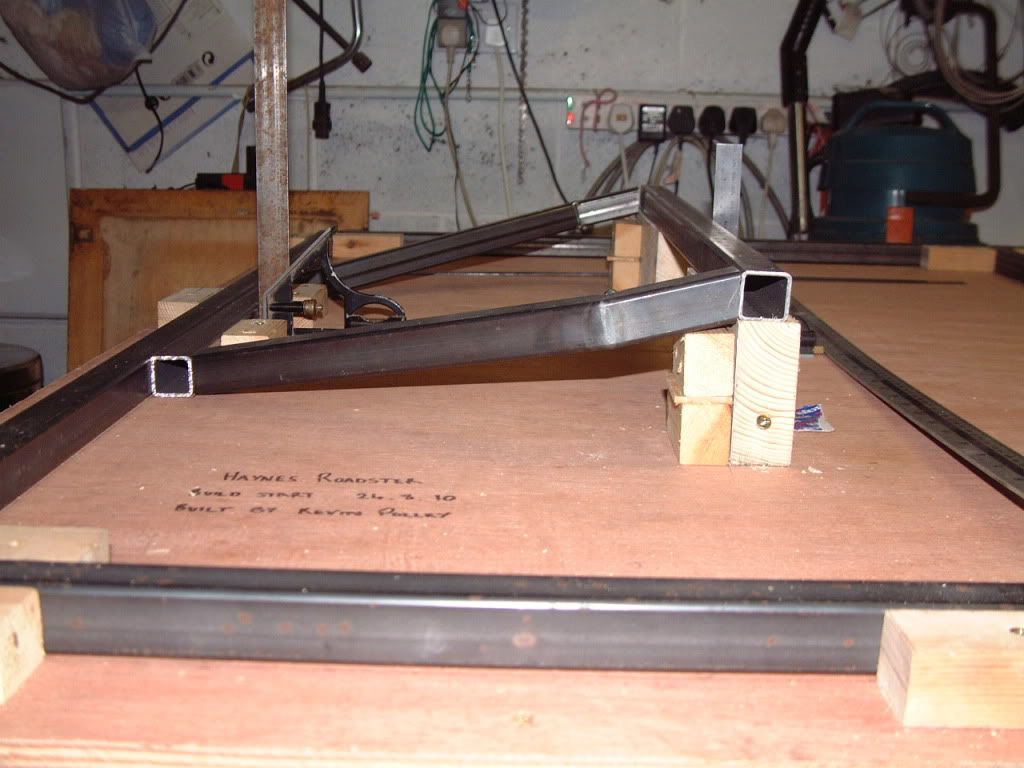 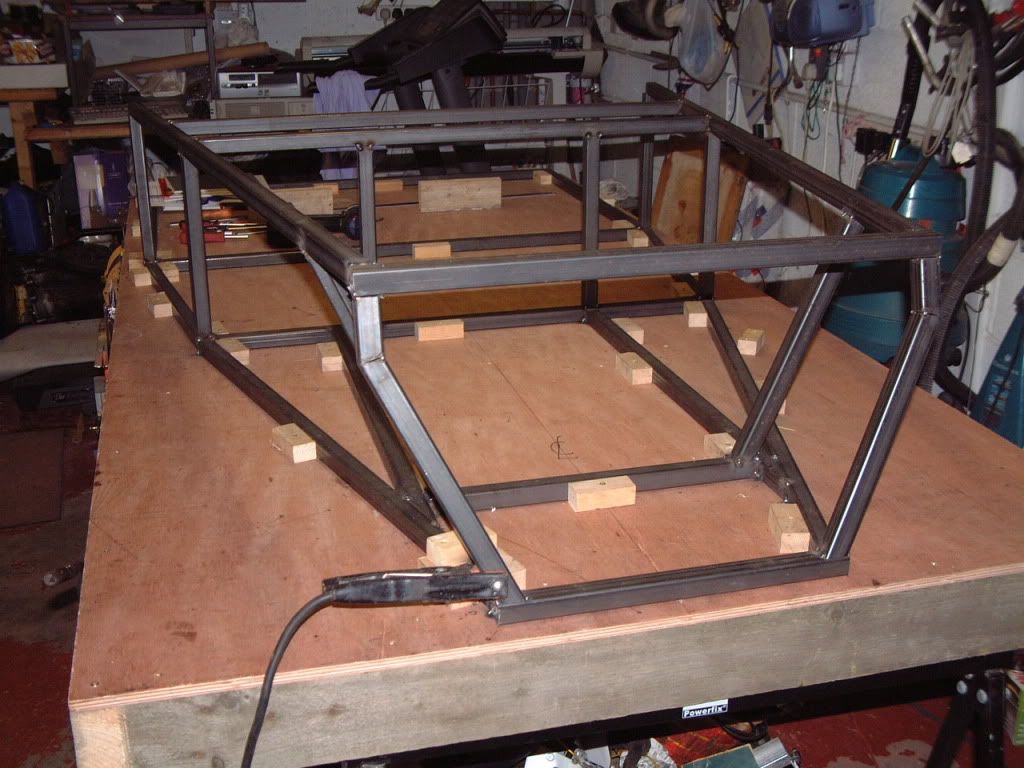 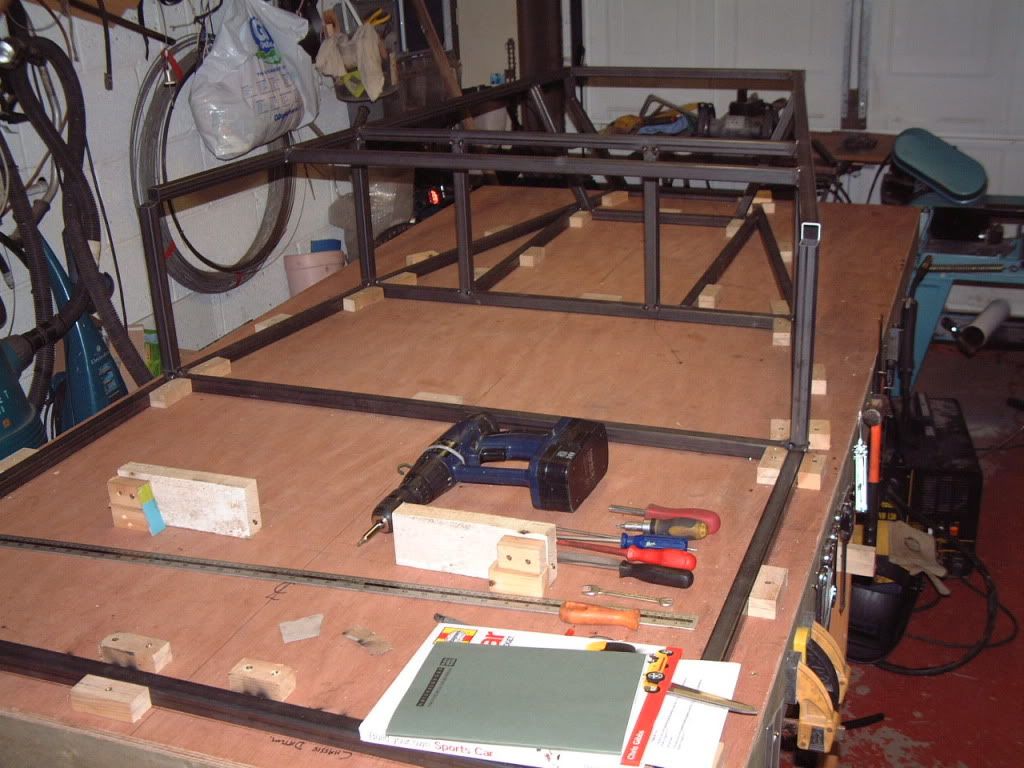 |
Looks like you need to up the amps and the gas a little more looking at those test bits. chassis is growing very nicely :D
|
always nice to see a chassis growing :)
TT |
Yeah I know Ash....had it turned down a little just for tacking, Intend to ramp it up some for full welding of the chassis
Hi TT it's much nicer when its your own:D |
Another few rails added mainly the seatback area.....finding very much like meccano without the holes, nut & bolts great fun even enjoying cutting the steel (something no one seems to enjoy)
heres another couple of pics 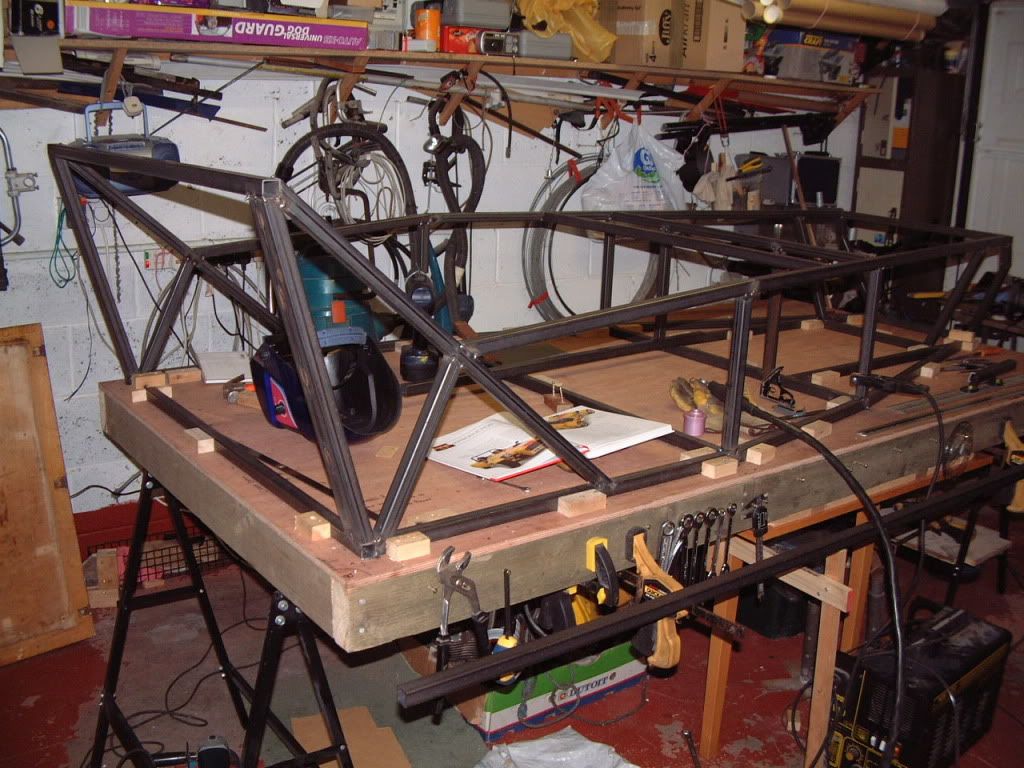 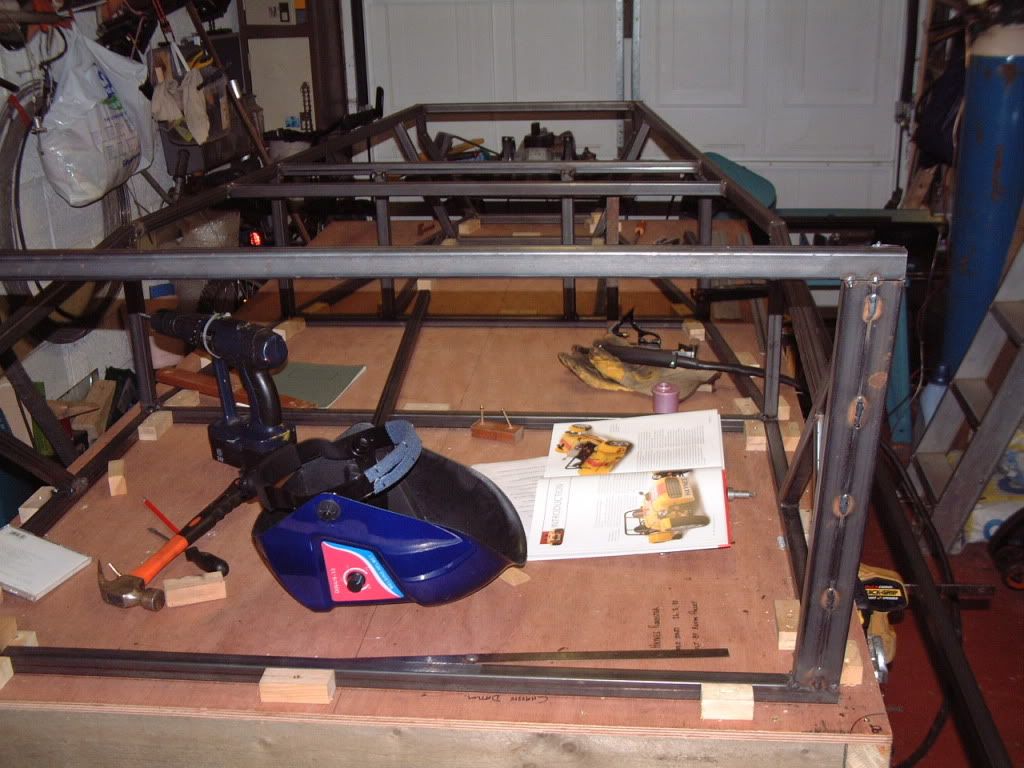 |
few more bit added......those bloody D1s and 2's are real buggers :mad: with those compound angles.....but got there in the end.
When is the best time to start fully welding the chassis ? before shifting it forwards or after. 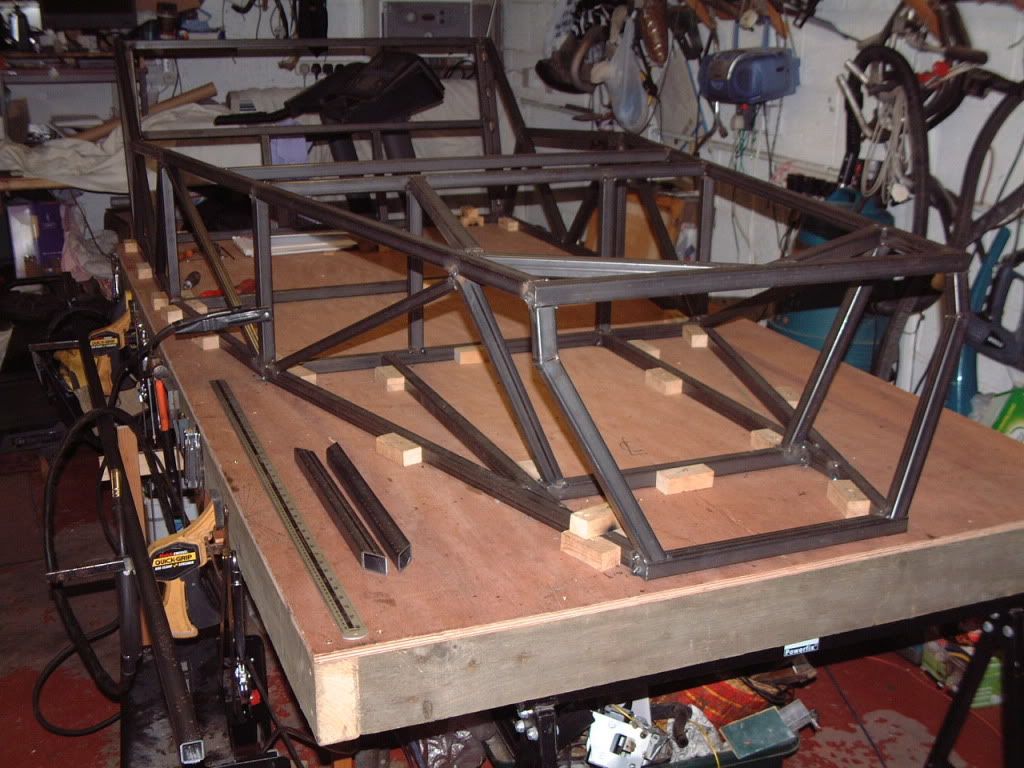 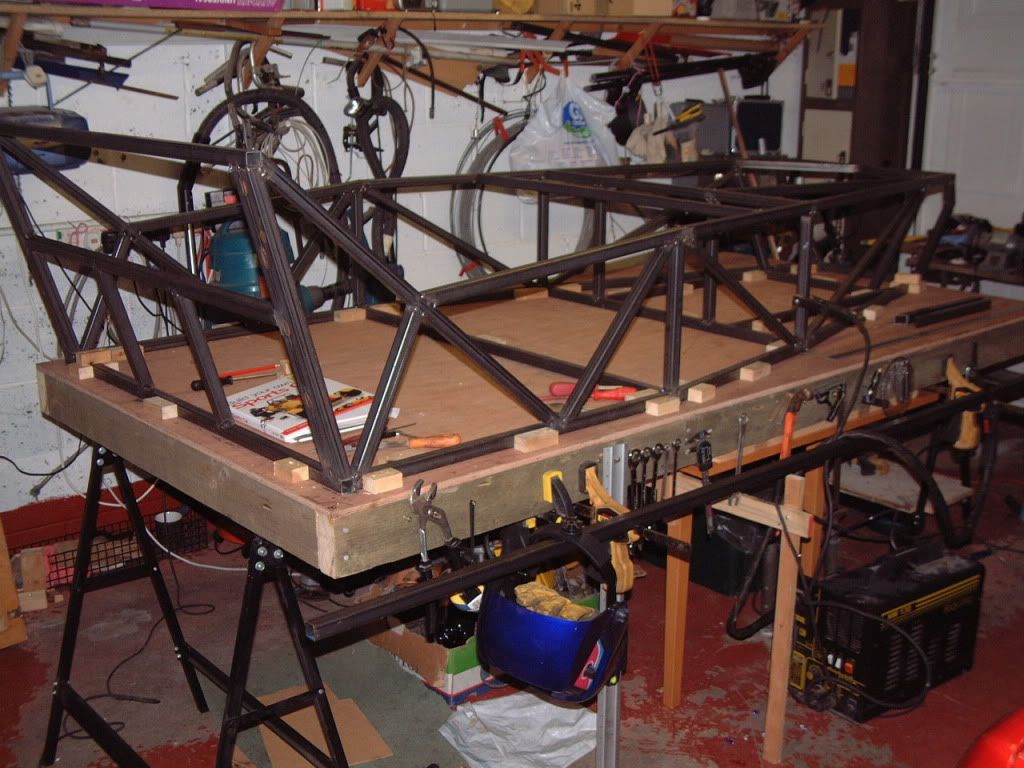 |
Making progress there... I tack welded the whole chassis together including the transmission tunnel and steering support before I started fully welding as I needed to start moving the chassis around to fully weld all the little awkward to get areas :)
|
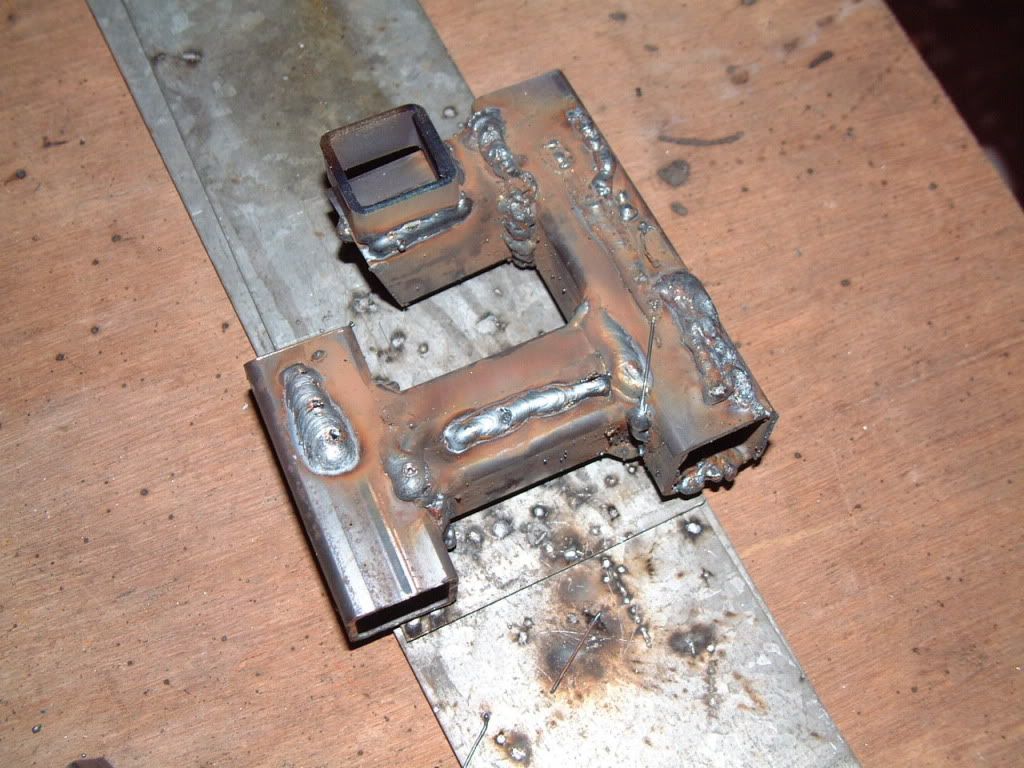
Okay.....lets play spot the cock up!!!!:eek: these last two pics have a glaringly obvious boo boo that I have now rectified, I,m sure one of the Andy's will spot it.
Glad I found it before it is fully welded. |
Quote:
I like a challenge so had to respond to this...... I reckon the error is that the 2 SB4,s are in the wrong place ;) May I ask what the 2 pieces of steel in the foreground on the table are? are they parts SB5 & SB6 ? can,t quite see the compound angle in the photo :) Nice work there Kev :cool: cheers andy |
Well done bud....I thought if anyone would get this it would be Handy, yep its my one and only cock up thus far but like I said already rectified and sb4's moved further in to the corect 178mm apart and not 178mm to either side of C/L......yes Handy sb5 & 6 thats what they are but I have not yet completed the compound angle that goes to sb2 should be fun getting it right
I have spoken to a guy down in Blackhall Rocks who is going to supply me with 6m of 25mm and 6m of 19mm seamless tube for £40:D hope to get a good few hrs on the chassis this week. ttfn K4 |
Kev...
A little tip....( sorry if it sounds like teaching granma to suck eggs ) When cutting the compound angles on SB5 & SB6......totally ignore the 17degree "View B" in the cutting diagram on page 166, the 17 degree,s is what you actually end up creating by making the compund cut 52 degree,s / 27 degree,s. lay the tube on the table in the position as in the diagram, bottom sketch, ( as you have already cut the 52 degree angle) then turn the steel 1 flat away from you then scribe the 27 degree angle on the uppermost face( upper sketch), then turn it back 2 flats towards you, scribe the 27 degree line from top right hand point of the steel ( scribe line goes from top right down to bottom left ), then turn steel 1 flat away from you and use a steel ruler to scribe the 2 lines together. When cutting it, cut each scribe line on 1 flat at a time, turning the steel in the vice to complete each cut......result = perfect compound angle. Hope this helps, The other side is in opposite hand. cheers andy |
Update
Cheers for the tip Handy.....I have already been using an almost identical method as you describe and I agree it works very well. Now approaching some of the CP's and as usual I search and scour the shed,loft and garage for 3mm plate and find one piece so annother hunt in the shed throws up a compressor tank that is box shaped, I check the thickness of the plate and yep it is 3mm .....champion me thinks as I know I have another one of these lying around somewhere, should be enough to get all of the 3mm components cut out. Cutting it was going to be a pain in the harris but then me thinks.......open the bandsaw and use it like a powered fretsaw.... flippin heck, what do ya know!....it works and now working my way through all the CP parts. so heres a few more pics new old stock compressor tank butchered for 3mm plate 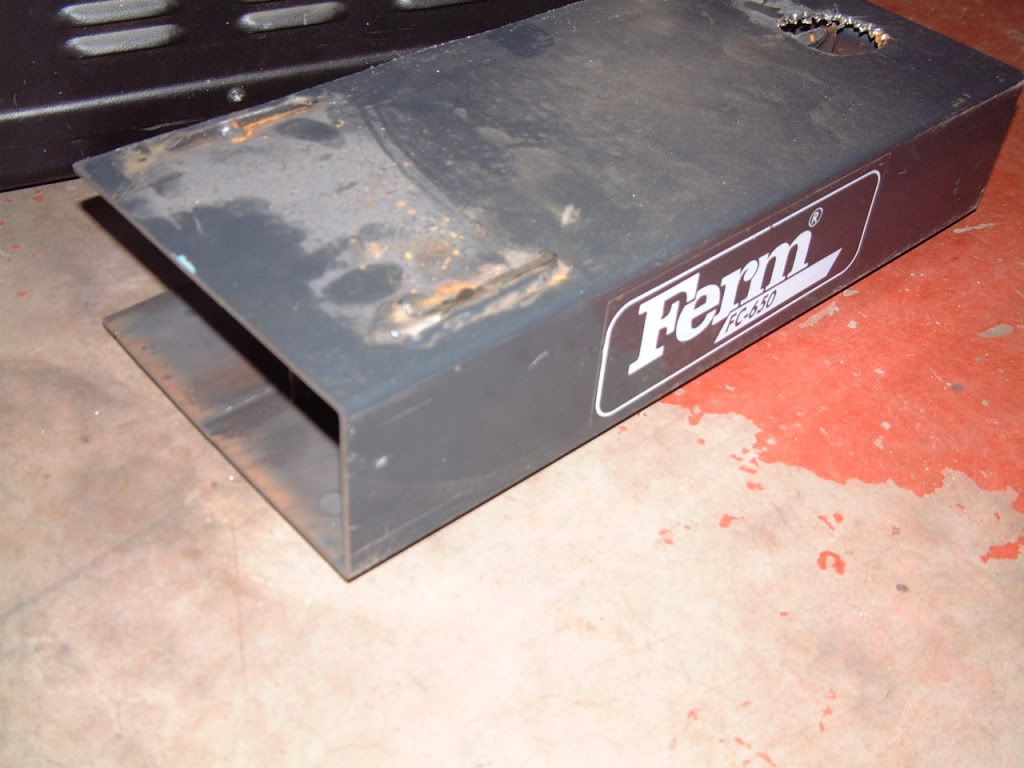 using my metal bandsaw as a powered fretsaw 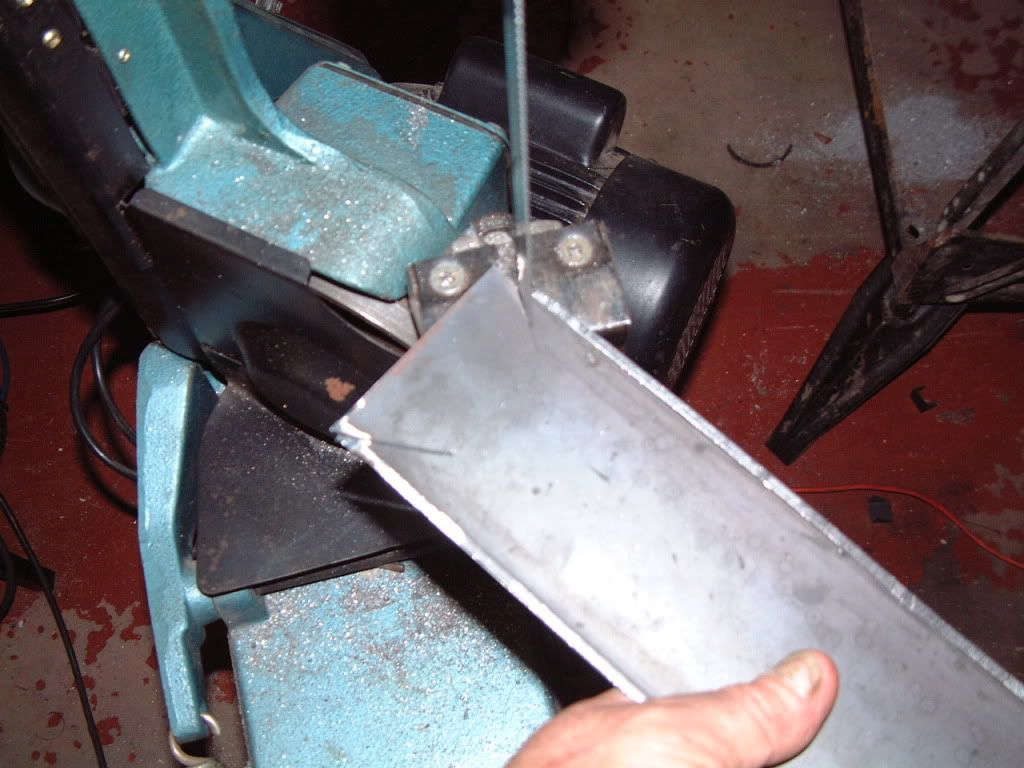 chassis continuing to grow 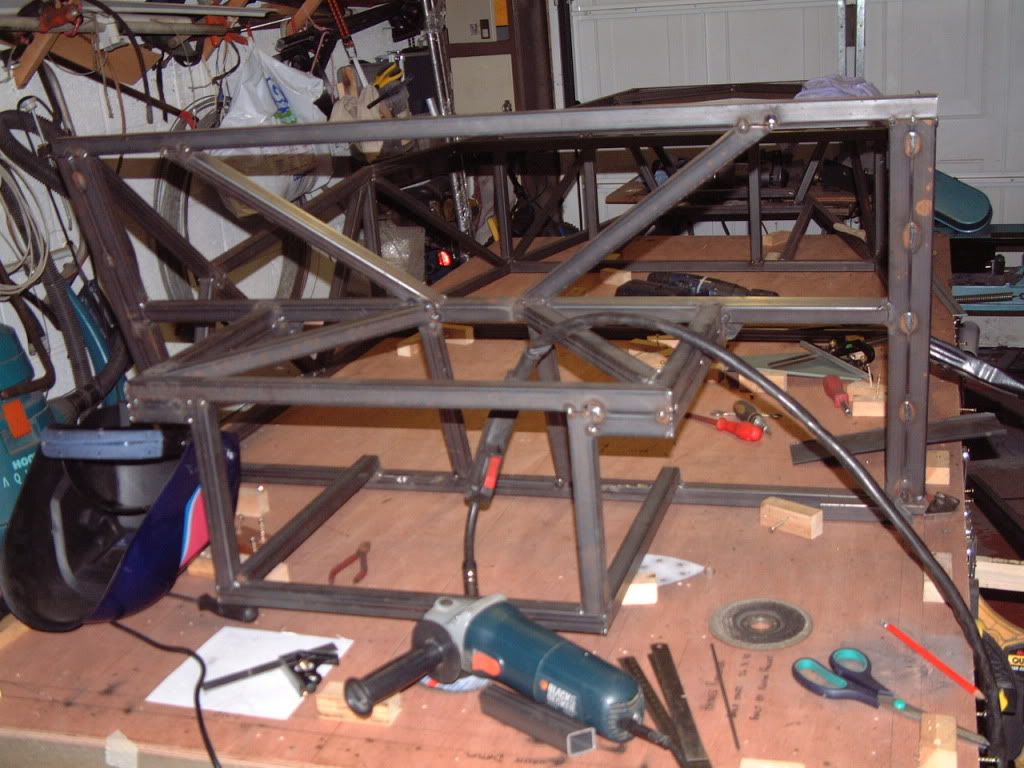 |
Nice work Kev :cool:
Very "Thrifty" using the old compressor steel :D Your chassis is looking great, its soon coming to life ..... question???? have you sat in the drivers seat area yet? :D :p sorry if my "tip" was teaching granma to suck eggs .... cheers andy |
I am so tempted Andy ...I don't think it will be long before I do the ritualistic sit in and brum brum it air steering wheel style.
I will always be grateful of any tips Andy..... wether I know them or not so do not let that stop you from offering advice, all advice is invaluable with a project like this and the willingness of people on this forum to share thier tips, cock ups etc will make this build much easier than it ought to be. Think I might be "mushrooming" tomoz coz I have just recieved my red anodizing dye this morning, will post piccies when finished them. |
Quote:
If you are "mushrooming".....for goodness sake , don,t show the photos to Ronnie :eek: he,ll end up doing himself a mischief :D Keep up the great work, will have to pop up sometime for a cuppa & a Natter :cool: cheers andy |
| All times are GMT +1. The time now is 08:38 PM. |
Powered by vBulletin® Version 3.6.4
Copyright ©2000 - 2024, Jelsoft Enterprises Ltd.