Stots Build Thread
Been lurking a while but I have some photos so figured I should do a build thread.
I build a Sylva Jester pre SVA and have missed owning a kit car so thought the Haynes Roadster would fit the bill, so I set about finding a donor and bought a flat pack. I'm going for a very classic looking build, KAR120C style so no carbon or digital gauges etc. Hopefully the car will compliment my Royal Enfield Bullet. On with the pics. Got My Donor as it failed MOT for rust. 115000 miles and drives fine.  Spent a weekend stripping out the interior and engine bay and then lifted the shell off the following weekend.   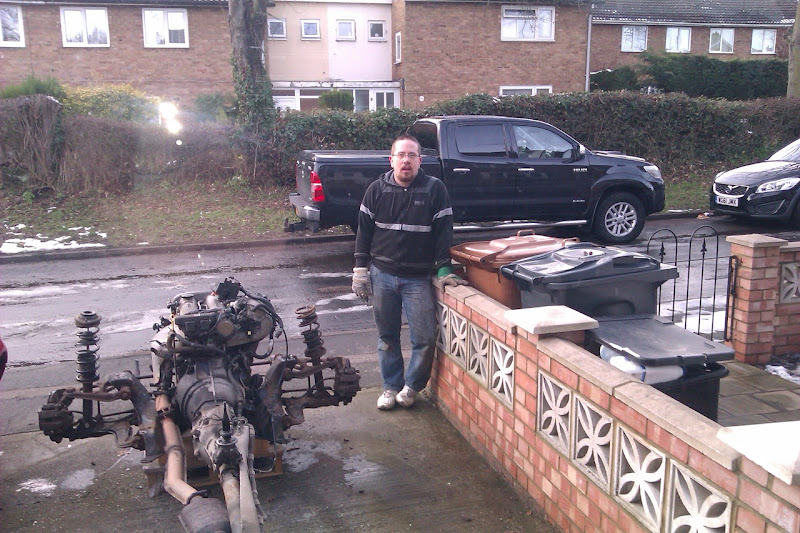 Knackering work... |
Striped the subframes, PPF and engine and chained the engine up for a few nights.
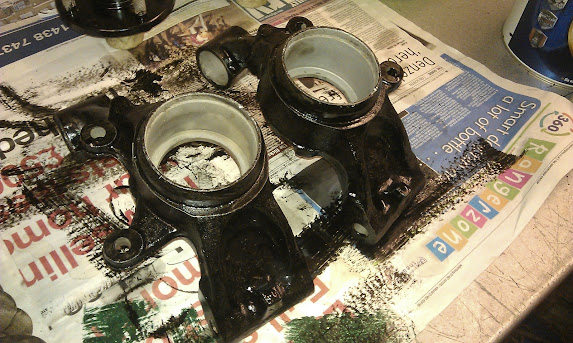
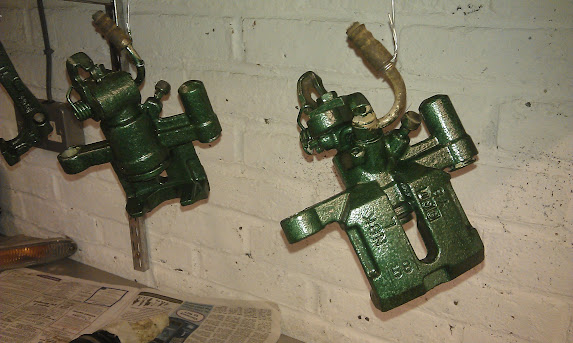
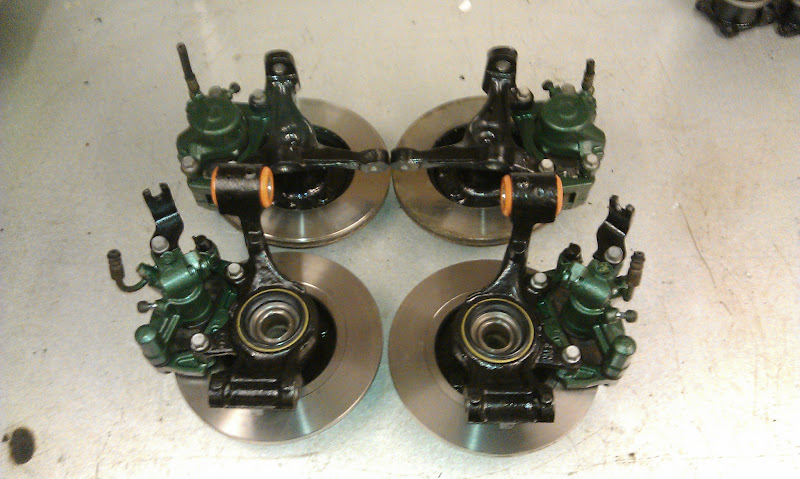
 Subframes and shell are going to Phil at Talon so he can use them to jig up his new project. Phil is doing me the wishbones in return. Bonus! 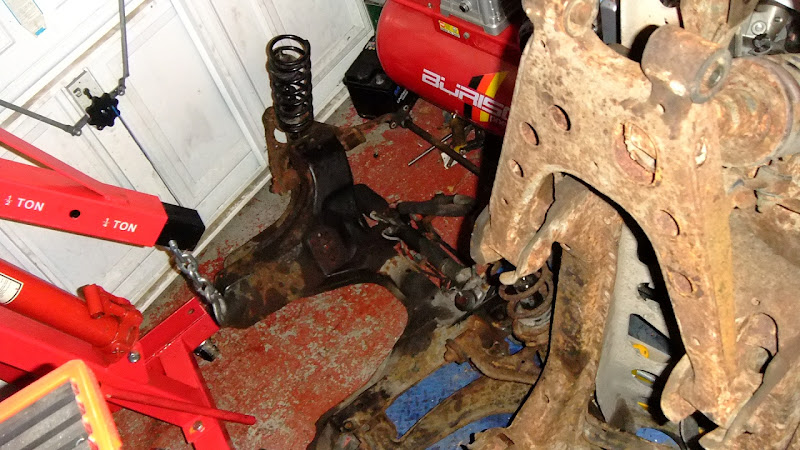  Spent a few days striping the hubs and uprights. I have a sand blaster so I striped it all down and painted them up in smooth black and hammered green.  Amazing how much crap accumulates on these parts. I have all the front running gear painted now and starting the rear parts this weekend. Cheers Stot |
Hi Stot
Looks like a good start--Very satisfying to turn cruddy old parts into lovely shiny ones:) :) |
Makes a change to get a clean collection for once, I usually pull my projects and donor cars from 4" of liquid mud or it's up side down in a ditch covered in 'police aware' stickers.
|
strong solid progress there bud.... keep it up, nice to see another build take shape.
|
Quote:
Cheers Stot |
That's a great start mate, loving the pics :)
|
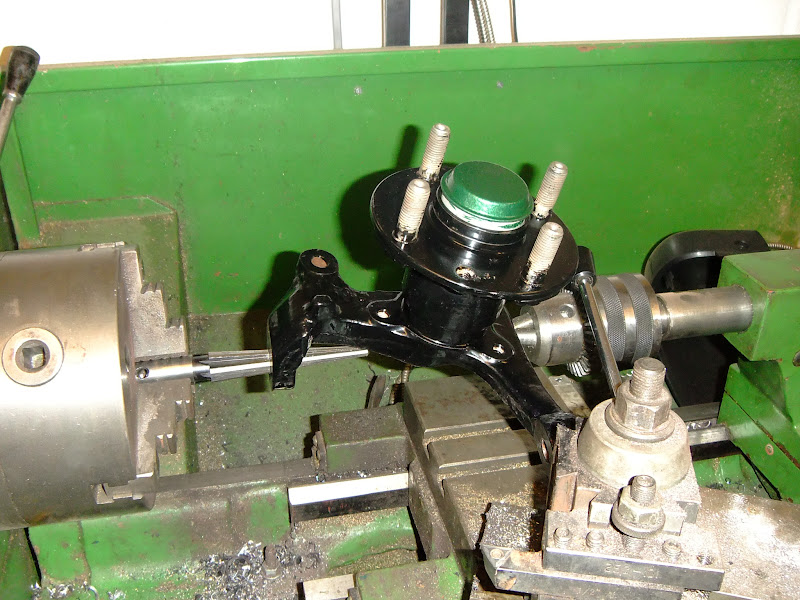
I reamed the uprights today. Glad I have a lathe or this would have taken hours!
   |
I also got some more welding done on my chassis before I ran out of gas. :rolleyes:
  Its not far off. Transmission tunnel and suspension brackets mainly. Cheers Stot |
Nice work! All looking very smart cant wait to see more :)
Oh don't suppose you have the plug that goes to the fuel sender spare? If so let me know as I'm trying to find one. |
Quote:
Ill probably be using the MX5 sender but its possible another plug on the loom that I'm not using is the same so ill take a look. Cheers Stot |
Fantastic thanks mate :D
|
Seemed to have missed this one somehow...:o
Great to see another MX5 version on the go and it looks like you're off to a flying start.:) :) Keep the pictures coming... |
Quote:
The uprights shouldn't needed reaming - I thought BMW 5 series ends had the correct taper for MX5 uprights? Lots of progress though - puts me to shame (although I have a fairly good excuse to not weld my chassis up yet) :o |
Quote:
Quote:
Cheers Stot |
I reamed mine out. Andy at ssc attached the reamer to a drill and it was done in no time. Never heard anyone using BMW fittings before.
|
Quote:
|
Quote:
|
Quote:
|
Quote:
Cheers Stot |
Hi Stot,:)
I hear you was down my neck of the woods Saturday. If I had known I could have shown you round my car and had a chat. The car was in the workshop where you picked up your stuff from and I was working on it upto about 4o'clock so must have just missed you...:( |
Hi Johno,
I missed that bodywork by minutes unfortunately so it wasn't me if that's what you meant? I was at home helping Phil @ Talon load my MX5 shell onto the back of his truck. :D Never seen another man make my wife so happy.... :p Cheers Stot |
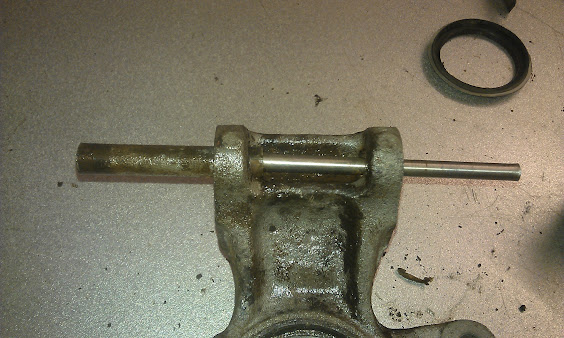
a wee update. I needed to strip the rear uprights completely and I had a seized bolt stuck in one of them. I had cut the bolt to remove the upright from the wishbone.
I spent an age trying to get the damn circlip out of the upright and in the end took an old set of vice grips and welded them to the circlip!  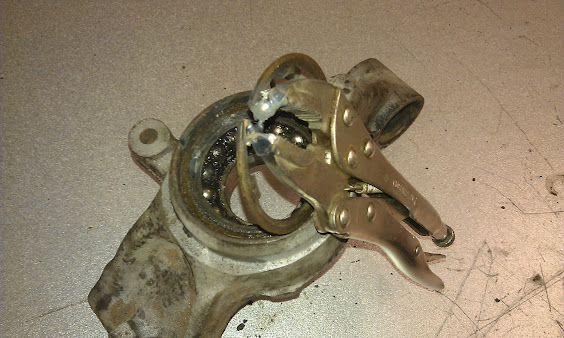 Came out in seconds and i pressed the bearings out with a 12 ton press.   Ready for final blasting an painting. |
Next up the seized bolt.
 I center drilled it on the mill and then used a dead center in the press to free it up and a long socket to push it through.   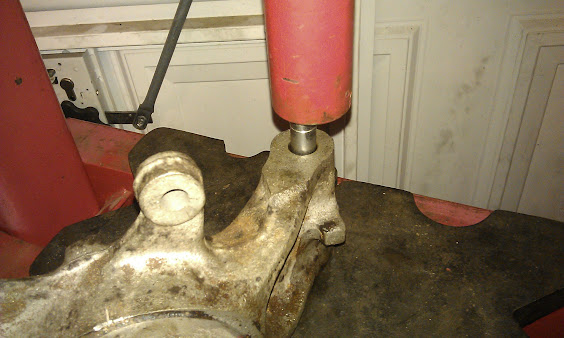 It went with a bang. |
I drifted it out the rest of the way.
  Another job done. Cheers Stot |
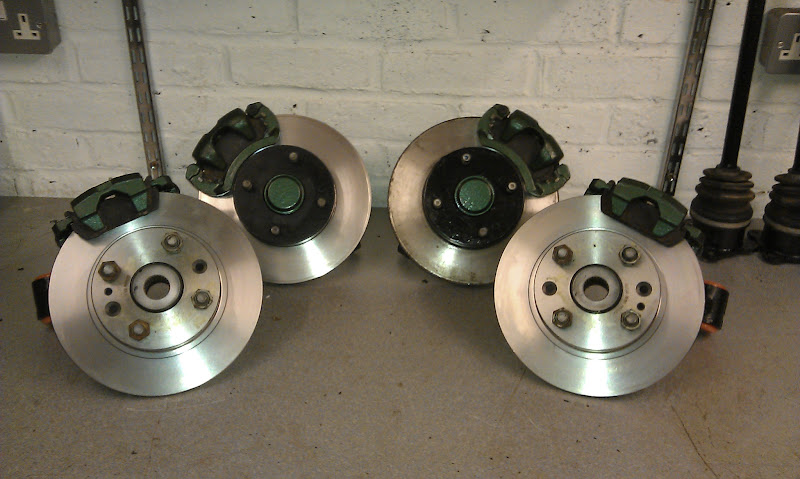
Got the rear drivetrain bits blasted and painted. These are first coat pictures but I did the second coat this morning so they are done.
   I have new bearings, brake seals, ball joints etc to go on. Be rolling soon... :eek: Cheers Stot |
Nice work!
I gave up trying to remove the bolts out of my rear uprights and bought another pair with them pre-removed :rolleyes: |
Quote:
Cheers Stot |
Nice work :D Looking forward to seeing more!
|
They come out a lot easier if you can spin the bolts in the uprights with an impact gun, soak over night with oil, then they come out with a drift and a big Ammer!
|
Quote:
|
Quote:
Cheers Stot |
Uprights are ready to just bolt on now with all new brake seals, new rear bearings and new bushes. :cool:
  Next I need to finish welding up the chassis and get the wishbone brackets tacked up. Cheers Stot |
Very nice indeed;)
|
Look what just turned up from Phil @ Talon. :D
 He even painted them for me. :cool: Cheers Stot |
Made some more progress with the chassis. Trans tunnel is in and suspension brackets are on.
  One of my D12s has gone missing. :mad: most everything else is fully welded. I trial fitted one of the front suspension and uprights to see how it would fit too.  Look a bit weird from that angle but it will probably make sense once I do them flat. Cheers Stot |
Some cracking progress there :)
Are the wishbones roughly based on the Saturn design? If so you may have a problem with the steering arm extension hitting the lower wishbone. You can get round it by limiting the amount of steering lock as it only just hits on full lock. I know Phil made some lower wishbones with a slight bend in them to get over this as well I believe for the Voodou design I think. Any thoughts on how you are going to mount your diff yet? It's been a topic of much debate in the past on which way to mount it. Looking forward to more photos...:cool: :cool: |
Quote:
Quote:
The next goal is to get it rolling so that I can wheel it to and from my detached garage so steering uprights and maybe handbrake next. Cheers Stot |
Made a start on my pedal box tonight.
 I note on the MX5 setup the furthest left lower bolt hole is covered by the pedal so needs to be repositioned. Cheers Stot |
Both skov and myself noticed on he mx5 the accelerator pedal moves a long way. It might be an idea before its installed to see if it can be modified in some way.
|
| All times are GMT +1. The time now is 10:25 AM. |
Powered by vBulletin® Version 3.6.4
Copyright ©2000 - 2024, Jelsoft Enterprises Ltd.